การปรับแต่ง iOS SDK
การผสานรวม
Anchor link to- Deep linking
- Universal Links
- การติดตามการซื้อในแอป
- การแจ้งเตือนพุช Geozones
- การสร้างคิว Rich Media
- เล่นวิดีโอที่ส่งมาใน Rich Notification อัตโนมัติด้วย force touch
- เสียงพุชที่กำหนดเอง
- iOS Provisional Push
Deep linking
Anchor link toในไฟล์ Info.plist ของคุณ ให้เพิ่มอาร์เรย์ URL types พร้อมด้วย URL Identifier และ URL Scheme
ในตัวอย่างด้านล่าง URL Scheme คือ com.pushwoosh และ URL Identifier คือ promotion

ในไฟล์ App Delegate ของคุณ (โดยปกติคือ AppDelegate.m สำหรับ iOS 12 และต่ำกว่า หรือ SceneDelegate.m สำหรับ iOS 13 และสูงกว่า) ให้เพิ่มฟังก์ชัน openURL delegate ที่เหมาะสมตามที่ระบุไว้ในตัวอย่างด้านล่าง ตัวอย่างจะตรวจสอบหน้าเว็บที่ถูกต้อง แยกวิเคราะห์ค่า “id” จาก URL และเปิด PromoPageViewController เพื่อตอบสนอง
AppDelegate.swift
func application(_ app: UIApplication, open url: URL, options: [UIApplication.OpenURLOptionsKey : Any] = [:]) -> Bool {    let components = URLComponents(url: url, resolvingAgainstBaseURL: false)    let page = components?.host    var promotionId: String?
    if page == "promotion" {        return    }
    let items = components?.queryItems ?? []
    for item in items {        if item.name == "id" {            promotionId = item.value        }    }
    //show PromoPageViewController}
- (BOOL)application:(UIApplication *)application openURL:(NSURL *)url sourceApplication:(NSString *)sourceApplication annotation:(id)annotation { NSURLComponents *components = [NSURLComponents componentsWithURL:url resolvingAgainstBaseURL:NO]; NSString *page = components.host; NSString *promotionId = nil;
//return if this is not a promotion deep link if(![page isEqualToString:@"promotion"]) return NO;
for(NSURLQueryItem *item in components.queryItems) { if([item.name isEqualToString:@"id"]) promotionId = item.value; }
PromoPageViewController *vc = [[PromoPageViewController alloc] init]; vc.promotionId = promotionId [self presentViewController:vc animated:YES completion:nil];}SceneDelegate.swift
func scene(_ scene: UIScene, openURLContexts URLContexts: Set<UIOpenURLContext>) {    guard let urlContext = URLContexts.first else { return }
    let components = URLComponents(url: urlContext.url, resolvingAgainstBaseURL: false)    let page = components?.host    var promotionId: String?
    guard page == "promotion" else {        return    }
    let items = components?.queryItems ?? []
    for item in items {        if item.name == "id" {            promotionId = item.value        }    }
    //show PromoPageViewController}
- (void)scene:(UIWindowScene *)scene openURLContexts:(NSSet<UIOpenURLContext *> *)URLContexts { UIOpenURLContext *urlContext = URLContexts.anyObject; if (!urlContext) { return; }
NSURLComponents *components = [NSURLComponents componentsWithURL:urlContext.URL resolvingAgainstBaseURL:NO]; NSString *page = components.host; NSString *promotionId = nil;
if (![page isEqualToString:@"promotion"]) { return; }
for (NSURLQueryItem *item in components.queryItems) { if ([item.name isEqualToString:@"id"]) { promotionId = item.value; } }
//show PromoPageViewController}Universal Links
Anchor link toUniversal Links ช่วยให้ผู้ใช้สามารถเปิดแอปของคุณได้โดยตรงเมื่อแตะลิงก์ไปยังเว็บไซต์ของคุณ ซึ่งแตกต่างจาก URL schemes ที่กำหนดเอง Universal Links ใช้ URL https:// มาตรฐานและมอบประสบการณ์ผู้ใช้ที่ราบรื่นยิ่งขึ้น
วิธีการทำงาน
Anchor link toเมื่อการแจ้งเตือนพุชมี URL https:// (ในพารามิเตอร์ “url” หรือ “l”) SDK จะ:
- สร้าง
NSUserActivityพร้อมกับ URL - เรียกตัวจัดการ Universal Links ของแอปของคุณ (
scene:continueUserActivity:หรือapplication:continueUserActivity:restorationHandler:) - หากแอปของคุณไม่จัดการ URL นั้น มันจะเปิดใน Safari เป็นทางเลือกสำรอง
การตั้งค่า
Anchor link to- กำหนดค่า Associated Domains ใน Xcode
เพิ่มความสามารถ Associated Domains ให้กับแอปของคุณและเพิ่มโดเมนของคุณ:
applinks:yourdomain.com- โฮสต์ไฟล์ Apple App Site Association
สร้างไฟล์ apple-app-site-association บนเว็บเซิร์ฟเวอร์ของคุณที่ https://yourdomain.com/.well-known/apple-app-site-association:
{ "applinks": { "apps": [], "details": [ { "appID": "TEAM_ID.com.your.bundleid", "paths": ["/path/*", "/promotion/*"] } ] }}แทนที่ TEAM_ID ด้วย Apple Developer Team ID ของคุณ และ com.your.bundleid ด้วย bundle identifier ของแอปของคุณ
- ใช้งานตัวจัดการ Universal Links
SceneDelegate.swift (iOS 13+)
func scene(_ scene: UIScene, continue userActivity: NSUserActivity) {    guard userActivity.activityType == NSUserActivityTypeBrowsingWeb,          let url = userActivity.webpageURL else {        return    }
    // Handle the Universal Link URL    let components = URLComponents(url: url, resolvingAgainstBaseURL: false)    let path = components?.path
    if path?.starts(with: "/promotion") == true {        // Navigate to promotion screen        let promotionId = components?.queryItems?.first(where: { $0.name == "id" })?.value        // Show promotion with promotionId    }}
- (void)scene:(UIScene *)scene continueUserActivity:(NSUserActivity *)userActivity { if (![userActivity.activityType isEqualToString:NSUserActivityTypeBrowsingWeb]) { return; }
NSURL *url = userActivity.webpageURL; if (!url) { return; }
// Handle the Universal Link URL NSURLComponents *components = [NSURLComponents componentsWithURL:url resolvingAgainstBaseURL:NO]; NSString *path = components.path;
if ([path hasPrefix:@"/promotion"]) { // Navigate to promotion screen NSString *promotionId = nil; for (NSURLQueryItem *item in components.queryItems) { if ([item.name isEqualToString:@"id"]) { promotionId = item.value; break; } } // Show promotion with promotionId }}AppDelegate.swift (iOS 12 และเก่ากว่า หรือเป็นทางเลือกสำรอง)
func application(_ application: UIApplication,                 continue userActivity: NSUserActivity,                 restorationHandler: @escaping ([UIUserActivityRestoring]?) -> Void) -> Bool {    guard userActivity.activityType == NSUserActivityTypeBrowsingWeb,          let url = userActivity.webpageURL else {        return false    }
    // Handle the Universal Link URL    let components = URLComponents(url: url, resolvingAgainstBaseURL: false)    let path = components?.path
    if path?.starts(with: "/promotion") == true {        // Navigate to promotion screen        return true    }
    return false}
- (BOOL)application:(UIApplication *)application continueUserActivity:(NSUserActivity *)userActivity restorationHandler:(void (^)(NSArray<id<UIUserActivityRestoring>> *restorableObjects))restorationHandler {
if (![userActivity.activityType isEqualToString:NSUserActivityTypeBrowsingWeb]) { return NO; }
NSURL *url = userActivity.webpageURL; if (!url) { return NO; }
// Handle the Universal Link URL NSURLComponents *components = [NSURLComponents componentsWithURL:url resolvingAgainstBaseURL:NO]; NSString *path = components.path;
if ([path hasPrefix:@"/promotion"]) { // Navigate to promotion screen return YES; }
return NO;}การส่งพุชด้วย Universal Link
Anchor link toเมื่อสร้างการแจ้งเตือนพุช ให้ใช้ URL เว็บไซต์ของคุณในช่อง Action:
https://yourdomain.com/promotion?id=123SDK จะกำหนดเส้นทาง URL นี้ไปยังตัวจัดการ Universal Links ของคุณโดยอัตโนมัติ ช่วยให้คุณสามารถนำทางผู้ใช้ไปยังหน้าจอที่เหมาะสมในแอปของคุณได้
การติดตามการซื้อในแอป
Anchor link toโดยค่าเริ่มต้น การติดตามการซื้อในแอปจะถูกปิดใช้งาน หากคุณต้องการติดตามการซื้อในแอปเมื่อกำหนดค่า Customer Journeys ให้ตั้งค่าแฟล็ก Pushwoosh_PURCHASE_TRACKING_ENABLED เป็น true ในไฟล์ info.plist คุณสามารถดูรายการแฟล็กที่มีอยู่ได้ใน ตาราง
หากคุณต้องการติดตามการซื้อในแอปด้วยตนเอง คุณสามารถใช้โค้ดด้านล่าง
ในเมธอด paymentQueue:updatedTransactions: delegate ให้เรียกเมธอด sendSKPaymentTransactions ของ PushManager
func paymentQueue(_ queue: SKPaymentQueue, updatedTransactions transactions: [SKPaymentTransaction]) { // In-Apps Tracking Pushwoosh code here Pushwoosh.sharedInstance().sendSKPaymentTransactions(transactions) // the rest of the code, consume transactions, etc }- (void)paymentQueue:(SKPaymentQueue *)queue updatedTransactions:(NSArray *)transactions {
[[PushNotificationManager pushManager] sendSKPaymentTransactions:transactions];
//the rest of the code, consume transactions, etc}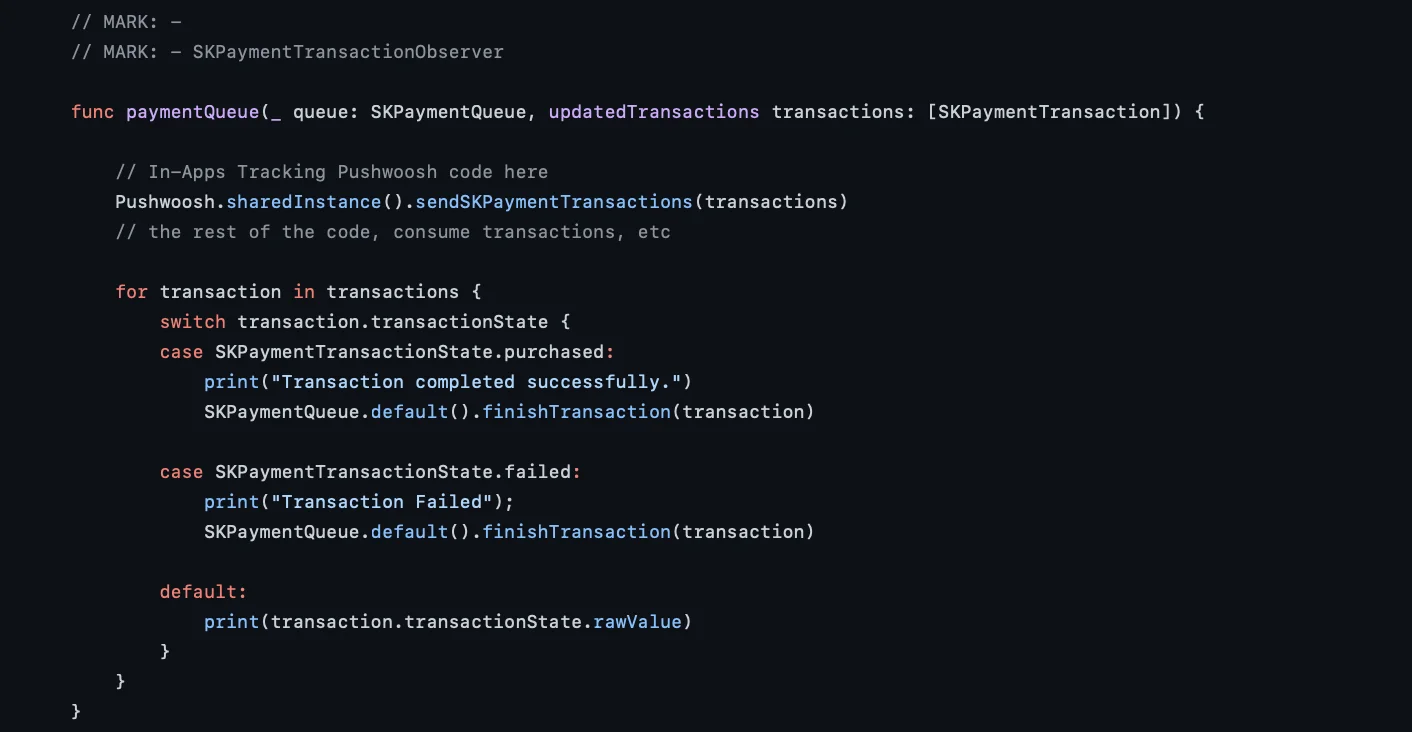
การแจ้งเตือนพุช Geozones
Anchor link toการแจ้งเตือนพุช Geozones ถูกรวมอยู่ในเฟรมเวิร์กแยกต่างหาก PushwooshGeozones
- เพิ่ม PushwooshGeozones.framework ไปยังโปรเจกต์ของคุณ
เพื่อเพิ่ม PushwooshGeozones.framework ไปยังโปรเจกต์ของคุณโดยใช้ตัวจัดการ dependency ให้ใส่บรรทัดต่อไปนี้
ใน podfile หรือ cartfile ของคุณ:
pod 'PushwooshXCFramework/Geozones'github "Pushwoosh/pushwoosh-ios-sdk"หากคุณต้องการใช้ PushwooshGeozones.xcframework ให้ป้อน Package URL ต่อไปนี้:
PushwooshGeozones-XCFramework
อีกทางเลือกหนึ่ง คุณสามารถลากและวางเฟรมเวิร์กเข้าไปใน Link Binaries With Libraries ใน Build Phases ของโปรเจกต์ของคุณได้
- เพิ่มคีย์ต่อไปนี้ลงใน Info.plist ของคุณ:
- NSLocationWhenInUseUsageDescription – (จำเป็น) เพื่อให้แอปติดตาม Geozones เฉพาะเมื่อทำงานในเบื้องหน้าเท่านั้น
- NSLocationAlwaysAndWhenInUseUsageDescription – (จำเป็น) เพื่อให้แอปติดตาม Geozones ทั้งในเบื้องหน้าและเบื้องหลัง และเพื่อแสดงกล่องโต้ตอบขออนุญาต
- NSLocationAlwaysUsageDescription – (ทางเลือก) เพื่อให้แอปติดตาม Geozones ตลอดเวลา; ควรใช้หากแอปของคุณกำหนดเป้าหมายเป็น iOS 10 และเวอร์ชันก่อนหน้า
<key>NSLocationAlwaysAndWhenInUseUsageDescription</key><string>for app to track Geozones in both conditions and to show a permission request dialog</string><key>NSLocationWhenInUseUsageDescription</key><string>for app to track Geozones only while running in the foreground</string>- นำเข้าเฟรมเวิร์ก
import PushwooshGeozones#import <PushwooshGeozones/PWGeozonesManager.h>- เริ่มการติดตาม Geozones
PWGeozonesManager.shared()?.startLocationTracking()[[PWGeozonesManager sharedManager] startLocationTracking];ตัวอย่าง
Anchor link tooverride func viewDidLoad() { super.viewDidLoad()
// Start Geozones tracking when needed PWGeozonesManager.shared().startLocationTracking()}- (void)viewDidLoad { [super viewDidLoad]; // Do any additional setup after loading the view.
// Start Geozones tracking when needed [[PWGeozonesManager sharedManager] startLocationTracking];}การสร้างคิว Rich Media
Anchor link toในกรณีที่มีหน้า Rich Media หลายหน้าที่ต้องแสดงพร้อมกัน (ตัวอย่างเช่น เหตุการณ์ทริกเกอร์สำหรับ In-Apps สองรายการขึ้นไปเกิดขึ้นในเวลาเดียวกัน หรือหน้า Rich Media กำลังแสดงอยู่แล้วในขณะที่เหตุการณ์ทริกเกอร์อื่นเกิดขึ้น) คุณสามารถตั้งค่าคิวสำหรับการแสดงหน้า Rich Media ได้ หากต้องการสร้างคิว ให้ทำตามขั้นตอนที่อธิบายไว้ด้านล่าง
- สร้างคลาสที่ใช้งาน PWRichMediaPresentingDelegate:
@interface ChainedRichMediaPresentingDelegate () <PWRichMediaPresentingDelegate>
@property (nonatomic) NSMutableArray *queue;
@property (nonatomic) BOOL inAppIsPresenting;
@end

@implementation ChainedRichMediaPresentingDelegate
- (instancetype)init {    self = [super init];
    if (self) {        _queue = [NSMutableArray new];    }
    return self;}
- (BOOL)richMediaManager:(PWRichMediaManager *)richMediaManager shouldPresentRichMedia:(PWRichMedia *)richMedia {    [_queue addObject:richMedia];    return !_inAppIsPresenting;}
- (void)richMediaManager:(PWRichMediaManager *)richMediaManager didPresentRichMedia:(PWRichMedia *)richMedia {    _inAppIsPresenting = YES;}
- (void)richMediaManager:(PWRichMediaManager *)richMediaManager didCloseRichMedia:(PWRichMedia *)richMedia {    _inAppIsPresenting = NO;
    [_queue removeObject:richMedia];
    if (_queue.count) {        [[PWRichMediaManager sharedManager] presentRichMedia:_queue.firstObject];    }}
- (void)richMediaManager:(PWRichMediaManager *)richMediaManager presentingDidFailForRichMedia:(PWRichMedia *)richMedia withError:(NSError *)error {    [self richMediaManager:richMediaManager didCloseRichMedia:richMedia];}
@end
2. ตั้งค่า delegate:
[PWRichMediaManager sharedManager].delegate = [ChainedRichMediaPresentingDelegate new];เล่นวิดีโอที่ส่งมาใน Rich Notification อัตโนมัติด้วย force touch
Anchor link toเพื่อให้วิดีโอที่ส่งมาเป็น ไฟล์แนบ Rich Notification เล่นอัตโนมัติเมื่อการแจ้งเตือนถูกขยายโดยไม่มีการโต้ตอบจากผู้ใช้ ให้ทำตามขั้นตอนด้านล่าง:
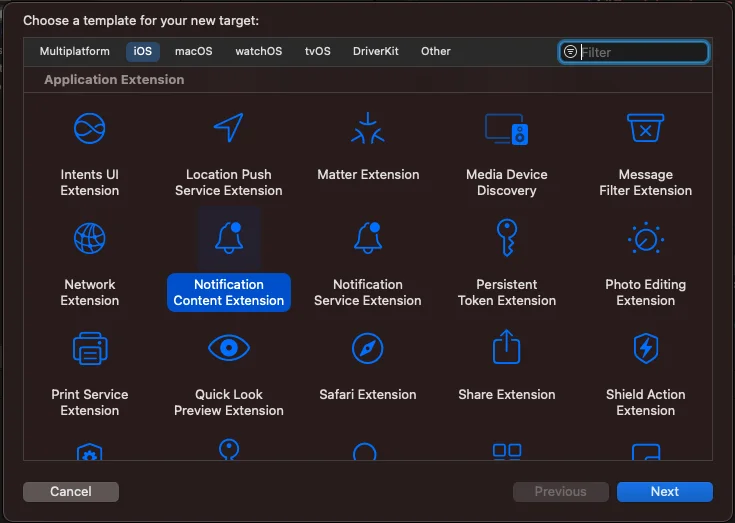
- เพิ่ม Notification Content Extension ไปยังโปรเจกต์ของคุณ:
- ใน Xcode เลือก File > New > Target
- เลือก Notification Content Extension
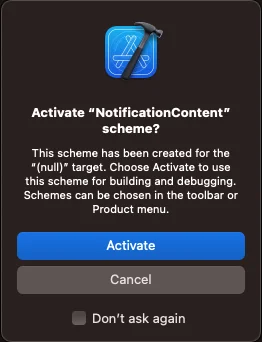
- กำหนดชื่อและทำการตั้งค่าให้เสร็จสิ้น
หากได้รับข้อความ “Activate scheme” ให้เลือก Cancel
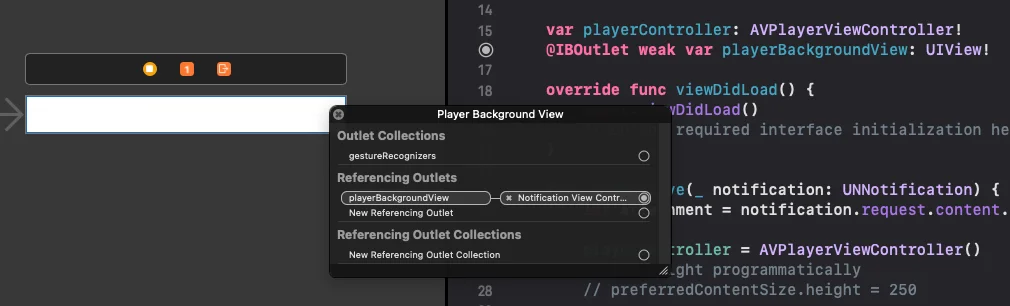
- ปรับคุณสมบัติและเมธอดใน Content Extension ดังนี้:
import UIKitimport UserNotificationsimport UserNotificationsUIimport AVKit

class NotificationViewController: UIViewController, UNNotificationContentExtension {    var playerController: AVPlayerViewController!    @IBOutlet weak var playerBackgroundView: UIView!
    override func viewDidLoad() {        super.viewDidLoad()        // Do any required interface initialization here.    }
    func didReceive(_ notification: UNNotification) {        let attachment = notification.request.content.attachments.first
        playerController = AVPlayerViewController()        // Set height programmatically        // preferredContentSize.height = 250
        if let url = attachment?.url {            setupVideoPlayer(url: url)        } else {            print("No valid URL...")        }    }
private func setupVideoPlayer(url: URL) { guard let playerController = self.playerController else { return } let player = AVPlayer(url: url) playerController.player = player playerController.view.frame = self.playerBackgroundView.bounds playerBackgroundView.addSubview(playerController.view) addChild(playerController) playerController.didMove(toParent: self) player.play() }- รวม UIView เข้าไปใน MainInterface.storyboard:
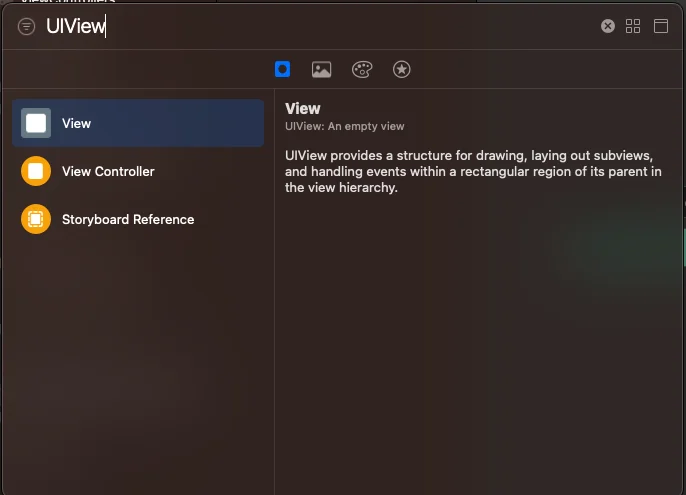
- เชื่อมโยง playerBackgroundView IBOutlet กับ UIView ที่คุณเพิ่งเพิ่ม:
- อัปเดตไฟล์ info.plist ด้วยรายการต่อไปนี้:
UNNotificationExtensionUserInteractionEnabled = true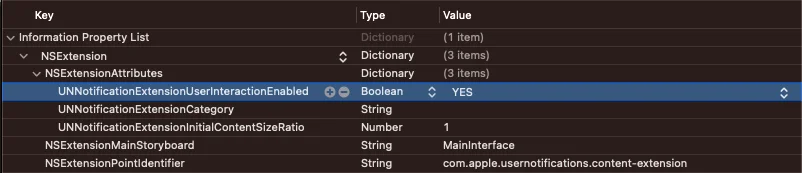
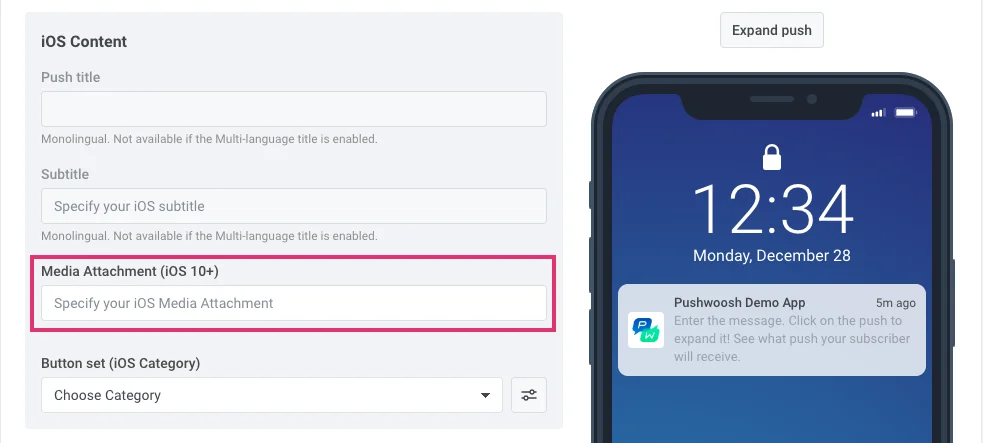
ในการแนบวิดีโอไปกับการแจ้งเตือนของคุณ ให้ป้อน URL ของวิดีโอในช่อง Media Attachment ใน Control Panel:
เมื่อส่งการแจ้งเตือนผ่าน API request /createMessage ให้รวม URL ในพารามิเตอร์ “ios_attachment” และตรวจสอบให้แน่ใจว่าแฟล็ก “mutable-content” ถูกตั้งค่าเป็น `1`
เสียงพุชที่กำหนดเอง
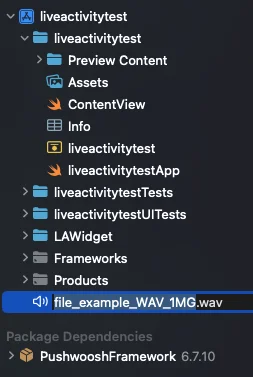
Anchor link toในการเล่นเสียงที่กำหนดเองเมื่อได้รับการแจ้งเตือนพุช ก่อนอื่นให้ใส่ไฟล์เสียงลงในโฟลเดอร์รากของโปรเจกต์ของคุณ
จากนั้น ระบุชื่อไฟล์เสียงในพารามิเตอร์พุช – กรอกข้อมูลในช่อง Sound ของ การตั้งค่าเฉพาะของ iOS ของข้อความของคุณ หรือระบุชื่อไฟล์เป็นค่าสำหรับพารามิเตอร์ “ios_sound” ของ API request createMessage
ไฟล์เสียงสำหรับเสียง iOS ที่กำหนดเองต้องอยู่ในรูปแบบใดรูปแบบหนึ่งต่อไปนี้: .aif, .caf, .wav โปรดตรวจสอบให้แน่ใจว่าได้ระบุรูปแบบในชื่อไฟล์ มิฉะนั้น Pushwoosh iOS SDK จะไม่สนใจ
iOS Provisional Push
Anchor link toวิธีการทำงาน
Anchor link toการแจ้งเตือนพุชแบบชั่วคราว (Provisional push notifications) จะปรากฏอย่างเงียบๆ ใน Notification Center ของผู้ใช้ แต่จะไม่ปรากฏบนหน้าจอล็อก พุชประเภทนี้ไม่จำเป็นต้องได้รับอนุญาตจากผู้ใช้อย่างชัดเจน: คุณสามารถเริ่มส่งได้ทันทีที่ผู้ใช้ติดตั้งและเปิดแอปของคุณ
อย่างไรก็ตาม ผู้ใช้ยังคงสามารถสมัครรับการแจ้งเตือนพุชที่โดดเด่นของคุณได้: เมื่อเปิด Provisional Push พวกเขามีสองทางเลือกในการเลือกประสบการณ์ของตนเอง – คือเก็บพุชไว้ใน Notification Center โดยไม่มีการแจ้งเตือนและเสียง หรืออนุญาตให้คุณส่งพุชอย่างโดดเด่นเพื่อให้ปรากฏบนหน้าจอล็อก
Provisional Pushes ถูกออกแบบมาเพื่อให้ผู้ใช้ตัดสินใจอย่างมีข้อมูลว่าพวกเขาต้องการรับการแจ้งเตือนจากแอปของคุณหรือไม่ เนื่องจากคำขอสมัครสมาชิก APN แบบเนทีฟจะแสดงให้ผู้ใช้เห็นเพียงครั้งเดียว และหากต้องการสมัครในภายหลัง พวกเขาจะต้องไปที่การตั้งค่าระบบของโทรศัพท์ ซึ่งผู้ใช้บางคนอาจไม่สมัครเนื่องจากพวกเขาไม่ทราบว่าพวกเขาจะได้รับประโยชน์อะไรจากพุชของคุณ Provisional Pushes ให้ความเข้าใจนี้แก่ผู้ใช้: พวกเขาสามารถเห็นเนื้อหาที่คุณส่งในการแจ้งเตือนพุชและตัดสินใจว่าพวกเขาต้องการได้รับการแจ้งเตือนเกี่ยวกับเนื้อหานี้อย่างโดดเด่นหรือไม่
วิธีการใช้งาน
Anchor link to1. ผสานรวม Pushwoosh iOS SDK โดยทำตาม คู่มือ
2. เพิ่มสตริงต่อไปนี้ลงใน AppDelegate ของโปรเจกต์ของคุณก่อนที่จะเรียกเมธอด registerForPushNotifications():
if #available(iOS 12.0, *) { Pushwoosh.sharedInstance().additionalAuthorizationOptions = UNAuthorizationOptions.provisional}if (@available(iOS 12.0, *)) { [Pushwoosh sharedInstance].additionalAuthorizationOptions = UNAuthorizationOptionProvisional;}เท่านี้ก็เรียบร้อย! ผู้ใช้แอปจะได้รับข้อความโดยตรงไปยัง Notification Center ของพวกเขาทันทีที่ติดตั้งแอป
แบ่งปันความคิดเห็นของคุณกับเรา
Anchor link toความคิดเห็นของคุณช่วยให้เราสร้างประสบการณ์ที่ดีขึ้น ดังนั้นเราจึงอยากรับฟังจากคุณหากคุณมีปัญหาใดๆ ในระหว่างกระบวนการผสานรวม SDK หากคุณประสบปัญหาใดๆ โปรดอย่าลังเลที่จะแบ่งปันความคิดของคุณกับเรา ผ่านแบบฟอร์มนี้