VoIP certificate configuration for iOS
Upload your VoIP certificate in the Control Panel so that Pushwoosh can deliver VoIP push notifications to your iOS app. After you complete the steps below, you can send incoming-call alerts and other VoIP events through Pushwoosh to devices that have your app installed.
Creating the certificate
Anchor link toFollow the same flow as for a standard APNs certificate:
- Generate a certificate request file in Keychain Access.
- Create the certificate in Apple Developer Portal. Under Services, choose VoIP Services Certificate. See Create VoIP services certificates in Apple Help.
- Export the private key as .p12 from Keychain Access.
You will need the .p12 file and the private key password when filling the form below.
Configuring the certificate in the Control Panel
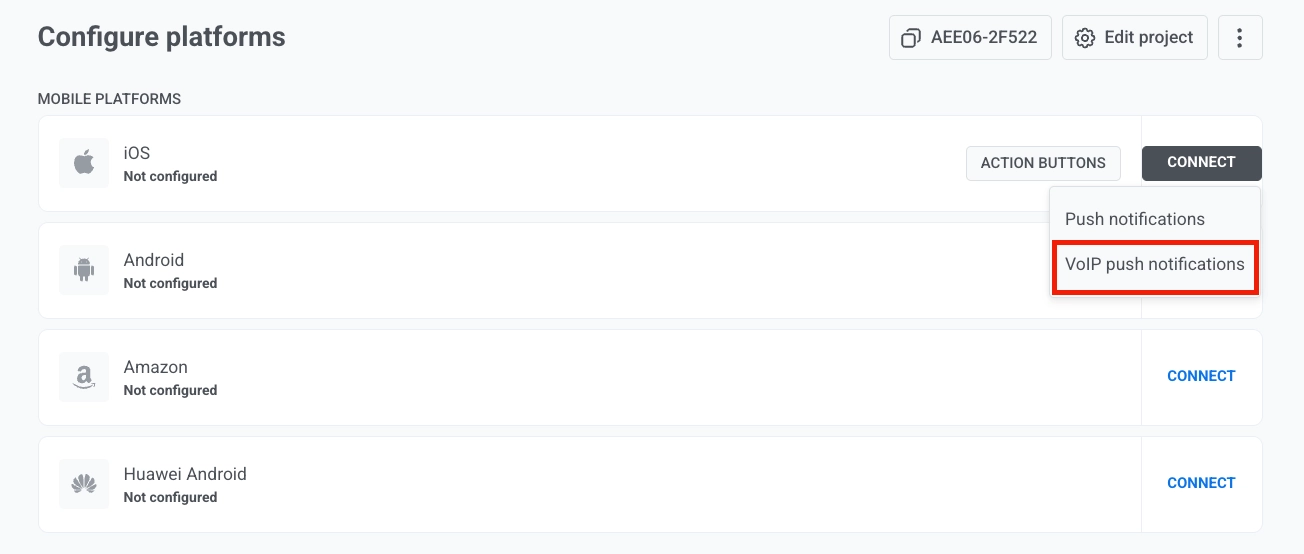
Anchor link to- Go to Settings → Configure platforms in the Control Panel.
- Find iOS in the Mobile platforms list and click Connect next to it.
- In the dropdown, select VoIP push notifications.
- Next to VoIP certificate file (.p12), click the attachment icon and select the .p12 file you exported from Keychain Access.
- In Private key password, enter the password you set when exporting the .p12 file.
- Under Gateway, select Sandbox for development and testing, or Production for live apps.
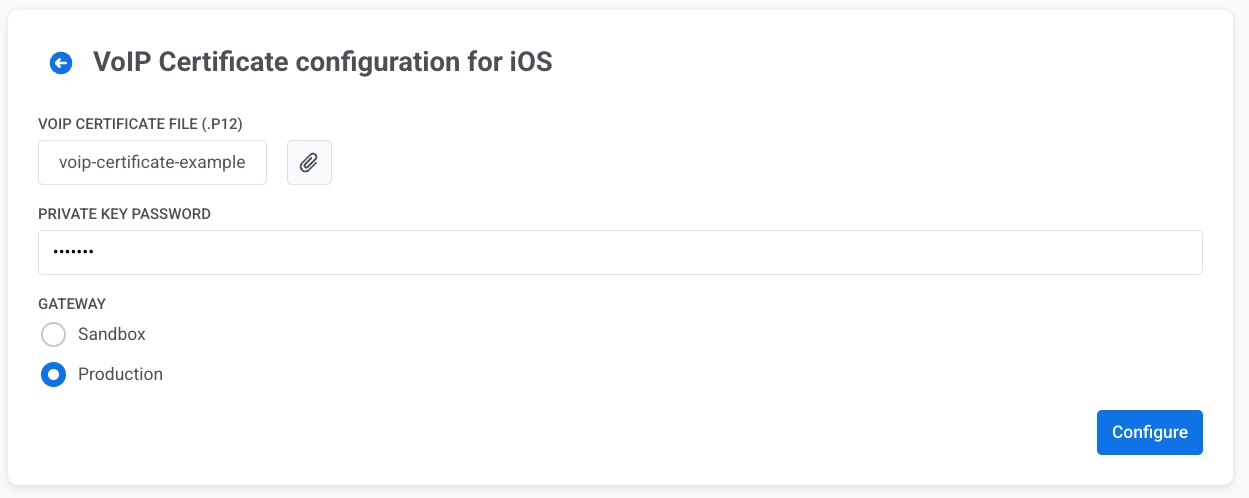
- Click Configure to save the configuration.
Once the configuration is saved, Pushwoosh can deliver VoIP push notifications to your iOS app. To implement receiving and handling VoIP pushes in the app, use the Pushwoosh VoIP module and the Messages API for sending.