API Access token
API Access Token is a unique identifier assigned to a particular project or several projects in your account. It authenticates your account for managing your projects via the API, including account modifications, sending messages, editing projects, etc.
API Access token types
Anchor link toPushwoosh provides two different API Access Token types: Server and Device.
Each token type is only valid for its specific API scope. An authentication error will occur if the incorrect token is used.
Server API token
Anchor link toThe Server API token is used with all API methods, except those under the Device API. It should be included in the request body in the auth field.
Device API token
Anchor link toThe Device API token is used exclusively with Device API methods. It should be included in the HTTP request headers using the Authorization header.
Below is an example of the correct header format:
Authorization: Token <device_api_token>Replace <device_api_token> with your actual Device API Token value.
Create and manage API Access tokens
Anchor link toYou can view, create, and manage your API Access tokens in the API Access section of the Pushwoosh Control Panel. To access it, go to Settings → API Access.
Your role needs both the API access and Personal data permissions, because a token can read the whole audience.
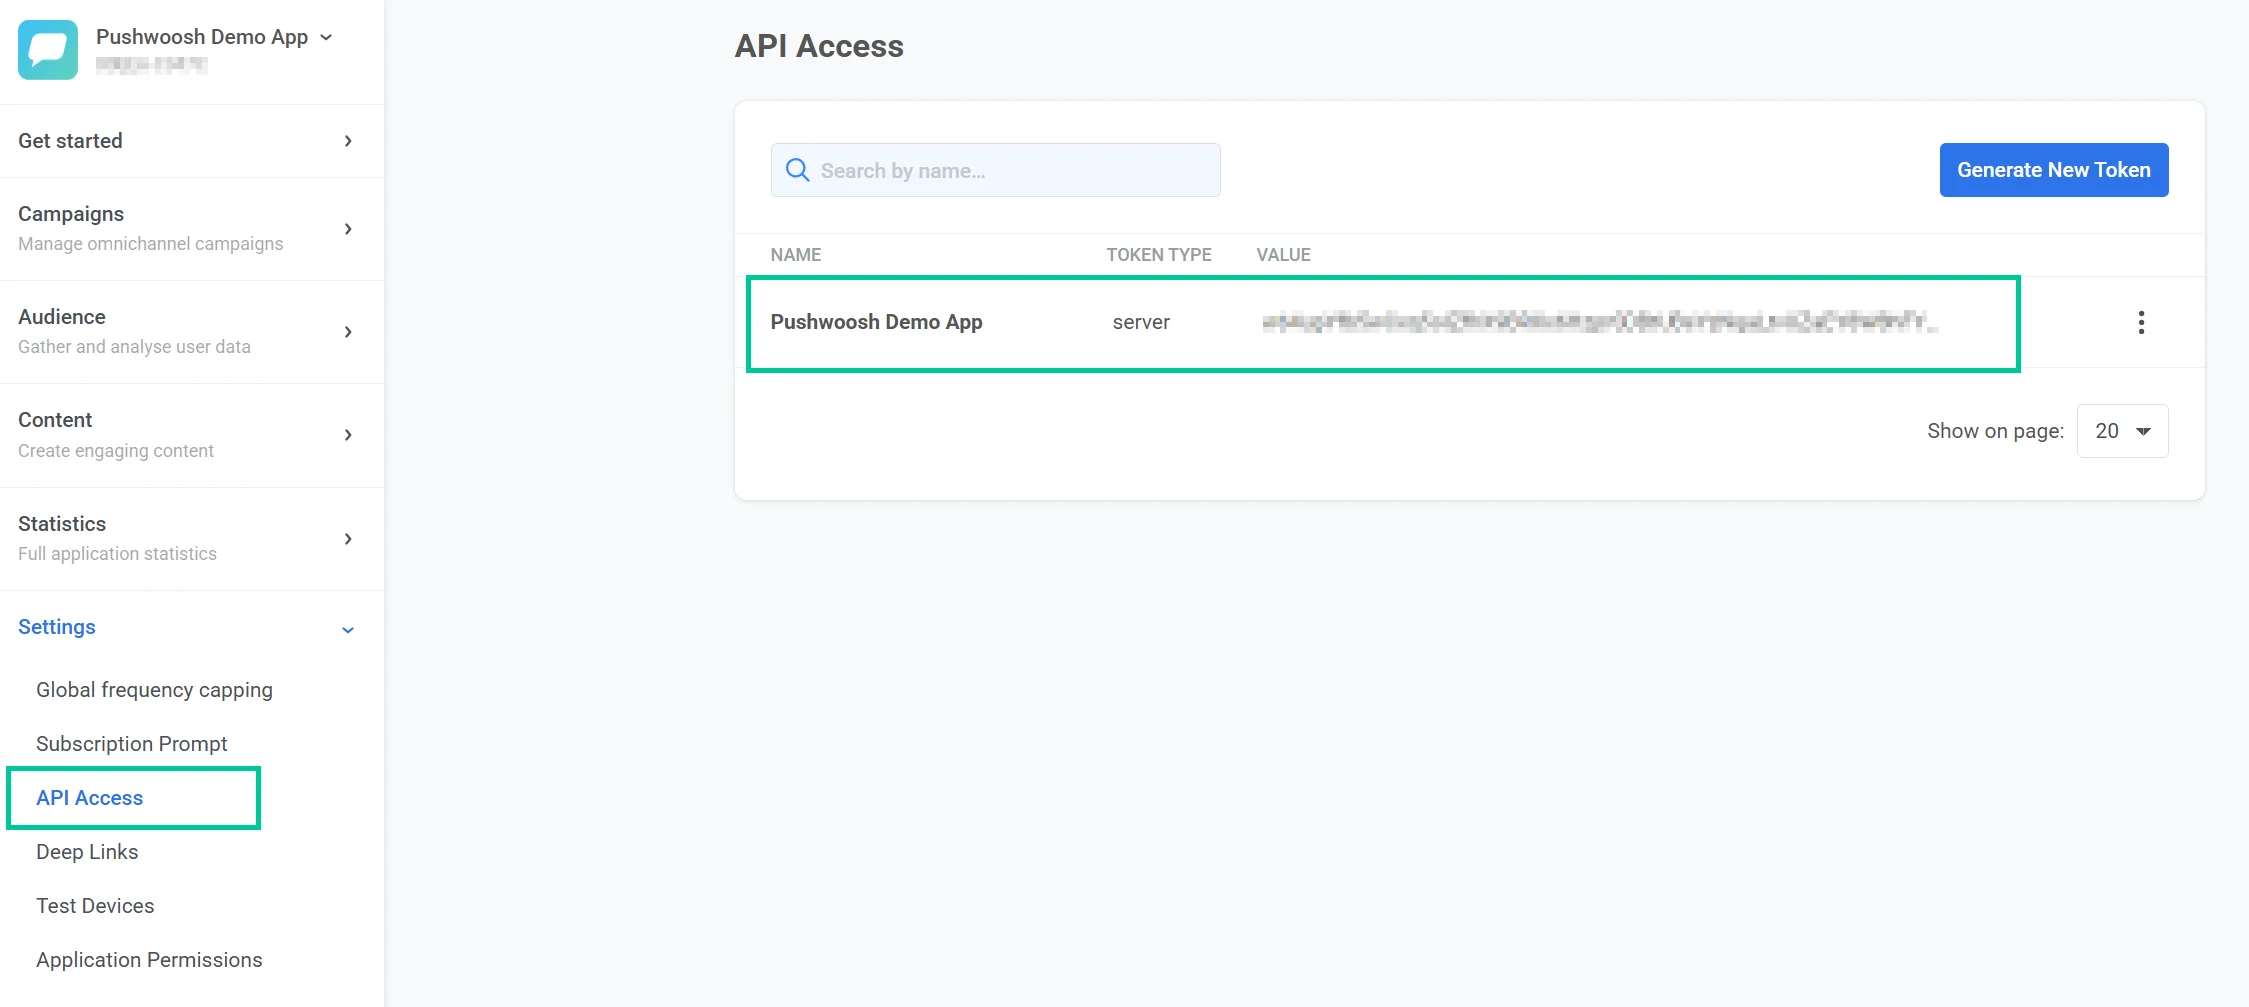
By default, each account includes a token called Pushwoosh Demo App, which is set up as a server token.
Create a new API Access token
Anchor link toTo create a new API Access token:
-
Go to the API Access section in the Control Panel.
-
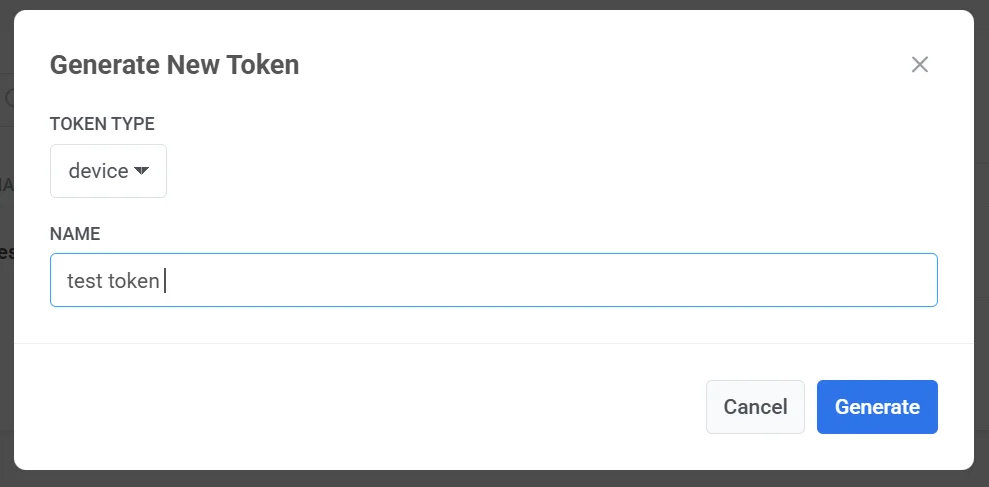
Click Generate New Token.
-
In the window that appears, choose the token type:
-
Enter a name for the token.
-
Click Generate to create the token.
Important: Be sure to give the token access to the right app in your Pushwoosh Control Panel. Learn more
The new token will appear in the API Access list. From there, you can copy its value for use in API requests or manage its access permissions as needed.
Manage a token
Anchor link toTo manage an existing API token, click the three-dot menu (⋮) next to the token entry in the API Access section.
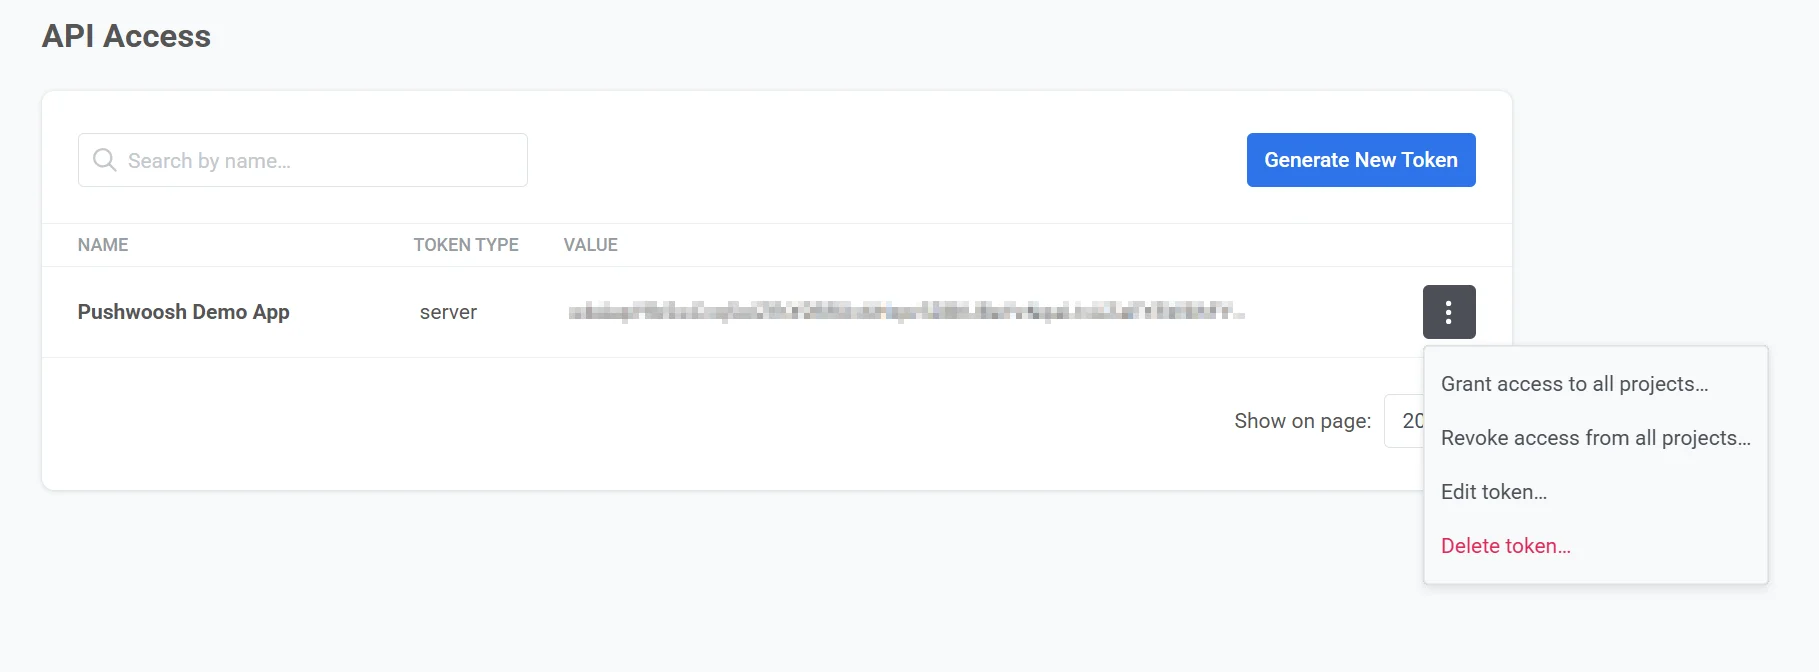
The following options are available:
Grant access to all projects
Anchor link toGives the token access to all projects in your account. This allows it to fully use the API across all projects.
Revoke access from all projects
Anchor link toRemoves the token’s access to all projects in your account. The token will no longer be able to use the API until access is given again.
Edit token
Anchor link toOpens the Edit API Token Permissions screen, where you can:
-
Change the token name
-
Copy the token value
-
Choose which projects the token can access by selecting or unselecting them in the list
-
Turn the token’s permissions on or off: Account modification, Applications modification, Tags modification, Message sending & deleting
-
Set the allowed IP addresses the token can be used from (Server tokens only)
The Permissions tab also shows the token’s last used time and how many of its calls were refused in the last 7 and 30 days.
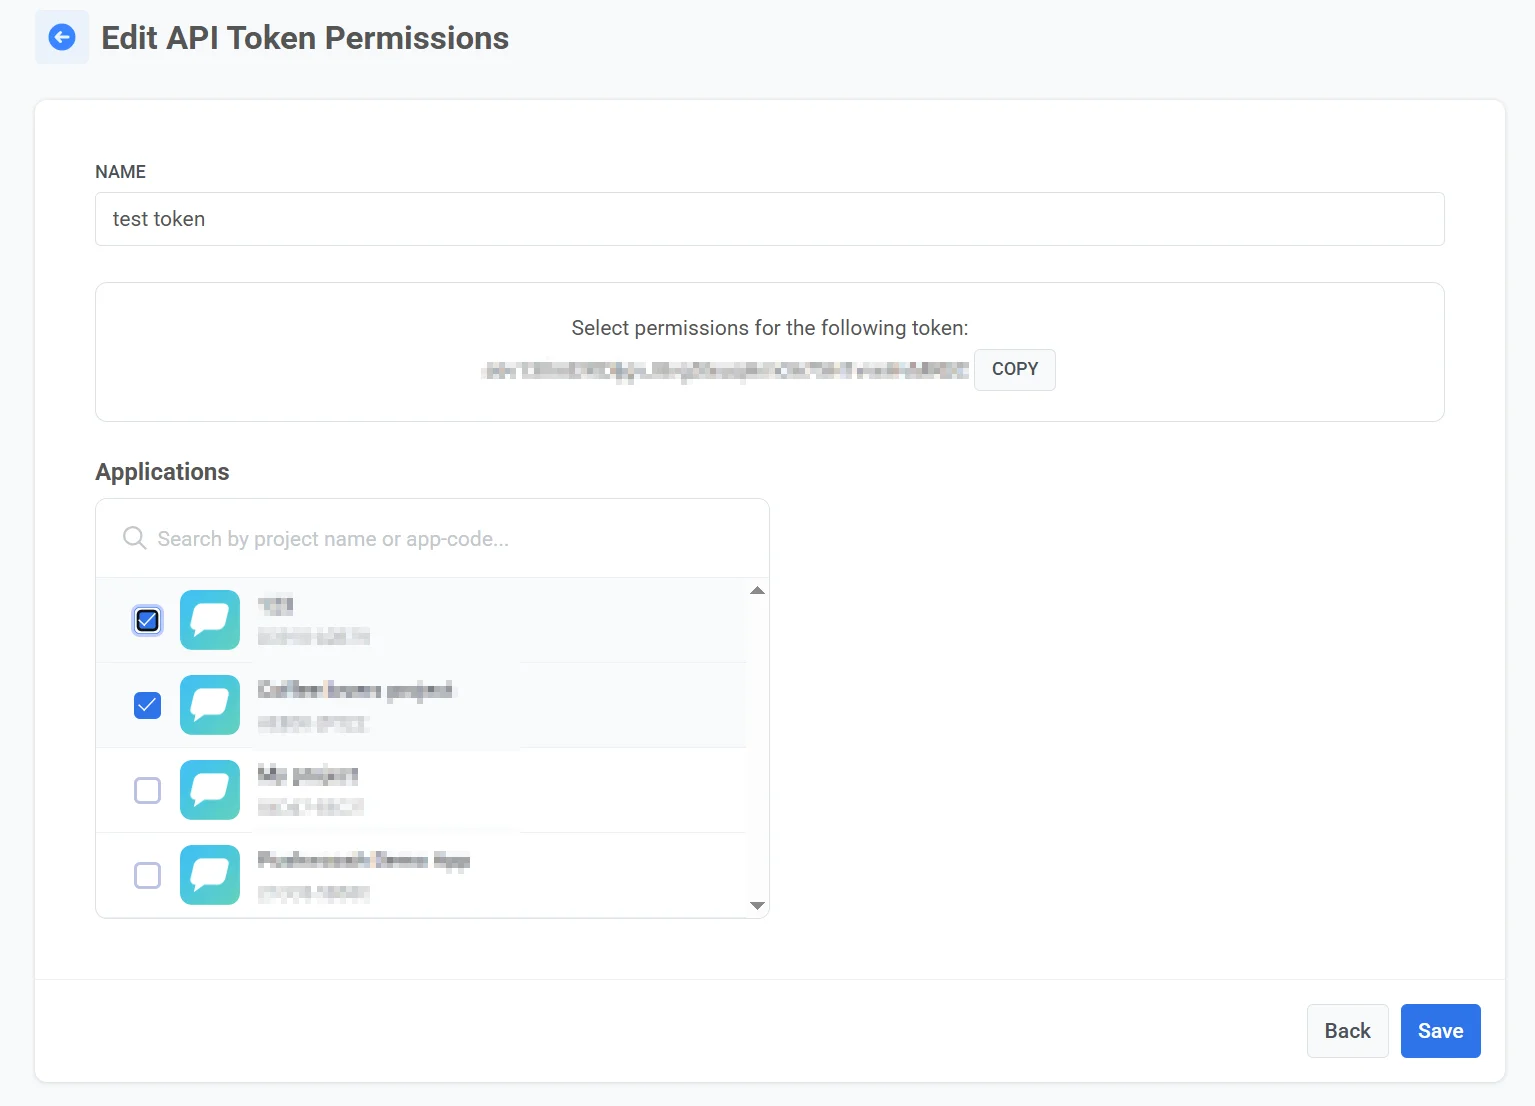
After you finish making changes, click Save to apply them.
Check a token’s usage journal
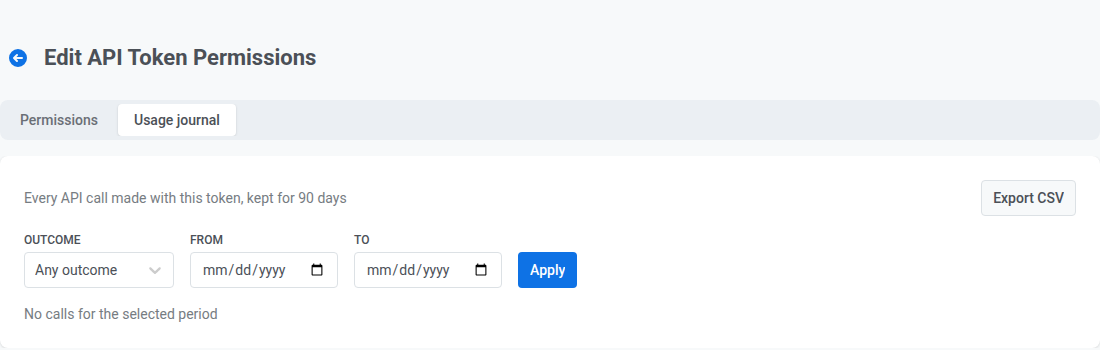
Anchor link toOpen the Usage journal tab on the Edit API Token Permissions screen to review every API call made with the token over the last 90 days. Choose an outcome (Any outcome, Accepted, Completed, Refused: IP address, Refused: no rights) and a date range, then click Apply to filter the list. Click Export CSV to download the filtered log as a CSV file.
Delete token
Anchor link toPermanently removes the token from your account.
Authorizing API requests
Anchor link toTo authorize API requests, use the correct type of API Access token based on the type of API method you are calling:
For Server API methods
Anchor link toInclude the token in the “auth” field of the request body:
Example:
{ "request": { "application": "XXXXX-XXXXX", "auth": "yxoPUlwqm…………pIyEX4H", // paste your server token here "notifications": [{ "send_date": "now", "content": "Hello world" }] }}For Device API methods
Anchor link toUse the Device token. Include it in the HTTP request header using the following format:
Authorization: Token <device_api_token>Replace <device_api_token> with your actual token value.
Restrict a token to specific IP addresses
Anchor link toA Server token can be restricted to a list of allowed source IP addresses. When the list is set, Pushwoosh only accepts API requests made with that token from a matching address. Device tokens don’t have this option.
Open Edit token for a Server token and enter the addresses in Allowed IP addresses:
- Add up to 50 entries, IPv4 or IPv6, each a single address (
203.0.113.7) or a CIDR range (203.0.113.0/24). - A single address is stored as a full-length range, e.g.
203.0.113.7becomes203.0.113.7/32. - A range is canonicalized to its network address, e.g.
203.0.113.7/24becomes203.0.113.0/24. 0.0.0.0/0and::/0are rejected, since they would match every address and provide no restriction.- Leave the list empty to keep the token usable from any address. This is the default for existing and new tokens.
Click Save to apply the list. Saving is rejected if the list has more than 50 entries or an entry that isn’t a valid address or CIDR range.
What happens when a request comes from a disallowed address
Anchor link toPushwoosh checks the allowed IP addresses on every API call made with the token, whether it’s a v1 REST call (as documented across this API reference, for example the Messages API), a Messaging API v2 call, or a Customer Journey API call. A request from an address outside the token’s allowed list is rejected.
The response format differs by which calls you make:
- Sending, canceling, and deleting messages, such as
createMessage, the channel-specificcreate*Messagemethods,cancelMessage, anddeleteMessage, return HTTP 200 with"status_code": 403in the response body, the same as their other authorization failures. - Other v1 REST calls, such as the Applications, Tags, Geozones, Segmentation (Filters), Campaigns, Presets, Test devices, and Statistics APIs, return a real HTTP 403 with a JSON error body.
- Messaging API v2 and the Customer Journey API return HTTP 403 with a
PermissionDeniederror.