iOS App Clips
App Clips ช่วยให้ผู้ใช้ทำงานให้เสร็จได้อย่างรวดเร็วโดยไม่ต้องดาวน์โหลดแอปเต็มของคุณ ด้วย Pushwoosh คุณสามารถส่ง push notification ไปยังผู้ใช้ App Clip ได้ — iOS จะให้สิทธิ์การแจ้งเตือนเป็นเวลา 8 ชั่วโมงโดยอัตโนมัติเมื่อ App Clip ถูกเปิด
สิ่งที่คุณต้องมี
Anchor link to- Pushwoosh iOS SDK 7.0.33+
- Xcode 15+
- แอปพลิเคชัน Pushwoosh แยกต่างหากสำหรับ App Clip ของคุณ (bundle ID ที่แตกต่างกัน = แอปแยกต่างหาก)
- อุปกรณ์จริงสำหรับการทดสอบ (push token ไม่ทำงานบน simulator)
1. สร้างแอปพลิเคชัน Pushwoosh
Anchor link toApp Clip ของคุณมี bundle ID ที่แตกต่างกัน (เช่น com.yourapp.Clip) ดังนั้นจึงต้องมีแอป Pushwoosh แยกต่างหากพร้อมคีย์ APNs ของตัวเอง
- ไปที่ Pushwoosh Control Panel
- สร้างแอปพลิเคชันใหม่ด้วย bundle ID ของ App Clip
- อัปโหลดคีย์ยืนยันตัวตน APNs ของคุณ
- คัดลอก Application Code และ API Token
2. สร้าง App Clip target
Anchor link to- ใน Xcode: File → New → Target → App Clip
- เพิ่มความสามารถ Push Notifications ให้กับ App Clip target
สำหรับภาพหน้าจอโดยละเอียดเกี่ยวกับการเพิ่มความสามารถ โปรดดูที่ คู่มือการผสานรวมพื้นฐาน
3. เพิ่ม Pushwoosh frameworks
Anchor link toใน Build Phases → Link Binary With Libraries ของ App Clip target ให้เพิ่ม:
PushwooshFramework.frameworkPushwooshCore.frameworkPushwooshBridge.framework
4. กำหนดค่า Info.plist
Anchor link to<!-- Pushwoosh --><key>Pushwoosh_APPID</key><string>XXXXX-XXXXX</string><key>Pushwoosh_API_TOKEN</key><string>YOUR_API_TOKEN</string>
<!-- Ephemeral push (8-hour auto-grant, no dialog) --><key>NSAppClip</key><dict> <key>NSAppClipRequestEphemeralUserNotification</key> <true/> <key>NSAppClipRequestLocationConfirmation</key> <false/></dict>
<key>UIBackgroundModes</key><array> <string>remote-notification</string></array>5. เริ่มต้น SDK
Anchor link toimport SwiftUIimport PushwooshFramework
class AppClipDelegate: NSObject, UIApplicationDelegate, PWMessagingDelegate {
func application(_ application: UIApplication, didFinishLaunchingWithOptions launchOptions: [UIApplication.LaunchOptionsKey: Any]? = nil) -> Bool { Pushwoosh.configure.delegate = self Pushwoosh.configure.registerForPushNotifications() return true }
func application(_ application: UIApplication, didRegisterForRemoteNotificationsWithDeviceToken deviceToken: Data) { Pushwoosh.configure.handlePushRegistration(deviceToken) }
func application(_ application: UIApplication, didFailToRegisterForRemoteNotificationsWithError error: Error) { Pushwoosh.configure.handlePushRegistrationFailure(error as NSError) }
func application(_ application: UIApplication, didReceiveRemoteNotification userInfo: [AnyHashable: Any], fetchCompletionHandler completionHandler: @escaping (UIBackgroundFetchResult) -> Void) { Pushwoosh.configure.handlePushReceived(userInfo) completionHandler(.noData) }
func pushwoosh(_ pushwoosh: Pushwoosh, onMessageOpened message: PWMessage) { print("Push opened: \(message.payload ?? [:])") }}
@mainstruct YourAppClip: App { @UIApplicationDelegateAdaptor(AppClipDelegate.self) var appDelegate
var body: some Scene { WindowGroup { ContentView() } }}import UIKitimport PushwooshFramework
@mainclass AppDelegate: UIResponder, UIApplicationDelegate, PWMessagingDelegate {
func application(_ application: UIApplication, didFinishLaunchingWithOptions launchOptions: [UIApplication.LaunchOptionsKey: Any]?) -> Bool { Pushwoosh.configure.delegate = self Pushwoosh.configure.registerForPushNotifications() return true }
func application(_ application: UIApplication, didRegisterForRemoteNotificationsWithDeviceToken deviceToken: Data) { Pushwoosh.configure.handlePushRegistration(deviceToken) }
func application(_ application: UIApplication, didFailToRegisterForRemoteNotificationsWithError error: Error) { Pushwoosh.configure.handlePushRegistrationFailure(error as NSError) }
func application(_ application: UIApplication, didReceiveRemoteNotification userInfo: [AnyHashable: Any], fetchCompletionHandler completionHandler: @escaping (UIBackgroundFetchResult) -> Void) { Pushwoosh.configure.handlePushReceived(userInfo) completionHandler(.noData) }
func pushwoosh(_ pushwoosh: Pushwoosh, onMessageOpened message: PWMessage) { print("Push opened: \(message.payload ?? [:])") }}ด้วยสิทธิ์ชั่วคราว iOS จะให้สิทธิ์การเข้าถึง push เป็นเวลา 8 ชั่วโมงโดยอัตโนมัติ หากคุณต้องการใช้โหมดชั่วคราวโดยไม่แสดงกล่องโต้ตอบขอสิทธิ์ ให้เรียกใช้ UIApplication.shared.registerForRemoteNotifications() โดยตรงแทน Pushwoosh.configure.registerForPushNotifications()
หากต้องการขอสิทธิ์ push แบบถาวร (กล่องโต้ตอบมาตรฐาน) ให้ใช้ Pushwoosh.configure.registerForPushNotifications() ตามที่แสดงด้านบน
สิทธิ์ push ชั่วคราว
Anchor link toเมื่อผู้ใช้เปิด App Clip ของคุณ iOS จะให้สิทธิ์การเข้าถึง push notification เป็นเวลา 8 ชั่วโมงโดยไม่ต้องถาม หลังจาก 8 ชั่วโมง สิทธิ์จะหมดอายุ ผู้ใช้ต้องเปิด App Clip อีกครั้งเพื่อรับสิทธิ์อีก 8 ชั่วโมง
หากต้องการรับ push token เป็นเวลา 8 ชั่วโมงโดยไม่แสดงกล่องโต้ตอบขอสิทธิ์:
UIApplication.shared.registerForRemoteNotifications()หากต้องการรับ push token แบบถาวร (แสดงกล่องโต้ตอบขอสิทธิ์มาตรฐาน):
Pushwoosh.configure.registerForPushNotifications()ข้อจำกัด
Anchor link to| ข้อจำกัด | รายละเอียด |
|---|---|
| ไม่มี rich notifications | App Clips ไม่สามารถรวม Notification Service Extension ได้ — ไม่มีรูปภาพ, ไม่มี Communication Notifications |
| จำกัดขนาด | 15 MB (iOS 16) / 50 MB (iOS 17+) |
| ช่วงเวลา push 8 ชั่วโมง | สิทธิ์ชั่วคราวจะหมดอายุหลังจาก 8 ชั่วโมง |
| ไม่มีการประมวลผลเบื้องหลัง | Silent push มีฟังก์ชันการทำงานที่จำกัด |
| Device ID | identifierForVendor จะคืนค่าเป็นศูนย์ — SDK จะจัดการสิ่งนี้โดยอัตโนมัติ (7.0.33+) |
หน้าตาเป็นอย่างไร
Anchor link to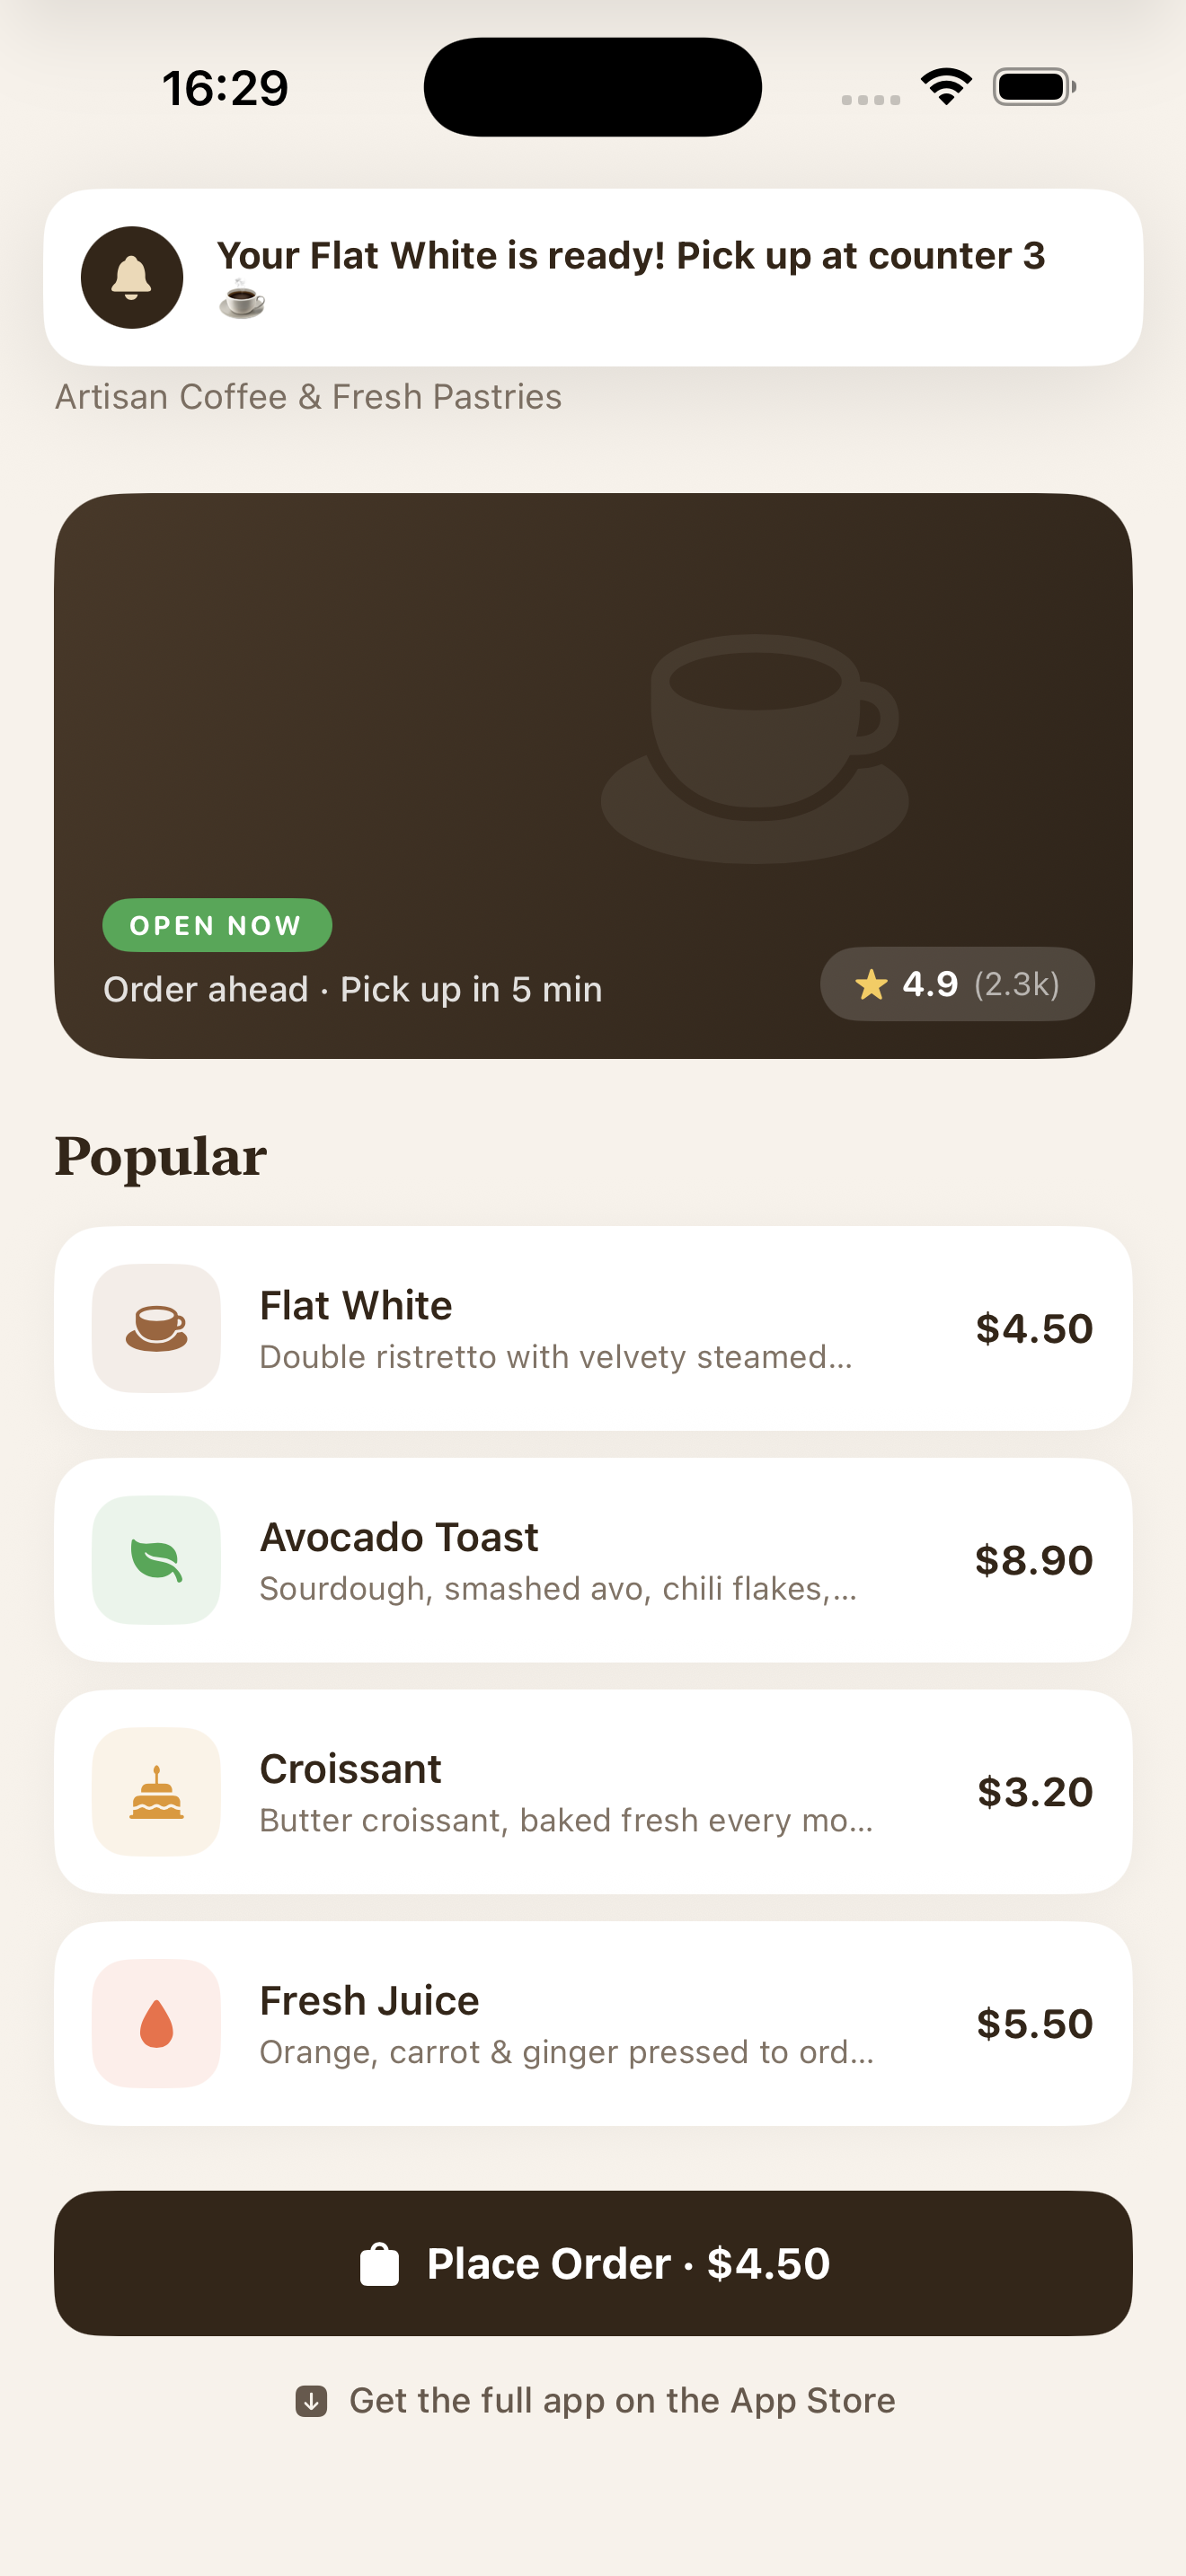
Push notification ที่ได้รับใน App Clip พร้อมสิทธิ์ชั่วคราว