Web push SDK 3.0
Integration
Anchor link toGet Pushwoosh Web Push SDK and unzip it. You should have the following files:
Anchor link to- pushwoosh-service-worker.js
Place all these files to top-level root of your website directory.
Anchor link toInitialize the SDK:
Anchor link to- Include the SDK from our CDN asynchronously.
<script type="text/javascript" src="//cdn.pushwoosh.com/webpush/v3/pushwoosh-web-notifications.js" async></script>- Initialize the Web Push SDK and make sure to queue the initialization until the moment the SDK is fully loaded.
<script type="text/javascript">var Pushwoosh = Pushwoosh || [];Pushwoosh.push(['init', { logLevel: 'info', // possible values: error, info, debug applicationCode: 'XXXXX-XXXXX', // you application code from Pushwoosh Control Panel apiToken: 'XXXXXXX', // Device API Token safariWebsitePushID: 'web.com.example.domain', // unique reverse-domain string, obtained in you Apple Developer Portal. Only needed if you send push notifications to Safari browser defaultNotificationTitle: 'Pushwoosh', // sets a default title for push notifications defaultNotificationImage: 'https://yoursite.com/img/logo-medium.png', // URL to custom custom notification image autoSubscribe: false, // or true. If true, prompts a user to subscribe for pushes upon SDK initialization subscribeWidget: { enable: true }, userId: 'user_id', // optional, set custom user ID tags: { 'Name': 'John Smith' // optional, set custom Tags }}]);</script>Web popups
Anchor link toAdd webPopups to your init object to enable Web popup campaigns on your site.
webPopups: { enable: true,},Web popup campaigns display overlays you configure in the Control Panel such as promos, announcements, or lead capture forms. Unlike the custom subscription popup (subscribePopup), which only handles web push opt-in, Web popup campaigns can display any content you configure.
For setup in the Control Panel, see Understanding Web popups.
Push subscription button
Anchor link toTo prompt your users to subscribe for push notifications, we recommend implementing a push subscription button on your website. Enhance user experience and get more subscribers!
Configuration
Anchor link toTo finish implementing push notifications into your website, you need to configure web platforms in your Pushwoosh Control Panel following our step-by-step guides:
Registering service worker in a different scope
Anchor link toSometimes you can’t place the service worker file in a root directory of a website but in a subdirectory.
In this case, modify the configuration (step 4.3) by adding a parameter
serviceWorkerUrl: “/push-notifications/pushwoosh-service-worker.js”
where /push-notifications/pushwoosh-service-worker.js is the path to pushwoosh-service-worker.js file.
Event handlers
Anchor link toIn Pushwoosh Web SDK 3.0 you can subscribe to certain events to track them**,** or unsubscribe from events if don’t need tracking them anymore.
To track the Web SDK 3.0 load, fire the onLoad event as follows:
// Load EventPushwoosh.push(['onLoad', (api) => { console.log('Pushwoosh load!');}]);To track the correct Web SDK initialization, fire the onReady event:
// Ready EventPushwoosh.push((api) => { console.log('Pushwoosh ready!');});To subscribe to or unsubscribe from any of the SDK events, use the handlers after the SDK load:
Pushwoosh.push(['onLoad', (api) => {  function onEventNameHandler() {    console.log('Triggered event: event-name!');  }
  // To subscribe to an event:  Pushwoosh.addEventHandler('event-name', onEventNameHandler)
  // To unsubscribe from an event:  Pushwoosh.removeEventHandler('event-name', onEventNameHandler)}]);
SDK events
Anchor link toSubscribe event
Anchor link toExecuted after a user agrees to receive push notifications.
Pushwoosh.push(['onLoad', (api) => { Pushwoosh.addEventHandler('subscribe', (payload) => { console.log('Triggered event: subscribe'); });}]);Unsubscribe event
Anchor link toExecuted after a device is unregistered from notifications.
Pushwoosh.push(['onLoad', (api) => { Pushwoosh.addEventHandler('unsubscribe', (payload) => { console.log('Triggered event: unsubscribe'); });}]);Subscription widget events
Anchor link toTrack displaying of a Subscription Prompt widget.
Pushwoosh.push(['onLoad', (api) => {  // Executed on displaying of the Subscription Prompt widget  Pushwoosh.addEventHandler('show-subscription-widget', (payload) => {    console.log('Triggered event: show-subscription-widget');  });
  // Executed on hiding of the Subscription Prompt widget  Pushwoosh.addEventHandler('hide-subscription-widget', (payload) => {    console.log('Triggered event: hide-subscription-widget');  });}]);
Notification permission dialog events
Anchor link toTrack displaying of native subscription dialog.
Pushwoosh.push(['onLoad', function (api) {  // Executed on permission dialog displaying  Pushwoosh.addEventHandler('show-notification-permission-dialog', (payload) => {    console.log('Triggered event: show-notification-permission-dialog');  });
  // Executed on hiding the permission dialog with one of three possible statuses:  // 1. default - the dialog is closed  // 2. granted - permission is granted  // 3. denied - permission is denied  Pushwoosh.addEventHandler('hide-notification-permission-dialog', (payload) => {    console.log('Triggered event: hide-notification-permission-dialog', payload.permission);  });}]);
Permission events
Anchor link toCheck the push notifications permission’s status on SDK initialization; track the update of this status whenever it takes place.
Pushwoosh.push(['onLoad', (api) => {  // Executed during the SDK initialization if 'autoSubscribe: false' or/and if a user ignores a push notification prompt.  Pushwoosh.addEventHandler('permission-default', (payload) => {    console.log('Triggered event: permission-default');  });
  // Executed during the SDK initialization if notifications are blocked or once a user blocks push notifications.  Pushwoosh.addEventHandler('permission-denied', (payload) => {    console.log('Triggered event: permission-denied');  });
  // Executed during the SDK initialization if notifications are allowed or once a user allows push notifications.  Pushwoosh.addEventHandler('permission-granted', (payload) => {    console.log('Triggered event: permission-granted');  });}]);
Receive push event
Anchor link toTrack push delivery to a device.
Pushwoosh.push(['onLoad', (api) => { // Executed when a push notification is displayed. Pushwoosh.addEventHandler('receive-push', (payload) => { console.log('Triggered event: receive-push', payload.notification); });}]);Notification events
Anchor link toTrack whether a push notification is opened or closed by a user.
Pushwoosh.push(['onLoad', (api) => {  // Executed when a user clicks on notification.  Pushwoosh.addEventHandler('open-notification', (payload) => {    console.log('Triggered event: open-notification', payload.notification);  });
  // Executed when a user closes a push notification.  Pushwoosh.addEventHandler('hide-notification', (payload) => {    console.log('Triggered event: hide-notification', payload.notification);  });}]);
Inbox events
Anchor link toTrack notifications sent to Inbox.
Pushwoosh.push(['onLoad', (api) => {  // Executed by ServiceWorker after the Inbox Message is received and saved to indexedDB.  Pushwoosh.addEventHandler('receive-inbox-message', (payload) => {    console.log('Triggered event: receive-inbox-message', payload.message);  });
  // Executed after the Inbox is updated automatically while the page is loading.  Pushwoosh.addEventHandler('update-inbox-messages', (payload) => {    console.log('Triggered event: receive-inbox-message', payload.messages);  });}]);
Custom subscription popup events
Anchor link toFor details about handling custom subscription popup events, please refer to the Custom Subscription Popup Events Guide.
After the Web Push SDK is initialized, you can make the following calls to Pushwoosh API. All the methods return Promise objects.
Pushwoosh.push((api) => {  // Set tags for a user  api.setTags({    'Tag Name 1': 'value1',    'Tag Name 2': 'value2'  });
  // Get tags for a user from server  api.getTags();
  // Register user ID  api.registerUser('user123');
    // Register user email  api.registerEmail('user@example.com');
  // Register SMS number  api.registerSmsNumber('+15551234567');
  // Register WhatsApp number  api.registerWhatsappNumber('+1234567890');
  // Post an Event  api.postEvent('myEventName', {attributeName: 'attributeValue'});
  //Unregister from notifications  api.unregisterDevice();
  // Set the device language (overrides the value in the "Language" Tag)  api.setLanguage('es');
  // Alternatively Multi-register user with devices and channels  api.multiRegisterDevice({    user_id: 'user123',    email: 'user@example.com',    sms_phone_number: '+1234567890',    tags: {      'UserType': { operation: TTagOperationSet, value: 'Premium' },      'Interests': { operation: TTagOperationAppend, values: ['sports', 'technology'] }    }  });});
multiRegisterDevice
Anchor link toEnhanced registration method that allows registering a user profile with multiple devices and messaging channels in a single API call. This method is particularly useful for cross-platform applications or when implementing omnichannel messaging strategies.
Pushwoosh.push((api) => { api.multiRegisterDevice({ user_id: 'user123', // Optional: User identifier email: 'user@example.com', // Optional: Email for email messaging sms_phone_number: '+1234567890', // Optional: SMS phone number (E.164 format) whatsapp_phone_number: '+1234567890', // Optional: WhatsApp number (E.164 format) kakao_phone_number: '+1234567890', // Optional: KakaoTalk number (E.164 format) language: 'en', // Optional: Language code (ISO 639-1) timezone: 'America/New_York', // Optional: Timezone identifier city: 'New York', // Optional: City for targeting country: 'US', // Optional: Country for targeting state: 'NY', // Optional: State for targeting tags: { // Optional: Tag values with operations 'UserType': { operation: TTagOperationSet, // Set tag value (0) value: 'Premium' }, 'Interests': { operation: TTagOperationAppend, // Append to tag value (1) values: ['sports', 'technology'] }, 'LoginCount': { operation: TTagOperationIncrement, // Increment tag value (3) value: '1' } }, push_devices: [ // Optional: Array of push devices { hwid: 'web-device-456', platform: TPlatformChrome, // Chrome platform (11) push_token: 'fcm-token-here', app_version: '2.1.0', platformData: { public_key: 'web-push-public-key', auth_token: 'web-push-auth-token', browser: 'chrome' } } ] }) .then((response) => { console.log('Multi-registration successful:', response); }) .catch((error) => { console.error('Multi-registration failed:', error); });});Platform Types:
TPlatformSafari(10): Safari platformTPlatformChrome(11): Chrome platformTPlatformFirefox(12): Firefox platform
Tag Operation Types:
TTagOperationSet(0): Set tag value (replace existing value)TTagOperationAppend(1): Append to tag value (add to list)TTagOperationRemove(2): Remove tag value (remove from list)TTagOperationIncrement(3): Increment tag value (numeric increment)
Benefits:
- Single API call: Register multiple devices and channels at once
- Atomic operation: All registrations succeed or fail together
- User-centric: Associates all devices with a single user profile
- Advanced tagging: Supports complex tag operations
- Cross-platform: Handle multiple platforms simultaneously
Example of sending Tags to Pushwoosh:
Pushwoosh.push((api) => { var myCustomTags = { 'Tag 1': 123, 'Tag 2': 'some string' }; api.setTags(myCustomTags) .then((res) => { var skipped = res && res.skipped || []; if (!skipped.length) { console.log('success'); } else { console.warn('skipped tags:', skipped); } }) .catch((err) => { console.error('setTags error:', err); });});Increment Tag value
Anchor link toTo increment a value of a Number Tag, use the operation parameter with the ‘increment’ value as follows:
Pushwoosh.push((api) => { api.setTags({ 'Tag 1': { operation: 'increment', value: 1 } })});Append Tag values
Anchor link toTo append new values to the existing List Tag, use the operation parameter with the ‘append’ value as follows:
Pushwoosh.push((api) => { api.setTags({ 'Tag 3': { operation: 'append', value: ['Value3'] } })});Remove Tag value
Anchor link toTo remove a value from a List Tag, use the operation parameter with the ‘remove’ value as follows:
Pushwoosh.push((api) =>{ api.setTags({ 'Tag 3': { operation: 'remove', value: ['Value2'] } })});Public methods
Anchor link toPushwoosh.subscribe()
This method is used to request a user’s permission for push notifications. If a user is already subscribed, the method will stop executing.
If a user hasn’t subscribed for pushes yet:
1. Permission for push notifications is requested.
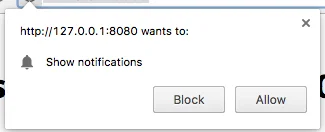
2. If a user allows notifications, onSubscribe event is triggered.
Pushwoosh.subscribe() is executed automatically if autoSubscribe: true. is set during the SDK initialization.
Call this method if you have chosen to manually prompt a user to subscribe for pushes using the autoSubscribe: false parameter during the initialization:
<button onclick="Pushwoosh.subscribe()">Subscribe</button><script> Pushwoosh.push(['onSubscribe', (api) => { console.log('User successfully subscribed'); }]);</script>Pushwoosh.unsubscribe()
/unregisterDevicemethod is executed.onUnsubscribeevent is triggered.
<button onclick="Pushwoosh.unsubscribe()">Unsubscribe</button><script type="text/javascript"> Pushwoosh.push(['onUnsubscribe', (api) => { console.log('User successfully unsubscribed'); }]);</script>Pushwoosh.isSubscribed()
Checks if a user is subscribed and returns true/false flag.
Pushwoosh.isSubscribed().then((isSubscribed) => { console.log('isSubscribed', isSubscribed);});Pushwoosh.getHWID()
Returns Pushwoosh HWID.
Pushwoosh.getHWID().then((hwid) => { console.log('hwid:', hwid);});Pushwoosh.getPushToken()
Returns push token if it is available.
Pushwoosh.getPushToken().then((pushToken) => { console.log('pushToken:', pushToken);});Pushwoosh.getUserId()
Returns User ID if available.
Pushwoosh.getUserId().then((userId) => { console.log('userId:', userId);});Pushwoosh.getParams()
Returns a list of the following parameters:
Pushwoosh.getParams().then((params) => { params = params || {}; var hwid = params.hwid; var pushToken = params.pushToken; var userId = params.userId;});Pushwoosh.isAvailableNotifications()
Checks if a browser supports the Pushwoosh WebSDK 3.0, returns ‘true’ or ‘false’.
Pushwoosh.isAvailableNotifications() // true/falseInboxMessages methods
Anchor link tomessagesWithNoActionPerformedCount(): Promise<number>
Returns the number of opened messages.
Pushwoosh.pwinbox.messagesWithNoActionPerformedCount() .then((count) => { console.log(`${count} messages opened`); });unreadMessagesCount()
Returns the number of unread messages.
Pushwoosh.pwinbox.unreadMessagesCount() .then((count) => { console.log(`${count} messages unread`); });messagesCount(): Promise<number>
Returns the total number of messages.
Pushwoosh.pwinbox.messagesCount() .then((count) => { console.log(`${count} messages`); });loadMessages(): Promise<Array>
Loads the list of undeleted messages.
Pushwoosh.pwinbox.loadMessages() .then(() => { console.log('Messages have been loaded'); });readMessagesWithCodes(codes: Array<string>): Promise<void>
Marks messages as read by Inbox_Ids.
Pushwoosh.pwinbox.readMessagesWithCodes(codes) .then(() => { console.log('Messages have been read'); });performActionForMessageWithCode(code: string): Promise<void>
Performs the action assigned to a message and marks the message as read.
Pushwoosh.pwinbox.performActionForMessageWithCode(code) .then(() => { console.log('Action has been performed'); });deleteMessagesWithCodes(codes: Array<string>): Promise<void>
Marks messages as deleted.
Pushwoosh.pwinbox.deleteMessagesWithCodes([code]) .then(() => { console.log('Messages have been deleted'); });syncMessages(): Promise<void>
Synchronizes messages with the server.
Pushwoosh.pwinbox.syncMessages() .then(() => { console.log('Messages have been synchronized'); });Progressive Web App support
Anchor link toTo integrate Pushwoosh into your Progressive Web Application (PWA), follow the steps described below.
1. Copy the path to your Service Worker file:
if ('serviceWorker' in navigator) { window.addEventListener('load', () => { navigator.serviceWorker.register('/service-worker.js') // <- your service worker url });}Then, use the serviceWorkerUrl parameter while initializing the WebSDK as follows:
var Pushwoosh = Pushwoosh || [];Pushwoosh.push(['init', { logLevel: 'error', applicationCode: 'XXXXX-XXXXX', safariWebsitePushID: 'web.com.example.domain', defaultNotificationTitle: 'Pushwoosh', defaultNotificationImage: 'https://yoursite.com/img/logo-medium.png', serviceWorkerUrl: '/service-worker.js', // <- your service worker url}]);WebSDK does not register the new Service Worker immediately; a Service Worker is registered when it’s needed:
- when a device receives a push token (on device registration or re-subscription),
- when a push token is deleted (on removing a device from user base).
It speeds your pages loading by shortening the number of server requests.
Browsers do not allow two different Service Workers to be registered at the same time (read more: https://github.com/w3c/ServiceWorker/issues/921), so to make your PWA work correctly, a common Service Worker should be registered for your codebase and the Pushwoosh codebase.
2. Add the following string to your Service Worker (at the beginning or at the end of, it doesn’t matter):
importScripts('https://cdn.pushwoosh.com/webpush/v3/pushwoosh-service-worker.js' + self.location.search);Thus you enable receiving and processing of push notifications sent via Pushwoosh services for your Service Worker.
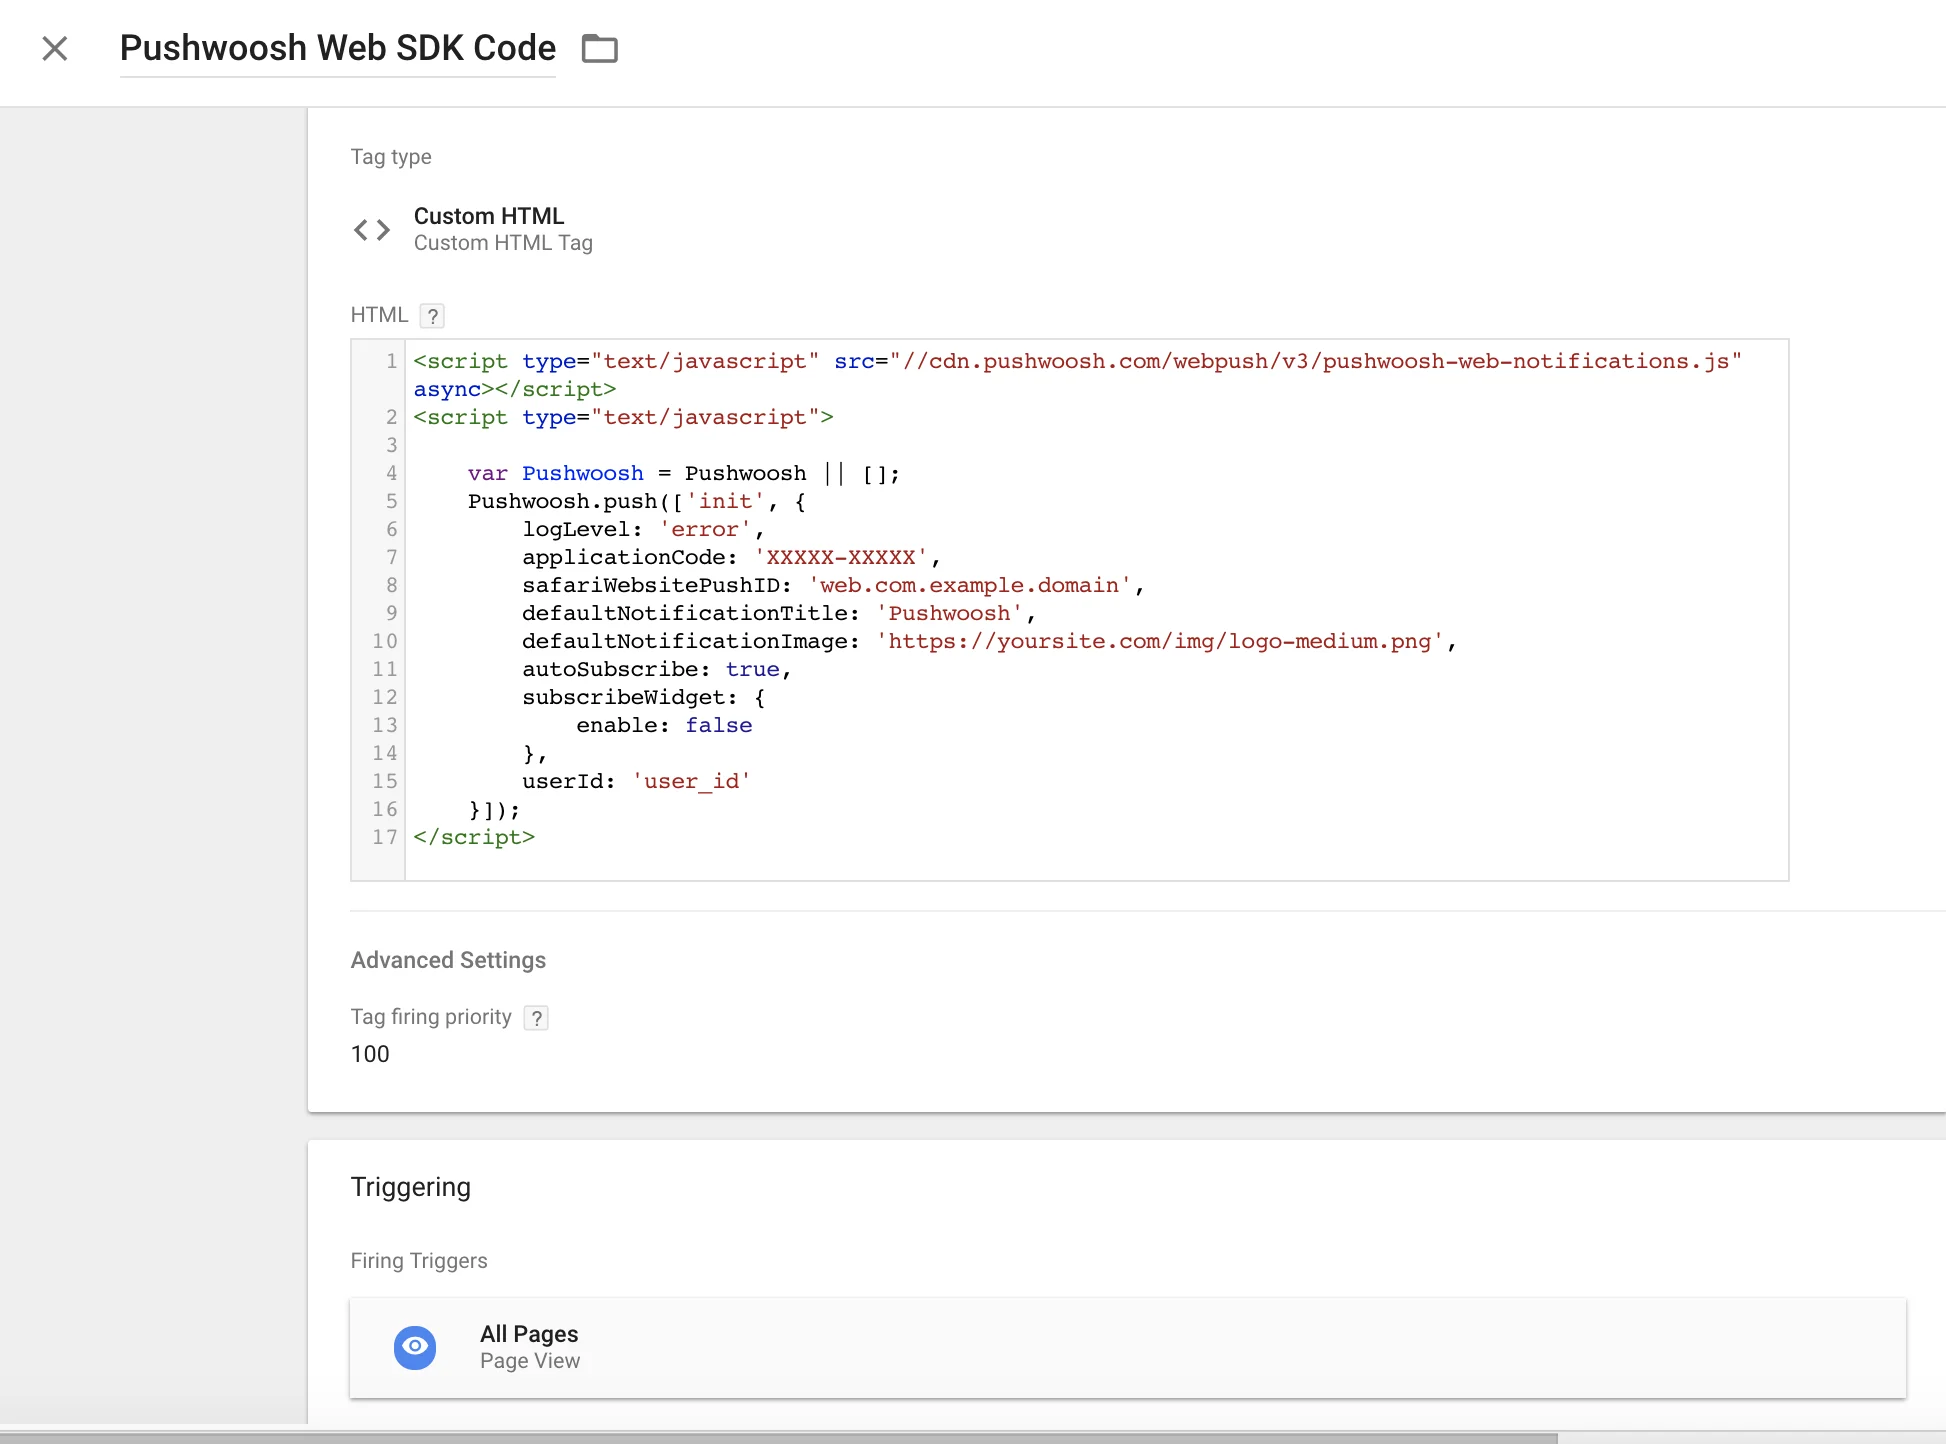
Installing from Google Tag Manager
Anchor link toUse the following code in your Google Tag Manager to initialize Pushwoosh SDK. Create a Custom HTML Tag and paste the code below. Make sure to change your Pushwoosh Application Code, Safari Website ID, and default notification image URL.
Also set high Tag Firing priority (ex: 100) and trigger it on All Pages. See below for a screenshot.Copy
<script type="text/javascript" src="//cdn.pushwoosh.com/webpush/v3/pushwoosh-web-notifications.js" async></script><script type="text/javascript"> var Pushwoosh = Pushwoosh || []; Pushwoosh.push(['init', { logLevel: 'error', applicationCode: 'XXXXX-XXXXX', safariWebsitePushID: 'web.com.example.domain', defaultNotificationTitle: 'Pushwoosh', defaultNotificationImage: 'https://yoursite.com/img/logo-medium.png', autoSubscribe: true, subscribeWidget: { enable: false }, userId: 'user_id' }]);</script>