مجموعة أدوات تطوير إشعارات الويب 3.0
الدمج
Anchor link toاحصل على Pushwoosh Web Push SDK وقم بفك ضغطه. يجب أن يكون لديك الملفات التالية:
Anchor link to- pushwoosh-service-worker.js
ضع كل هذه الملفات في الدليل الجذر ذي المستوى الأعلى لموقع الويب الخاص بك.
Anchor link toتهيئة SDK:
Anchor link to- قم بتضمين SDK من شبكة توصيل المحتوى (CDN) الخاصة بنا بشكل غير متزامن.
<script type="text/javascript" src="//cdn.pushwoosh.com/webpush/v3/pushwoosh-web-notifications.js" async></script>- قم بتهيئة Web Push SDK وتأكد من وضع التهيئة في قائمة الانتظار حتى يتم تحميل SDK بالكامل.
<script type="text/javascript">var Pushwoosh = Pushwoosh || [];Pushwoosh.push(['init', { logLevel: 'info', // possible values: error, info, debug applicationCode: 'XXXXX-XXXXX', // you application code from Pushwoosh Control Panel apiToken: 'XXXXXXX', // Device API Token safariWebsitePushID: 'web.com.example.domain', // unique reverse-domain string, obtained in you Apple Developer Portal. Only needed if you send push notifications to Safari browser defaultNotificationTitle: 'Pushwoosh', // sets a default title for push notifications defaultNotificationImage: 'https://yoursite.com/img/logo-medium.png', // URL to custom custom notification image autoSubscribe: false, // or true. If true, prompts a user to subscribe for pushes upon SDK initialization subscribeWidget: { enable: true }, userId: 'user_id', // optional, set custom user ID tags: { 'Name': 'John Smith' // optional, set custom Tags }}]);</script>النوافذ المنبثقة على الويب
Anchor link toأضف webPopups إلى كائن init الخاص بك لتمكين حملات النوافذ المنبثقة على الويب على موقعك.
webPopups: { enable: true,},تعرض حملات النوافذ المنبثقة على الويب تراكبات تقوم بتكوينها في لوحة التحكم مثل العروض الترويجية أو الإعلانات أو نماذج التقاط العملاء المحتملين. على عكس نافذة الاشتراك المنبثقة المخصصة (subscribePopup)، التي تتعامل فقط مع الموافقة على إشعارات الويب، يمكن لحملات النوافذ المنبثقة على الويب عرض أي محتوى تقوم بتكوينه.
للإعداد في لوحة التحكم، راجع فهم النوافذ المنبثقة على الويب.
زر الاشتراك في الإشعارات
Anchor link toلحث المستخدمين على الاشتراك في إشعارات الدفع، نوصي بتنفيذ زر اشتراك في الإشعارات على موقع الويب الخاص بك. عزز تجربة المستخدم واحصل على المزيد من المشتركين!
التكوين
Anchor link toلإنهاء تنفيذ إشعارات الدفع في موقع الويب الخاص بك، تحتاج إلى تكوين منصات الويب في لوحة تحكم Pushwoosh الخاصة بك باتباع أدلتنا خطوة بخطوة:
تسجيل عامل الخدمة في نطاق مختلف
Anchor link toفي بعض الأحيان لا يمكنك وضع ملف عامل الخدمة في الدليل الجذر لموقع الويب ولكن في دليل فرعي.
في هذه الحالة، قم بتعديل التكوين (الخطوة 4.3) بإضافة معلمة
serviceWorkerUrl: “/push-notifications/pushwoosh-service-worker.js”
حيث /push-notifications/pushwoosh-service-worker.js هو المسار إلى ملف pushwoosh-service-worker.js.
معالجات الأحداث
Anchor link toفي Pushwoosh Web SDK 3.0 يمكنك الاشتراك في أحداث معينة لتتبعها**،** أو إلغاء الاشتراك من الأحداث إذا لم تعد بحاجة إلى تتبعها.
لتتبع تحميل Web SDK 3.0، قم بتشغيل حدث onLoad كما يلي:
// Load EventPushwoosh.push(['onLoad', (api) => { console.log('Pushwoosh load!');}]);لتتبع التهيئة الصحيحة لـ Web SDK، قم بتشغيل حدث onReady:
// Ready EventPushwoosh.push((api) => { console.log('Pushwoosh ready!');});للاشتراك في أي من أحداث SDK أو إلغاء الاشتراك منها، استخدم المعالجات بعد تحميل SDK:
Pushwoosh.push(['onLoad', (api) => {  function onEventNameHandler() {    console.log('Triggered event: event-name!');  }
  // To subscribe to an event:  Pushwoosh.addEventHandler('event-name', onEventNameHandler)
  // To unsubscribe from an event:  Pushwoosh.removeEventHandler('event-name', onEventNameHandler)}]);
أحداث SDK
Anchor link toحدث الاشتراك
Anchor link toيتم تنفيذه بعد موافقة المستخدم على تلقي إشعارات الدفع.
Pushwoosh.push(['onLoad', (api) => { Pushwoosh.addEventHandler('subscribe', (payload) => { console.log('Triggered event: subscribe'); });}]);حدث إلغاء الاشتراك
Anchor link toيتم تنفيذه بعد إلغاء تسجيل جهاز من الإشعارات.
Pushwoosh.push(['onLoad', (api) => { Pushwoosh.addEventHandler('unsubscribe', (payload) => { console.log('Triggered event: unsubscribe'); });}]);أحداث أداة الاشتراك
Anchor link toتتبع عرض أداة طلب الاشتراك.
Pushwoosh.push(['onLoad', (api) => {  // Executed on displaying of the Subscription Prompt widget  Pushwoosh.addEventHandler('show-subscription-widget', (payload) => {    console.log('Triggered event: show-subscription-widget');  });
  // Executed on hiding of the Subscription Prompt widget  Pushwoosh.addEventHandler('hide-subscription-widget', (payload) => {    console.log('Triggered event: hide-subscription-widget');  });}]);
أحداث مربع حوار إذن الإشعارات
Anchor link toتتبع عرض مربع حوار الاشتراك الأصلي.
Pushwoosh.push(['onLoad', function (api) {  // Executed on permission dialog displaying  Pushwoosh.addEventHandler('show-notification-permission-dialog', (payload) => {    console.log('Triggered event: show-notification-permission-dialog');  });
  // Executed on hiding the permission dialog with one of three possible statuses:  // 1. default - the dialog is closed  // 2. granted - permission is granted  // 3. denied - permission is denied  Pushwoosh.addEventHandler('hide-notification-permission-dialog', (payload) => {    console.log('Triggered event: hide-notification-permission-dialog', payload.permission);  });}]);
أحداث الإذن
Anchor link toتحقق من حالة إذن إشعارات الدفع عند تهيئة SDK؛ تتبع تحديث هذه الحالة كلما حدث.
Pushwoosh.push(['onLoad', (api) => {  // Executed during the SDK initialization if 'autoSubscribe: false' or/and if a user ignores a push notification prompt.  Pushwoosh.addEventHandler('permission-default', (payload) => {    console.log('Triggered event: permission-default');  });
  // Executed during the SDK initialization if notifications are blocked or once a user blocks push notifications.  Pushwoosh.addEventHandler('permission-denied', (payload) => {    console.log('Triggered event: permission-denied');  });
  // Executed during the SDK initialization if notifications are allowed or once a user allows push notifications.  Pushwoosh.addEventHandler('permission-granted', (payload) => {    console.log('Triggered event: permission-granted');  });}]);
حدث استلام الإشعار
Anchor link toتتبع تسليم الإشعار إلى جهاز.
Pushwoosh.push(['onLoad', (api) => { // Executed when a push notification is displayed. Pushwoosh.addEventHandler('receive-push', (payload) => { console.log('Triggered event: receive-push', payload.notification); });}]);أحداث الإشعارات
Anchor link toتتبع ما إذا كان الإشعار قد تم فتحه أو إغلاقه من قبل المستخدم.
Pushwoosh.push(['onLoad', (api) => {  // Executed when a user clicks on notification.  Pushwoosh.addEventHandler('open-notification', (payload) => {    console.log('Triggered event: open-notification', payload.notification);  });
  // Executed when a user closes a push notification.  Pushwoosh.addEventHandler('hide-notification', (payload) => {    console.log('Triggered event: hide-notification', payload.notification);  });}]);
أحداث صندوق الوارد
Anchor link toتتبع الإشعارات المرسلة إلى صندوق الوارد.
Pushwoosh.push(['onLoad', (api) => {  // Executed by ServiceWorker after the Inbox Message is received and saved to indexedDB.  Pushwoosh.addEventHandler('receive-inbox-message', (payload) => {    console.log('Triggered event: receive-inbox-message', payload.message);  });
  // Executed after the Inbox is updated automatically while the page is loading.  Pushwoosh.addEventHandler('update-inbox-messages', (payload) => {    console.log('Triggered event: receive-inbox-message', payload.messages);  });}]);
أحداث نافذة الاشتراك المنبثقة المخصصة
Anchor link toللحصول على تفاصيل حول معالجة أحداث نافذة الاشتراك المنبثقة المخصصة، يرجى الرجوع إلى دليل أحداث نافذة الاشتراك المنبثقة المخصصة.
واجهة برمجة التطبيقات (API)
Anchor link toبعد تهيئة Web Push SDK، يمكنك إجراء الاستدعاءات التالية لواجهة برمجة تطبيقات Pushwoosh. تعيد جميع الطرق كائنات Promise.
Pushwoosh.push((api) => {  // Set tags for a user  api.setTags({    'Tag Name 1': 'value1',    'Tag Name 2': 'value2'  });
  // Get tags for a user from server  api.getTags();
  // Register user ID  api.registerUser('user123');
    // Register user email  api.registerEmail('user@example.com');
  // Register SMS number  api.registerSmsNumber('+15551234567');
  // Register WhatsApp number  api.registerWhatsappNumber('+1234567890');
  // Post an Event  api.postEvent('myEventName', {attributeName: 'attributeValue'});
  //Unregister from notifications  api.unregisterDevice();
  // Set the device language (overrides the value in the "Language" Tag)  api.setLanguage('es');
  // Alternatively Multi-register user with devices and channels  api.multiRegisterDevice({    user_id: 'user123',    email: 'user@example.com',    sms_phone_number: '+1234567890',    tags: {      'UserType': { operation: TTagOperationSet, value: 'Premium' },      'Interests': { operation: TTagOperationAppend, values: ['sports', 'technology'] }    }  });});
multiRegisterDevice
Anchor link toطريقة تسجيل محسنة تسمح بتسجيل ملف تعريف مستخدم مع أجهزة وقنوات مراسلة متعددة في استدعاء API واحد. هذه الطريقة مفيدة بشكل خاص للتطبيقات متعددة المنصات أو عند تنفيذ استراتيجيات المراسلة متعددة القنوات.
Pushwoosh.push((api) => { api.multiRegisterDevice({ user_id: 'user123', // Optional: User identifier email: 'user@example.com', // Optional: Email for email messaging sms_phone_number: '+1234567890', // Optional: SMS phone number (E.164 format) whatsapp_phone_number: '+1234567890', // Optional: WhatsApp number (E.164 format) kakao_phone_number: '+1234567890', // Optional: KakaoTalk number (E.164 format) language: 'en', // Optional: Language code (ISO 639-1) timezone: 'America/New_York', // Optional: Timezone identifier city: 'New York', // Optional: City for targeting country: 'US', // Optional: Country for targeting state: 'NY', // Optional: State for targeting tags: { // Optional: Tag values with operations 'UserType': { operation: TTagOperationSet, // Set tag value (0) value: 'Premium' }, 'Interests': { operation: TTagOperationAppend, // Append to tag value (1) values: ['sports', 'technology'] }, 'LoginCount': { operation: TTagOperationIncrement, // Increment tag value (3) value: '1' } }, push_devices: [ // Optional: Array of push devices { hwid: 'web-device-456', platform: TPlatformChrome, // Chrome platform (11) push_token: 'fcm-token-here', app_version: '2.1.0', platformData: { public_key: 'web-push-public-key', auth_token: 'web-push-auth-token', browser: 'chrome' } } ] }) .then((response) => { console.log('Multi-registration successful:', response); }) .catch((error) => { console.error('Multi-registration failed:', error); });});أنواع المنصات:
TPlatformSafari(10): منصة SafariTPlatformChrome(11): منصة ChromeTPlatformFirefox(12): منصة Firefox
أنواع عمليات الوسوم:
TTagOperationSet(0): تعيين قيمة الوسم (استبدال القيمة الحالية)TTagOperationAppend(1): إلحاق بقيمة الوسم (إضافة إلى القائمة)TTagOperationRemove(2): إزالة قيمة الوسم (إزالة من القائمة)TTagOperationIncrement(3): زيادة قيمة الوسم (زيادة رقمية)
الفوائد:
- استدعاء API واحد: تسجيل أجهزة وقنوات متعددة في وقت واحد
- عملية ذرية: تنجح جميع التسجيلات أو تفشل معًا
- محورها المستخدم: يربط جميع الأجهزة بملف تعريف مستخدم واحد
- وسم متقدم: يدعم عمليات الوسوم المعقدة
- متعدد المنصات: التعامل مع منصات متعددة في وقت واحد
مثال على إرسال الوسوم إلى Pushwoosh:
Pushwoosh.push((api) => { var myCustomTags = { 'Tag 1': 123, 'Tag 2': 'some string' }; api.setTags(myCustomTags) .then((res) => { var skipped = res && res.skipped || []; if (!skipped.length) { console.log('success'); } else { console.warn('skipped tags:', skipped); } }) .catch((err) => { console.error('setTags error:', err); });});زيادة قيمة الوسم
Anchor link toلزيادة قيمة وسم رقمي، استخدم المعلمة operation مع القيمة ‘increment’ كما يلي:
Pushwoosh.push((api) => { api.setTags({ 'Tag 1': { operation: 'increment', value: 1 } })});إلحاق قيم الوسم
Anchor link toلإلحاق قيم جديدة بوسم القائمة الحالي، استخدم المعلمة operation مع القيمة ‘append’ كما يلي:
Pushwoosh.push((api) => { api.setTags({ 'Tag 3': { operation: 'append', value: ['Value3'] } })});إزالة قيمة الوسم
Anchor link toلإزالة قيمة من وسم القائمة، استخدم المعلمة operation مع القيمة ‘remove’ كما يلي:
Pushwoosh.push((api) =>{ api.setTags({ 'Tag 3': { operation: 'remove', value: ['Value2'] } })});الطرق العامة
Anchor link toPushwoosh.subscribe()
تُستخدم هذه الطريقة لطلب إذن المستخدم لإشعارات الدفع. إذا كان المستخدم مشتركًا بالفعل، ستتوقف الطريقة عن التنفيذ.
إذا لم يكن المستخدم قد اشترك في الإشعارات بعد:
- يتم طلب الإذن لإشعارات الدفع.
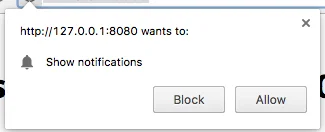
- إذا سمح المستخدم بالإشعارات، يتم تشغيل حدث
onSubscribe.
يتم تنفيذ Pushwoosh.subscribe() تلقائيًا إذا تم تعيين autoSubscribe: true. أثناء تهيئة SDK.
استدعِ هذه الطريقة إذا اخترت أن تطلب من المستخدم يدويًا الاشتراك في الإشعارات باستخدام المعلمة autoSubscribe: false أثناء التهيئة:
<button onclick="Pushwoosh.subscribe()">Subscribe</button><script> Pushwoosh.push(['onSubscribe', (api) => { console.log('User successfully subscribed'); }]);</script>Pushwoosh.unsubscribe()
- يتم تنفيذ طريقة
/unregisterDevice. - يتم تشغيل حدث
onUnsubscribe.
<button onclick="Pushwoosh.unsubscribe()">Unsubscribe</button><script type="text/javascript"> Pushwoosh.push(['onUnsubscribe', (api) => { console.log('User successfully unsubscribed'); }]);</script>Pushwoosh.isSubscribed()
يتحقق مما إذا كان المستخدم مشتركًا ويعيد علامة true/false.
Pushwoosh.isSubscribed().then((isSubscribed) => { console.log('isSubscribed', isSubscribed);});Pushwoosh.getHWID()
يعيد Pushwoosh HWID.
Pushwoosh.getHWID().then((hwid) => { console.log('hwid:', hwid);});Pushwoosh.getPushToken()
يعيد رمز الإشعار إذا كان متاحًا.
Pushwoosh.getPushToken().then((pushToken) => { console.log('pushToken:', pushToken);});Pushwoosh.getUserId()
يعيد User ID إذا كان متاحًا.
Pushwoosh.getUserId().then((userId) => { console.log('userId:', userId);});Pushwoosh.getParams()
يعيد قائمة بالمعلمات التالية:
Pushwoosh.getParams().then((params) => { params = params || {}; var hwid = params.hwid; var pushToken = params.pushToken; var userId = params.userId;});Pushwoosh.isAvailableNotifications()
يتحقق مما إذا كان المتصفح يدعم Pushwoosh WebSDK 3.0، ويعيد ‘true’ أو ‘false’.
Pushwoosh.isAvailableNotifications() // true/falseطرق InboxMessages
Anchor link tomessagesWithNoActionPerformedCount(): Promise<number>
يعيد عدد الرسائل المفتوحة.
Pushwoosh.pwinbox.messagesWithNoActionPerformedCount() .then((count) => { console.log(`${count} messages opened`); });unreadMessagesCount()
يعيد عدد الرسائل غير المقروءة.
Pushwoosh.pwinbox.unreadMessagesCount() .then((count) => { console.log(`${count} messages unread`); });messagesCount(): Promise<number>
يعيد العدد الإجمالي للرسائل.
Pushwoosh.pwinbox.messagesCount() .then((count) => { console.log(`${count} messages`); });loadMessages(): Promise<Array>
يحمل قائمة الرسائل غير المحذوفة.
Pushwoosh.pwinbox.loadMessages() .then(() => { console.log('Messages have been loaded'); });readMessagesWithCodes(codes: Array<string>): Promise<void>
يضع علامة على الرسائل كمقروءة بواسطة Inbox_Ids.
Pushwoosh.pwinbox.readMessagesWithCodes(codes) .then(() => { console.log('Messages have been read'); });performActionForMessageWithCode(code: string): Promise<void>
ينفذ الإجراء المخصص لرسالة ويضع علامة على الرسالة كمقروءة.
Pushwoosh.pwinbox.performActionForMessageWithCode(code) .then(() => { console.log('Action has been performed'); });deleteMessagesWithCodes(codes: Array<string>): Promise<void>
يضع علامة على الرسائل كمحذوفة.
Pushwoosh.pwinbox.deleteMessagesWithCodes([code]) .then(() => { console.log('Messages have been deleted'); });syncMessages(): Promise<void>
يزامن الرسائل مع الخادم.
Pushwoosh.pwinbox.syncMessages() .then(() => { console.log('Messages have been synchronized'); });دعم تطبيقات الويب التقدمية (PWA)
Anchor link toلدمج Pushwoosh في تطبيق الويب التقدمي (PWA) الخاص بك، اتبع الخطوات الموضحة أدناه.
1. انسخ المسار إلى ملف Service Worker الخاص بك:
if ('serviceWorker' in navigator) { window.addEventListener('load', () => { navigator.serviceWorker.register('/service-worker.js') // <- your service worker url });}ثم، استخدم المعلمة serviceWorkerUrl أثناء تهيئة WebSDK كما يلي:
var Pushwoosh = Pushwoosh || [];Pushwoosh.push(['init', { logLevel: 'error', applicationCode: 'XXXXX-XXXXX', safariWebsitePushID: 'web.com.example.domain', defaultNotificationTitle: 'Pushwoosh', defaultNotificationImage: 'https://yoursite.com/img/logo-medium.png', serviceWorkerUrl: '/service-worker.js', // <- your service worker url}]);لا يقوم WebSDK بتسجيل Service Worker الجديد على الفور؛ يتم تسجيل Service Worker عند الحاجة إليه:
- عندما يتلقى جهاز رمز إشعار (عند تسجيل الجهاز أو إعادة الاشتراك)،
- عندما يتم حذف رمز إشعار (عند إزالة جهاز من قاعدة المستخدمين).
إنه يسرع تحميل صفحاتك عن طريق تقصير عدد طلبات الخادم.
لا تسمح المتصفحات بتسجيل اثنين من Service Workers المختلفين في نفس الوقت (اقرأ المزيد: https://github.com/w3c/ServiceWorker/issues/921)، لذلك لجعل PWA الخاص بك يعمل بشكل صحيح، يجب تسجيل Service Worker مشترك لقاعدة التعليمات البرمجية الخاصة بك وقاعدة التعليمات البرمجية لـ Pushwoosh.
2. أضف السلسلة التالية إلى Service Worker الخاص بك (في البداية أو في النهاية، لا يهم):
importScripts('https://cdn.pushwoosh.com/webpush/v3/pushwoosh-service-worker.js' + self.location.search);وبالتالي فإنك تمكن من تلقي ومعالجة إشعارات الدفع المرسلة عبر خدمات Pushwoosh لـ Service Worker الخاص بك.
التثبيت من Google Tag Manager
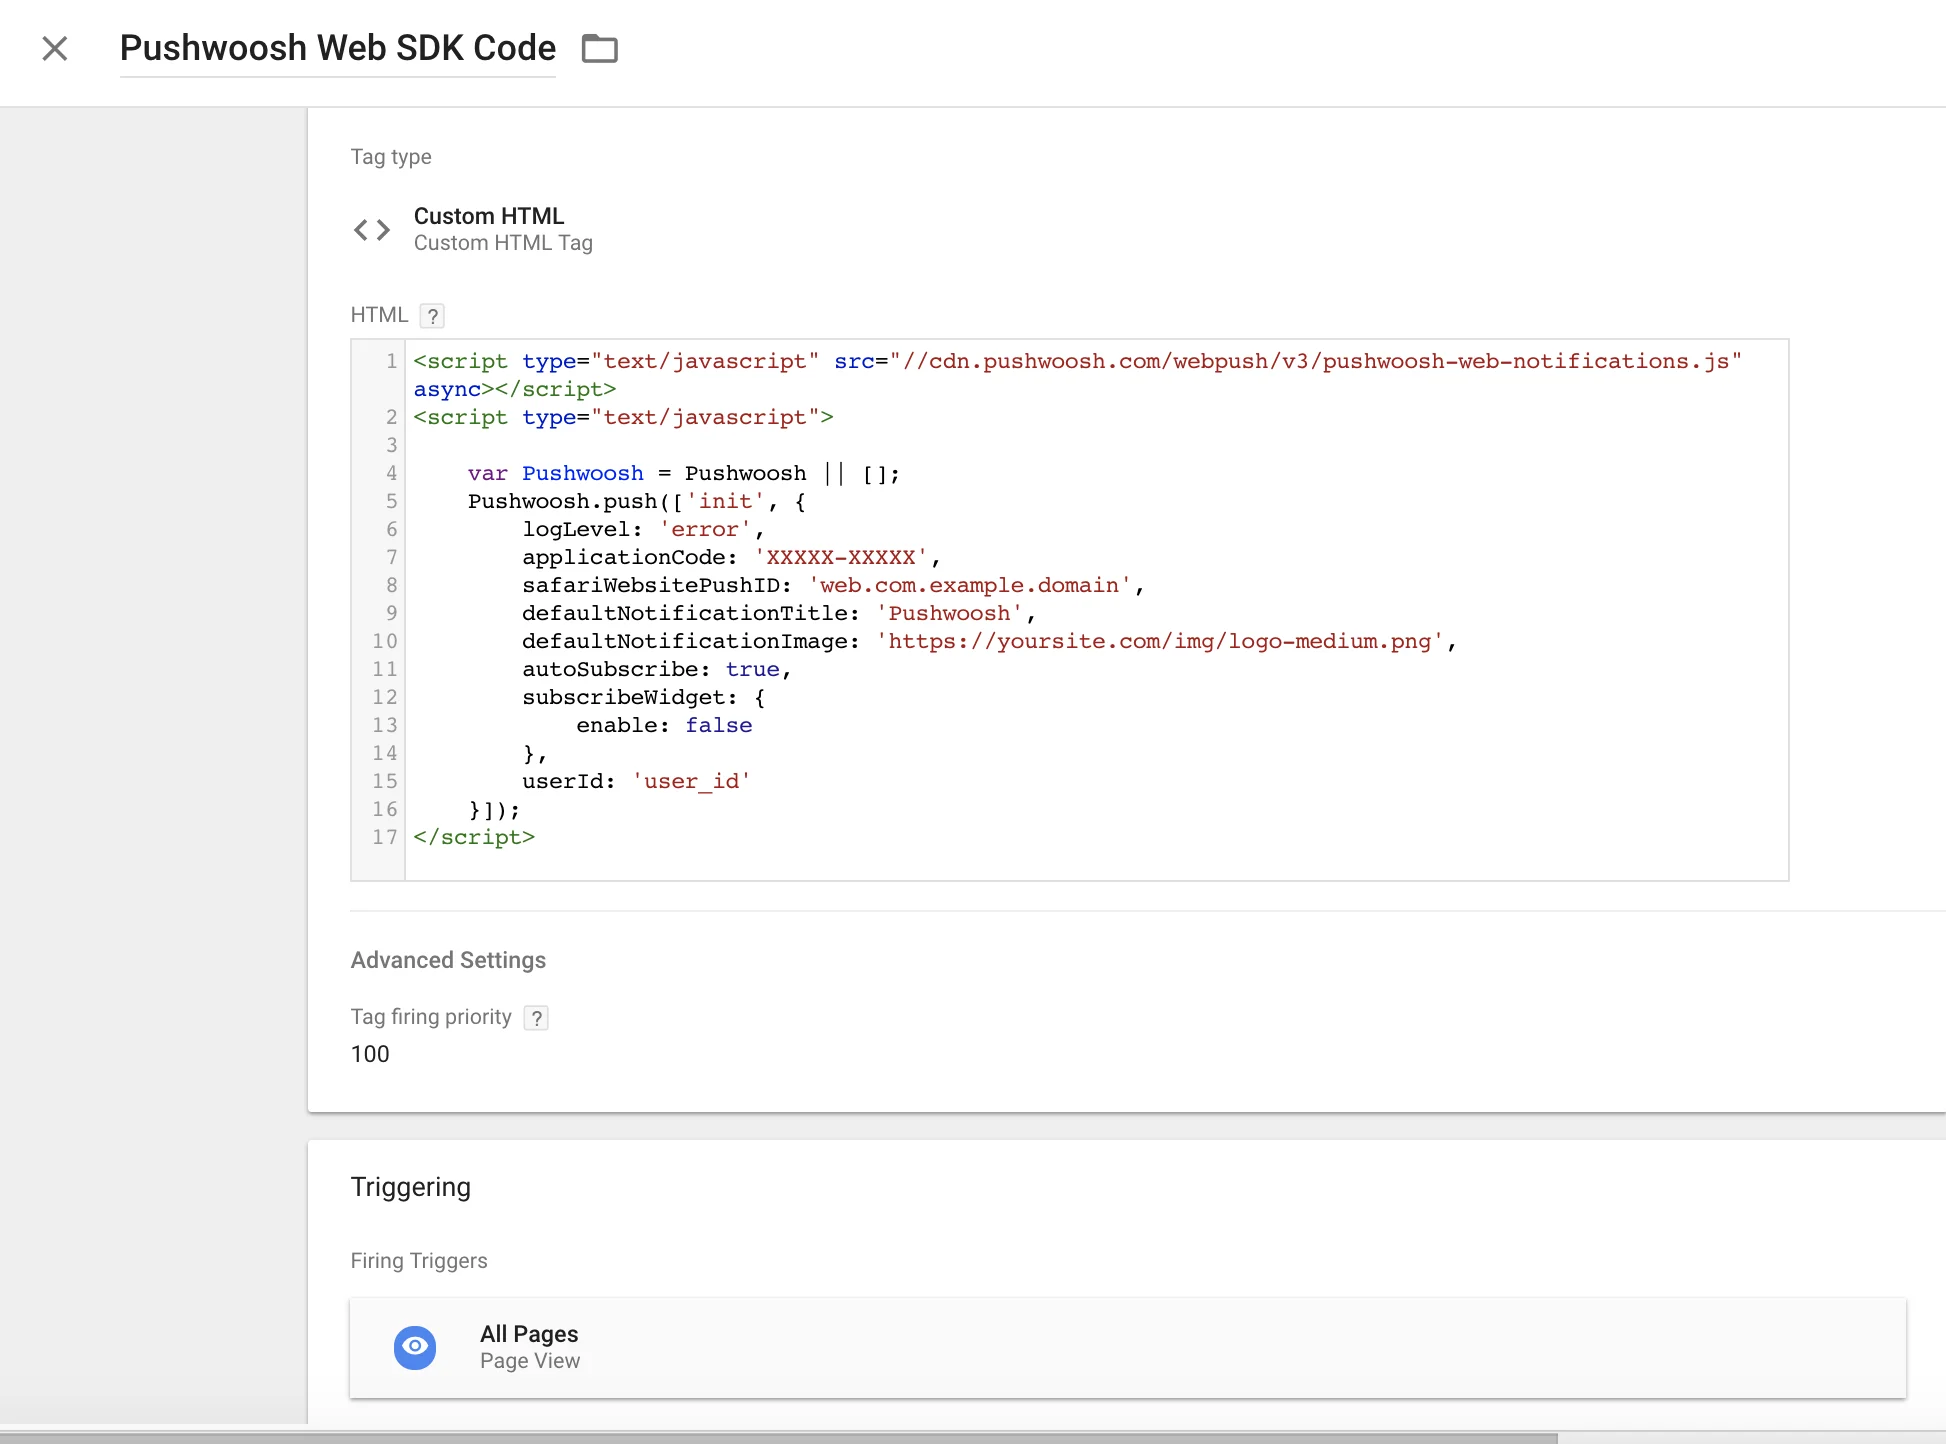
Anchor link toاستخدم الكود التالي في Google Tag Manager لتهيئة Pushwoosh SDK. قم بإنشاء علامة HTML مخصصة والصق الكود أدناه. تأكد من تغيير Pushwoosh Application Code و Safari Website ID وعنوان URL لصورة الإشعار الافتراضية.
أيضًا قم بتعيين أولوية Tag Firing عالية (على سبيل المثال: 100) وقم بتشغيلها على All Pages. انظر أدناه للحصول على لقطة شاشة.
<script type="text/javascript" src="//cdn.pushwoosh.com/webpush/v3/pushwoosh-web-notifications.js" async></script><script type="text/javascript"> var Pushwoosh = Pushwoosh || []; Pushwoosh.push(['init', { logLevel: 'error', applicationCode: 'XXXXX-XXXXX', safariWebsitePushID: 'web.com.example.domain', defaultNotificationTitle: 'Pushwoosh', defaultNotificationImage: 'https://yoursite.com/img/logo-medium.png', autoSubscribe: true, subscribeWidget: { enable: false }, userId: 'user_id' }]);</script>