How to set up an email sunset flow
A sunset flow stops emailing contacts who no longer read your emails. This protects your sender reputation and deliverability. You can set it up in two ways:
- Sunset policy only. Pushwoosh stops marketing emails to contacts who haven’t opened or clicked your emails for a period you choose. You don’t need a journey.
- Sunset policy and a reconfirmation journey. A journey asks inactive contacts whether they still want your emails and unsubscribes those who don’t answer. This gives contacts a chance to stay before the policy stops emailing them.
This guide shows both: first turn on the sunset policy, then create the reconfirmation journey.
Turn on the sunset policy
Anchor link toThe sunset policy is optional and off by default. You turn it on for each project in the email platform settings. Transactional emails ignore it.
-
Go to Settings → Configure Platforms and click Platform settings in the Emails row.
-
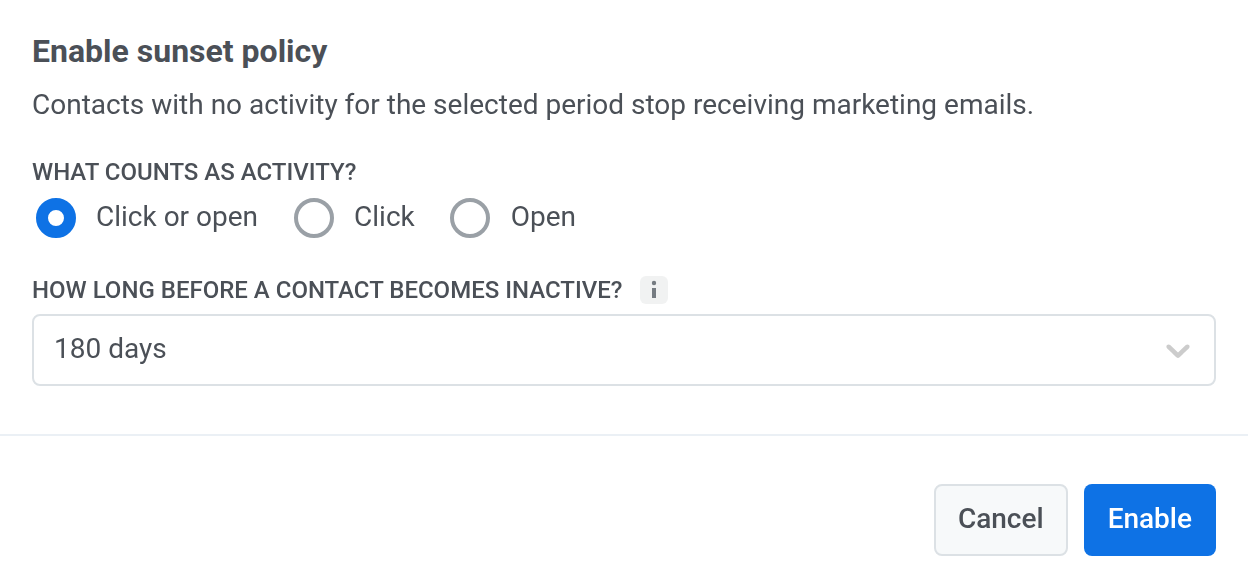
On the Sunset policy card, click Enable.

-
In What counts as activity?, choose Click or open.
-
In How long before a contact becomes inactive?, choose the period, for example, 180 days.
-
Click Enable.
From now on, marketing emails skip contacts whose last open or click is older than the period you chose. Skipped contacts aren’t unsubscribed. They receive marketing emails again after they open or click an email that was sent with Ignore sunset policy turned on.
Create the reconfirmation journey
Anchor link to- Go to Campaigns → Customer Journey Builder, then click Create Campaign → Email.
- Select Build a Journey from Scratch.
Choose the contacts to reconfirm
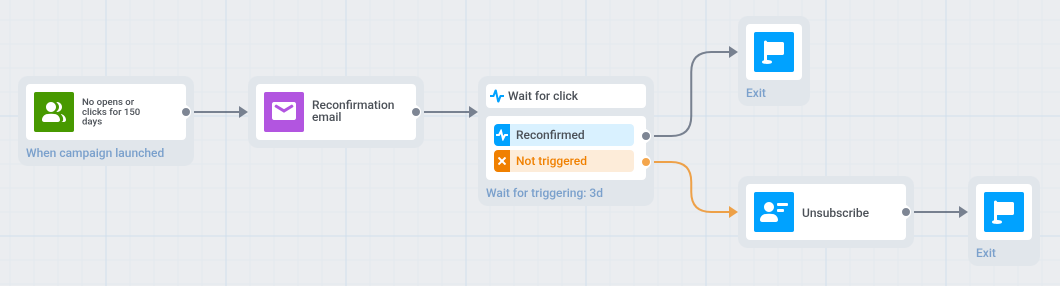
Anchor link toUse an Audience-based Entry with a segment of email contacts who haven’t opened or clicked your emails for a while. Pick a period a little shorter than the policy period, for example, 150 days for a 180-day policy, so contacts get the question before the policy stops their emails.
-
In the Audience-based Entry element, click Create Segment → Build segment.
-
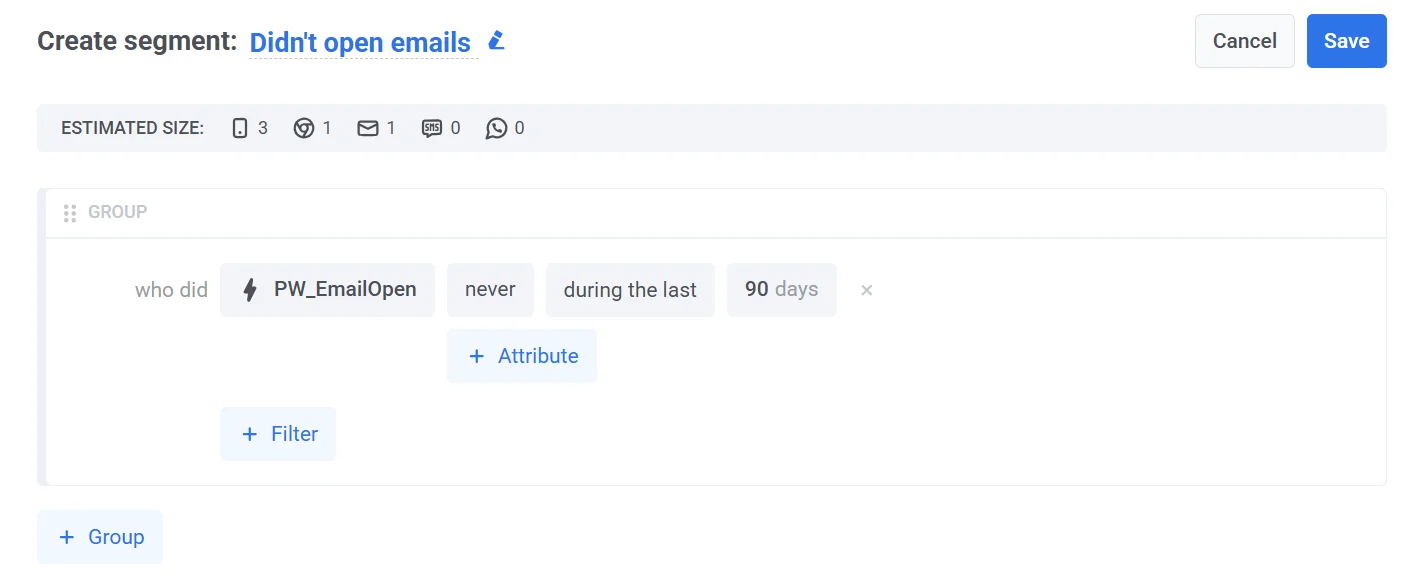
Name the segment, for example, No opens or clicks for 150 days.
-
Add a User ID filter, switch it to Email, choose contains, and enter @. This keeps only email contacts in the segment.
-
Click Filter and add an Event filter: choose PW_EmailOpen, then never, during the last N days, and enter 150.
-
Add a second Event filter with the same settings for PW_EmailLinkClicked.
-
Add a Tag filter: choose First Install, then N or more days ago, and enter 150. This leaves out contacts added less than 150 days ago, who haven’t had time to open your emails yet.
-
Click Save.
-
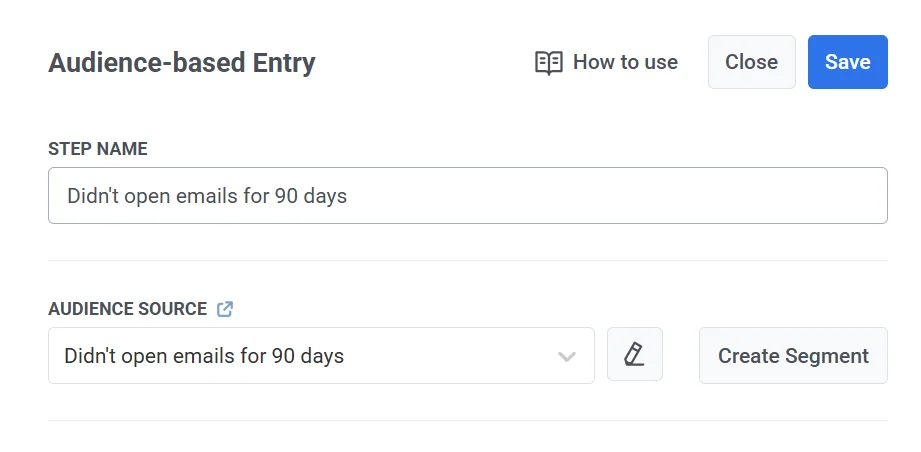
Make sure the new segment is selected in Audience source.
-
Click Save.
Add the reconfirmation email
Anchor link to-
Drag an Email element onto the canvas after the entry.
-
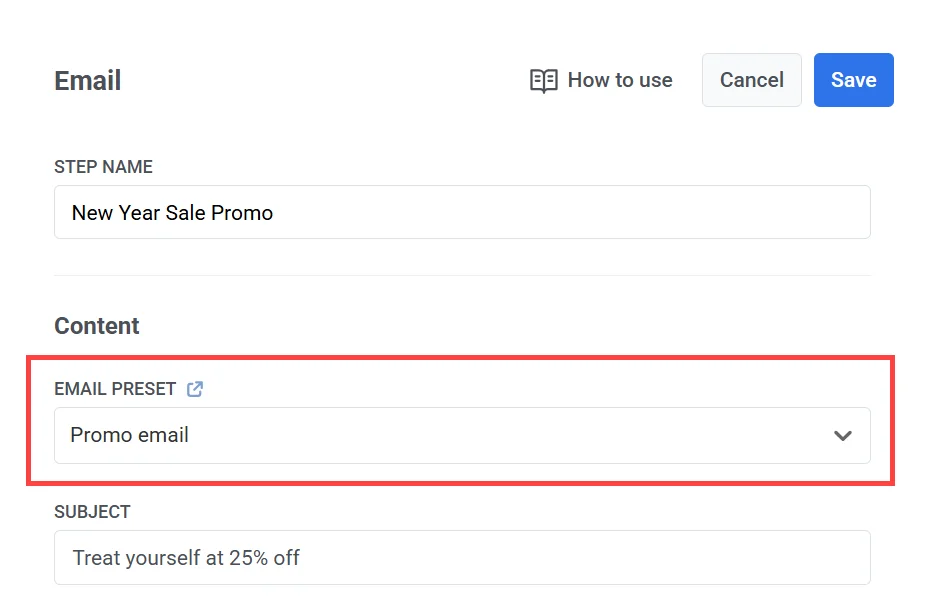
Select a preset that asks contacts whether they still want your emails, or create a new one. Include a confirmation link, because a click on it is what keeps the contact subscribed.
-
Under the preset, choose the Marketing message type.
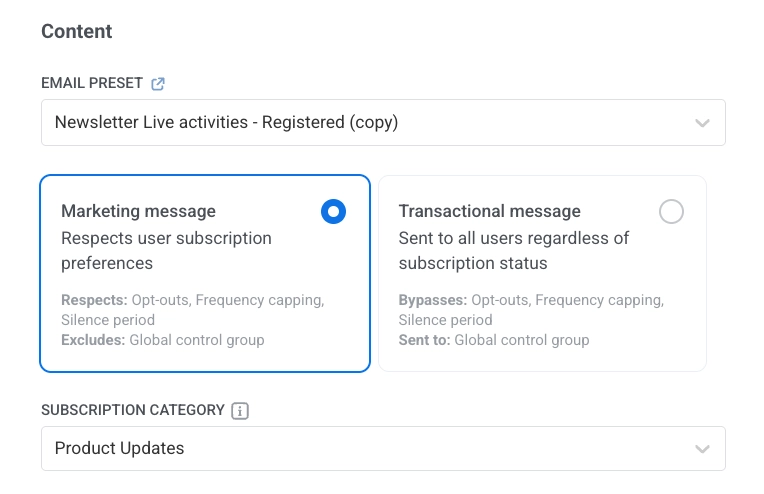
-
If the sunset policy is on, scroll to Delivery settings and turn on Ignore sunset policy.

-
Click Save.
A click on the confirmation link also counts as activity for the sunset policy, so contacts who reconfirm keep getting your marketing emails.
Wait for the confirmation click
Anchor link to-
After the Email element, add a Wait for Trigger element.
-
In Waiting period, set the time to wait for the click, for example, 3 days.
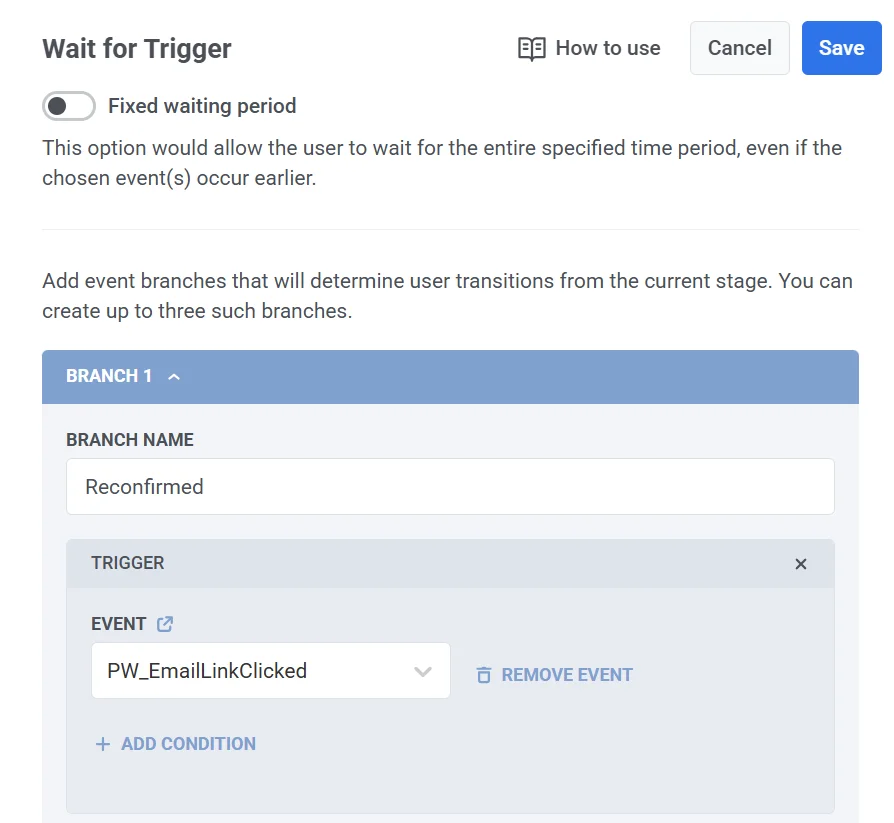
-
In Branch Name, enter Reconfirmed.
-
Click Add Event and choose PW_EmailLinkClicked.
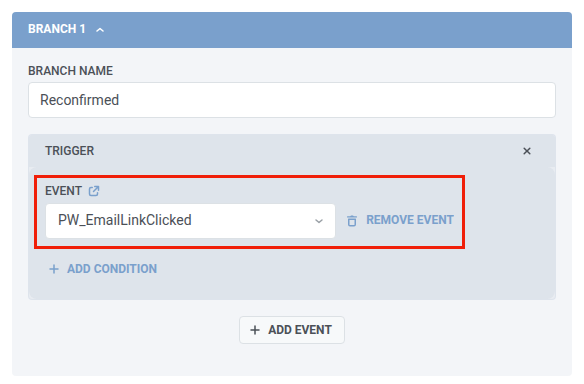
-
Click Save.
What happens after the waiting period starts:
- Any link reconfirms. Any link in the email fires PW_EmailLinkClicked, so a click on any link reconfirms the contact.
- Scanners don’t count. Clicks from email security scanners don’t fire the event, so they don’t reconfirm anyone.
- No click means Not triggered. Contacts who don’t click within the waiting period go to the Not triggered branch, which is created automatically.
Unsubscribe contacts who don’t reconfirm
Anchor link to-
On the Not triggered branch, add an Update User Profile element.
-
In Manual Tag Value, choose the Unsubscribed Emails tag and set the value to true.
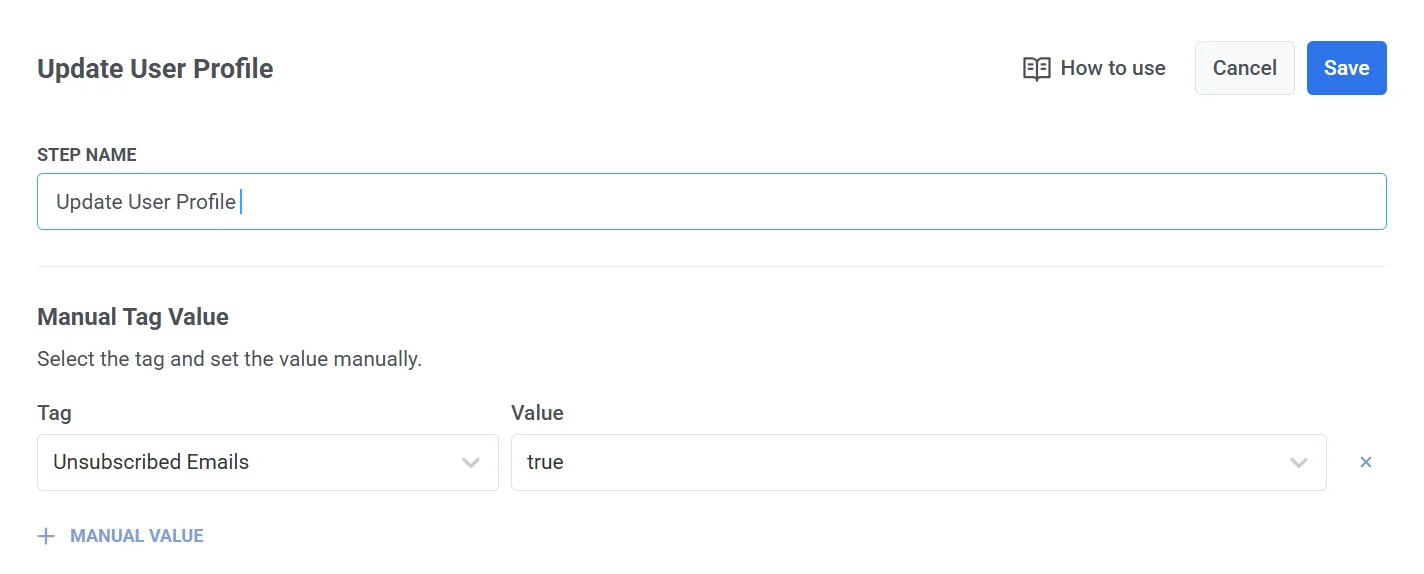
-
Click Save.
What this step does:
- Marketing emails stop. The Unsubscribed Emails tag stops marketing emails to the contact. Transactional emails still reach them.
- You can undo it. To subscribe a contact again, set the tag back to false.
- Contacts who already unsubscribed enter the journey too. The segment doesn’t check the tag. These contacts don’t receive the reconfirmation email, so they end up on this branch. Their tag stays true.
End the branches and launch
Anchor link to-
On the Reconfirmed branch, optionally send a thank-you email.
-
End both branches with an Exit element or leave them without an outgoing connection.
-
Click Launch campaign.