# Marketo 集成
本指南将说明如何将 [Marketo](https://login.marketo.com/) 与 Pushwoosh 集成。您将能够在 Marketo 营销活动中使用 Web 推送通知作为沟通渠道。
例如,假设一个用户访问了您的 Marketo 登录页面但未采取任何行动。您将能够通过 Web 推送通知向该用户发送提醒。此 Web 推送通知还可以使用为该用户记录的 Marketo 数据进行个性化,以实现最大程度的互动!
## 1. 创建 Service Worker
请遵循本[指南](/zh/developer/pushwoosh-sdk/web-push-notifications/web-push-sdk-30)并完成**前提步骤**和步骤 **1 - 2.2**。
完成上述步骤后,您应该准备好了 _manifest.json_ 和 _pushwoosh-service-worker.js_ 文件。
切换到 **Marketo Design Studio**。
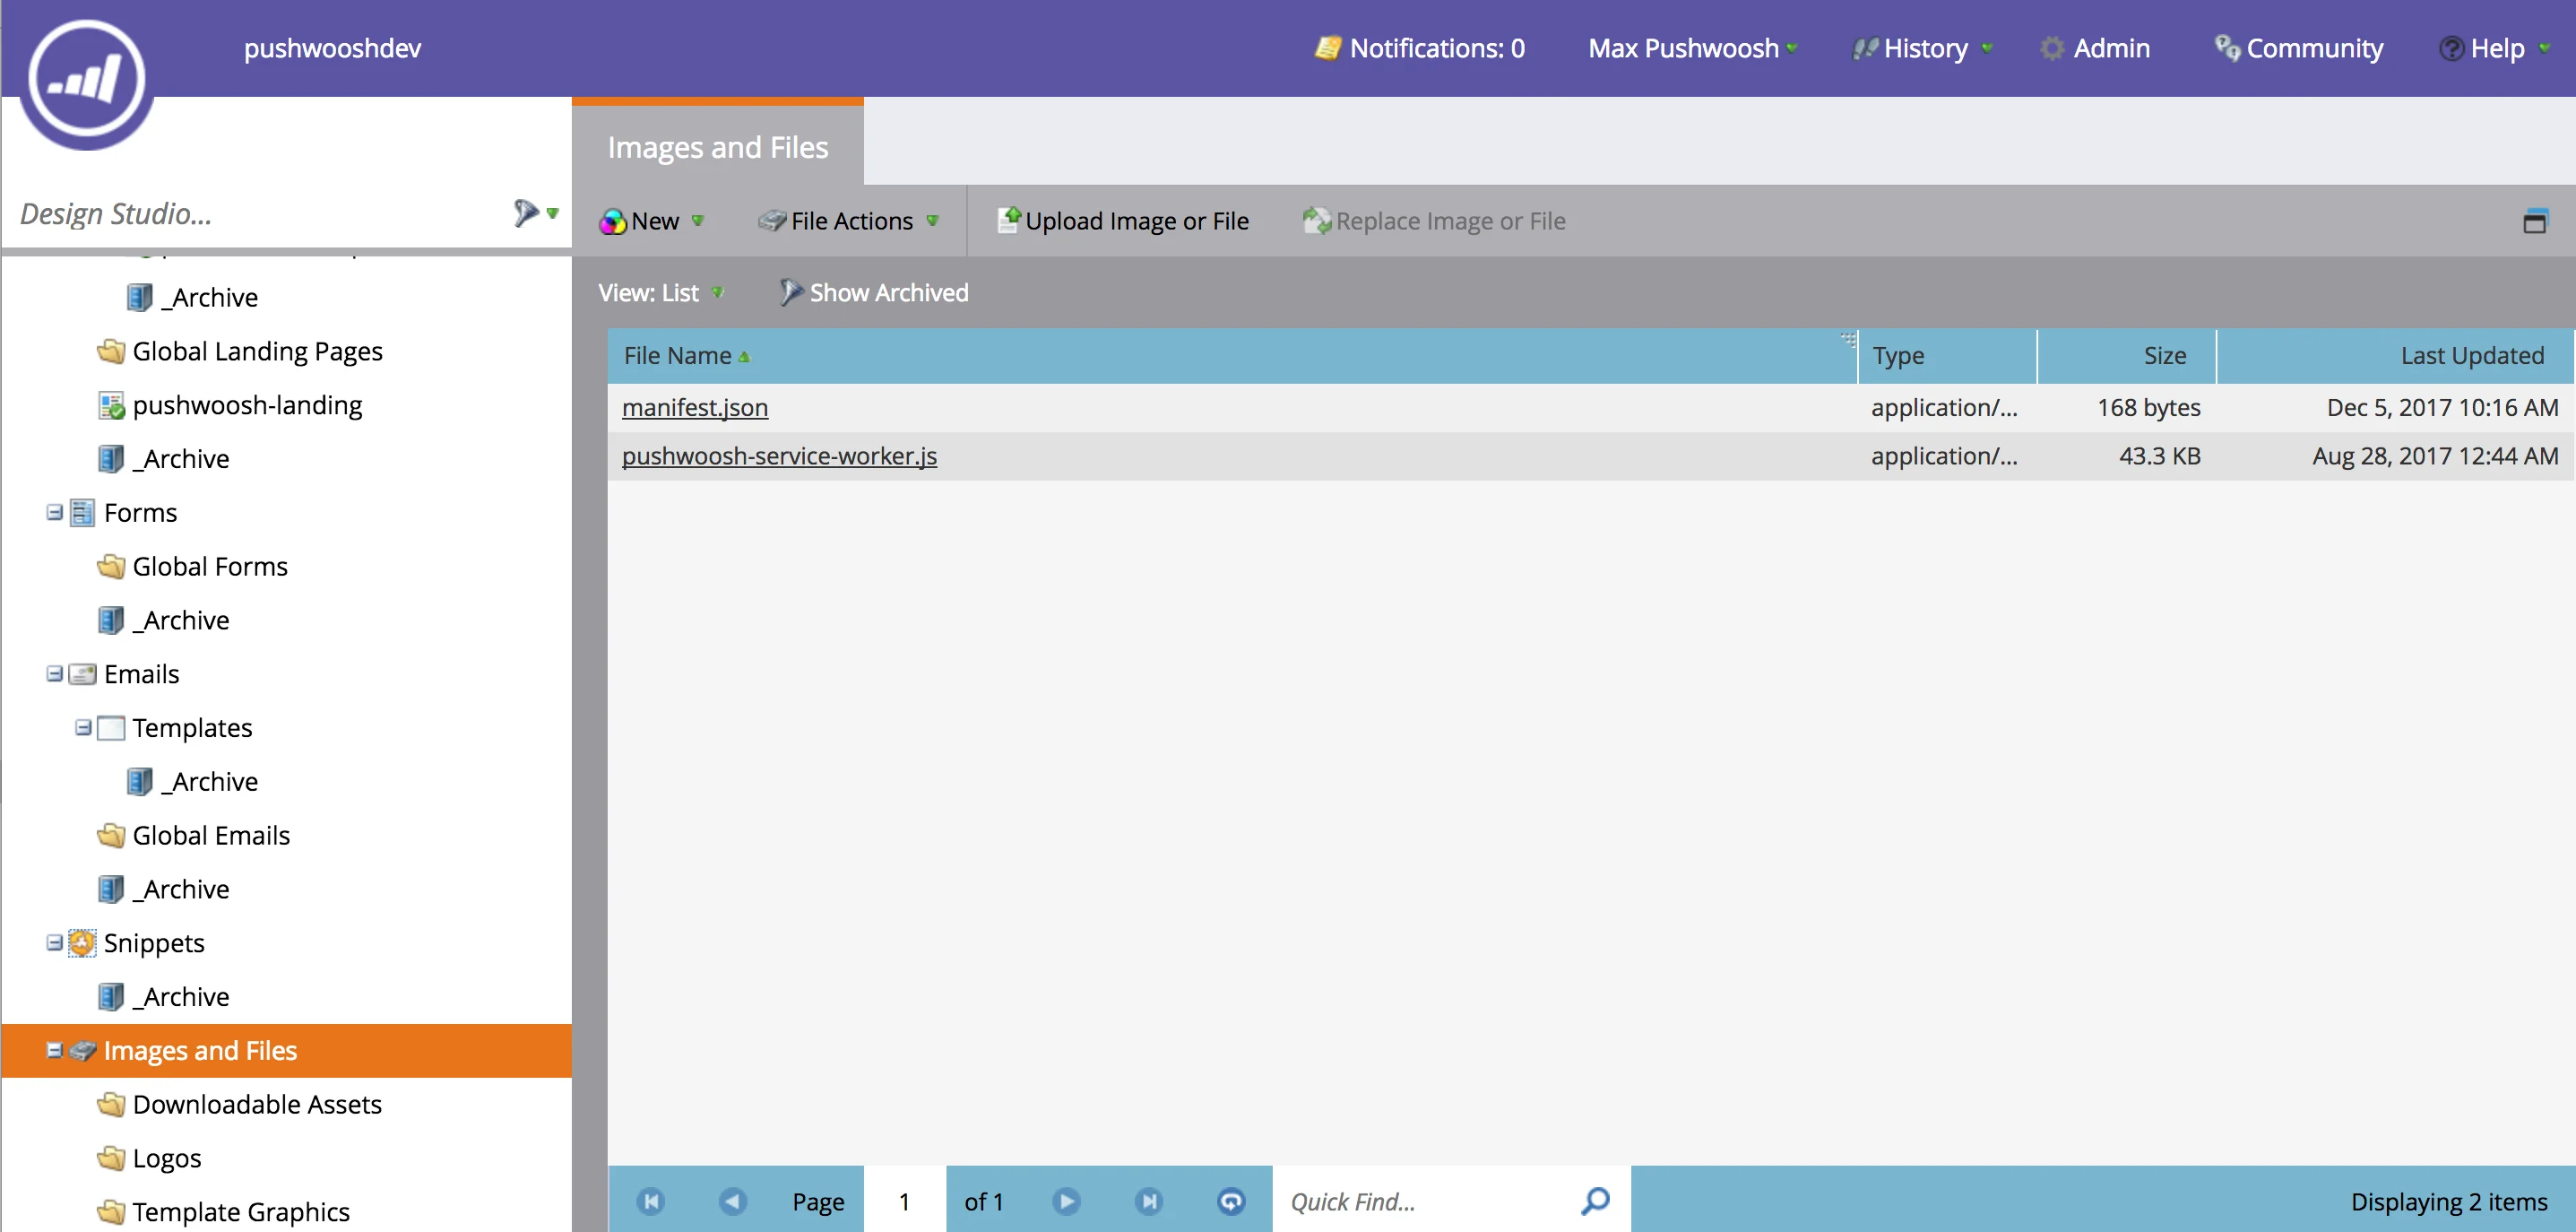
Marketo 只能将文件上传到资源文件夹,即名为“Images and Files”的文件夹。
将 _manifest.json_ 和 _pushwoosh-service-worker.js_ 上传到此文件夹。
 ## 2. 创建推送订阅页面
如上所述,Marketo 只能将文件上传到资源文件夹,该文件夹与登录页面的范围不同。
例如,如果您点击上面上传的任何文件并检查其 URL,您会看到类似“[https://your-host-name.com/rs/765-IWA-819/images/pushwoosh-service-worker.js](https://your-host-name.com/rs/765-IWA-819/images/pushwoosh-service-worker.js)”的内容。
但是,如果您点击登录页面并检查其 URL,它将是类似“[https://your-host-name.com/lp/765-IWA-819/pushwoosh-landing.html](https://your-host-name.com/lp/765-IWA-819/pushwoosh-landing.html)”的内容。
请注意登录页面 URL 中的 **"lp"** 部分和脚本 URL 中的 **"rs"** 部分。
这意味着我们需要在与登录页面不同的范围内注册我们的 _Service Worker_ 脚本。
为此,我们将一个特殊的推送订阅页面上传到 Marketo 资源文件夹,然后从登录页面打开它。让我们来创建这个订阅页面。
从以下 gist 获取 _push-subscription.html_ 文件:
[https://gist.github.com/shaders/2b518e3acaf9b4712d5260205243343d#file-push-subscription-html](https://gist.github.com/shaders/2b518e3acaf9b4712d5260205243343d#file-push-subscription-html)
打开文件并更改以下几行:
* 第 8 行 - 将链接更改为上一步中上传的 _manifest.json_ 文件的 URL。
* 第 24 行 - 将 _scope_ 参数值更改为您的资源文件夹的 URL(这是 _manifest.json_ 所在的文件夹)。
* 第 20 行 - 将 _applicationCode_ 参数值更改为您的 Pushwoosh App Id。
请注意,该脚本还将 Pushwoosh 以用户为中心的推送通知与 Marketo 的潜在客户标识符进行映射:_userId:leadId_(第 26 行)
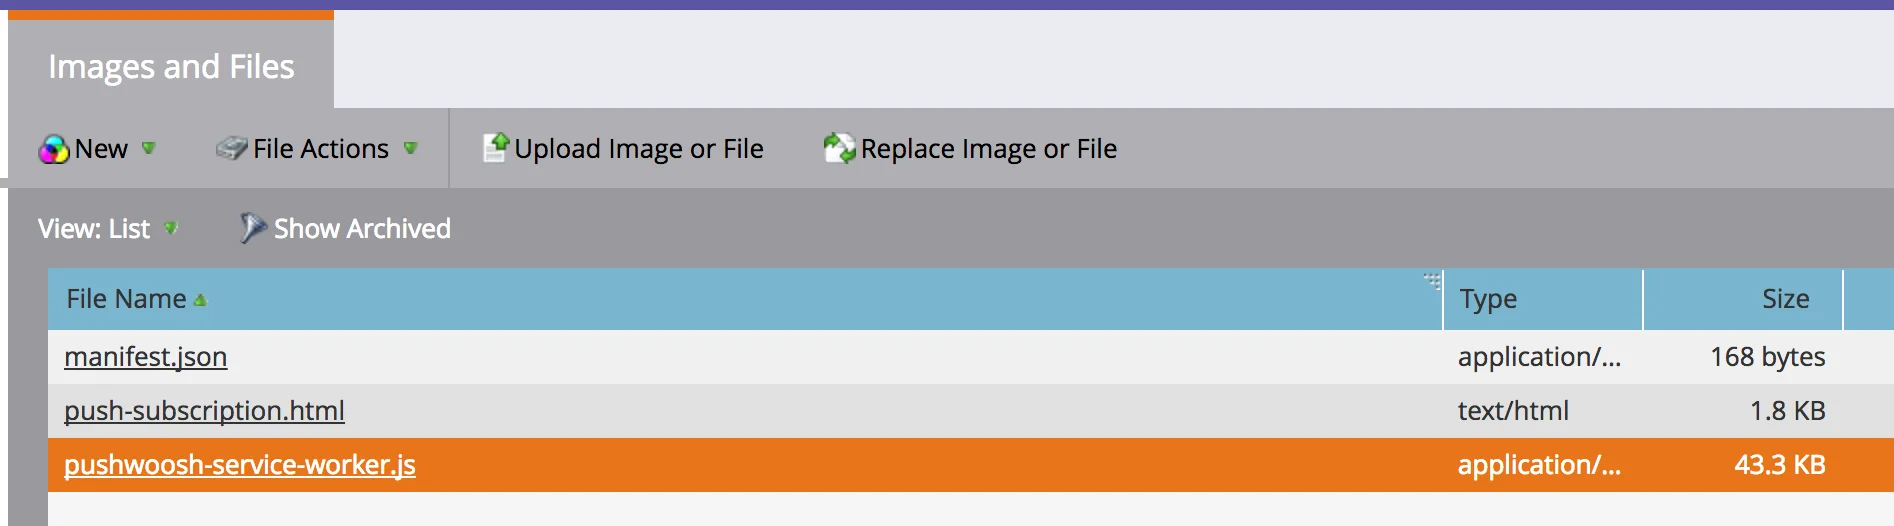
将生成的文件上传到“Images and Files”文件夹。现在您应该在该文件夹中看到这些文件:
## 2. 创建推送订阅页面
如上所述,Marketo 只能将文件上传到资源文件夹,该文件夹与登录页面的范围不同。
例如,如果您点击上面上传的任何文件并检查其 URL,您会看到类似“[https://your-host-name.com/rs/765-IWA-819/images/pushwoosh-service-worker.js](https://your-host-name.com/rs/765-IWA-819/images/pushwoosh-service-worker.js)”的内容。
但是,如果您点击登录页面并检查其 URL,它将是类似“[https://your-host-name.com/lp/765-IWA-819/pushwoosh-landing.html](https://your-host-name.com/lp/765-IWA-819/pushwoosh-landing.html)”的内容。
请注意登录页面 URL 中的 **"lp"** 部分和脚本 URL 中的 **"rs"** 部分。
这意味着我们需要在与登录页面不同的范围内注册我们的 _Service Worker_ 脚本。
为此,我们将一个特殊的推送订阅页面上传到 Marketo 资源文件夹,然后从登录页面打开它。让我们来创建这个订阅页面。
从以下 gist 获取 _push-subscription.html_ 文件:
[https://gist.github.com/shaders/2b518e3acaf9b4712d5260205243343d#file-push-subscription-html](https://gist.github.com/shaders/2b518e3acaf9b4712d5260205243343d#file-push-subscription-html)
打开文件并更改以下几行:
* 第 8 行 - 将链接更改为上一步中上传的 _manifest.json_ 文件的 URL。
* 第 24 行 - 将 _scope_ 参数值更改为您的资源文件夹的 URL(这是 _manifest.json_ 所在的文件夹)。
* 第 20 行 - 将 _applicationCode_ 参数值更改为您的 Pushwoosh App Id。
请注意,该脚本还将 Pushwoosh 以用户为中心的推送通知与 Marketo 的潜在客户标识符进行映射:_userId:leadId_(第 26 行)
将生成的文件上传到“Images and Files”文件夹。现在您应该在该文件夹中看到这些文件:
 ## 3. 创建带有推送订阅的登录页面
从以下 gist 获取 _pushwoosh-template.html_ 文件:
[https://gist.github.com/shaders/2b518e3acaf9b4712d5260205243343d#file-pushwoosh-template-html](https://gist.github.com/shaders/2b518e3acaf9b4712d5260205243343d#file-pushwoosh-template-html)
打开文件并更改以下几行:
* 第 47 行 - 将 _scope_ 参数值更改为您的资源文件夹的 URL。
* 第 65 行 - 将链接更改为上一步中上传的 _push-subscription.html_ 文件的 URL。
* 第 43 行 - 将 _applicationCode_ 参数值更改为您的 Pushwoosh App Id。
与上一个脚本一样,此脚本也将 Pushwoosh 以用户为中心的推送通知与 Marketo 的潜在客户标识符进行映射:_userId:leadId_(第 49 行)
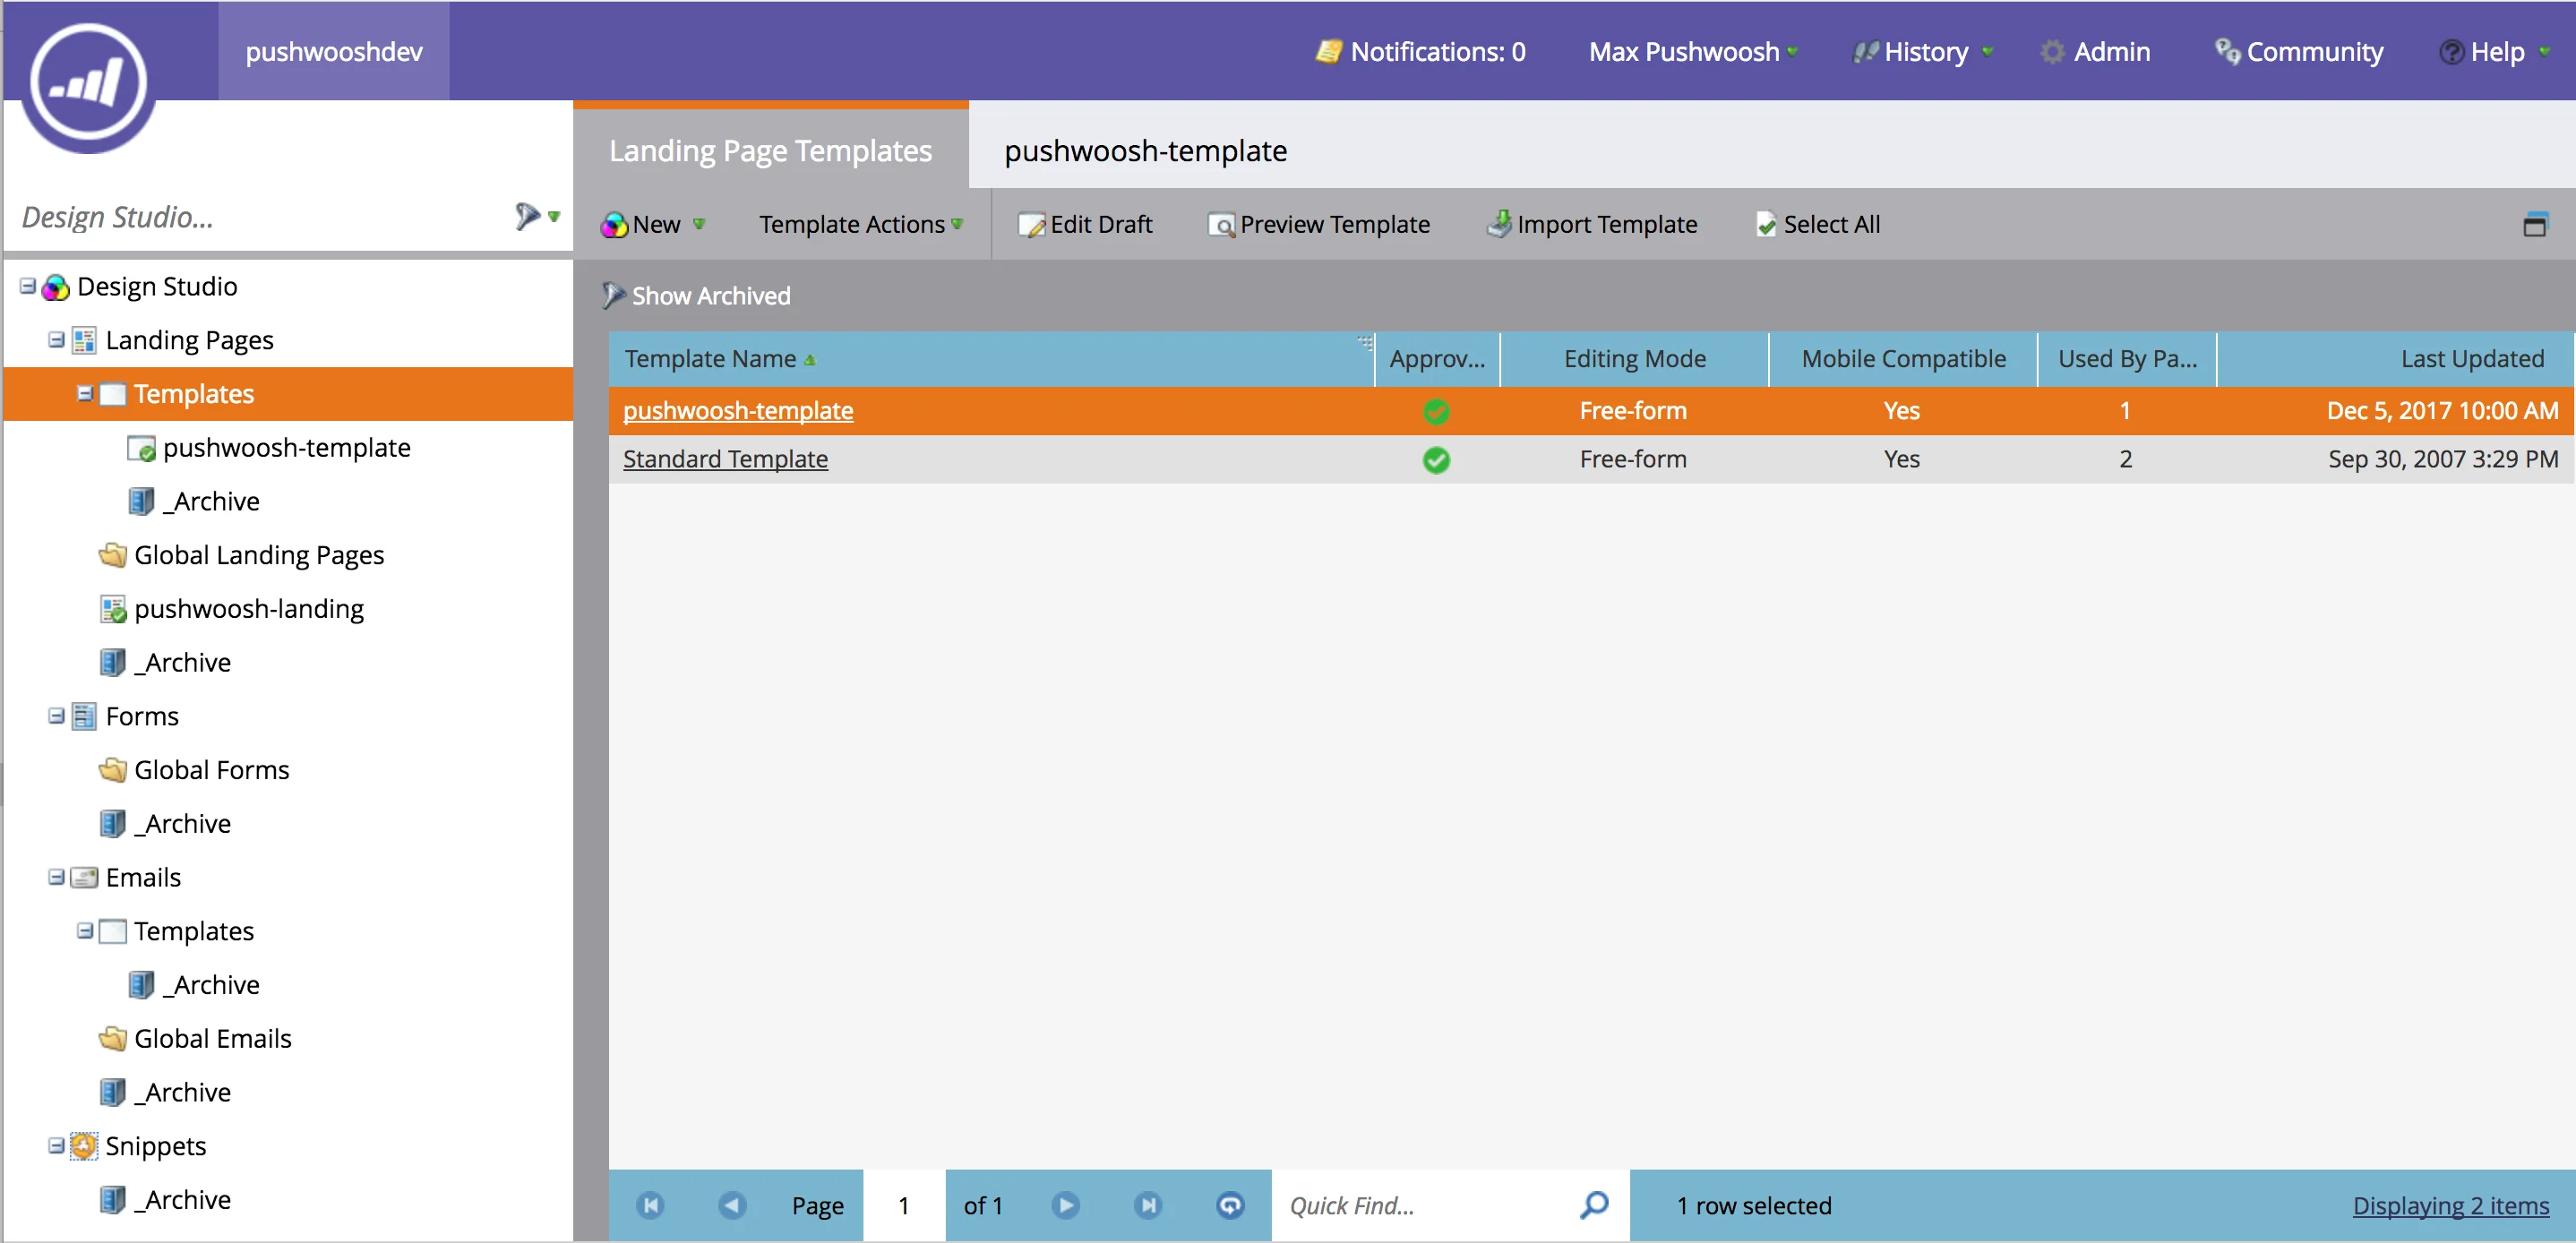
现在转到您的 **Marketo 登录页面**的“**Templates**”部分,创建模板(在下面的屏幕截图中称为“pushwoosh-template”),并将生成文件的内容复制粘贴到那里。
## 3. 创建带有推送订阅的登录页面
从以下 gist 获取 _pushwoosh-template.html_ 文件:
[https://gist.github.com/shaders/2b518e3acaf9b4712d5260205243343d#file-pushwoosh-template-html](https://gist.github.com/shaders/2b518e3acaf9b4712d5260205243343d#file-pushwoosh-template-html)
打开文件并更改以下几行:
* 第 47 行 - 将 _scope_ 参数值更改为您的资源文件夹的 URL。
* 第 65 行 - 将链接更改为上一步中上传的 _push-subscription.html_ 文件的 URL。
* 第 43 行 - 将 _applicationCode_ 参数值更改为您的 Pushwoosh App Id。
与上一个脚本一样,此脚本也将 Pushwoosh 以用户为中心的推送通知与 Marketo 的潜在客户标识符进行映射:_userId:leadId_(第 49 行)
现在转到您的 **Marketo 登录页面**的“**Templates**”部分,创建模板(在下面的屏幕截图中称为“pushwoosh-template”),并将生成文件的内容复制粘贴到那里。
 现在,让我们基于此模板创建一个新的登录页面。
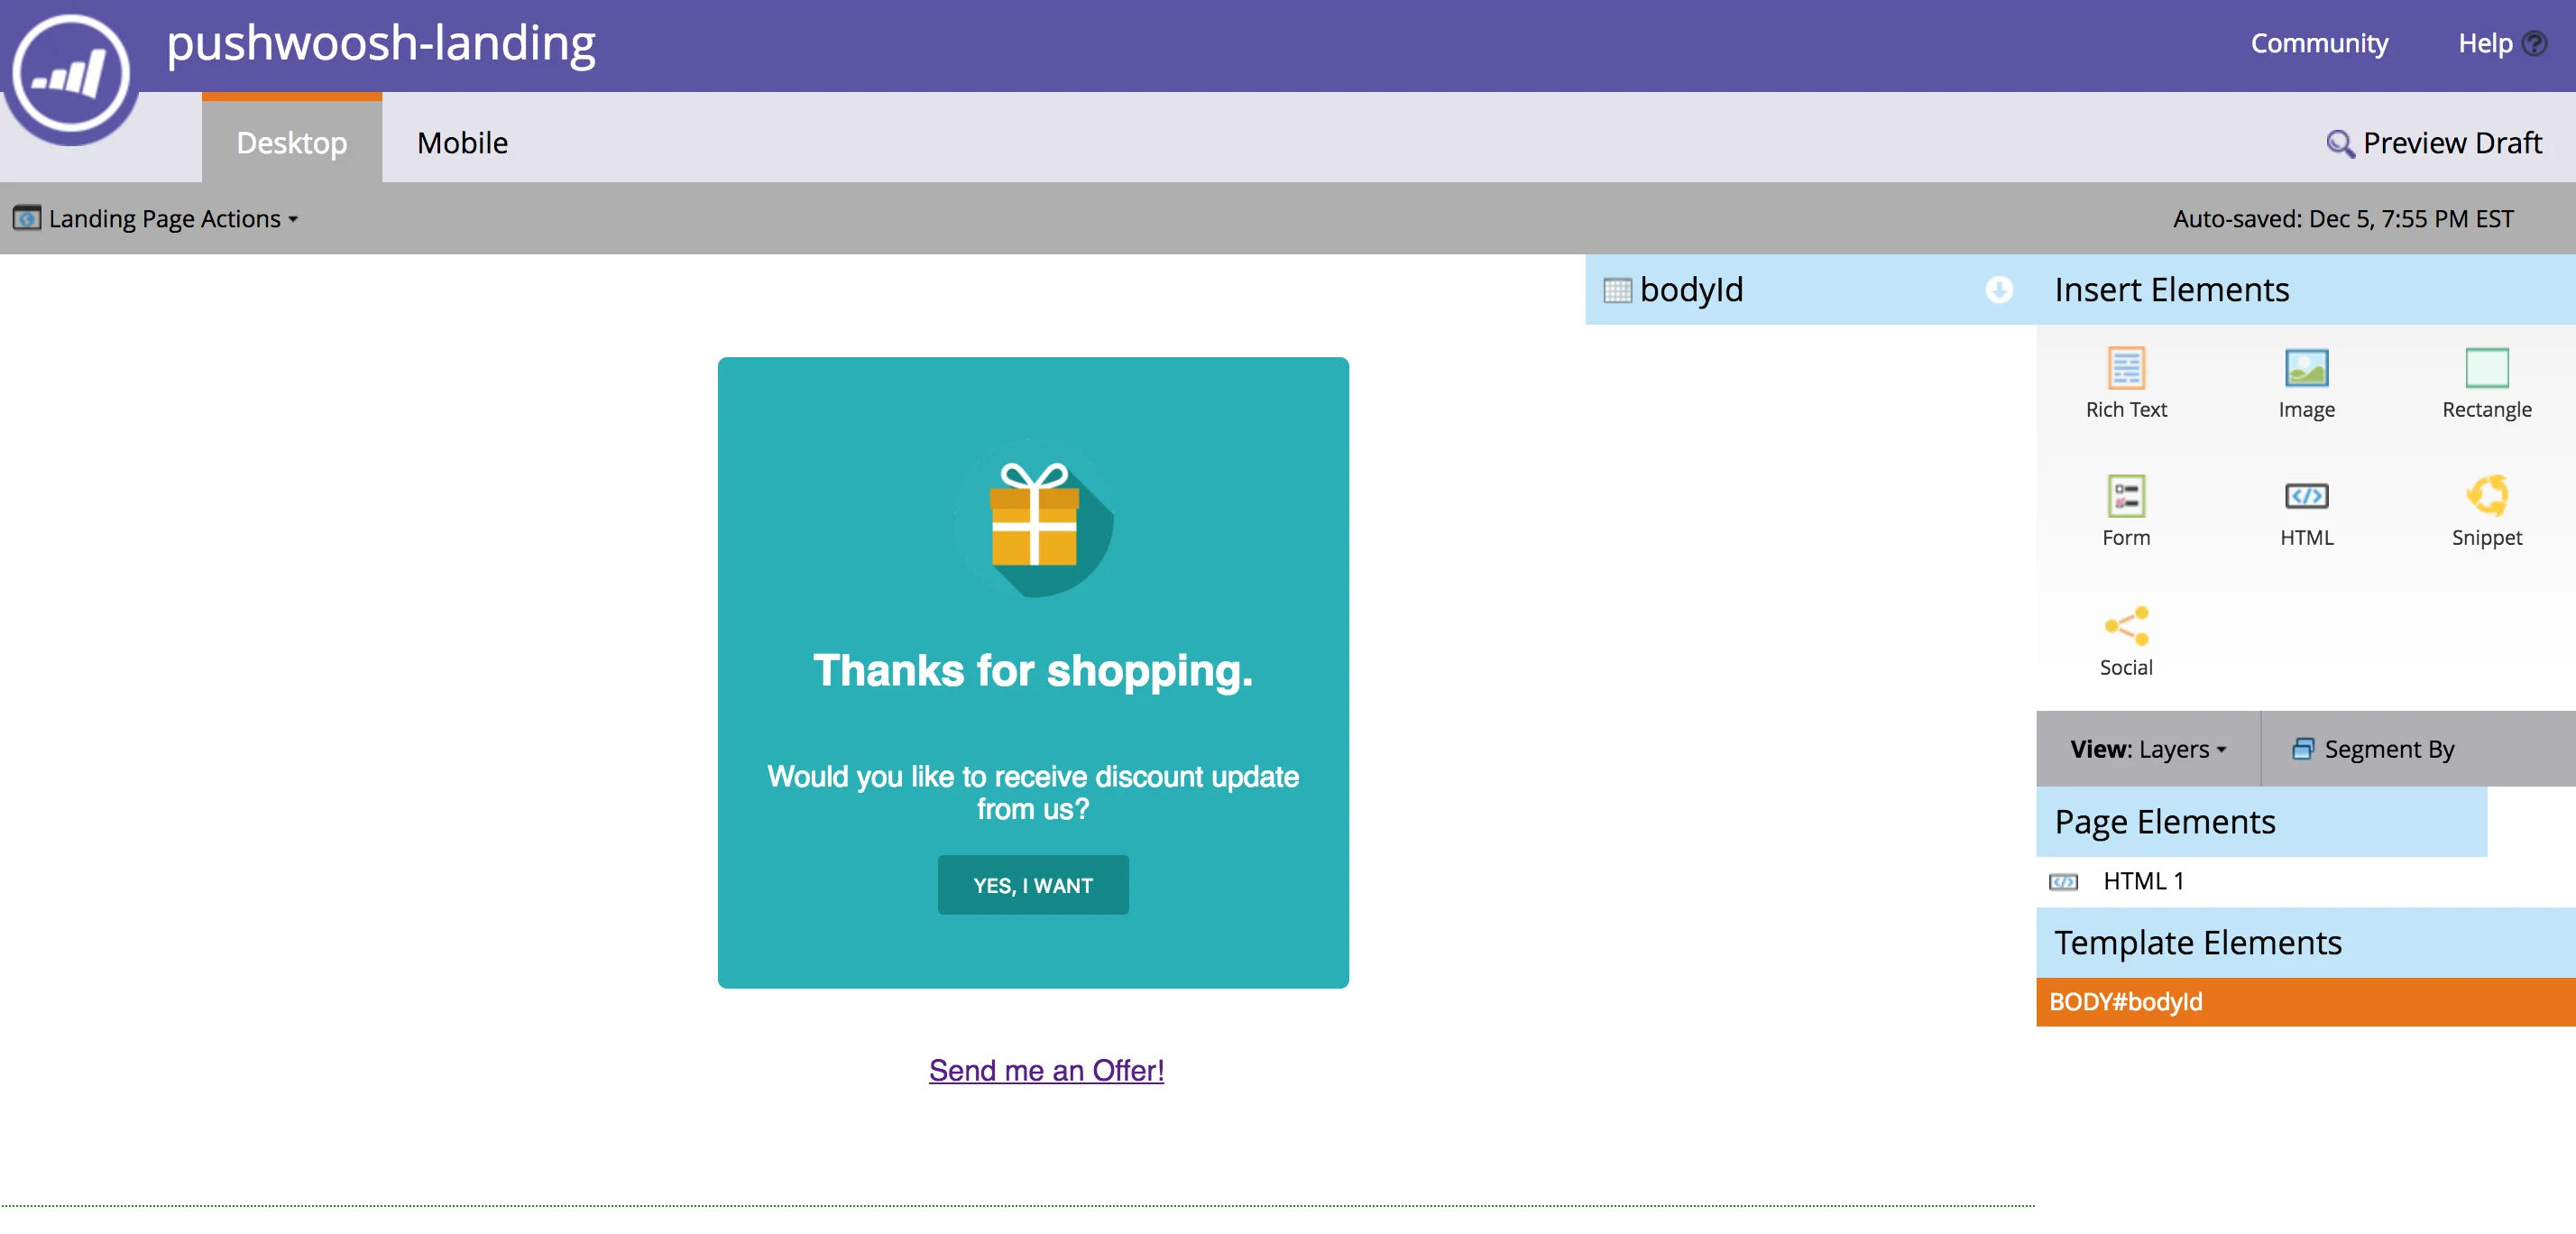
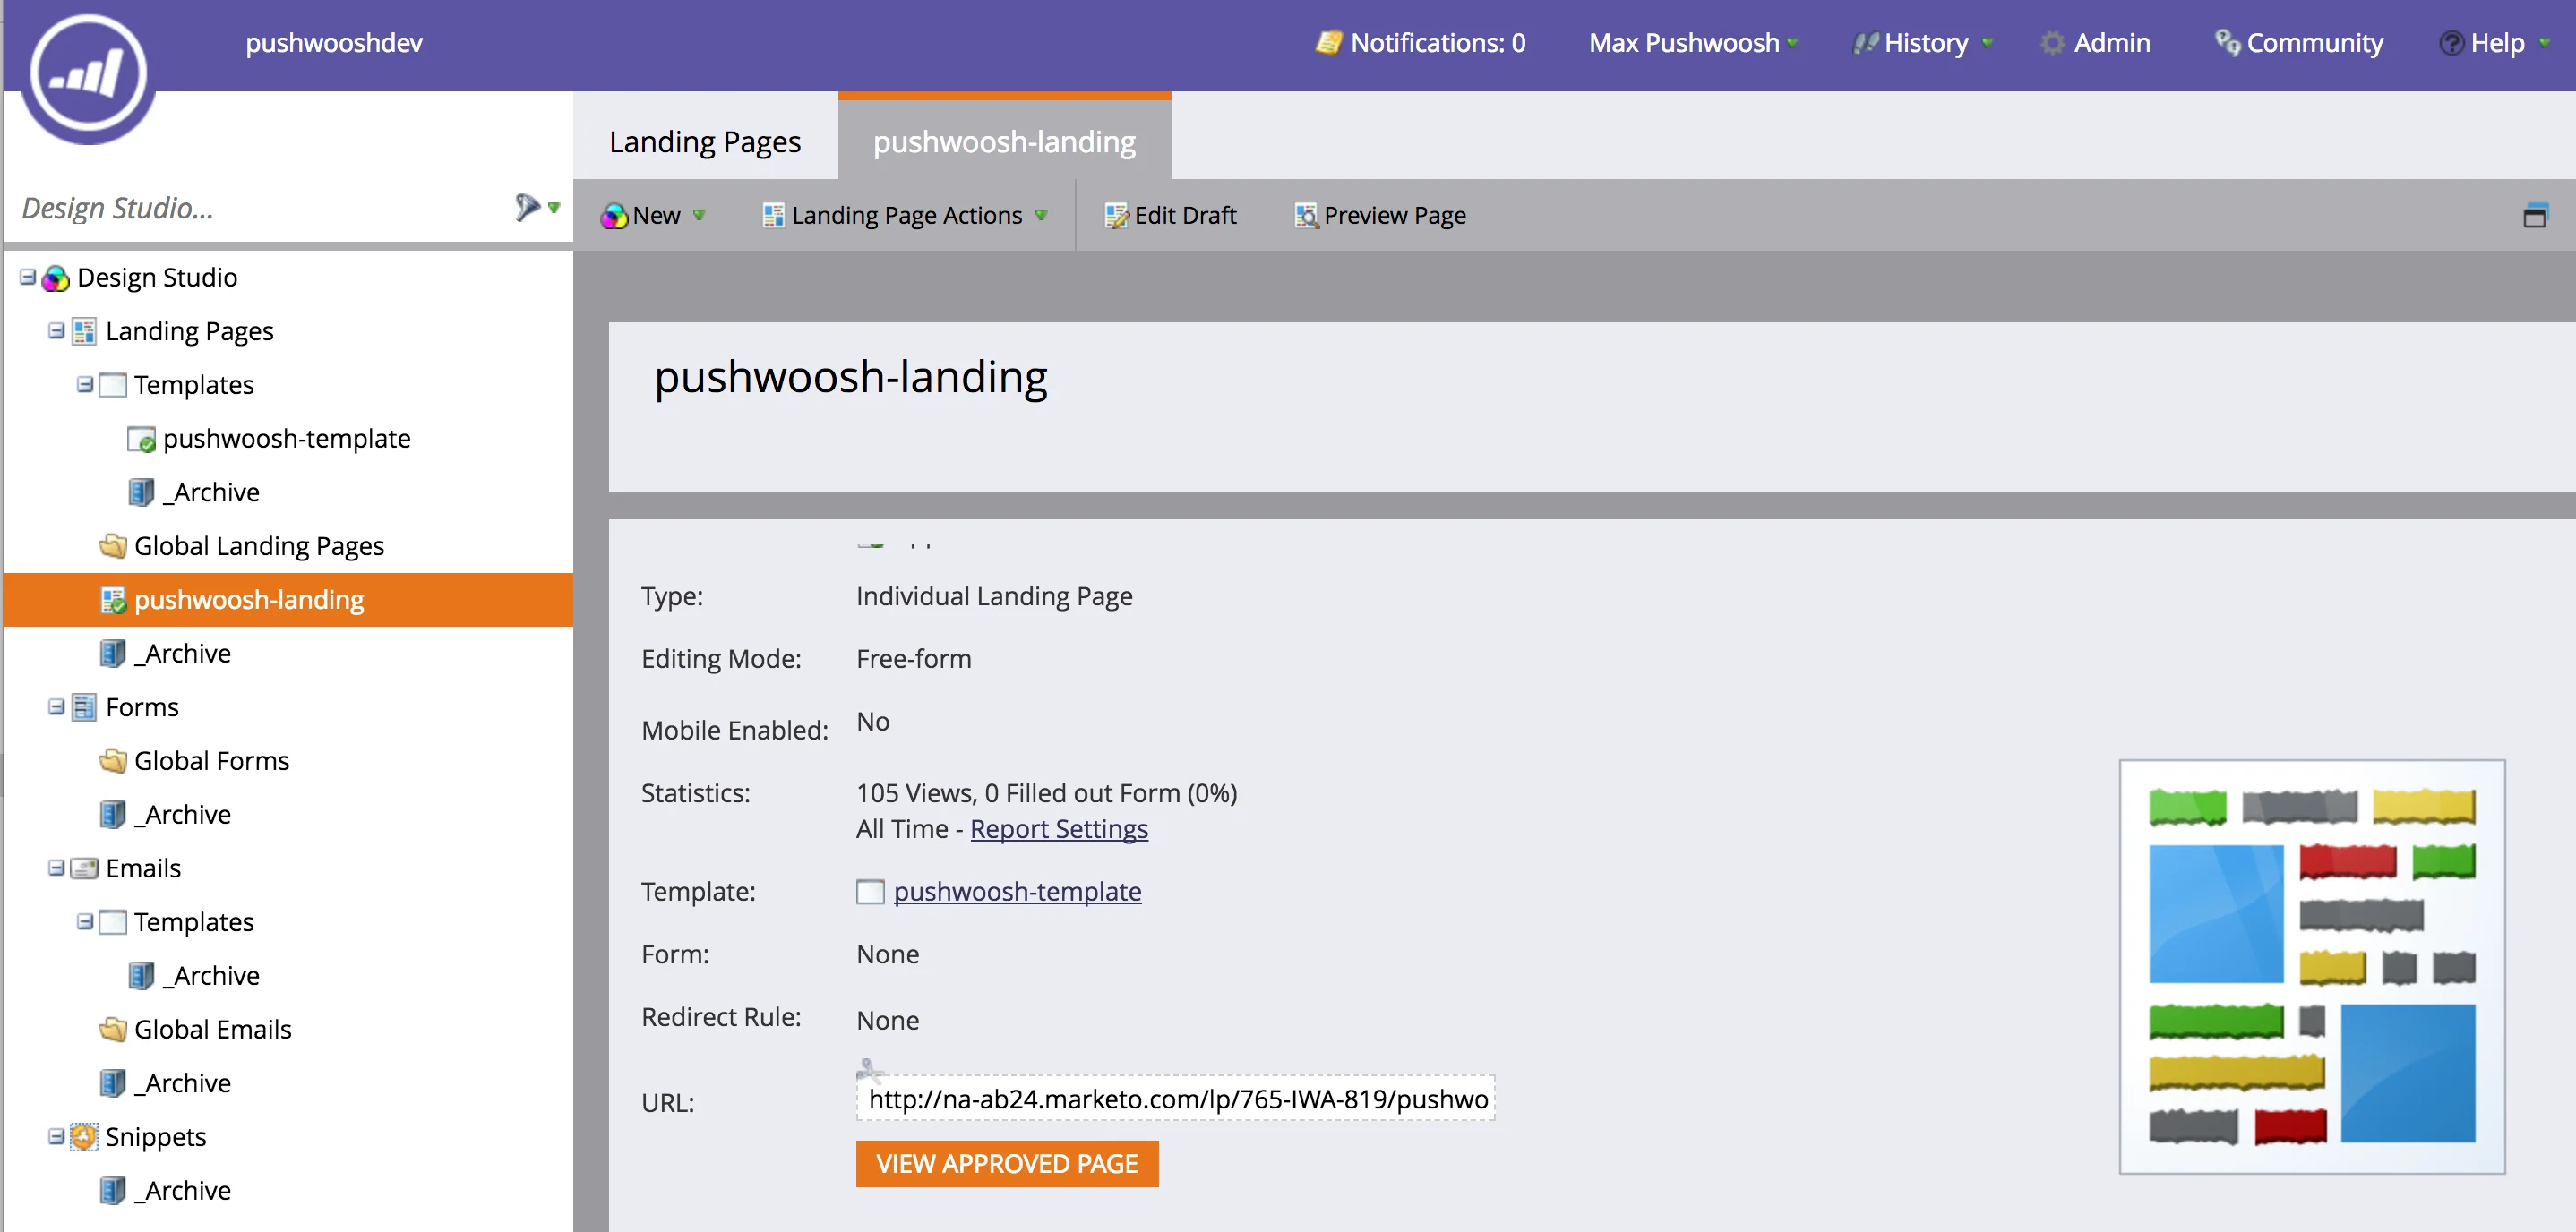 在我们的示例中,为了简单起见,我们将向登录页面添加一个简单的链接,以展示 Pushwoosh 与 Marketo 营销活动自动化的集成功能。我们将创建一个营销活动,当用户点击此链接时,该活动将触发个人推送通知。
我们将使用与登录页面相同的 URL。
```txt
给我发送优惠!
```
在我们的示例中,为了简单起见,我们将向登录页面添加一个简单的链接,以展示 Pushwoosh 与 Marketo 营销活动自动化的集成功能。我们将创建一个营销活动,当用户点击此链接时,该活动将触发个人推送通知。
我们将使用与登录页面相同的 URL。
```txt
给我发送优惠!
```
 ## 4. 创建 Pushwoosh Webhook
转到 **Marketo 的“Admin”部分**并创建一个具有以下参数的新 Webhook:
* URL - [https://go.pushwoosh.com/json/1.3/createMessage](https://go.pushwoosh.com/json/1.3/createMessage)
* 请求类型:POST
将以下代码粘贴为模板。
```
{
"request": {
"application": "ENTER_YOUR_PUSHWOOSH_APP_ID",
"auth": "ENTER_YOUR_PUSHWOOSH_API_TOKEN_HERE",
"notifications": [{
"send_date": "now",
"ignore_user_timezone": true,
"content": "我们为您准备了新的优惠!",
"users" : ["{{lead.Id:default="ABCD-EFGH"}}"]
}]
}
}
```
请注意,我们使用 Marketo Lead ID 来引用 Pushwoosh 中的用户。有关以用户为中心的推送通知的更多信息,请参阅[此处](/zh/product/messaging-channels/push-notifications/send-push-notifications/push-by-user-id)。
## 4. 创建 Pushwoosh Webhook
转到 **Marketo 的“Admin”部分**并创建一个具有以下参数的新 Webhook:
* URL - [https://go.pushwoosh.com/json/1.3/createMessage](https://go.pushwoosh.com/json/1.3/createMessage)
* 请求类型:POST
将以下代码粘贴为模板。
```
{
"request": {
"application": "ENTER_YOUR_PUSHWOOSH_APP_ID",
"auth": "ENTER_YOUR_PUSHWOOSH_API_TOKEN_HERE",
"notifications": [{
"send_date": "now",
"ignore_user_timezone": true,
"content": "我们为您准备了新的优惠!",
"users" : ["{{lead.Id:default="ABCD-EFGH"}}"]
}]
}
}
```
请注意,我们使用 Marketo Lead ID 来引用 Pushwoosh 中的用户。有关以用户为中心的推送通知的更多信息,请参阅[此处](/zh/product/messaging-channels/push-notifications/send-push-notifications/push-by-user-id)。
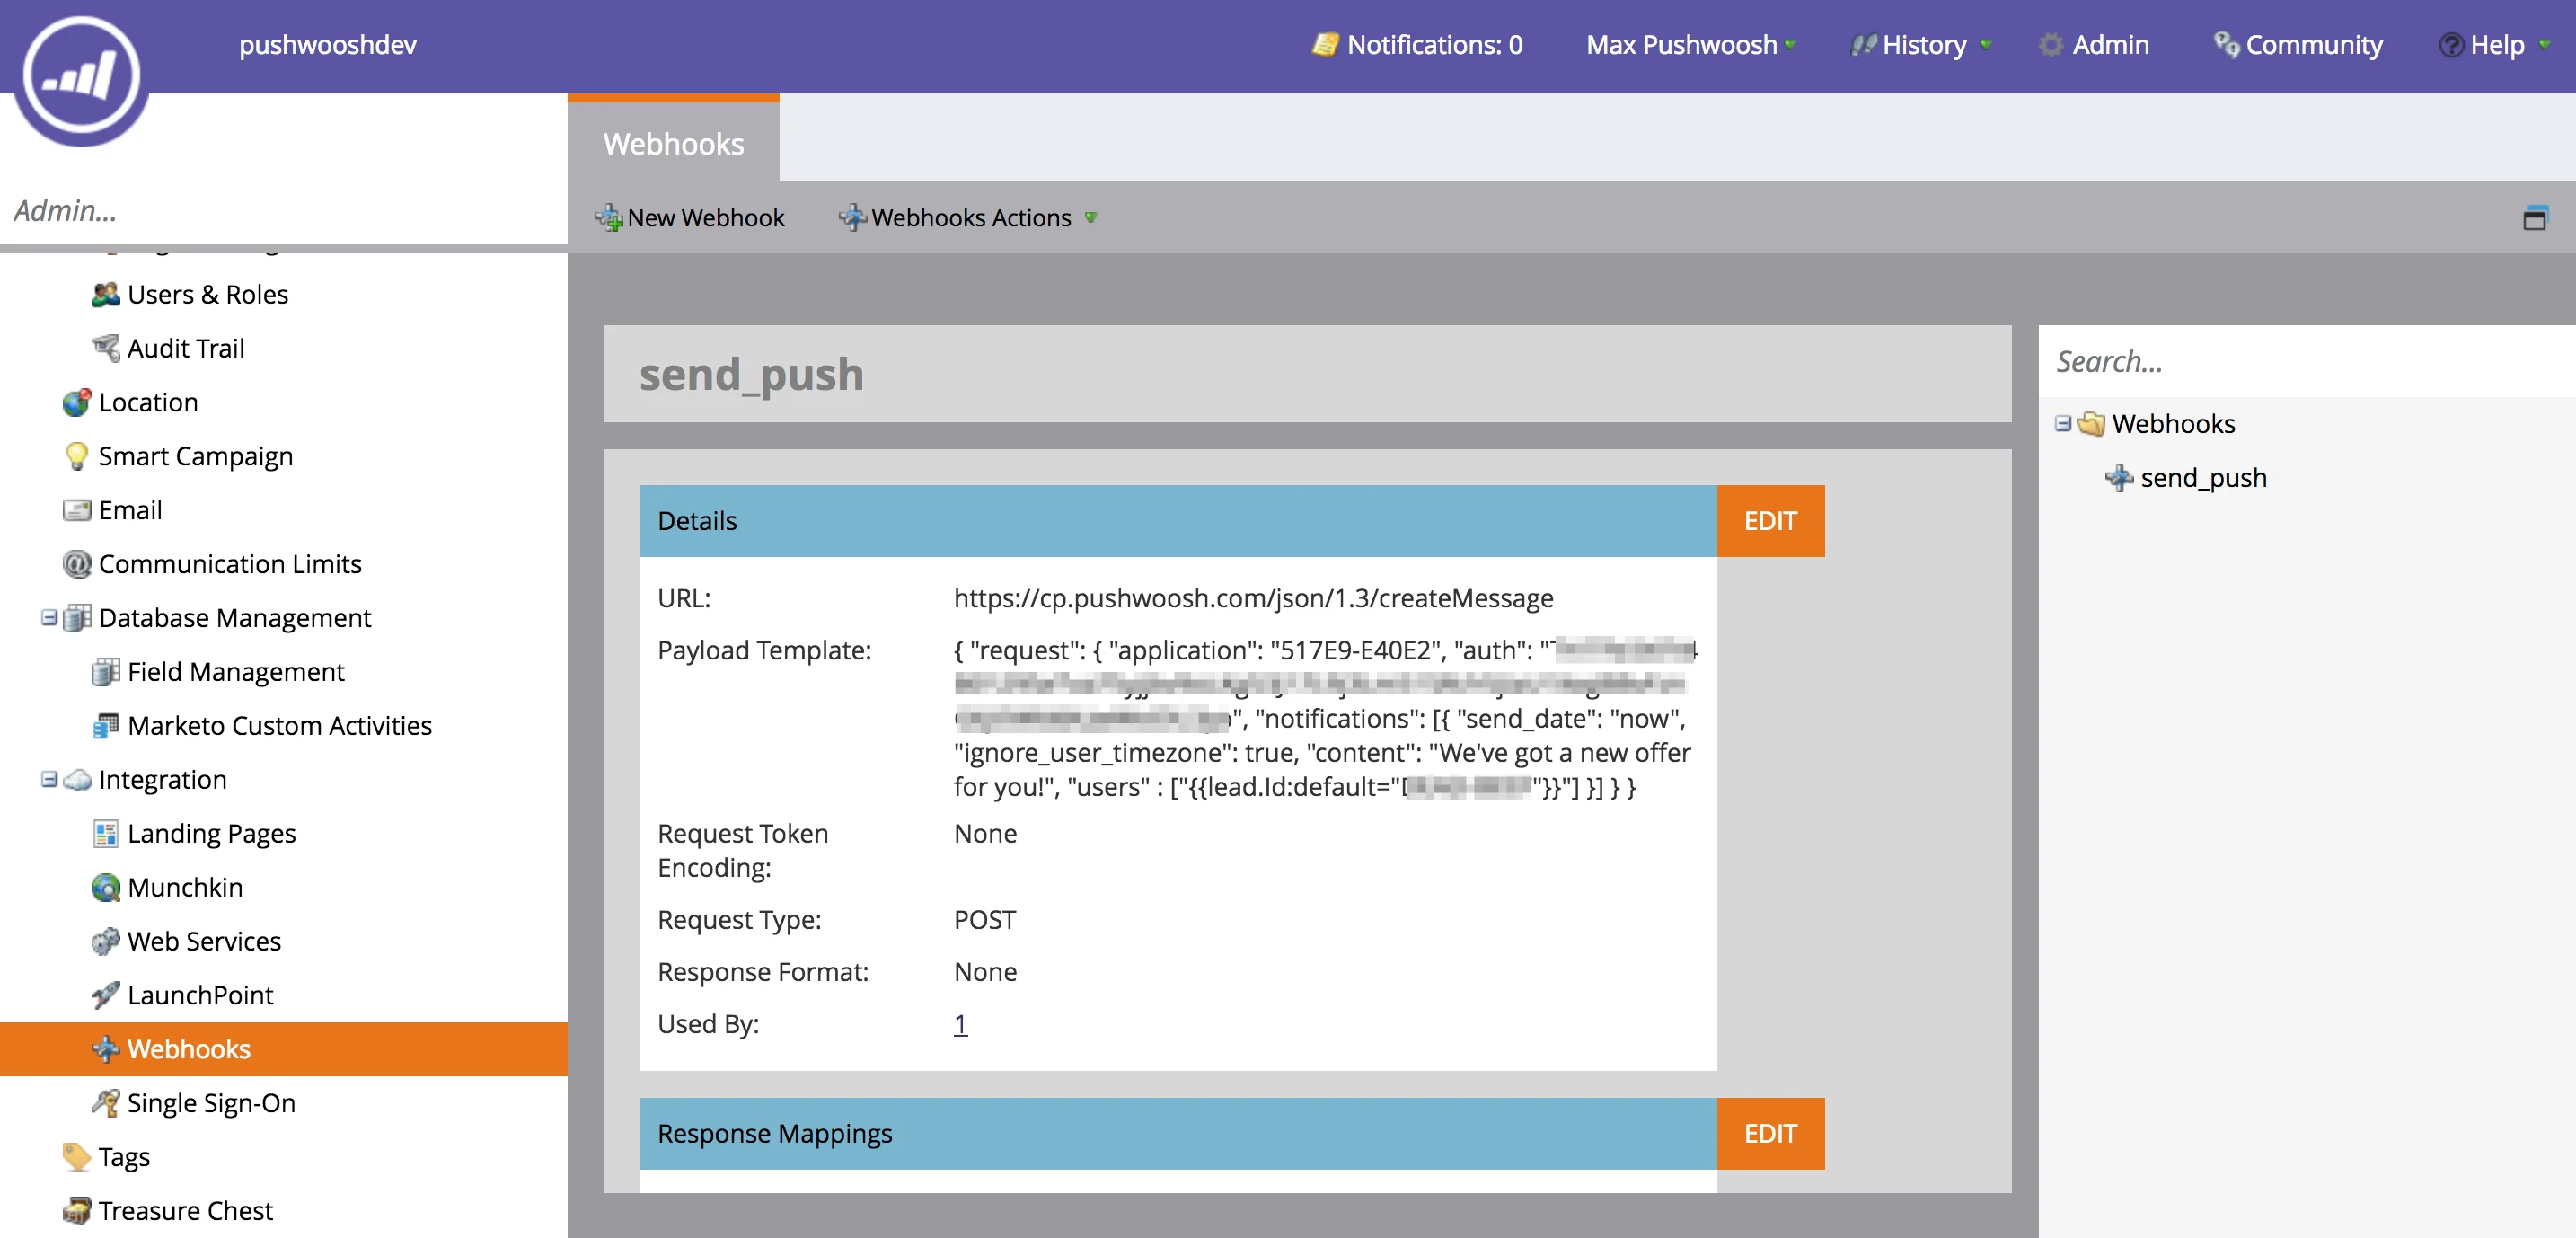 在我们这个非常简单的示例中,我们使用了静态推送消息。但是,您可以使用 [`createMessage`](/zh/developer/api-reference/messages-api/#createmessage) 的所有功能。
要个性化推送通知,您可以使用 Pushwoosh 的 **Preset**,并在 `/createMessage` 调用的 **"dynamic_content_placeholders"** 参数中传递来自 Marketo 的值,以实现推送个性化。
## 5. 与 Marketo 自动化营销活动集成
转到 Marketo 的“**Marketing Activities**”部分并创建一个营销活动。
在我们的示例中,当用户点击我们登录页面上的链接(即我们在上面两个步骤中创建的链接)时,我们将触发该营销活动。
在我们这个非常简单的示例中,我们使用了静态推送消息。但是,您可以使用 [`createMessage`](/zh/developer/api-reference/messages-api/#createmessage) 的所有功能。
要个性化推送通知,您可以使用 Pushwoosh 的 **Preset**,并在 `/createMessage` 调用的 **"dynamic_content_placeholders"** 参数中传递来自 Marketo 的值,以实现推送个性化。
## 5. 与 Marketo 自动化营销活动集成
转到 Marketo 的“**Marketing Activities**”部分并创建一个营销活动。
在我们的示例中,当用户点击我们登录页面上的链接(即我们在上面两个步骤中创建的链接)时,我们将触发该营销活动。
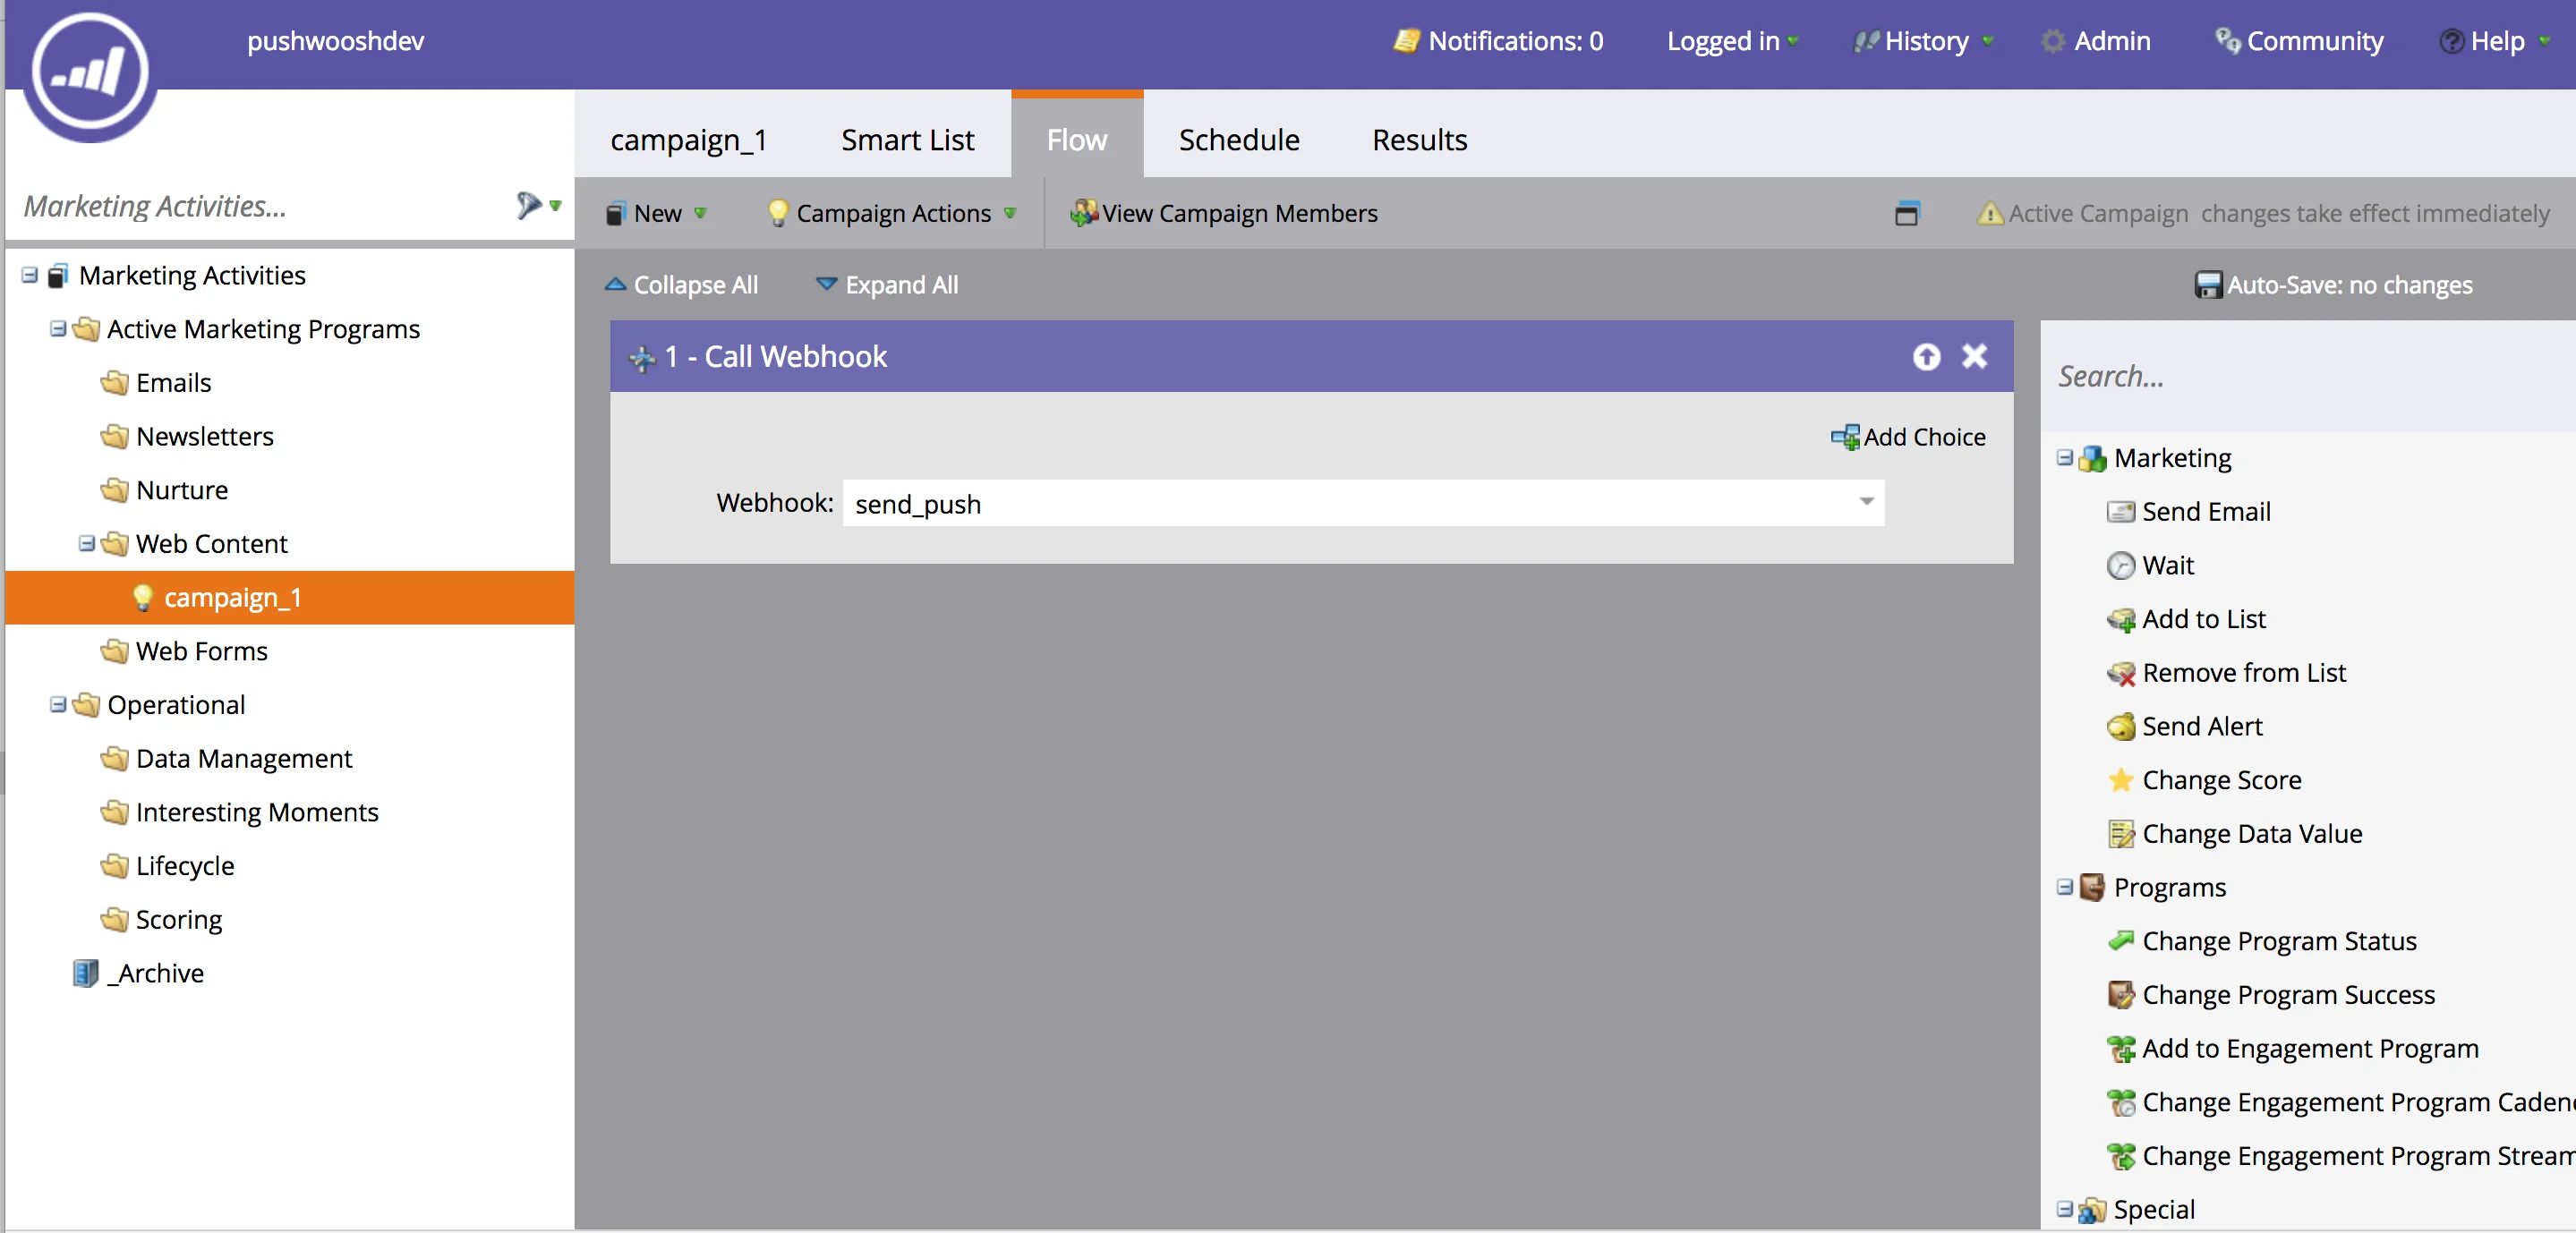
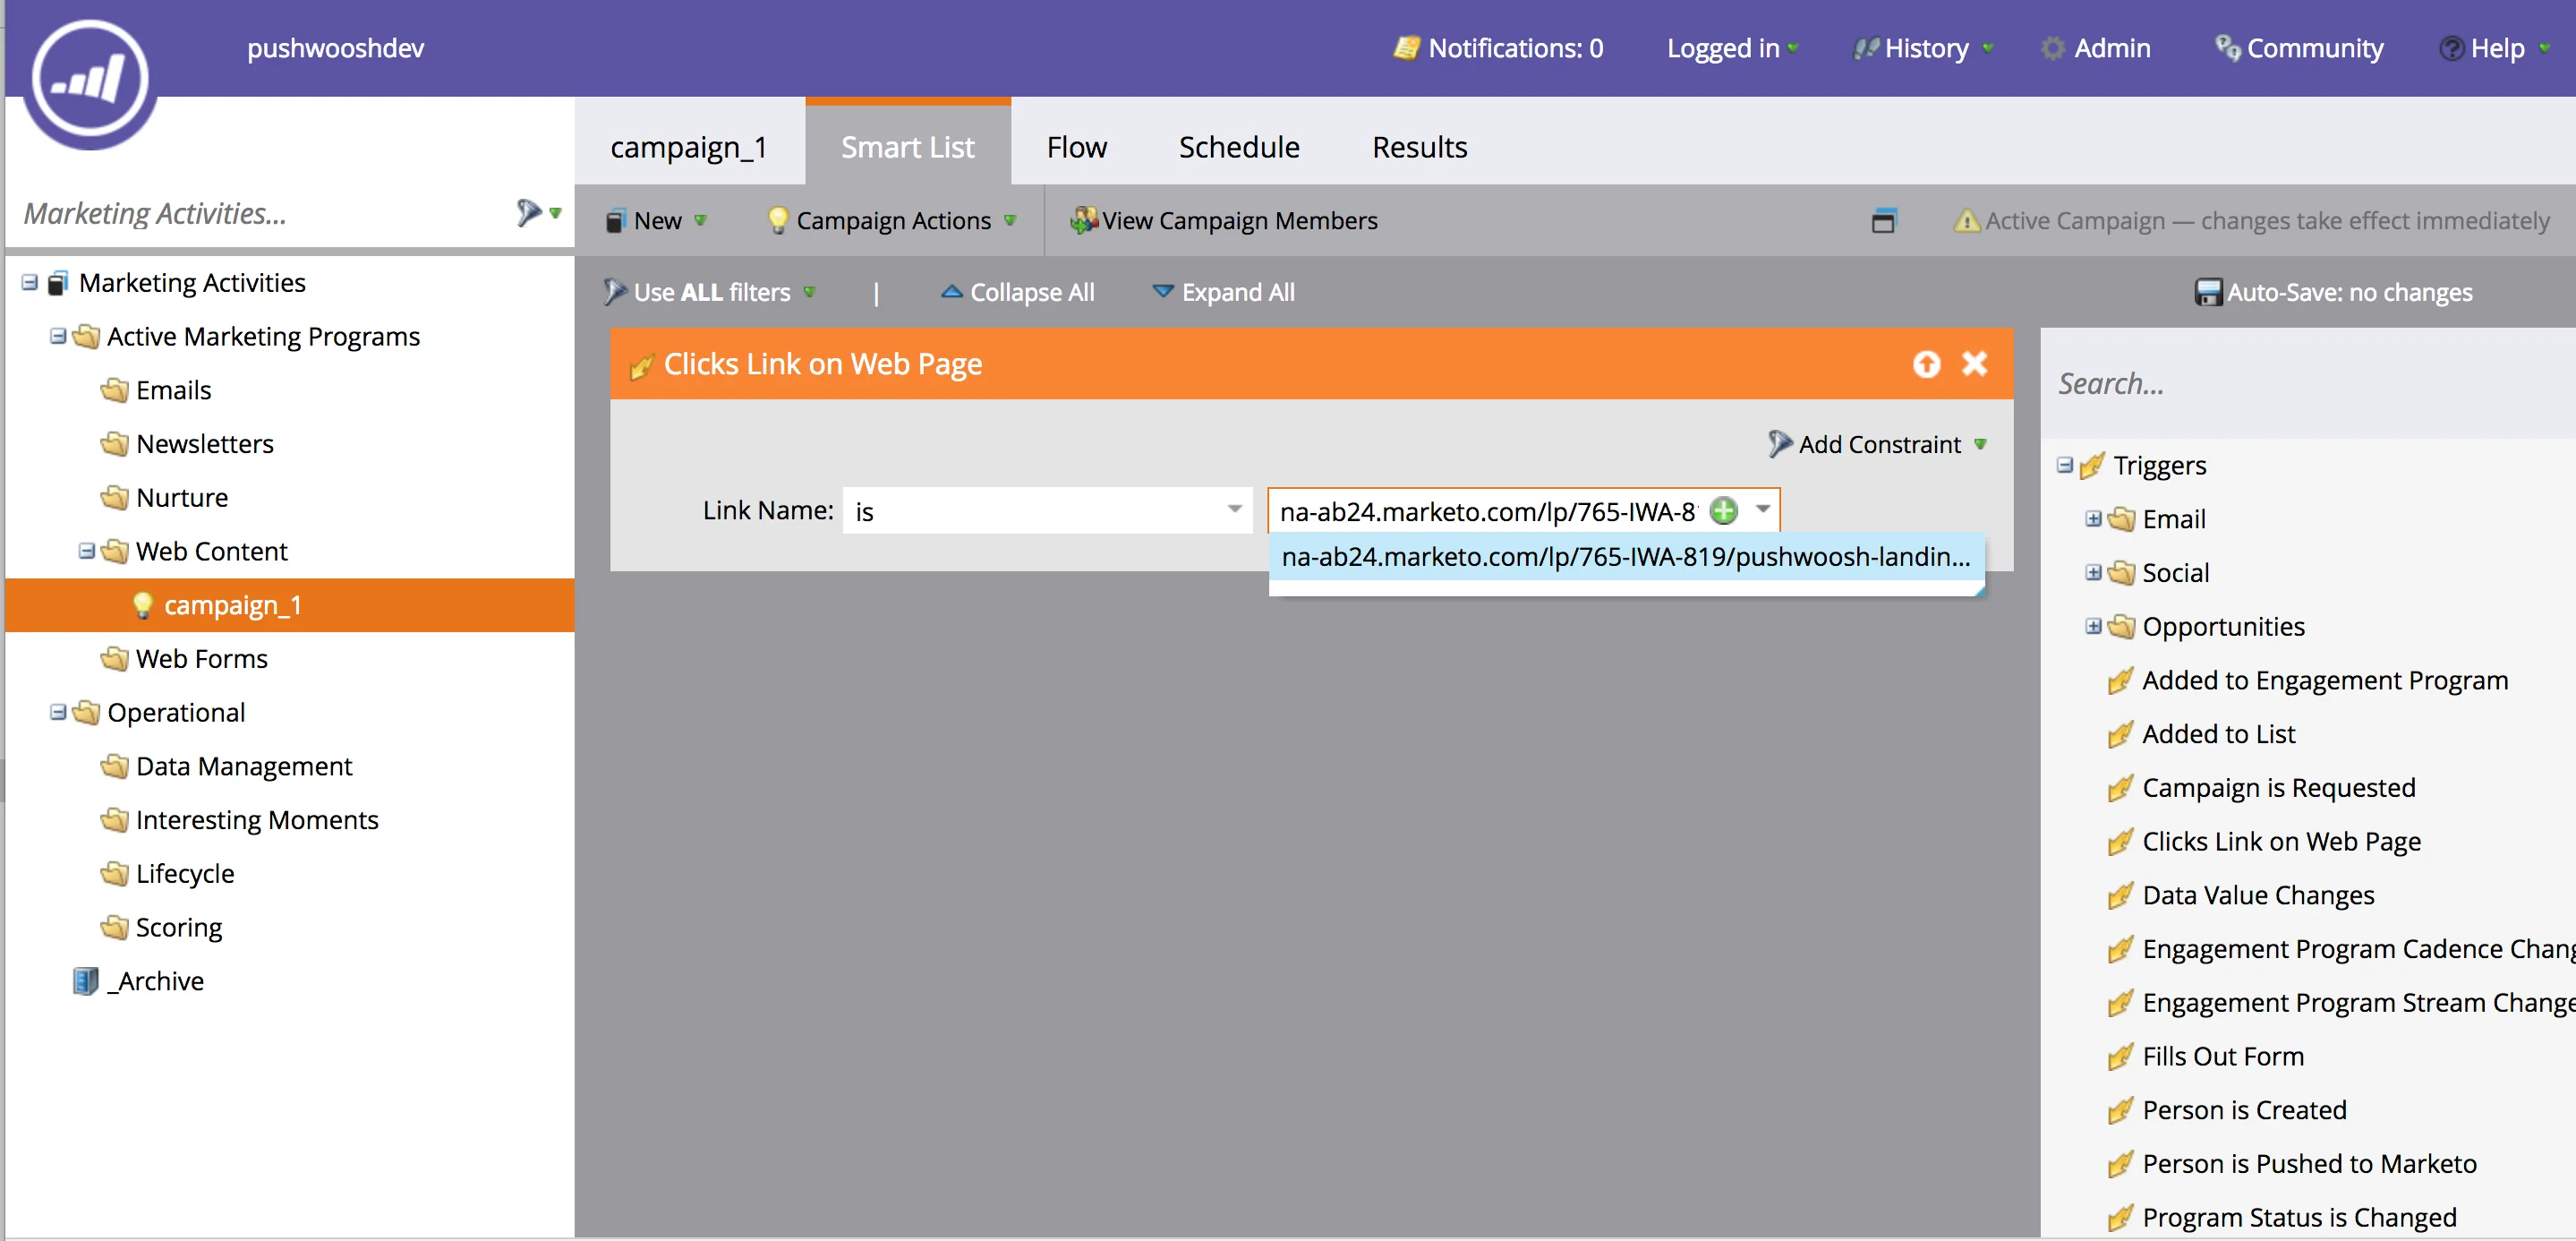 b. 在“Flow”部分选择“send_push” Webhook
 * 现在打开登录页面 URL
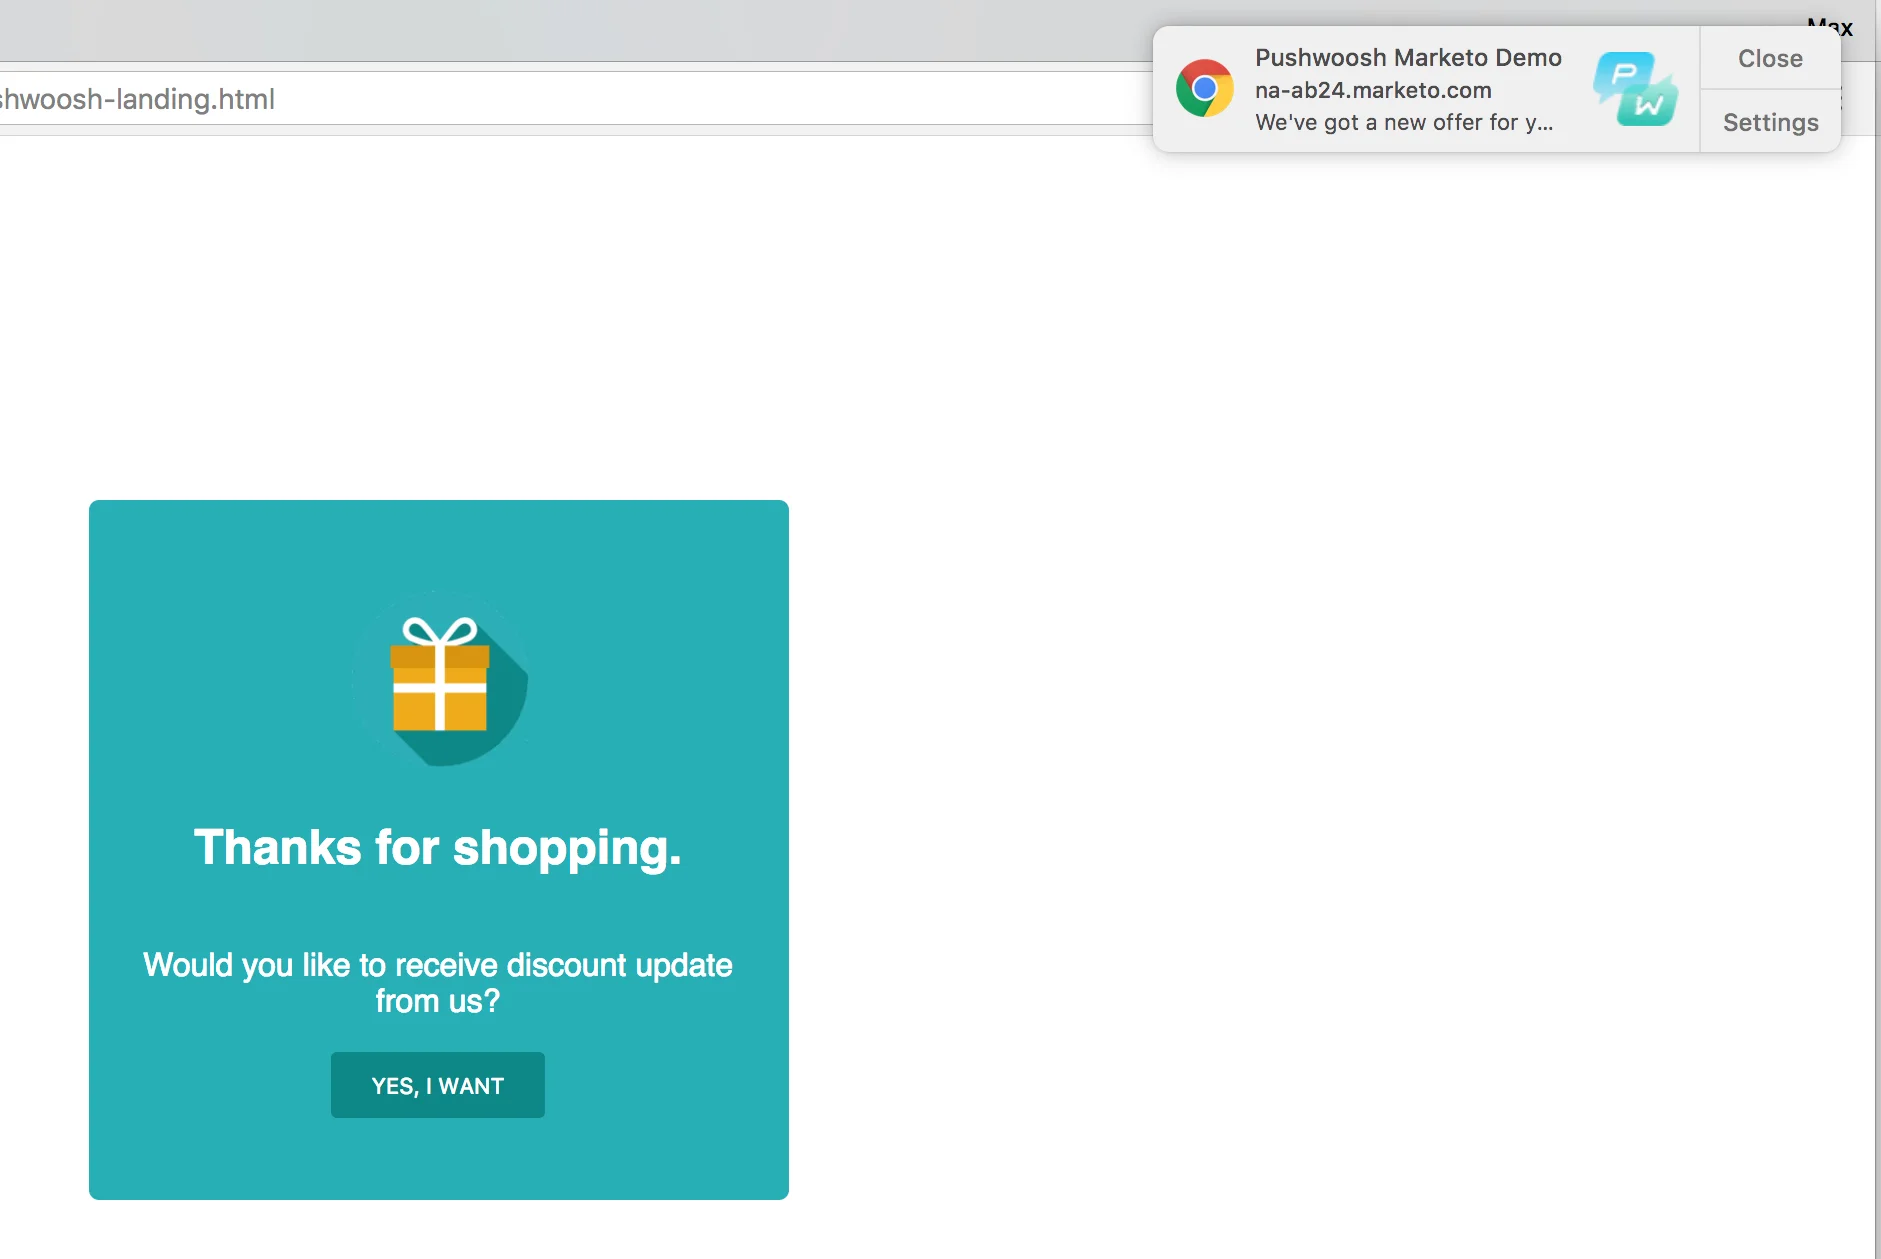
* 点击 **“Yes, I Want”** 按钮打开推送订阅对话框
* 订阅推送通知
* 点击 **“Send me an Offer!”** 链接
您已收到 Marketo 自动推送通知!
* 现在打开登录页面 URL
* 点击 **“Yes, I Want”** 按钮打开推送订阅对话框
* 订阅推送通知
* 点击 **“Send me an Offer!”** 链接
您已收到 Marketo 自动推送通知!