# iOS App Clips
App Clips (轻应用) 允许用户在不下载完整应用的情况下快速完成任务。通过 Pushwoosh,您可以向 App Clip 用户发送推送通知 — 当 App Clip 打开时,iOS 会自动授予 **8 小时的通知访问权限**。
## 您需要什么
- Pushwoosh iOS SDK **7.0.33+**
- Xcode 15+
- 为您的 App Clip 提供一个 **独立的 Pushwoosh 应用**(不同的 bundle ID = 独立的应用)
- 一台用于测试的真实设备(推送令牌在模拟器上不起作用)
## 1. 创建一个 Pushwoosh 应用
您的 App Clip 有一个不同的 bundle ID(例如 `com.yourapp.Clip`),因此它需要一个 **独立的 Pushwoosh 应用** 及其自己的 APNs 密钥。
1. 前往 [Pushwoosh Control Panel](https://app.pushwoosh.com/)
2. 使用 App Clip 的 bundle ID 创建一个新应用
3. 上传您的 APNs 身份验证密钥
4. 复制 **Application Code** 和 **API Token**
## 2. 创建一个 App Clip target
1. 在 Xcode 中:**File → New → Target → App Clip**
2. 将 **Push Notifications** 功能添加到 App Clip target
有关添加功能的详细截图,请参阅 [基本集成指南](/zh/developer/pushwoosh-sdk/ios-sdk/setting-up-pushwoosh-ios-sdk-7-0/basic-integration-guide/)。
## 3. 添加 Pushwoosh 框架
在 App Clip target 的 **Build Phases → Link Binary With Libraries** 中,添加:
- `PushwooshFramework.framework`
- `PushwooshCore.framework`
- `PushwooshBridge.framework`
## 4. 配置 Info.plist
```xml
Pushwoosh_APPID
XXXXX-XXXXX
Pushwoosh_API_TOKEN
YOUR_API_TOKEN
NSAppClip
NSAppClipRequestEphemeralUserNotification
NSAppClipRequestLocationConfirmation
UIBackgroundModes
remote-notification
```
## 5. 初始化 SDK
```swift
import SwiftUI
import PushwooshFramework
class AppClipDelegate: NSObject, UIApplicationDelegate, PWMessagingDelegate {
func application(_ application: UIApplication,
didFinishLaunchingWithOptions launchOptions: [UIApplication.LaunchOptionsKey: Any]? = nil) -> Bool {
Pushwoosh.configure.delegate = self
Pushwoosh.configure.registerForPushNotifications()
return true
}
func application(_ application: UIApplication,
didRegisterForRemoteNotificationsWithDeviceToken deviceToken: Data) {
Pushwoosh.configure.handlePushRegistration(deviceToken)
}
func application(_ application: UIApplication,
didFailToRegisterForRemoteNotificationsWithError error: Error) {
Pushwoosh.configure.handlePushRegistrationFailure(error as NSError)
}
func application(_ application: UIApplication,
didReceiveRemoteNotification userInfo: [AnyHashable: Any],
fetchCompletionHandler completionHandler: @escaping (UIBackgroundFetchResult) -> Void) {
Pushwoosh.configure.handlePushReceived(userInfo)
completionHandler(.noData)
}
func pushwoosh(_ pushwoosh: Pushwoosh, onMessageOpened message: PWMessage) {
print("Push opened: \(message.payload ?? [:])")
}
}
@main
struct YourAppClip: App {
@UIApplicationDelegateAdaptor(AppClipDelegate.self) var appDelegate
var body: some Scene {
WindowGroup {
ContentView()
}
}
}
```
```swift
import UIKit
import PushwooshFramework
@main
class AppDelegate: UIResponder, UIApplicationDelegate, PWMessagingDelegate {
func application(_ application: UIApplication,
didFinishLaunchingWithOptions launchOptions: [UIApplication.LaunchOptionsKey: Any]?) -> Bool {
Pushwoosh.configure.delegate = self
Pushwoosh.configure.registerForPushNotifications()
return true
}
func application(_ application: UIApplication,
didRegisterForRemoteNotificationsWithDeviceToken deviceToken: Data) {
Pushwoosh.configure.handlePushRegistration(deviceToken)
}
func application(_ application: UIApplication,
didFailToRegisterForRemoteNotificationsWithError error: Error) {
Pushwoosh.configure.handlePushRegistrationFailure(error as NSError)
}
func application(_ application: UIApplication,
didReceiveRemoteNotification userInfo: [AnyHashable: Any],
fetchCompletionHandler completionHandler: @escaping (UIBackgroundFetchResult) -> Void) {
Pushwoosh.configure.handlePushReceived(userInfo)
completionHandler(.noData)
}
func pushwoosh(_ pushwoosh: Pushwoosh, onMessageOpened message: PWMessage) {
print("Push opened: \(message.payload ?? [:])")
}
}
```
通过临时权限,iOS 会自动授予 8 小时的推送访问权限。如果您想在 **不显示权限对话框** 的情况下使用临时模式,请直接调用 `UIApplication.shared.registerForRemoteNotifications()`,而不是 `Pushwoosh.configure.registerForPushNotifications()`。
要请求 **永久** 推送权限(标准对话框),请如上所示使用 `Pushwoosh.configure.registerForPushNotifications()`。
## 临时推送权限
当用户打开您的 App Clip 时,iOS 会在不询问的情况下授予 **8 小时** 的推送通知访问权限。8 小时后,该权限将过期。用户必须重新打开 App Clip 才能再获得 8 小时的权限。
要在 **不显示权限对话框** 的情况下获取 8 小时的推送令牌:
```swift
UIApplication.shared.registerForRemoteNotifications()
```
要获取 **永久** 推送令牌(显示标准权限对话框):
```swift
Pushwoosh.configure.registerForPushNotifications()
```
## 限制
| 限制 | 详情 |
|---|---|
| **无富媒体通知** | App Clips 无法包含通知服务扩展 — 没有图片,没有通信通知 |
| **大小限制** | 15 MB (iOS 16) / 50 MB (iOS 17+) |
| **8 小时推送窗口** | 临时权限在 8 小时后过期 |
| **无后台处理** | 静默推送功能有限 |
| **Device ID** | `identifierForVendor` 返回零 — SDK 会自动处理此问题 (7.0.33+) |
## 效果展示
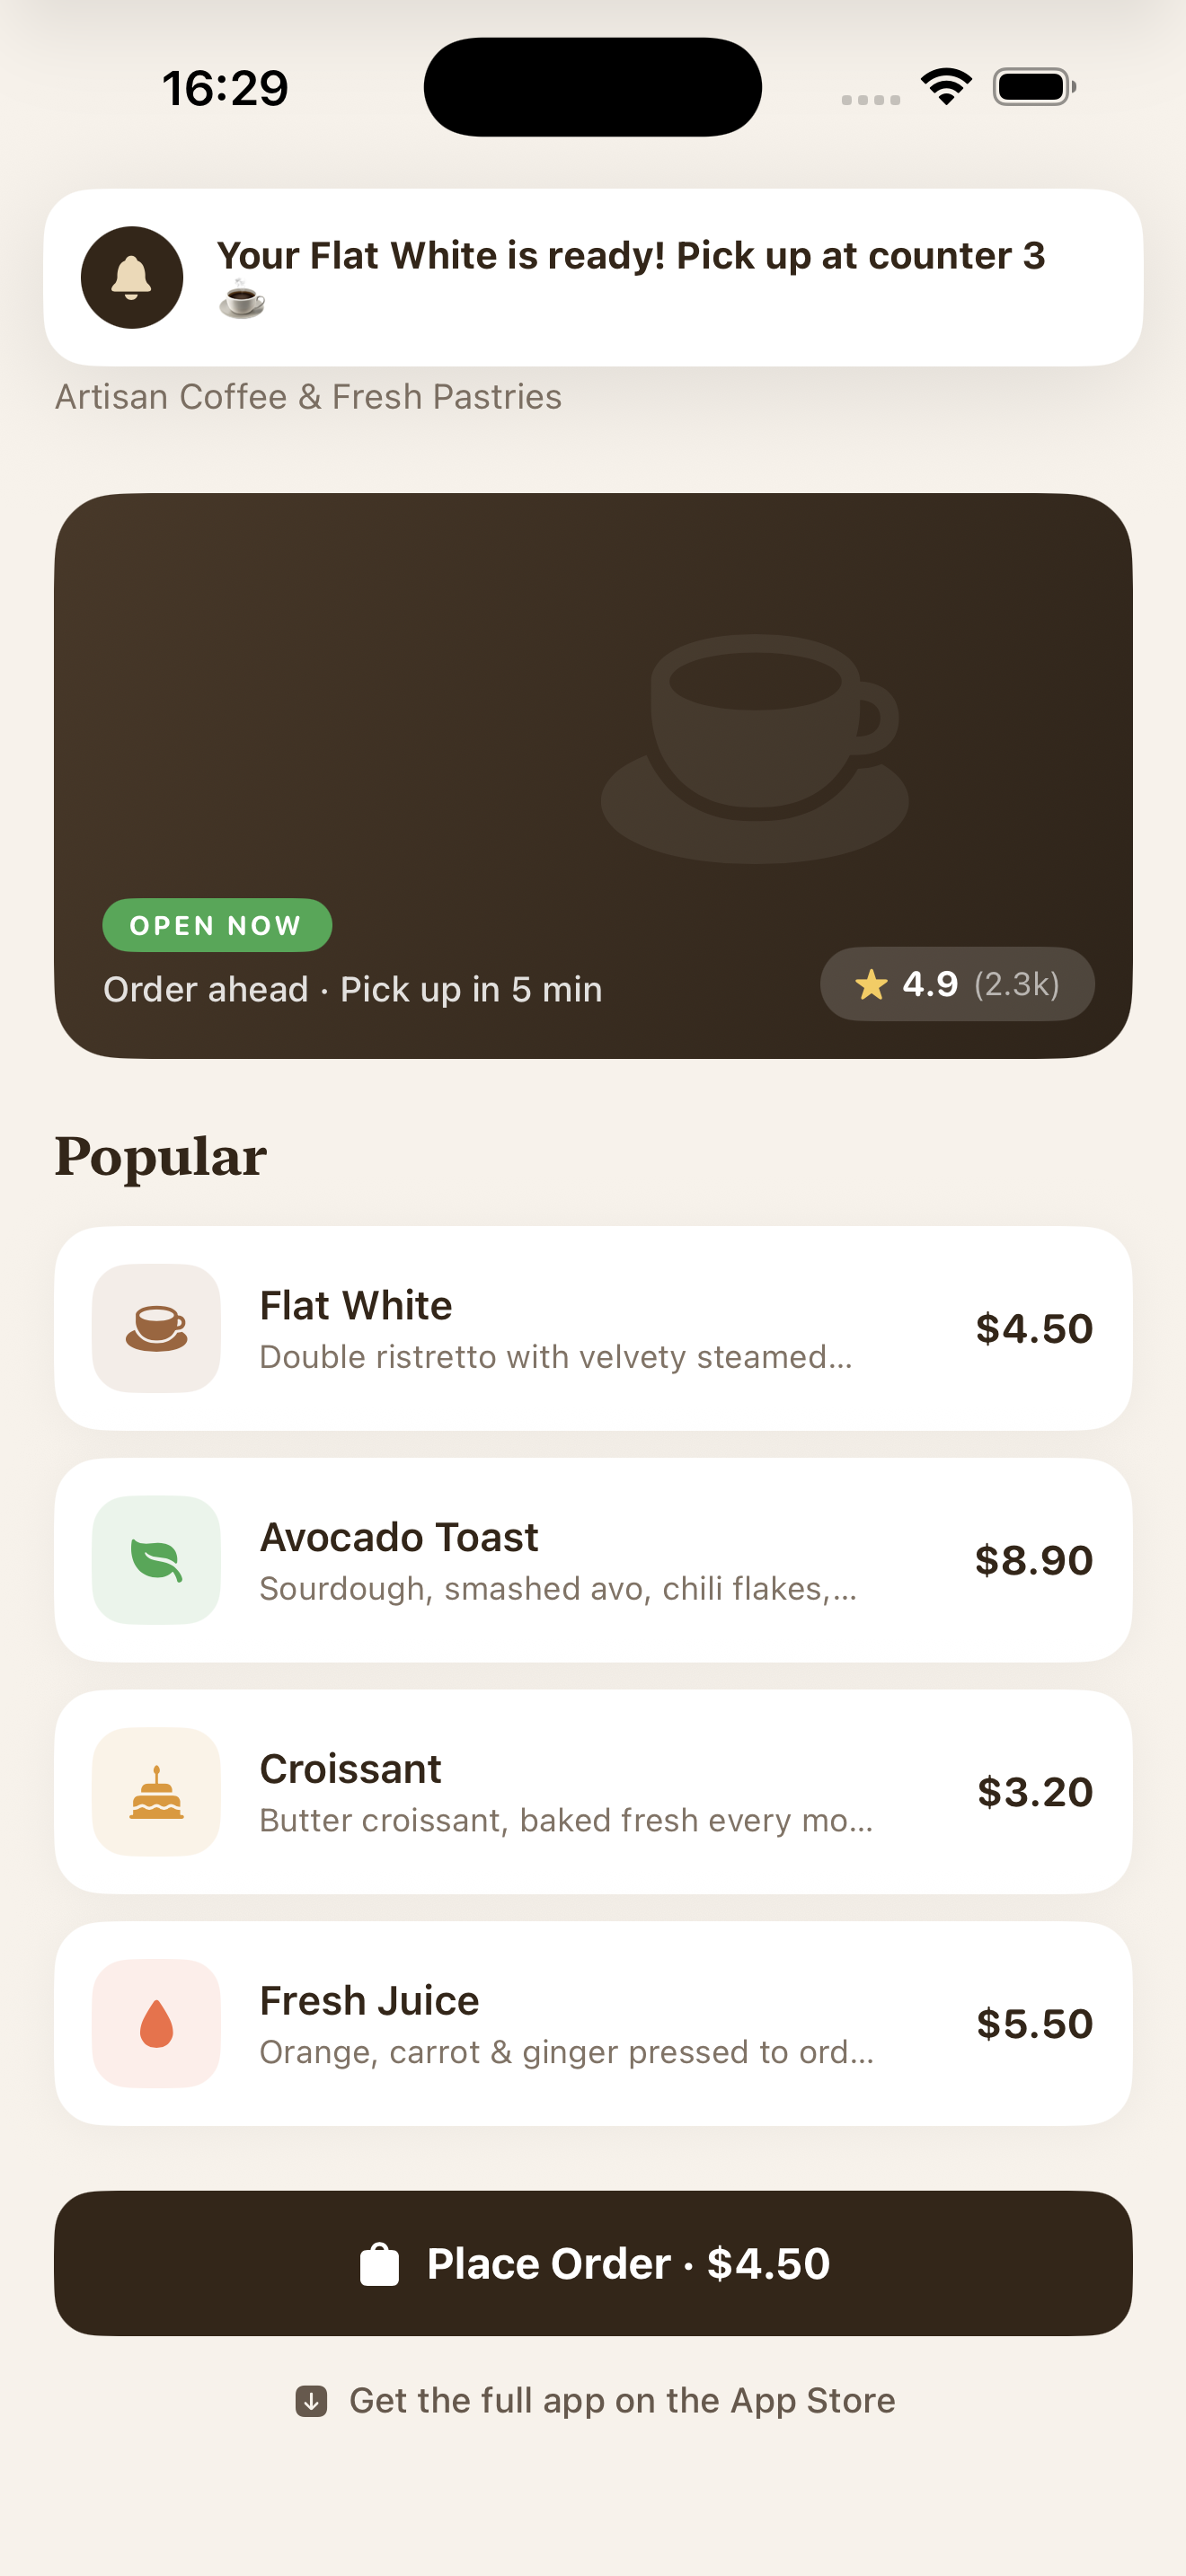 *在具有临时权限的 App Clip 中收到的推送通知*