# 发送自定义数据
本指南将帮助您更好地理解如何通过推送通知 payload 将自定义数据传递给您的应用,以便您的应用能够对这些推送做出反应并相应地执行各种操作。
处理自定义数据的方式可能因您的业务目标而异。在本文中,我们将展示一些解析自定义数据和执行简单操作的基本示例:
* 更改应用的背景颜色;
* 在您的应用中打开一个自定义页面。
## 前提条件
本指南涵盖 iOS 原生开发。我们假设您已经按照 [iOS 入门指南](/zh/developer/pushwoosh-sdk/ios-sdk/setting-up-pushwoosh-ios-sdk/quick-start/) 配置了一个 iOS 示例应用程序,并且能够接收推送通知。
在 `AppDelegate` 的 `didFinishLaunchingWithOptions` 函数中,我们将使用 `self.viewController` 作为推送通知处理的委托:
```swift
func application(_ application: UIApplication, didFinishLaunchingWithOptions launchOptions: [UIApplication.LaunchOptionsKey: Any]?) -> Bool {
Pushwoosh.sharedInstance().delegate = self.viewController
Pushwoosh.sharedInstance().registerForPushNotifications()
if let launchOptions = launchOptions {
Pushwoosh.sharedInstance().handlePushReceived(launchOptions)
}
return true
}
```
我们的 `ViewController` 实现了 `PWMessagingDelegate` 协议:
```swift
extension ViewController: PWMessagingDelegate
```
因此,它具有处理接收到的推送通知的 `onMessageOpened` 函数:
```swift
// User pressed on the push notification
func pushwoosh(_ pushwoosh: Pushwoosh, onMessageOpened message: PWMessage) {}
```
## 打开另一个 ViewController 并更改背景颜色
现在我们从推送 payload 中获取 `customData`。例如,让我们更改视图的背景颜色和折扣百分比。我们假设自定义数据将包含 `“r”`、`“g”`、`“b”` 和 `“d”` 项,格式为 JSON 对象,如下所示:
```swift
guard let customDataJson = message.customData,
let redString = customDataJson["r"] as? String,
let greenString = customDataJson["g"] as? String,
let blueString = customDataJson["b"] as? String,
let discount = customDataJson["d"] as? String else {
return
}
setViewBackgroundColor(red: redString, green: greenString, blue: blueString, discount: discount)
```
我们将使用以下函数打开一个新的 ViewController 并设置背景颜色和折扣百分比:
```swift
func setViewBackgroundColor(red: String, green: String, blue: String, discount: String) {
let red = CGFloat((red as NSString).floatValue)
let green = CGFloat((green as NSString).floatValue)
let blue = CGFloat((blue as NSString).floatValue)
let color = UIColor(red: red / 255.0, green: green / 255.0, blue: blue / 255.0, alpha: 1)
if let topController = UIApplication.shared.topMostController() {
let storyboard = UIStoryboard(name: "Main", bundle: nil)
if let customViewController = storyboard.instantiateViewController(withIdentifier: "custom_page") as? CustomPageViewController {
customViewController.discount = discount
customViewController.bgColor = color
topController.present(customViewController, animated: true, completion: nil)
}
}
}
```
让我们测试一下我们的示例。导航到 Pushwoosh Journey,并将一个 **Push 元素** 添加到画布上。接下来,点击 **创建新内容**。在打开的 Push 内容表单中,输入任意推送通知文本。
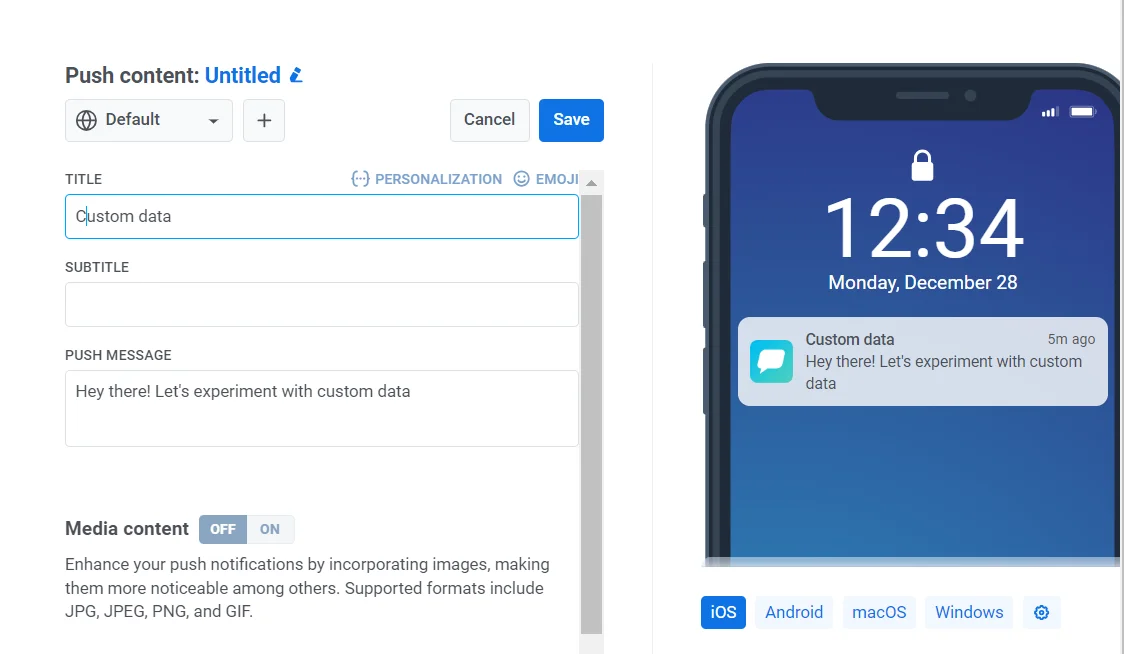 然后,打开 `发送自定义数据` 开关。将 JSON 插入到“自定义数据”字段中。
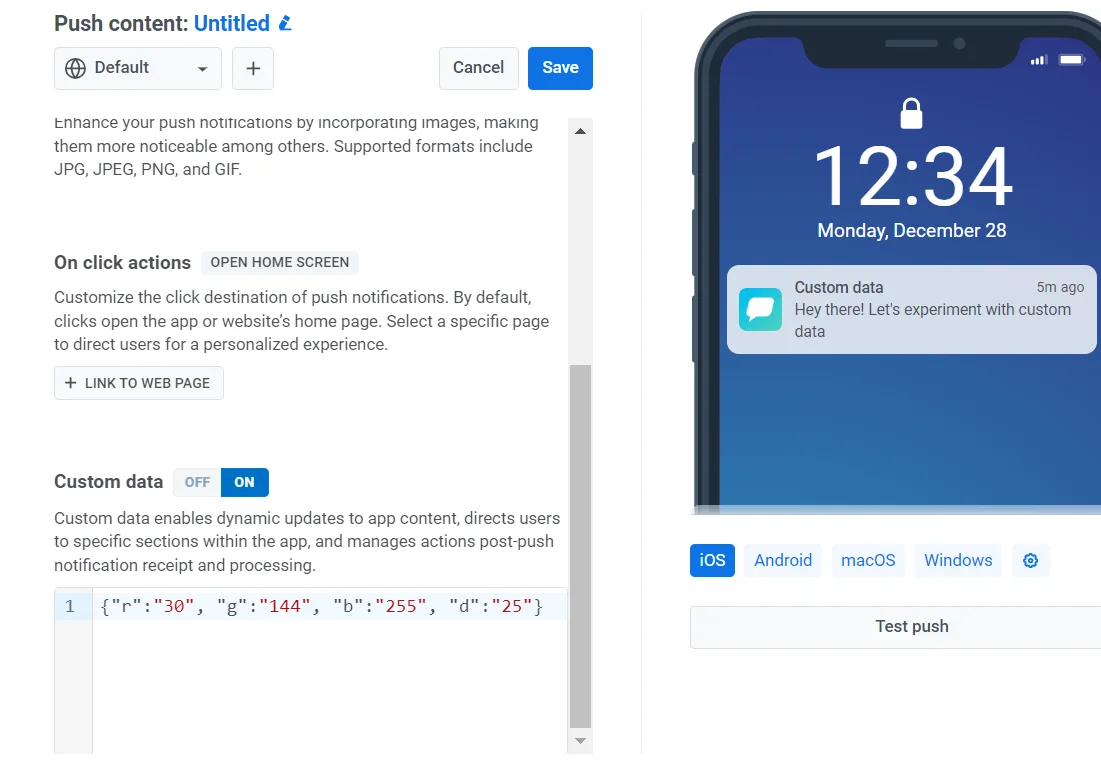
由于我们已决定自定义数据格式是一个包含 `“r”`、`“g”`、`“b”` 值的 JSON 对象,我们需要在 Control Panel 中使用 `“custom data”` 字段,并用 JSON 对象 `{"r":"30", "g":"144", "b":"255", "d":"25"}` 填充它:
然后,打开 `发送自定义数据` 开关。将 JSON 插入到“自定义数据”字段中。
由于我们已决定自定义数据格式是一个包含 `“r”`、`“g”`、`“b”` 值的 JSON 对象,我们需要在 Control Panel 中使用 `“custom data”` 字段,并用 JSON 对象 `{"r":"30", "g":"144", "b":"255", "d":"25"}` 填充它:
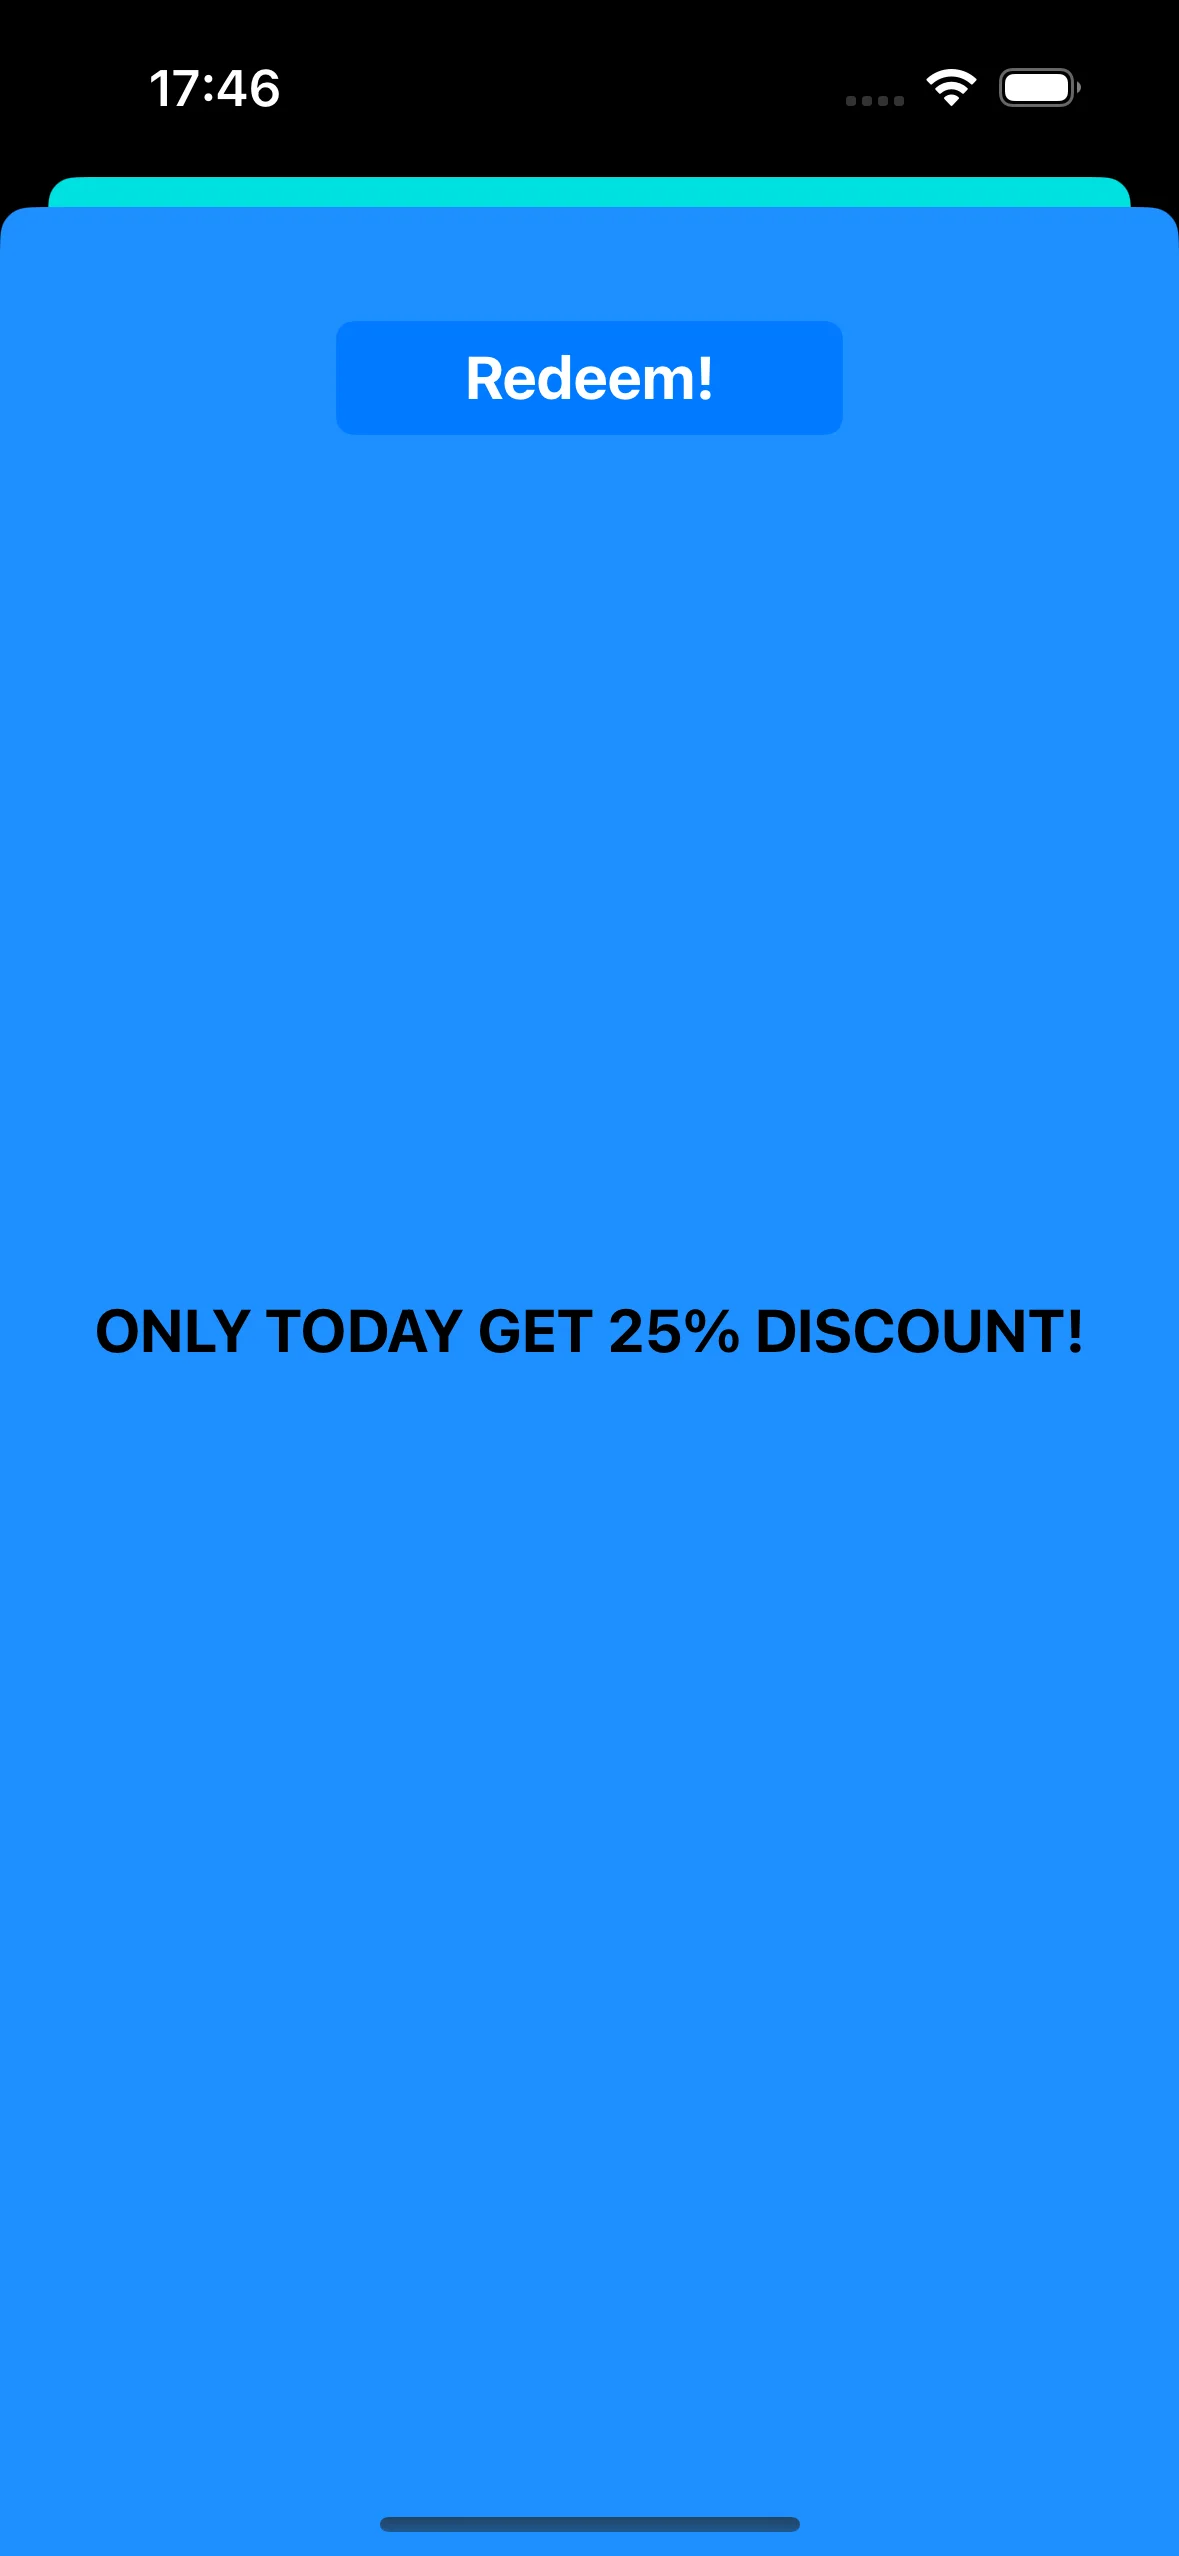
 点击推送通知后,`CustomPageViewController` 会打开,背景颜色被设置,折扣也被应用:
 `CustomPageViewController` 代码:
```swift
class CustomPageViewController: UIViewController {
var bgColor: UIColor?
var discount: String?
@IBOutlet weak var titleLabel: UILabel!
override func viewDidLoad() {
super.viewDidLoad()
self.view.backgroundColor = self.bgColor
if self.discount != nil {
self.titleLabel?.text = "ONLY TODAY GET \(self.discount!)% DISCOUNT!"
}
}
func showPromoPage(discount: String) {
let vc = CustomPageViewController()
vc.bgColor = self.view.backgroundColor
vc.discount = discount
vc.modalTransitionStyle = UIModalTransitionStyle.crossDissolve
if self.presentedViewController != nil {
self.dismiss(animated: true, completion: {
self.present(vc, animated: true, completion: nil)
})
} else {
self.present(vc, animated: true, completion: nil)
}
}
@IBAction func closeButtonAction(_ sender: Any) {
self.dismiss(animated: true)
}
}
```
我们假设折扣值将作为推送通知 payload 的 JSON 中的 `“d”` 参数传来。由于推送通知 payload 的大小有限,您最好为参数使用简短的名称。
```swift
guard let customDataJson = message.customData,
let redString = customDataJson["r"] as? String,
let greenString = customDataJson["g"] as? String,
let blueString = customDataJson["b"] as? String,
let discount = customDataJson["d"] as? String else {
return
}
```
您可以编写代码来初始化和打开不同的 View Controller,具体取决于您在推送通知 payload 中传递的参数。
## 打开 A/B 测试视图控制器
让我们考虑推送通知中自定义数据的另一个用例。例如,我们需要为一个用户分群打开一个视图控制器,为另一个不同的用户分群打开另一个视图控制器。简而言之,我们可以使用自定义数据在您的应用程序中进行 A/B 测试。
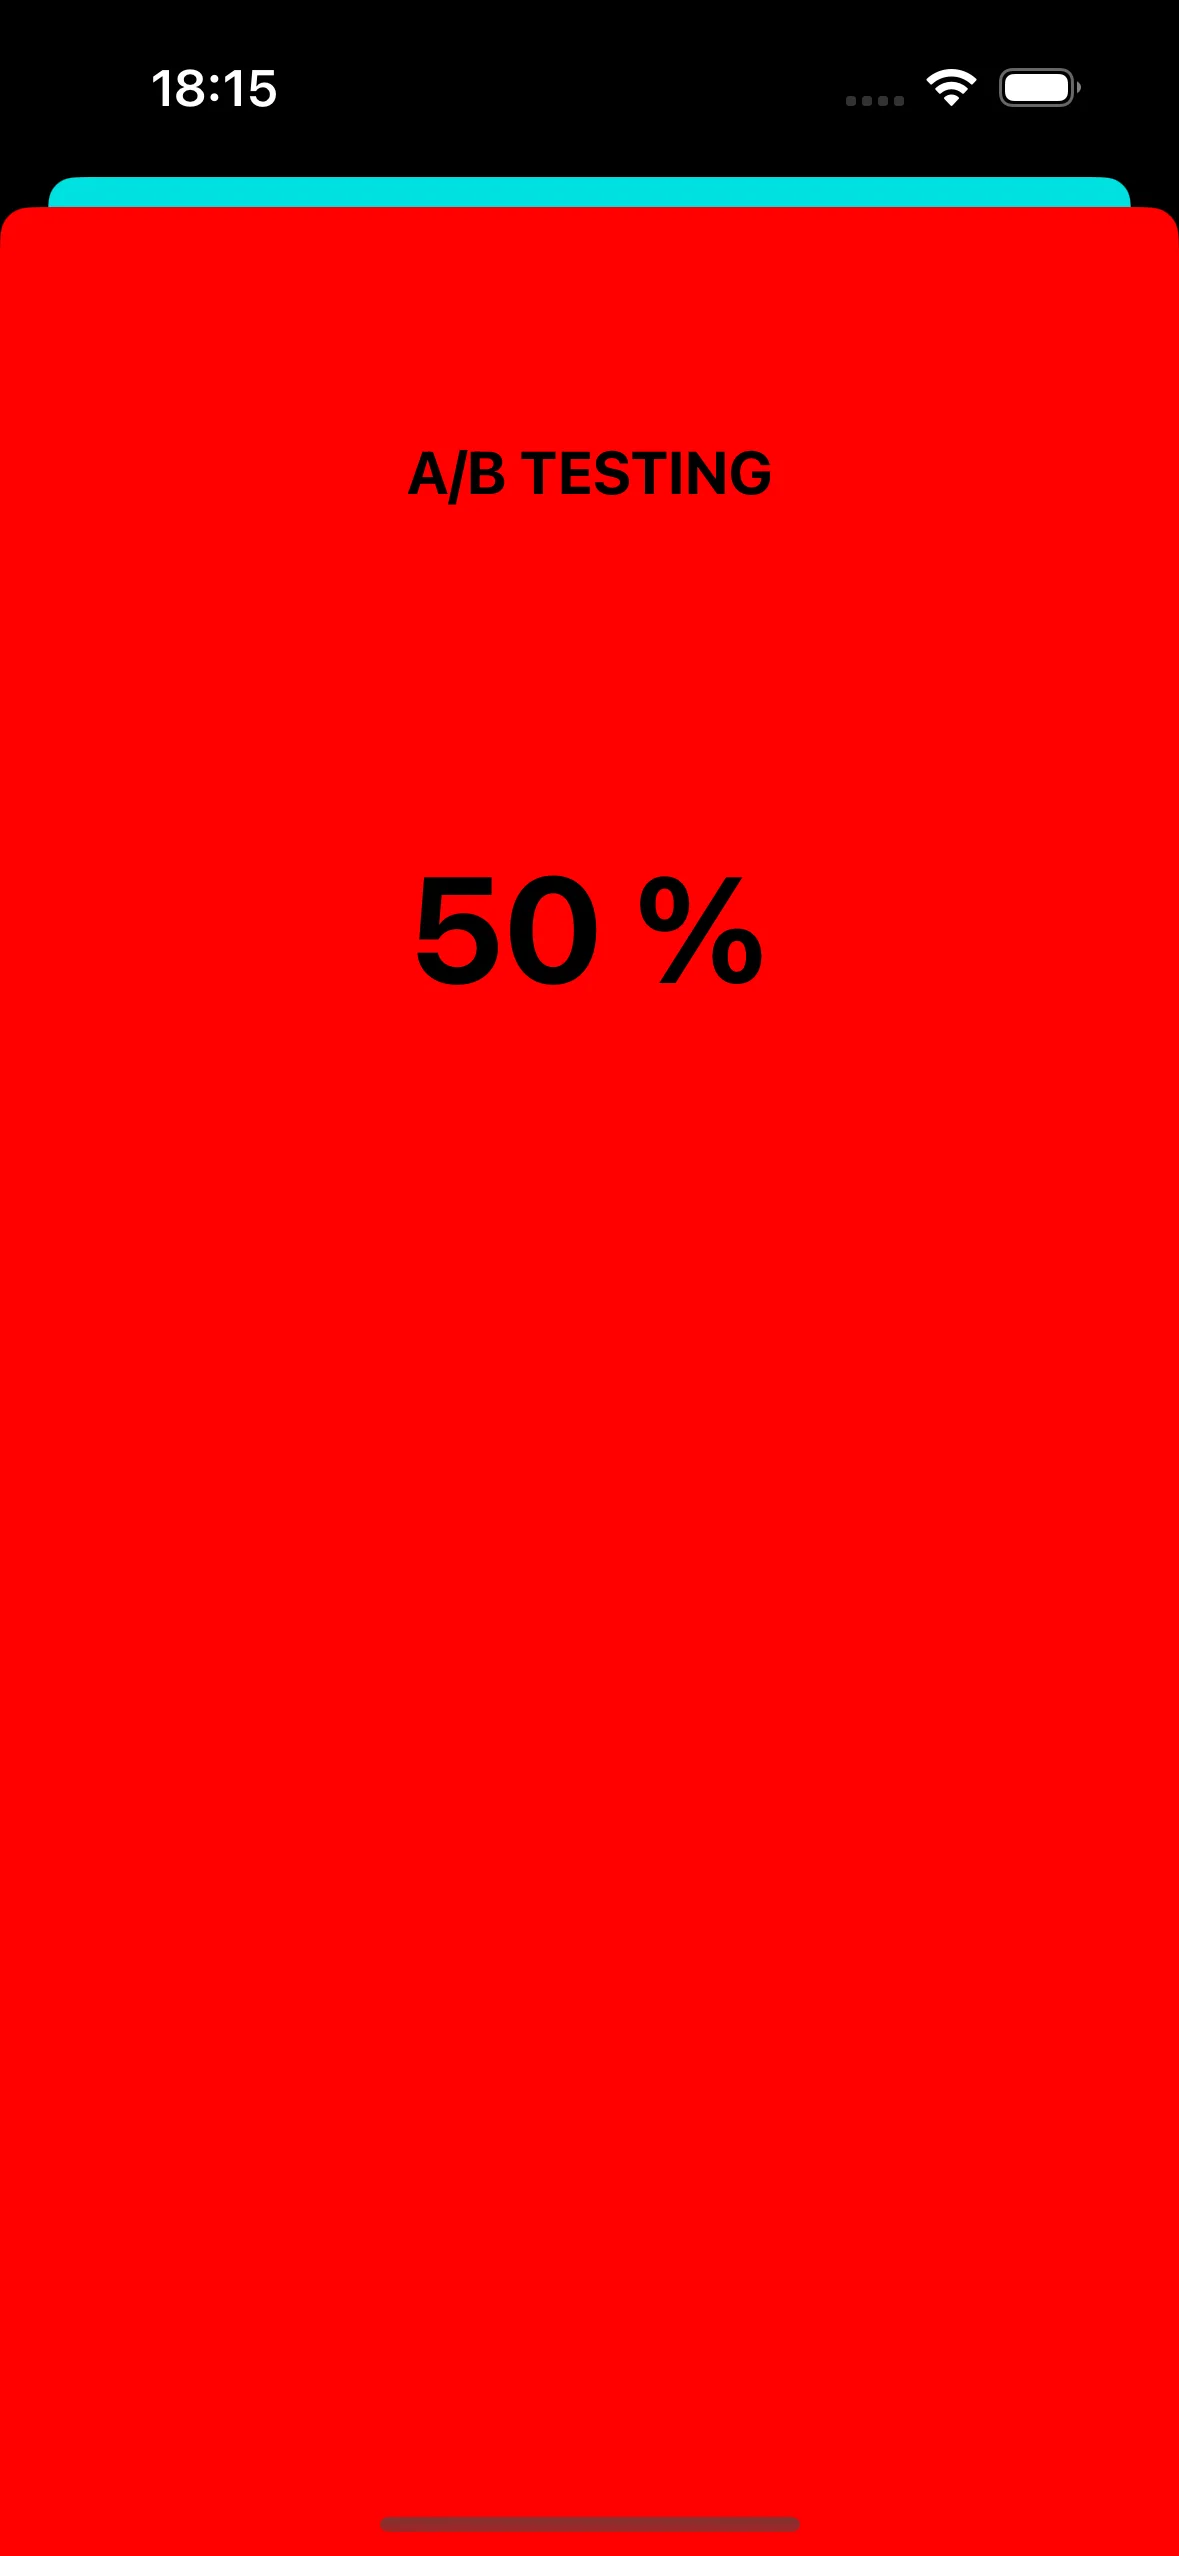
让我们创建两个视图控制器。一个控制器 (A) 将以一个折扣值打开,而第二个控制器 (B) 将以不同的折扣参数打开。
现在让我们编写代码,根据推送通知 payload 打开相应的视图控制器:
```swift
func pushwoosh(_ pushwoosh: Pushwoosh, onMessageOpened message: PWMessage) {
// MARK: - A/B Testing via Custom Data
guard let customDataJson = message.customData,
let viewController = customDataJson["vc"] as? String else {
return
}
if viewController == "A" {
setControllerA()
} else if viewController == "B" {
setControllerB()
}
}
func setControllerA() {
if let topController = UIApplication.shared.topMostController() {
let storyboard = UIStoryboard(name: "Main", bundle: nil)
if let customViewController = storyboard.instantiateViewController(withIdentifier: "a_vc") as? AViewController {
customViewController.discountA = "50"
topController.present(customViewController, animated: true, completion: nil)
}
}
}
func setControllerB() {
if let topController = UIApplication.shared.topMostController() {
let storyboard = UIStoryboard(name: "Main", bundle: nil)
if let customViewController = storyboard.instantiateViewController(withIdentifier: "b_vc") as? BViewController {
customViewController.discountB = "100"
topController.present(customViewController, animated: true, completion: nil)
}
}
}
```
将您的 JSON 添加到“自定义数据”字段中。
```
{
"vc": "A"
}
// Choose your Custom Data (A or B)
{
"vc": "B"
}
```
根据您在推送 payload 中发送的自定义数据,即 `'vc': 'A'` 或 `'vc': 'B'`,一部分用户将打开一个控制器,而另一部分用户将打开另一个不同的控制器。
#### 视图控制器 “A”
`CustomPageViewController` 代码:
```swift
class CustomPageViewController: UIViewController {
var bgColor: UIColor?
var discount: String?
@IBOutlet weak var titleLabel: UILabel!
override func viewDidLoad() {
super.viewDidLoad()
self.view.backgroundColor = self.bgColor
if self.discount != nil {
self.titleLabel?.text = "ONLY TODAY GET \(self.discount!)% DISCOUNT!"
}
}
func showPromoPage(discount: String) {
let vc = CustomPageViewController()
vc.bgColor = self.view.backgroundColor
vc.discount = discount
vc.modalTransitionStyle = UIModalTransitionStyle.crossDissolve
if self.presentedViewController != nil {
self.dismiss(animated: true, completion: {
self.present(vc, animated: true, completion: nil)
})
} else {
self.present(vc, animated: true, completion: nil)
}
}
@IBAction func closeButtonAction(_ sender: Any) {
self.dismiss(animated: true)
}
}
```
我们假设折扣值将作为推送通知 payload 的 JSON 中的 `“d”` 参数传来。由于推送通知 payload 的大小有限,您最好为参数使用简短的名称。
```swift
guard let customDataJson = message.customData,
let redString = customDataJson["r"] as? String,
let greenString = customDataJson["g"] as? String,
let blueString = customDataJson["b"] as? String,
let discount = customDataJson["d"] as? String else {
return
}
```
您可以编写代码来初始化和打开不同的 View Controller,具体取决于您在推送通知 payload 中传递的参数。
## 打开 A/B 测试视图控制器
让我们考虑推送通知中自定义数据的另一个用例。例如,我们需要为一个用户分群打开一个视图控制器,为另一个不同的用户分群打开另一个视图控制器。简而言之,我们可以使用自定义数据在您的应用程序中进行 A/B 测试。
让我们创建两个视图控制器。一个控制器 (A) 将以一个折扣值打开,而第二个控制器 (B) 将以不同的折扣参数打开。
现在让我们编写代码,根据推送通知 payload 打开相应的视图控制器:
```swift
func pushwoosh(_ pushwoosh: Pushwoosh, onMessageOpened message: PWMessage) {
// MARK: - A/B Testing via Custom Data
guard let customDataJson = message.customData,
let viewController = customDataJson["vc"] as? String else {
return
}
if viewController == "A" {
setControllerA()
} else if viewController == "B" {
setControllerB()
}
}
func setControllerA() {
if let topController = UIApplication.shared.topMostController() {
let storyboard = UIStoryboard(name: "Main", bundle: nil)
if let customViewController = storyboard.instantiateViewController(withIdentifier: "a_vc") as? AViewController {
customViewController.discountA = "50"
topController.present(customViewController, animated: true, completion: nil)
}
}
}
func setControllerB() {
if let topController = UIApplication.shared.topMostController() {
let storyboard = UIStoryboard(name: "Main", bundle: nil)
if let customViewController = storyboard.instantiateViewController(withIdentifier: "b_vc") as? BViewController {
customViewController.discountB = "100"
topController.present(customViewController, animated: true, completion: nil)
}
}
}
```
将您的 JSON 添加到“自定义数据”字段中。
```
{
"vc": "A"
}
// Choose your Custom Data (A or B)
{
"vc": "B"
}
```
根据您在推送 payload 中发送的自定义数据,即 `'vc': 'A'` 或 `'vc': 'B'`,一部分用户将打开一个控制器,而另一部分用户将打开另一个不同的控制器。
#### 视图控制器 “A”
 #### 视图控制器 “B”
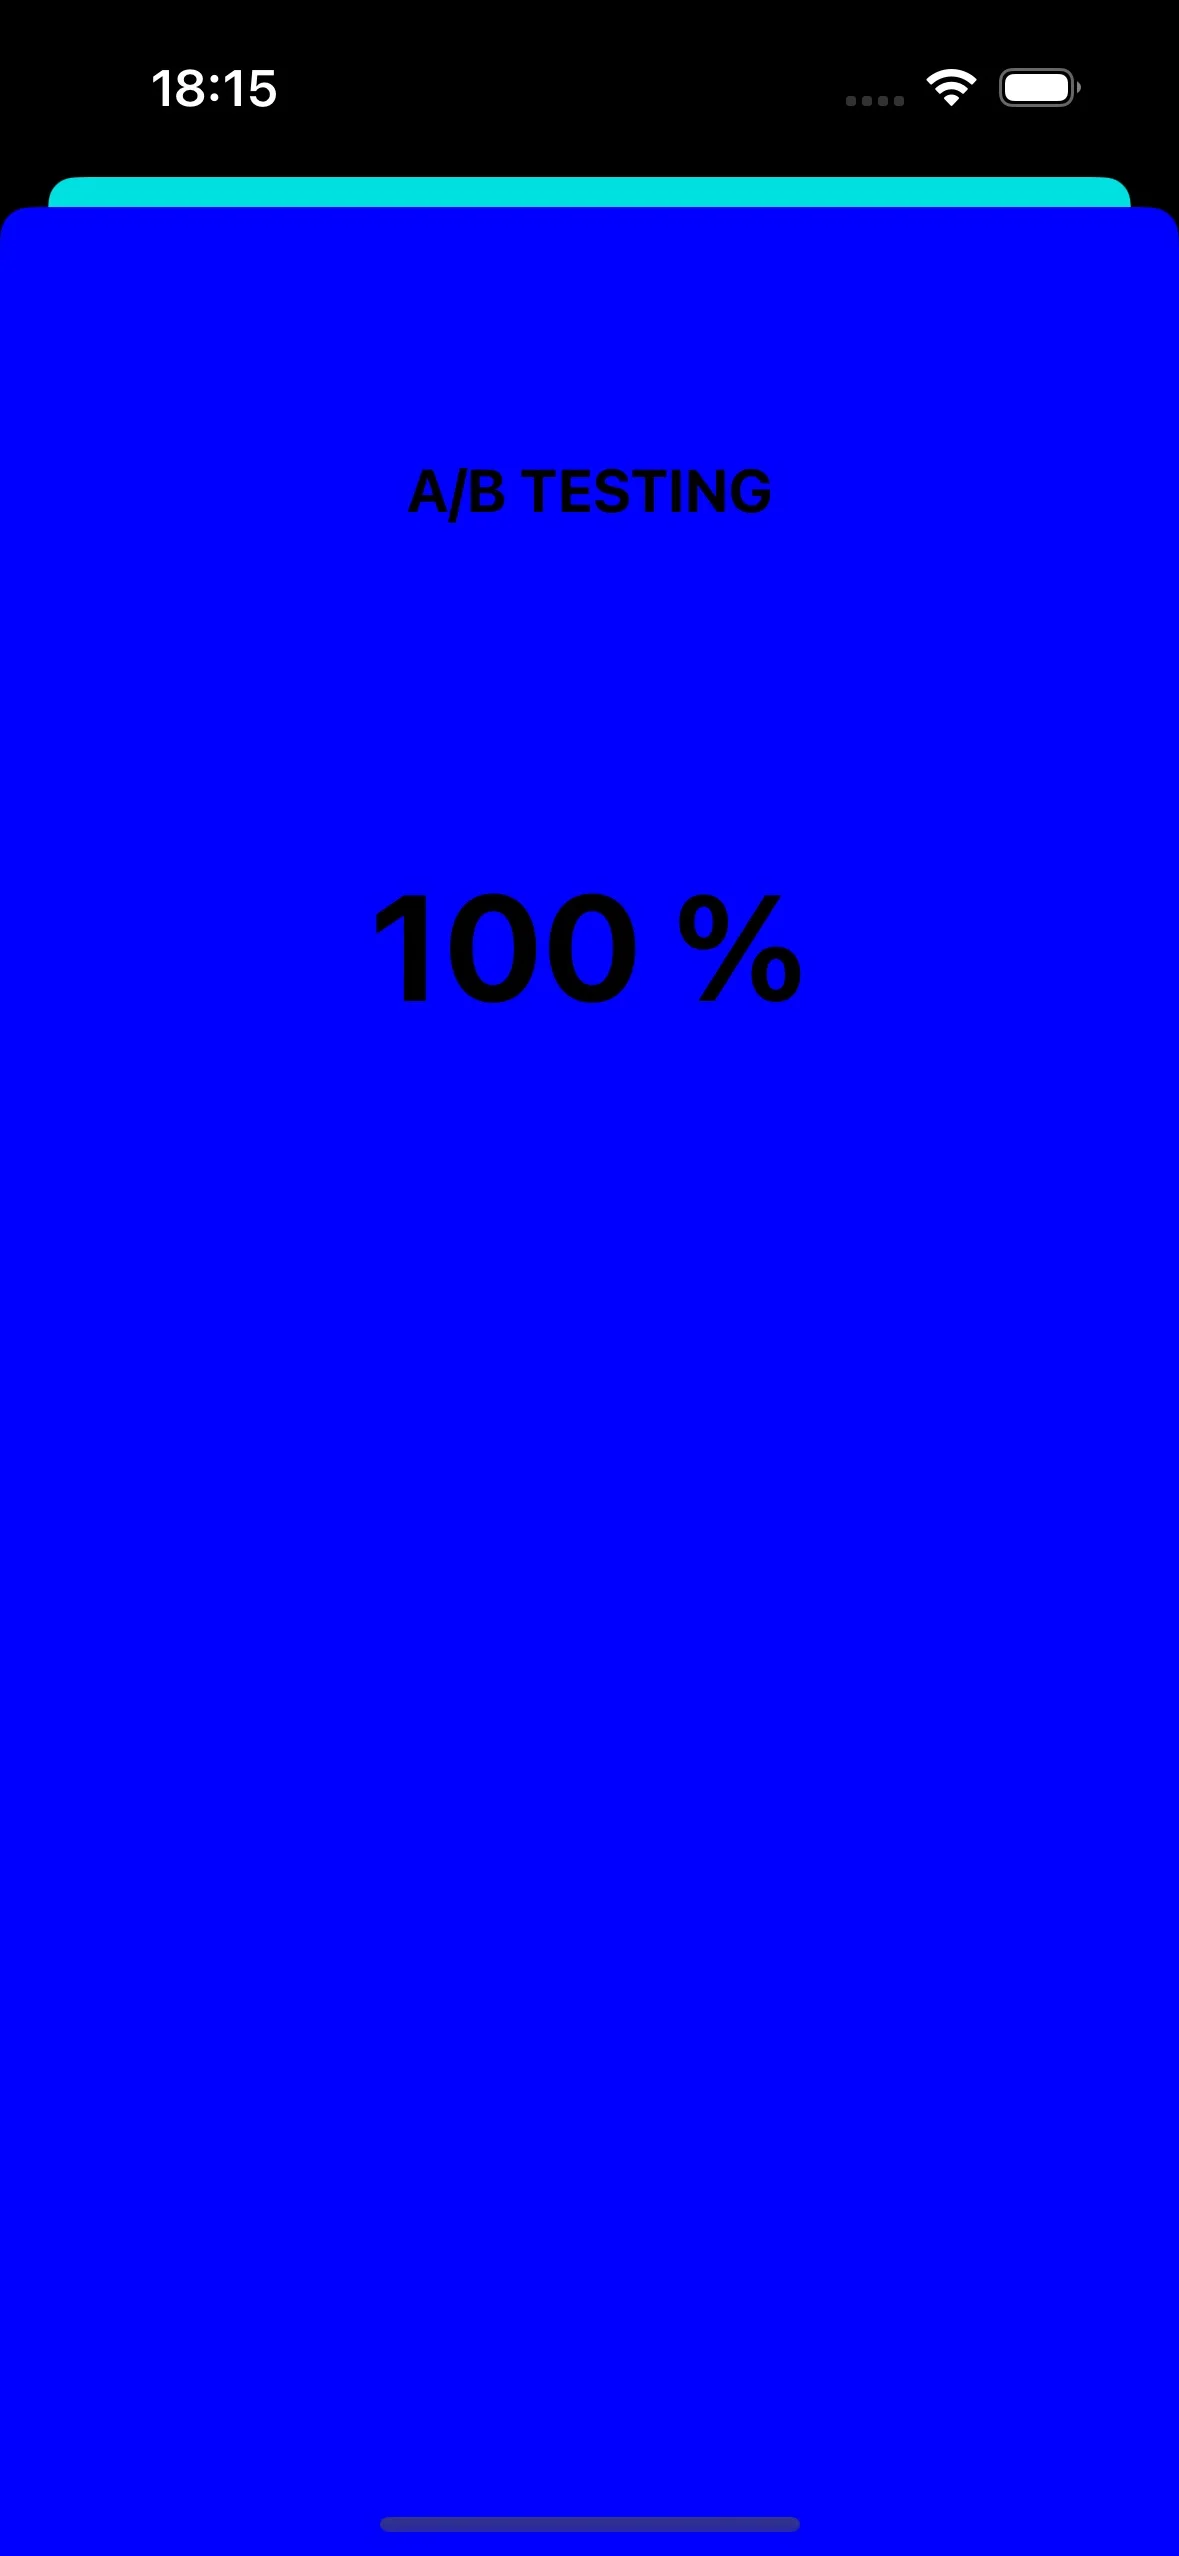 ## 通过推送通知更改应用图标
另一个关于如何在 iOS 中使用推送通知的例子是更改应用图标。
首先,让我们向 assets 中添加三个不同的图标。一个将用作默认应用图标,另外两个将根据推送通知中的自定义数据进行更改。
## 通过推送通知更改应用图标
另一个关于如何在 iOS 中使用推送通知的例子是更改应用图标。
首先,让我们向 assets 中添加三个不同的图标。一个将用作默认应用图标,另外两个将根据推送通知中的自定义数据进行更改。
 要在您的 iOS 应用程序中启用备用应用图标,您需要在 `Info.plist` 文件中添加必要的配置。以下是具体步骤:
```xml
CFBundleIcons
CFBundleAlternateIcons
AppIcon-2
CFBundleIconFiles
Icon-2
UIPrerenderedIcon
AppIcon-3
CFBundleIconFiles
Icon-3
UIPrerenderedIcon
CFBundlePrimaryIcon
CFBundleIconFiles
Icon-1
UIPrerenderedIcon
```
在 `pushwoosh(_ pushwoosh: Pushwoosh, onMessageOpened message: PWMessage)` 回调中,您可以添加代码,根据推送通知中收到的自定义数据来更改应用图标。以下是实现方法:
```swift
func pushwoosh(_ pushwoosh: Pushwoosh, onMessageOpened message: PWMessage) {
// MARK: - Change the app icon dynamically
guard let customDataJson = message.customData,
let appIcon = customDataJson["i"] as? String else {
return
}
UIApplication.shared.setAlternateIconName(appIcon) { error in
if let error = error {
print(error.localizedDescription)
} else {
print("Success!")
}
}
}
```
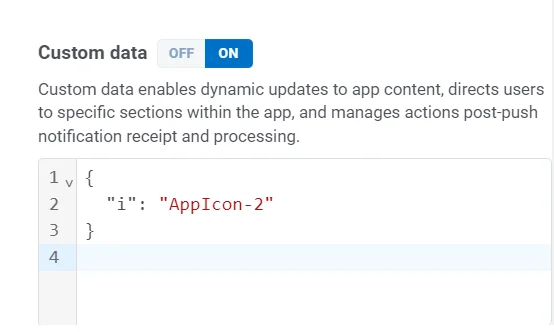
添加 JSON 代码:
```
{
"i": "AppIcon-2"
}
```
要在您的 iOS 应用程序中启用备用应用图标,您需要在 `Info.plist` 文件中添加必要的配置。以下是具体步骤:
```xml
CFBundleIcons
CFBundleAlternateIcons
AppIcon-2
CFBundleIconFiles
Icon-2
UIPrerenderedIcon
AppIcon-3
CFBundleIconFiles
Icon-3
UIPrerenderedIcon
CFBundlePrimaryIcon
CFBundleIconFiles
Icon-1
UIPrerenderedIcon
```
在 `pushwoosh(_ pushwoosh: Pushwoosh, onMessageOpened message: PWMessage)` 回调中,您可以添加代码,根据推送通知中收到的自定义数据来更改应用图标。以下是实现方法:
```swift
func pushwoosh(_ pushwoosh: Pushwoosh, onMessageOpened message: PWMessage) {
// MARK: - Change the app icon dynamically
guard let customDataJson = message.customData,
let appIcon = customDataJson["i"] as? String else {
return
}
UIApplication.shared.setAlternateIconName(appIcon) { error in
if let error = error {
print(error.localizedDescription)
} else {
print("Success!")
}
}
}
```
添加 JSON 代码:
```
{
"i": "AppIcon-2"
}
```
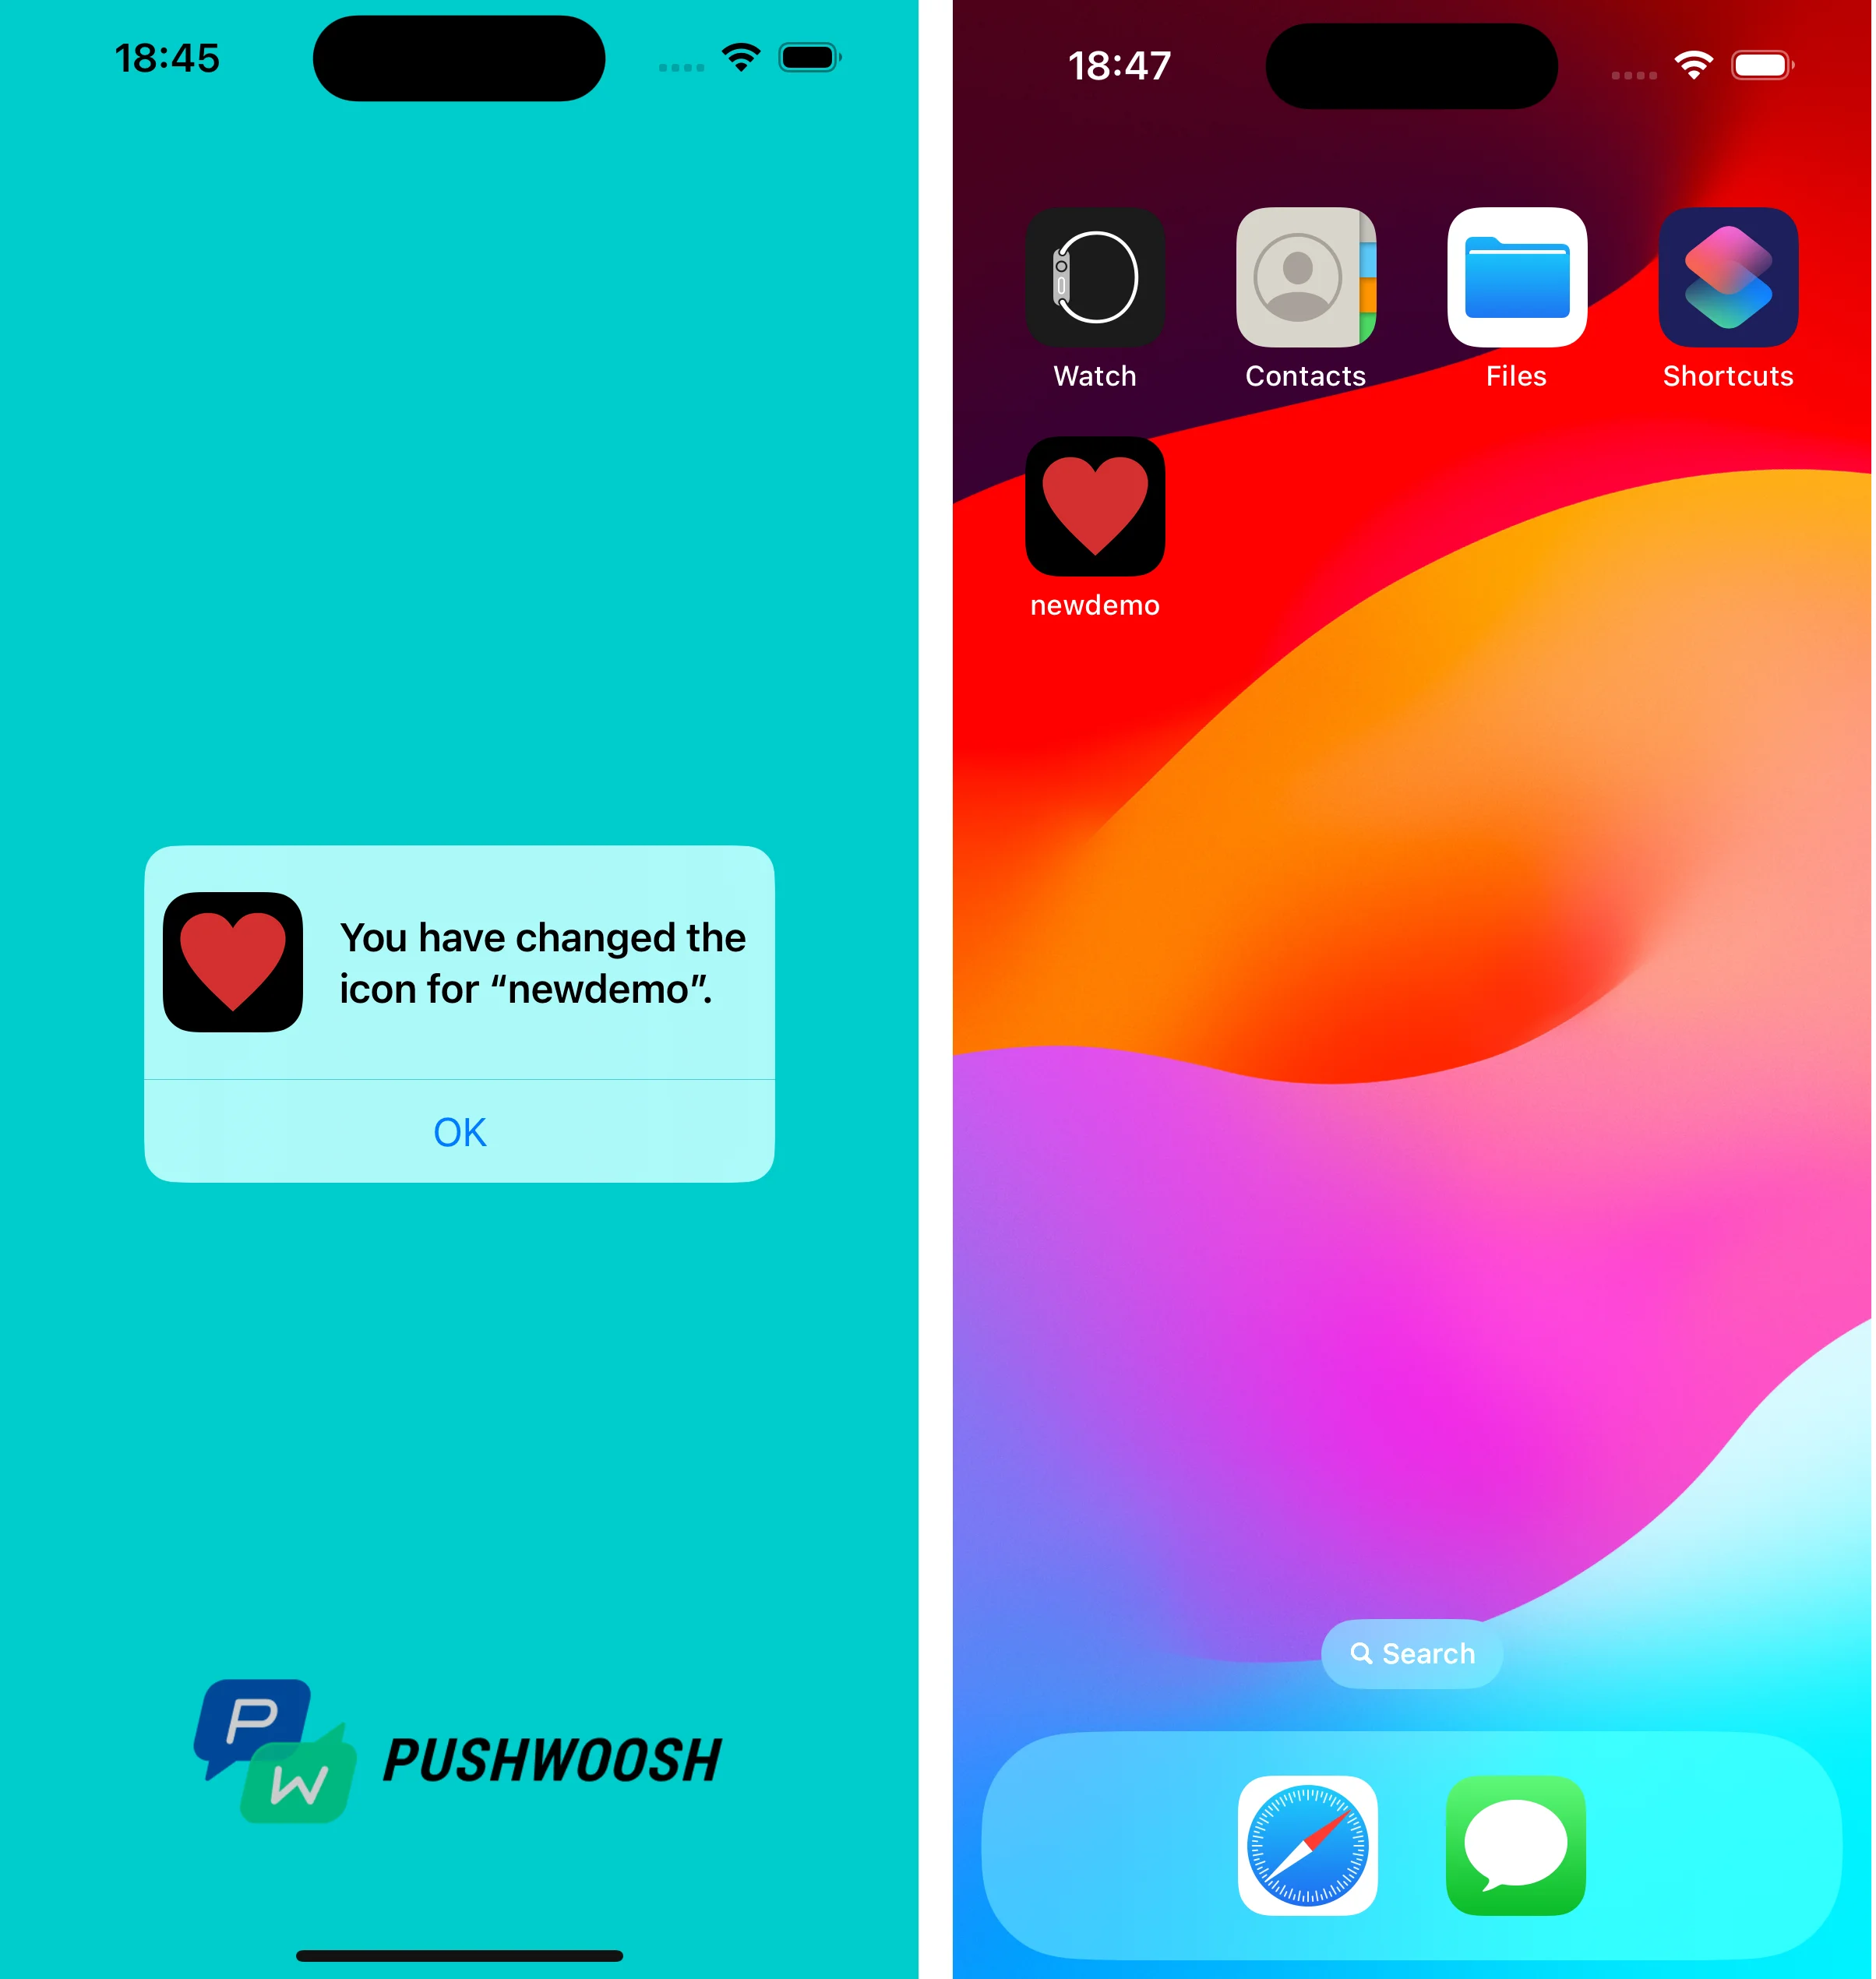
 点击推送通知时,系统会提示您在设备上更改应用图标。
 您可以在 [GitHub](https://github.com/Pushwoosh/pushwoosh-quickstart-ios/tree/main/customdata/newdemo) 上找到使用自定义数据的项目。