# How to issue a wallet pass on geozone entry
Issue an Apple or Google Wallet pass when a shopper enters a store geozone, then push the install link. This guide builds that journey with the [Issue Wallet Pass](/product/customer-journey/journey-elements/channels/issue-wallet-pass/) element.
## Create a Wallet Pass Campaign
The [Issue Wallet Pass](/product/customer-journey/journey-elements/channels/issue-wallet-pass/) element can only issue passes from an existing campaign, so create one first. A campaign's **Platform** is permanent, so if you support both Apple Wallet and Google Wallet, repeat this section once per platform.
1. Go to **Campaigns → Wallet Passes → Campaigns** and click **Create campaign**.
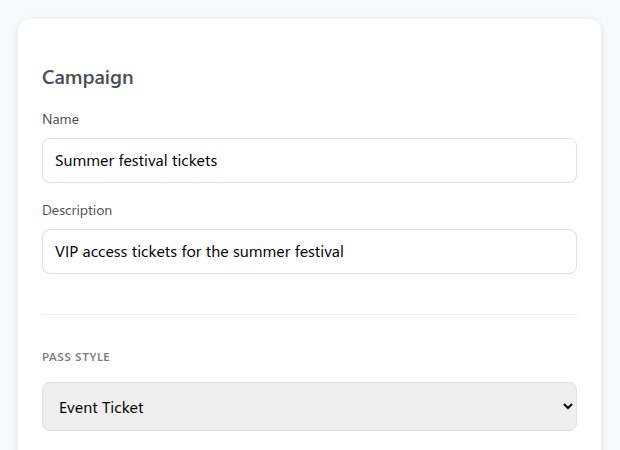
2. Choose **Apple Wallet** or **Google Wallet** as the **Platform**, enter a **Name** for your own reference, for example `Store loyalty` (this labels the campaign in Pushwoosh, it doesn't appear on the pass), and pick a pass style, for example **Store Card** (Apple) or **Loyalty card** (Google).
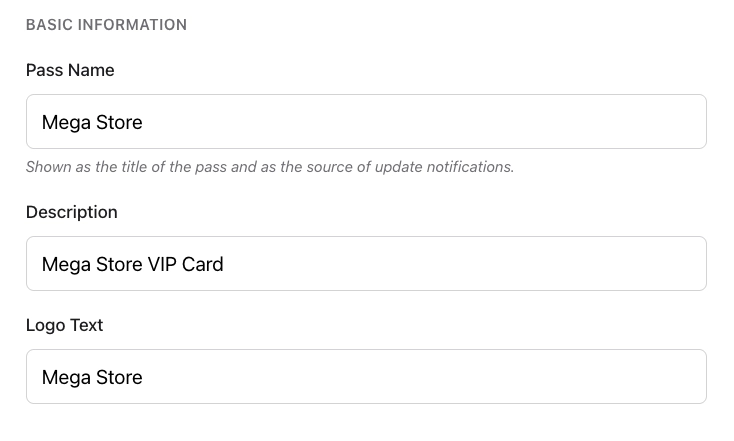
3. Under **Basic Information**, set **Pass Name** to what shows on the pass itself, for example `Store Loyalty Card`.
4. Design the rest of the pass, then preview and create the campaign.
Full field-by-field walkthrough: [Create Wallet Pass Campaigns](/product/messaging-channels/wallet-passes/wallet-pass-campaigns/).
## Create the store's geozone
The journey needs a live geozone to trigger from, so create one before building the journey.
1. Go to **Campaigns → Geo campaigns** and click **Create geozone**.
2. Enter a **Campaign name**, for example `Downtown store`.
3. Under **Set the trigger location**, choose **Circle**, search for the store's address, and set the **Range**.
4. Under **Entry actions**, turn on [**Fire event**](/product/messaging-channels/push-notifications/geo-campaigns/create-geozone/#fire-event). Leave **Event name** empty so the default `PW_GeozoneEntered` is used.
5. Turn [**Send push**](/product/messaging-channels/push-notifications/geo-campaigns/create-geozone/#send-push) off if you only want the journey to message the shopper, not a separate geozone push on the same entry.
6. Set **Cooldown** (**Standalone** with a short duration is enough to start) and **Campaign schedule** (**Always active** unless you need set hours), then click **Save**. The event is available in **Trigger-based entry** as soon as you save.
Full field-by-field walkthrough: [Create a geozone](/product/messaging-channels/push-notifications/geo-campaigns/create-geozone/).
## Build the journey
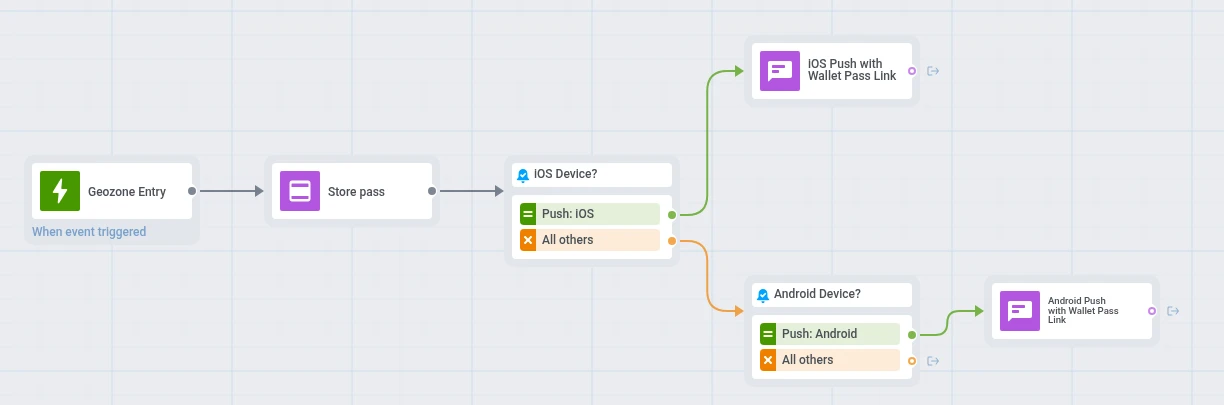
Go to **Campaigns → Customer Journey Builder**, click **Create campaign**, and build everything below on one canvas.
### Set the entry
1. Add a [Trigger-based entry](/product/customer-journey/journey-elements/entry-elements/trigger-based-entry/) element to the canvas.
2. Select `PW_GeozoneEntered` as the **Event**.
### Issue the wallet pass
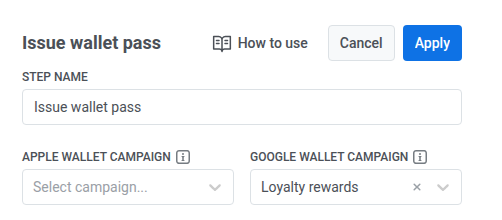
1. Add **Issue Wallet Pass** right after the entry.
2. Name it `Store pass`.
3. In **Apple Wallet campaign**, select the campaign you created for Apple. In **Google Wallet campaign**, select the campaign you created for Google. Each dropdown only lists campaigns for its own platform. The element issues a pass for each platform you select.
### Branch by platform and send the push
1. After **Issue Wallet Pass**, add a [Reachability check](/product/customer-journey/journey-elements/flow-controls/reachability-check/) element and name it, for example, `iOS Device?`.
2. Under **Push Notifications**, keep only **iOS** selected (remove the other platform chips).
3. Under **Which devices to check**, select **Only the device that entered**, so the check matches the device that triggered the geozone entry, not every device the shopper owns.
4. On the **Push: iOS** branch, add a [Send Push](/product/customer-journey/journey-elements/channels/push/) element.
5. In the message body, insert `{apple_install_link|regular|}`.
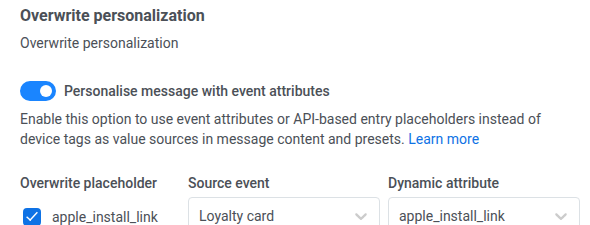
6. Turn on **Personalise message with event attributes**, check **Overwrite placeholder**, set **Source event** to `Store pass`, and set **Dynamic attribute** to `apple_install_link`.
7. After you edit the push, reselect the preset so the mapping picks up the new placeholder. Full click path: [Deliver the pass to the user](/product/customer-journey/journey-elements/channels/issue-wallet-pass/#deliver-the-pass-to-the-user).
8. On **All others**, add a second **Reachability check** named `Android Device?`, with **Push Notifications** narrowed to **Android** and the same **Only the device that entered** setting.
9. On its **Push: Android** branch, add **Send Push**. Insert `{google_save_link|regular|}` and map **Dynamic attribute** `google_save_link` the same way as on the iOS branch.
10. Leave the remaining **All others** branch unconnected, unless you have another channel for those users. A branch with no outgoing connection ends the journey there on its own, so it doesn't need an **Exit** element.
A shopper reaches **All others** when their device isn't registered on the platform you're checking, or when their **Push Alerts Enabled** tag isn't `true` for that device (push permission off).
When `PW_GeozoneEntered` fires, the shopper enters the journey, **Issue Wallet Pass** issues their pass, and the matching **Send Push** delivers the install link for their platform.
### Launch and check
1. Launch the journey when the canvas is ready.
2. After a test entry, check entries and drop-offs on **Issue Wallet Pass** and the stats on each **Send Push**.
 3. Under **Basic Information**, set **Pass Name** to what shows on the pass itself, for example `Store Loyalty Card`.
 4. Design the rest of the pass, then preview and create the campaign.
Full field-by-field walkthrough: [Create Wallet Pass Campaigns](/product/messaging-channels/wallet-passes/wallet-pass-campaigns/).
## Create the store's geozone
The journey needs a live geozone to trigger from, so create one before building the journey.
1. Go to **Campaigns → Geo campaigns** and click **Create geozone**.
4. Design the rest of the pass, then preview and create the campaign.
Full field-by-field walkthrough: [Create Wallet Pass Campaigns](/product/messaging-channels/wallet-passes/wallet-pass-campaigns/).
## Create the store's geozone
The journey needs a live geozone to trigger from, so create one before building the journey.
1. Go to **Campaigns → Geo campaigns** and click **Create geozone**.
 2. Enter a **Campaign name**, for example `Downtown store`.
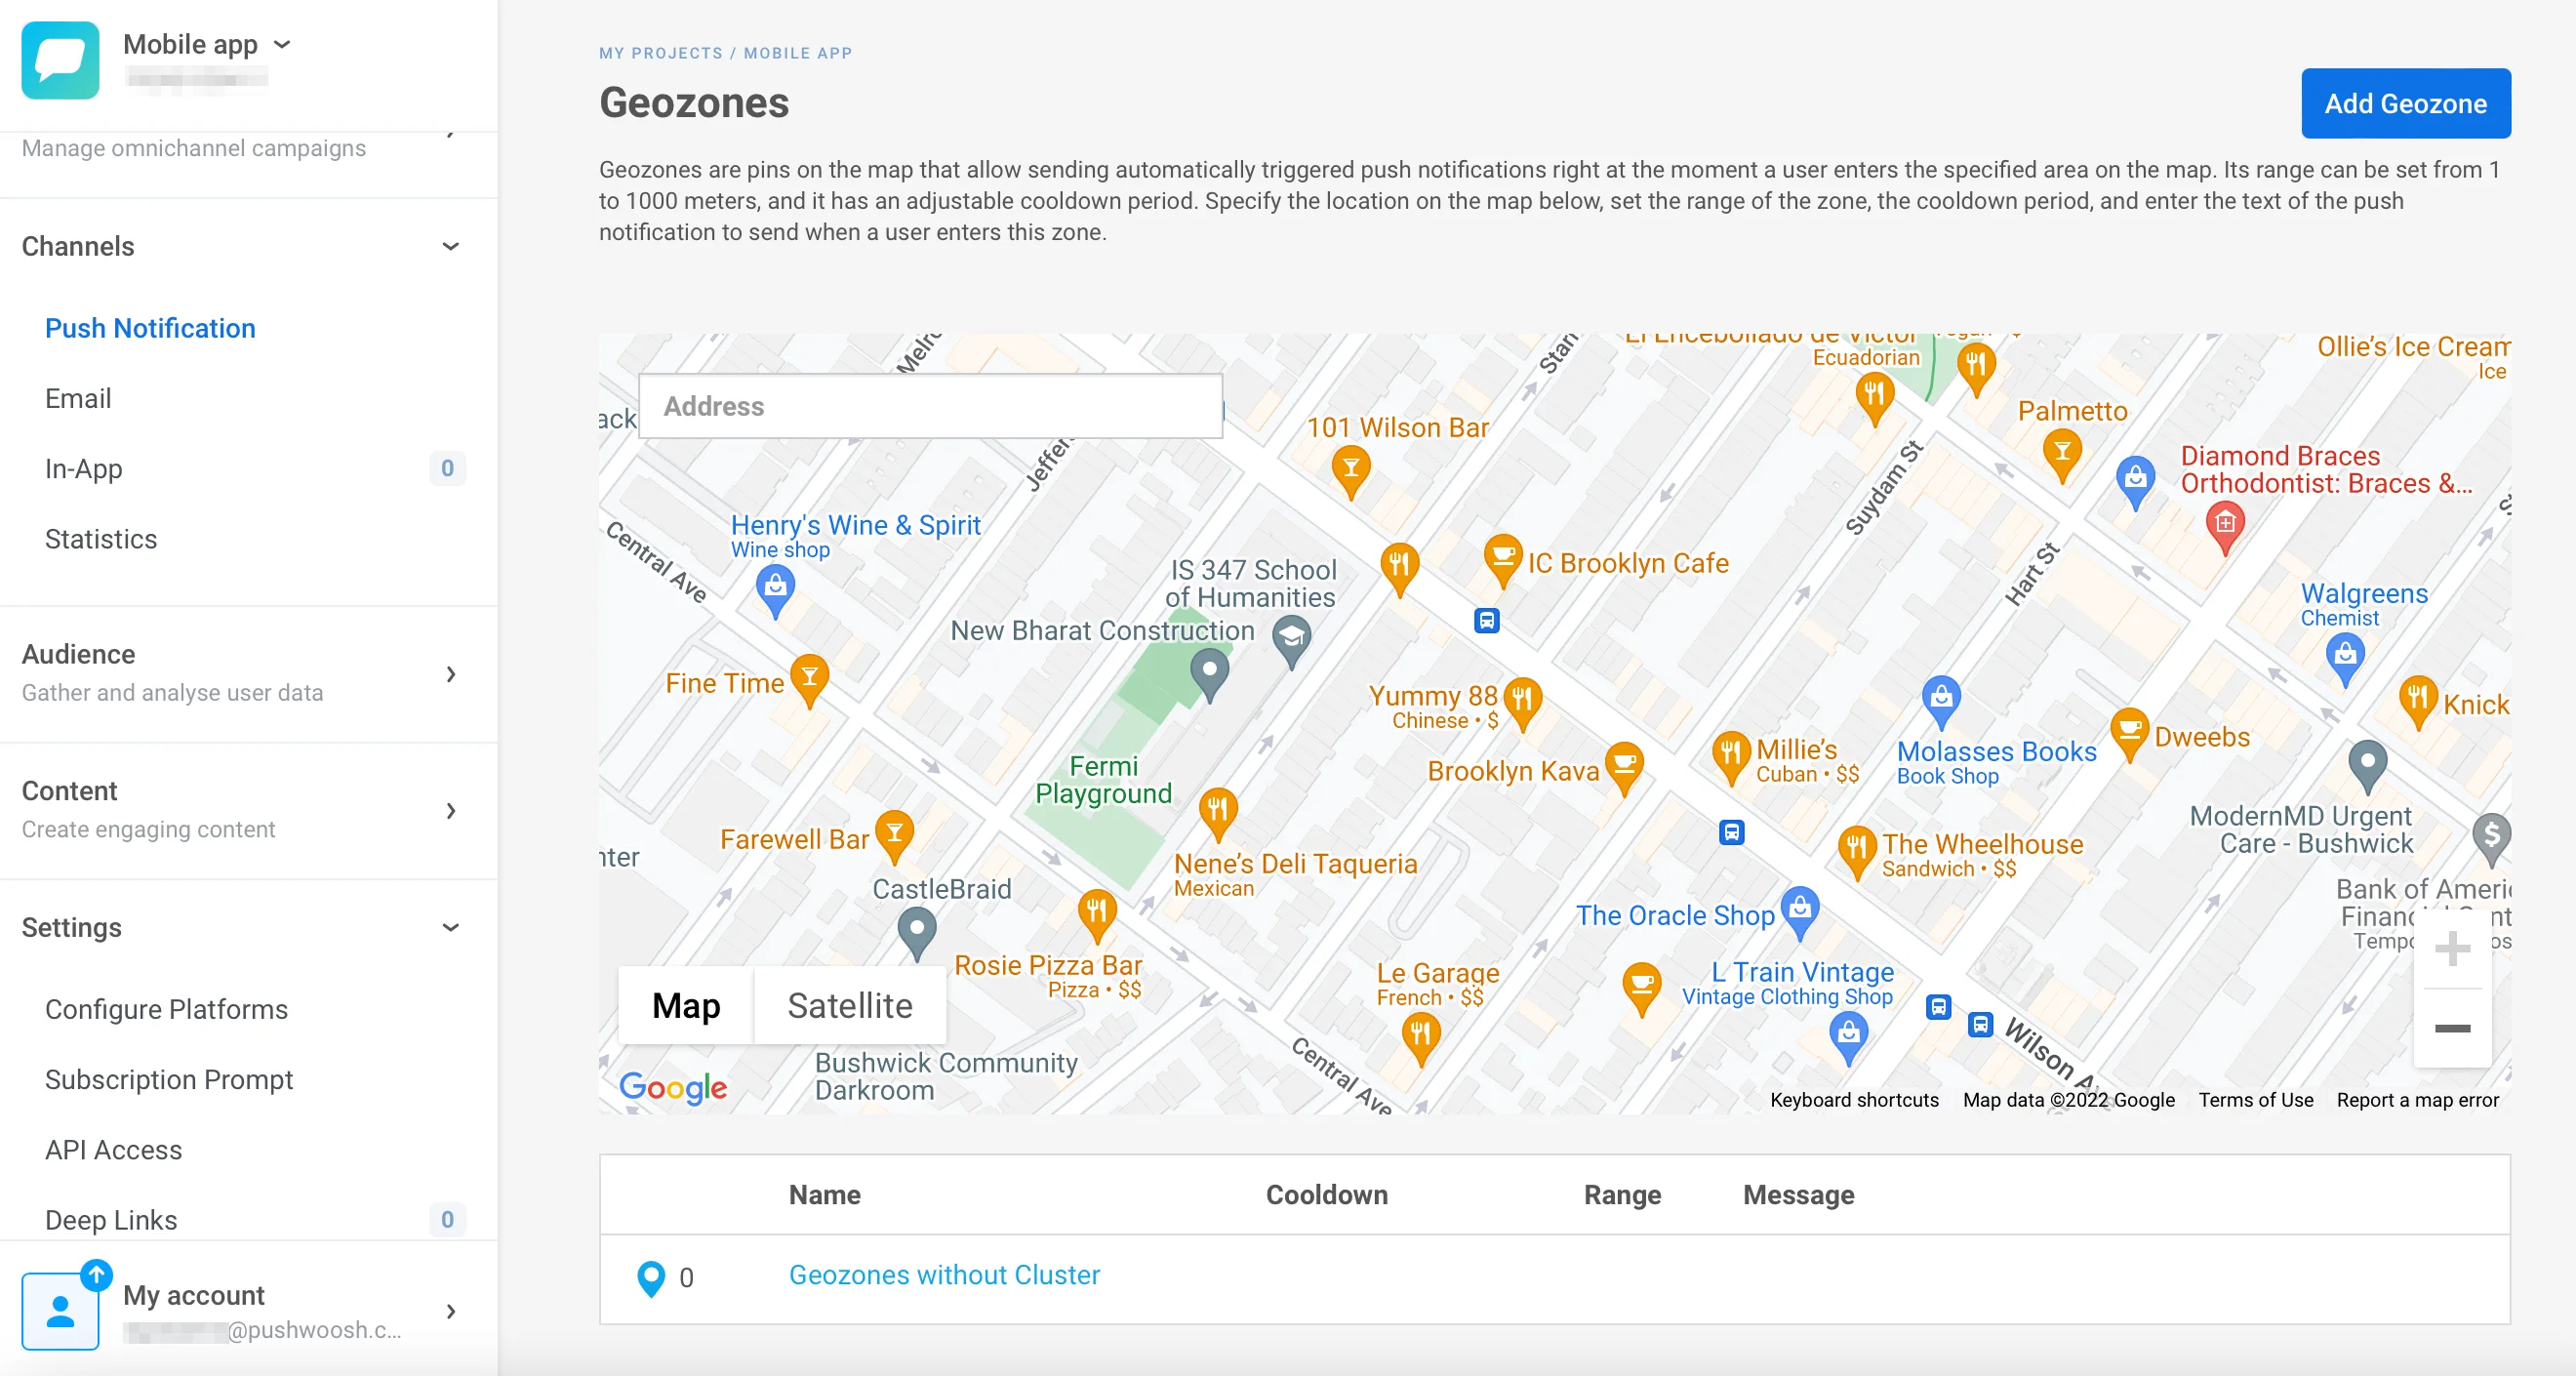
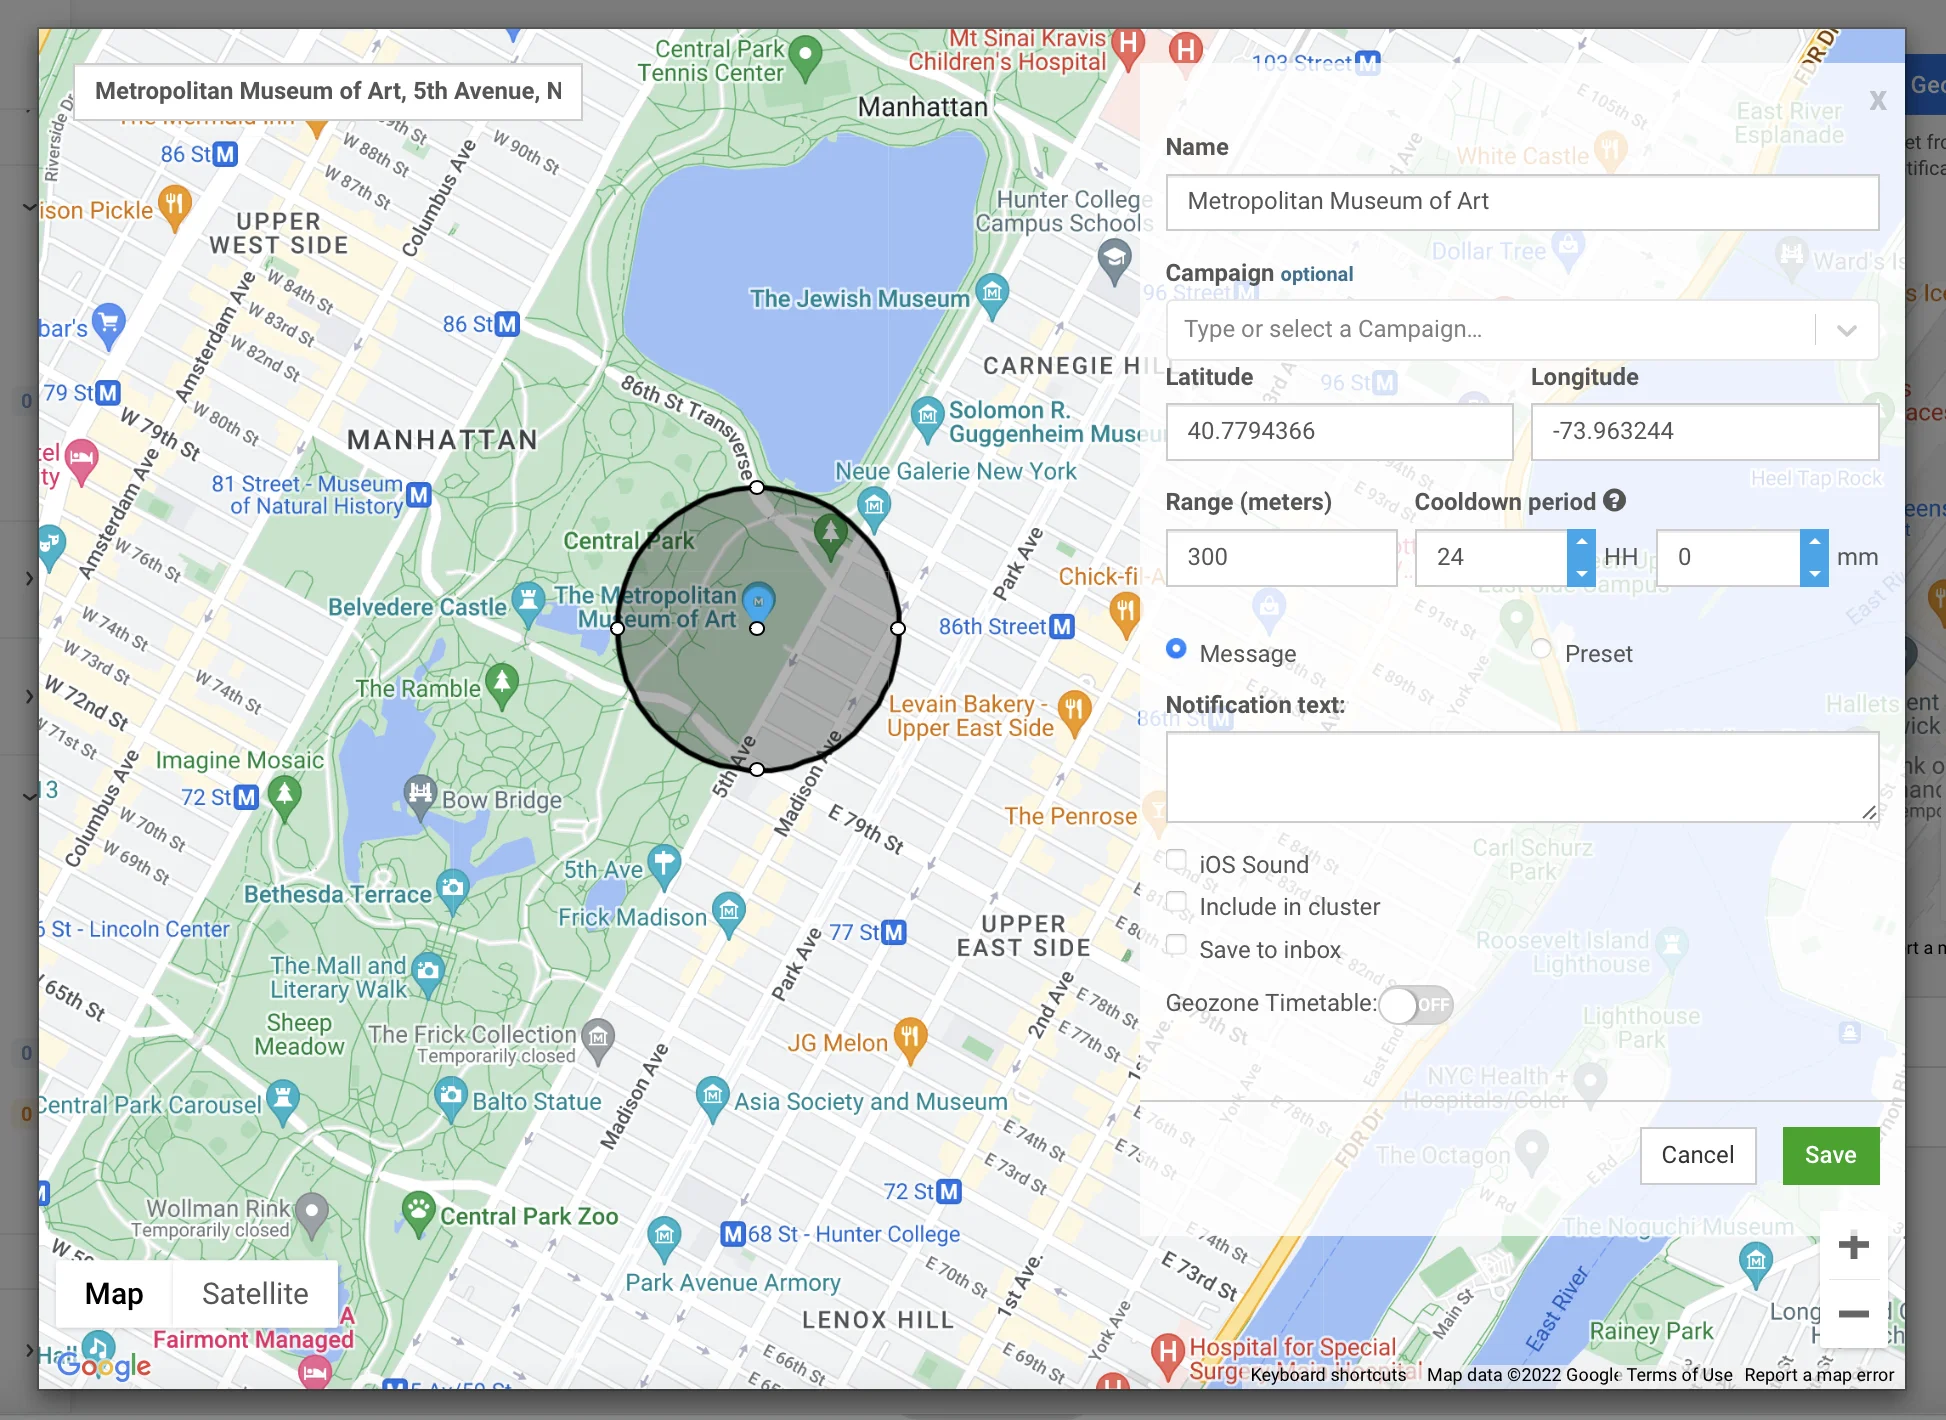 3. Under **Set the trigger location**, choose **Circle**, search for the store's address, and set the **Range**.
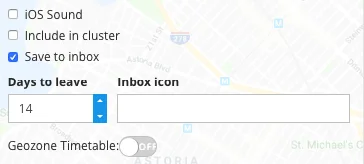 4. Under **Entry actions**, turn on [**Fire event**](/product/messaging-channels/push-notifications/geo-campaigns/create-geozone/#fire-event). Leave **Event name** empty so the default `PW_GeozoneEntered` is used.
5. Turn [**Send push**](/product/messaging-channels/push-notifications/geo-campaigns/create-geozone/#send-push) off if you only want the journey to message the shopper, not a separate geozone push on the same entry.
6. Set **Cooldown** (**Standalone** with a short duration is enough to start) and **Campaign schedule** (**Always active** unless you need set hours), then click **Save**. The event is available in **Trigger-based entry** as soon as you save.
4. Under **Entry actions**, turn on [**Fire event**](/product/messaging-channels/push-notifications/geo-campaigns/create-geozone/#fire-event). Leave **Event name** empty so the default `PW_GeozoneEntered` is used.
5. Turn [**Send push**](/product/messaging-channels/push-notifications/geo-campaigns/create-geozone/#send-push) off if you only want the journey to message the shopper, not a separate geozone push on the same entry.
6. Set **Cooldown** (**Standalone** with a short duration is enough to start) and **Campaign schedule** (**Always active** unless you need set hours), then click **Save**. The event is available in **Trigger-based entry** as soon as you save.
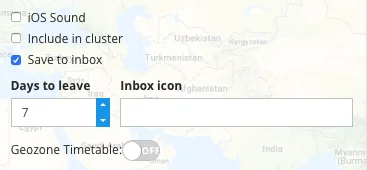 Full field-by-field walkthrough: [Create a geozone](/product/messaging-channels/push-notifications/geo-campaigns/create-geozone/).
## Build the journey
Go to **Campaigns → Customer Journey Builder**, click **Create campaign**, and build everything below on one canvas.
### Set the entry
1. Add a [Trigger-based entry](/product/customer-journey/journey-elements/entry-elements/trigger-based-entry/) element to the canvas.
2. Select `PW_GeozoneEntered` as the **Event**.
### Issue the wallet pass
1. Add **Issue Wallet Pass** right after the entry.
2. Name it `Store pass`.
Full field-by-field walkthrough: [Create a geozone](/product/messaging-channels/push-notifications/geo-campaigns/create-geozone/).
## Build the journey
Go to **Campaigns → Customer Journey Builder**, click **Create campaign**, and build everything below on one canvas.
### Set the entry
1. Add a [Trigger-based entry](/product/customer-journey/journey-elements/entry-elements/trigger-based-entry/) element to the canvas.
2. Select `PW_GeozoneEntered` as the **Event**.
### Issue the wallet pass
1. Add **Issue Wallet Pass** right after the entry.
2. Name it `Store pass`.
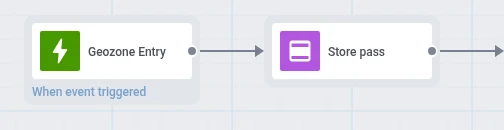 3. In **Apple Wallet campaign**, select the campaign you created for Apple. In **Google Wallet campaign**, select the campaign you created for Google. Each dropdown only lists campaigns for its own platform. The element issues a pass for each platform you select.
 ### Branch by platform and send the push
1. After **Issue Wallet Pass**, add a [Reachability check](/product/customer-journey/journey-elements/flow-controls/reachability-check/) element and name it, for example, `iOS Device?`.
2. Under **Push Notifications**, keep only **iOS** selected (remove the other platform chips).
3. Under **Which devices to check**, select **Only the device that entered**, so the check matches the device that triggered the geozone entry, not every device the shopper owns.
4. On the **Push: iOS** branch, add a [Send Push](/product/customer-journey/journey-elements/channels/push/) element.
5. In the message body, insert `{apple_install_link|regular|}`.
6. Turn on **Personalise message with event attributes**, check **Overwrite placeholder**, set **Source event** to `Store pass`, and set **Dynamic attribute** to `apple_install_link`.
### Branch by platform and send the push
1. After **Issue Wallet Pass**, add a [Reachability check](/product/customer-journey/journey-elements/flow-controls/reachability-check/) element and name it, for example, `iOS Device?`.
2. Under **Push Notifications**, keep only **iOS** selected (remove the other platform chips).
3. Under **Which devices to check**, select **Only the device that entered**, so the check matches the device that triggered the geozone entry, not every device the shopper owns.
4. On the **Push: iOS** branch, add a [Send Push](/product/customer-journey/journey-elements/channels/push/) element.
5. In the message body, insert `{apple_install_link|regular|}`.
6. Turn on **Personalise message with event attributes**, check **Overwrite placeholder**, set **Source event** to `Store pass`, and set **Dynamic attribute** to `apple_install_link`.
 7. After you edit the push, reselect the preset so the mapping picks up the new placeholder. Full click path: [Deliver the pass to the user](/product/customer-journey/journey-elements/channels/issue-wallet-pass/#deliver-the-pass-to-the-user).
8. On **All others**, add a second **Reachability check** named `Android Device?`, with **Push Notifications** narrowed to **Android** and the same **Only the device that entered** setting.
9. On its **Push: Android** branch, add **Send Push**. Insert `{google_save_link|regular|}` and map **Dynamic attribute** `google_save_link` the same way as on the iOS branch.
10. Leave the remaining **All others** branch unconnected, unless you have another channel for those users. A branch with no outgoing connection ends the journey there on its own, so it doesn't need an **Exit** element.
A shopper reaches **All others** when their device isn't registered on the platform you're checking, or when their **Push Alerts Enabled** tag isn't `true` for that device (push permission off).
When `PW_GeozoneEntered` fires, the shopper enters the journey, **Issue Wallet Pass** issues their pass, and the matching **Send Push** delivers the install link for their platform.
### Launch and check
1. Launch the journey when the canvas is ready.
2. After a test entry, check entries and drop-offs on **Issue Wallet Pass** and the stats on each **Send Push**.
7. After you edit the push, reselect the preset so the mapping picks up the new placeholder. Full click path: [Deliver the pass to the user](/product/customer-journey/journey-elements/channels/issue-wallet-pass/#deliver-the-pass-to-the-user).
8. On **All others**, add a second **Reachability check** named `Android Device?`, with **Push Notifications** narrowed to **Android** and the same **Only the device that entered** setting.
9. On its **Push: Android** branch, add **Send Push**. Insert `{google_save_link|regular|}` and map **Dynamic attribute** `google_save_link` the same way as on the iOS branch.
10. Leave the remaining **All others** branch unconnected, unless you have another channel for those users. A branch with no outgoing connection ends the journey there on its own, so it doesn't need an **Exit** element.
A shopper reaches **All others** when their device isn't registered on the platform you're checking, or when their **Push Alerts Enabled** tag isn't `true` for that device (push permission off).
When `PW_GeozoneEntered` fires, the shopper enters the journey, **Issue Wallet Pass** issues their pass, and the matching **Send Push** delivers the install link for their platform.
### Launch and check
1. Launch the journey when the canvas is ready.
2. After a test entry, check entries and drop-offs on **Issue Wallet Pass** and the stats on each **Send Push**.