# Push แบบกำหนดเป้าหมาย
ขั้นตอนการทำงานนี้แสดงวิธีส่ง push notification แบบกำหนดเป้าหมายไปยังกลุ่มเป้าหมายที่เฉพาะเจาะจง วิธีการสร้าง segment ของคุณสำหรับ push แบบกำหนดเป้าหมายจะแตกต่างกันไป ขึ้นอยู่กับว่า push notification นั้นเริ่มต้นขั้นตอนการสื่อสารหรือดำเนินการต่อจากขั้นตอนที่มีอยู่แล้ว
## หาก push notification เริ่มต้นขั้นตอนการสื่อสาร
เมื่อคุณสร้าง [ขั้นตอน push พื้นฐาน](/th/product/messaging-channels/push-notifications/send-push-notifications/one-time-push-via-customer-journey/) แล้ว คุณสามารถตั้งค่า push แบบกำหนดเป้าหมายของคุณได้
ดับเบิลคลิกที่องค์ประกอบ [**Audience-based Entry**](/th/product/customer-journey/journey-elements/entry-elements/audience-based-entry/) เพื่อเลือกกลุ่มเป้าหมายสำหรับ push notification ของคุณ สร้าง segment ตั้งแต่ต้น เลือกจาก segment ที่มีอยู่ของคุณ หรือนำเข้าไฟล์ segment
#### 1. สร้าง segment ตั้งแต่ต้น
คลิก **Create segment** และเลือก **Build segment** จากเมนูดรอปดาวน์
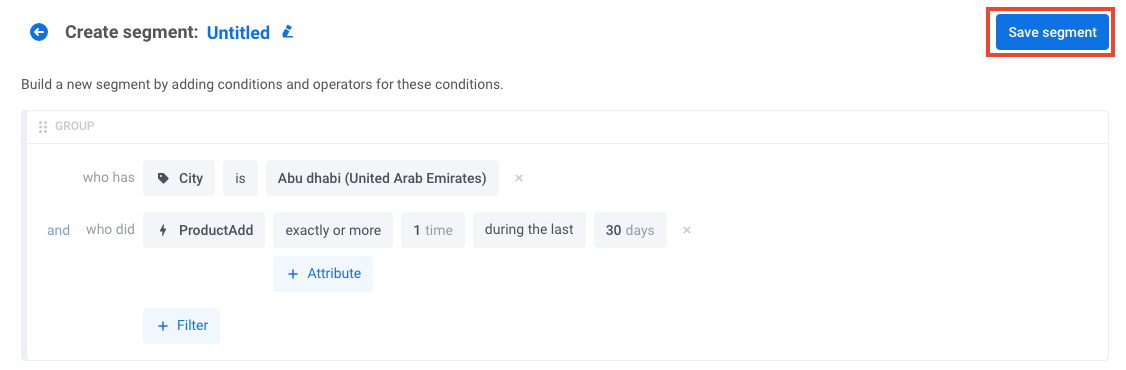 ใน drawer ที่เปิดขึ้นมา ให้สร้าง segment [เรียนรู้วิธีสร้าง segment](/th/product/audience-data-and-segmentation/segmentation/create-segments/)
 #### 2. เลือก segment ที่มีอยู่
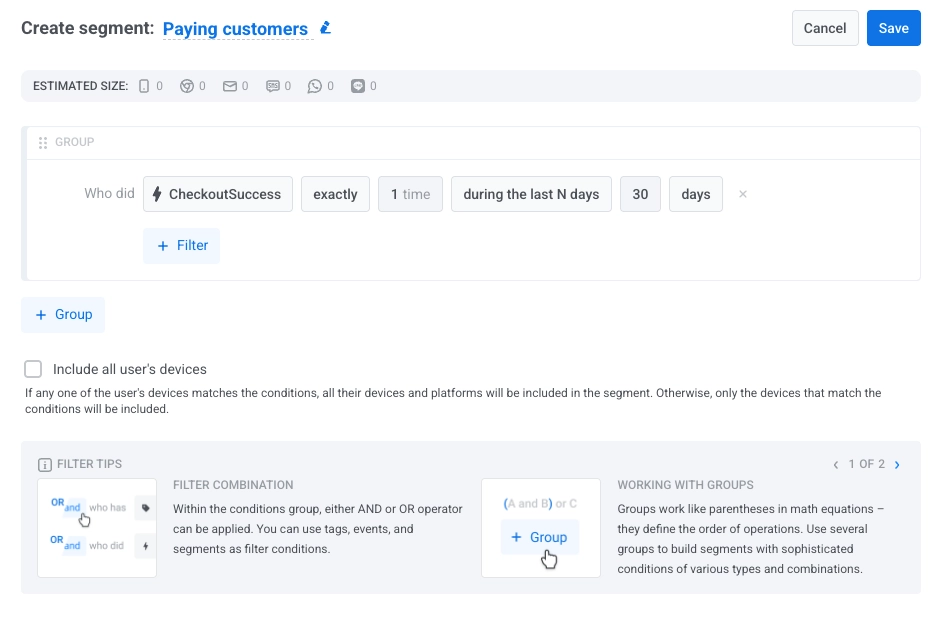
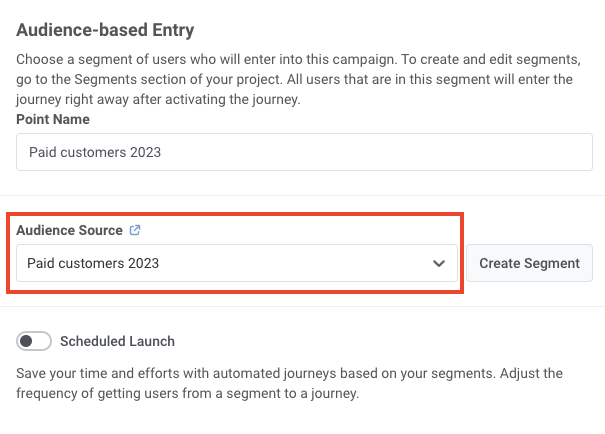
เลือก segment ที่มีอยู่ของคุณในช่อง **Audience source** ในตัวอย่างต่อไปนี้ push จะถูกกำหนดเป้าหมายไปยังลูกค้าที่ชำระเงินแล้ว:
#### 2. เลือก segment ที่มีอยู่
เลือก segment ที่มีอยู่ของคุณในช่อง **Audience source** ในตัวอย่างต่อไปนี้ push จะถูกกำหนดเป้าหมายไปยังลูกค้าที่ชำระเงินแล้ว:
 #### 3. นำเข้าไฟล์ segment
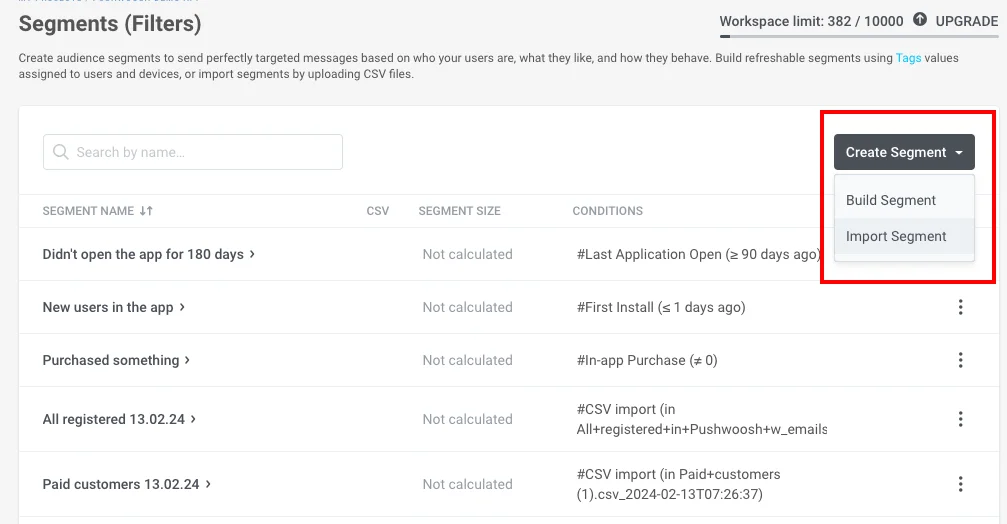
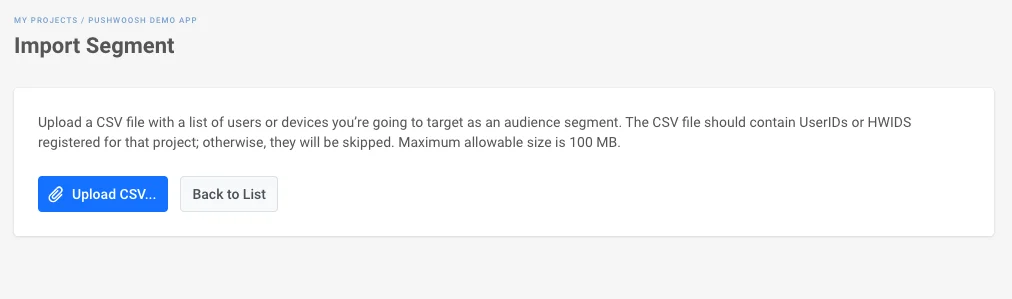
ในส่วน **Audience source** คลิก **Create segment** และเลือก **Import segment** จากเมนูดรอปดาวน์:
#### 3. นำเข้าไฟล์ segment
ในส่วน **Audience source** คลิก **Create segment** และเลือก **Import segment** จากเมนูดรอปดาวน์:
 จากนั้นนำเข้าไฟล์ของคุณในรูปแบบ CSV สำหรับคำแนะนำทีละขั้นตอนและข้อกำหนดของไฟล์ ดู [วิธีการนำเข้า segment](/th/product/audience-data-and-segmentation/segmentation/create-segments/by-import/#how-to-import-a-segment)
 เมื่อคุณเลือกแหล่งที่มาของกลุ่มเป้าหมายและตั้งค่าองค์ประกอบแล้ว คลิก **Save**
## หาก push notification ดำเนินการต่อจากขั้นตอนการสื่อสาร
แทรกองค์ประกอบ [**Condition split**](/th/product/customer-journey/journey-elements/flow-controls/segment-split/) ระหว่างองค์ประกอบการสื่อสารก่อนหน้าและ push notification ที่คุณต้องการกำหนดเป้าหมาย ดับเบิลคลิกที่องค์ประกอบเพื่อเปิดการกำหนดค่า
### กำหนด segment
ใต้หัวข้อ **What defines the user flow?** เลือก **Segment**
เมื่อคุณเลือกแหล่งที่มาของกลุ่มเป้าหมายและตั้งค่าองค์ประกอบแล้ว คลิก **Save**
## หาก push notification ดำเนินการต่อจากขั้นตอนการสื่อสาร
แทรกองค์ประกอบ [**Condition split**](/th/product/customer-journey/journey-elements/flow-controls/segment-split/) ระหว่างองค์ประกอบการสื่อสารก่อนหน้าและ push notification ที่คุณต้องการกำหนดเป้าหมาย ดับเบิลคลิกที่องค์ประกอบเพื่อเปิดการกำหนดค่า
### กำหนด segment
ใต้หัวข้อ **What defines the user flow?** เลือก **Segment**
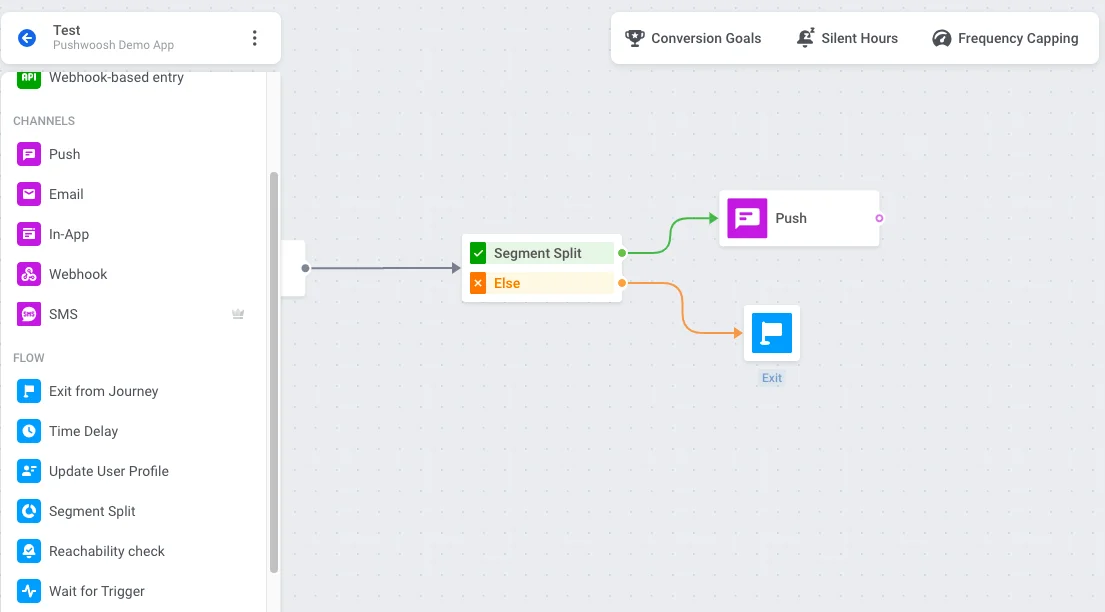 จากนั้นคุณสามารถตั้งค่า segment ได้สามวิธี:
#### เลือก segment ที่มีอยู่
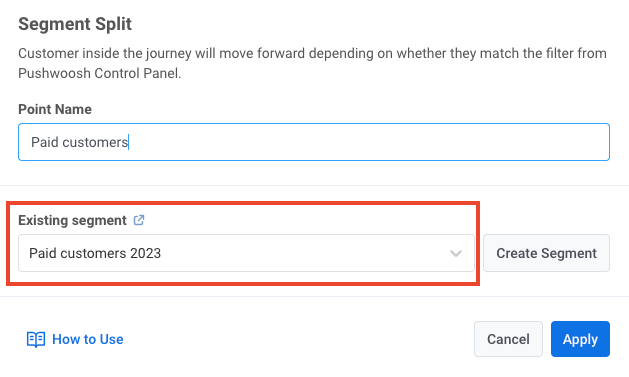
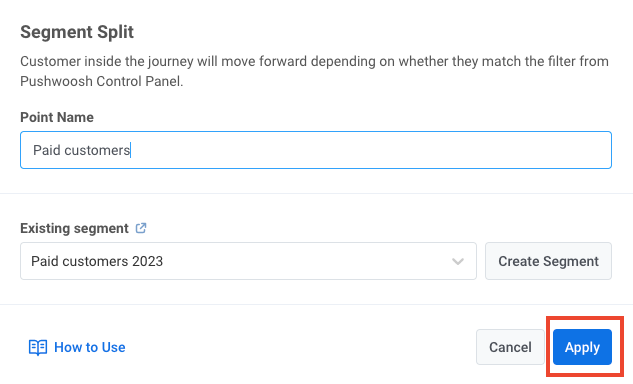
ใช้ช่อง **Existing segment** เพื่อเลือก segment ของคุณ
จากนั้นคุณสามารถตั้งค่า segment ได้สามวิธี:
#### เลือก segment ที่มีอยู่
ใช้ช่อง **Existing segment** เพื่อเลือก segment ของคุณ
 #### สร้าง segment ตั้งแต่ต้น
คลิก **Create segment** ถัดจากส่วน **Branches** และเลือก **Build segment** จากเมนูดรอปดาวน์ drawer จะเปิดขึ้นเพื่อให้คุณสร้าง segment
[เรียนรู้วิธีสร้าง segment](/th/product/audience-data-and-segmentation/segmentation/create-segments/)
#### นำเข้าไฟล์ segment
คลิก **Create segment** และเลือก **Import segment** จากเมนูดรอปดาวน์ จากนั้นนำเข้าไฟล์ของคุณในรูปแบบ CSV
สำหรับคำแนะนำทีละขั้นตอนและข้อกำหนดของไฟล์ ดู [วิธีการนำเข้า segment](/th/product/audience-data-and-segmentation/segmentation/create-segments/by-import/#how-to-import-a-segment)
### กำหนดค่า branches
ส่วน **Branches** จะแสดงเส้นทางที่มีอยู่ เช่น **Users in a segment** (ผู้ใช้ที่ตรงกับ segment ที่คุณตั้งค่า) และ **All other users**
#### สร้าง segment ตั้งแต่ต้น
คลิก **Create segment** ถัดจากส่วน **Branches** และเลือก **Build segment** จากเมนูดรอปดาวน์ drawer จะเปิดขึ้นเพื่อให้คุณสร้าง segment
[เรียนรู้วิธีสร้าง segment](/th/product/audience-data-and-segmentation/segmentation/create-segments/)
#### นำเข้าไฟล์ segment
คลิก **Create segment** และเลือก **Import segment** จากเมนูดรอปดาวน์ จากนั้นนำเข้าไฟล์ของคุณในรูปแบบ CSV
สำหรับคำแนะนำทีละขั้นตอนและข้อกำหนดของไฟล์ ดู [วิธีการนำเข้า segment](/th/product/audience-data-and-segmentation/segmentation/create-segments/by-import/#how-to-import-a-segment)
### กำหนดค่า branches
ส่วน **Branches** จะแสดงเส้นทางที่มีอยู่ เช่น **Users in a segment** (ผู้ใช้ที่ตรงกับ segment ที่คุณตั้งค่า) และ **All other users**
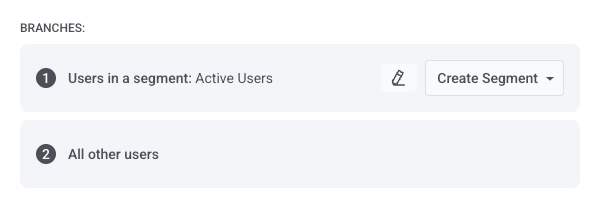 บน journey canvas เพิ่ม push notification ไปยัง branch **Users in a segment** เพิ่ม exit หรือองค์ประกอบอื่นไปยัง branch **All other users** เพื่อให้เส้นทางนั้นถูกกำหนด
 เมื่อเสร็จแล้ว คลิก **Save**