การตั้งค่า Swift Package Manager
ข้อกำหนดเบื้องต้น
Anchor link to- สร้างบัญชี Pushwoosh หากคุณยังไม่มี
- เครื่อง Mac ที่มี Xcode เวอร์ชันใหม่ (เฉพาะ Apple Silicon)
- ใบรับรอง iOS Push Certificate ดูรายละเอียดที่: การกำหนดค่า iOS
การผสานการทำงาน
Anchor link to- เปิดโปรเจกต์ของคุณใน Xcode และไปที่ การตั้งค่าของโปรเจกต์ (project’s settings) -> Package Dependencies -> และกดปุ่ม ’+’
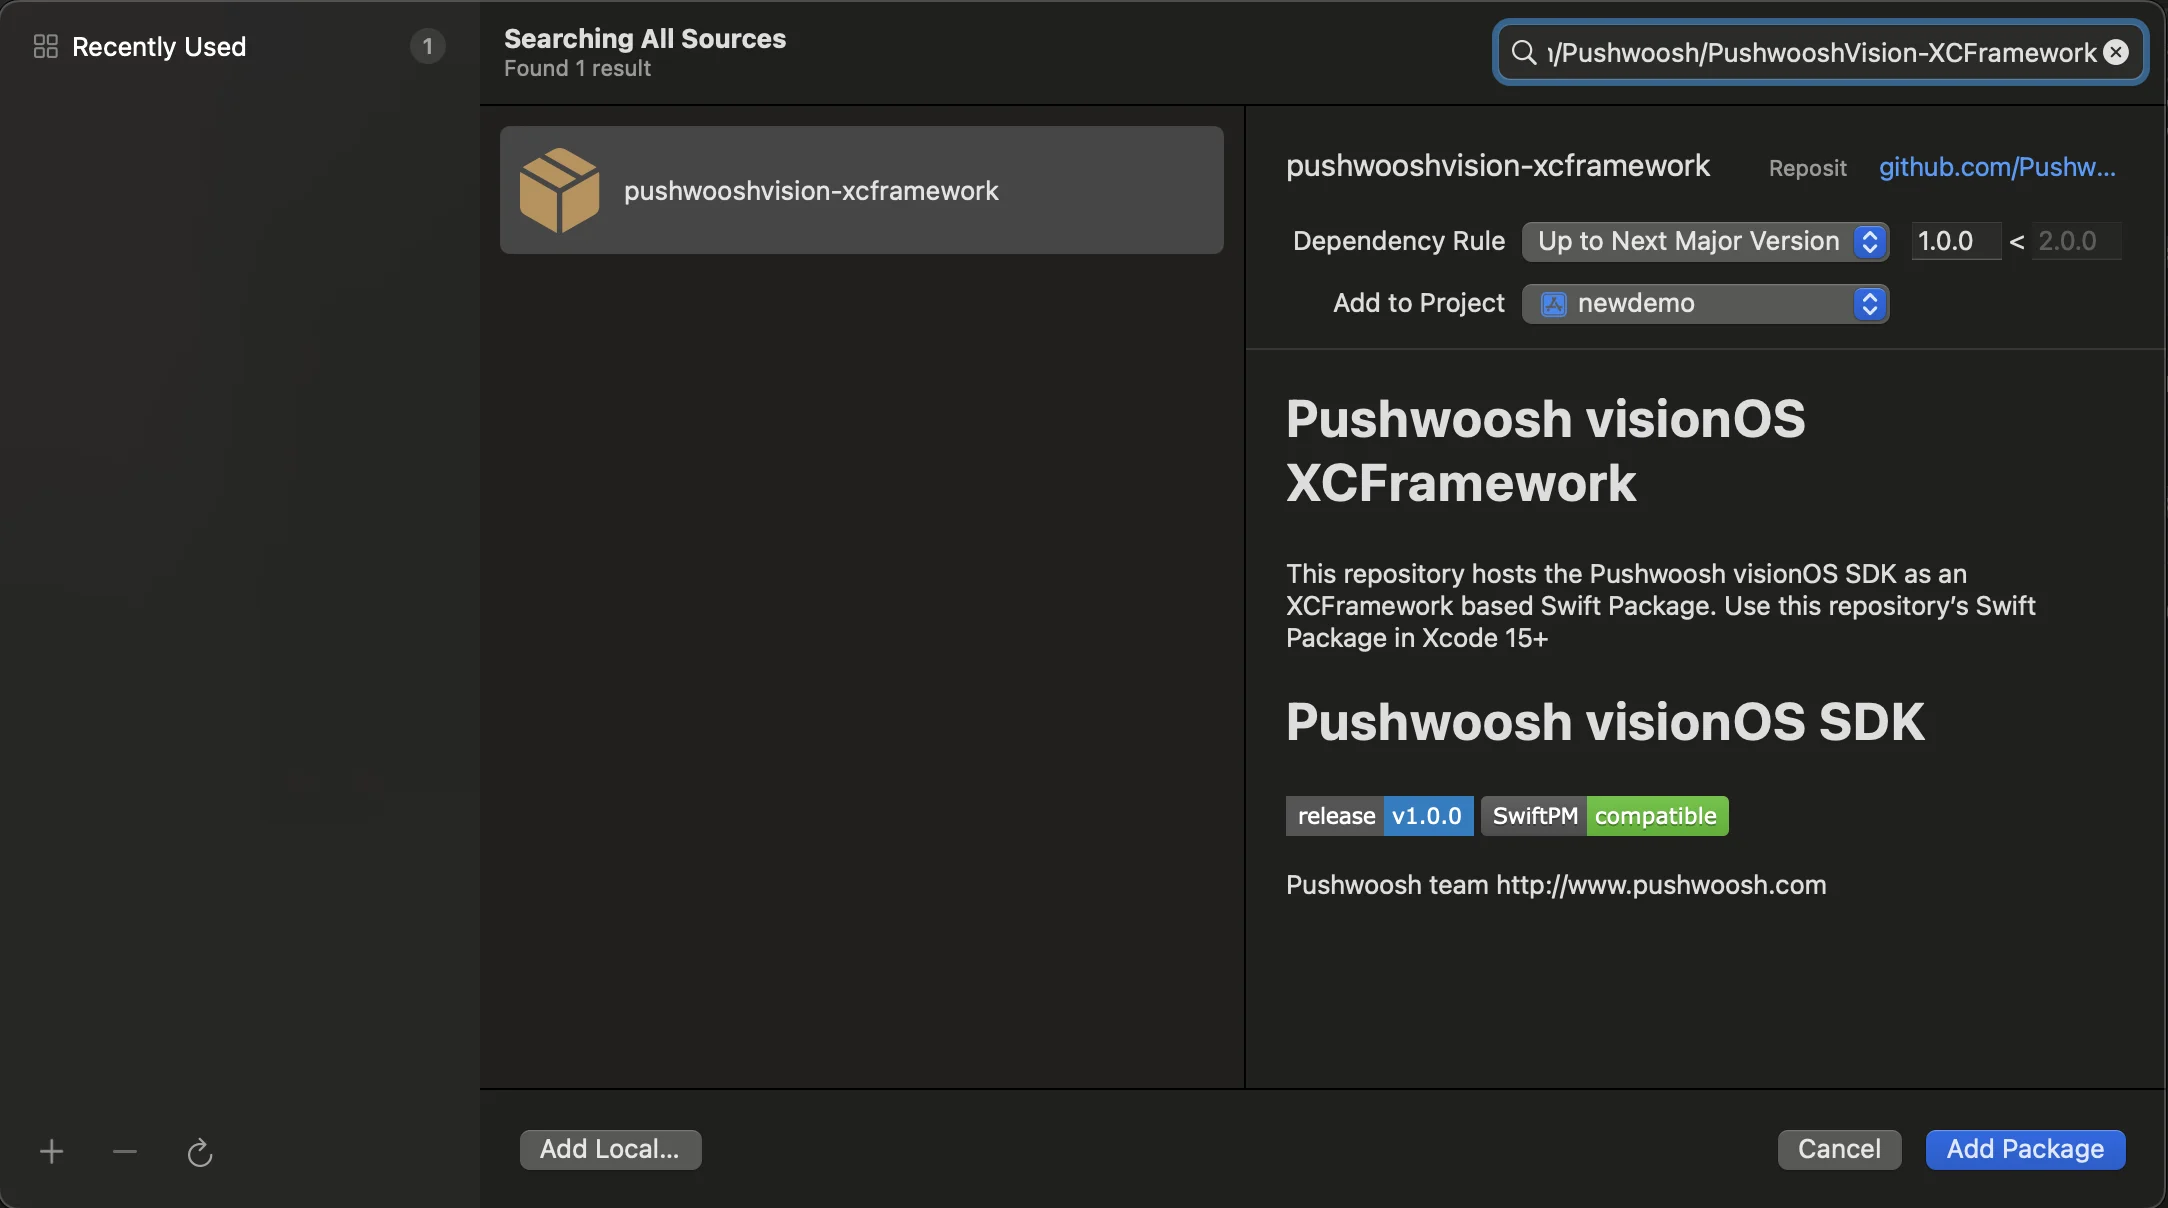
- ป้อน Package URL ต่อไปนี้:
https://github.com/Pushwoosh/PushwooshVision-XCFramework
- ตั้งค่า Dependency Rule
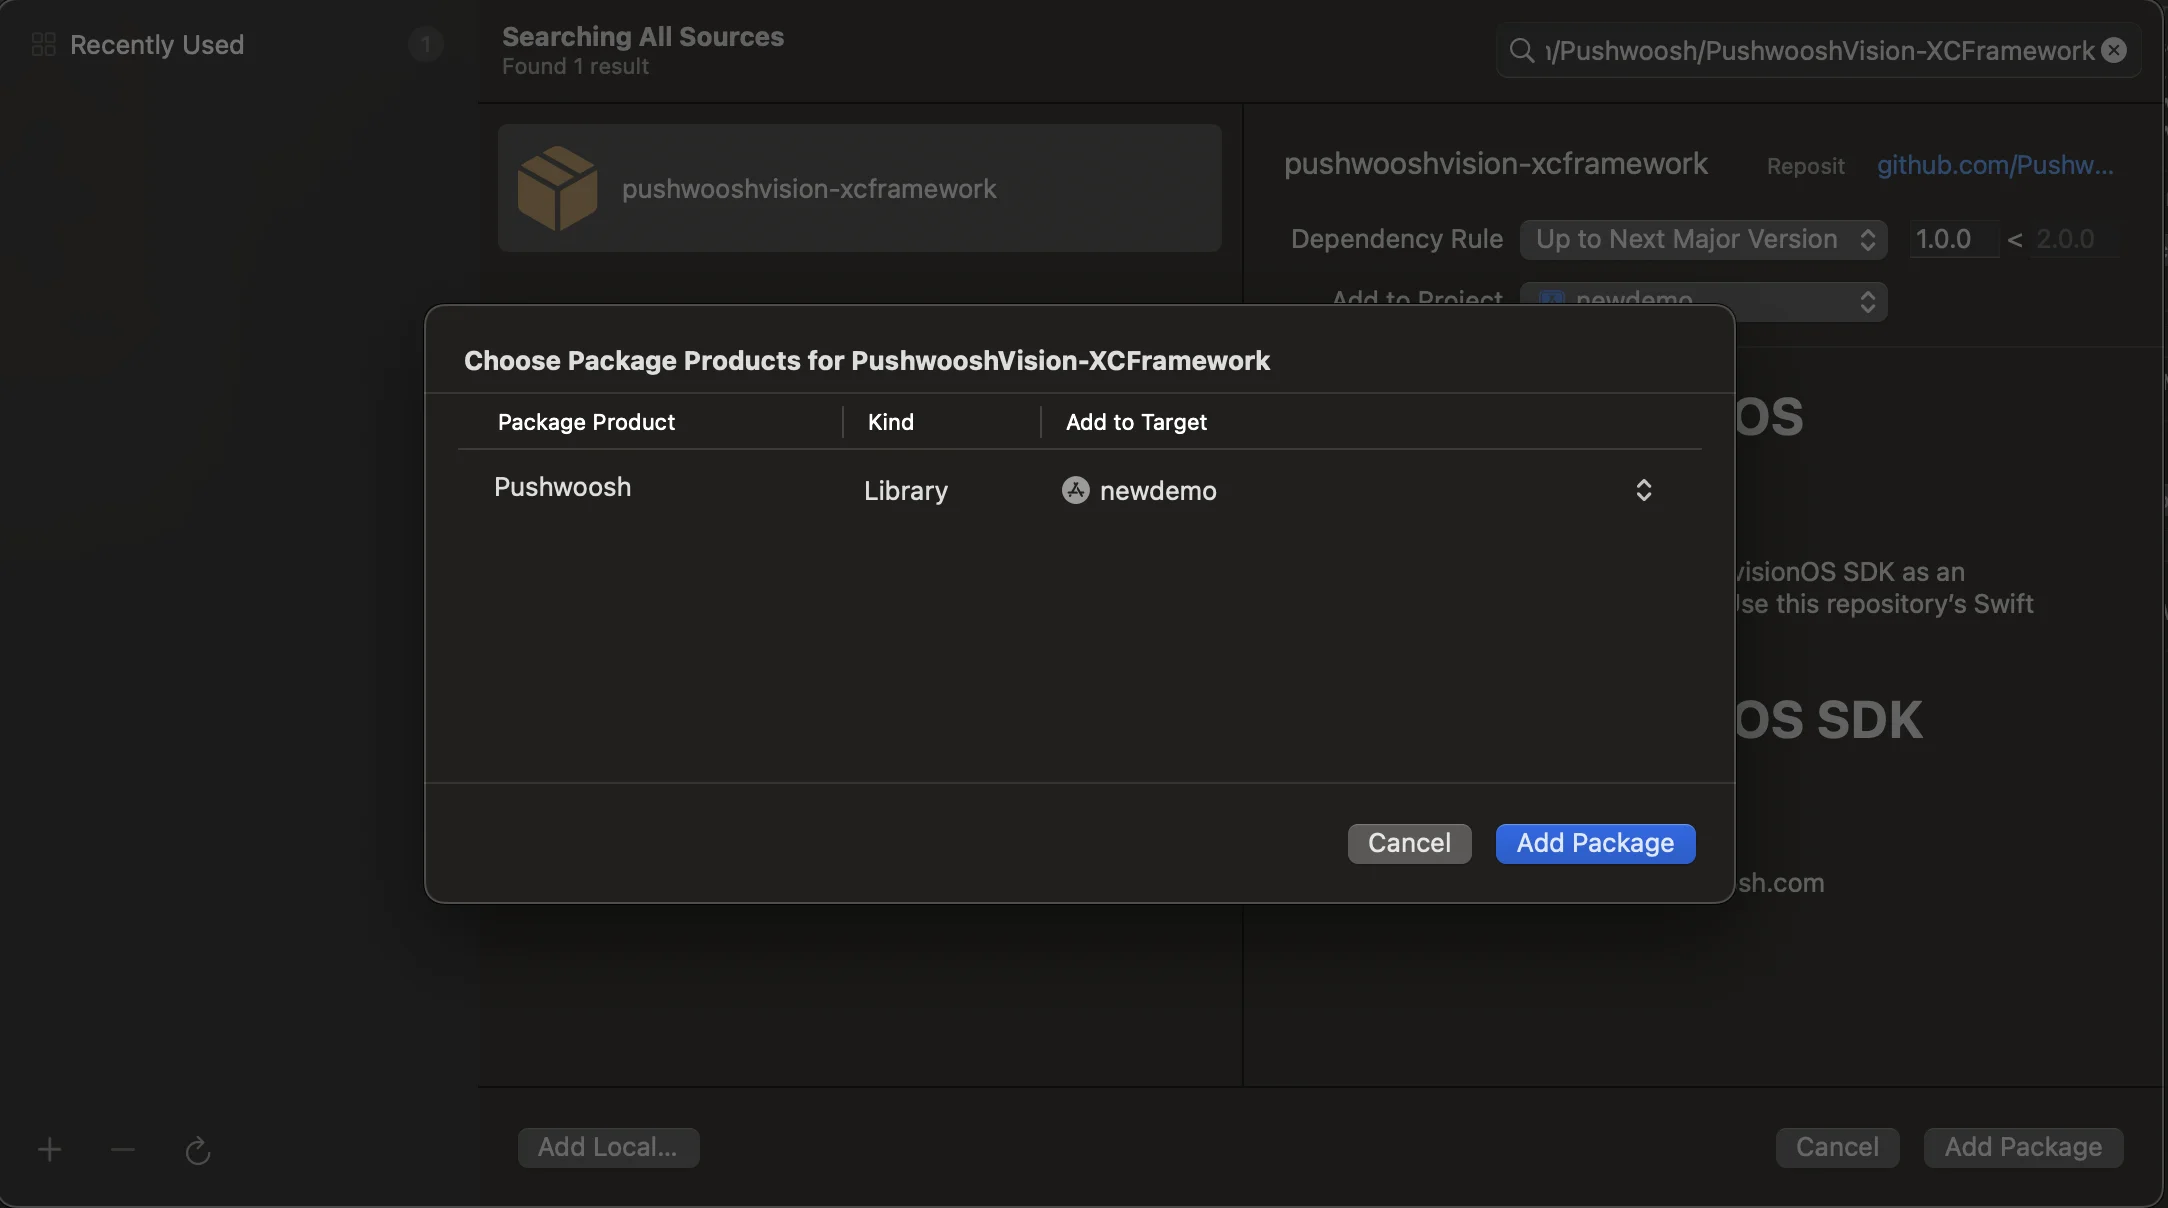
- ในหน้าจอถัดไป เพื่อเลือก Package ของคุณ ให้เลือก Pushwoosh Package และ Add Package ไปยัง Target ของแอปหลักของคุณ
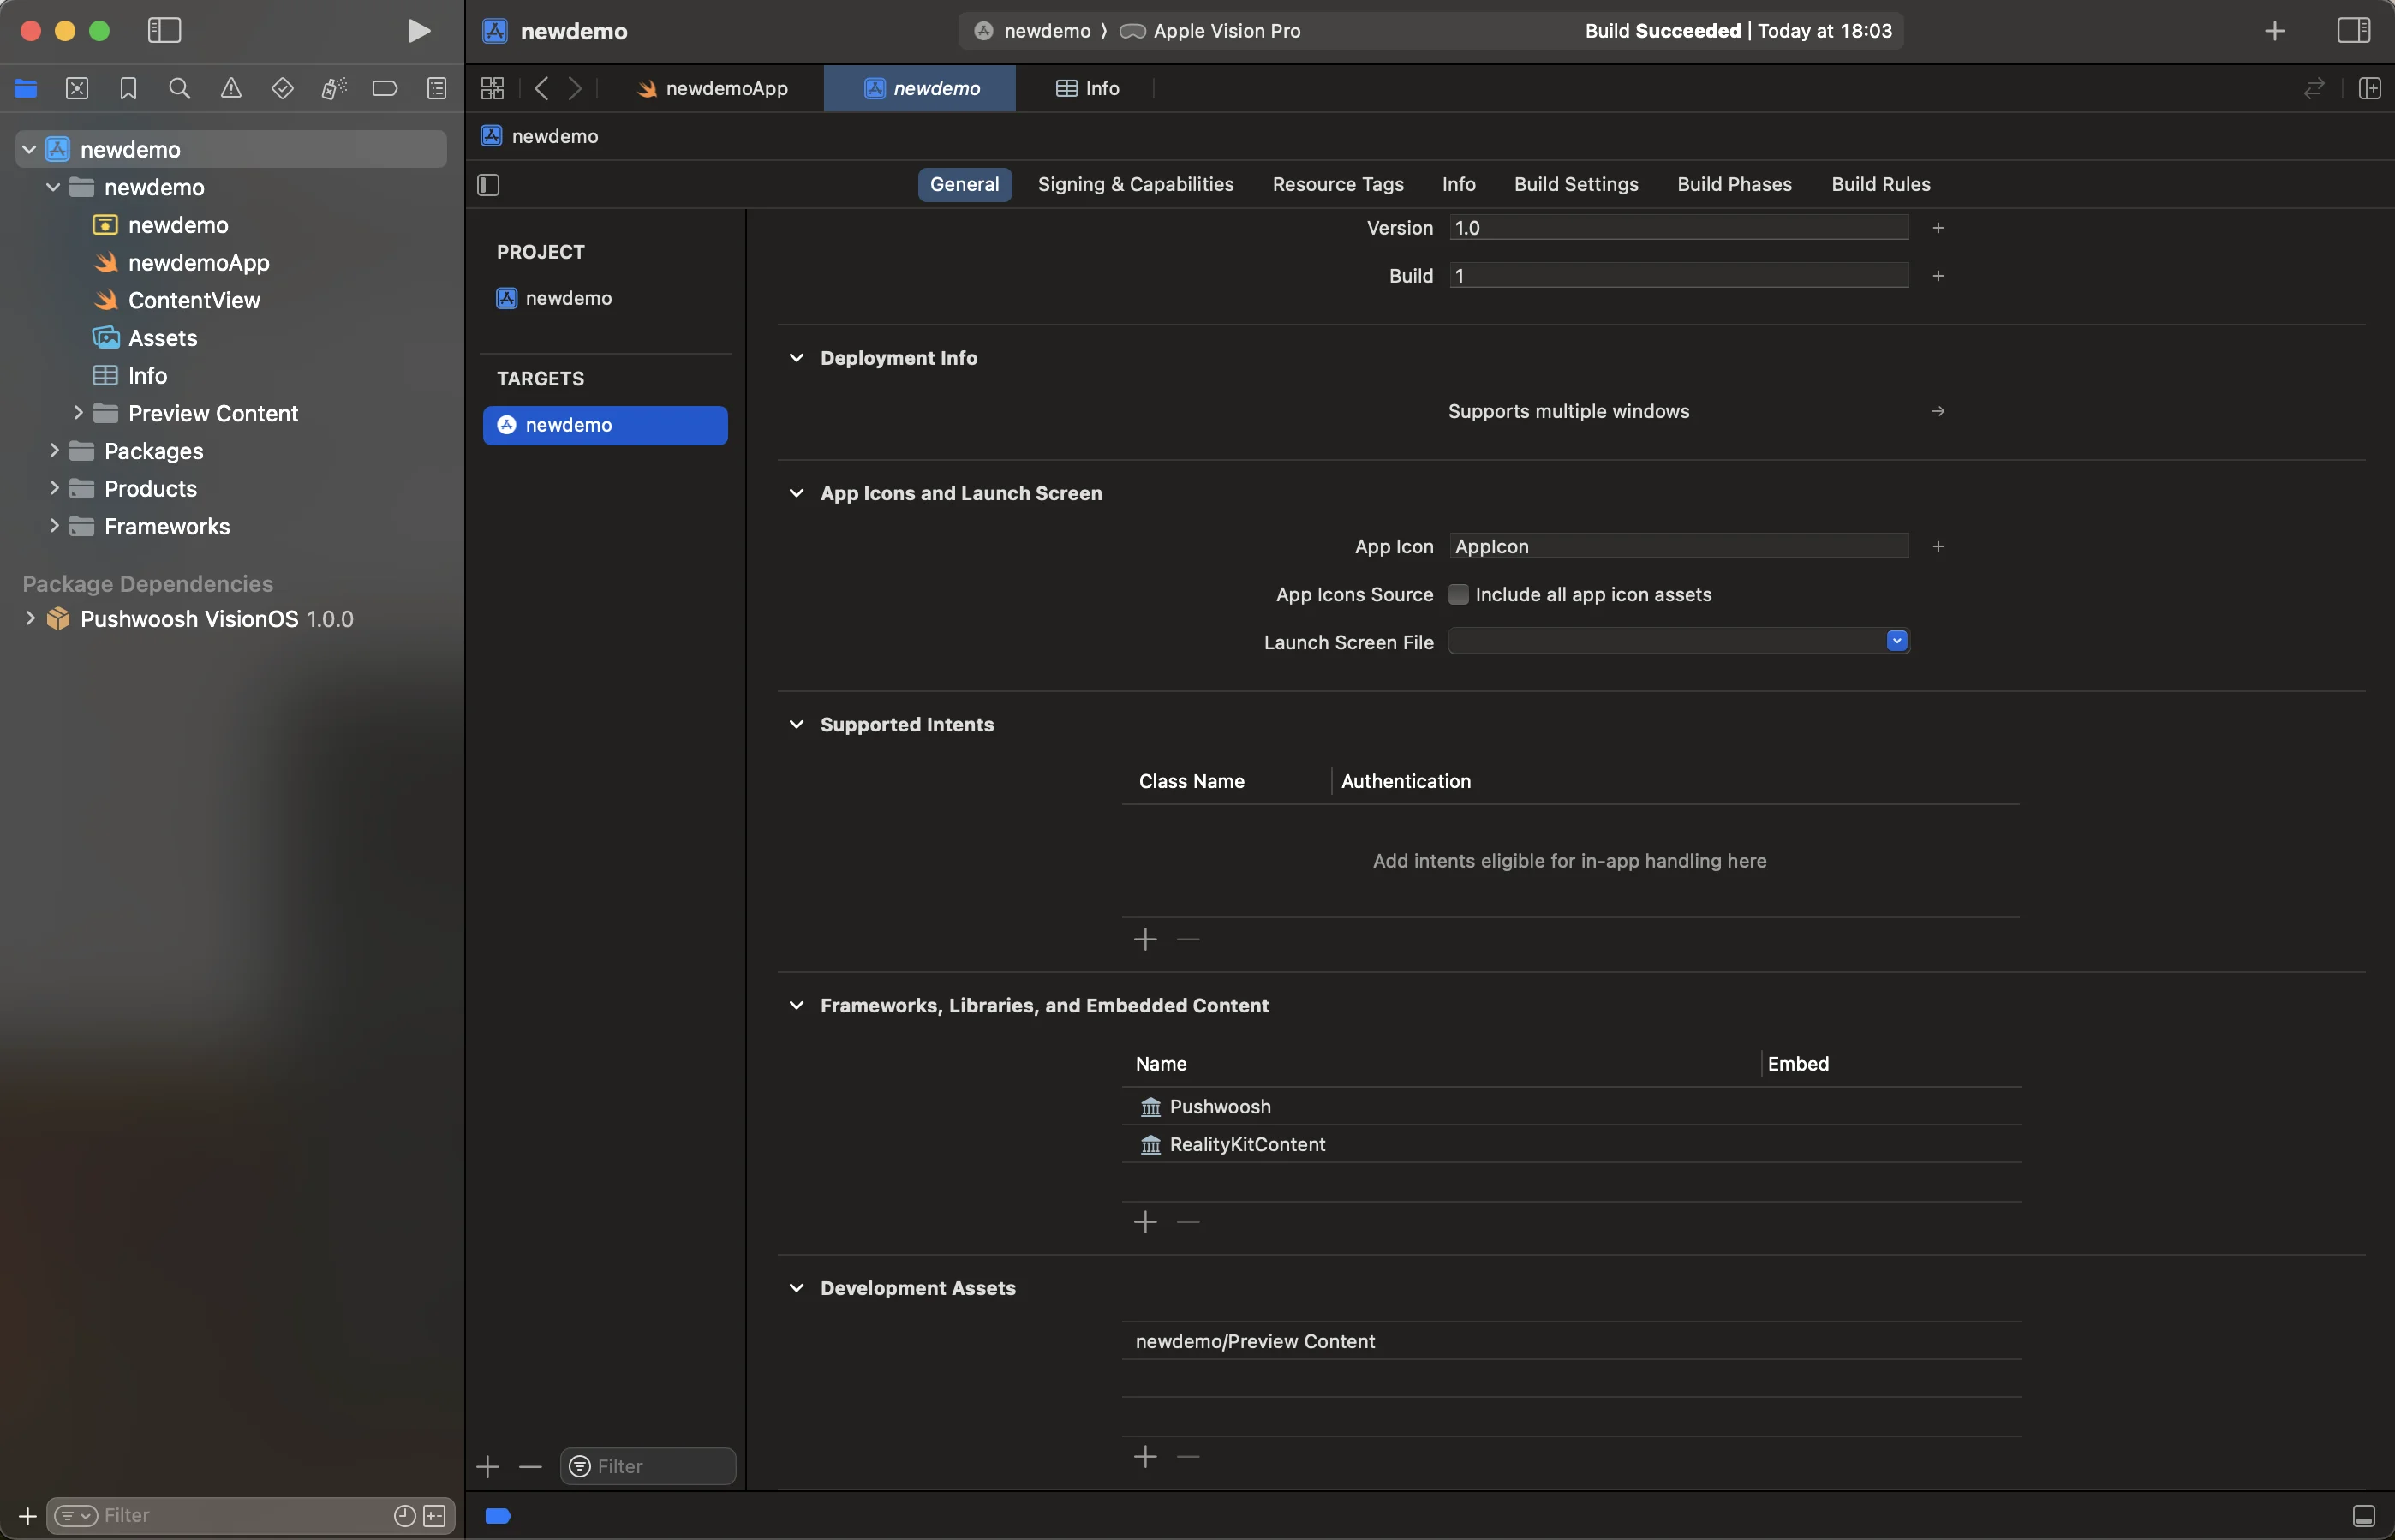
- เปิด Main App Target ของคุณและภายใต้ Frameworks, Libraries, and Embedded Content ตรวจสอบให้แน่ใจว่า Pushwoosh iOS SDK ได้ถูกเพิ่มเข้ามาแล้ว
- ยอดเยี่ยม! คุณได้ผสานการทำงาน Pushwoosh visionOS SDK เข้ากับโปรเจกต์ของคุณเรียบร้อยแล้ว
เพิ่ม Capabilities ที่จำเป็น
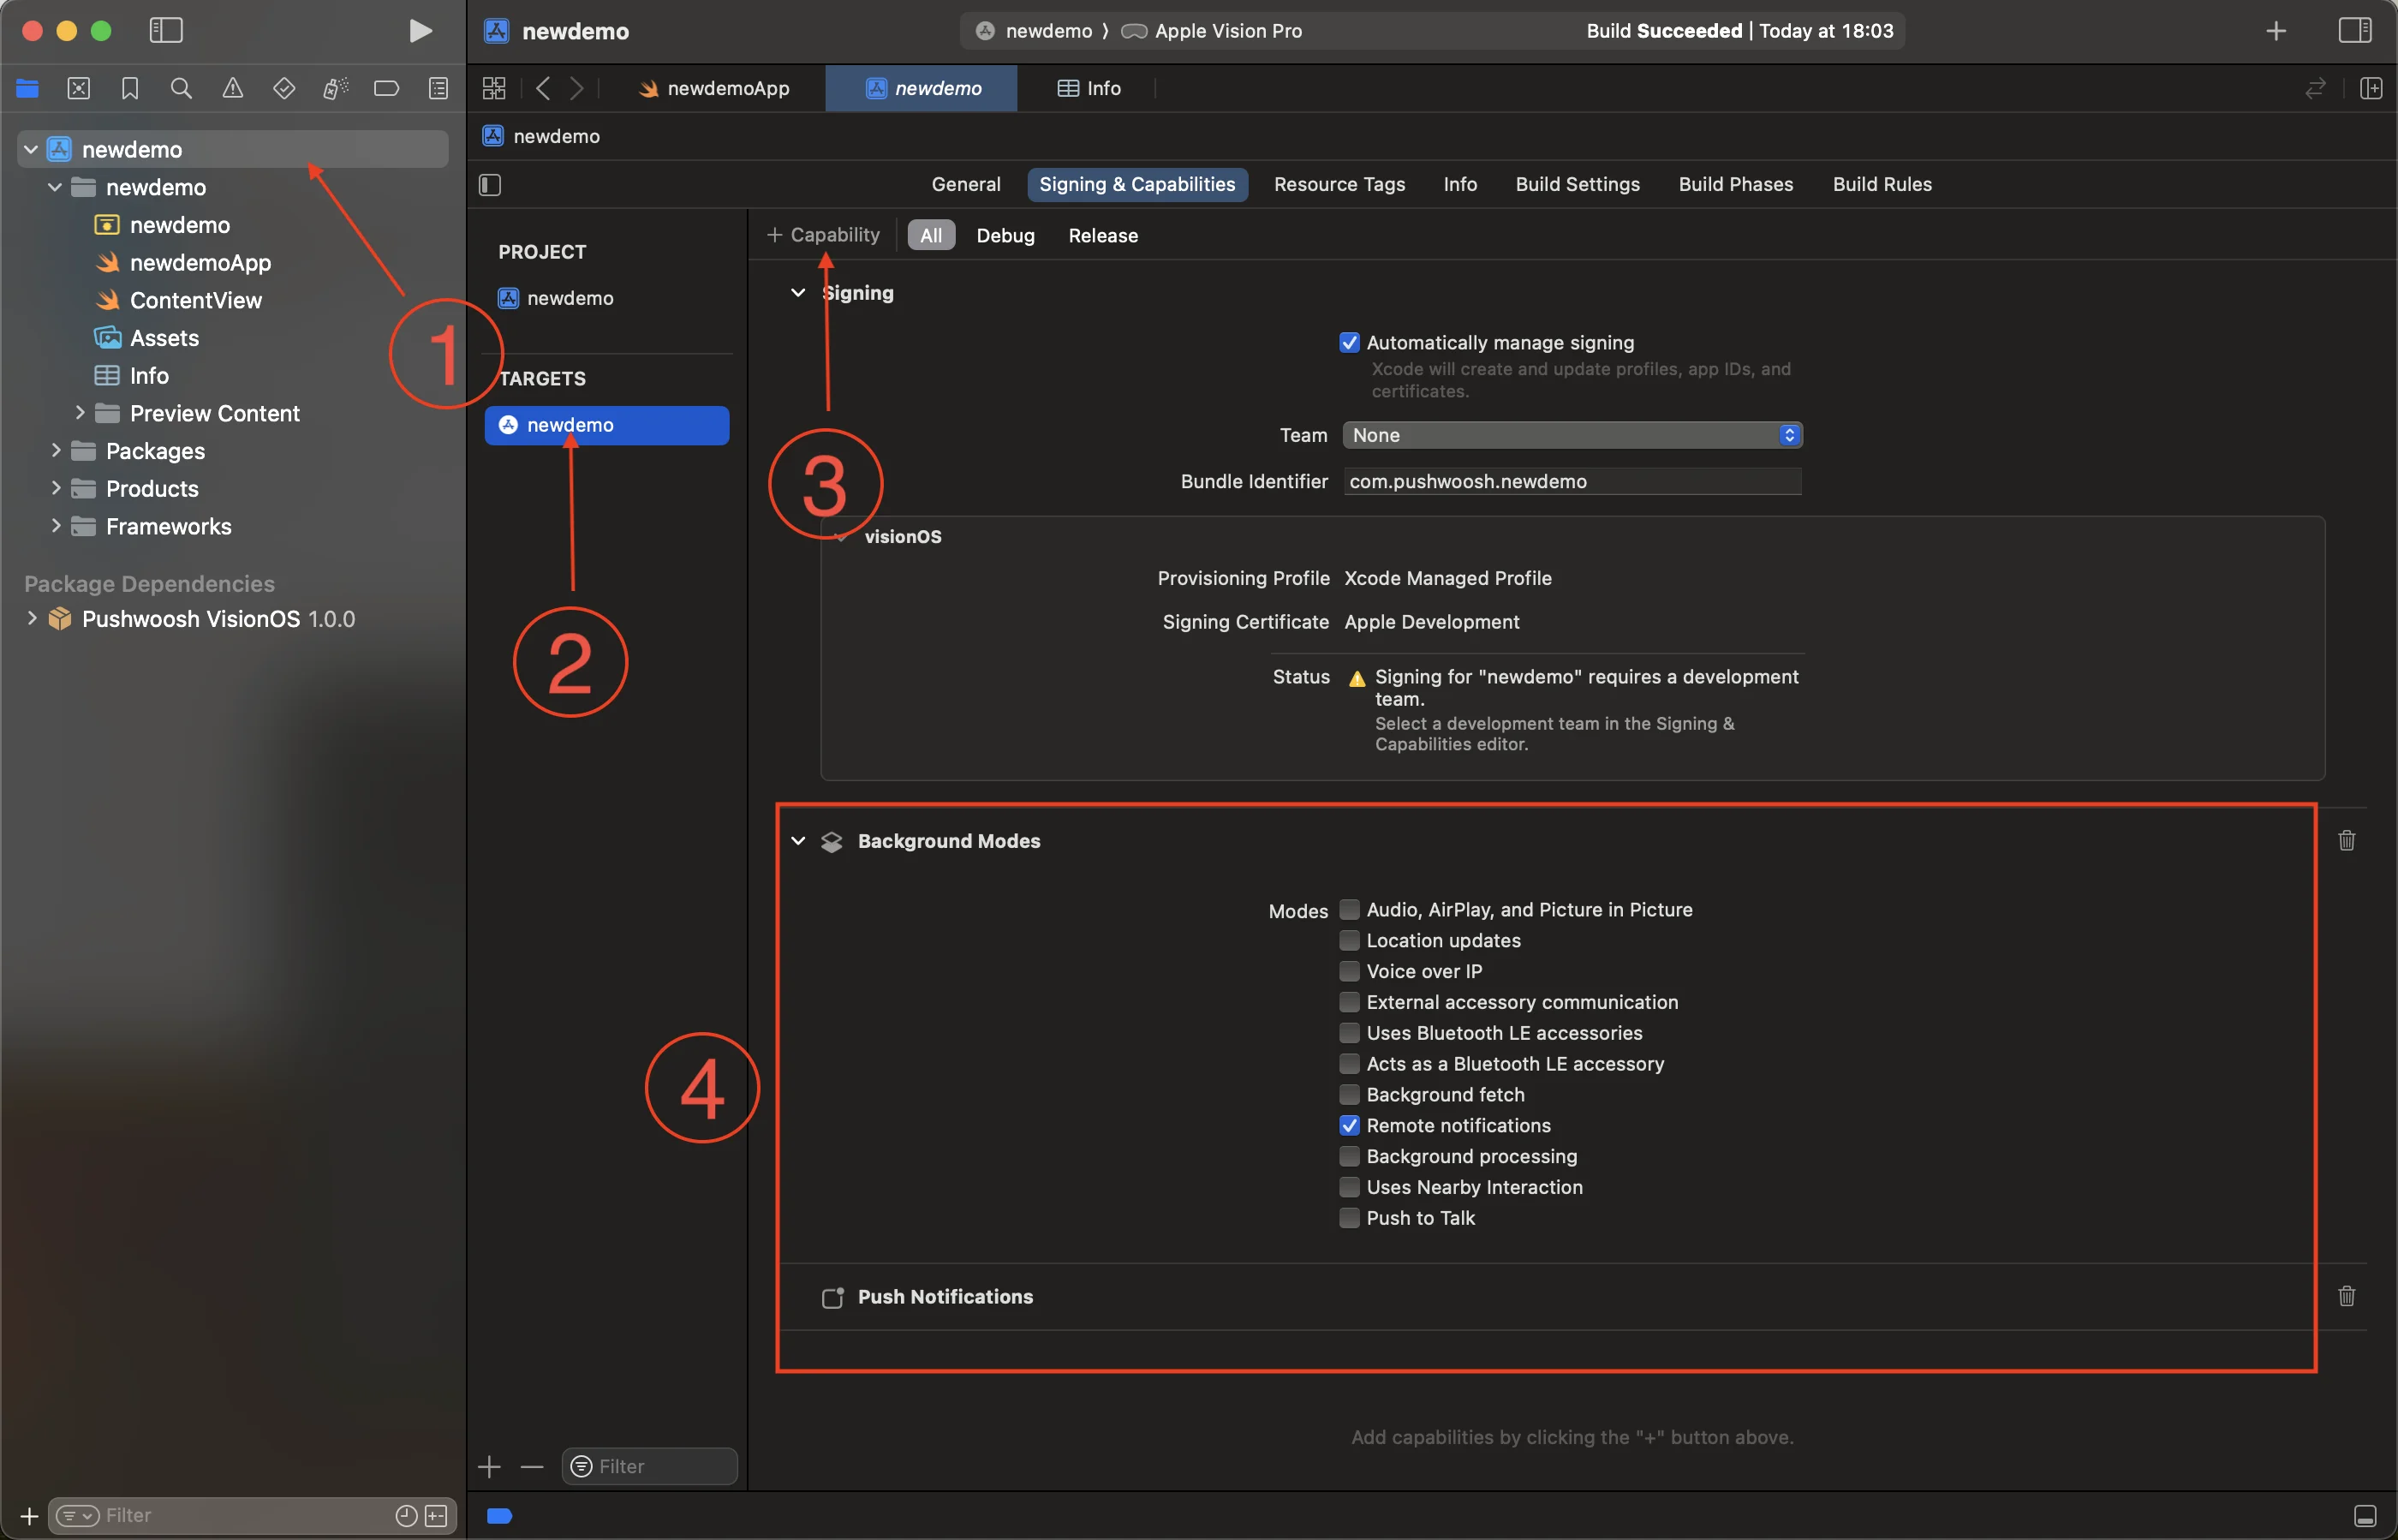
Anchor link to- เลือกโปรเจกต์ราก (1) และ Target ของแอปหลักของคุณ (2) จากนั้นไปที่แท็บ Signing and Capabilities
- กดปุ่ม + Capability (3) และเลือก Push Notifications capability
- จากนั้น เพิ่ม Background Modes capability และทำเครื่องหมายที่ช่อง Remote notifications (4)

- ยอดเยี่ยม! การกำหนดค่า capabilities ของ Xcode เสร็จสมบูรณ์แล้ว
เพิ่มโค้ดสำหรับเริ่มต้น Pushwoosh
Anchor link to- เพิ่มโค้ดต่อไปนี้ลงในแอปของคุณ
import SwiftUIimport Pushwoosh
class AppDelegate: NSObject, UIApplicationDelegate, UNUserNotificationCenterDelegate, PWMessagingDelegate {    func application(_ application: UIApplication, didFinishLaunchingWithOptions launchOptions: [UIApplication.LaunchOptionsKey : Any]? = nil) -> Bool {
        Pushwoosh.sharedInstance().registerForPushNotifications()        Pushwoosh.sharedInstance().delegate = self        return true    }
    func application(_ application: UIApplication, didRegisterForRemoteNotificationsWithDeviceToken deviceToken: Data) {        Pushwoosh.sharedInstance().handlePushRegistration(deviceToken)    }
    func application(_ application: UIApplication, didFailToRegisterForRemoteNotificationsWithError error: any Error) {        Pushwoosh.sharedInstance().handlePushRegistrationFailure(error)        print("\(error.localizedDescription)")    }
    func pushwoosh(_ pushwoosh: Pushwoosh, onMessageOpened message: PWMessage) {        print("Message opened: \(message.payload!)")    }
    func pushwoosh(_ pushwoosh: Pushwoosh, onMessageReceived message: PWMessage) {        print("Message received: \(message.payload!)")    }}
@mainstruct newdemoApp: App {    @UIApplicationDelegateAdaptor(AppDelegate.self) var appDelegate
var body: some Scene { WindowGroup { ContentView() } }}- ในไฟล์
Info.plistของคุณ เพิ่มคีย์ประเภทสตริงต่อไปนี้:
<key>Pushwoosh_APPID</key><string>XXXXX-XXXXX</string>
<key>Pushwoosh_API_TOKEN</key><string>YOUR_DEVICE_API_TOKEN</string>Pushwoosh_APPID: คือ Pushwoosh Application Code ของคุณPushwoosh_API_TOKEN: คือ Pushwoosh Device API Token ของคุณ
สำคัญ: ตรวจสอบให้แน่ใจว่าได้ให้สิทธิ์การเข้าถึงแก่โทเค็นสำหรับแอปพลิเคชันที่ถูกต้องใน Pushwoosh Control Panel ของคุณ เรียนรู้เพิ่มเติม
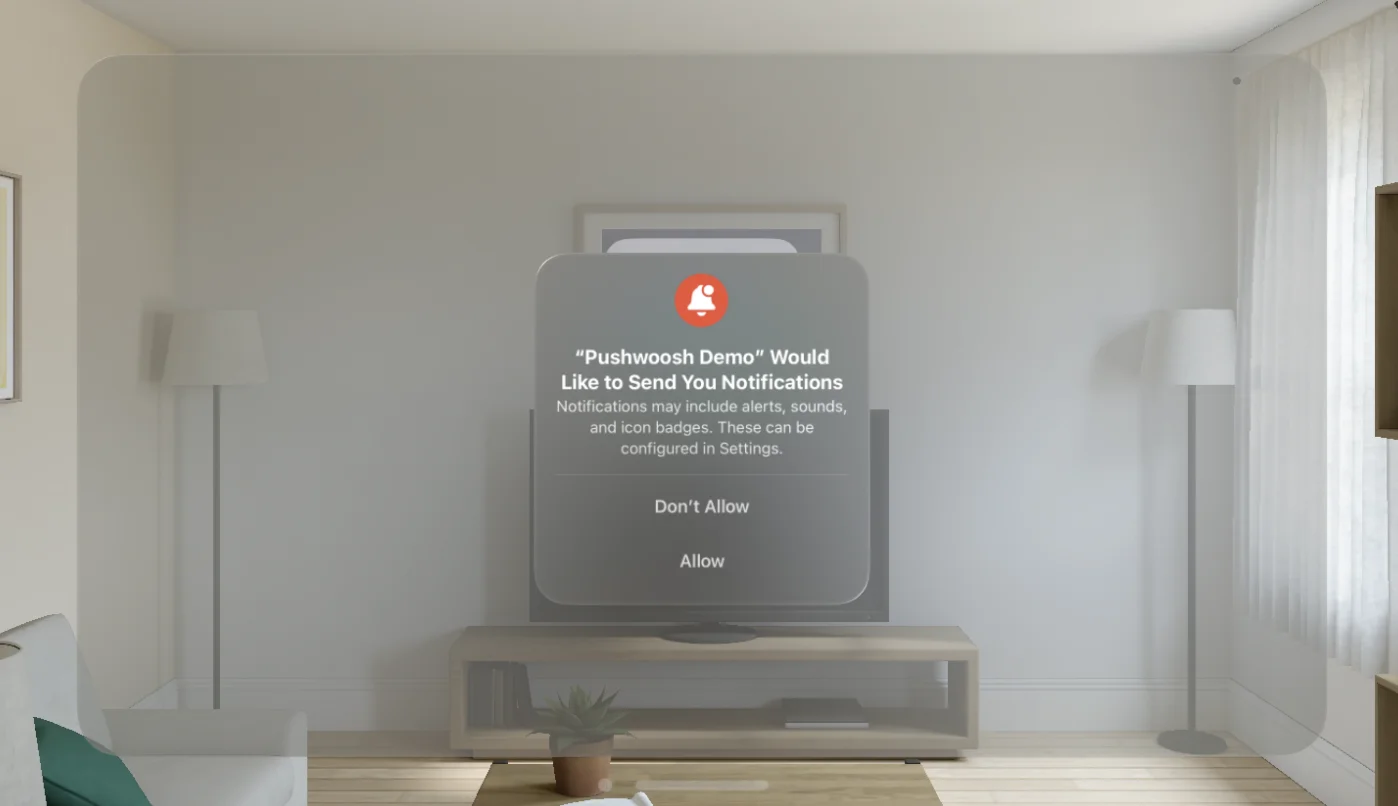
- ยอดเยี่ยม! ตอนนี้คุณสามารถส่ง push notification แรกของคุณได้แล้ว!


แบ่งปันความคิดเห็นของคุณกับเรา
Anchor link toความคิดเห็นของคุณช่วยให้เราสร้างประสบการณ์ที่ดีขึ้น ดังนั้นเรายินดีที่จะรับฟังความคิดเห็นจากคุณหากคุณมีปัญหาใดๆ ในระหว่างกระบวนการผสานการทำงาน SDK หากคุณประสบปัญหาใดๆ โปรดอย่าลังเลที่จะแบ่งปันความคิดเห็นของคุณกับเรา ผ่านฟอร์มนี้