# ตั้งค่า InboxKit ด้วย CocoaPods
*ใช้งานได้ตั้งแต่ iOS SDK [7.0.40](https://github.com/Pushwoosh/pushwoosh-ios-sdk/releases/tag/7.0.40)*
InboxKit มาในรูปแบบ subspec ที่เป็นตัวเลือกของ pod หลัก `PushwooshXCFramework` คุณจำเป็นต้องผสานรวม SDK หลักไว้แล้ว หากคุณเริ่มต้นจากศูนย์ ให้ทำตาม [คู่มือการผสานรวมพื้นฐาน](/th/developer/pushwoosh-sdk/ios-sdk/setting-up-pushwoosh-ios-sdk-7-0/basic-integration-guide/) ก่อน
## เพิ่ม InboxKit pod
1. เปิด `Podfile` ของคุณและเพิ่ม InboxKit subspec ไปยัง target ของแอป:
```ruby
target 'MyApp' do
use_frameworks!
pod 'PushwooshXCFramework'
pod 'PushwooshXCFramework/PushwooshInboxKit'
end
```
2. รัน `pod install` จากไดเรกทอรีโปรเจกต์ของคุณ:
```bash
pod install
```
3. เปิดไฟล์ `.xcworkspace` ที่สร้างขึ้น ตอนนี้ InboxKit จะถูกเชื่อมโยงเข้ากับ SDK หลักแล้ว
## แสดง inbox
เพิ่ม inbox controller ไปยัง navigation flow ใดก็ได้ การกำหนดค่าเริ่มต้นก็เพียงพอที่จะทำให้ inbox ทำงานได้ด้วย cell มาตรฐานสามประเภท:
```swift
import PushwooshInboxKit
let inboxVC = PushwooshInboxKitViewController()
navigationController?.pushViewController(inboxVC, animated: true)
```
```objective-c
@import PushwooshInboxKit;
PushwooshInboxKitViewController *inboxVC = [PushwooshInboxKitViewController new];
[self.navigationController pushViewController:inboxVC animated:YES];
```
## ปรับแต่ง inbox
ใน Swift ให้กำหนดค่า controller ผ่าน value type `PushwooshInboxKitAttributes` ส่วนใน Objective-C ให้ใช้ setters ที่รองรับ `@objc` บน controller — เนื่องจาก `PushwooshInboxKitAttributes` เป็น Swift struct และไม่ได้ถูก bridged
```swift
var attributes = PushwooshInboxKitAttributes()
attributes.pullToRefreshEnabled = true
attributes.swipeToDeleteEnabled = true
attributes.pinningEnabled = true
attributes.style.unreadBadgeColor = .systemBlue
attributes.style.titleFont = .systemFont(ofSize: 17, weight: .semibold)
let inboxVC = PushwooshInboxKitViewController(attributes: attributes)
```
```objective-c
PushwooshInboxKitViewController *inboxVC = [PushwooshInboxKitViewController new];
[inboxVC setBackgroundColor:[UIColor systemBackgroundColor]];
[inboxVC setEmptyMessage:@"You have no messages yet"];
```
`Style` struct จะเปิดเผยสี, ฟอนต์, corner radii และ date formatter ทั้งหมดที่ใช้โดย cell เริ่มต้น ทุกค่าเป็นสี semantic ของ Apple โดยค่าเริ่มต้น ดังนั้น inbox จึงตอบสนองต่อ dark mode ของระบบโดยอัตโนมัติ
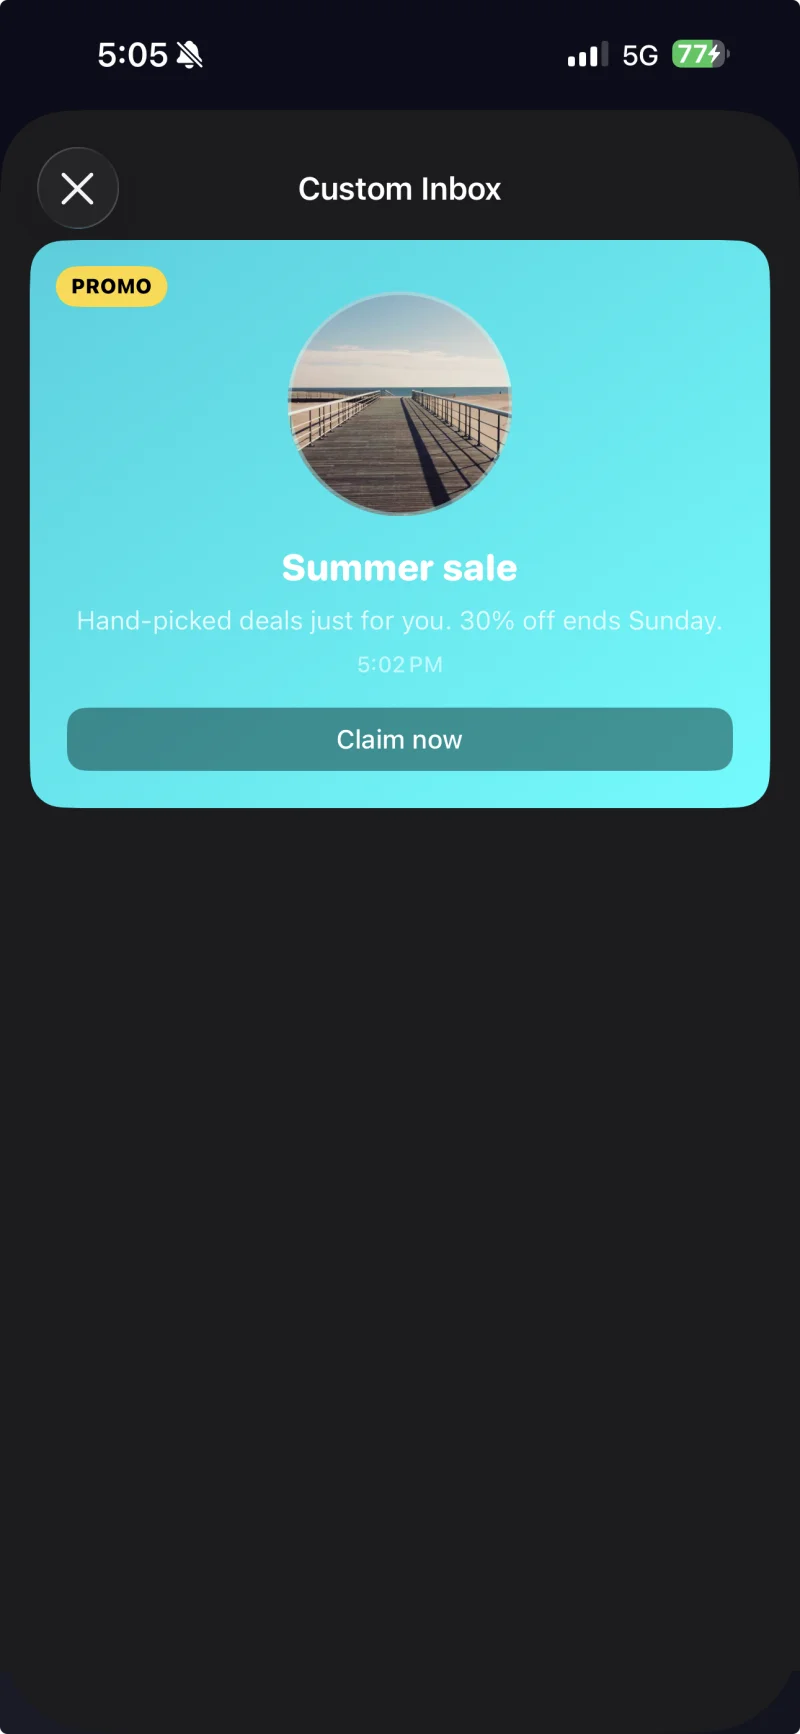
Cell ที่มีคำบรรยายพร้อมธีมที่กำหนดเองซึ่งปรับใช้ผ่าน PushwooshInboxKitAttributes.Style
## จัดการการแตะและการรีเฟรช
ทำตาม `PushwooshInboxKitDelegate` เพื่อตอบสนองต่อการกระทำของผู้ใช้และ event การรีเฟรช ทุกเมธอดมีการใช้งานเริ่มต้น ดังนั้นคุณจึงสามารถ override เฉพาะส่วนที่ต้องการได้:
```swift
final class InboxCoordinator: NSObject, PushwooshInboxKitDelegate {
func inboxKit(_ vc: PushwooshInboxKitViewController,
didSelect message: PWInboxMessageProtocol) -> Bool {
// คืนค่า true เพื่อให้ SDK เปิด URL ของข้อความหรือ richmedia
// คืนค่า false หากคุณจัดการการแตะทั้งหมดแล้ว (เช่น นำทางไปยังหน้าจอที่กำหนดเอง)
return true
}
func inboxKit(_ vc: PushwooshInboxKitViewController,
didRefreshWith messages: [PWInboxMessageProtocol],
error: Error?) {
// แสดงสถานะว่างเปล่า / ข้อผิดพลาดของคุณเองที่นี่หากจำเป็น
}
}
inboxVC.delegate = inboxCoordinator
```
SDK มี bulk operations เป็นเมธอด `@objc` บน controller ดังนั้นคุณจึงสามารถเชื่อมต่อเข้ากับ `UIBarButtonItem` ได้โดยตรง:
```swift
let markAll = UIBarButtonItem(
image: UIImage(systemName: "checkmark.circle"),
style: .plain,
target: inboxVC,
action: #selector(PushwooshInboxKitViewController.markAllAsRead)
)
let clearRead = UIBarButtonItem(
image: UIImage(systemName: "trash"),
style: .plain,
target: inboxVC,
action: #selector(PushwooshInboxKitViewController.clearReadMessages)
)
inboxVC.navigationItem.rightBarButtonItems = [clearRead, markAll]
```
## ขั้นตอนถัดไป