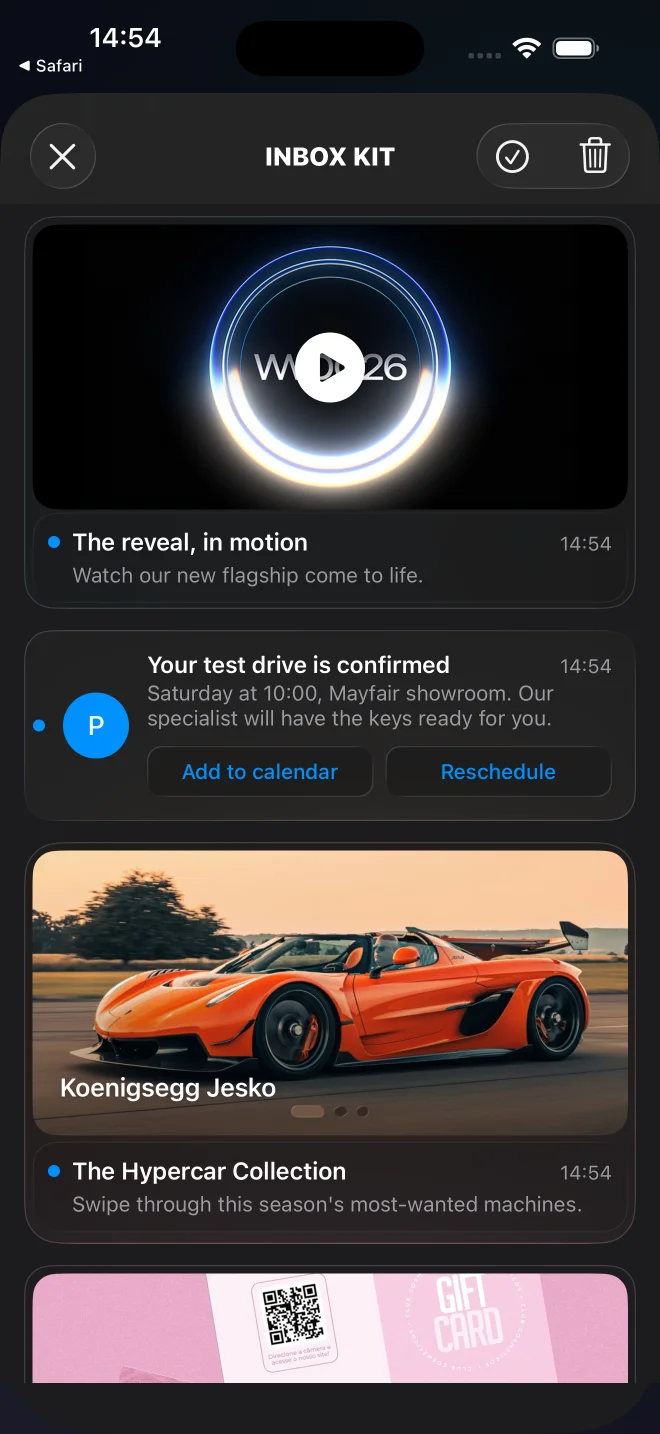
ฟีด InboxKit เริ่มต้นพร้อมการ์ดแบนเนอร์, มีคำบรรยาย, คลาสสิก, แคโรเซล, วิดีโอ และ Apple Wallet
## เมื่อใดที่ควรใช้ InboxKit
ใช้ InboxKit สำหรับการผสานรวม iOS ใหม่ทั้งหมด เป็นโมดูลที่แนะนำให้ใช้แทนที่โมดูล Objective-C [PushwooshInboxUI](/th/developer/pushwoosh-sdk/ios-sdk/setting-up-pushwoosh-inboxui-ios/) รุ่นเก่า
InboxKit ให้คุณ:
- ประเภทเซลล์ในตัวหกประเภท — แบนเนอร์, มีคำบรรยาย, คลาสสิก, แคโรเซล, วิดีโอ และ Apple Wallet — ซึ่งเลือกต่อข้อความผ่าน `displayType` ของเพย์โหลด หรือบังคับจากโค้ดผ่าน `attributes.forceCellKind` ดู [ประเภทการ์ด](#card-types) สำหรับรายการทั้งหมด (การ์ด Apple Wallet มีเฉพาะใน iOS เท่านั้น)
- ปุ่ม CTA ในบรรทัดพร้อม enum `PushwooshInboxButtonAction` ที่ระบุประเภท (`openURL`, `dismiss`, `markRead`, `custom`) SDK จะจัดการสามอย่างแรกโดยอัตโนมัติ delegate ของคุณจะส่ง `custom` ไปยังตรรกะของคุณเอง
- รองรับการปักหมุด: ข้อความที่มี `actionParams["pinned"] == true` จะลอยอยู่ด้านบนสุดของฟีดและแสดงสัญลักษณ์หมุด
- ปัดเพื่อลบ, ดึงเพื่อรีเฟรช, ทำเครื่องหมายว่าอ่านแล้วโดยอัตโนมัติเมื่อหายไป — ทั้งหมดนี้สามารถสลับเปิดปิดได้ผ่าน `PushwooshInboxKitAttributes`
- การจัดเก็บข้อมูลถาวร: การลบและสถานะการอ่านจะยังคงอยู่แม้จะรีสตาร์ทกระบวนการ แม้ว่าการเรียกเครือข่ายจะยังไม่ได้รับการยืนยันก็ตาม
- คลาสพื้นฐาน `PushwooshInboxCell` ที่เปิดกว้างสำหรับเลย์เอาต์ที่กำหนดเองทั้งหมด
สัญญาของเซิร์ฟเวอร์ไม่เปลี่ยนแปลง — แบ็กเอนด์กล่องข้อความ, เพย์โหลด และเครื่องมือแดชบอร์ดของ Pushwoosh ยังคงทำงานเหมือนเดิม
## เลือกวิธีการผสานรวมของคุณ
- [**ตั้งค่า InboxKit ด้วย Swift Package Manager**](/th/developer/pushwoosh-sdk/ios-sdk/setting-up-pushwoosh-inboxkit-ios/set-up-inboxkit-with-swift-package-manager/) — แนะนำสำหรับโปรเจกต์ใหม่
- [**ตั้งค่า InboxKit ด้วย CocoaPods**](/th/developer/pushwoosh-sdk/ios-sdk/setting-up-pushwoosh-inboxkit-ios/set-up-inboxkit-with-cocoapods/) — สำหรับโปรเจกต์ที่ใช้ CocoaPods อยู่แล้ว
## ประเภทการ์ด
InboxKit จะเลือกเลย์เอาต์เซลล์ต่อข้อความ ตัวแก้ไขเริ่มต้นจะอ่าน `displayType` จากเพย์โหลดของ push — วางไว้ในอ็อบเจกต์ `data` ซึ่ง SDK จะส่งมอบภายใต้ `actionParams` เมื่อ `displayType` หายไป ตัวแก้ไขจะกลับไปใช้ฮิวริสติก: รูปภาพ + ไม่มีชื่อเรื่อง → แบนเนอร์, รูปภาพ + ชื่อเรื่อง → มีคำบรรยาย, นอกนั้นเป็นคลาสสิก หากต้องการบังคับใช้เลย์เอาต์เดียวสำหรับทั้งฟีดจากโค้ด ให้ตั้งค่า `attributes.forceCellKind`
เลย์เอาต์ rich แต่ละแบบจะลดระดับลงอย่างสวยงาม: หากไม่มีเพย์โหลดที่จำเป็นหรือมีรูปแบบไม่ถูกต้อง การ์ดจะกลับไปเป็น `classic` แทนที่จะแสดงตัวยึดตำแหน่งที่ว่างเปล่า (และจะมีการบันทึก `WARN`)
| `displayType` | เลย์เอาต์ | ฟิลด์เพย์โหลดที่จำเป็น | ลดระดับเป็น |
|---|---|---|---|
| `banner` | รูปภาพเต็มขอบ ไม่มีข้อความ | รูปภาพ (`inbox_image` หรือ `data.image`) | `classic` เมื่อไม่มีรูปภาพ |
| `captioned` | รูปภาพด้านบน, ชื่อเรื่อง + เนื้อหาด้านล่าง | รูปภาพ (`inbox_image` หรือ `data.image`) | `classic` เมื่อไม่มีรูปภาพ |
| `classic` | อวาตาร์อักษรย่อสี + ชื่อเรื่อง + เนื้อหา | — | — |
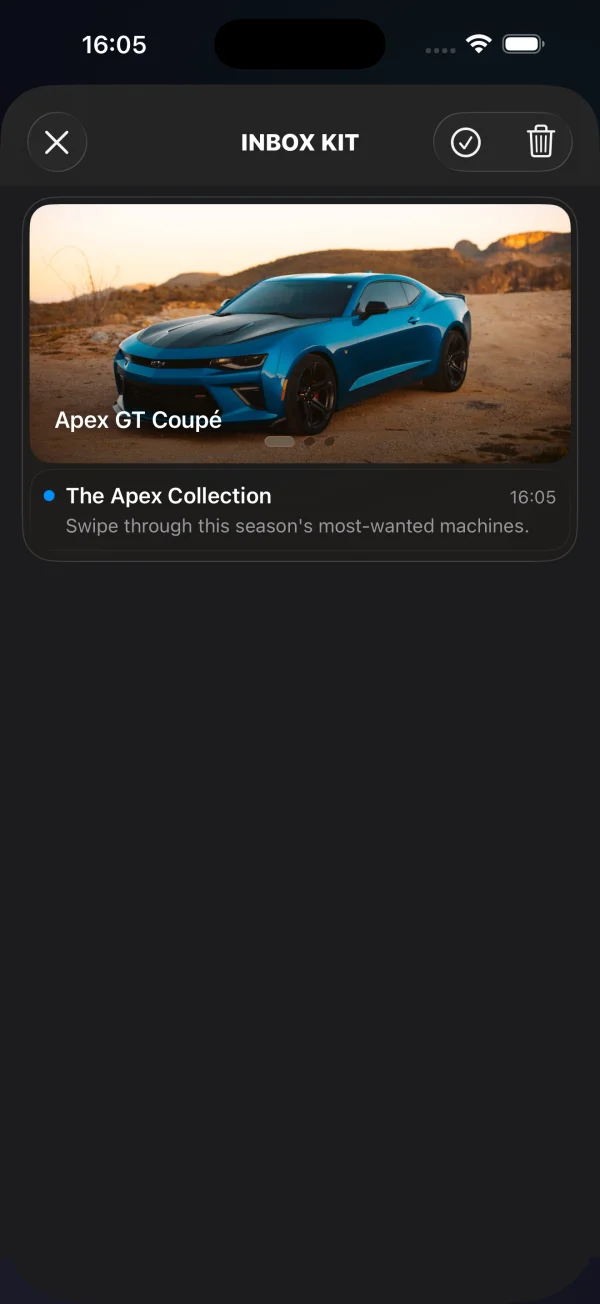
| `carousel` | แกลเลอรีหลายรูปภาพที่ปัดได้ | `data.carousel` (อาร์เรย์ของสไลด์) | `classic` เมื่อไม่มีสไลด์ |
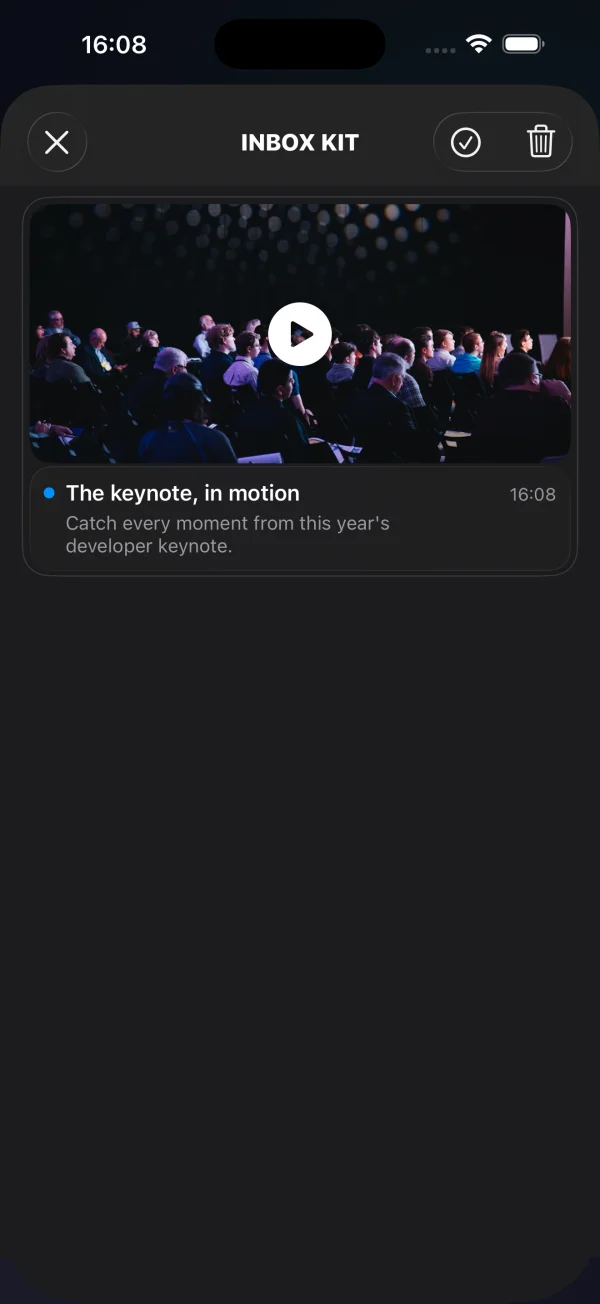
| `video` | โปสเตอร์พร้อมป้ายเล่น, แตะเพื่อเล่นเต็มหน้าจอ | `data.video` (`url` + `poster` ที่เป็นตัวเลือก) | `classic` เมื่อไม่มีตัวอธิบาย |
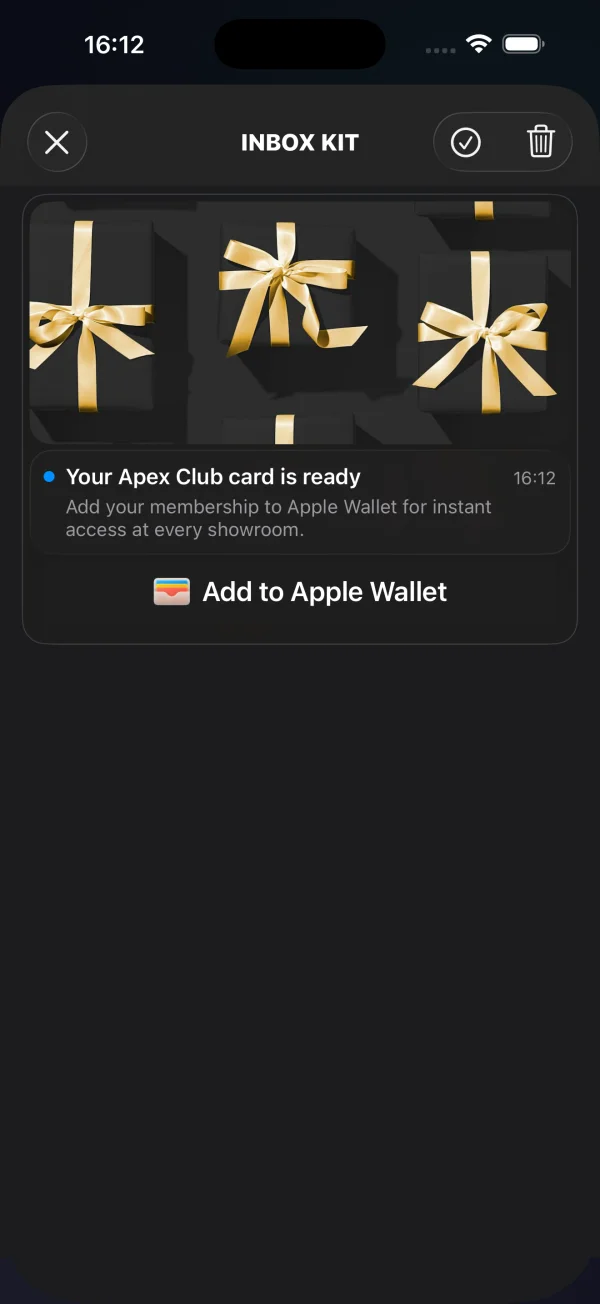
| `wallet` | ปุ่ม "Add to Apple Wallet" (เฉพาะ iOS) | `data.wallet` (URL ของ `.pkpass`) | `classic` เมื่อไม่มี URL ของบัตร |
{/* TODO(screenshot): replace each placeholder below with a per-card screenshot. Suggested filenames: setting-up-pushwoosh-inboxkit-ios-card-banner.webp, -captioned.webp, -classic.webp, -carousel.webp, -video.webp, -wallet.webp — then swap each for an

. */}
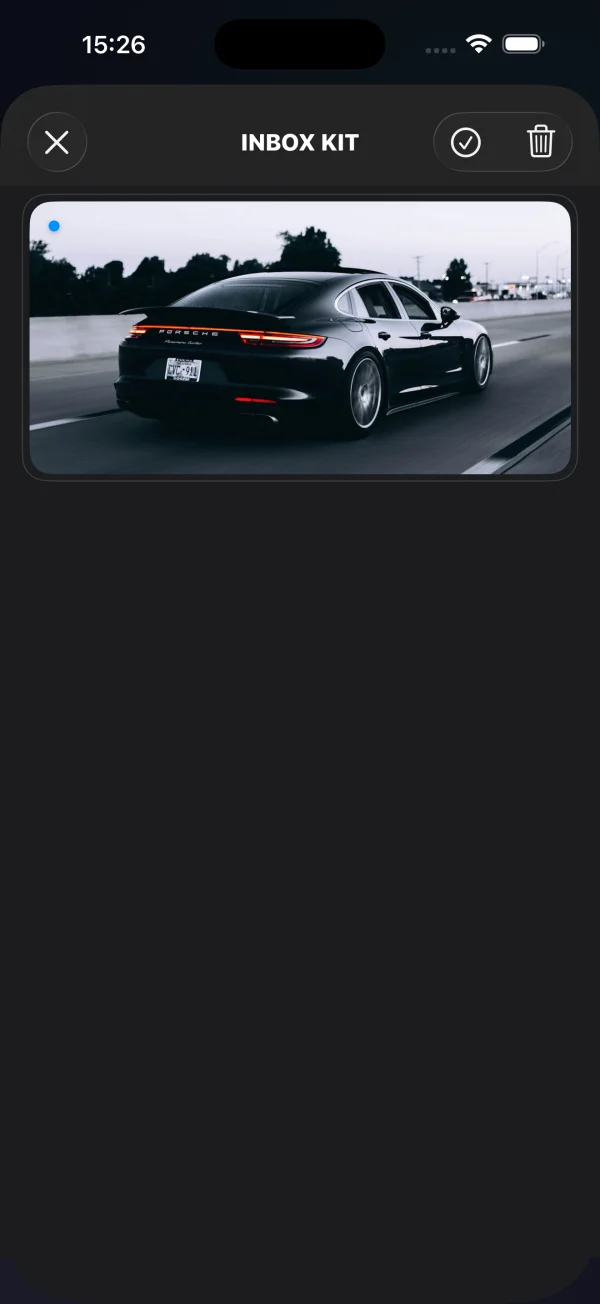 การ์ดแบนเนอร์
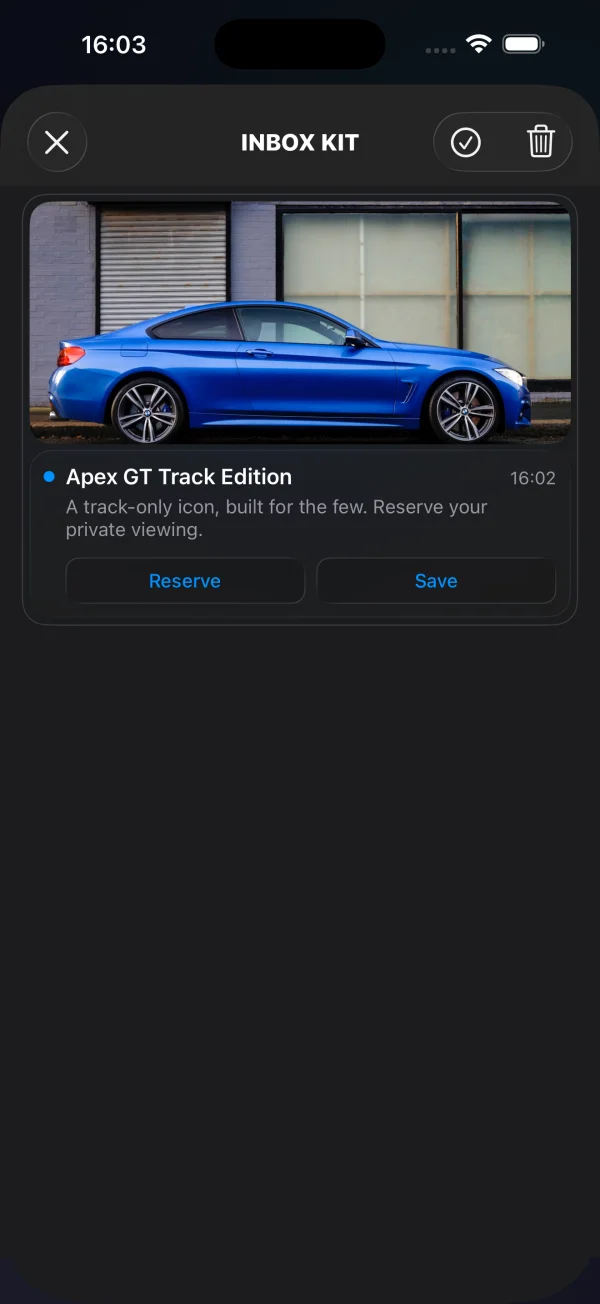 การ์ดมีคำบรรยาย
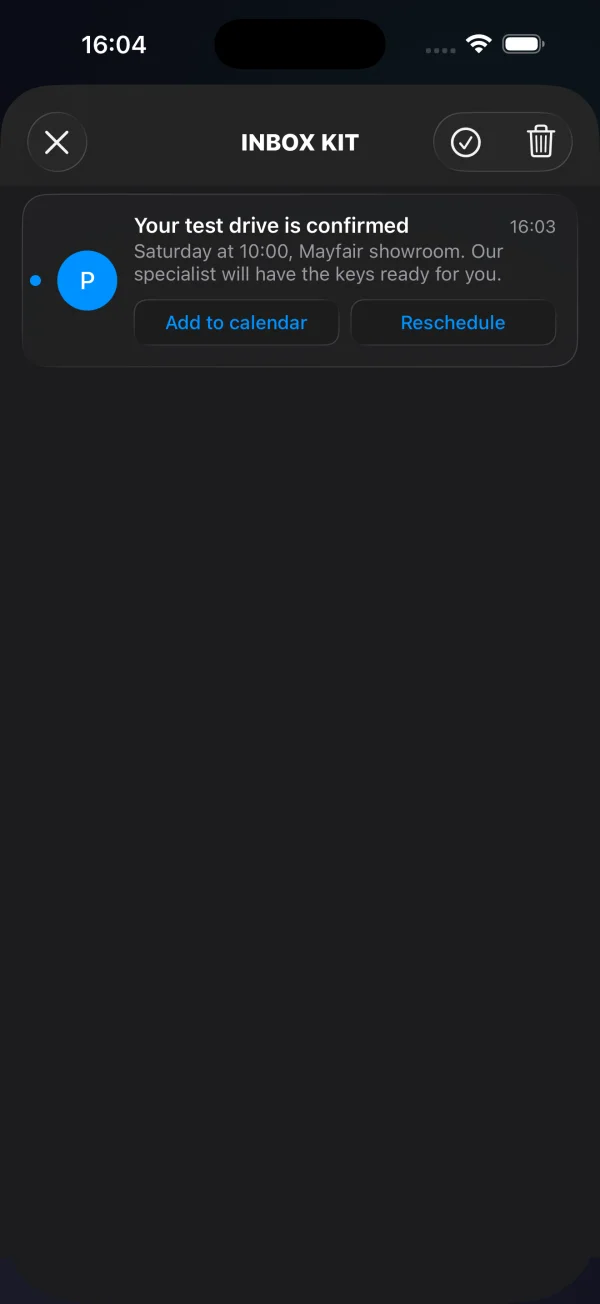 การ์ดคลาสสิก
 การ์ดแคโรเซล
 การ์ดวิดีโอ
 การ์ด Apple Wallet
การ์ดแบนเนอร์, มีคำบรรยาย และคลาสสิกขับเคลื่อนโดยฟิลด์ข้อความมาตรฐาน (รูปภาพ, ชื่อเรื่อง, เนื้อหา) บวกกับอาร์เรย์ `buttons` ที่เป็นตัวเลือก — ดู [เพิ่มปุ่ม CTA ในบรรทัด](#add-inline-cta-buttons) การ์ดแคโรเซล, วิดีโอ และ Apple Wallet มีข้อมูลโครงสร้างเพิ่มเติมภายใน `data` ซึ่งมีเอกสารอธิบายไว้ด้านล่าง
### การ์ดแคโรเซล
แคโรเซลจะแสดงรูปภาพหลายรูปจากข้อความเดียว — เป็นแกลเลอรีที่ปัดได้พร้อมคำบรรยายและปลายทางการแตะต่อสไลด์ที่เป็นตัวเลือก สไลด์จะอยู่ใน `data.carousel` แต่ละสไลด์ต้องมี `image`; `title` (คำบรรยายซ้อนทับ) และ `url` (deep link ที่เปิดเมื่อแตะ) เป็นตัวเลือก สไลด์ที่ไม่มีรูปภาพจะถูกทิ้งไป การแตะบนสไลด์ที่ไม่มี `url` จะส่งต่อไปยังการกระทำแถวเริ่มต้นของข้อความ
```json title="POST https://api.pushwoosh.com/json/1.3/createMessage"
{
"request": {
"application": "XXXXX-XXXXX",
"auth": "API_TOKEN",
"notifications": [{
"send_date": "now",
"ios_title": "New arrivals",
"content": "Swipe through this week's drops",
"inbox_days": 7,
"data": {
"displayType": "carousel",
"carousel": [
{ "image": "https://cdn.example.com/inbox/1.jpg", "title": "New in", "url": "myapp://product/1" },
{ "image": "https://cdn.example.com/inbox/2.jpg", "title": "On sale", "url": "myapp://product/2" },
{ "image": "https://cdn.example.com/inbox/3.jpg" }
]
},
"platforms": [1]
}]
}
}
```
### การ์ดวิดีโอ
การ์ดวิดีโอจะแสดงรูปภาพโปสเตอร์พร้อมป้ายเล่น การแตะจะเปิดเครื่องเล่นเต็มหน้าจอ (เปิดเสียง แม้จะเปิดสวิตช์ปิดเสียงอยู่) ตัวอธิบายจะอยู่ใน `data.video`: `url` เป็นสิ่งจำเป็นและต้องเป็นสตรีมหรือไฟล์ `http`/`https`; `poster` เป็นรูปภาพตัวอย่างที่เป็นตัวเลือก
```json title="POST https://api.pushwoosh.com/json/1.3/createMessage"
{
"request": {
"application": "XXXXX-XXXXX",
"auth": "API_TOKEN",
"notifications": [{
"send_date": "now",
"ios_title": "Watch the reveal",
"content": "Tap to play",
"inbox_days": 7,
"data": {
"displayType": "video",
"video": {
"url": "https://cdn.example.com/inbox/clip.mp4",
"poster": "https://cdn.example.com/inbox/poster.jpg"
}
},
"platforms": [1]
}]
}
}
```
### การ์ด Apple Wallet
การ์ด Apple Wallet จะแสดงรูปภาพฮีโร่, ชื่อเรื่อง และเนื้อหาที่เป็นตัวเลือกเหนือปุ่ม **Add to Apple Wallet** อย่างเป็นทางการ การแตะปุ่มจะดาวน์โหลด `.pkpass` และแสดงชีตเพิ่มบัตรของระบบ ใช้เพื่อส่งมอบคูปอง, บัตรสะสมคะแนน, ตั๋ว หรือบัตรขึ้นเครื่องได้โดยตรงจากกล่องข้อความ การ์ดนี้มีเฉพาะใน iOS / Mac Catalyst เท่านั้น — บนแพลตฟอร์มอื่น ข้อความจะแสดงเป็นการ์ดคลาสสิก
URL ของบัตรจะอยู่ใน `data.wallet` ซึ่งอาจเป็นสตริงเปล่าหรืออ็อบเจกต์ที่มีฟิลด์ `pass` ก็ได้ `data.image` ที่เป็นตัวเลือกจะเพิ่มรูปภาพฮีโร่ ปุ่มจะซ่อนตัวเองโดยอัตโนมัติเมื่อไม่มี URL ของบัตรหรืออุปกรณ์ไม่สามารถเพิ่มบัตรได้
```json title="POST https://api.pushwoosh.com/json/1.3/createMessage"
{
"request": {
"application": "XXXXX-XXXXX",
"auth": "API_TOKEN",
"notifications": [{
"send_date": "now",
"ios_title": "Your loyalty card is ready",
"content": "Add it to Apple Wallet in one tap",
"inbox_days": 7,
"data": {
"displayType": "wallet",
"image": "https://cdn.example.com/inbox/loyalty.png",
"wallet": "https://passes.example.com/v1/passes/pass.com.example.loyalty/abc123?token=…"
},
"platforms": [1]
}]
}
}
```
ผลลัพธ์จะถูกรายงานไปยัง delegate ของคุณ:
```swift
extension MyInboxHost: PushwooshInboxKitDelegate {
func inboxKit(_ vc: PushwooshInboxKitViewController,
didAddWalletPassFor message: PWInboxMessageProtocol) {
// The pass is now in the user's Wallet — show a confirmation if you like.
}
func inboxKit(_ vc: PushwooshInboxKitViewController,
didFailToAddWalletPassFor message: PWInboxMessageProtocol,
error: Error?) {
// Download failed — surface a retry, log, etc.
}
}
```
การเรียกกลับทั้งสองเป็นตัวเลือก (มีการใช้งานเริ่มต้นที่ว่างเปล่า) การที่ผู้ใช้ยกเลิกชีตของระบบไม่ถือเป็นความสำเร็จหรือความล้มเหลว ดังนั้นจึงไม่มีการเรียกกลับในกรณีนั้น
## การเข้าถึง
เซลล์ของ InboxKit พร้อมใช้งานกับ VoiceOver ทันทีที่แกะกล่อง การ์ดแบนเนอร์, มีคำบรรยาย และคลาสสิกจะเปิดเผยชื่อเรื่อง, เนื้อหา และวันที่ผ่านป้ายกำกับพื้นฐาน และปุ่ม CTA ในบรรทัดจะอ่านชื่อเรื่องของตัวเอง การ์ด rich จะเพิ่มความหมายที่ชัดเจน:
- **วิดีโอ** — โปสเตอร์จะถูกเปิดเผยเป็นองค์ประกอบปุ่มเดียวที่มีป้ายกำกับว่า "Play video" (ลักษณะ `.button` + `.startsMediaSession`) ดังนั้น VoiceOver จะประกาศว่าเป็นตัวควบคุมสื่อแทนที่จะเป็นรูปภาพธรรมดา
- **แคโรเซล** — แต่ละสไลด์เป็นองค์ประกอบปุ่มซึ่งป้ายกำกับการเข้าถึงคือคำบรรยายของสไลด์ หรือ "Slide" เมื่อไม่มีคำบรรยาย ตัวบ่งชี้หน้าจะประกาศตำแหน่งปัจจุบันเป็น "*n* of *total*"
- **Apple Wallet** — ปุ่ม **Add to Apple Wallet** เป็นปุ่ม `PKAddPassButton` มาตรฐานของ Apple ซึ่งมีป้ายกำกับ VoiceOver ที่แปลเป็นภาษาท้องถิ่นของตัวเอง
สำหรับการทดสอบ UI และระบบอัตโนมัติ มีการตั้งค่า `accessibilityIdentifier` ที่เสถียรสองตัว: `inboxkit.video.play` บนโปสเตอร์วิดีโอ และ `inboxkit.wallet.add` บนปุ่ม Wallet
## อ่านข้อมูลที่กำหนดเองจากข้อความ
เพื่อให้ push ปรากฏในกล่องข้อความ คำขอ `createMessage` ของ [Messages API](/th/developer/api-reference/messages-api/) ต้องมี `inbox_image`, `inbox_date` หรือ `inbox_days` — หากไม่มีฟิลด์เหล่านี้ push จะถูกส่งเป็นการแจ้งเตือนปกติและจะไม่ไปถึงฟีดกล่องข้อความ ข้อมูลที่กำหนดเองแบบอิสระจะอยู่ภายใต้คีย์ `data` ซึ่ง SDK จะส่งไปยังไคลเอนต์เป็นพารามิเตอร์ `u`:
```json title="POST https://api.pushwoosh.com/json/1.3/createMessage"
{
"request": {
"application": "XXXXX-XXXXX",
"auth": "API_TOKEN",
"notifications": [{
"send_date": "now",
"ios_title": "Summer sale",
"content": "30% off everything — limited time only",
"inbox_image": "https://cdn.example.com/inbox/summer.png",
"inbox_days": 7,
"data": {
"displayType": "captioned",
"promo_id": "SUMMER2026",
"screen": "promo_details"
},
"platforms": [1]
}]
}
}
```
SDK จะเปิดเผยอ็อบเจกต์นั้นบนข้อความในกล่องข้อความผ่าน `actionParams` อ่านจาก delegate เมื่อผู้ใช้แตะแถวหรือ CTA ในบรรทัด:
```swift
extension MyInboxHost: PushwooshInboxKitDelegate {
func inboxKit(_ vc: PushwooshInboxKitViewController,
didSelect message: PWInboxMessageProtocol) -> Bool {
guard let params = message.actionParams as? [String: Any] else { return true }
// The custom `data` object arrives under the "u" key —
// either as a nested dictionary or as a JSON-encoded string,
// depending on how the payload was built upstream.
let custom: [String: Any]? = {
if let dict = params["u"] as? [String: Any] { return dict }
if let raw = params["u"] as? String,
let bytes = raw.data(using: .utf8),
let parsed = try? JSONSerialization.jsonObject(with: bytes) as? [String: Any] {
return parsed
}
return nil
}()
if let promoId = custom?["promo_id"] as? String {
navigateToPromo(promoId)
return false // we handled the tap; SDK should not run the default action
}
return true
}
}
```
การค้นหา `actionParams["u"]` แบบเดียวกันนี้ทำงานภายใน `inboxKit(_:didTapButton:onMessage:)` สำหรับปุ่ม CTA ในบรรทัด สำหรับกรณี CTA ที่ระบุประเภท (`openURL`, `dismiss`, `markRead`) SDK จะดำเนินการเริ่มต้นอยู่แล้ว — คืนค่า `true` เพื่อคงพฤติกรรมนั้นไว้ หรือ `false` เพื่อระงับและเรียกใช้ตรรกะของคุณเอง
## เพิ่มปุ่ม CTA ในบรรทัด
ข้อความสามารถมีปุ่ม call-to-action ในบรรทัดได้สูงสุดสามปุ่ม ปุ่มจะอยู่ข้างข้อมูลที่กำหนดเองอื่นๆ ภายใน `data` เป็นอาร์เรย์ `buttons` SDK จะแสดงผลโดยอัตโนมัติภายในเซลล์ที่มีคำบรรยายและคลาสสิก:
```json title="POST https://api.pushwoosh.com/json/1.3/createMessage"
{
"request": {
"application": "XXXXX-XXXXX",
"auth": "API_TOKEN",
"notifications": [{
"send_date": "now",
"ios_title": "New promo card",
"content": "Tap a button to claim or save",
"inbox_image": "https://cdn.example.com/inbox/promo.png",
"inbox_days": 7,
"data": {
"displayType": "captioned",
"promo_id": "SUMMER2026",
"buttons": [
{ "title": "Claim", "url": "https://example.com/promo/SUMMER2026" },
{ "title": "Read", "action": "markRead" },
{ "title": "Save", "action": "custom", "tag": "save_promo" }
]
},
"platforms": [1]
}]
}
}
```
อ็อบเจกต์ปุ่มแต่ละอันมีฟิลด์เหล่านี้:
| ฟิลด์ | ประเภท | เมื่อ |
|---|---|---|
| `title` | string | จำเป็น ป้ายกำกับปุ่มที่มองเห็นได้ |
| `url` | string | URL ที่ไม่ว่างเปล่าและสามารถแยกวิเคราะห์ได้จะสร้างการกระทำ `openURL` SDK จะเปิดผ่าน `UIApplication.shared.open` เว้นแต่ delegate ของคุณจะระงับไว้ |
| `action` | string | โทเค็นการกระทำที่ชัดเจน: `dismiss` (ลบข้อความออกจากฟีด), `markRead` (ทำเครื่องหมายข้อความว่าอ่านแล้ว) หรือ `custom` (จัดการโดยโฮสต์) ไม่คำนึงถึงตัวพิมพ์เล็กหรือใหญ่ |
| อื่นๆ | any | เมื่อ `action` เป็น `custom` ทุกคีย์บนอ็อบเจกต์ปุ่มยกเว้น `title` และ `action` จะถูกส่งต่อไปยัง delegate ของคุณเป็นเพย์โหลดที่กำหนดเอง — ตกลงคีย์กับนักการตลาด (เช่น `tag`) และจัดการตามนั้น |
ลำดับความสำคัญในการแก้ไข: โทเค็น `action` ที่ชัดเจนก่อน จากนั้นเป็น `url` หากไม่ว่างเปล่า มิฉะนั้นปุ่มจะตกไปอยู่ใน `custom` ซึ่งมีเพย์โหลดทั้งหมด (ลบ `title` และ `action`)
ดักจับการแตะจาก delegate ของคุณ คุณสมบัติ `button.action` คือ enum `PushwooshInboxButtonAction` ที่ระบุประเภท:
```swift
extension MyInboxHost: PushwooshInboxKitDelegate {
func inboxKit(_ vc: PushwooshInboxKitViewController,
didTapButton button: PushwooshInboxButton,
onMessage message: PWInboxMessageProtocol) -> Bool {
switch button.action {
case .openURL(let url):
// Default behavior is fine — let SDK open the URL.
return true
case .dismiss, .markRead:
// SDK handles both. Return false if you want to override.
return true
case .custom(let payload):
// Marketer-defined custom button. Dispatch on a key you agreed on.
if let tag = payload["tag"] as? String {
switch tag {
case "save_promo":
saveCurrentPromoLocally(message: message)
default:
break
}
}
return true // ignored for custom — SDK never runs a default action here
}
}
}
```