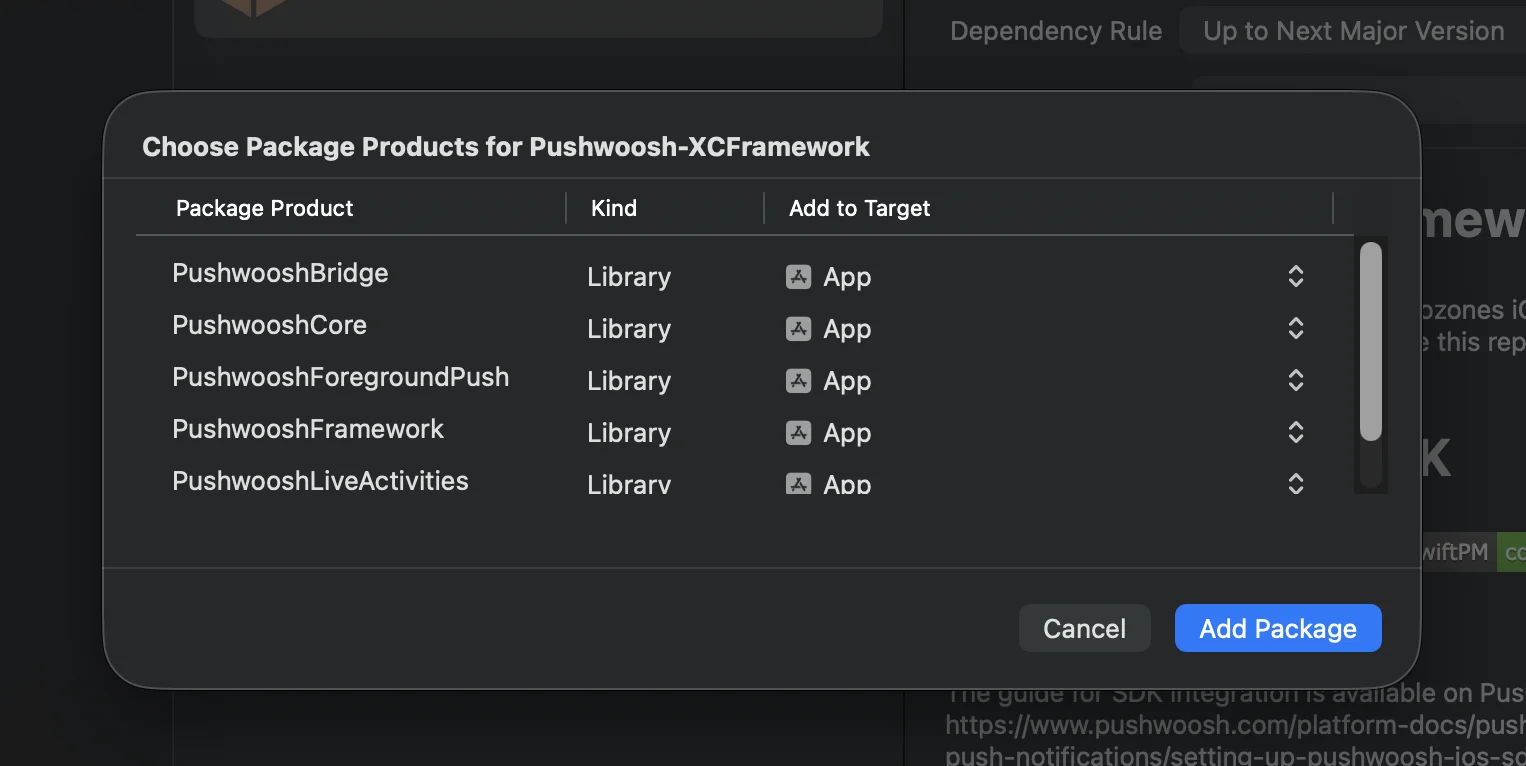
 **Cocoapods**
```bash
# Uncomment the next line to define a global platform for your project
# platform :ios, '13.0'
target 'MyApp' do
# Comment the next line if you don't want to use dynamic frameworks
use_frameworks!
pod 'PushwooshXCFramework'
pod 'PushwooshFramework/PushwooshForegroundPush'
end
```
### 3. เพิ่มการกำหนดค่า `PushwooshForegroundPush` ใน AppDelegate
```swift
import UIKit
import PushwooshFramework
import PushwooshForegroundPush
@main
class AppDelegate: UIResponder, UIApplicationDelegate, PWMessagingDelegate, PWForegroundPushDelegate {
func application(_ application: UIApplication, didFinishLaunchingWithOptions launchOptions: [UIApplication.LaunchOptionsKey: Any]?) -> Bool {
Pushwoosh.ForegroundPush.foregroundNotificationWith(style: .style1,
duration: 5,
vibration: .notification,
disappearedPushAnimation: .balls)
Pushwoosh.ForegroundPush.delegate = self
return true
}
func pushwoosh(_ pushwoosh: Pushwoosh, onMessageReceived message: PWMessage) {
if let payload = message.payload {
// Pushwoosh method
Pushwoosh.ForegroundPush.showForegroundPush(userInfo: payload)
}
}
}
```
การใช้เมธอด `foregroundNotificationWith`
เมธอด foregroundNotificationWith ช่วยให้คุณสามารถแสดงการแจ้งเตือน push ในเบื้องหน้าแบบกำหนดเองพร้อมสไตล์ ระยะเวลา และการตอบสนองแบบสัมผัสที่กำหนดค่าได้
ลายเซ็นเมธอด (Swift / Objective-C):
```swift
@objc
static func foregroundNotificationWith(
style: PWForegroundPushStyle,
duration: Int,
vibration: PWForegroundPushHapticFeedback,
disappearedPushAnimation: PWForegroundPushDisappearedAnimation
)
```
`พารามิเตอร์:`
1. `style` (`PWForegroundPushStyle`)
* ปัจจุบันมีเพียง style1 เท่านั้นที่ใช้งานได้
2. `duration` (`Int`)
* ระบุระยะเวลาที่การแจ้งเตือนจะแสดงก่อนที่จะหายไป (เป็นวินาที)
3. `vibration` (`PWForegroundPushHapticFeedback`)
* ควบคุมการตอบสนองแบบสัมผัสเมื่อการแจ้งเตือนแสดงขึ้น ตัวเลือกที่ใช้ได้:
```swift
case none // No vibration
case light // Light vibration
case medium // Medium vibration
case heavy // Heavy vibration
case soft // Soft vibration
case rigid // Rigid vibration
case notification // Standard notification vibration
```
4. `disappearedPushAnimation` (`PWForegroundPushDisappearedAnimation`)
* แอนิเมชันการหายไปของ push
```swift
case balls = 0
case regularPush
```
### 4. การใช้งานเมธอด `didTapForegroundPush` Delegate
เพื่อจัดการการแตะของผู้ใช้บนการแจ้งเตือน push ในเบื้องหน้าแบบกำหนดเอง ให้ใช้งานเมธอดโปรโตคอล `PWForegroundPushDelegate`:
```swift
// Handle tap on foreground push
func didTapForegroundPush(_ userInfo: [AnyHashable : Any]) {
print("Foreground custom push: \(userInfo)")
// Perform any action, e.g., navigate to a specific screen
// navigateToScreen(for: userInfo)
}
```
หมายเหตุ:
* เมธอดนี้จะถูกเรียกเมื่อผู้ใช้แตะที่ push ในเบื้องหน้าแบบกำหนดเอง
* userInfo มี payload ของการแจ้งเตือน
* ตรวจสอบให้แน่ใจว่าได้ตั้งค่า `Pushwoosh.ForegroundPush.delegate = self` หลังจากการกำหนดค่า
### 5. พารามิเตอร์ทางเลือกสำหรับการปรับแต่งการแจ้งเตือน push ในเบื้องหน้า
โมดูล `PushwooshForegroundPush` มีพารามิเตอร์ทางเลือกหลายอย่างเพื่อปรับแต่งลักษณะและการทำงานของการแจ้งเตือน push ในเบื้องหน้าของคุณ สามารถตั้งค่าเหล่านี้ได้ทั่วโลกผ่านคุณสมบัติแบบ static
**Cocoapods**
```bash
# Uncomment the next line to define a global platform for your project
# platform :ios, '13.0'
target 'MyApp' do
# Comment the next line if you don't want to use dynamic frameworks
use_frameworks!
pod 'PushwooshXCFramework'
pod 'PushwooshFramework/PushwooshForegroundPush'
end
```
### 3. เพิ่มการกำหนดค่า `PushwooshForegroundPush` ใน AppDelegate
```swift
import UIKit
import PushwooshFramework
import PushwooshForegroundPush
@main
class AppDelegate: UIResponder, UIApplicationDelegate, PWMessagingDelegate, PWForegroundPushDelegate {
func application(_ application: UIApplication, didFinishLaunchingWithOptions launchOptions: [UIApplication.LaunchOptionsKey: Any]?) -> Bool {
Pushwoosh.ForegroundPush.foregroundNotificationWith(style: .style1,
duration: 5,
vibration: .notification,
disappearedPushAnimation: .balls)
Pushwoosh.ForegroundPush.delegate = self
return true
}
func pushwoosh(_ pushwoosh: Pushwoosh, onMessageReceived message: PWMessage) {
if let payload = message.payload {
// Pushwoosh method
Pushwoosh.ForegroundPush.showForegroundPush(userInfo: payload)
}
}
}
```
การใช้เมธอด `foregroundNotificationWith`
เมธอด foregroundNotificationWith ช่วยให้คุณสามารถแสดงการแจ้งเตือน push ในเบื้องหน้าแบบกำหนดเองพร้อมสไตล์ ระยะเวลา และการตอบสนองแบบสัมผัสที่กำหนดค่าได้
ลายเซ็นเมธอด (Swift / Objective-C):
```swift
@objc
static func foregroundNotificationWith(
style: PWForegroundPushStyle,
duration: Int,
vibration: PWForegroundPushHapticFeedback,
disappearedPushAnimation: PWForegroundPushDisappearedAnimation
)
```
`พารามิเตอร์:`
1. `style` (`PWForegroundPushStyle`)
* ปัจจุบันมีเพียง style1 เท่านั้นที่ใช้งานได้
2. `duration` (`Int`)
* ระบุระยะเวลาที่การแจ้งเตือนจะแสดงก่อนที่จะหายไป (เป็นวินาที)
3. `vibration` (`PWForegroundPushHapticFeedback`)
* ควบคุมการตอบสนองแบบสัมผัสเมื่อการแจ้งเตือนแสดงขึ้น ตัวเลือกที่ใช้ได้:
```swift
case none // No vibration
case light // Light vibration
case medium // Medium vibration
case heavy // Heavy vibration
case soft // Soft vibration
case rigid // Rigid vibration
case notification // Standard notification vibration
```
4. `disappearedPushAnimation` (`PWForegroundPushDisappearedAnimation`)
* แอนิเมชันการหายไปของ push
```swift
case balls = 0
case regularPush
```
### 4. การใช้งานเมธอด `didTapForegroundPush` Delegate
เพื่อจัดการการแตะของผู้ใช้บนการแจ้งเตือน push ในเบื้องหน้าแบบกำหนดเอง ให้ใช้งานเมธอดโปรโตคอล `PWForegroundPushDelegate`:
```swift
// Handle tap on foreground push
func didTapForegroundPush(_ userInfo: [AnyHashable : Any]) {
print("Foreground custom push: \(userInfo)")
// Perform any action, e.g., navigate to a specific screen
// navigateToScreen(for: userInfo)
}
```
หมายเหตุ:
* เมธอดนี้จะถูกเรียกเมื่อผู้ใช้แตะที่ push ในเบื้องหน้าแบบกำหนดเอง
* userInfo มี payload ของการแจ้งเตือน
* ตรวจสอบให้แน่ใจว่าได้ตั้งค่า `Pushwoosh.ForegroundPush.delegate = self` หลังจากการกำหนดค่า
### 5. พารามิเตอร์ทางเลือกสำหรับการปรับแต่งการแจ้งเตือน push ในเบื้องหน้า
โมดูล `PushwooshForegroundPush` มีพารามิเตอร์ทางเลือกหลายอย่างเพื่อปรับแต่งลักษณะและการทำงานของการแจ้งเตือน push ในเบื้องหน้าของคุณ สามารถตั้งค่าเหล่านี้ได้ทั่วโลกผ่านคุณสมบัติแบบ static
| คุณสมบัติ | ประเภท | คำอธิบาย | ค่าเริ่มต้น |
|---|---|---|---|
| useLiquidView | Bool | ใช้มุมมอง Liquid Glass บน iOS 26 | false |
| gradientColors | [UIColor]? | อาร์เรย์ของสีที่เป็นทางเลือกสำหรับพื้นหลังแบบไล่ระดับสี | nil |
| backgroundColor | UIColor? | สีพื้นหลังสำหรับ push หากเป็น nil และไม่ได้ตั้งค่า gradientColors จะใช้การไล่ระดับสีเริ่มต้น | Default system gradient |
| usePushAnimation | Bool | จะให้มีแอนิเมชันของ push เมื่อแสดงหรือไม่ | true |
| titlePushColor | UIColor? | สีของข้อความหัวข้อการแจ้งเตือน ค่าเริ่มต้นคือสีขาวของระบบหากเป็น nil | white |
| messagePushColor | UIColor? | สีของข้อความเนื้อหาการแจ้งเตือน ค่าเริ่มต้นคือสีขาวของระบบหากเป็น nil | white |
| titlePushFont | UIFont? | ฟอนต์ของข้อความหัวข้อการแจ้งเตือน ค่าเริ่มต้นคือฟอนต์ของระบบหากเป็น nil | Default system font |
| messagePushFont | UIFont? | ฟอนต์ของข้อความเนื้อหาการแจ้งเตือน ค่าเริ่มต้นคือฟอนต์ของระบบหากเป็น nil | Default system font |