# การตั้งค่า Badges สำหรับ React Native
เนื่องจากปลั๊กอิน React Native ไม่มีเฮดเดอร์ PWNotificationExtensionManager คุณจึงต้องทำขั้นตอนเพิ่มเติมหลายขั้นตอนเพื่อติดตั้ง Badges สำหรับโปรเจกต์ React Native ของคุณ
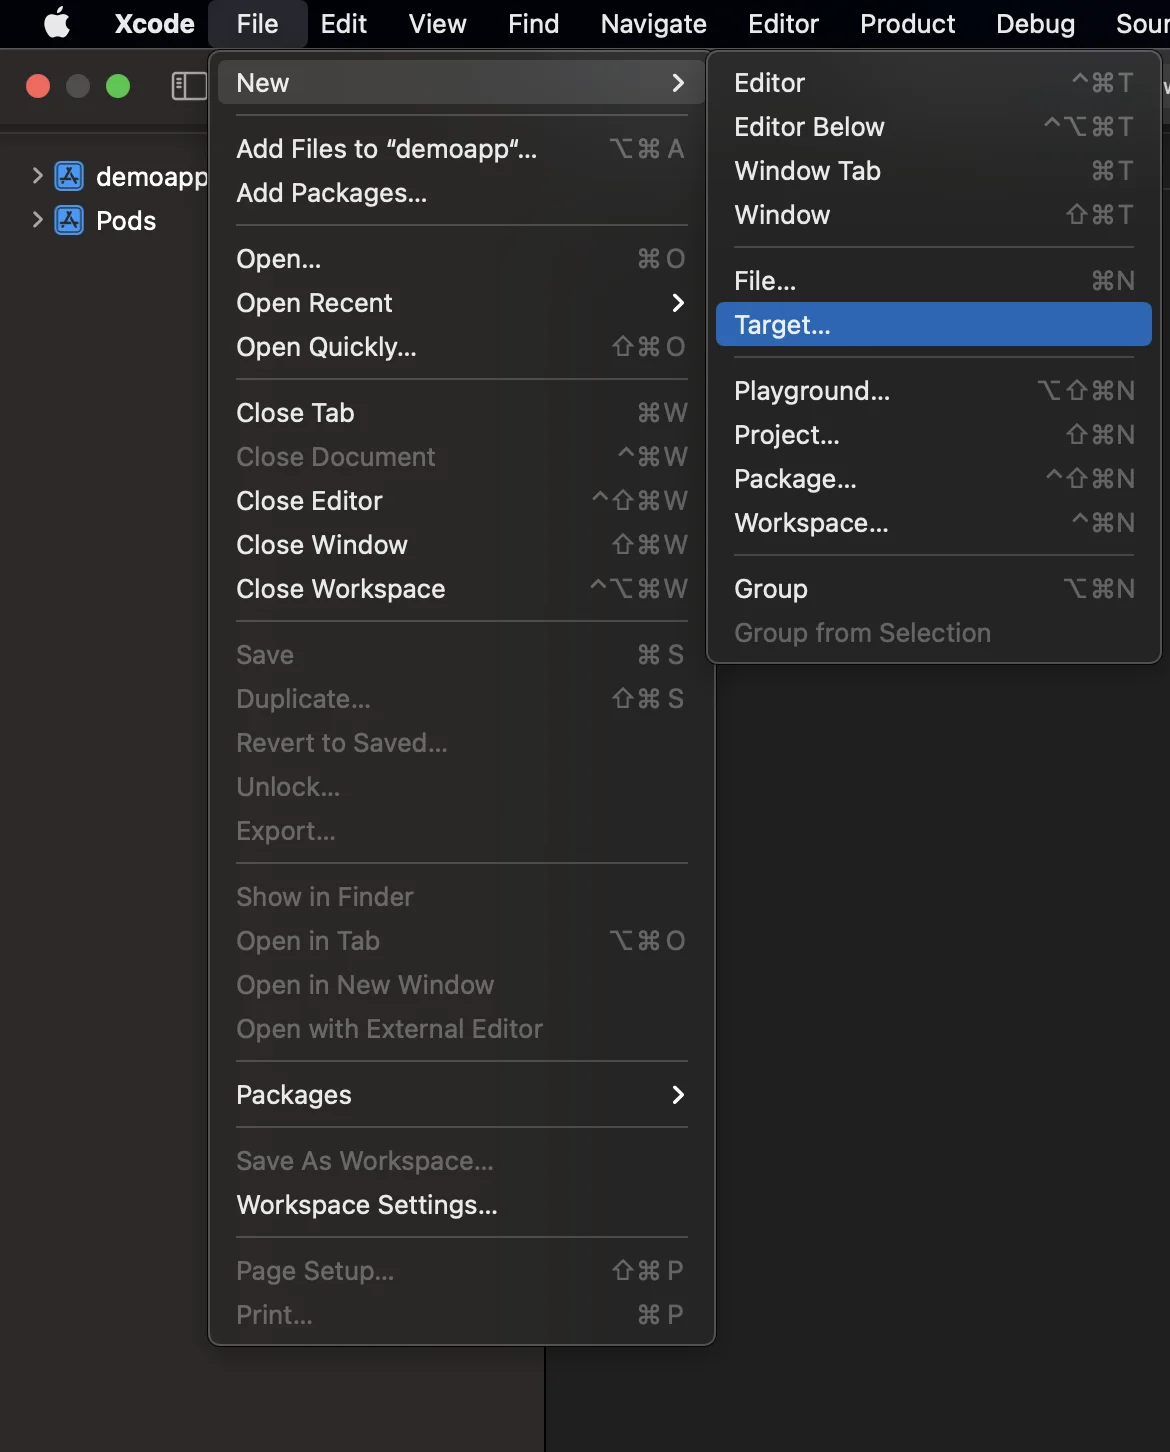
#### 1. เพิ่ม Notification Service Extension (File -> New -> Target...)
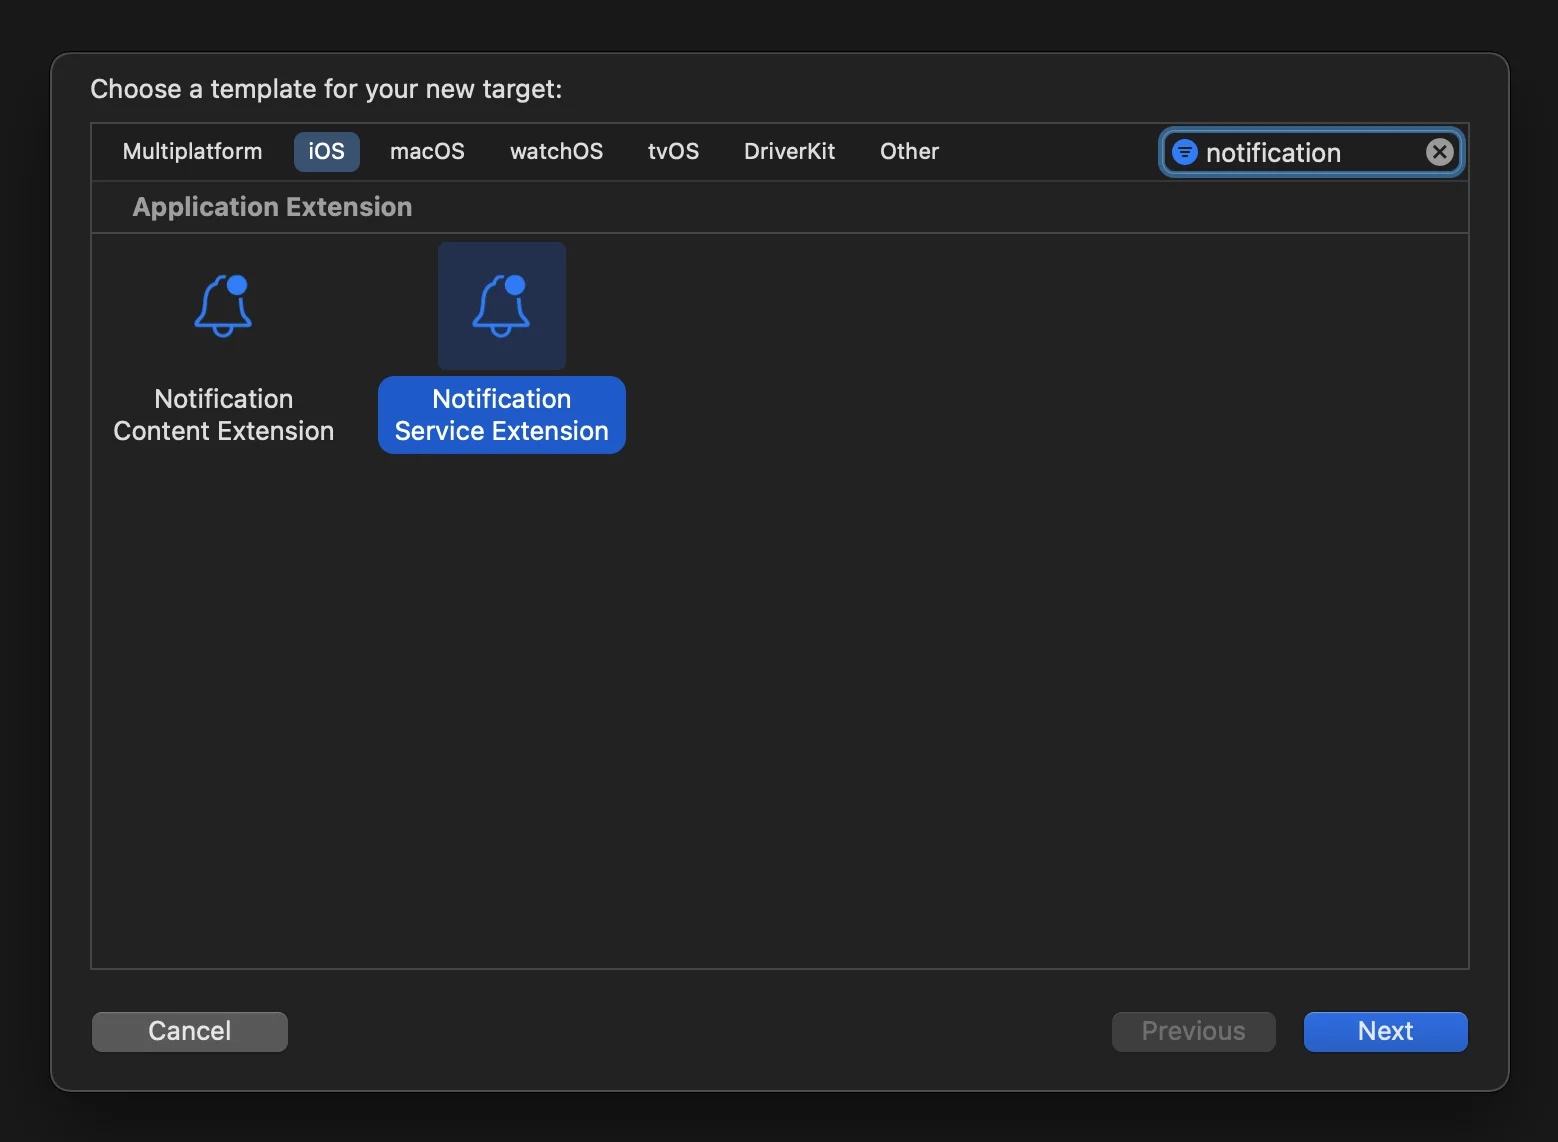
 #### 2. เลือก "Notification Service Extension"
 #### 3. อัปเดตโค้ด Notification Service Extension ดังนี้:
```
#import "NotificationService.h"
#import
@interface NotificationService ()
@property (nonatomic, strong) void (^contentHandler)(UNNotificationContent *contentToDeliver);
@property (nonatomic, strong) UNMutableNotificationContent *bestAttemptContent;
@end
@implementation NotificationService
- (void)didReceiveNotificationRequest:(UNNotificationRequest *)request withContentHandler:(void (^)(UNNotificationContent * _Nonnull))contentHandler {
self.contentHandler = contentHandler;
self.bestAttemptContent = [request.content mutableCopy];
[[PWNotificationExtensionManager sharedManager] handleNotificationRequest:request contentHandler:contentHandler];
}
- (void)serviceExtensionTimeWillExpire {
// Called just before the extension will be terminated by the system.
// Use this as an opportunity to deliver your "best attempt" at modified content, otherwise the original push payload will be used.
self.contentHandler(self.bestAttemptContent);
}
@end
```
#### 4. ลิงก์ dependencies กับ target
React Native จะไม่ลิงก์ dependencies ที่จำเป็นทั้งหมดไปยัง target ที่สร้างขึ้นด้วยตนเองโดยอัตโนมัติ ดังนั้นคุณควรอัปเดต **Build Phases** ของ target และให้ข้อมูลที่จำเป็น:
#### 3. อัปเดตโค้ด Notification Service Extension ดังนี้:
```
#import "NotificationService.h"
#import
@interface NotificationService ()
@property (nonatomic, strong) void (^contentHandler)(UNNotificationContent *contentToDeliver);
@property (nonatomic, strong) UNMutableNotificationContent *bestAttemptContent;
@end
@implementation NotificationService
- (void)didReceiveNotificationRequest:(UNNotificationRequest *)request withContentHandler:(void (^)(UNNotificationContent * _Nonnull))contentHandler {
self.contentHandler = contentHandler;
self.bestAttemptContent = [request.content mutableCopy];
[[PWNotificationExtensionManager sharedManager] handleNotificationRequest:request contentHandler:contentHandler];
}
- (void)serviceExtensionTimeWillExpire {
// Called just before the extension will be terminated by the system.
// Use this as an opportunity to deliver your "best attempt" at modified content, otherwise the original push payload will be used.
self.contentHandler(self.bestAttemptContent);
}
@end
```
#### 4. ลิงก์ dependencies กับ target
React Native จะไม่ลิงก์ dependencies ที่จำเป็นทั้งหมดไปยัง target ที่สร้างขึ้นด้วยตนเองโดยอัตโนมัติ ดังนั้นคุณควรอัปเดต **Build Phases** ของ target และให้ข้อมูลที่จำเป็น:
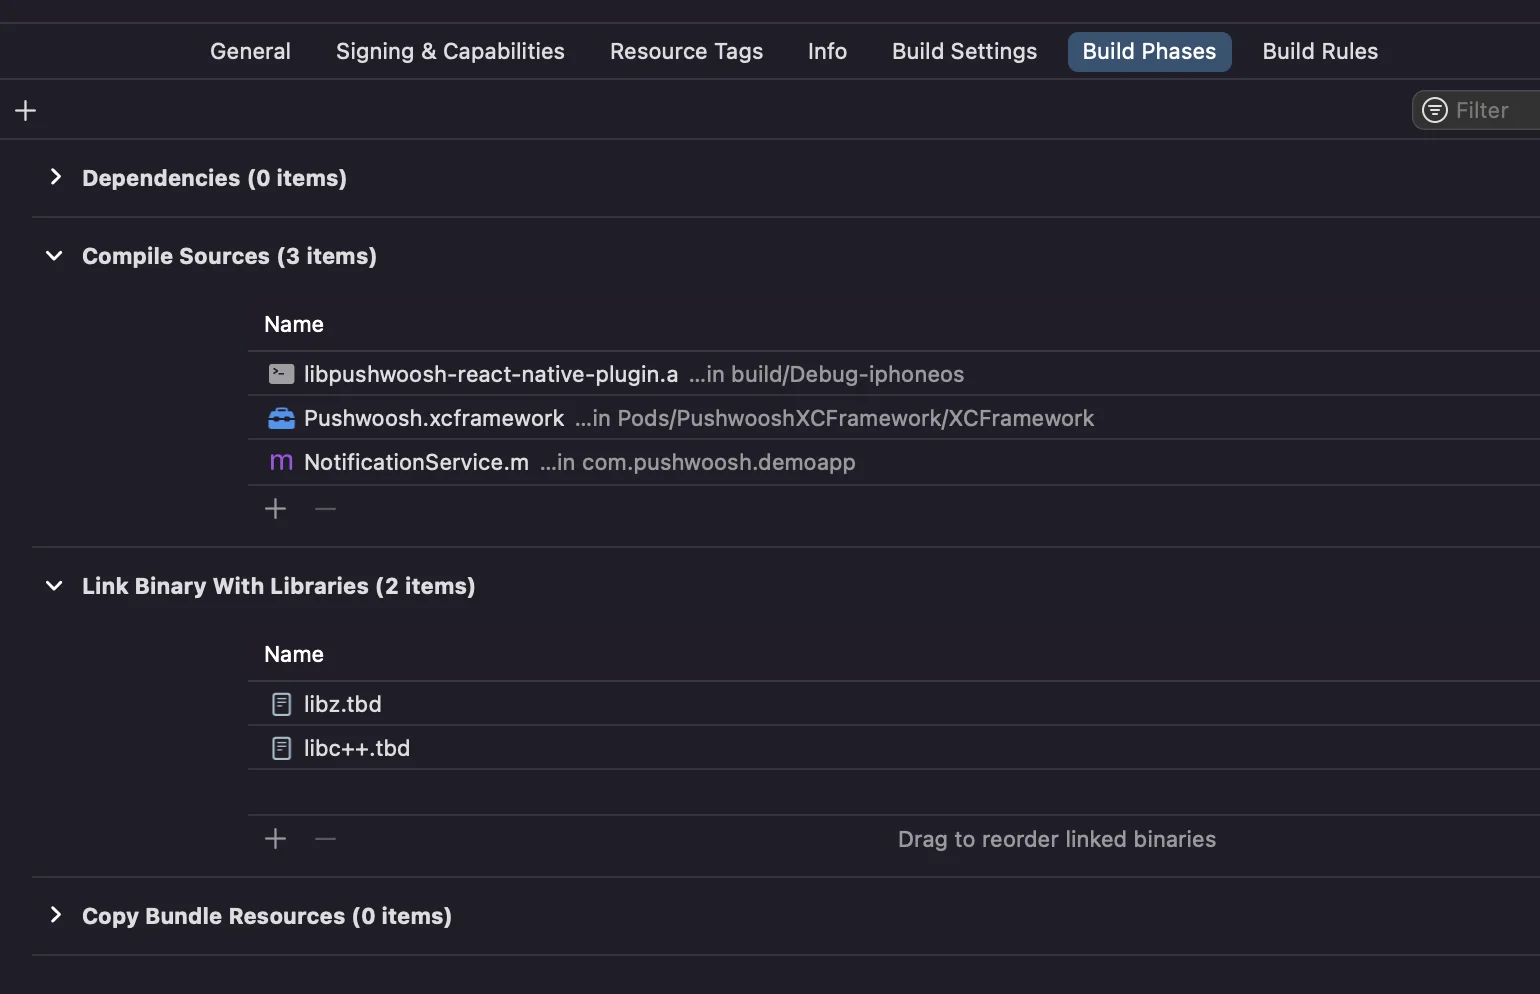 เพียงคลิกที่เครื่องหมาย **+** ใต้ **Compile Sources** และ **Link Binary With Libraries** และค้นหา libs/frameworks ที่ต้องการ
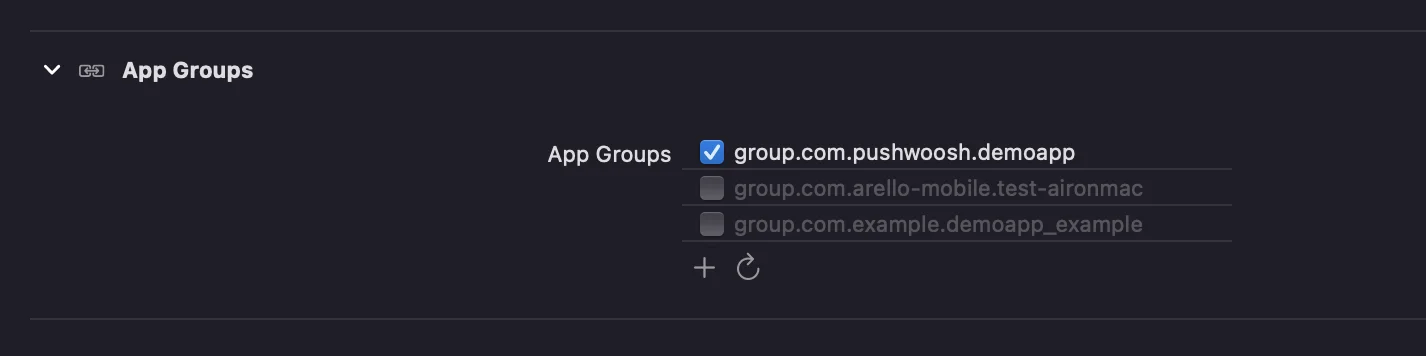
#### 5. เพิ่มความสามารถ **App Groups** ให้กับทั้งสอง targets ใน Xcode และตั้งค่า group เดียวกัน **สำหรับทั้งแอปและ extension**:
เพียงคลิกที่เครื่องหมาย **+** ใต้ **Compile Sources** และ **Link Binary With Libraries** และค้นหา libs/frameworks ที่ต้องการ
#### 5. เพิ่มความสามารถ **App Groups** ให้กับทั้งสอง targets ใน Xcode และตั้งค่า group เดียวกัน **สำหรับทั้งแอปและ extension**:
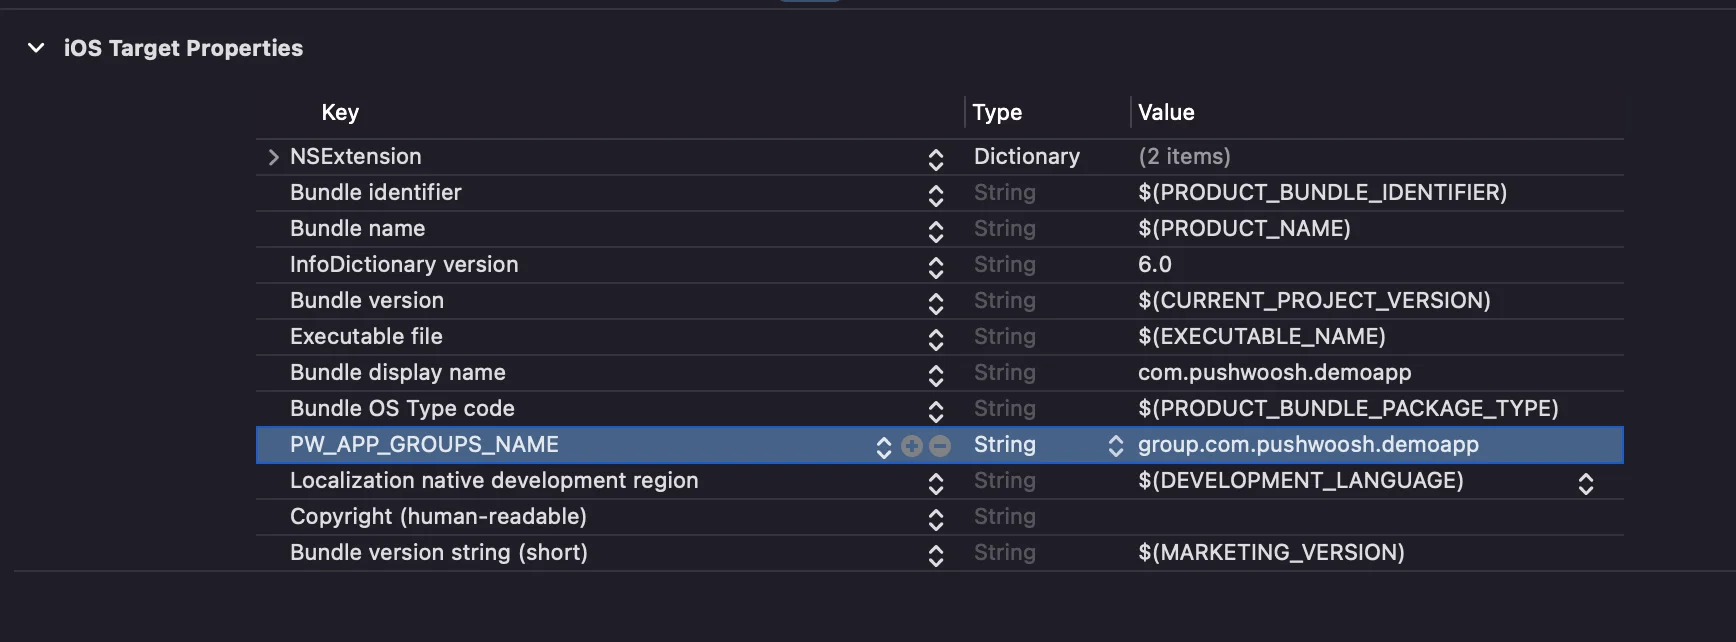
 #### 6. เพิ่มคีย์ **PW\_APP\_GROUPS\_NAME** ไปยัง info.plists ของ **ทั้งสอง** targets โดยค่าที่ใช้คือชื่อ app group ของคุณ: