# การส่งข้อมูลแบบกำหนดเอง
คู่มือนี้จะช่วยให้คุณเข้าใจวิธีส่งข้อมูลแบบกำหนดเองไปยังแอปของคุณใน payload ของการแจ้งเตือนแบบพุชได้ดียิ่งขึ้น เพื่อให้แอปของคุณสามารถตอบสนองต่อพุชดังกล่าวและดำเนินการต่างๆ ได้ตามนั้น
วิธีที่คุณจัดการข้อมูลแบบกำหนดเองอาจแตกต่างกันไปตามวัตถุประสงค์ทางธุรกิจของคุณ ในบทความนี้ เราจะแสดงตัวอย่างพื้นฐานของการแยกวิเคราะห์ข้อมูลแบบกำหนดเองและการดำเนินการง่ายๆ:
* การเปลี่ยนสีพื้นหลังของแอป
* การเปิดหน้าแบบกำหนดเองในแอปของคุณ
## ข้อกำหนดเบื้องต้น
คู่มือนี้ครอบคลุมการพัฒนา iOS Native โดยสมมติว่าคุณมีแอปพลิเคชันตัวอย่าง iOS ที่กำหนดค่าและรับการแจ้งเตือนแบบพุชตาม [คู่มือเริ่มต้นใช้งาน iOS](/th/developer/pushwoosh-sdk/ios-sdk/setting-up-pushwoosh-ios-sdk/quick-start/) แล้ว
ใน `AppDelegate` ในฟังก์ชัน `didFinishLaunchingWithOptions` เราจะใช้ `self.viewController` เป็น delegate สำหรับการประมวลผลการแจ้งเตือนแบบพุช:
```swift
func application(_ application: UIApplication, didFinishLaunchingWithOptions launchOptions: [UIApplication.LaunchOptionsKey: Any]?) -> Bool {
Pushwoosh.sharedInstance().delegate = self.viewController
Pushwoosh.sharedInstance().registerForPushNotifications()
if let launchOptions = launchOptions {
Pushwoosh.sharedInstance().handlePushReceived(launchOptions)
}
return true
}
```
`ViewController` ของเรา implement โปรโตคอล `PWMessagingDelegate`:
```swift
extension ViewController: PWMessagingDelegate
```
และดังนั้นจึงมีฟังก์ชัน `onMessageOpened` ที่จัดการการแจ้งเตือนแบบพุชที่ได้รับ:
```swift
// User pressed on the push notification
func pushwoosh(_ pushwoosh: Pushwoosh, onMessageOpened message: PWMessage) {}
```
## การเปิด ViewController อื่นและเปลี่ยนสีพื้นหลัง
ตอนนี้เรากำลังรับ `customData` จาก payload ของพุช ตัวอย่างเช่น เราจะเปลี่ยนสีพื้นหลังของ view และเปอร์เซ็นต์ส่วนลด เราสมมติว่าข้อมูลแบบกำหนดเองจะประกอบด้วยรายการ `“r”`, `“g”`, `“b”`, และ `"d"` ในรูปแบบอ็อบเจกต์ JSON ดังนี้:
```swift
guard let customDataJson = message.customData,
let redString = customDataJson["r"] as? String,
let greenString = customDataJson["g"] as? String,
let blueString = customDataJson["b"] as? String,
let discount = customDataJson["d"] as? String else {
return
}
setViewBackgroundColor(red: redString, green: greenString, blue: blueString, discount: discount)
```
เราจะใช้ฟังก์ชันต่อไปนี้เพื่อเปิด ViewController ใหม่และตั้งค่าสีพื้นหลังและเปอร์เซ็นต์ส่วนลด:
```swift
func setViewBackgroundColor(red: String, green: String, blue: String, discount: String) {
let red = CGFloat((red as NSString).floatValue)
let green = CGFloat((green as NSString).floatValue)
let blue = CGFloat((blue as NSString).floatValue)
let color = UIColor(red: red / 255.0, green: green / 255.0, blue: blue / 255.0, alpha: 1)
if let topController = UIApplication.shared.topMostController() {
let storyboard = UIStoryboard(name: "Main", bundle: nil)
if let customViewController = storyboard.instantiateViewController(withIdentifier: "custom_page") as? CustomPageViewController {
customViewController.discount = discount
customViewController.bgColor = color
topController.present(customViewController, animated: true, completion: nil)
}
}
}
```
มาทดสอบตัวอย่างของเรากัน ไปที่ Pushwoosh Journey และเพิ่ม **Push element** ลงใน canvas จากนั้นคลิกที่ **Create new content** ในฟอร์มเนื้อหาพุชที่เปิดขึ้นมา ให้ป้อนข้อความการแจ้งเตือนแบบพุชใดก็ได้
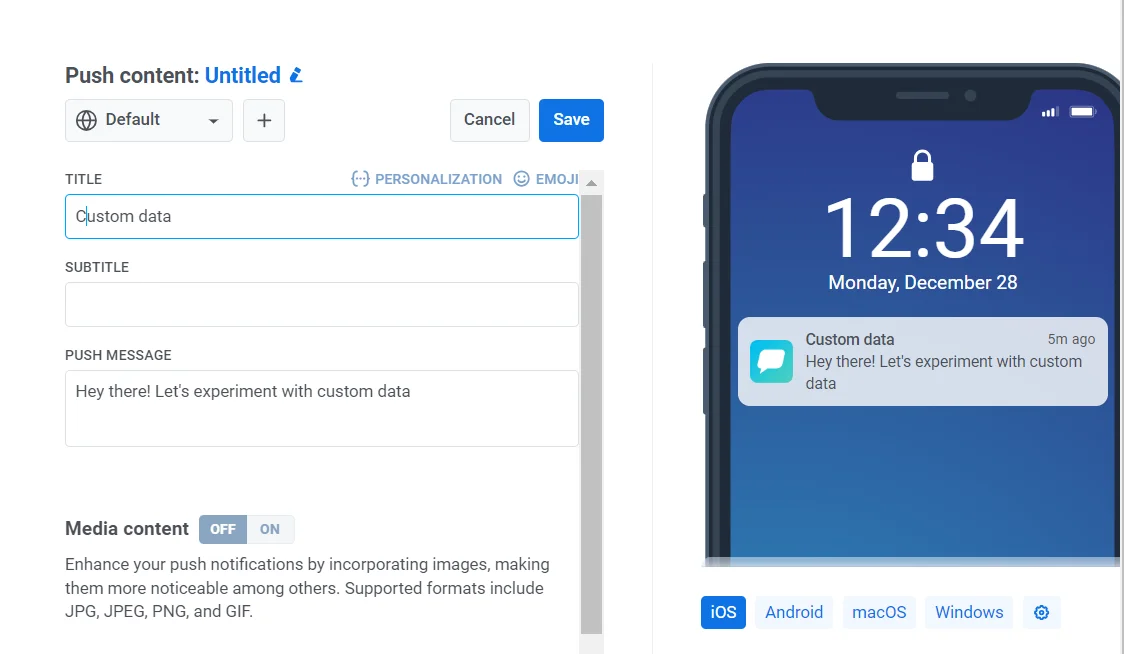 จากนั้นเปิดสวิตช์ `Send custom data` ใส่ JSON ลงในฟิลด์ Custom data
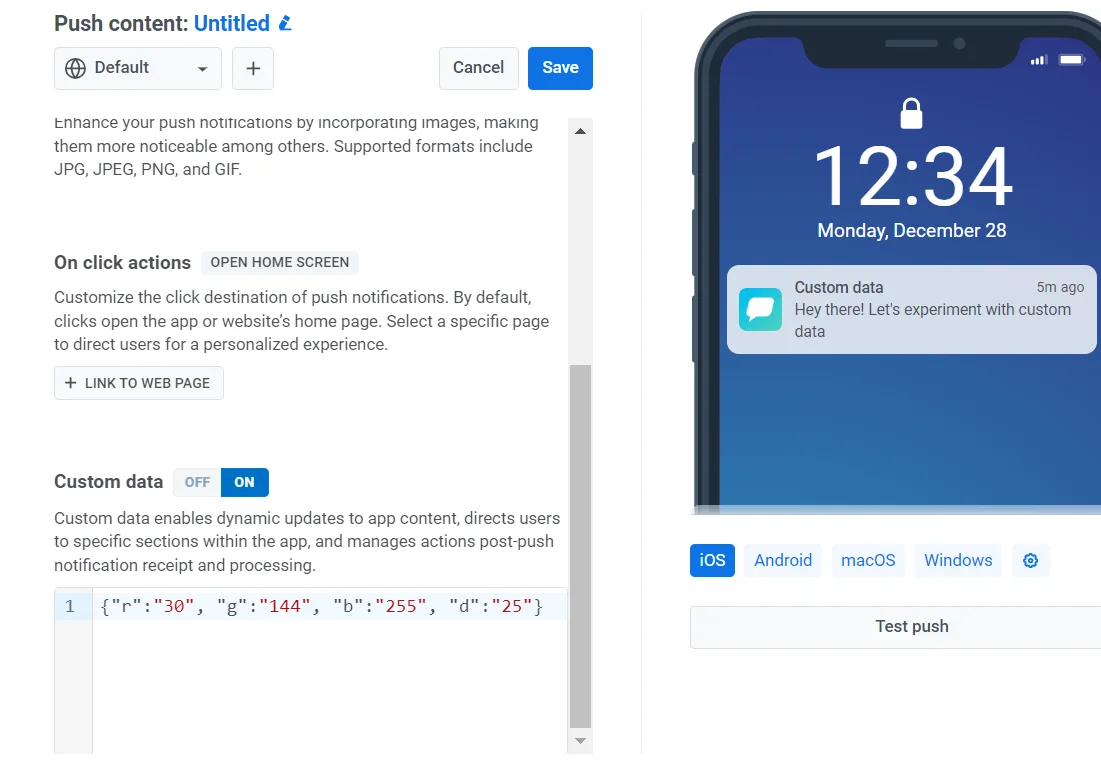
เนื่องจากเราได้ตัดสินใจแล้วว่ารูปแบบข้อมูลแบบกำหนดเองของเราจะเป็นอ็อบเจกต์ JSON ที่มีค่า `“r”`, `“g”`, `“b”` อยู่ในนั้น เราจึงต้องใช้ฟิลด์ `“custom data”` ใน Control Panel และใส่ข้อมูลด้วยอ็อบเจกต์ JSON `{"r":"30", "g":"144", "b":"255", "d":"25"}`:
จากนั้นเปิดสวิตช์ `Send custom data` ใส่ JSON ลงในฟิลด์ Custom data
เนื่องจากเราได้ตัดสินใจแล้วว่ารูปแบบข้อมูลแบบกำหนดเองของเราจะเป็นอ็อบเจกต์ JSON ที่มีค่า `“r”`, `“g”`, `“b”` อยู่ในนั้น เราจึงต้องใช้ฟิลด์ `“custom data”` ใน Control Panel และใส่ข้อมูลด้วยอ็อบเจกต์ JSON `{"r":"30", "g":"144", "b":"255", "d":"25"}`:
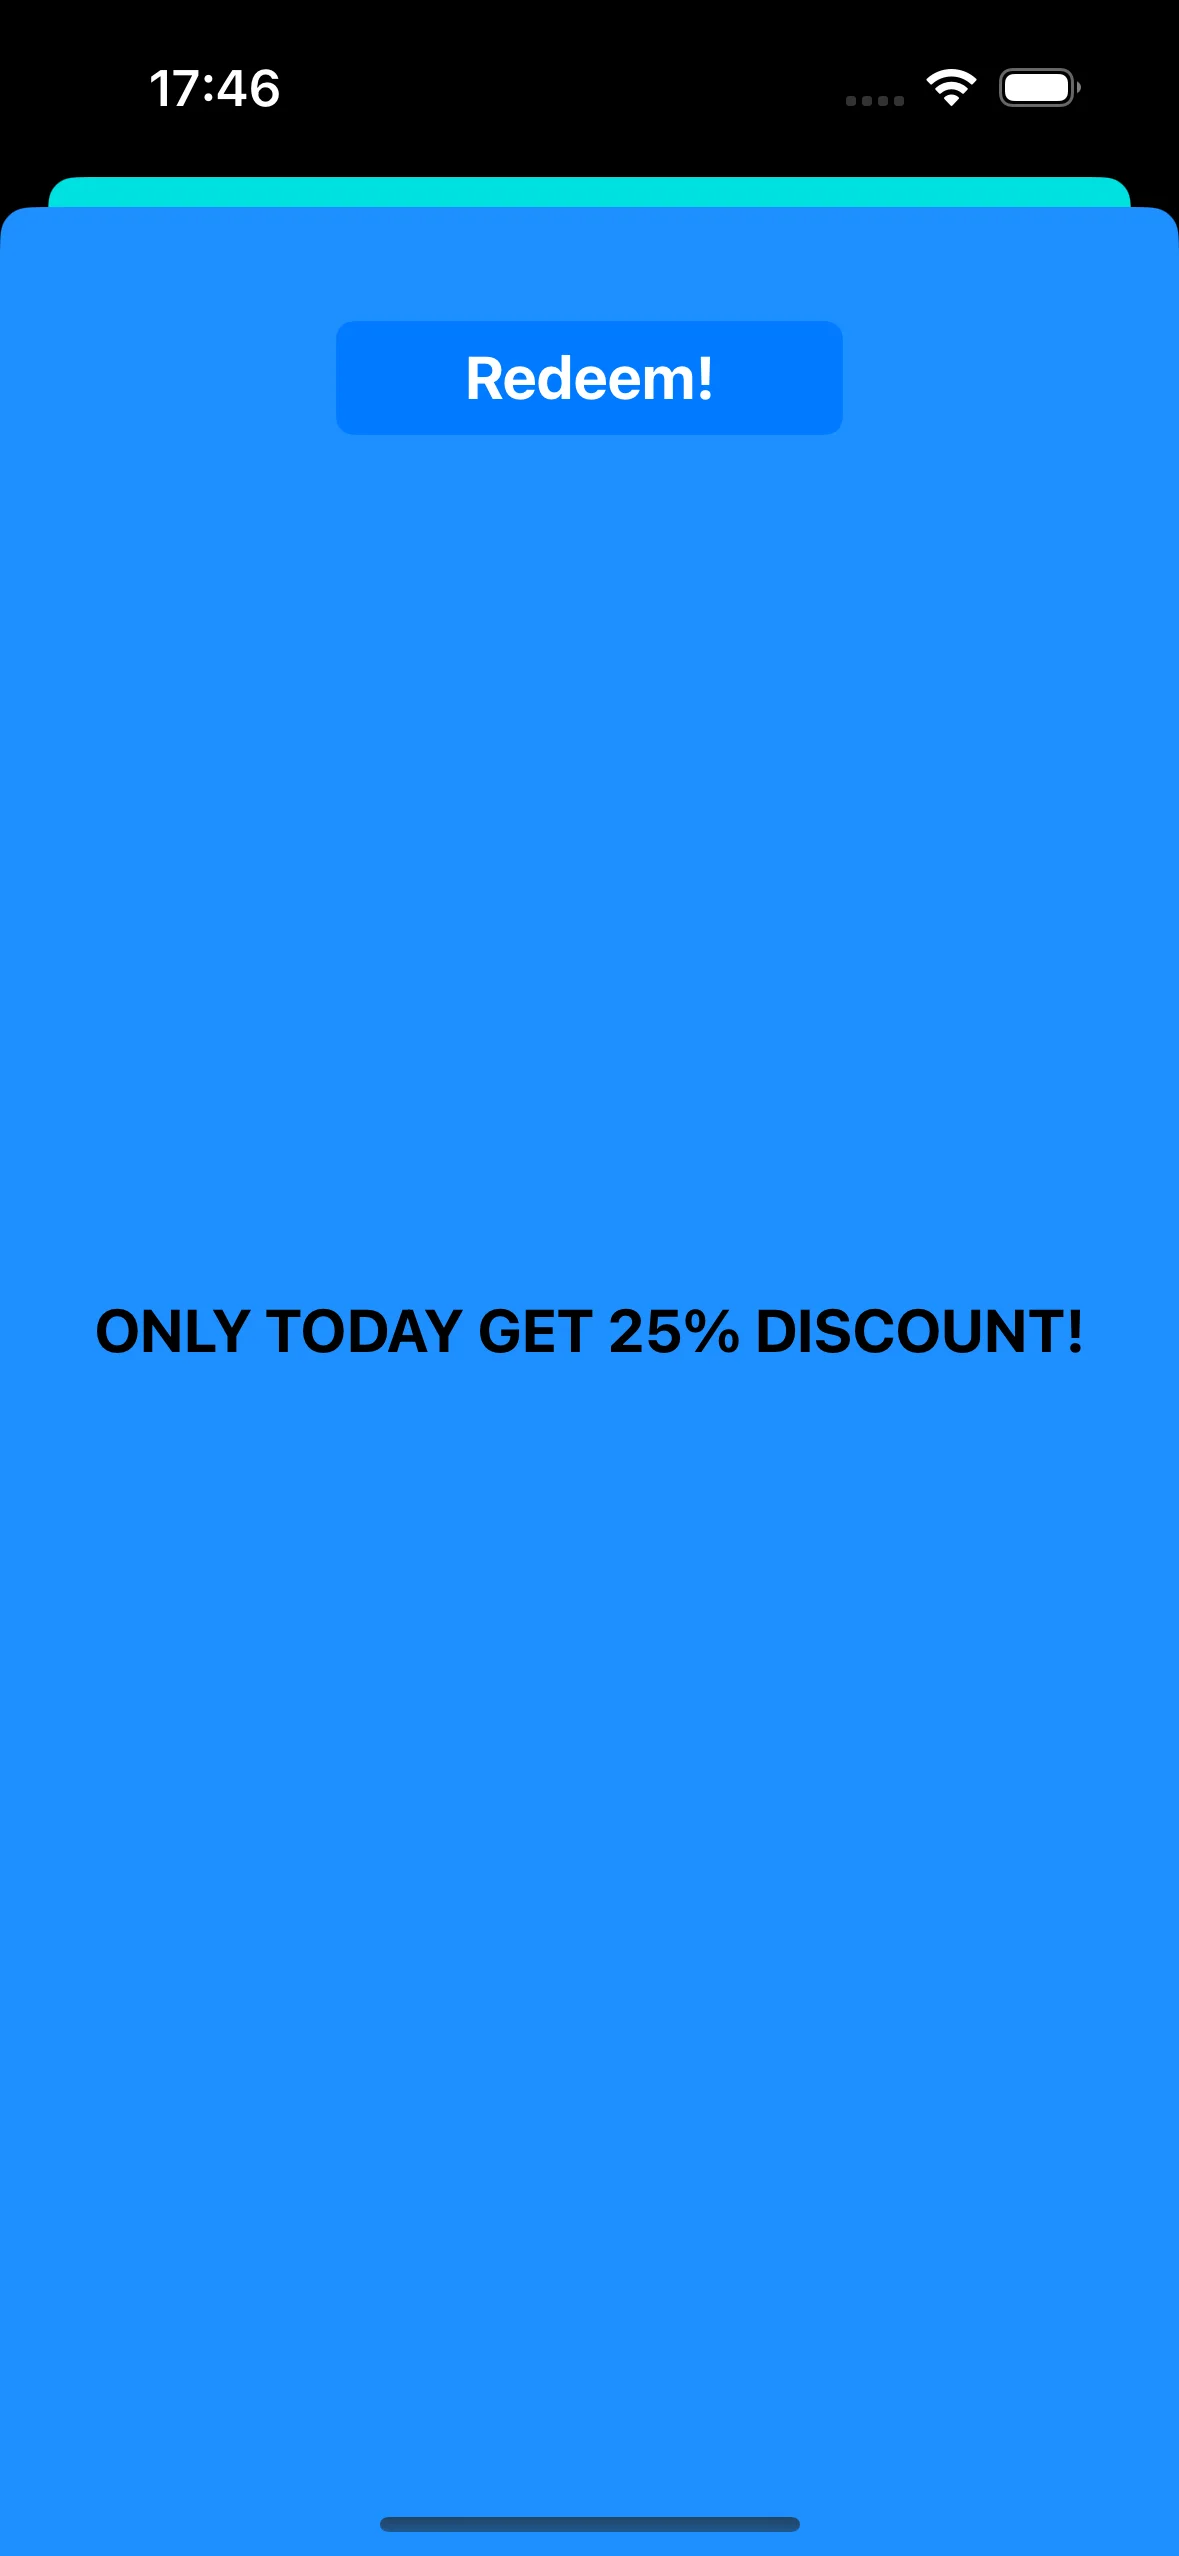
 เมื่อแตะที่การแจ้งเตือนแบบพุช `CustomPageViewController` จะเปิดขึ้น สีพื้นหลังจะถูกตั้งค่า และส่วนลดจะถูกนำไปใช้:
 โค้ด CustomPageViewController:
```swift
class CustomPageViewController: UIViewController {
var bgColor: UIColor?
var discount: String?
@IBOutlet weak var titleLabel: UILabel!
override func viewDidLoad() {
super.viewDidLoad()
self.view.backgroundColor = self.bgColor
if self.discount != nil {
self.titleLabel?.text = "ONLY TODAY GET \(self.discount!)% DISCOUNT!"
}
}
func showPromoPage(discount: String) {
let vc = CustomPageViewController()
vc.bgColor = self.view.backgroundColor
vc.discount = discount
vc.modalTransitionStyle = UIModalTransitionStyle.crossDissolve
if self.presentedViewController != nil {
self.dismiss(animated: true, completion: {
self.present(vc, animated: true, completion: nil)
})
} else {
self.present(vc, animated: true, completion: nil)
}
}
@IBAction func closeButtonAction(_ sender: Any) {
self.dismiss(animated: true)
}
}
```
เราสมมติว่าค่าส่วนลดจะมาในพารามิเตอร์ `"d"` ใน JSON ของ payload การแจ้งเตือนแบบพุช เนื่องจาก payload ของการแจ้งเตือนแบบพุชมีขนาดจำกัด คุณควรใช้ชื่อสั้นๆ สำหรับพารามิเตอร์
```swift
guard let customDataJson = message.customData,
let redString = customDataJson["r"] as? String,
let greenString = customDataJson["g"] as? String,
let blueString = customDataJson["b"] as? String,
let discount = customDataJson["d"] as? String else {
return
}
```
คุณสามารถเขียนโค้ดเพื่อเริ่มต้นและเปิด View Controllers ที่แตกต่างกันได้ ขึ้นอยู่กับพารามิเตอร์ที่คุณส่งใน payload ของการแจ้งเตือนแบบพุช
## การเปิด view controller สำหรับการทดสอบ A/B
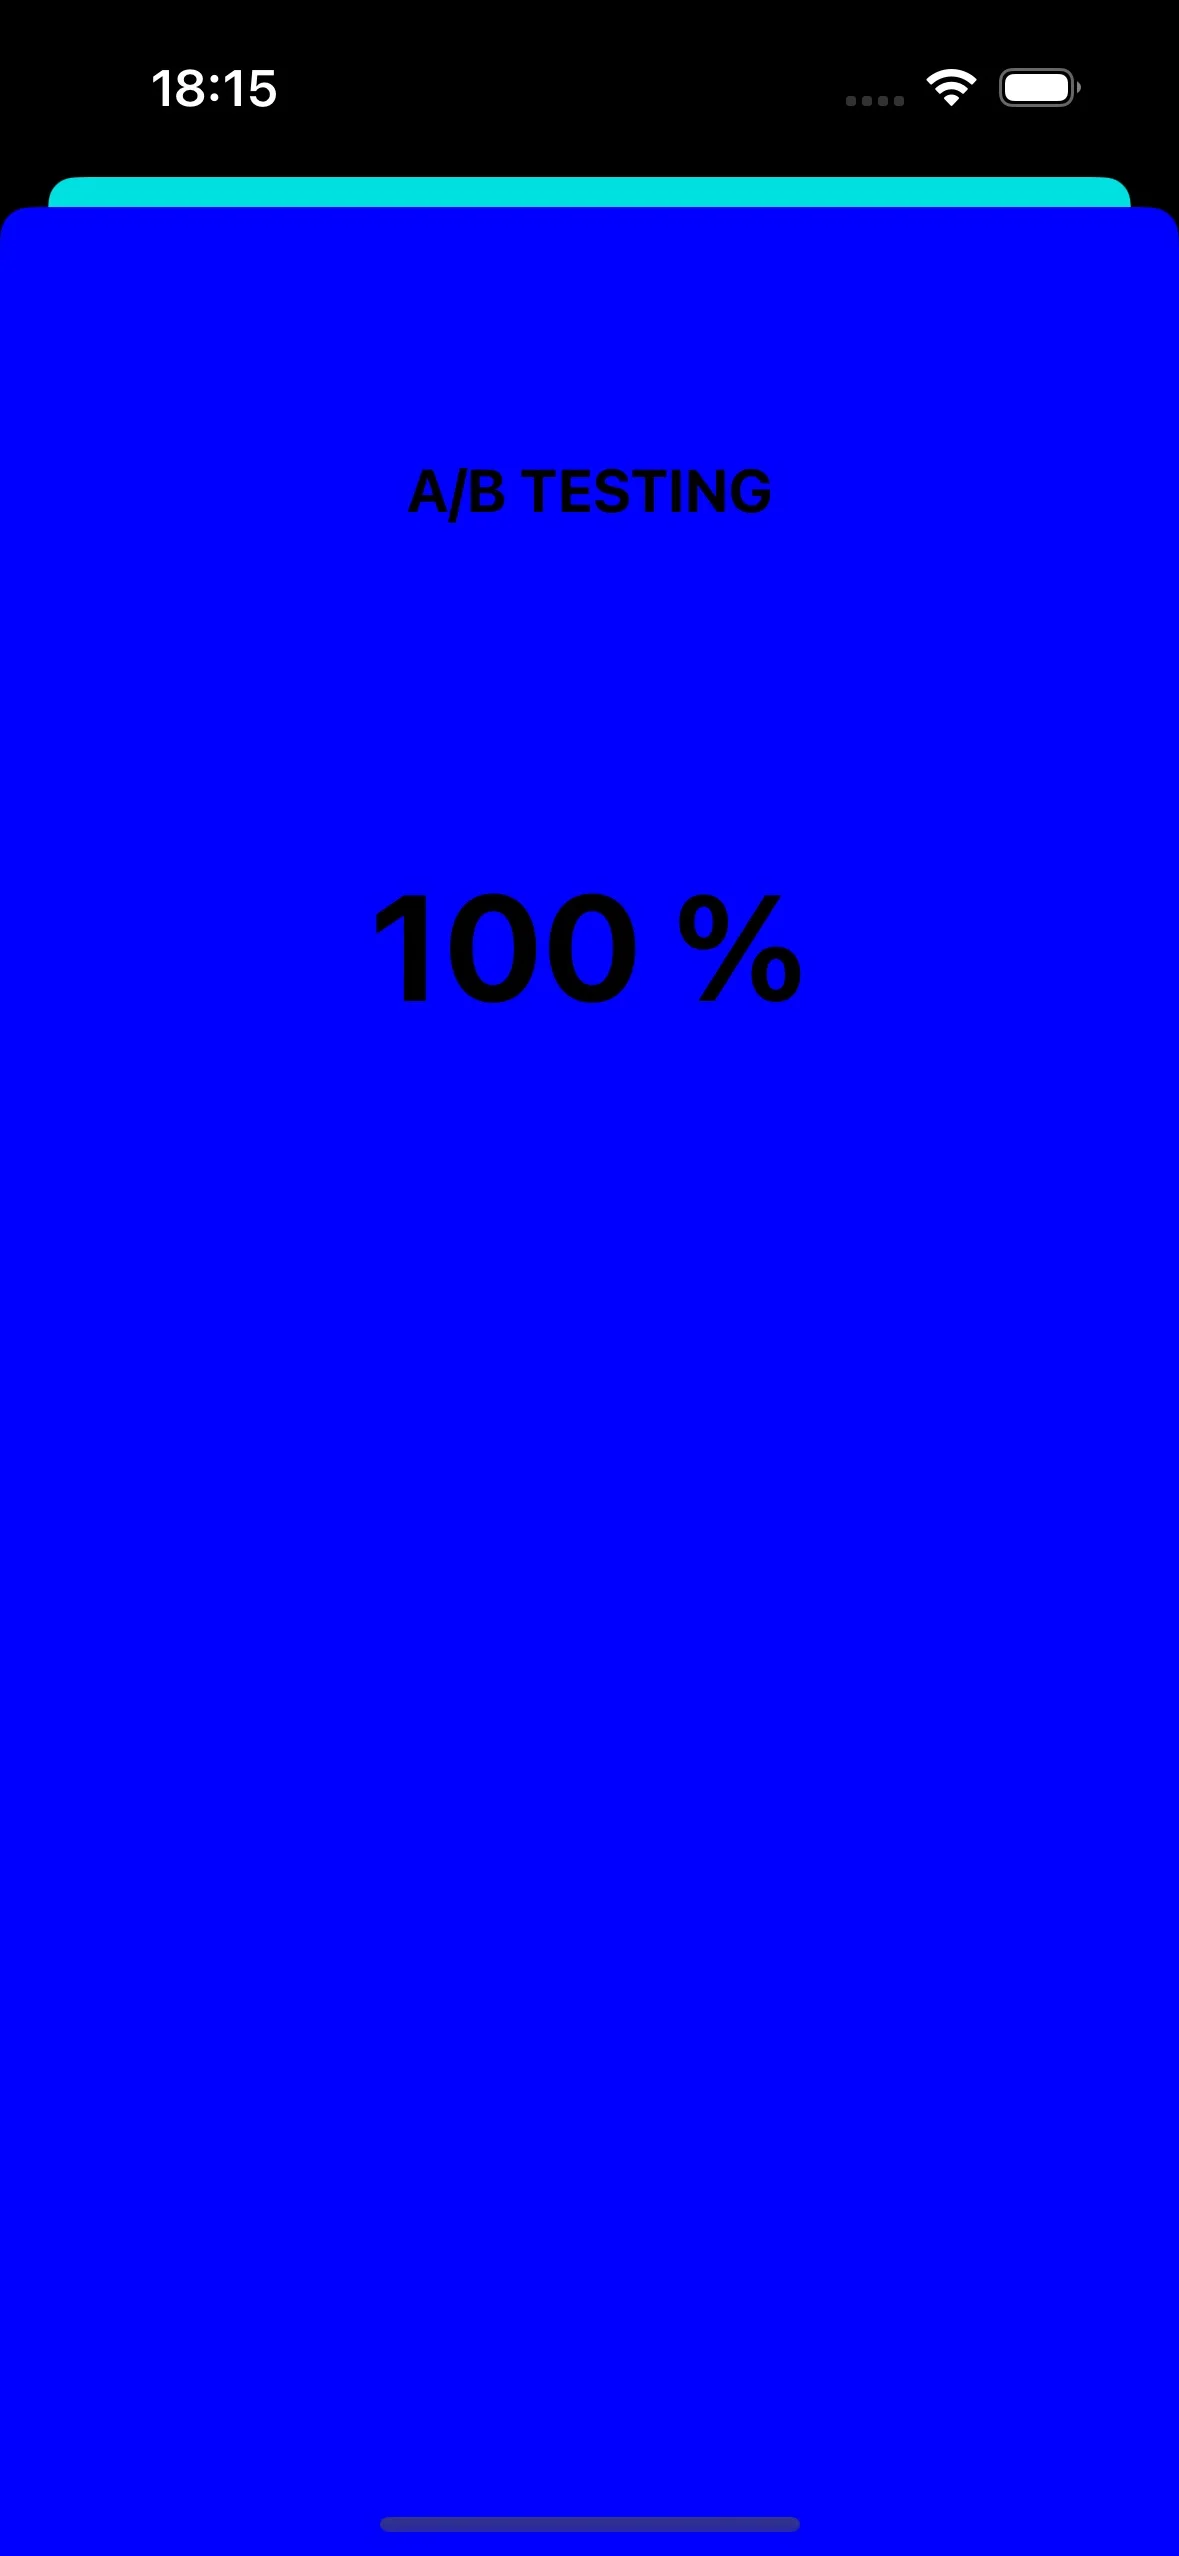
ลองพิจารณากรณีการใช้งานอื่นสำหรับข้อมูลแบบกำหนดเองในการแจ้งเตือนแบบพุช ตัวอย่างเช่น เราต้องการเปิด view controller หนึ่งสำหรับกลุ่มผู้ใช้หนึ่ง และอีก view controller หนึ่งสำหรับกลุ่มผู้ใช้ที่แตกต่างกัน พูดง่ายๆ คือ เราสามารถใช้ข้อมูลแบบกำหนดเองสำหรับการทดสอบ A/B ในแอปพลิเคชันของคุณได้
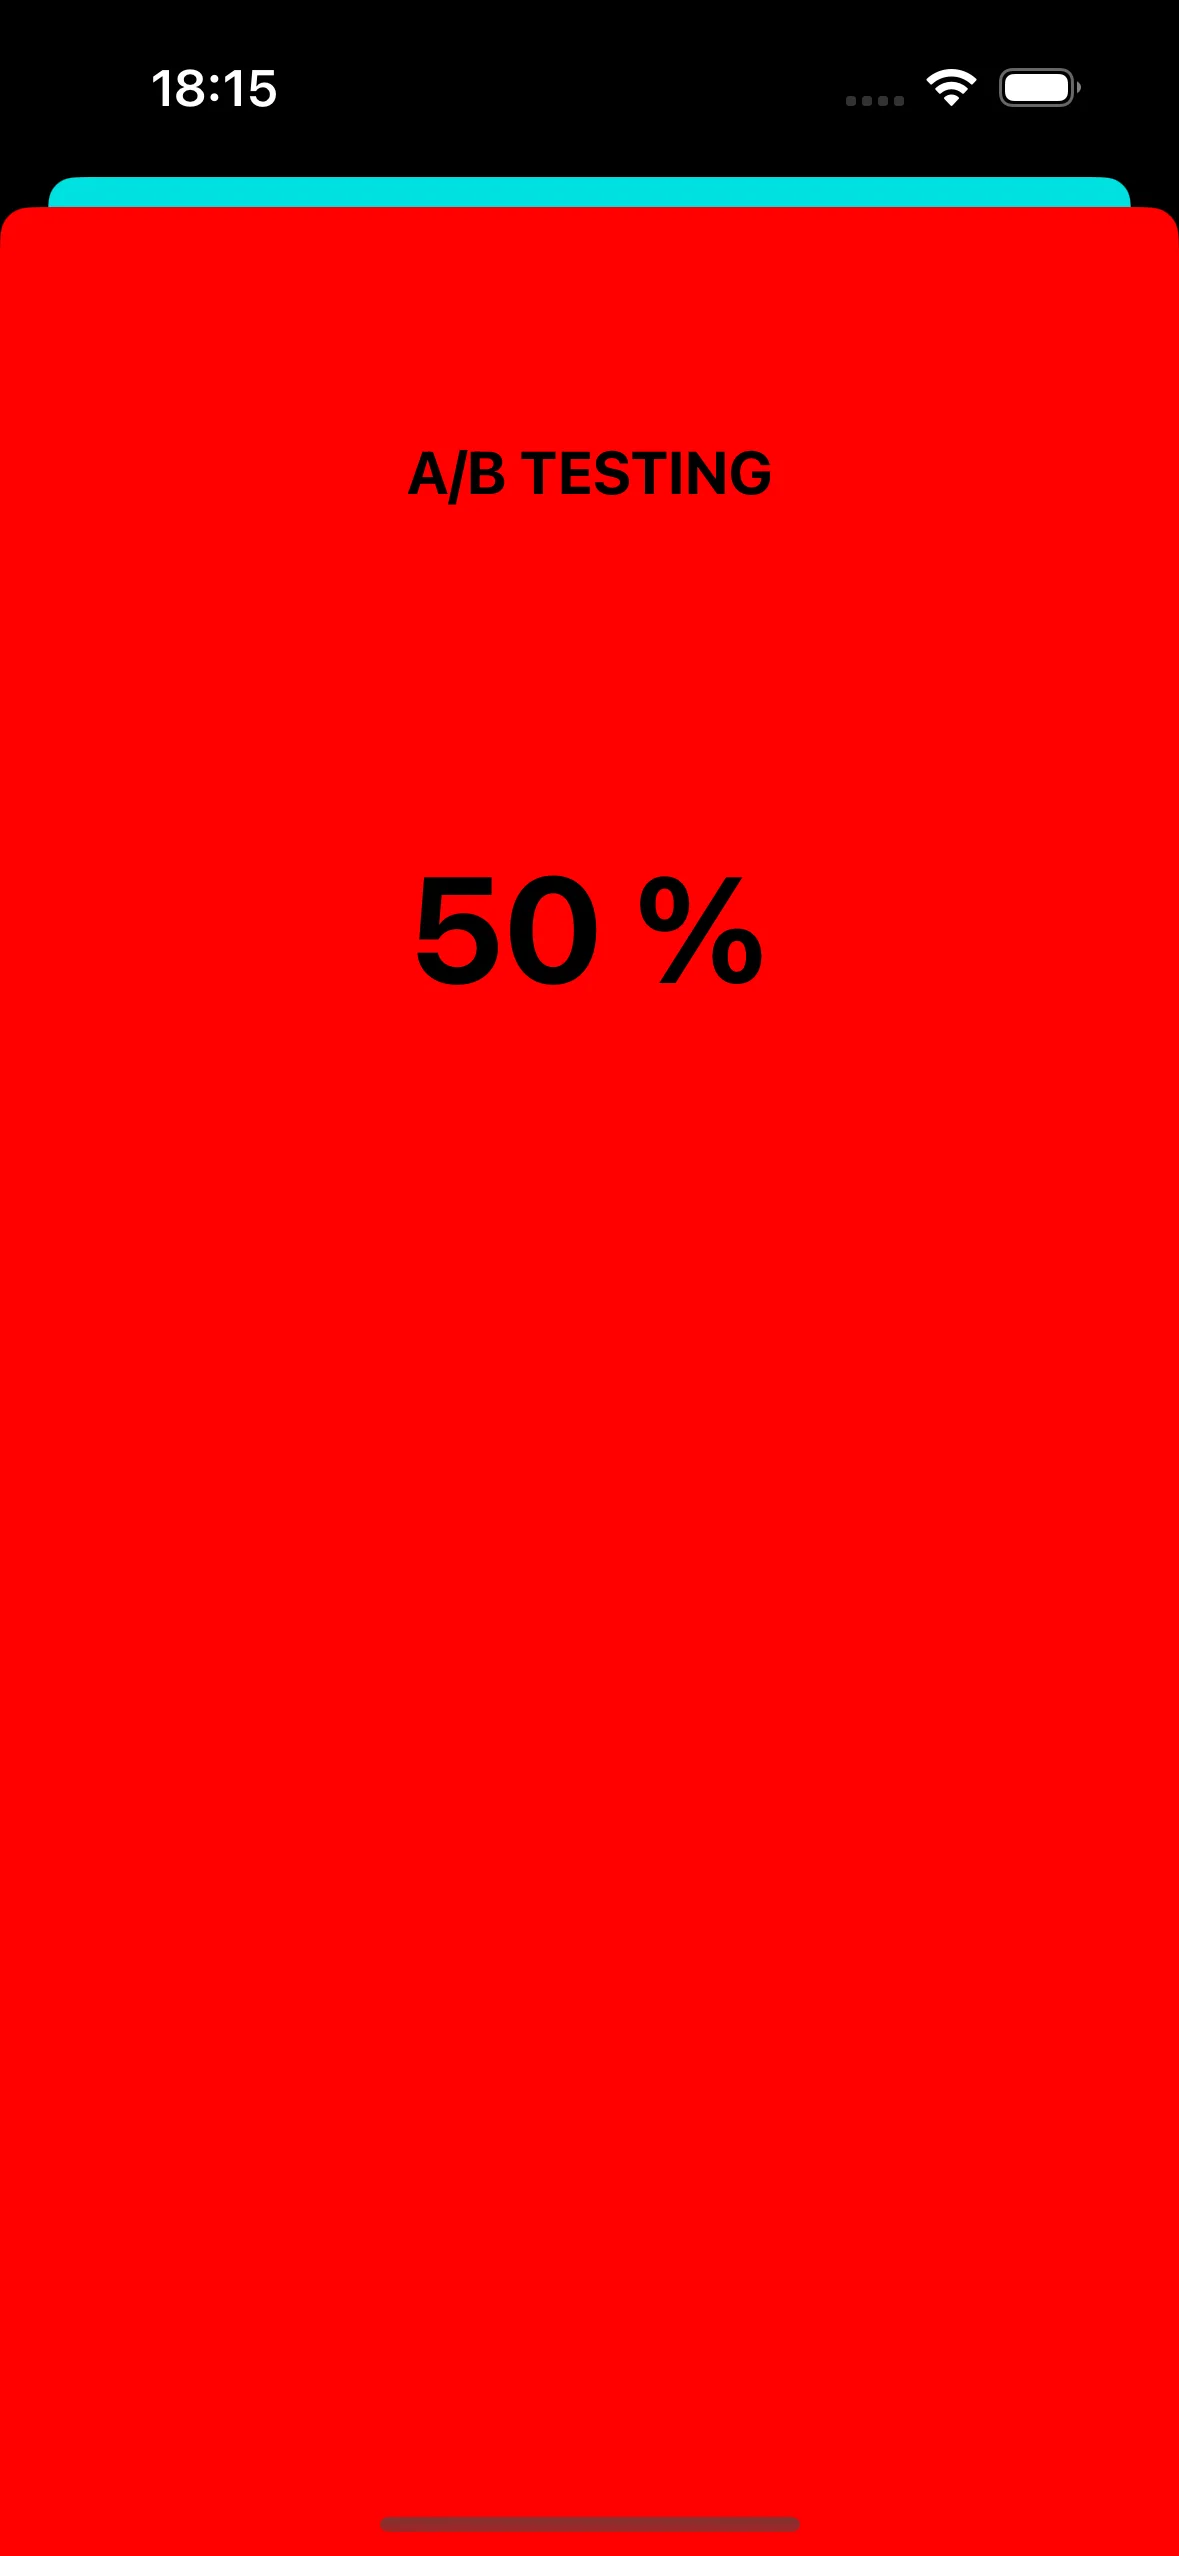
มาสร้าง view controller สองตัวกัน controller หนึ่ง (A) จะเปิดขึ้นพร้อมกับค่าส่วนลด และ controller ที่สอง (B) จะเปิดขึ้นพร้อมกับพารามิเตอร์ส่วนลดที่แตกต่างกัน
ตอนนี้มาเขียนโค้ดที่จะเปิด view controller ที่เหมาะสมตาม payload ของการแจ้งเตือนแบบพุชกัน:
```swift
func pushwoosh(_ pushwoosh: Pushwoosh, onMessageOpened message: PWMessage) {
// MARK: - A/B Testing via Custom Data
guard let customDataJson = message.customData,
let viewController = customDataJson["vc"] as? String else {
return
}
if viewController == "A" {
setControllerA()
} else if viewController == "B" {
setControllerB()
}
}
func setControllerA() {
if let topController = UIApplication.shared.topMostController() {
let storyboard = UIStoryboard(name: "Main", bundle: nil)
if let customViewController = storyboard.instantiateViewController(withIdentifier: "a_vc") as? AViewController {
customViewController.discountA = "50"
topController.present(customViewController, animated: true, completion: nil)
}
}
}
func setControllerB() {
if let topController = UIApplication.shared.topMostController() {
let storyboard = UIStoryboard(name: "Main", bundle: nil)
if let customViewController = storyboard.instantiateViewController(withIdentifier: "b_vc") as? BViewController {
customViewController.discountB = "100"
topController.present(customViewController, animated: true, completion: nil)
}
}
}
```
เพิ่ม JSON ของคุณลงในฟิลด์ Custom data
```
{
"vc": "A"
}
// Choose your Custom Data (A or B)
{
"vc": "B"
}
```
ขึ้นอยู่กับข้อมูลแบบกำหนดเองที่คุณส่งใน payload ของพุช ไม่ว่าจะเป็น `'vc': 'A'` หรือ `'vc': 'B'` กลุ่มผู้ใช้หนึ่งจะเปิด controller หนึ่ง ในขณะที่ผู้ใช้อีกกลุ่มหนึ่งจะเปิด controller ที่แตกต่างกัน
#### View Controller "A"
โค้ด CustomPageViewController:
```swift
class CustomPageViewController: UIViewController {
var bgColor: UIColor?
var discount: String?
@IBOutlet weak var titleLabel: UILabel!
override func viewDidLoad() {
super.viewDidLoad()
self.view.backgroundColor = self.bgColor
if self.discount != nil {
self.titleLabel?.text = "ONLY TODAY GET \(self.discount!)% DISCOUNT!"
}
}
func showPromoPage(discount: String) {
let vc = CustomPageViewController()
vc.bgColor = self.view.backgroundColor
vc.discount = discount
vc.modalTransitionStyle = UIModalTransitionStyle.crossDissolve
if self.presentedViewController != nil {
self.dismiss(animated: true, completion: {
self.present(vc, animated: true, completion: nil)
})
} else {
self.present(vc, animated: true, completion: nil)
}
}
@IBAction func closeButtonAction(_ sender: Any) {
self.dismiss(animated: true)
}
}
```
เราสมมติว่าค่าส่วนลดจะมาในพารามิเตอร์ `"d"` ใน JSON ของ payload การแจ้งเตือนแบบพุช เนื่องจาก payload ของการแจ้งเตือนแบบพุชมีขนาดจำกัด คุณควรใช้ชื่อสั้นๆ สำหรับพารามิเตอร์
```swift
guard let customDataJson = message.customData,
let redString = customDataJson["r"] as? String,
let greenString = customDataJson["g"] as? String,
let blueString = customDataJson["b"] as? String,
let discount = customDataJson["d"] as? String else {
return
}
```
คุณสามารถเขียนโค้ดเพื่อเริ่มต้นและเปิด View Controllers ที่แตกต่างกันได้ ขึ้นอยู่กับพารามิเตอร์ที่คุณส่งใน payload ของการแจ้งเตือนแบบพุช
## การเปิด view controller สำหรับการทดสอบ A/B
ลองพิจารณากรณีการใช้งานอื่นสำหรับข้อมูลแบบกำหนดเองในการแจ้งเตือนแบบพุช ตัวอย่างเช่น เราต้องการเปิด view controller หนึ่งสำหรับกลุ่มผู้ใช้หนึ่ง และอีก view controller หนึ่งสำหรับกลุ่มผู้ใช้ที่แตกต่างกัน พูดง่ายๆ คือ เราสามารถใช้ข้อมูลแบบกำหนดเองสำหรับการทดสอบ A/B ในแอปพลิเคชันของคุณได้
มาสร้าง view controller สองตัวกัน controller หนึ่ง (A) จะเปิดขึ้นพร้อมกับค่าส่วนลด และ controller ที่สอง (B) จะเปิดขึ้นพร้อมกับพารามิเตอร์ส่วนลดที่แตกต่างกัน
ตอนนี้มาเขียนโค้ดที่จะเปิด view controller ที่เหมาะสมตาม payload ของการแจ้งเตือนแบบพุชกัน:
```swift
func pushwoosh(_ pushwoosh: Pushwoosh, onMessageOpened message: PWMessage) {
// MARK: - A/B Testing via Custom Data
guard let customDataJson = message.customData,
let viewController = customDataJson["vc"] as? String else {
return
}
if viewController == "A" {
setControllerA()
} else if viewController == "B" {
setControllerB()
}
}
func setControllerA() {
if let topController = UIApplication.shared.topMostController() {
let storyboard = UIStoryboard(name: "Main", bundle: nil)
if let customViewController = storyboard.instantiateViewController(withIdentifier: "a_vc") as? AViewController {
customViewController.discountA = "50"
topController.present(customViewController, animated: true, completion: nil)
}
}
}
func setControllerB() {
if let topController = UIApplication.shared.topMostController() {
let storyboard = UIStoryboard(name: "Main", bundle: nil)
if let customViewController = storyboard.instantiateViewController(withIdentifier: "b_vc") as? BViewController {
customViewController.discountB = "100"
topController.present(customViewController, animated: true, completion: nil)
}
}
}
```
เพิ่ม JSON ของคุณลงในฟิลด์ Custom data
```
{
"vc": "A"
}
// Choose your Custom Data (A or B)
{
"vc": "B"
}
```
ขึ้นอยู่กับข้อมูลแบบกำหนดเองที่คุณส่งใน payload ของพุช ไม่ว่าจะเป็น `'vc': 'A'` หรือ `'vc': 'B'` กลุ่มผู้ใช้หนึ่งจะเปิด controller หนึ่ง ในขณะที่ผู้ใช้อีกกลุ่มหนึ่งจะเปิด controller ที่แตกต่างกัน
#### View Controller "A"
 #### View Controller "B"
 ## การเปลี่ยนไอคอนแอปผ่านการแจ้งเตือนแบบพุช
อีกตัวอย่างหนึ่งของวิธีที่เราสามารถใช้การแจ้งเตือนแบบพุชใน iOS คือการเปลี่ยนไอคอนแอป
ขั้นแรก ให้เราเพิ่มไอคอนที่แตกต่างกันสามไอคอนลงใน assets ไอคอนหนึ่งจะถูกใช้เป็นไอคอนแอปเริ่มต้น ในขณะที่อีกสองไอคอนจะเปลี่ยนไปตามข้อมูลแบบกำหนดเองในการแจ้งเตือนแบบพุช
## การเปลี่ยนไอคอนแอปผ่านการแจ้งเตือนแบบพุช
อีกตัวอย่างหนึ่งของวิธีที่เราสามารถใช้การแจ้งเตือนแบบพุชใน iOS คือการเปลี่ยนไอคอนแอป
ขั้นแรก ให้เราเพิ่มไอคอนที่แตกต่างกันสามไอคอนลงใน assets ไอคอนหนึ่งจะถูกใช้เป็นไอคอนแอปเริ่มต้น ในขณะที่อีกสองไอคอนจะเปลี่ยนไปตามข้อมูลแบบกำหนดเองในการแจ้งเตือนแบบพุช
 หากต้องการเปิดใช้งานไอคอนแอปสำรองในแอปพลิเคชัน iOS ของคุณ คุณต้องเพิ่มการกำหนดค่าที่จำเป็นในไฟล์ `Info.plist` นี่คือขั้นตอนในการทำ:
```xml
CFBundleIcons
CFBundleAlternateIcons
AppIcon-2
CFBundleIconFiles
Icon-2
UIPrerenderedIcon
AppIcon-3
CFBundleIconFiles
Icon-3
UIPrerenderedIcon
CFBundlePrimaryIcon
CFBundleIconFiles
Icon-1
UIPrerenderedIcon
```
ใน callback `pushwoosh(_ pushwoosh: Pushwoosh, onMessageOpened message: PWMessage)` คุณสามารถเพิ่มโค้ดเพื่อเปลี่ยนไอคอนแอปตามข้อมูลแบบกำหนดเองที่ได้รับในการแจ้งเตือนแบบพุช นี่คือวิธีที่คุณสามารถ implement สิ่งนี้ได้:
```swift
func pushwoosh(_ pushwoosh: Pushwoosh, onMessageOpened message: PWMessage) {
// MARK: - Change the app icon dynamically
guard let customDataJson = message.customData,
let appIcon = customDataJson["i"] as? String else {
return
}
UIApplication.shared.setAlternateIconName(appIcon) { error in
if let error = error {
print(error.localizedDescription)
} else {
print("Success!")
}
}
}
```
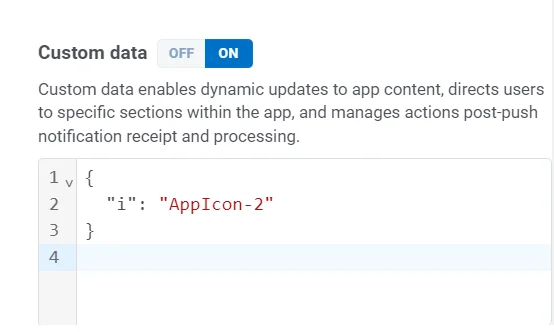
เพิ่มโค้ด JSON:
```
{
"i": "AppIcon-2"
}
```
หากต้องการเปิดใช้งานไอคอนแอปสำรองในแอปพลิเคชัน iOS ของคุณ คุณต้องเพิ่มการกำหนดค่าที่จำเป็นในไฟล์ `Info.plist` นี่คือขั้นตอนในการทำ:
```xml
CFBundleIcons
CFBundleAlternateIcons
AppIcon-2
CFBundleIconFiles
Icon-2
UIPrerenderedIcon
AppIcon-3
CFBundleIconFiles
Icon-3
UIPrerenderedIcon
CFBundlePrimaryIcon
CFBundleIconFiles
Icon-1
UIPrerenderedIcon
```
ใน callback `pushwoosh(_ pushwoosh: Pushwoosh, onMessageOpened message: PWMessage)` คุณสามารถเพิ่มโค้ดเพื่อเปลี่ยนไอคอนแอปตามข้อมูลแบบกำหนดเองที่ได้รับในการแจ้งเตือนแบบพุช นี่คือวิธีที่คุณสามารถ implement สิ่งนี้ได้:
```swift
func pushwoosh(_ pushwoosh: Pushwoosh, onMessageOpened message: PWMessage) {
// MARK: - Change the app icon dynamically
guard let customDataJson = message.customData,
let appIcon = customDataJson["i"] as? String else {
return
}
UIApplication.shared.setAlternateIconName(appIcon) { error in
if let error = error {
print(error.localizedDescription)
} else {
print("Success!")
}
}
}
```
เพิ่มโค้ด JSON:
```
{
"i": "AppIcon-2"
}
```
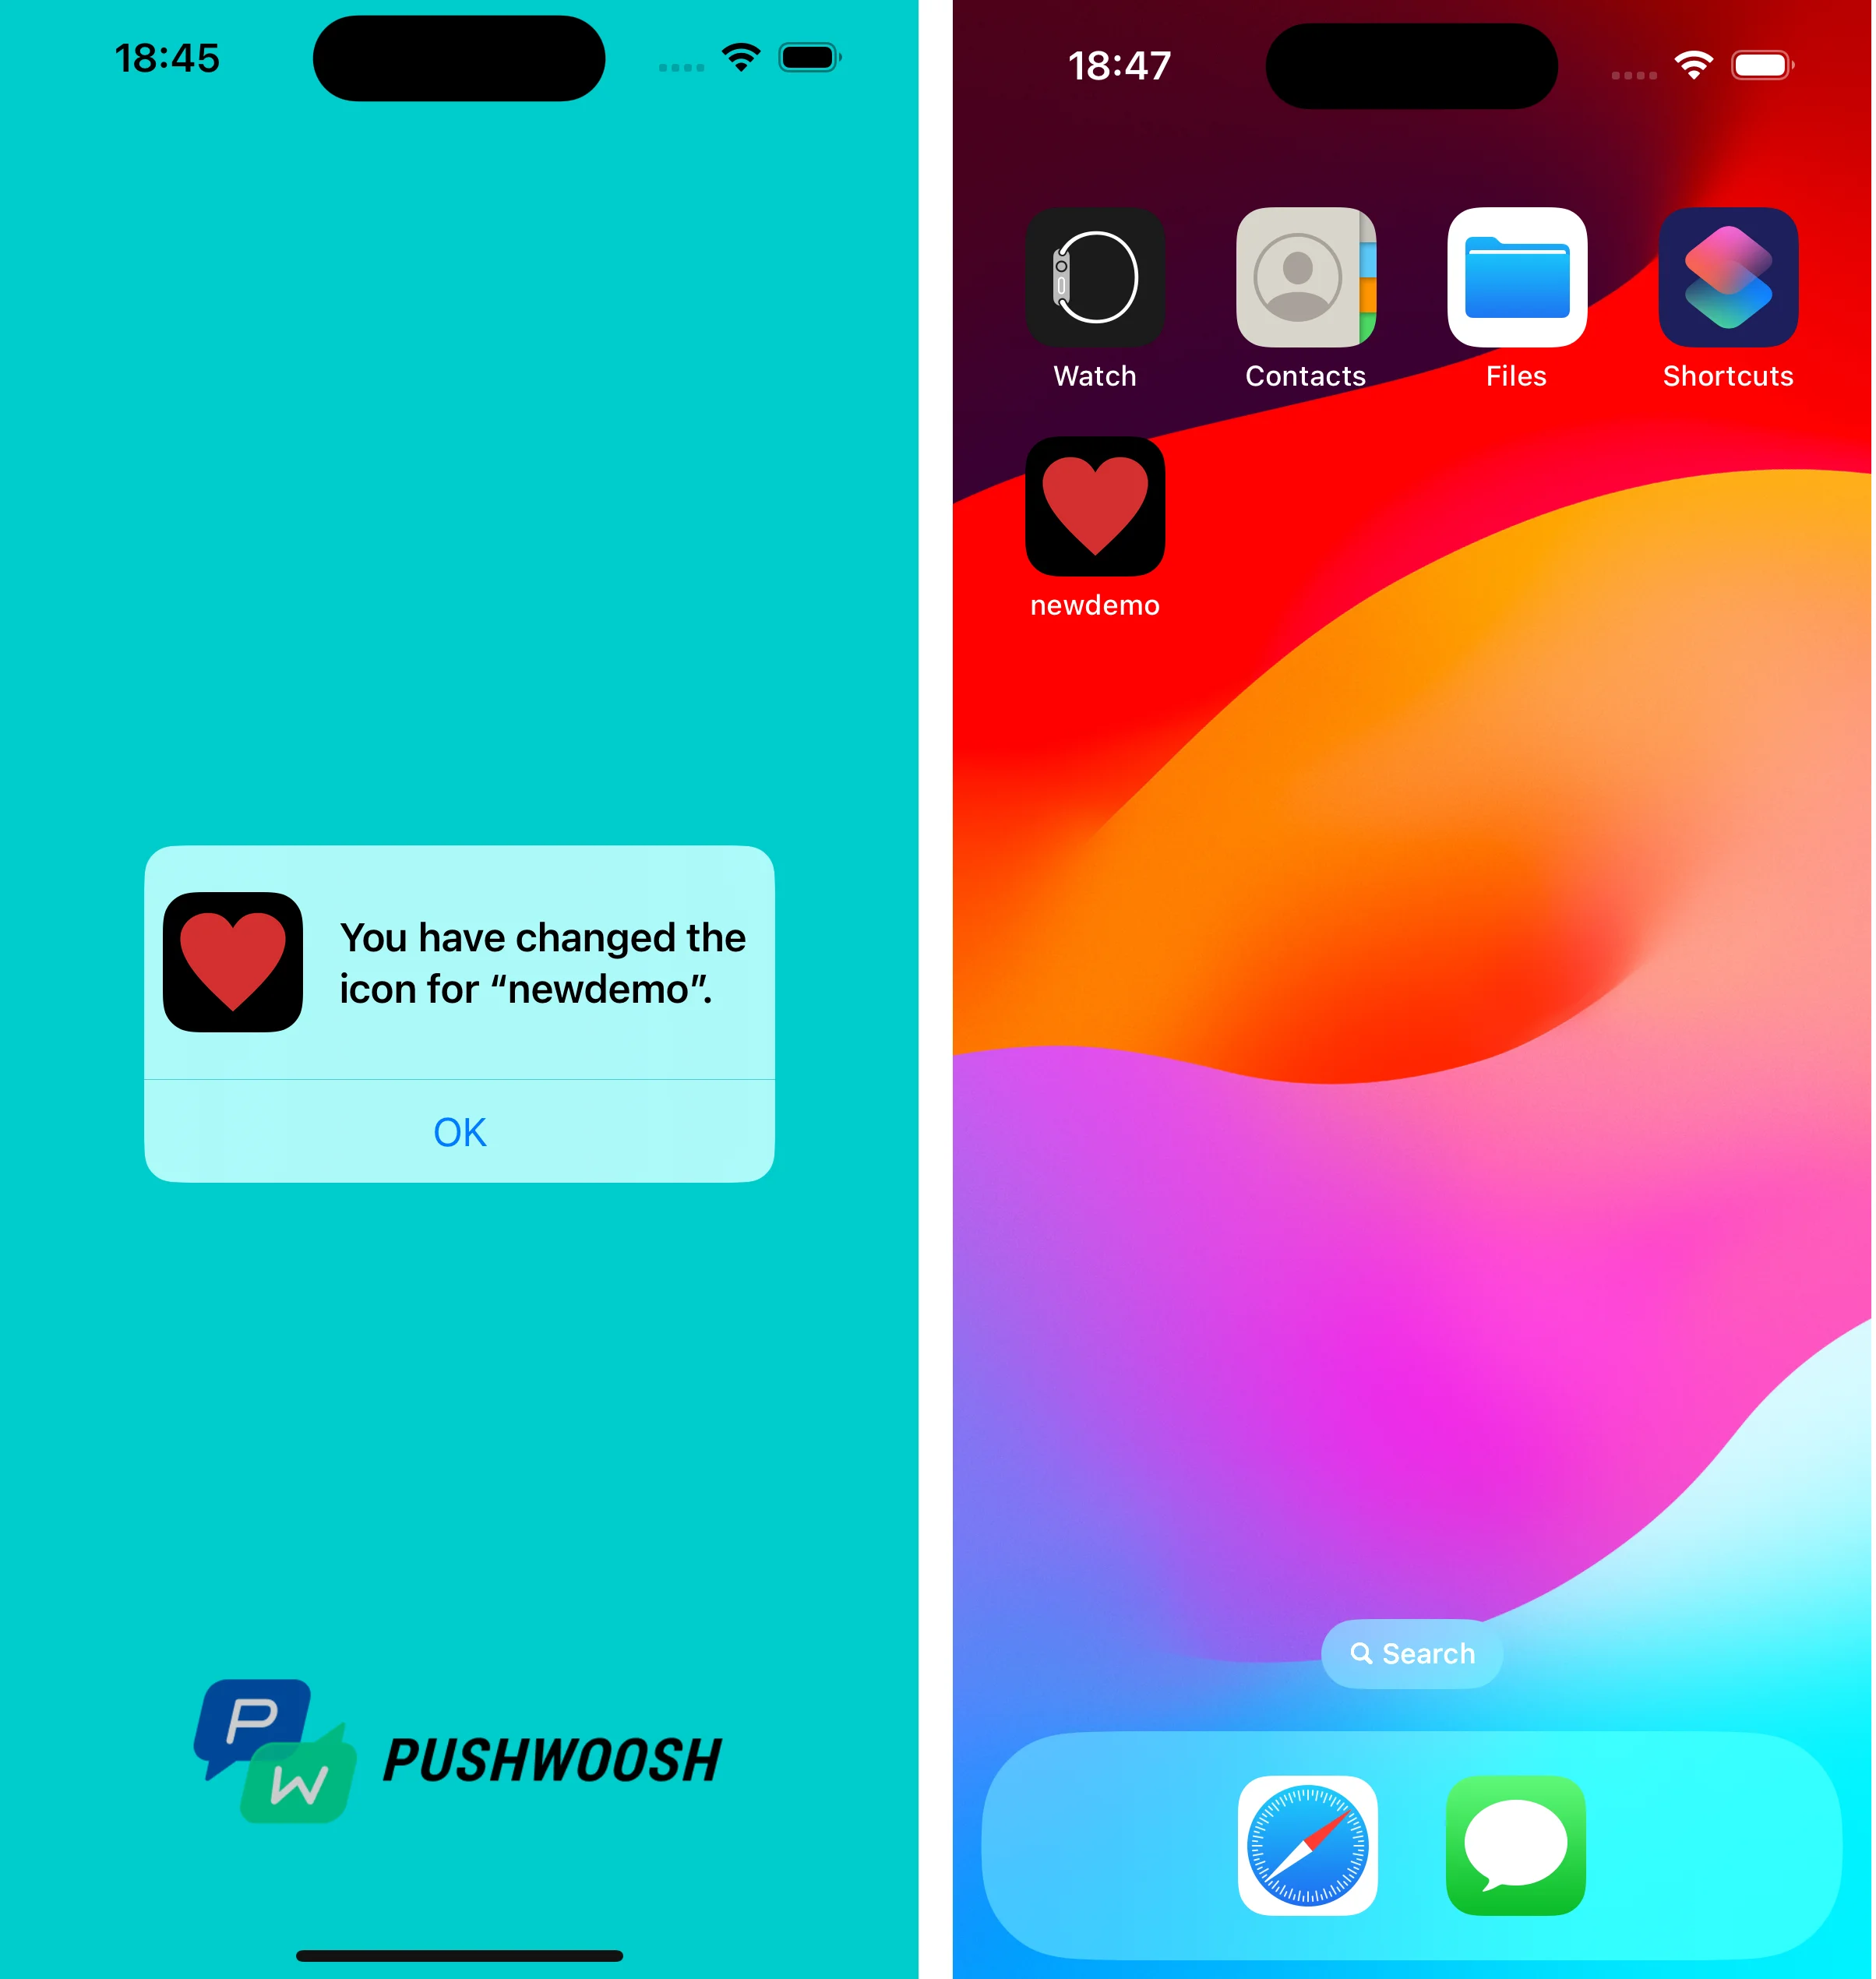
 เมื่อแตะที่การแจ้งเตือนแบบพุช ระบบจะแจ้งให้คุณเปลี่ยนไอคอนแอปบนอุปกรณ์
 คุณสามารถค้นหาโปรเจกต์ที่ใช้ข้อมูลแบบกำหนดเองได้ที่ [GitHub](https://github.com/Pushwoosh/pushwoosh-quickstart-ios/tree/main/customdata/newdemo)