# Настройка бейджей для React Native
Поскольку плагин React Native не содержит заголовок PWNotificationExtensionManager, вам необходимо выполнить несколько дополнительных шагов для реализации бейджей в вашем проекте React Native.
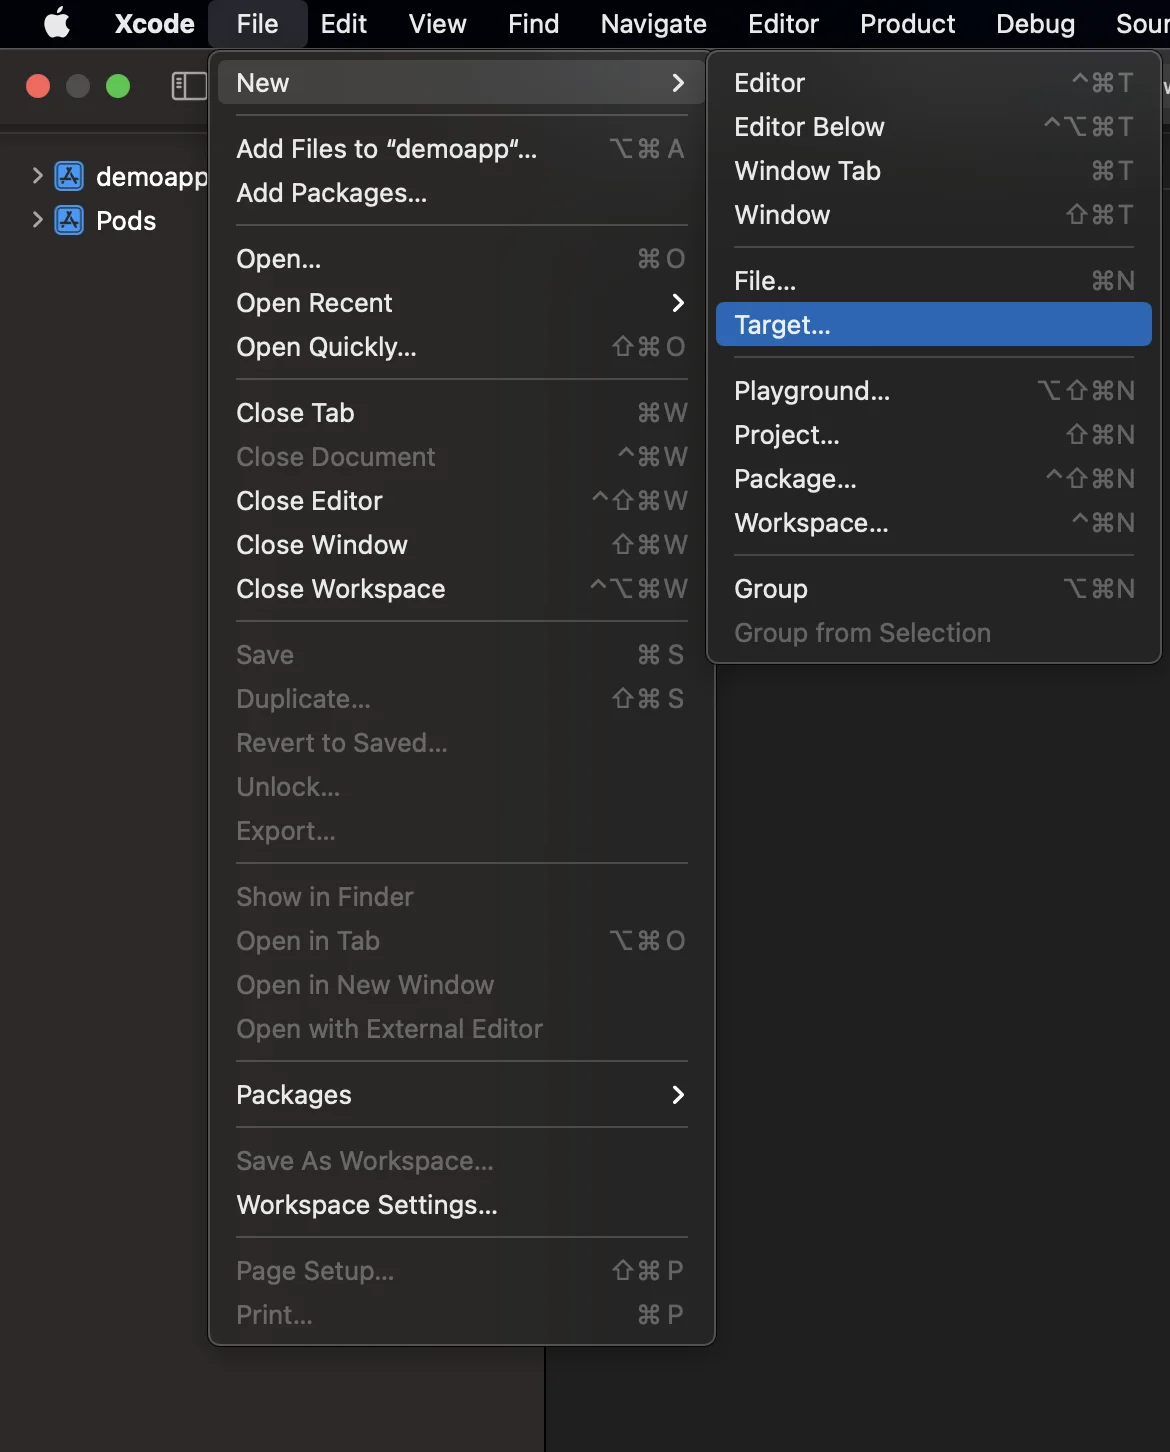
#### 1. Добавьте Notification Service Extension (File -> New -> Target...)
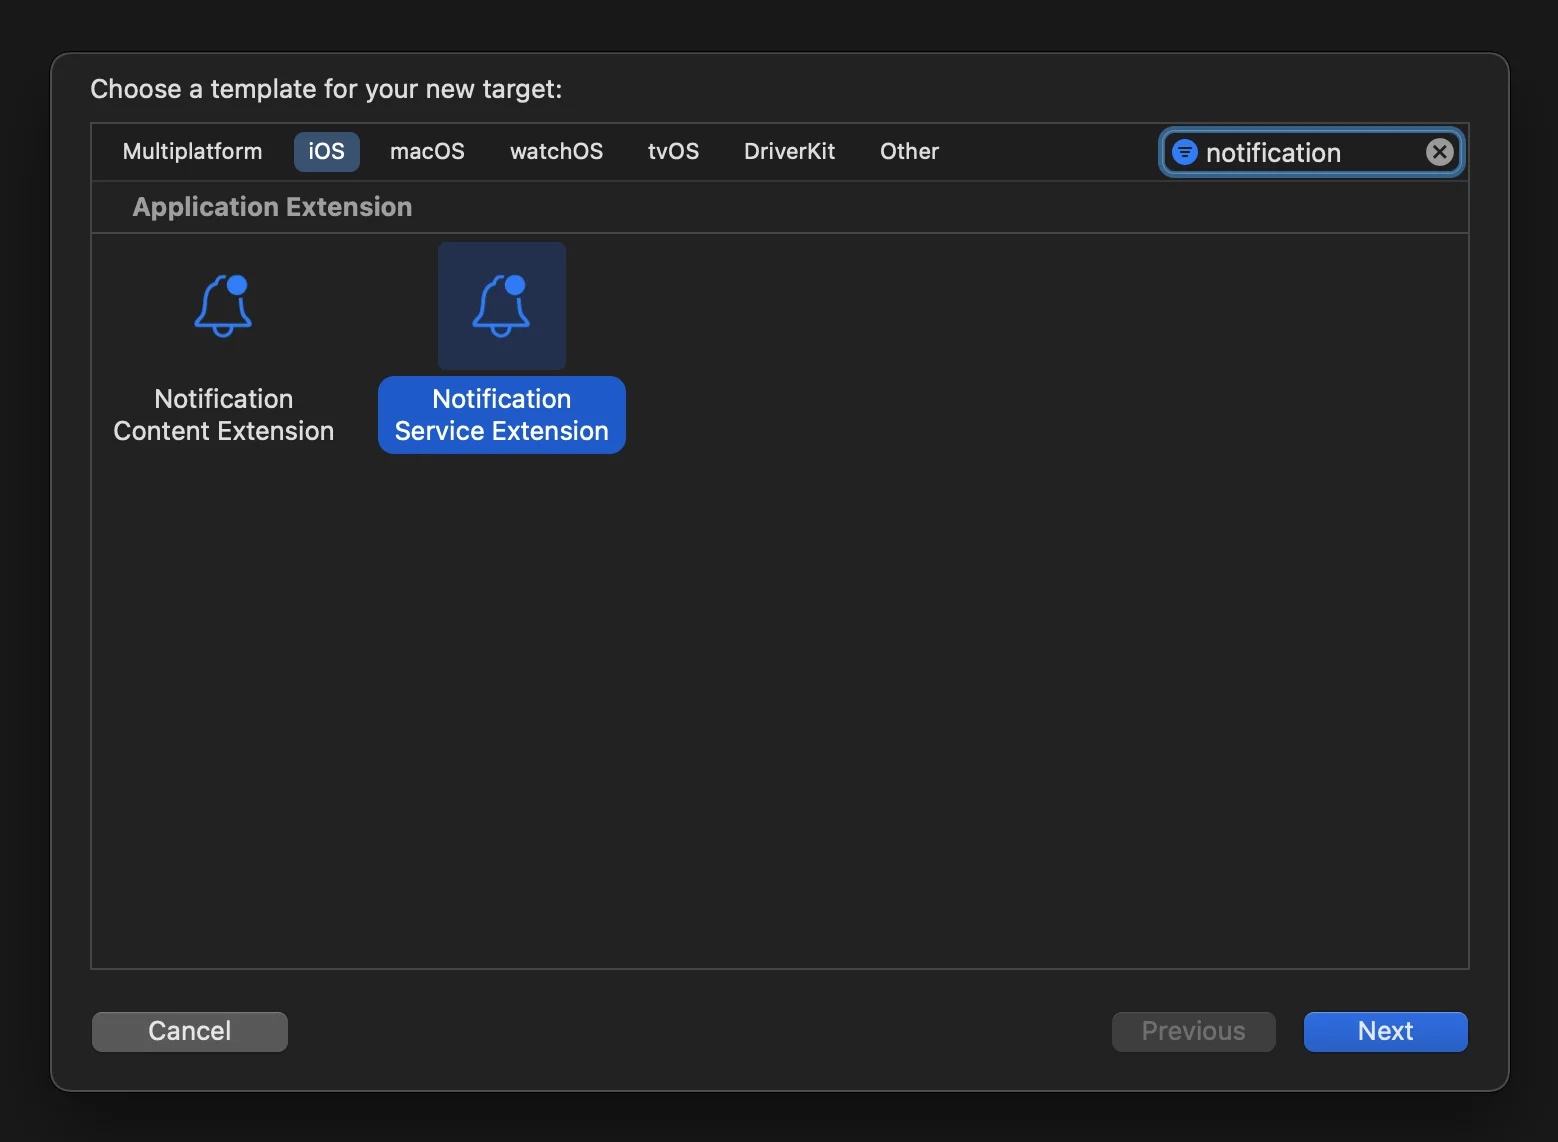
#### 2. Выберите "Notification Service Extension"
#### 3. Обновите код Notification Service Extension следующим образом:
```
#import "NotificationService.h"
#import
@interface NotificationService ()
@property (nonatomic, strong) void (^contentHandler)(UNNotificationContent *contentToDeliver);
@property (nonatomic, strong) UNMutableNotificationContent *bestAttemptContent;
@end
@implementation NotificationService
- (void)didReceiveNotificationRequest:(UNNotificationRequest *)request withContentHandler:(void (^)(UNNotificationContent * _Nonnull))contentHandler {
self.contentHandler = contentHandler;
self.bestAttemptContent = [request.content mutableCopy];
[[PWNotificationExtensionManager sharedManager] handleNotificationRequest:request contentHandler:contentHandler];
}
- (void)serviceExtensionTimeWillExpire {
// Called just before the extension will be terminated by the system.
// Use this as an opportunity to deliver your "best attempt" at modified content, otherwise the original push payload will be used.
self.contentHandler(self.bestAttemptContent);
}
@end
```
#### 4. Свяжите зависимости с целью (target)
React Native не связывает автоматически все необходимые зависимости с целью (target), созданной вручную, поэтому вам следует обновить **Build Phases** цели и предоставить необходимую информацию:
Просто нажмите на знак **+** под **Compile Sources** и **Link Binary With Libraries** и найдите необходимые библиотеки/фреймворки.
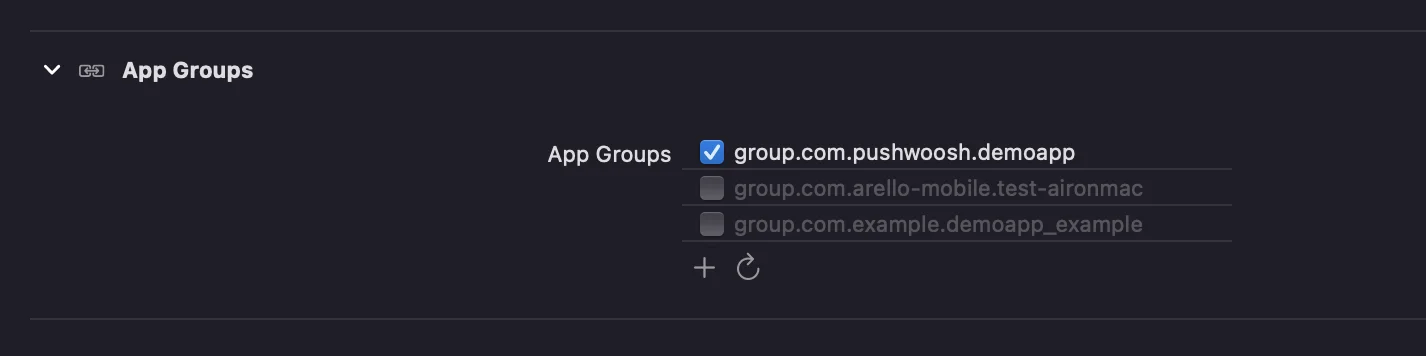
#### 5. Добавьте возможность **App Groups** для обеих целей в Xcode и установите одну и ту же группу **как для приложения, так и для расширения**:
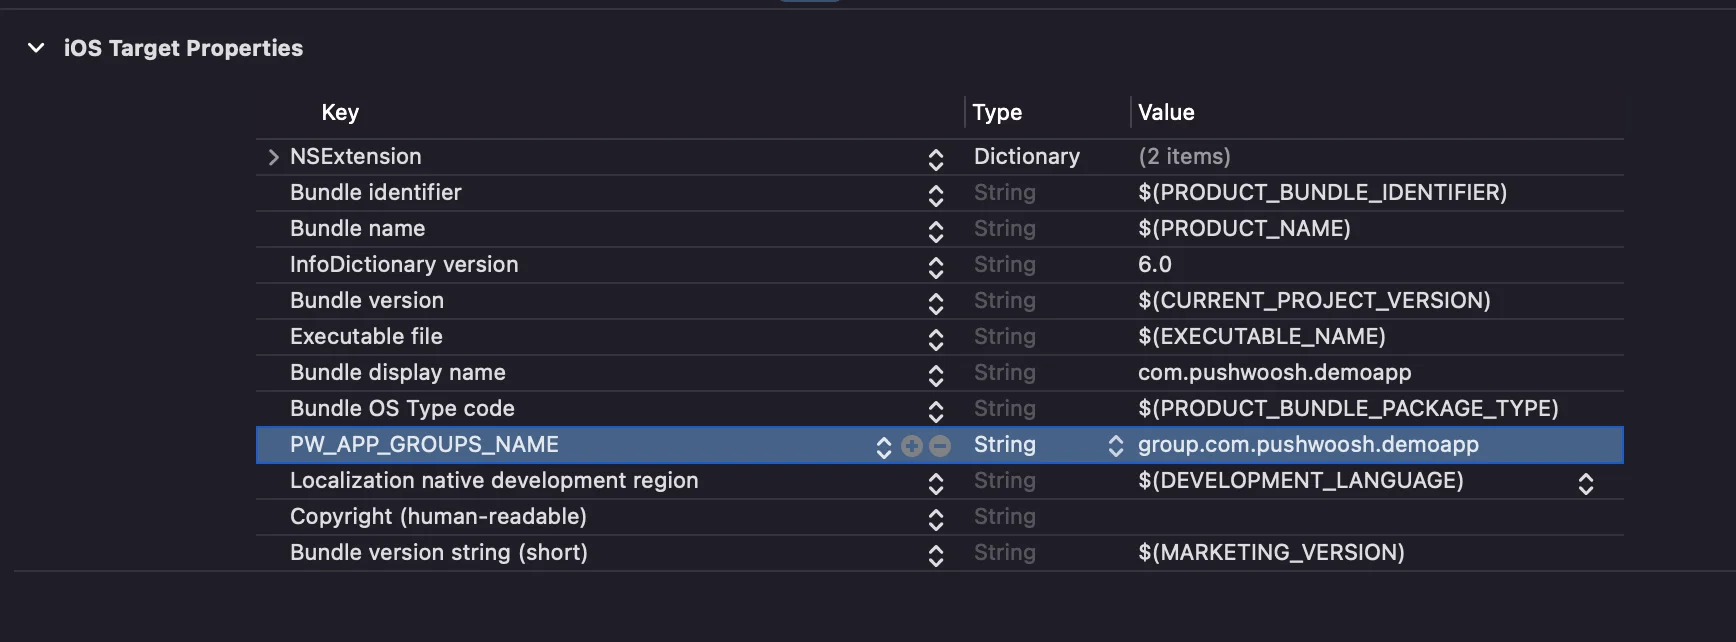
#### 6. Добавьте ключ **PW\_APP\_GROUPS\_NAME** в info.plist **обеих** целей. Значение — это имя вашей группы приложений:
 #### 2. Выберите "Notification Service Extension"
 #### 3. Обновите код Notification Service Extension следующим образом:
```
#import "NotificationService.h"
#import
#### 3. Обновите код Notification Service Extension следующим образом:
```
#import "NotificationService.h"
#import 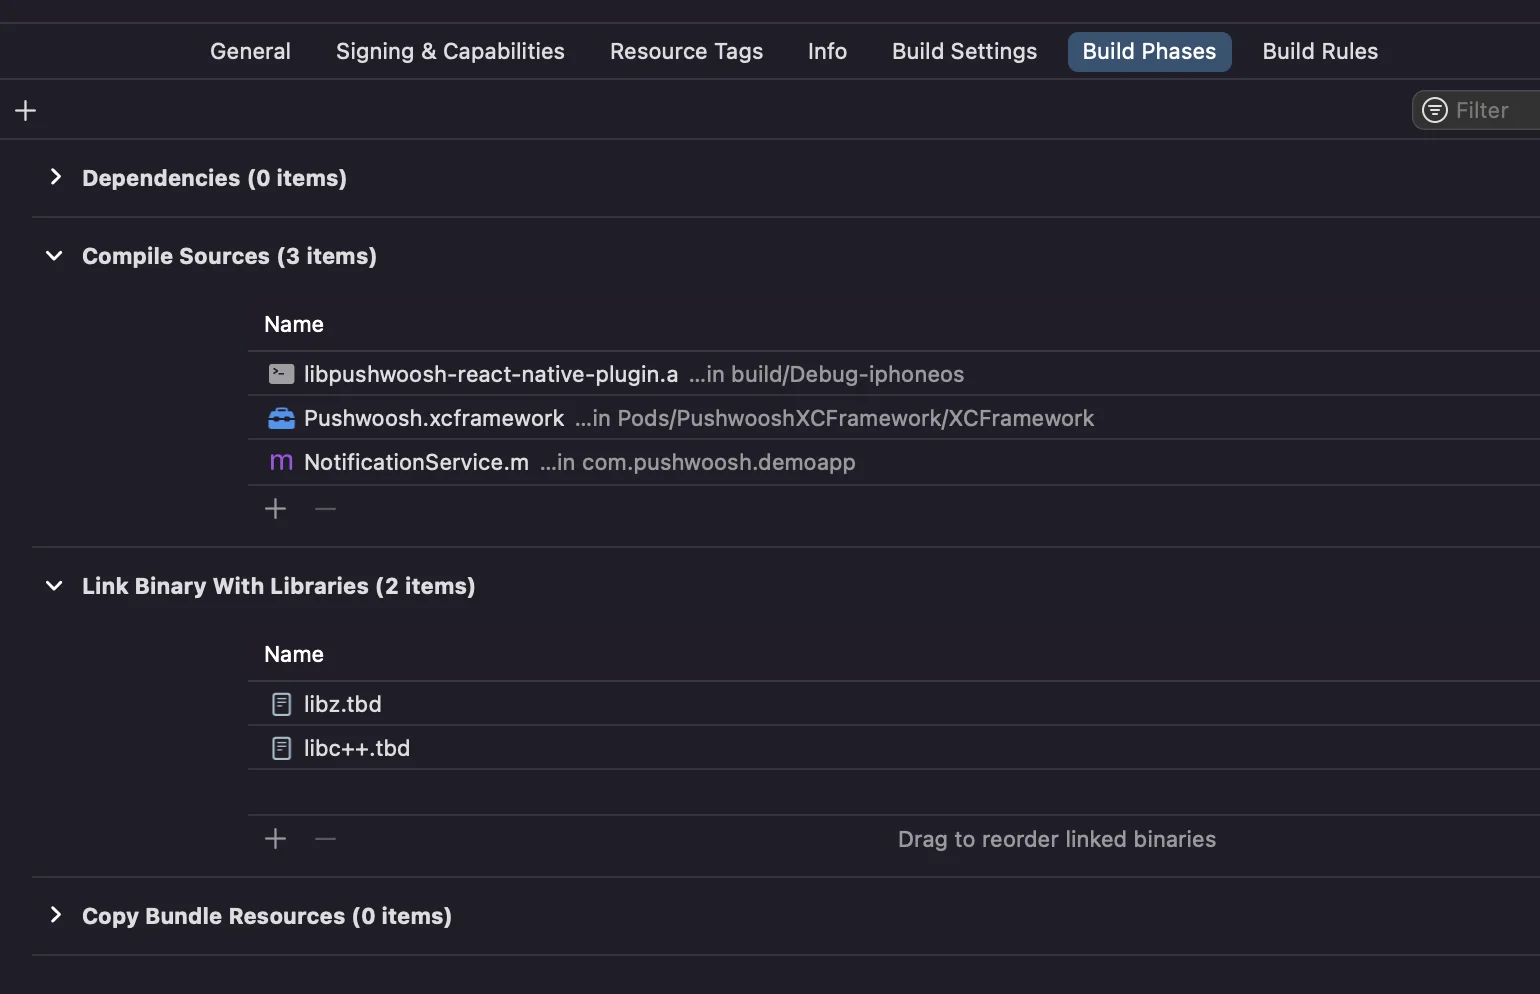 Просто нажмите на знак **+** под **Compile Sources** и **Link Binary With Libraries** и найдите необходимые библиотеки/фреймворки.
#### 5. Добавьте возможность **App Groups** для обеих целей в Xcode и установите одну и ту же группу **как для приложения, так и для расширения**:
Просто нажмите на знак **+** под **Compile Sources** и **Link Binary With Libraries** и найдите необходимые библиотеки/фреймворки.
#### 5. Добавьте возможность **App Groups** для обеих целей в Xcode и установите одну и ту же группу **как для приложения, так и для расширения**:
 #### 6. Добавьте ключ **PW\_APP\_GROUPS\_NAME** в info.plist **обеих** целей. Значение — это имя вашей группы приложений: