# Connected content
Connected content is a feature in [Liquid templates](/product/personalization/liquid-templates/) that allows you to dynamically retrieve and use data from an external source, such as a web service, directly within your email or push notification messages. This feature enables real-time personalization by fetching JSON data from a specified URL and saving it to a variable that can be utilized in your content.
## Key use cases
- **Product recommendations**: Display personalized product lists tailored to each user.
- **Promo codes**: Insert unique promo codes generated by a backend service.
## Prerequisites
* To use Connected Content, you must have your own backend service that generates and provides the required data (e.g., promo codes, product recommendations) based on **User ID, HWID, or custom tags**. Pushwoosh then fetches this data before sending a message.
## Step-by-step implementation guide
### Step 1. Set up backend service
The backend service should:
* Accept a request containing user-specific parameters (e.g., `userId`). Connected Content supports `UserID`, `HWID`, or any custom tags you’ve set up in your project.
* Return a JSON response with the required data. This content can then be inserted dynamically into messages
### Step 2. Create a preset with Connected content in Pushwoosh
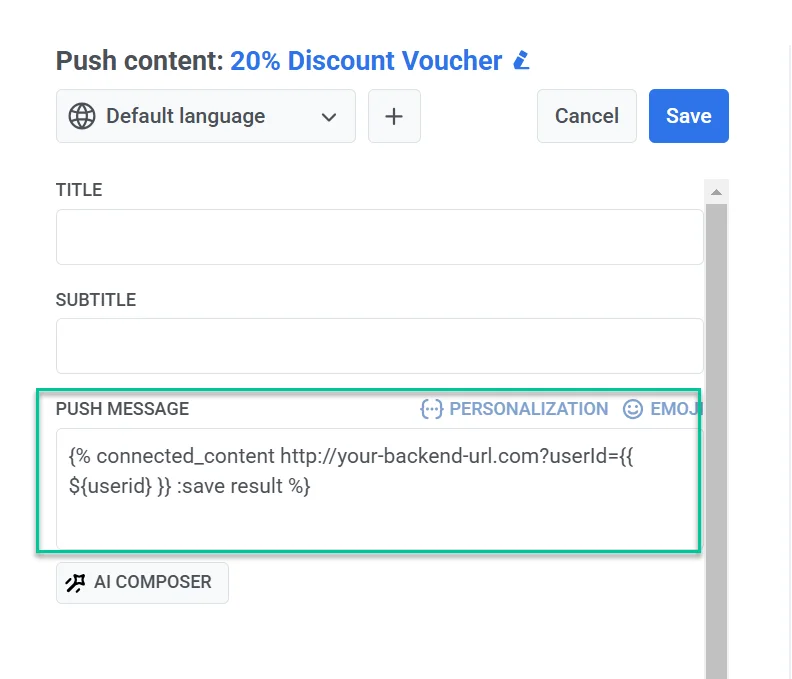
1. In the [Push](/product/content/push-presets/) or [Email content editor](/product/content/email-content/drag-and-drop-email-editor/), insert the Connected Content syntax into the message field.
**Example**
```
{% connected_content http://your-backend-url.com?userId={{ ${userid} }} :save result %}
```
**Syntax breakdown**
| | |
| ----- | ----- |
| `connected_content` | Fetches JSON data from the specified backend URL. |
| `http://your-backend-url.com` | The backend endpoint that returns required data in JSON format. |
| `userId={{ ${userid} }}` | A dynamic query parameter that passes the user ID to the backend. Inside `connected_content`, wrap a variable in `${}`. In the message text, write `{{userid}}` without it. |
| `:save result` | Stores the fetched JSON response in the result variable for use in Liquid templates |
**Authentication (optional)**
If your backend service requires authentication, you can include an API key or token in the Connected Content request to ensure secure access.
```
{% connected_content http://your-backend-url.com?userId={{ ${userid} }}&auth=YOUR_API_KEY :save result %}
```
You can also send authentication (or any other) data as HTTP headers using the optional `:headers` parameter — a JSON object of header names and values.
```
{% connected_content http://your-backend-url.com?userId={{ ${userid} }} :headers {"Authorization": "Bearer YOUR_TOKEN", "X-Api-Key": "YOUR_API_KEY"} :save result %}
```
| | |
| ----- | ----- |
| `:headers {...}` | A JSON object of HTTP headers sent with the request, e.g. `Authorization: Bearer `. |
**Using tags in Connected content**
To include a tag value, add it to the URL as a query parameter in the same `{{ ${tag_name} }}` form. Written as `{{ tag_name }}` inside the `connected_content` tag, the value is sent empty.
```
{% connected_content http://your-backend-url.com?userId={{ ${userid} }}&lang={{ ${Language} }} :save result %}
```
2. Next, add the message text incorporating the **retrieved data**, like this:
```
Hey, {{userid}}, grab your personal promo code - {{result.code}}
```
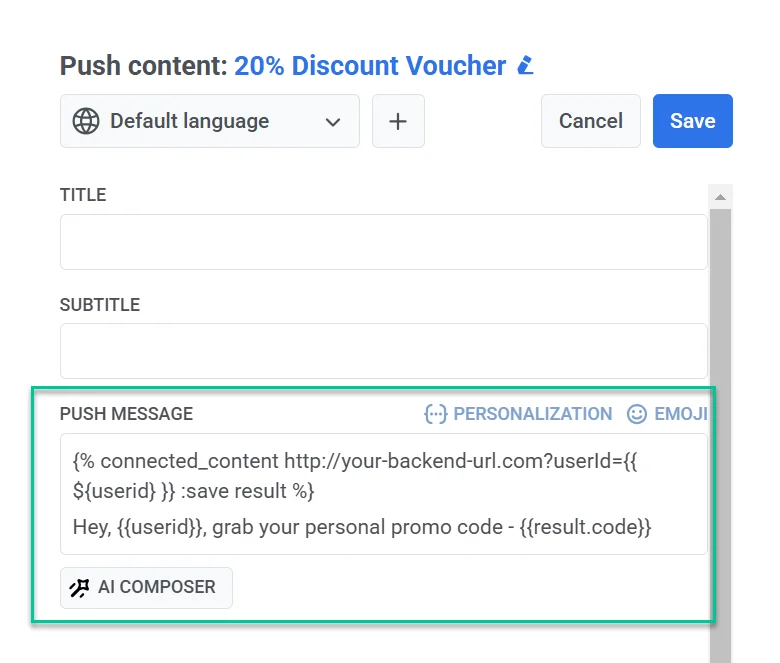
3. After finalizing the message content and configuring the preset settings, save it for reuse in campaigns.
### Step 3. Send a message using the configured preset
Send a message with this preset using the [one-time push](/product/messaging-channels/push-notifications/send-push-notifications/one-time-push/#how-to-send-a-push-notification-using-the-one-time-push-form) or [email form](/product/messaging-channels/emails/sending-emails/send-one-time-emails/) or [customer journey](/product/customer-journey/pushwoosh-journey-overview/).