# Dynamic content
## What is Dynamic content
This functionality allows you to personalize your push messages and emails by modifying the message content with corresponding Tag values that you collect from your users. You can address your user by name and use any of their preferences in the message to make it relevant for every single user.
## Use case
Picture this: the application provides coupons for best restaurants in town every Friday.
To draw users' attention and bring them back to the app, you may send a basic push message that says "There are some coupons for you in the app, open it now!". However, such a message doesn't convey any specific information for a user, so it's unlikely this push will be opened by everyone who receives it. To significantly increase the push open rate, notifications should be sent to the right audience with the right message. To send the most relevant messages, _collect the following information from users by calling_ [`setTags`](/developer/api-reference/device-api#settags):
* Name (sends _Alias_ tag value to Pushwoosh)
* Favorite Restaurant (sends _Restaurant_ tag value)
## How to personalize a push
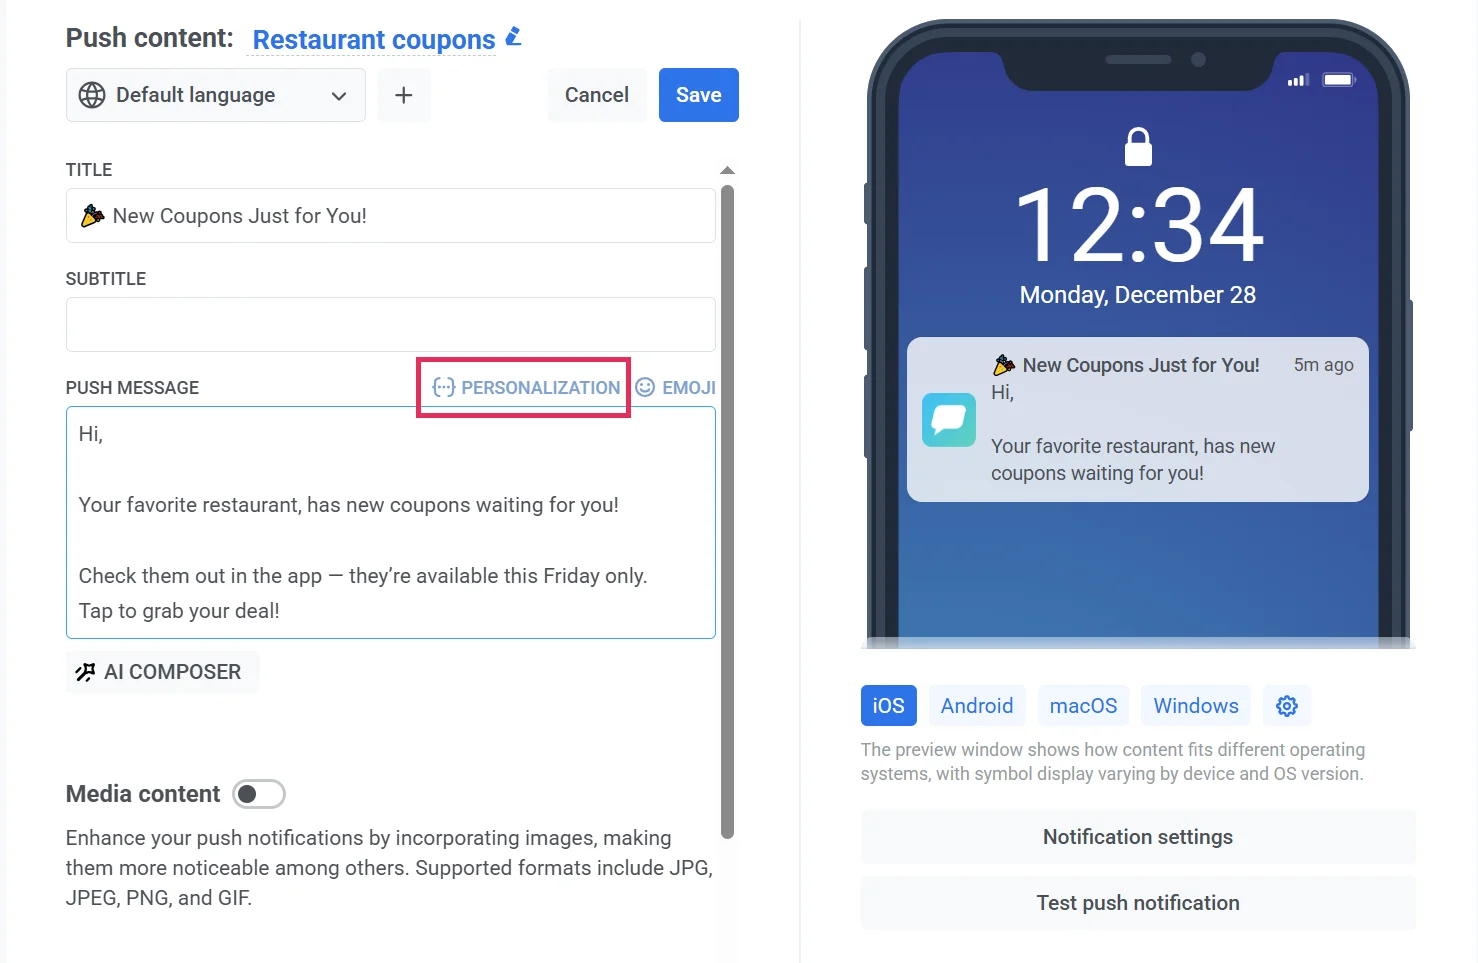
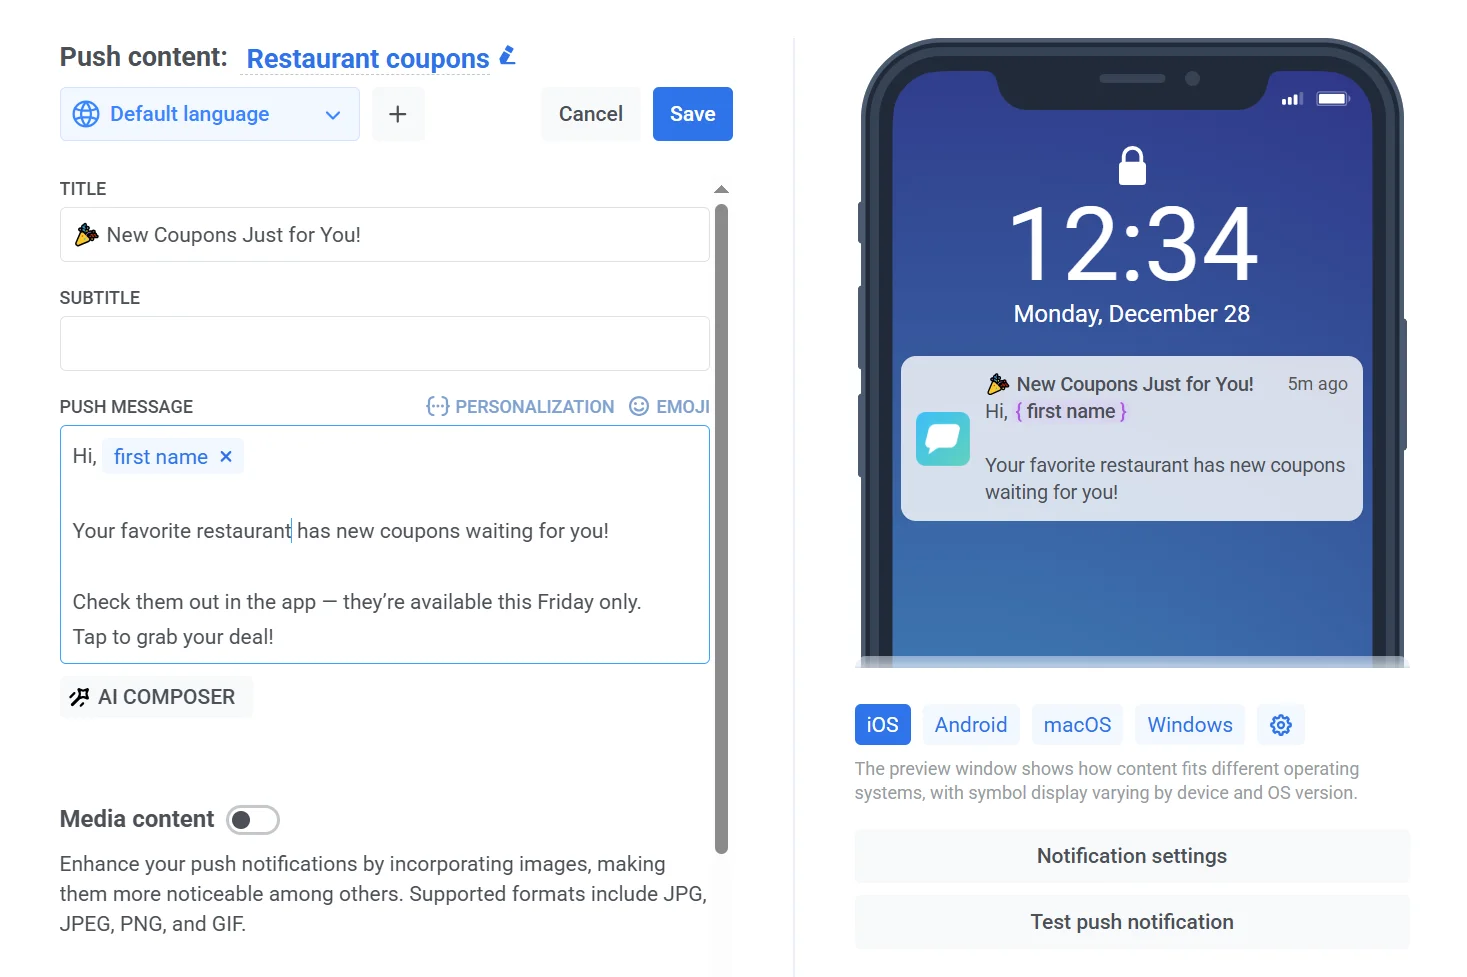
With this info about users, you can personalize push messages by using Dynamic content. To add the Dynamic content to your message text, click the **Personalization** button on the top right of the input field.
1. Choose a Tag
First, choose a Tag whose value will be used in the message. To apply, click **Insert**.
In our case, it's the Name tag so that each user will receive a personalized push notification.
2. Choose a format modifier
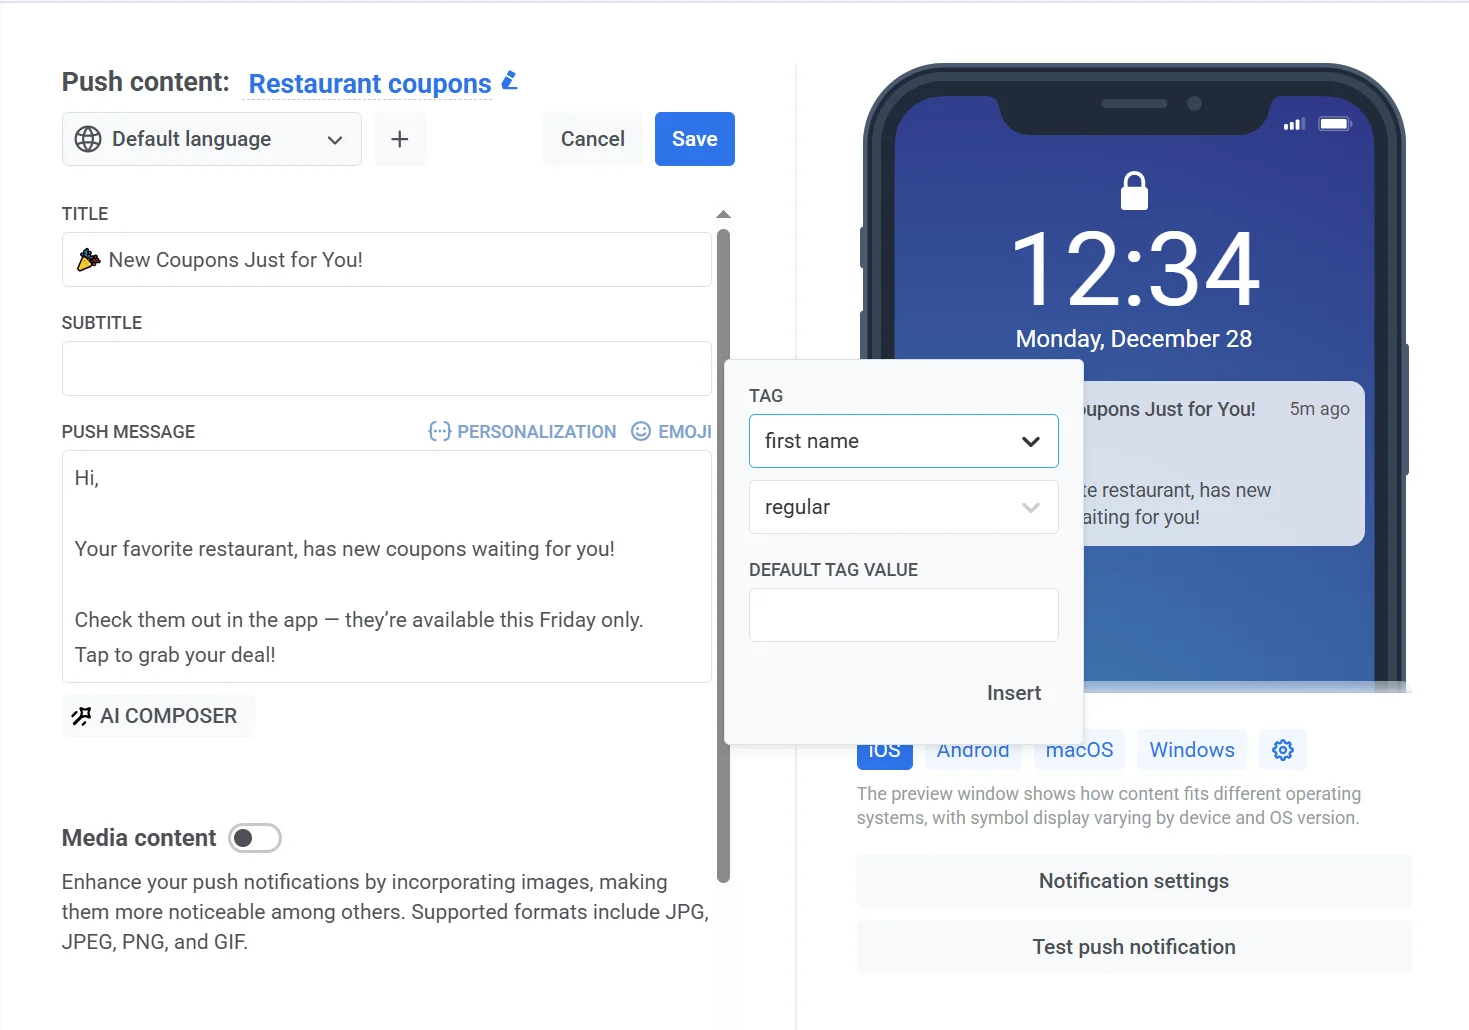
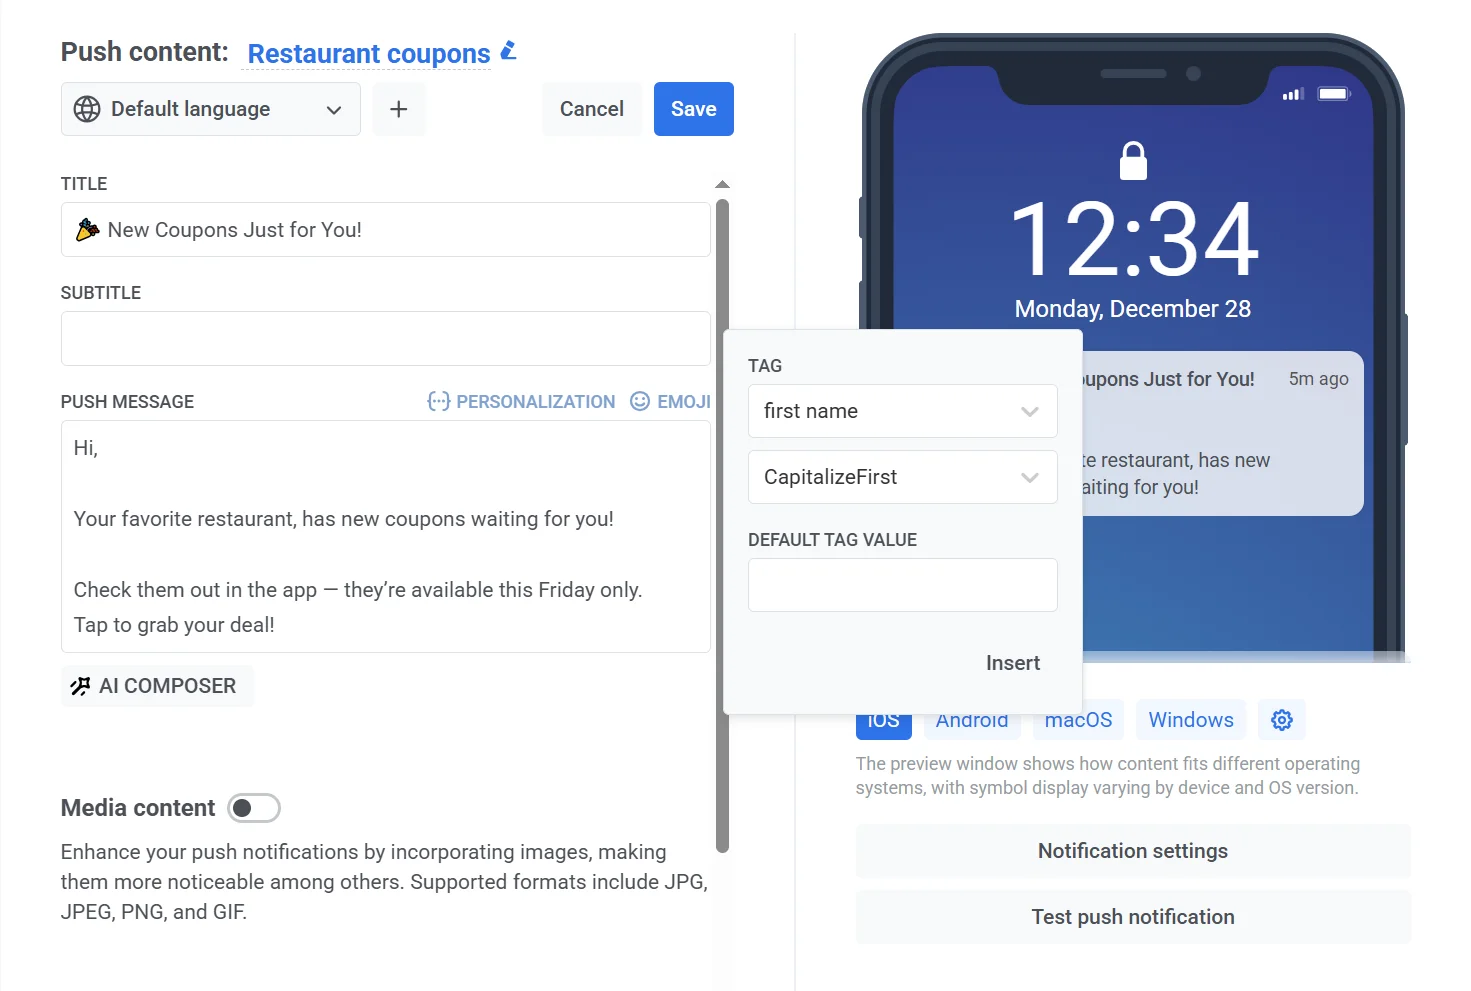
Then, select a Format Modifier for the chosen tag value. Since it's the name, capitalize the first character of the name, so "alexander" becomes "Alexander":
3. Specify a default value
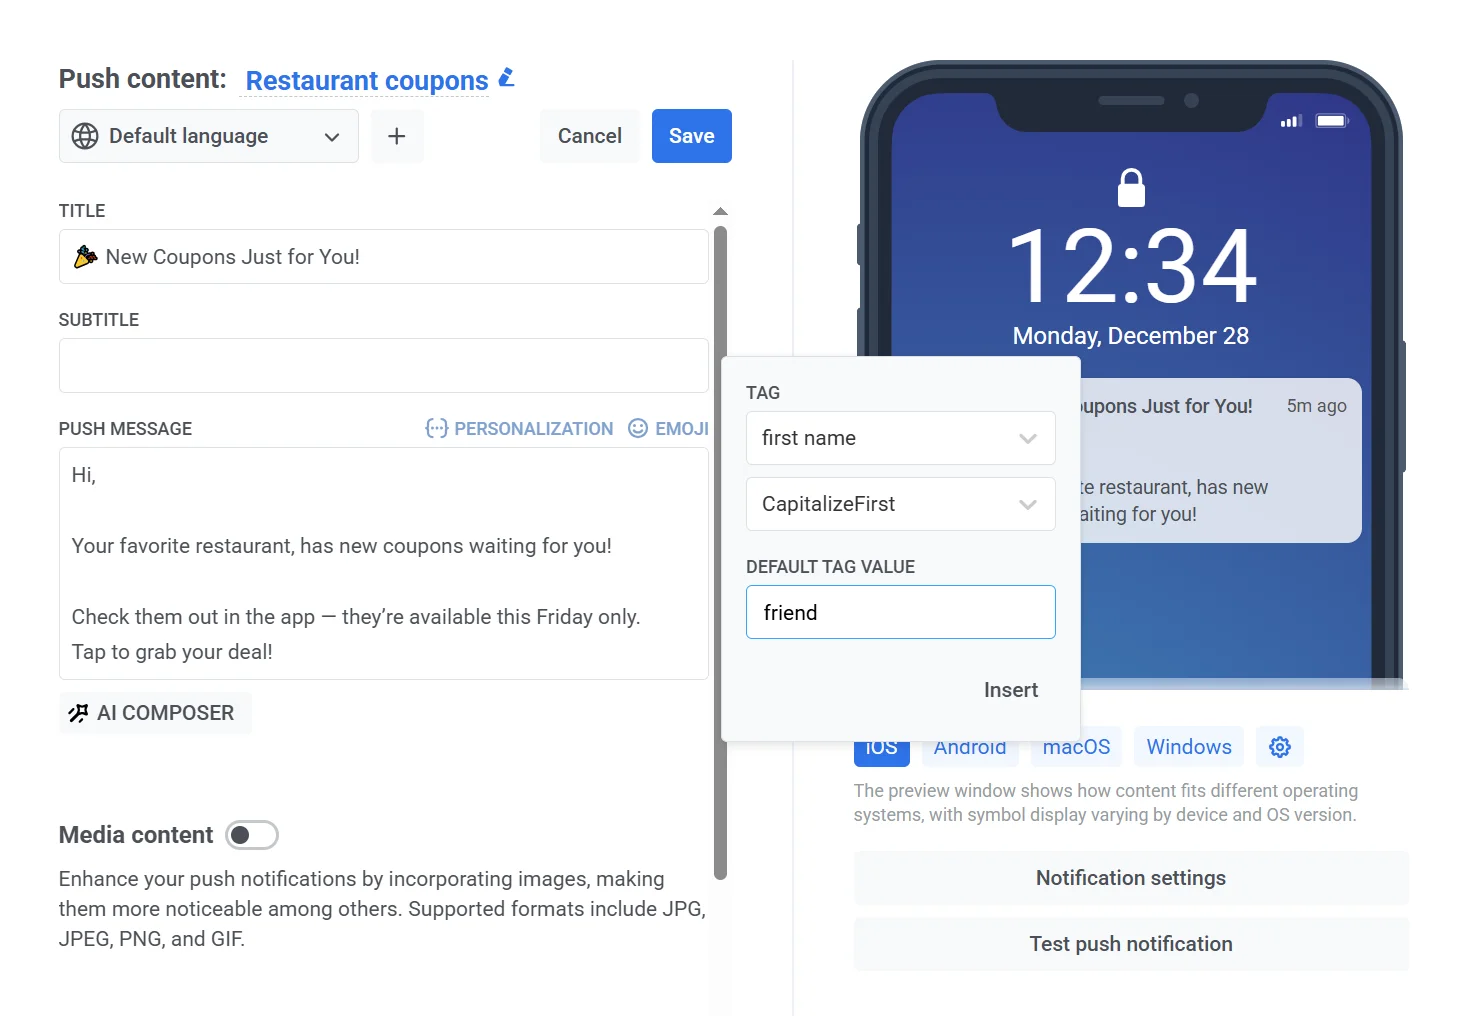
You can also specify the Default Tag Value, which is used as a tag value in case a user didn't specify it for some reason. Type in a default value for those who didn't provide it, for example, "friend".
4. Finally, click **Insert**.
## Insert User ID
Besides Tags, you can insert the [User ID](/product/pushwoosh-knowledge-hub/users-userids/) into push content. Pushwoosh resolves it for each recipient at send time, so you don't need to store it as a Tag.
1. Click **Personalization** on the field you want to personalize (title, message text, or other supported push content).
2. In the list, select **User ID**. Use the search box to find it quickly.
3. Choose a format modifier and, if needed, a default value (see step 3 in [How to personalize a push](#how-to-personalize-a-push)).
4. Click **Insert**.
## Personalization guides by channel
If you want to personalize messages across multiple channels, check out our detailed how-to guides for different channels:
 1. Choose a Tag
First, choose a Tag whose value will be used in the message. To apply, click **Insert**.
In our case, it's the Name tag so that each user will receive a personalized push notification.
1. Choose a Tag
First, choose a Tag whose value will be used in the message. To apply, click **Insert**.
In our case, it's the Name tag so that each user will receive a personalized push notification.
 2. Choose a format modifier
Then, select a Format Modifier for the chosen tag value. Since it's the name, capitalize the first character of the name, so "alexander" becomes "Alexander":
2. Choose a format modifier
Then, select a Format Modifier for the chosen tag value. Since it's the name, capitalize the first character of the name, so "alexander" becomes "Alexander":
 3. Specify a default value
You can also specify the Default Tag Value, which is used as a tag value in case a user didn't specify it for some reason. Type in a default value for those who didn't provide it, for example, "friend".
3. Specify a default value
You can also specify the Default Tag Value, which is used as a tag value in case a user didn't specify it for some reason. Type in a default value for those who didn't provide it, for example, "friend".
 4. Finally, click **Insert**.
 ## Insert User ID
Besides Tags, you can insert the [User ID](/product/pushwoosh-knowledge-hub/users-userids/) into push content. Pushwoosh resolves it for each recipient at send time, so you don't need to store it as a Tag.
1. Click **Personalization** on the field you want to personalize (title, message text, or other supported push content).
2. In the list, select **User ID**. Use the search box to find it quickly.
3. Choose a format modifier and, if needed, a default value (see step 3 in [How to personalize a push](#how-to-personalize-a-push)).
4. Click **Insert**.
## Personalization guides by channel
If you want to personalize messages across multiple channels, check out our detailed how-to guides for different channels:
## Insert User ID
Besides Tags, you can insert the [User ID](/product/pushwoosh-knowledge-hub/users-userids/) into push content. Pushwoosh resolves it for each recipient at send time, so you don't need to store it as a Tag.
1. Click **Personalization** on the field you want to personalize (title, message text, or other supported push content).
2. In the list, select **User ID**. Use the search box to find it quickly.
3. Choose a format modifier and, if needed, a default value (see step 3 in [How to personalize a push](#how-to-personalize-a-push)).
4. Click **Insert**.
## Personalization guides by channel
If you want to personalize messages across multiple channels, check out our detailed how-to guides for different channels: