# Send catalog messages via WhatsApp
WhatsApp allows you to send product catalogs directly to users as part of your campaigns. This is done through the **Catalog** message type supported in Meta's WhatsApp Business Platform. Pushwoosh integrates with this functionality, enabling you to trigger catalog messages from [customer journeys](/product/customer-journey/pushwoosh-journey-overview/).
## Before you begin
To send catalog messages via WhatsApp, please ensure you have completed the following steps:
* **Integrated WhatsApp with Pushwoosh:** Your WhatsApp Business Account should be connected and configured in Pushwoosh. [Read how to set this up](/product/first-steps/start-with-your-project/configure-platforms/whatsapp-configuration/)
* **WhatsApp payment method added:** Meta requires a valid payment method for sending messages. Ensure your payment information is current in your WhatsApp account.
* **User contacts imported:** Upload your WhatsApp contact list to Pushwoosh. [Learn how to import contacts](/product/messaging-channels/whatsapp-messages/register-phone-numbers-for-whatsapp#how-to-import-whatsapp-contacts-from-a-csv-file)
## Types of catalog messages
Pushwoosh supports two types of WhatsApp catalog messages:
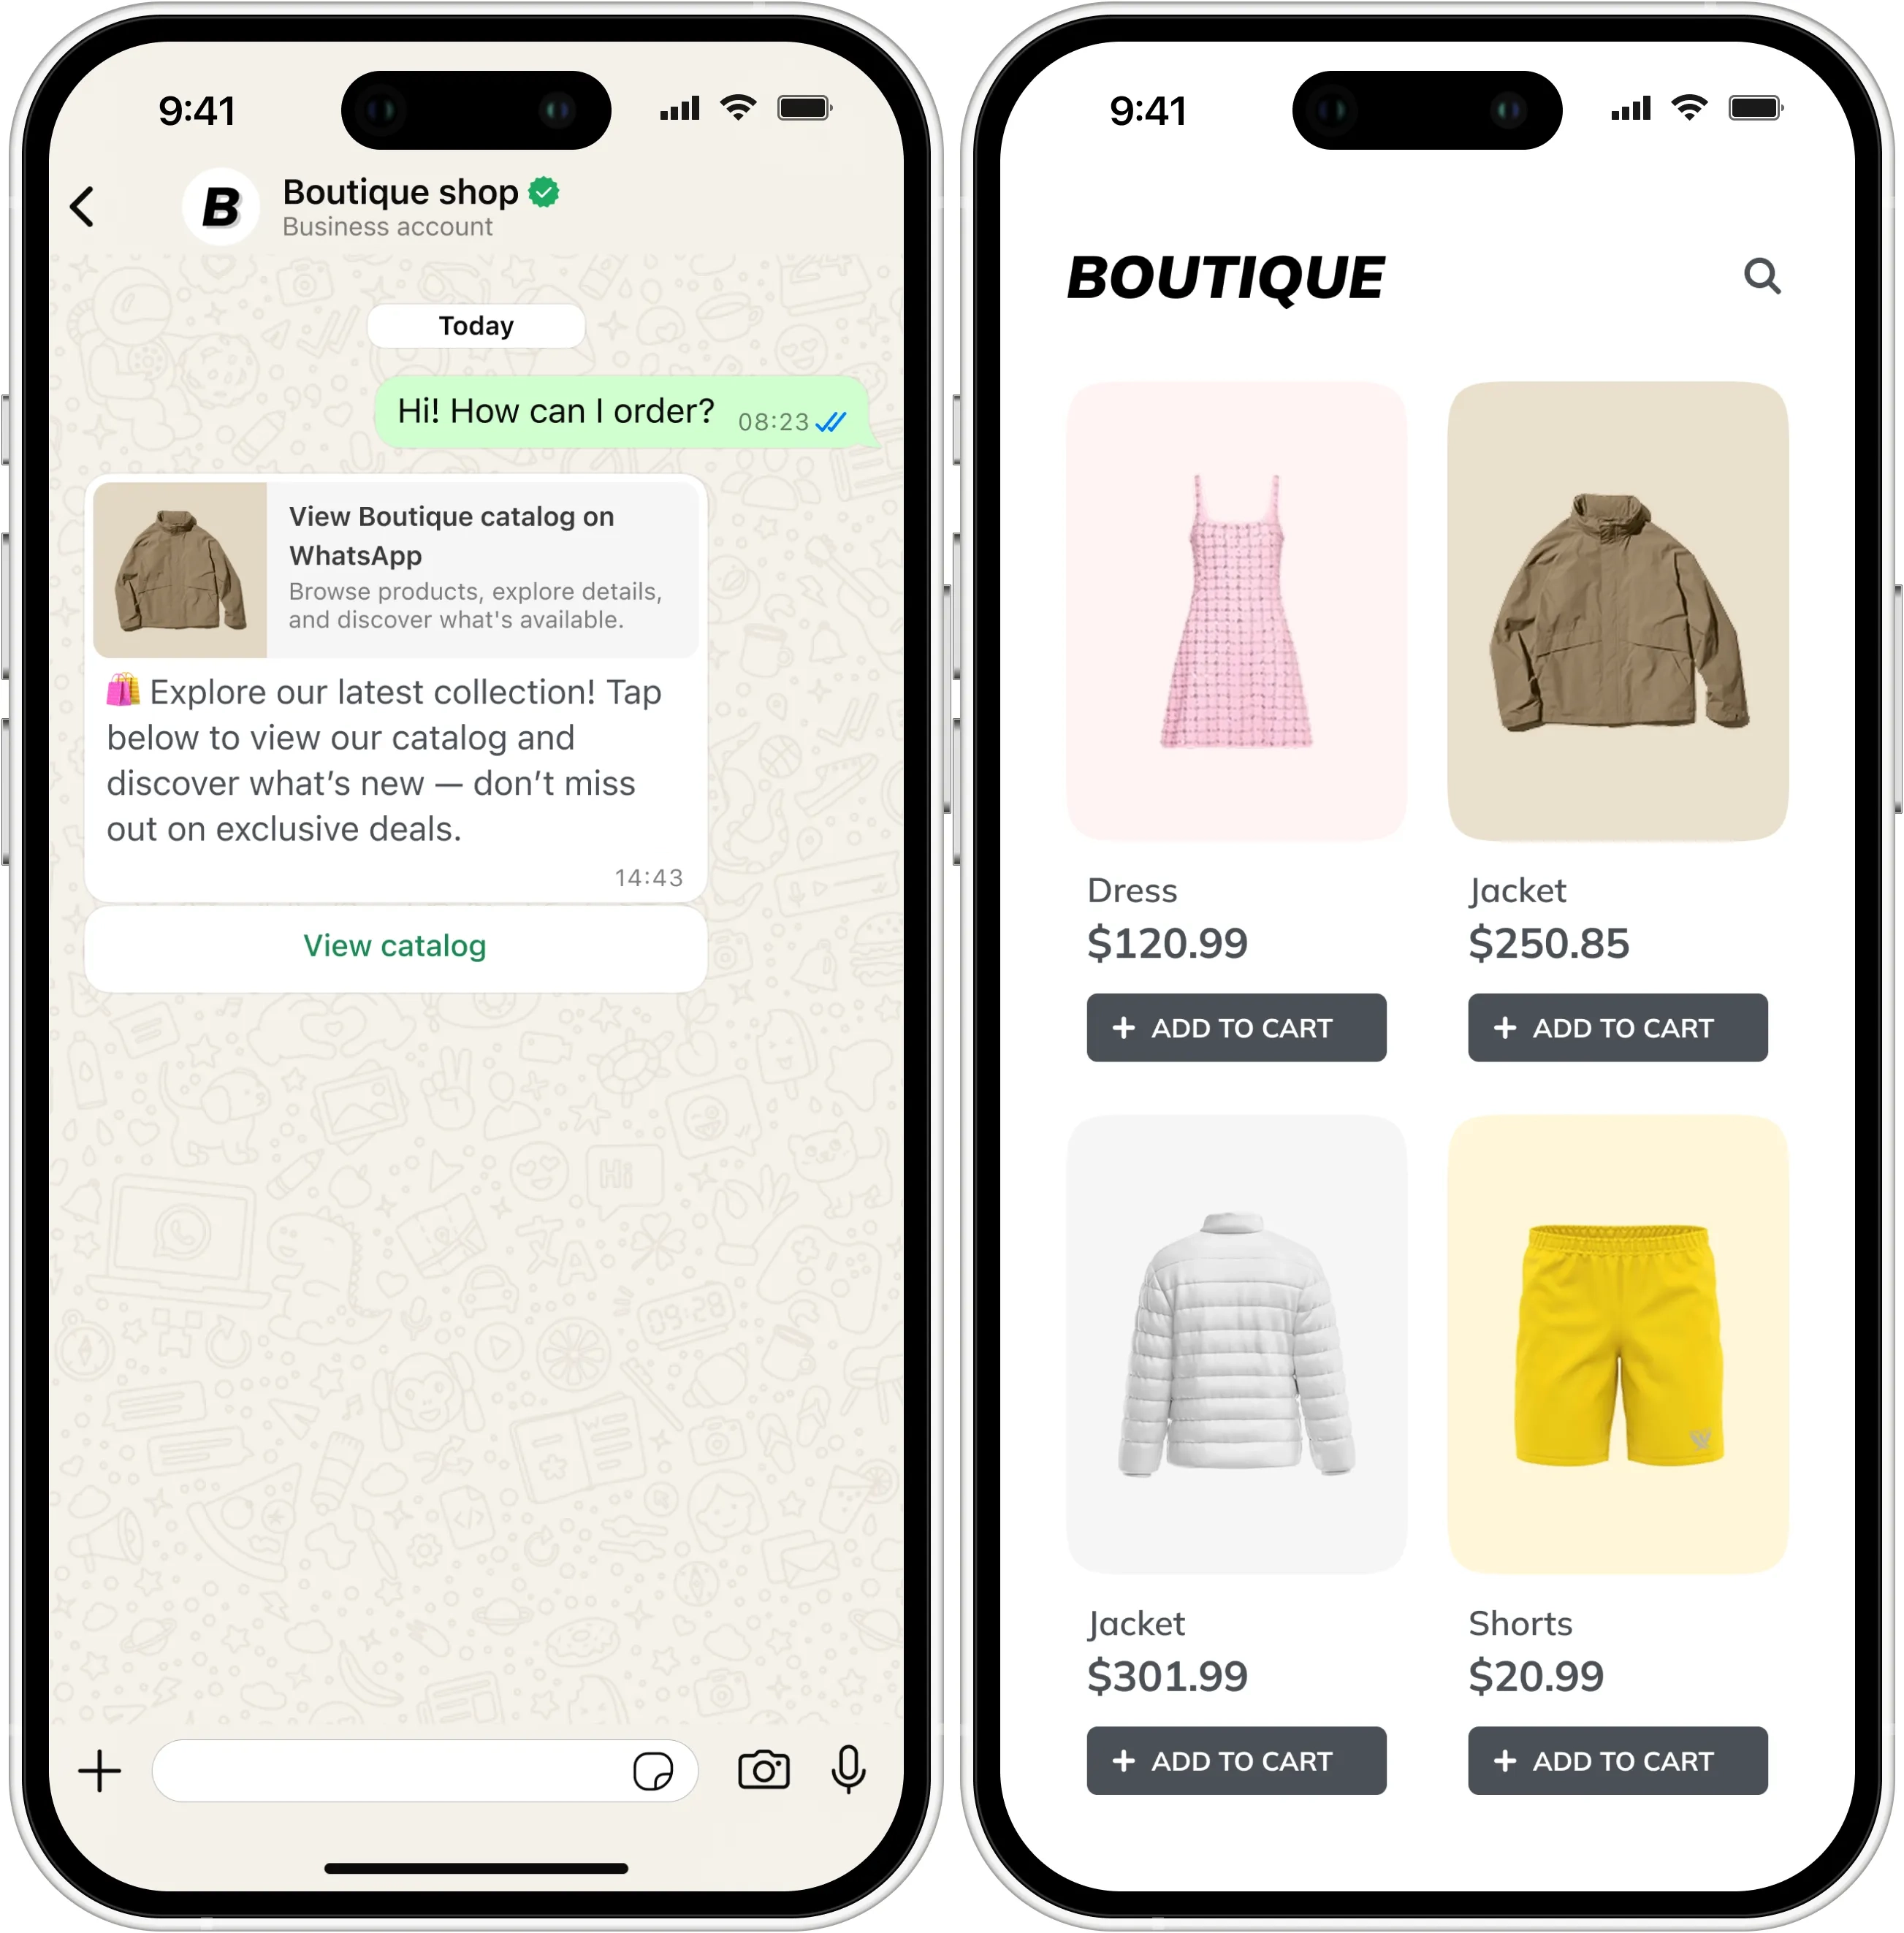
- **Basic catalog message**: A simple catalog message that includes a **View Catalog** button. When tapped, users can browse your entire connected catalog in WhatsApp. [Learn more about catalog messages](https://developers.facebook.com/documentation/business-messaging/whatsapp/templates/marketing-templates/catalog-templates)
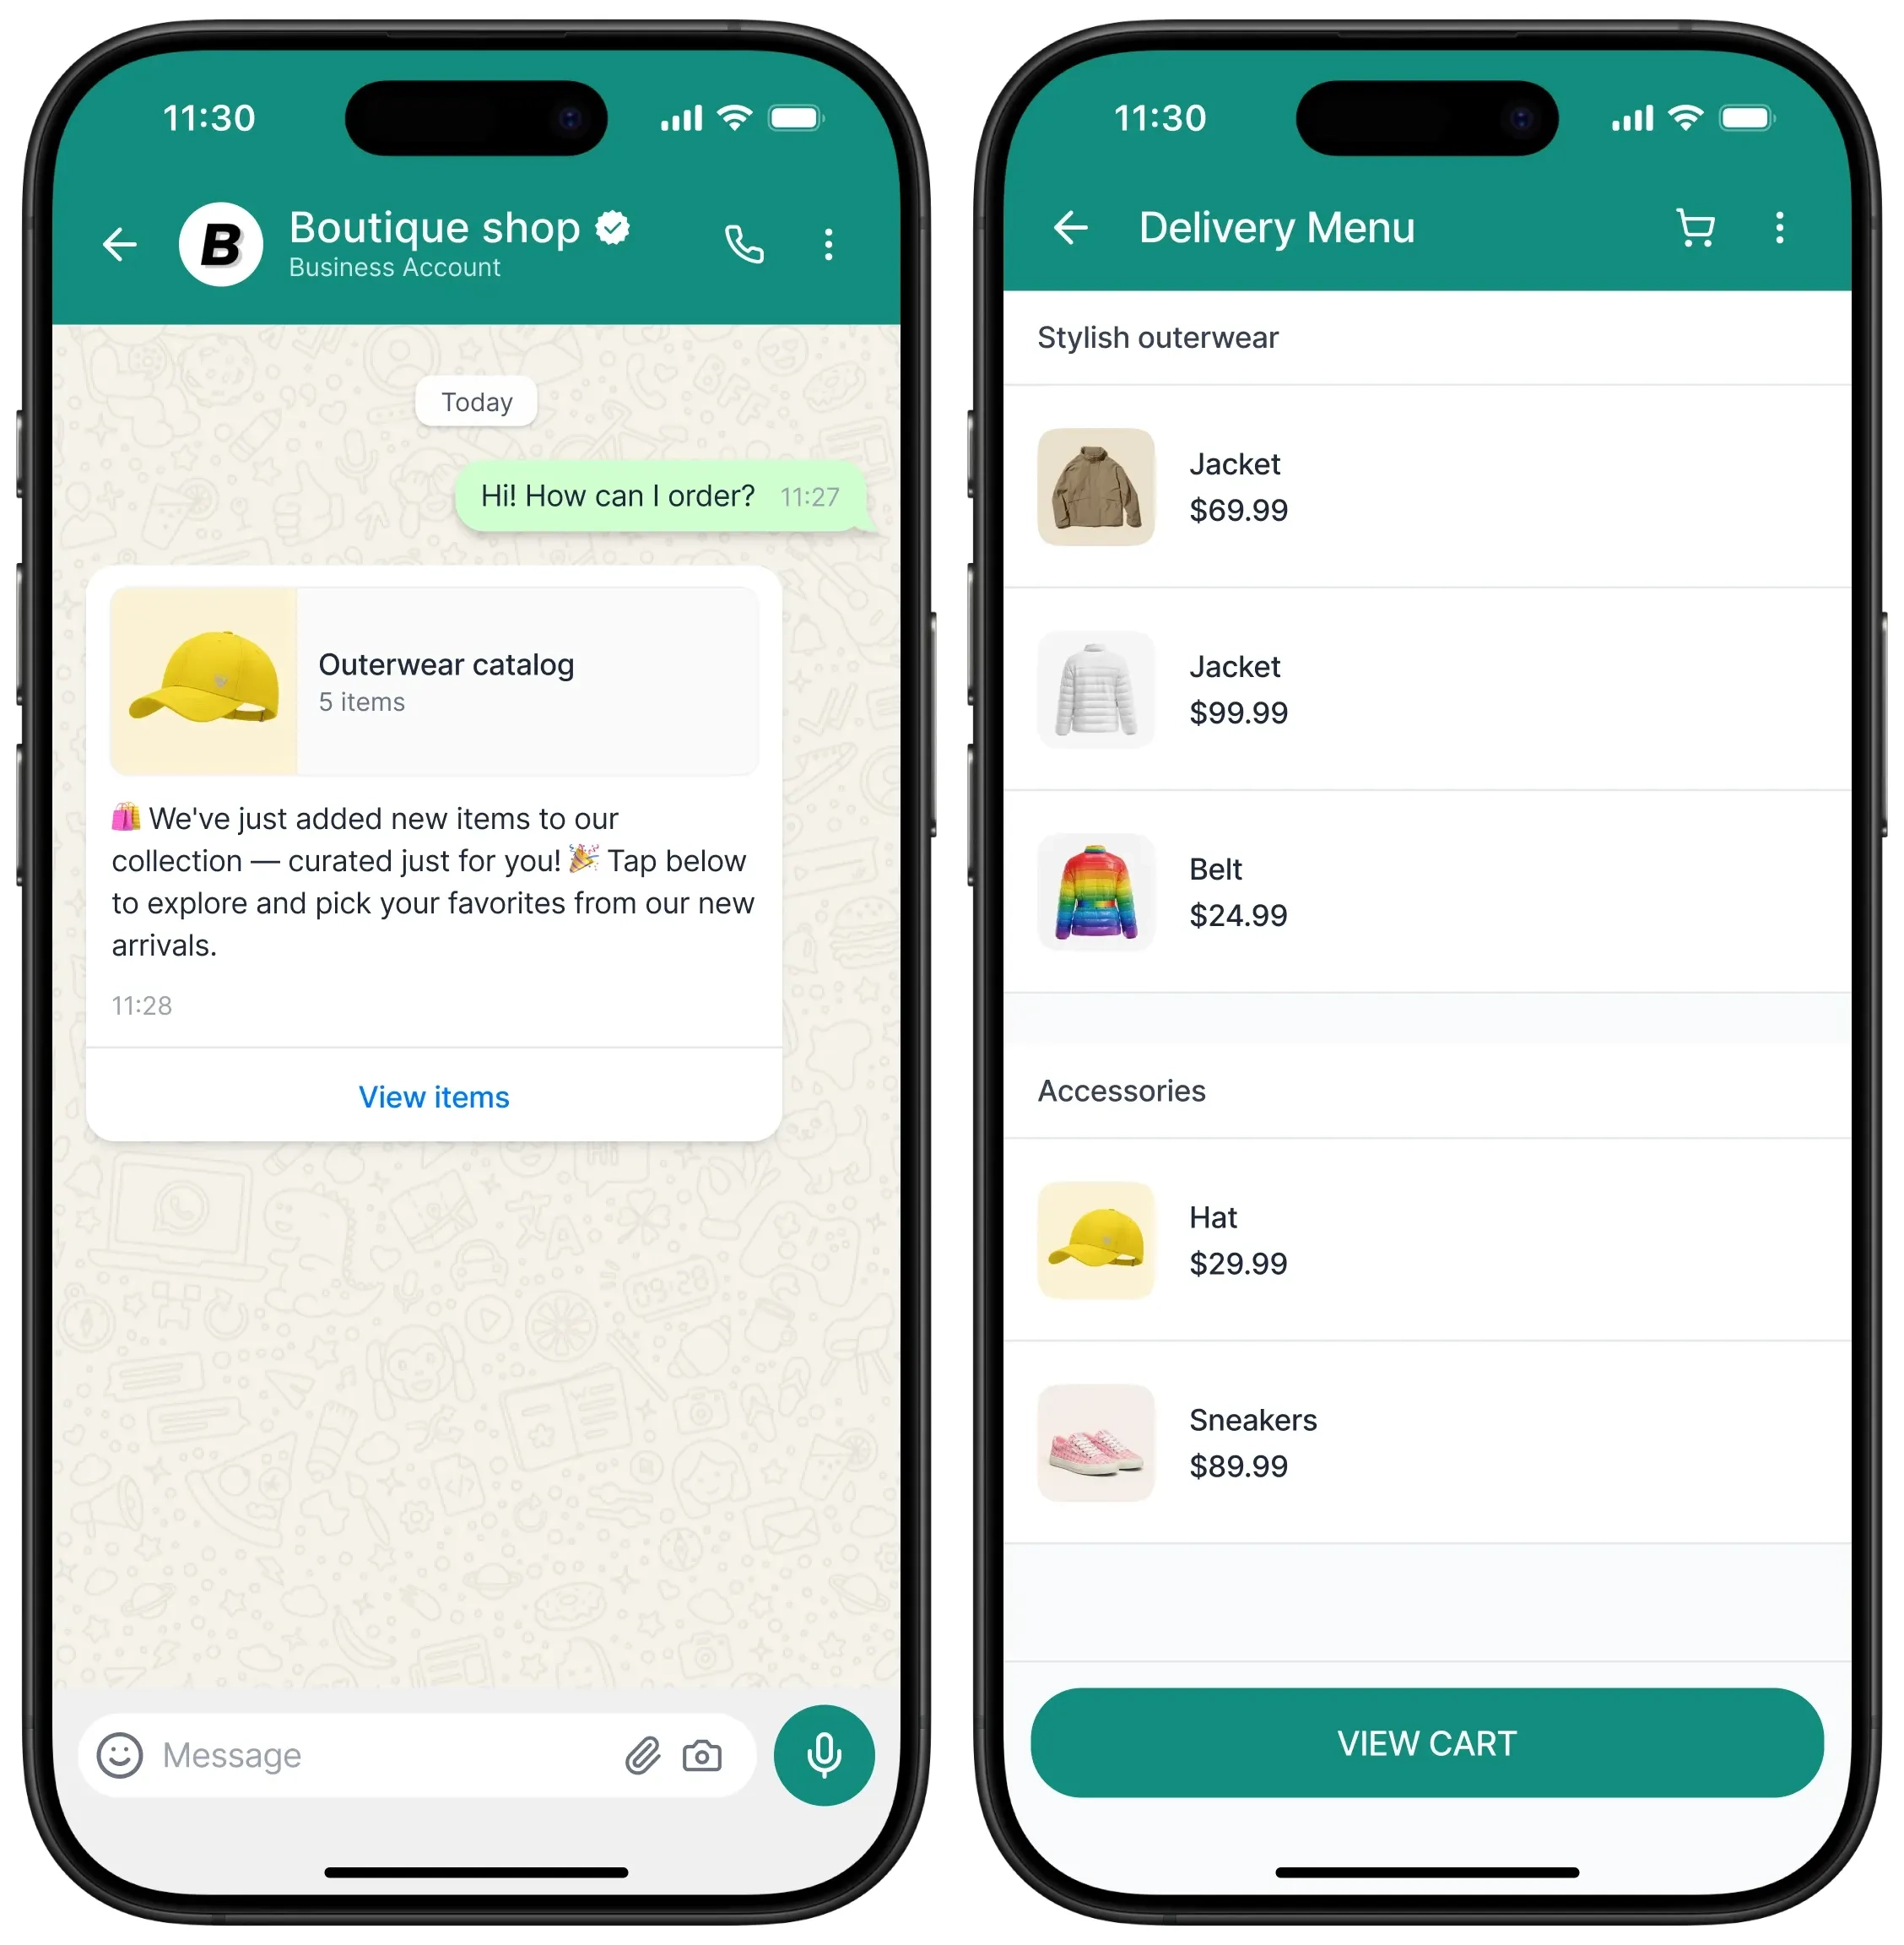
- **Multi-product catalog message**: A message format that allows you to select products to be shown in the message, grouped into sections. Users can view product details and make selections directly within WhatsApp. [Learn more about multi-product messages](https://developers.facebook.com/documentation/business-messaging/whatsapp/templates/marketing-templates/mpm-templates)
## Create a catalog in Meta Commerce Manager
Catalog messages allow you to connect your WhatsApp Business Account with a product catalog created and managed in Meta Commerce Manager.
Once connected, you can send messages with a **View Catalog** button that lets users browse your product catalog. When a customer taps the **View Catalog** button, your product catalog appears within WhatsApp.
This type of message is best for:
* Promoting product collections
* Enabling shopping directly from WhatsApp
* Driving sales through personalized browsing experiences
Learn more about [creating product catalogs in Meta Commerce Manager](https://www.facebook.com/business/help/1275400645914358?id=725943027795860)
## Link your catalog to WhatsApp Business Account
You need to link your product catalog to your WhatsApp Business Account. For instructions, see the [Meta WhatsApp Business documentation](https://www.facebook.com/business/help/158662536425974).
## Create a catalog message template in WhatsApp Manager
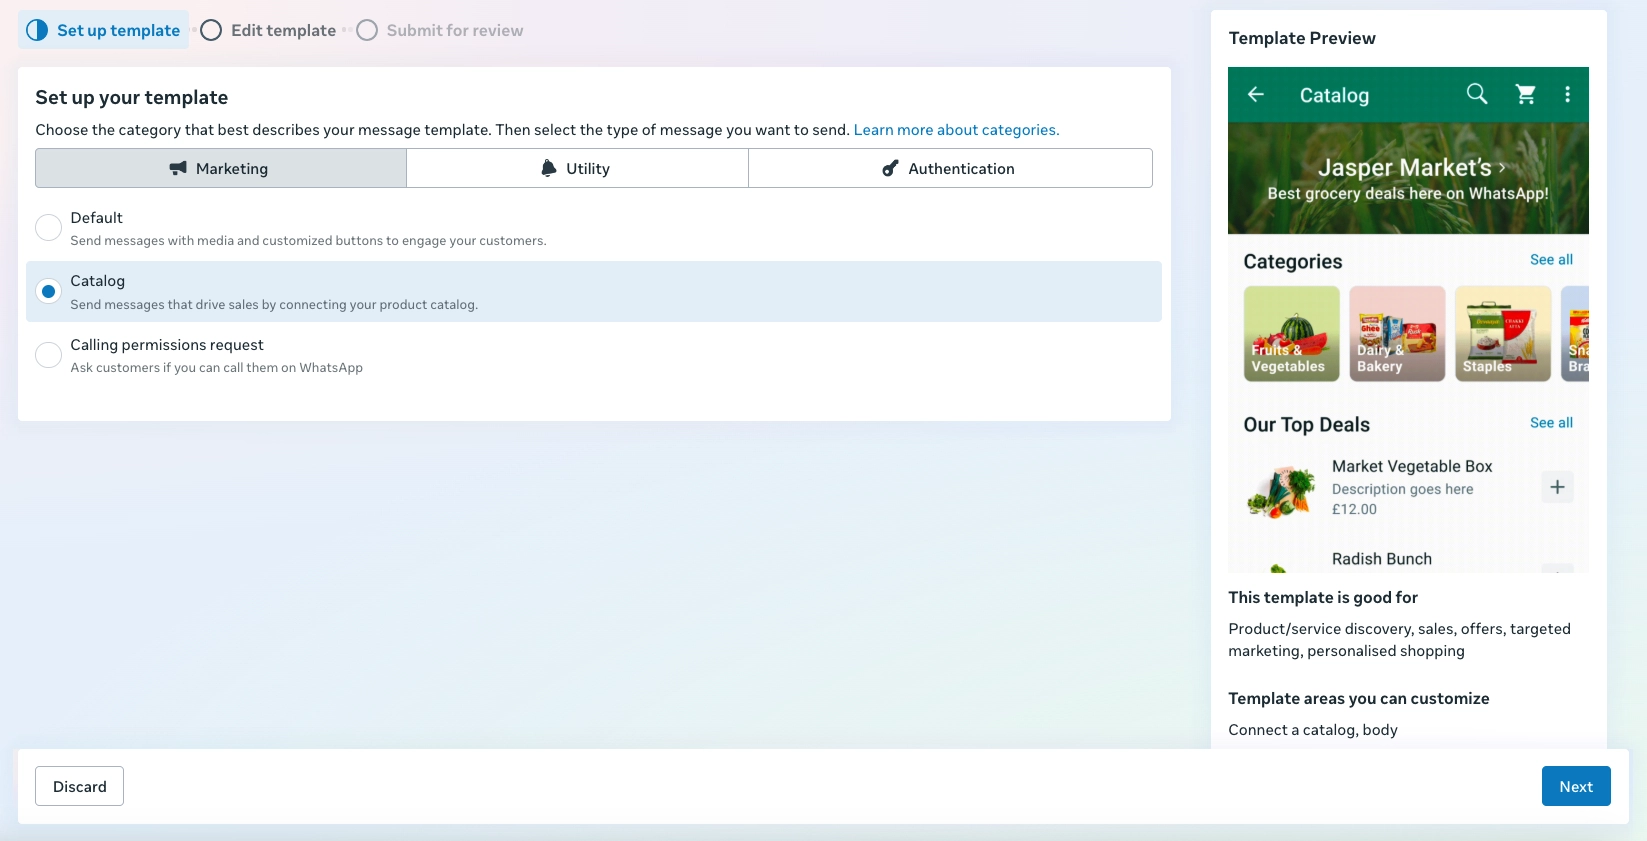
1. In **WhatsApp Manager**, start creating a new template.
2. Choose **Category → Marketing**, and then **Catalog**.
3. Enter the template name and language.
4. Then specify the catalog format. Select:
* `Catalog message` (for basic catalog message)
* `Multi-product message` (for product selection)
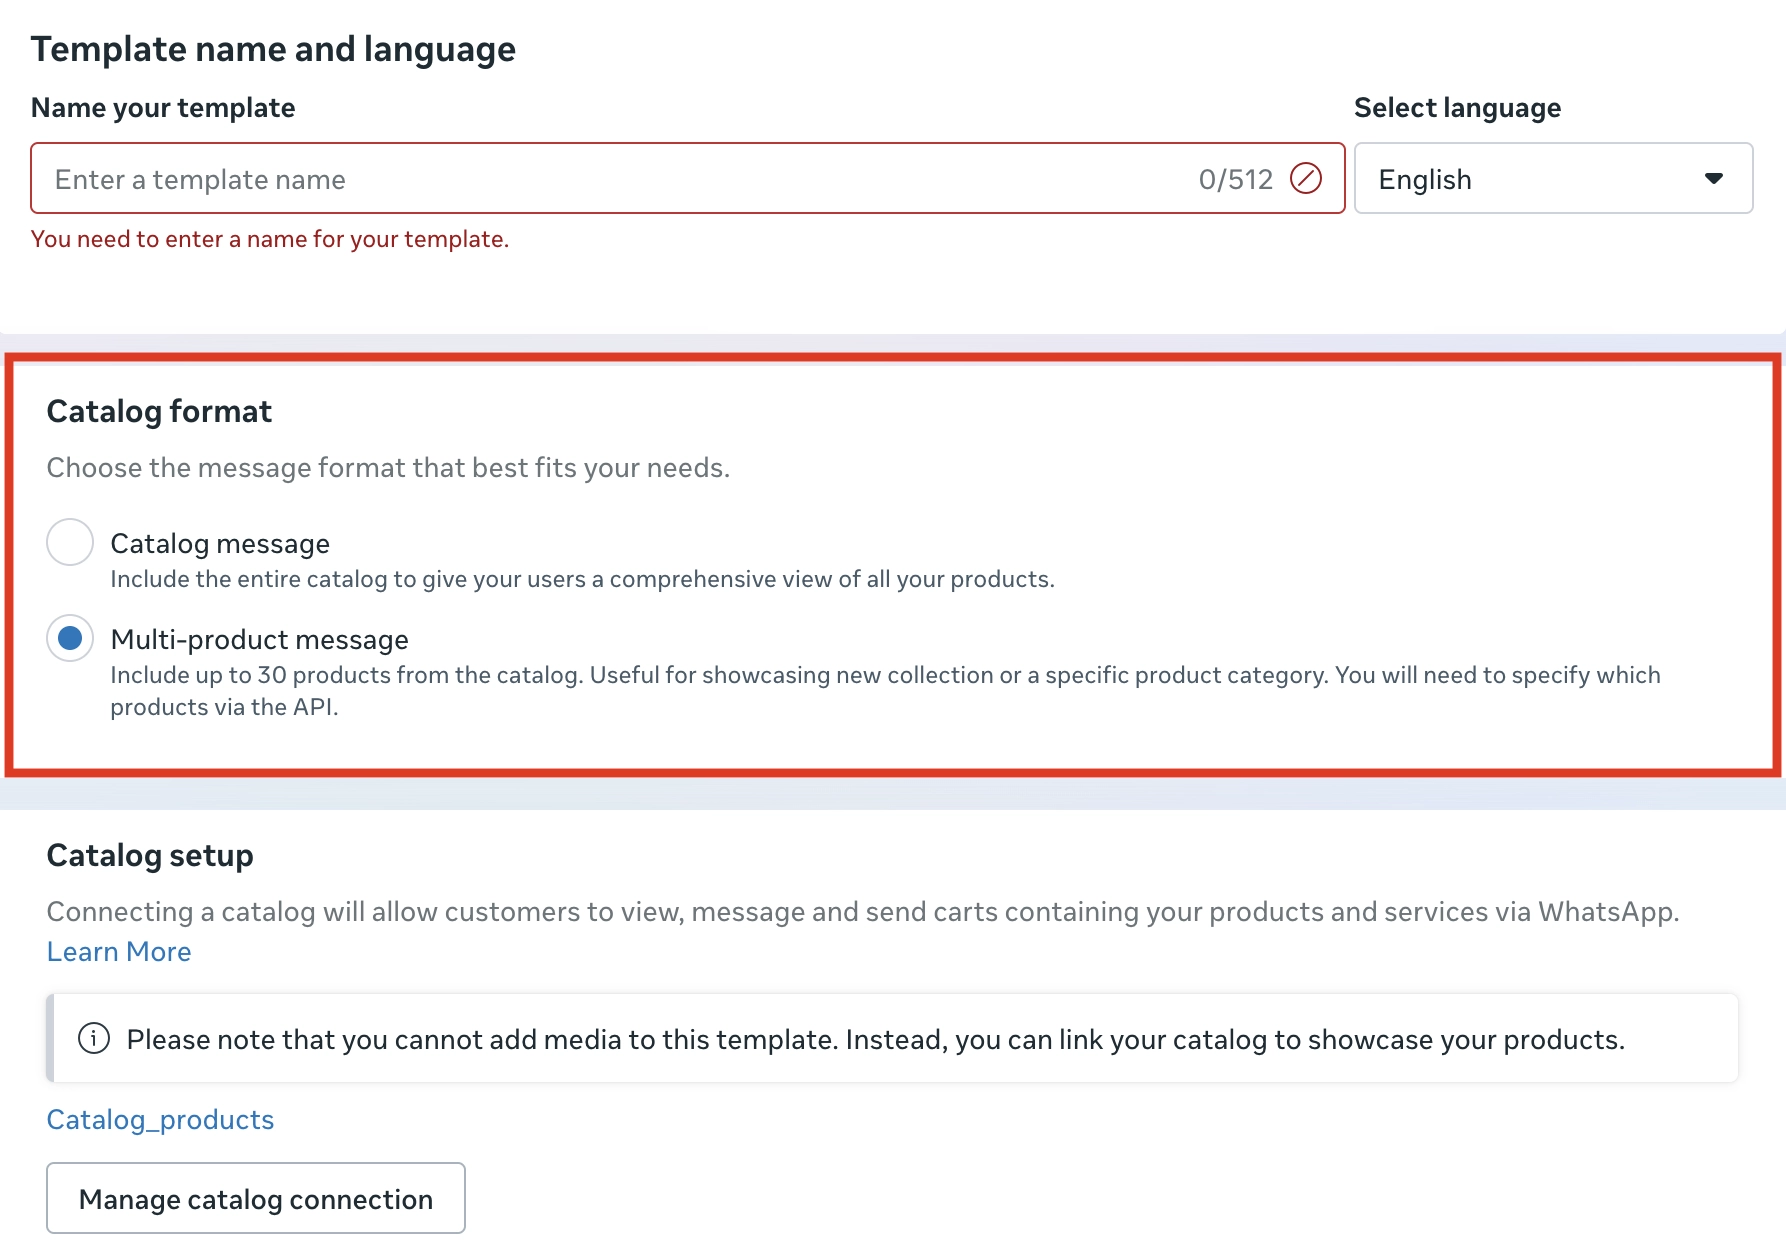
If your catalog is already connected, it will appear under the **Catalog setup** section. Click **Manage catalog connection** to view or update the linked catalog.
5. Compose your message body (e.g., *"🛍️ Explore our latest collection! Tap below to view our catalog and discover what's new — don't miss out on exclusive deals."*)
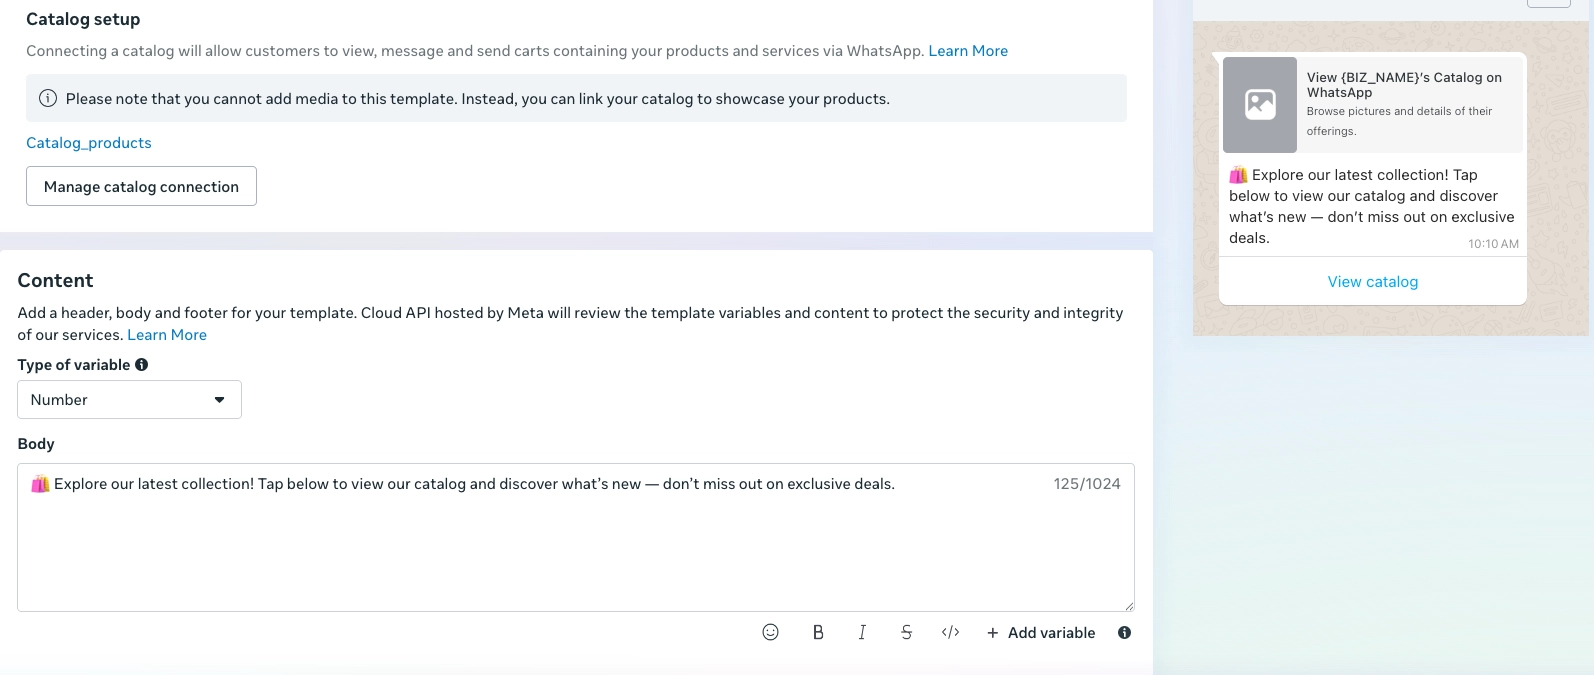
6. Submit the template for approval.
## Send catalog messages with Pushwoosh
### Start building a customer journey
1. Go to **Customer Journey Builder**.
2. Click **Create Campaign** and select **WhatsApp** as the channel.
3. Choose the campaign type, such as a **Triggered campaign**.
4. On the Journey canvas:
* Add an [Entry element](/product/customer-journey/journey-elements/entry-elements/) (for example, by event or audience).
* Add a [WhatsApp element](/product/customer-journey/journey-elements/channels/whatsapp/) to send the message.
### Configure the WhatsApp message element
#### Basic catalog message
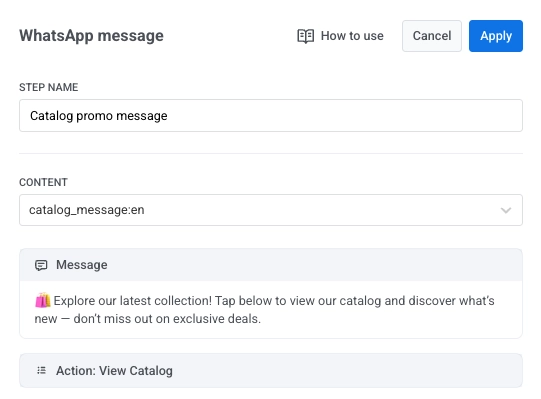
In the **WhatsApp element**:
1. Set a clear step name (for example, `Catalog promo message`).
2. Select your approved **catalog template**.
3. Click **Apply** to save your changes.
4. Optionally, enable **Split flow based on message read status** to define different follow-up actions.
#### Multi-product catalog message
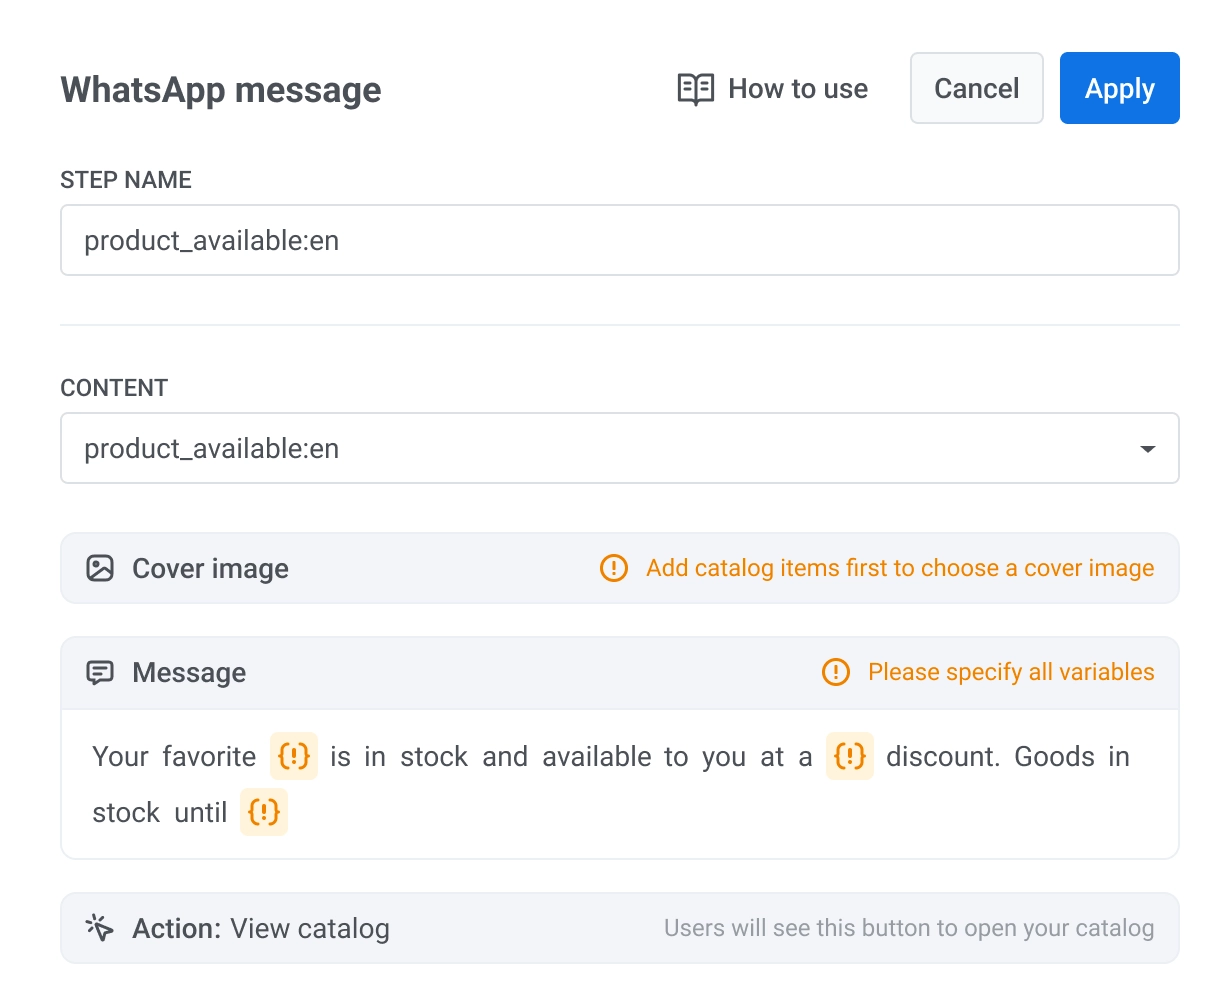
1. In the **WhatsApp element**, select your approved MPM template.
2. Select a cover image.
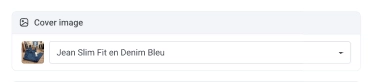
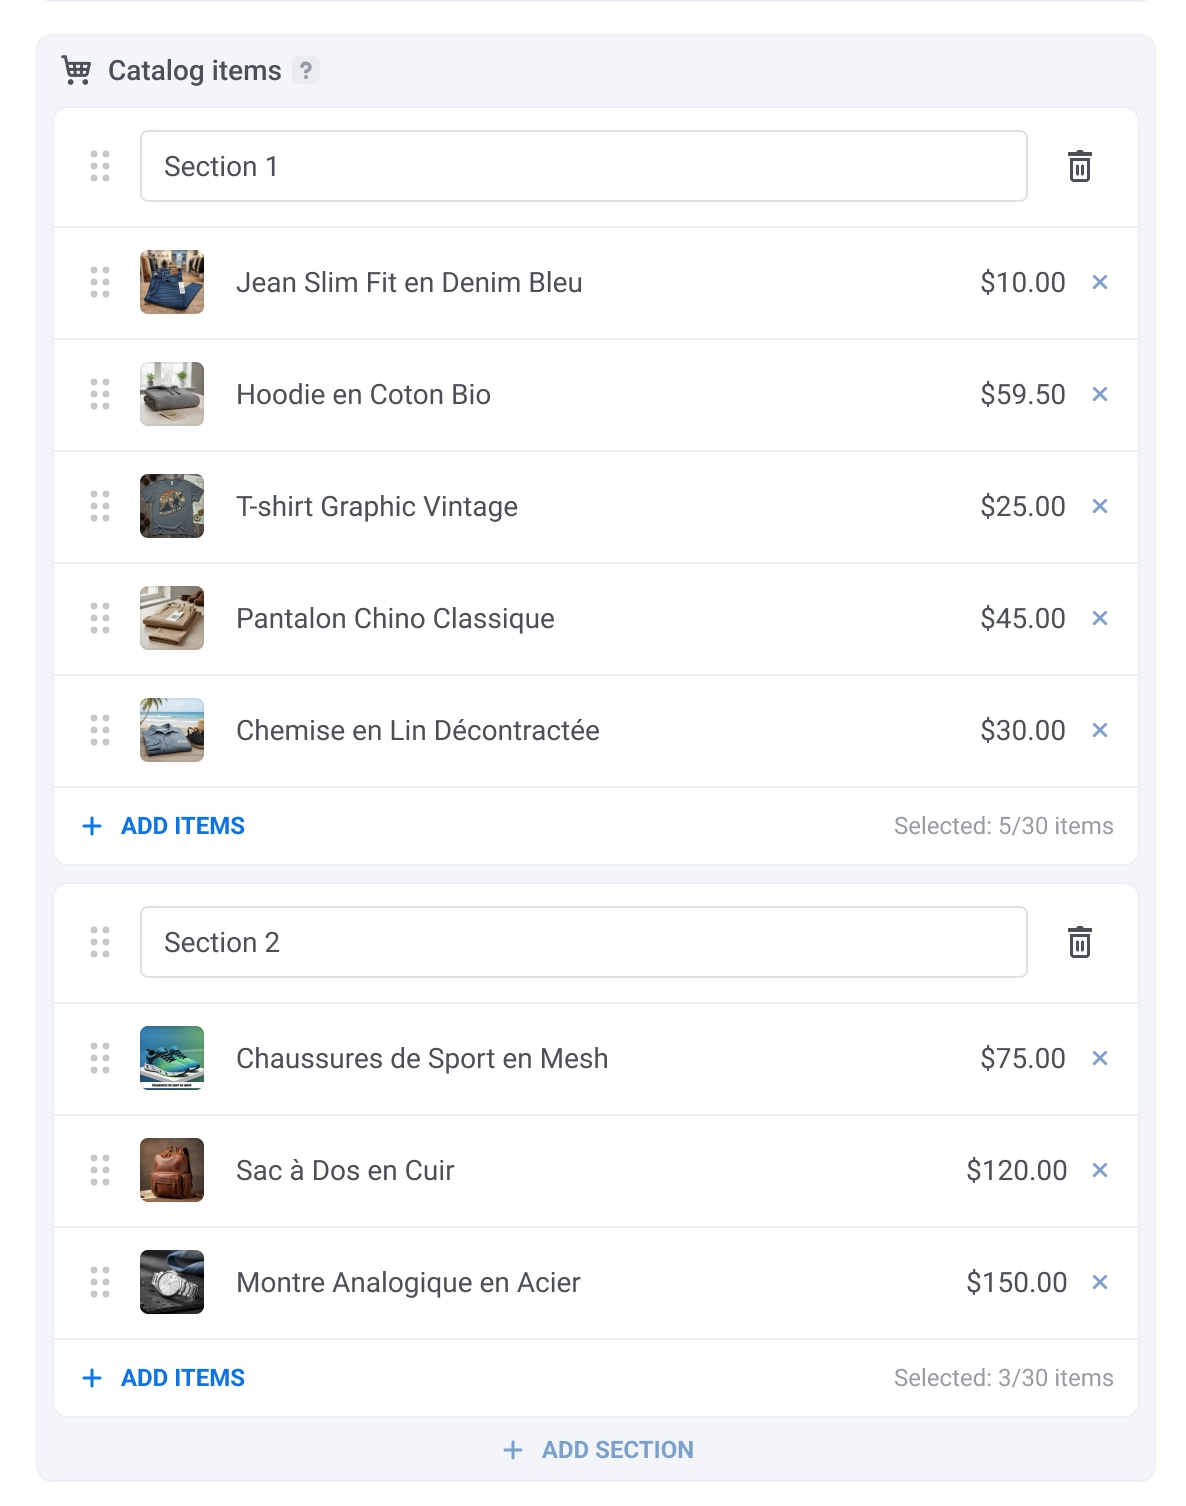
3. Configure the catalog section. For this, give each section a name and select up to 30 items per section. To select items, click **Add item** and select the items you want to display.
### Configure the rest of the journey
Add an [Exit element](/product/customer-journey/journey-elements/flow-controls/exit/) or connect to [other Journey elements](/product/customer-journey/journey-elements/) to finish configuring your customer journey.
## Message examples
Here's how catalog messages appear to recipients:
 2. Select a cover image.

3. Configure the catalog section. For this, give each section a name and select up to 30 items per section. To select items, click **Add item** and select the items you want to display.
2. Select a cover image.

3. Configure the catalog section. For this, give each section a name and select up to 30 items per section. To select items, click **Add item** and select the items you want to display.
 ### Configure the rest of the journey
Add an [Exit element](/product/customer-journey/journey-elements/flow-controls/exit/) or connect to [other Journey elements](/product/customer-journey/journey-elements/) to finish configuring your customer journey.
## Message examples
Here's how catalog messages appear to recipients:
### Configure the rest of the journey
Add an [Exit element](/product/customer-journey/journey-elements/flow-controls/exit/) or connect to [other Journey elements](/product/customer-journey/journey-elements/) to finish configuring your customer journey.
## Message examples
Here's how catalog messages appear to recipients: