# Create Web popup campaigns
Web popup campaigns let you place the Web popup content you've created onto your website, and control exactly when it appears and who sees it.
## Start a new campaign
1. Go to **Campaigns → Web popups**.
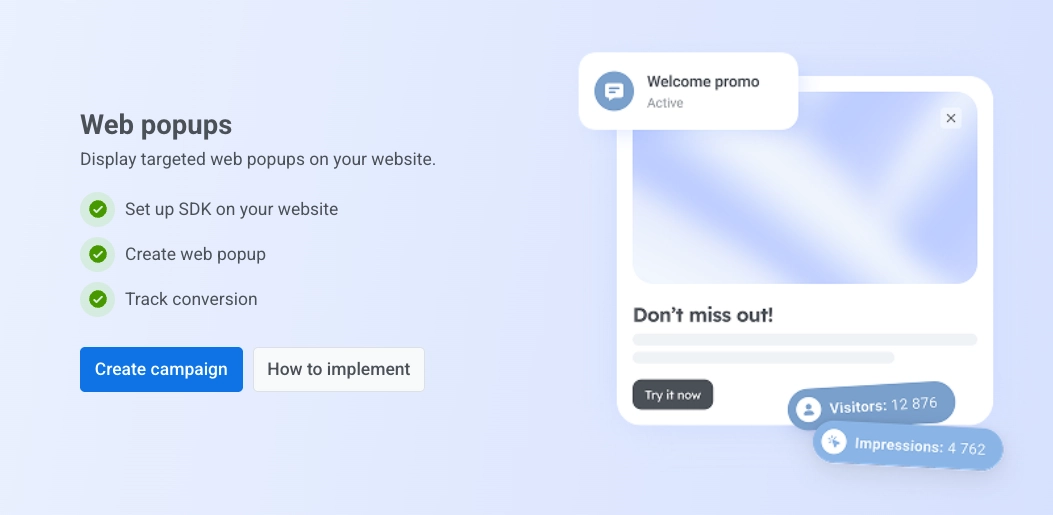
2. Click **Create campaign**.
### Select Web popup content
Choose what this campaign shows to visitors:
* **Web popup banner:** show a banner built in the popup editor. Select an existing item in the list, or click **Create new** to open the editor (see [Web popup content](/product/content/web-popups-content/)). Return to this tab when your content is ready and select it from the list.
* **Subscription form:** show an existing [subscription form](/product/audience-data-and-segmentation/subscription-forms/) instead of a banner. Search for the form by name in the **Subscription form** field.
If you haven't created one yet, click the external-link icon next to the field to open **Subscription forms** in a new tab.
Click **Next** when the right content is selected.
### Define audience
Select who should see the popup.
- **All users:** show the popup to everyone without filters.
- **Target audience:** show the popup only to users who match a segment or custom conditions. Two sub-options appear:
- **Use existing segment:** pick a saved [segment](/product/audience-data-and-segmentation/segmentation/) from the list. To create one without leaving the wizard, click **Create segment**.
- **Use custom conditions:** build the audience inline by adding filters by [**Tag**](/product/audience-data-and-segmentation/user-data-tags/tags/), [**Event**](/product/audience-data-and-segmentation/events/), [**Segment**](/product/audience-data-and-segmentation/segmentation/), or [**User ID**](/product/pushwoosh-knowledge-hub/users-userids/).
When you're done, click **Next**.
### Configure display settings
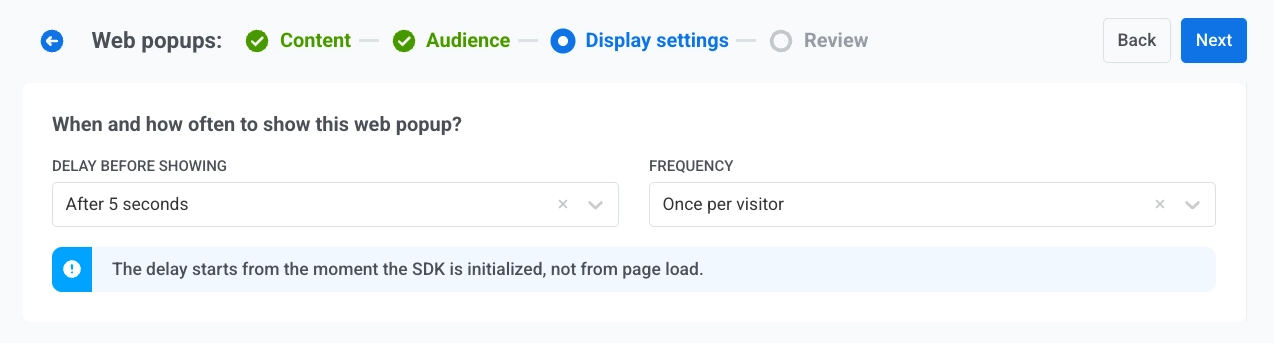
Set up when, how often, and where to show this Web popup.
#### Display delay
Choose when the Web popup may first appear after the page loads.
* **Immediately**
* **After 3 seconds**
* **After 5 seconds**
* **After 10 seconds**
#### Frequency
Under **FREQUENCY**, choose how often a visitor can see this Web popup:
* **Once per visitor:** the visitor sees the popup at most once in that browser, even in a new tab.
* **Once per session:** the visitor sees the popup once per browsing session. If they close a tab and return before the session ends, the popup does not appear again.
* **Every visit:** the popup appears each time the visitor loads a matching page.
#### Device
Controls which environment the Web popup appears on.
Select:
- **All devices**
- **Desktop**
- **Mobile**.
#### Show on pages
Controls which URLs trigger the Web popup.
##### All pages
Show the popup on every page of the site.
Optionally exclude specific pages: click **+ Add exclusion** and enter a path. You can add up to 10 exclusions.
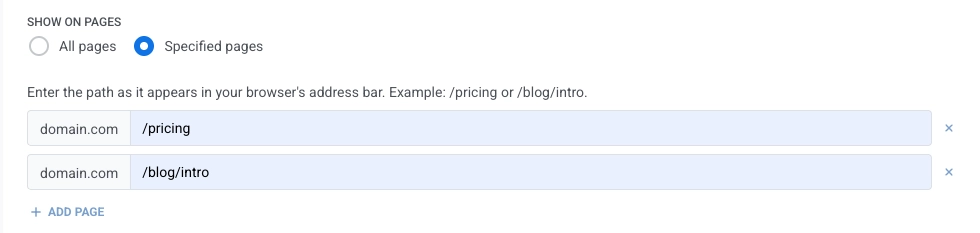
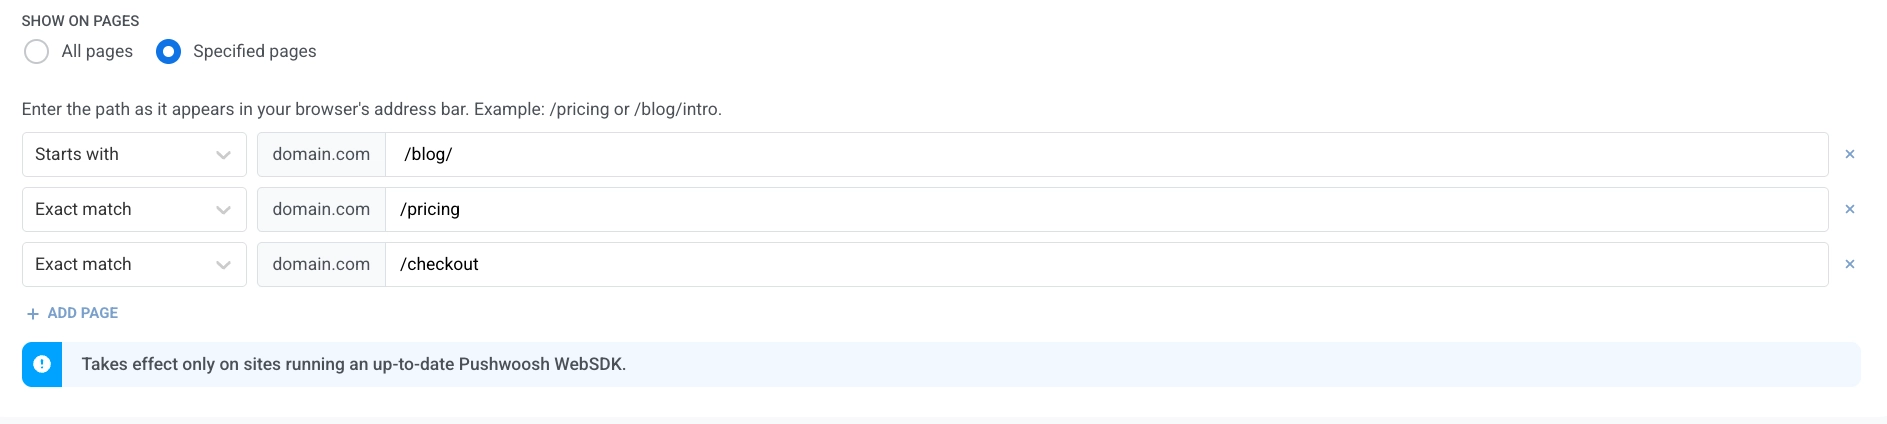
For each excluded page, enter the path as it appears after your domain, for example `/pricing` or `/blog/intro`, and choose how it should match:
* **Exact match:** the visited path must be identical to what you enter.
* **Starts with:** the popup applies to the entered path and every path under it.
##### Specified pages
Show the popup only on the pages you list. Click **+ Add page** to add more rows, or × to remove one. You can add up to 10 pages. Enter and match each path the same way as [exclusions on All pages](#all-pages).
Click **Next** to continue.
## Review the campaign
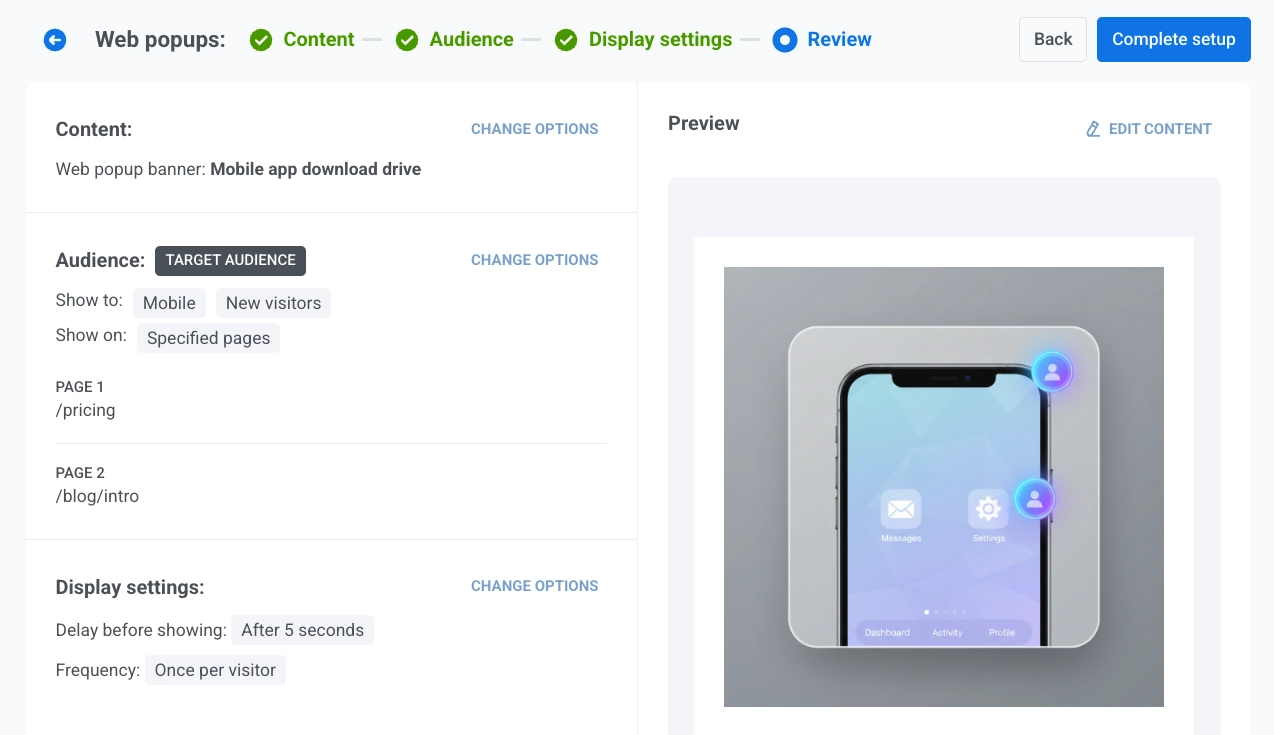
The **Review** screen summarizes:
* **Content:** the Web popup banner or subscription form attached, depending on what you picked in [Select Web popup content](#select-web-popup-content).
* **Audience:** **All users**, or **Target audience** with the selected segment name or custom conditions.
* **Display settings:** device, the pages the Web popup shows on (including match type and any exclusions), delay, and frequency.
Use **CHANGE OPTIONS** on any block to jump back and edit that part.
The **Preview** area shows how the Web popup looks on a sample viewport: the banner design, or a read-only preview of the selected subscription form's fields and button. Use **EDIT CONTENT** if you need to adjust the underlying content asset.
When everything looks right, click **Complete setup**.
Then pick an option from the menu:
* **Launch campaign** activates the Web popup.
* **Save as draft** saves the campaign without activating it. When you are ready to go live, go to **Campaigns → Web popups**, find the draft in the table, and click **Activate** on its row. Use **Edit campaign** in the row actions menu first if you still need to change settings.
To search, filter, and manage campaigns from the list, see [View and manage campaigns](/product/messaging-channels/web-popups/#view-and-manage-campaigns).
 ### Select Web popup content
Choose what this campaign shows to visitors:
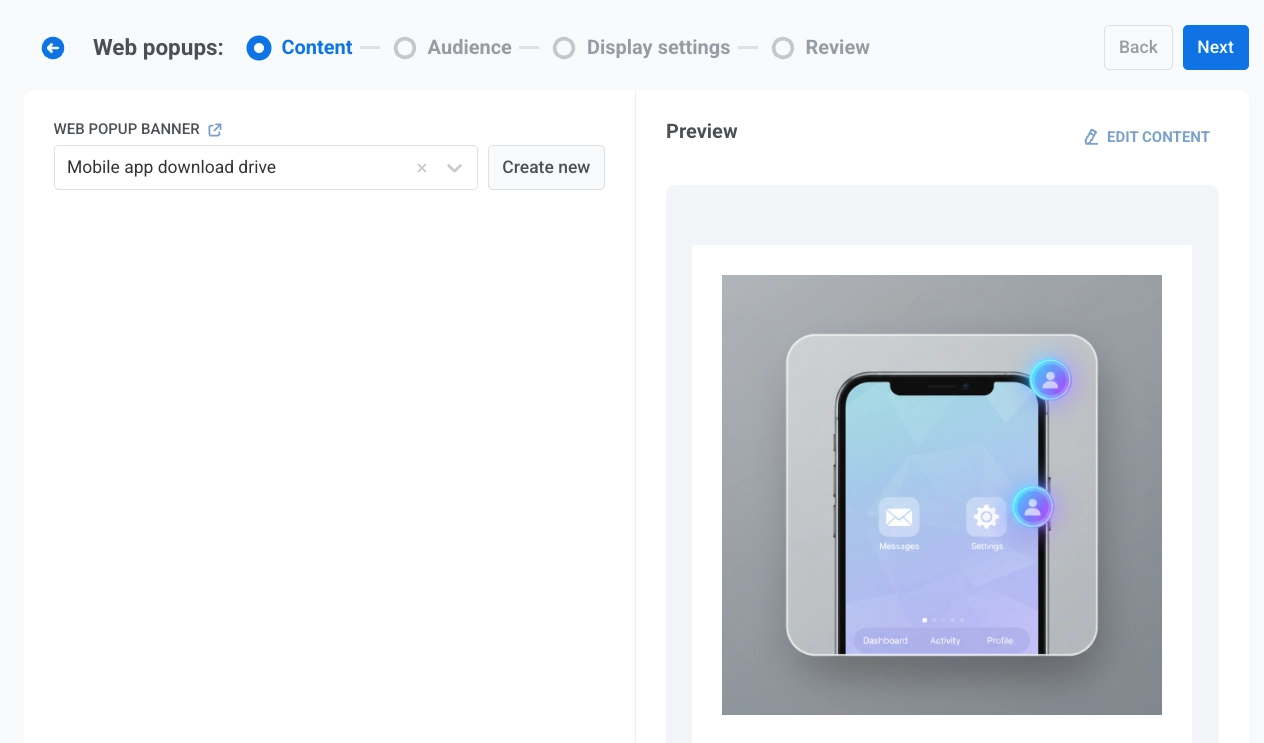
* **Web popup banner:** show a banner built in the popup editor. Select an existing item in the list, or click **Create new** to open the editor (see [Web popup content](/product/content/web-popups-content/)). Return to this tab when your content is ready and select it from the list.
### Select Web popup content
Choose what this campaign shows to visitors:
* **Web popup banner:** show a banner built in the popup editor. Select an existing item in the list, or click **Create new** to open the editor (see [Web popup content](/product/content/web-popups-content/)). Return to this tab when your content is ready and select it from the list.
 * **Subscription form:** show an existing [subscription form](/product/audience-data-and-segmentation/subscription-forms/) instead of a banner. Search for the form by name in the **Subscription form** field.
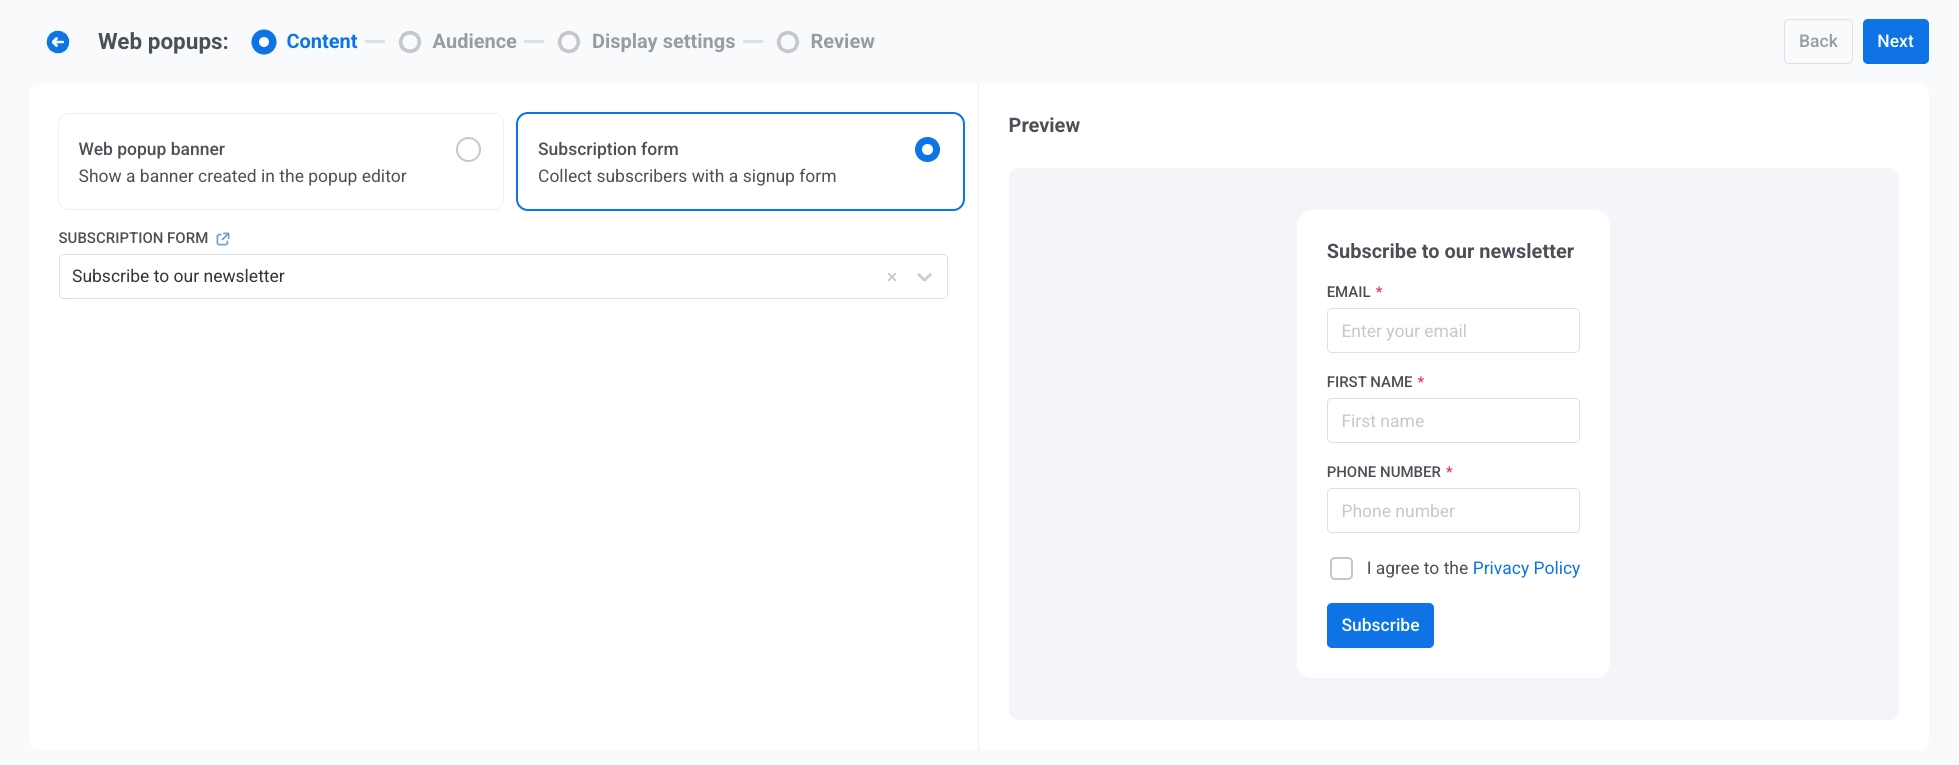 If you haven't created one yet, click the external-link icon next to the field to open **Subscription forms** in a new tab.
Click **Next** when the right content is selected.
### Define audience
Select who should see the popup.
- **All users:** show the popup to everyone without filters.
If you haven't created one yet, click the external-link icon next to the field to open **Subscription forms** in a new tab.
Click **Next** when the right content is selected.
### Define audience
Select who should see the popup.
- **All users:** show the popup to everyone without filters.
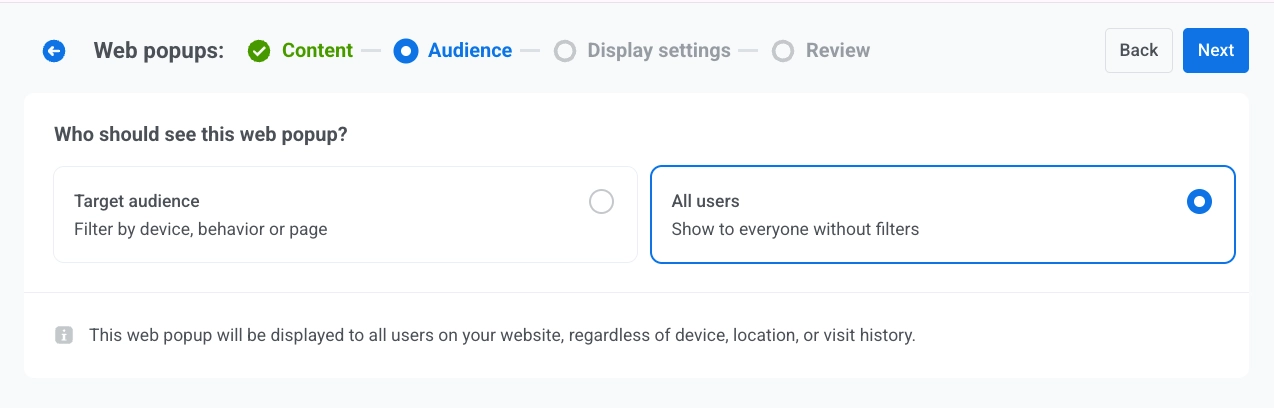 - **Target audience:** show the popup only to users who match a segment or custom conditions. Two sub-options appear:
- **Use existing segment:** pick a saved [segment](/product/audience-data-and-segmentation/segmentation/) from the list. To create one without leaving the wizard, click **Create segment**.
- **Use custom conditions:** build the audience inline by adding filters by [**Tag**](/product/audience-data-and-segmentation/user-data-tags/tags/), [**Event**](/product/audience-data-and-segmentation/events/), [**Segment**](/product/audience-data-and-segmentation/segmentation/), or [**User ID**](/product/pushwoosh-knowledge-hub/users-userids/).
- **Target audience:** show the popup only to users who match a segment or custom conditions. Two sub-options appear:
- **Use existing segment:** pick a saved [segment](/product/audience-data-and-segmentation/segmentation/) from the list. To create one without leaving the wizard, click **Create segment**.
- **Use custom conditions:** build the audience inline by adding filters by [**Tag**](/product/audience-data-and-segmentation/user-data-tags/tags/), [**Event**](/product/audience-data-and-segmentation/events/), [**Segment**](/product/audience-data-and-segmentation/segmentation/), or [**User ID**](/product/pushwoosh-knowledge-hub/users-userids/).
 When you're done, click **Next**.
### Configure display settings
Set up when, how often, and where to show this Web popup.
#### Display delay
Choose when the Web popup may first appear after the page loads.
* **Immediately**
* **After 3 seconds**
* **After 5 seconds**
* **After 10 seconds**
#### Frequency
Under **FREQUENCY**, choose how often a visitor can see this Web popup:
* **Once per visitor:** the visitor sees the popup at most once in that browser, even in a new tab.
* **Once per session:** the visitor sees the popup once per browsing session. If they close a tab and return before the session ends, the popup does not appear again.
* **Every visit:** the popup appears each time the visitor loads a matching page.
When you're done, click **Next**.
### Configure display settings
Set up when, how often, and where to show this Web popup.
#### Display delay
Choose when the Web popup may first appear after the page loads.
* **Immediately**
* **After 3 seconds**
* **After 5 seconds**
* **After 10 seconds**
#### Frequency
Under **FREQUENCY**, choose how often a visitor can see this Web popup:
* **Once per visitor:** the visitor sees the popup at most once in that browser, even in a new tab.
* **Once per session:** the visitor sees the popup once per browsing session. If they close a tab and return before the session ends, the popup does not appear again.
* **Every visit:** the popup appears each time the visitor loads a matching page.
 #### Device
Controls which environment the Web popup appears on.
Select:
- **All devices**
- **Desktop**
- **Mobile**.
#### Device
Controls which environment the Web popup appears on.
Select:
- **All devices**
- **Desktop**
- **Mobile**.
 #### Show on pages
Controls which URLs trigger the Web popup.
##### All pages
Show the popup on every page of the site.
Optionally exclude specific pages: click **+ Add exclusion** and enter a path. You can add up to 10 exclusions.
For each excluded page, enter the path as it appears after your domain, for example `/pricing` or `/blog/intro`, and choose how it should match:
* **Exact match:** the visited path must be identical to what you enter.
* **Starts with:** the popup applies to the entered path and every path under it.
#### Show on pages
Controls which URLs trigger the Web popup.
##### All pages
Show the popup on every page of the site.
Optionally exclude specific pages: click **+ Add exclusion** and enter a path. You can add up to 10 exclusions.
For each excluded page, enter the path as it appears after your domain, for example `/pricing` or `/blog/intro`, and choose how it should match:
* **Exact match:** the visited path must be identical to what you enter.
* **Starts with:** the popup applies to the entered path and every path under it.
 ##### Specified pages
Show the popup only on the pages you list. Click **+ Add page** to add more rows, or × to remove one. You can add up to 10 pages. Enter and match each path the same way as [exclusions on All pages](#all-pages).
##### Specified pages
Show the popup only on the pages you list. Click **+ Add page** to add more rows, or × to remove one. You can add up to 10 pages. Enter and match each path the same way as [exclusions on All pages](#all-pages).
 Click **Next** to continue.
## Review the campaign
The **Review** screen summarizes:
* **Content:** the Web popup banner or subscription form attached, depending on what you picked in [Select Web popup content](#select-web-popup-content).
* **Audience:** **All users**, or **Target audience** with the selected segment name or custom conditions.
* **Display settings:** device, the pages the Web popup shows on (including match type and any exclusions), delay, and frequency.
Use **CHANGE OPTIONS** on any block to jump back and edit that part.
The **Preview** area shows how the Web popup looks on a sample viewport: the banner design, or a read-only preview of the selected subscription form's fields and button. Use **EDIT CONTENT** if you need to adjust the underlying content asset.
Click **Next** to continue.
## Review the campaign
The **Review** screen summarizes:
* **Content:** the Web popup banner or subscription form attached, depending on what you picked in [Select Web popup content](#select-web-popup-content).
* **Audience:** **All users**, or **Target audience** with the selected segment name or custom conditions.
* **Display settings:** device, the pages the Web popup shows on (including match type and any exclusions), delay, and frequency.
Use **CHANGE OPTIONS** on any block to jump back and edit that part.
The **Preview** area shows how the Web popup looks on a sample viewport: the banner design, or a read-only preview of the selected subscription form's fields and button. Use **EDIT CONTENT** if you need to adjust the underlying content asset.
 When everything looks right, click **Complete setup**.
Then pick an option from the menu:
* **Launch campaign** activates the Web popup.
* **Save as draft** saves the campaign without activating it. When you are ready to go live, go to **Campaigns → Web popups**, find the draft in the table, and click **Activate** on its row. Use **Edit campaign** in the row actions menu first if you still need to change settings.
To search, filter, and manage campaigns from the list, see [View and manage campaigns](/product/messaging-channels/web-popups/#view-and-manage-campaigns).
When everything looks right, click **Complete setup**.
Then pick an option from the menu:
* **Launch campaign** activates the Web popup.
* **Save as draft** saves the campaign without activating it. When you are ready to go live, go to **Campaigns → Web popups**, find the draft in the table, and click **Activate** on its row. Use **Edit campaign** in the row actions menu first if you still need to change settings.
To search, filter, and manage campaigns from the list, see [View and manage campaigns](/product/messaging-channels/web-popups/#view-and-manage-campaigns).