# Understanding Web campaigns
Web campaigns show your web content to visitors while they browse your site. A **Popup** campaign appears over the page, and an **Inline** campaign appears as a block inside an element of the page. Use them for promotions, onboarding hints, email signups, and other goals.
## When to use web campaigns
Common use cases:
* **Promotions and sales:** discounts, coupons, or seasonal offers on browsing or category URLs where the message fits what the visitor is doing on that page.
* **Welcome or first-purchase offers:** **New visitors** (or a broad audience) on the home page, signup flow, or a dedicated landing path.
* **Product or feature announcements:** draw attention on the sections of the site where the news is relevant (for example a product area or changelog page).
* **Lead capture:** point to a form, demo, or download on pages that already match the offer (pricing, resources, contact).
* **Onboarding or guidance:** short tips on specific pages you target in the campaign audience settings, such as pricing, help, or account settings.
## Start working with Web campaigns
Before you can show web campaigns on your website, complete the following steps:
1. **Integrate the Web Push SDK**
Your development team needs to add the Web Push SDK to your site. Web campaigns load by default once the SDK is initialized, so no extra setup is required to turn them on.
[Learn more](/developer/pushwoosh-sdk/web-push-notifications/web-push-sdk-30/#initialize-the-sdk)
2. **Create web content or a web form**
Open **Content → Web content**, click **Create**, and choose the type:
- **Web content:** shows a message, for example an offer or an announcement.
- **Web form:** collects an email address and visitor answers.
You choose this content when you configure the campaign.
[Learn more](/product/content/web-popup-content/)
3. **Create a web campaign**
Go to **Campaigns → Web campaigns**, click **Create campaign**, choose **Popup** or **Inline**, and configure content, audience, and display settings.
[Learn more](/product/messaging-channels/web-campaigns/create-web-campaigns/)
## View and manage campaigns
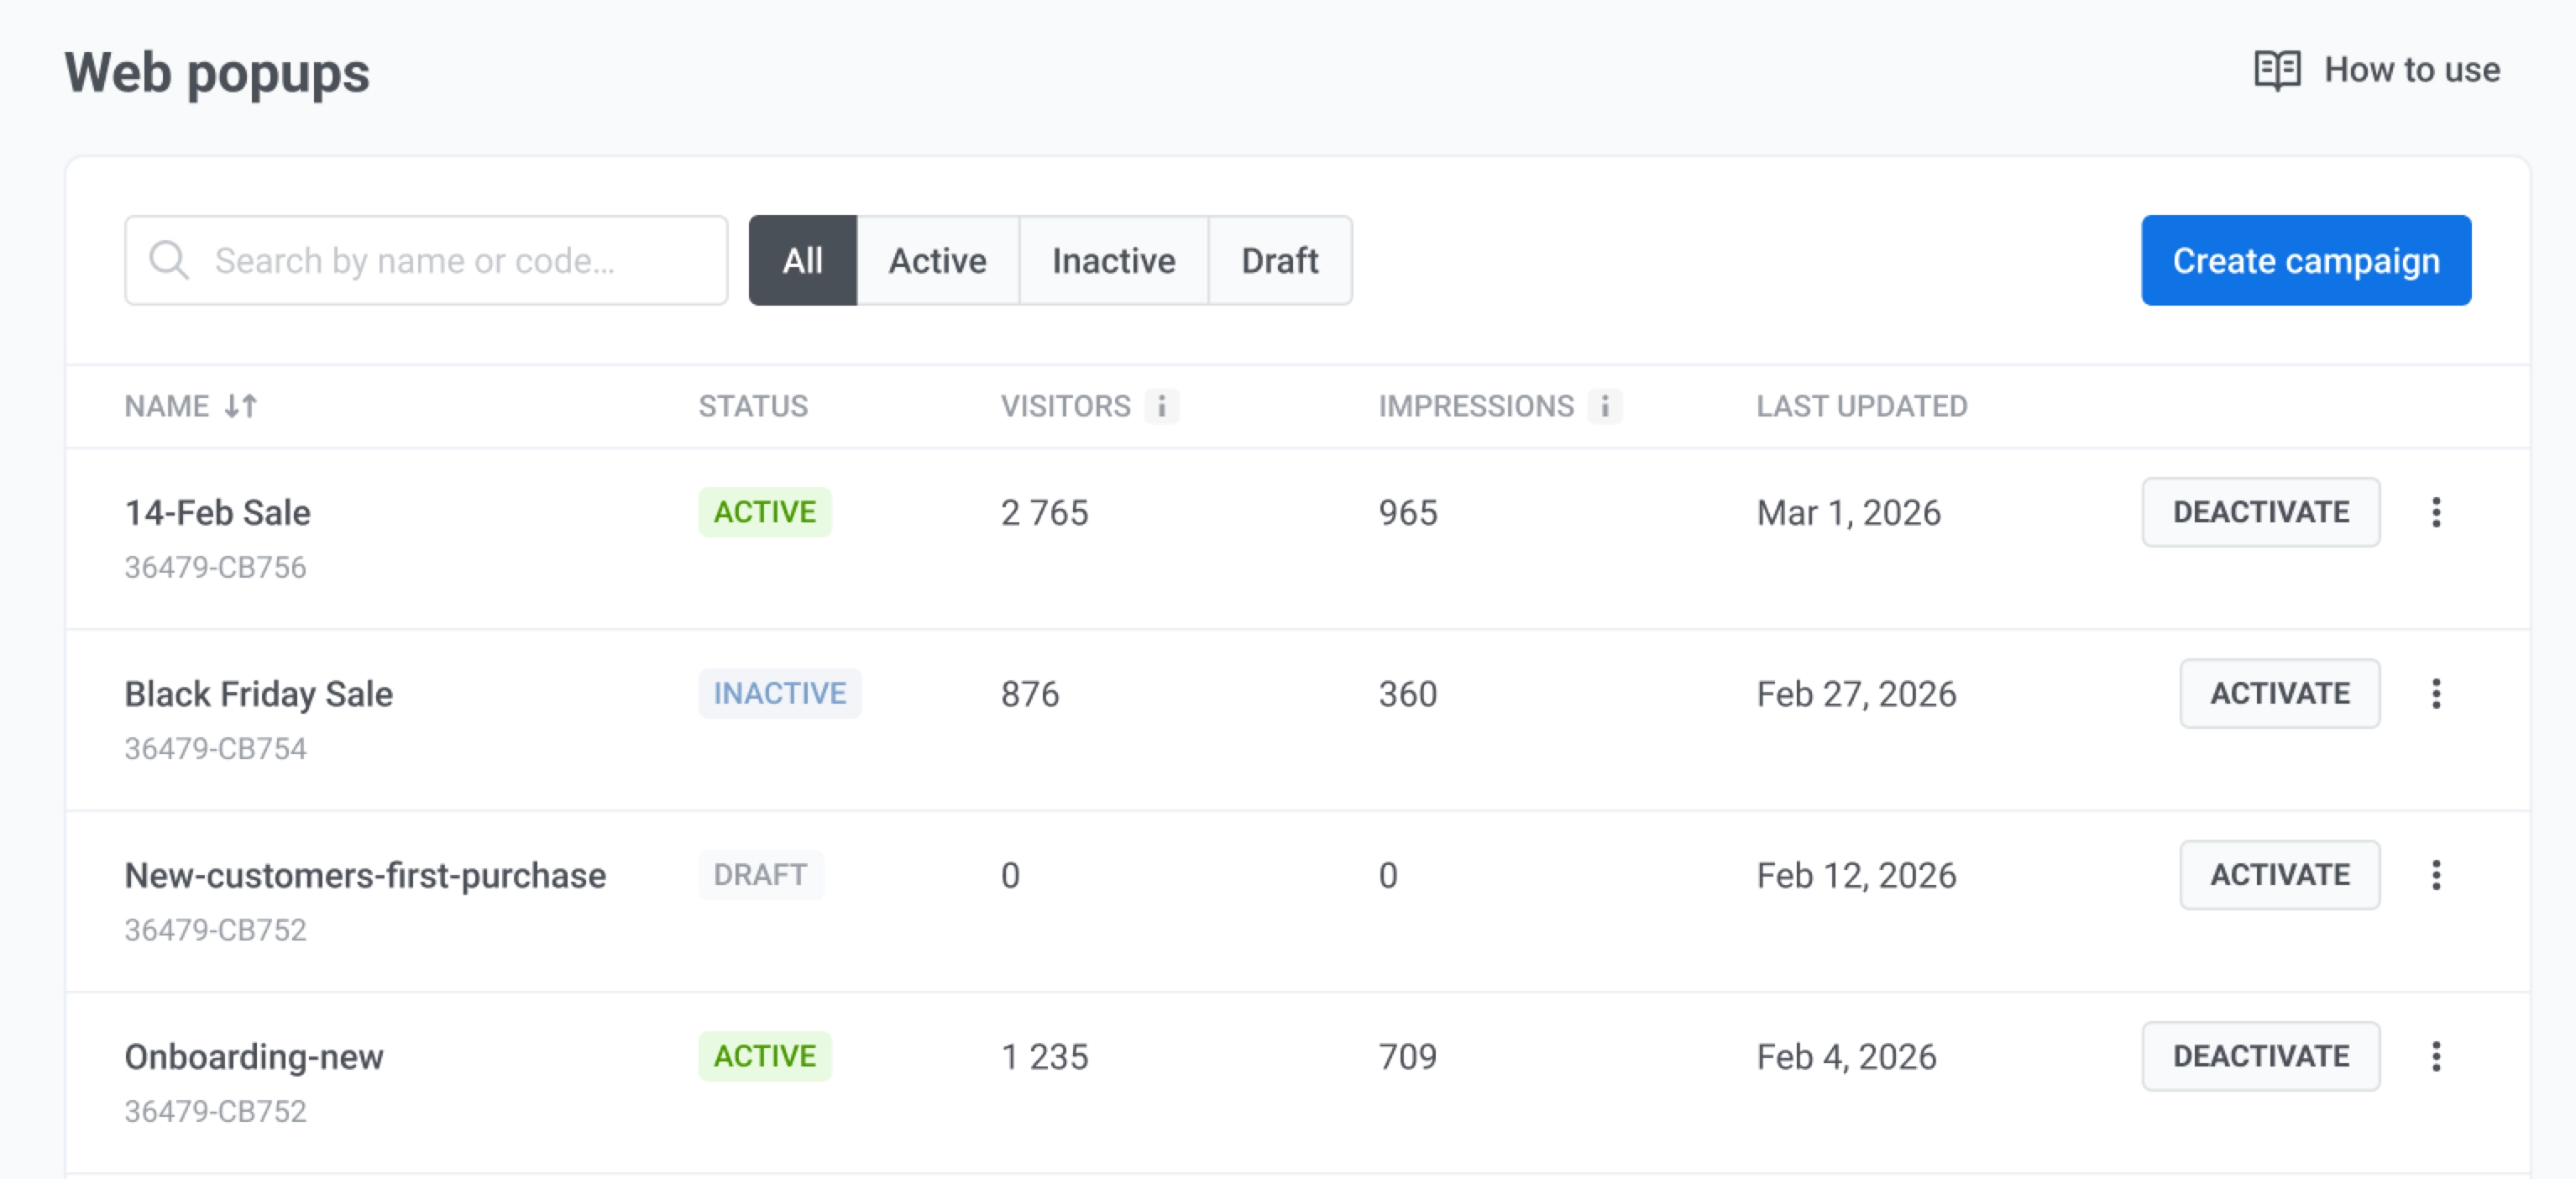
Go to **Campaigns → Web campaigns** to manage all Popup and Inline campaigns in one place. Use **Create campaign** to start a new wizard.
To find a campaign, search by its name or code. To narrow the list, filter it by status (**All**, **Draft**, **Active**, or **Inactive**) and by type (**All types**, **Web popups**, or **Inline blocks**).
 ### Monitor your campaigns
In the table, you can review how each web campaign is performing. Check **Status** to see whether a campaign is live.
The columns report the following:
* **Name:** the campaign name. Below it, the campaign type (**Popup** or **Inline block**) and the campaign code.
* **Visits:** how many page loads got the campaign ready to show, including repeat visits by the same visitor. A Popup counts a visit once the visitor matches its settings, before the display delay runs out. An Inline campaign counts a visit once its block is placed on the page.
* **Impressions:** how many times visitors actually saw the campaign, including repeat views. A Popup counts when it's shown, an Inline campaign when it scrolls into view.
* **Interactions:** how many times visitors clicked links and buttons in the content or submitted a [web form](/product/content/web-popup-content/web-forms/), including repeat clicks. Closing the campaign with ✕ doesn't count. A campaign without clicks shows 0.
Click a campaign name to open its [statistics](/product/statistics-and-analytics/messaging-statistics/web-campaign-statistics/).
### Take action on a campaign
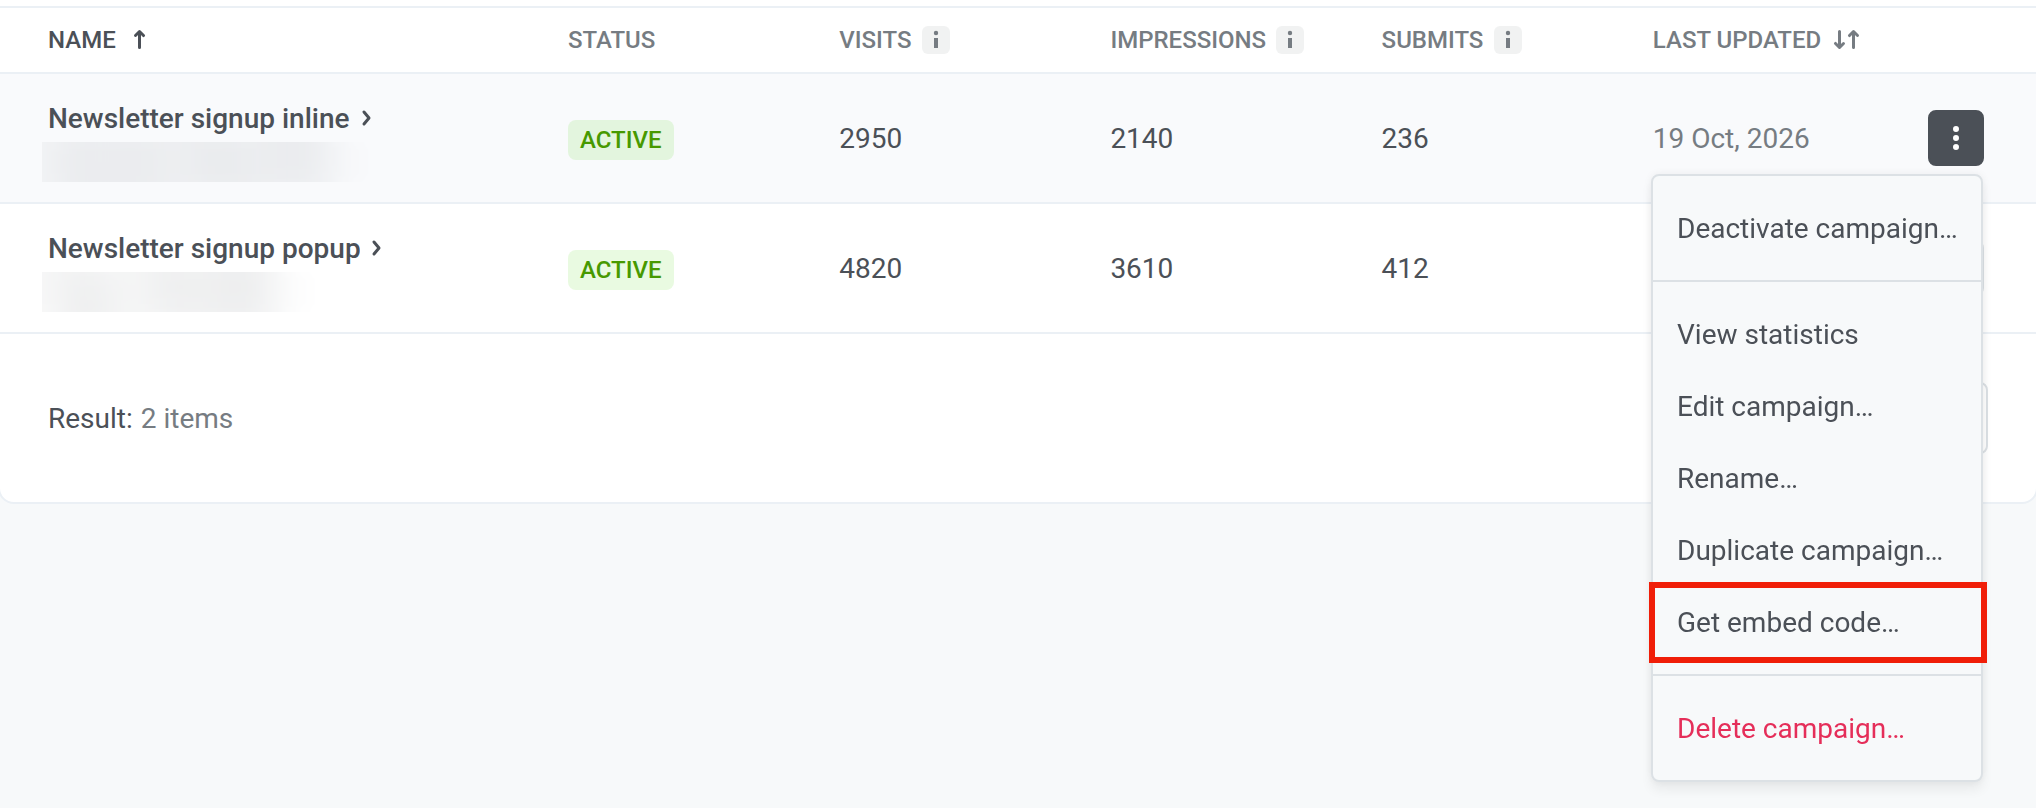
Click the three dots on a campaign's row to open its actions menu:
* Choose **Activate campaign…** or **Deactivate campaign…** to turn the campaign on or off, and confirm in the dialog.
* Choose **View statistics** to open the campaign's [statistics](/product/statistics-and-analytics/messaging-statistics/web-campaign-statistics/).
* Choose **Edit campaign…** to change content, audience, or display settings.
* Choose **Rename…** to change the campaign name only, without opening the full editor.
* Choose **Duplicate campaign…** to copy settings as a starting point.
* Choose **Get embed code…** on an **Inline** campaign to see the element to add to your page.
* Choose **Delete campaign…** to remove the campaign. This action cannot be undone.
 ## Track campaign results
Open the campaign's statistics from **Campaigns → Web campaigns** to see how many times the campaign loaded on a page and was seen. For a web form, the statistics also show submits, failed submissions, and the subscribers you can export.