# Create Web campaigns
A web campaign places the web content you've created onto your website and controls when it appears and who sees it. A campaign shows its content in one of two ways: as a **Popup** or as an **Inline** block.
## Start a new campaign
1. Go to **Campaigns → Web campaigns**.
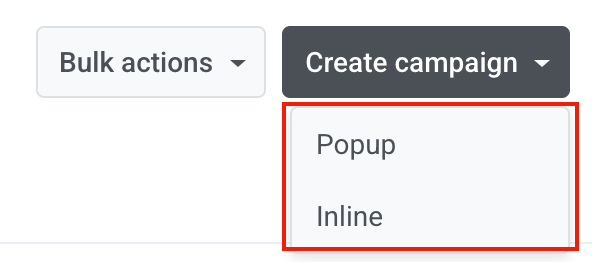
2. Click **Create campaign** and choose the type:
- **Popup:** an overlay on top of the page.
- **Inline:** a block inside an element of your page, for example in a sidebar or under an article.
You can't change the type later.
### Select web content
Choose the content this campaign shows to visitors. You can pick existing content or make new content without leaving the wizard.
- **Existing content:** in **Web content**, select an item from the list. Under each name, the list shows its type: **Web content** for regular content or **Web form** for a [web form](/product/content/web-popup-content/web-forms/).
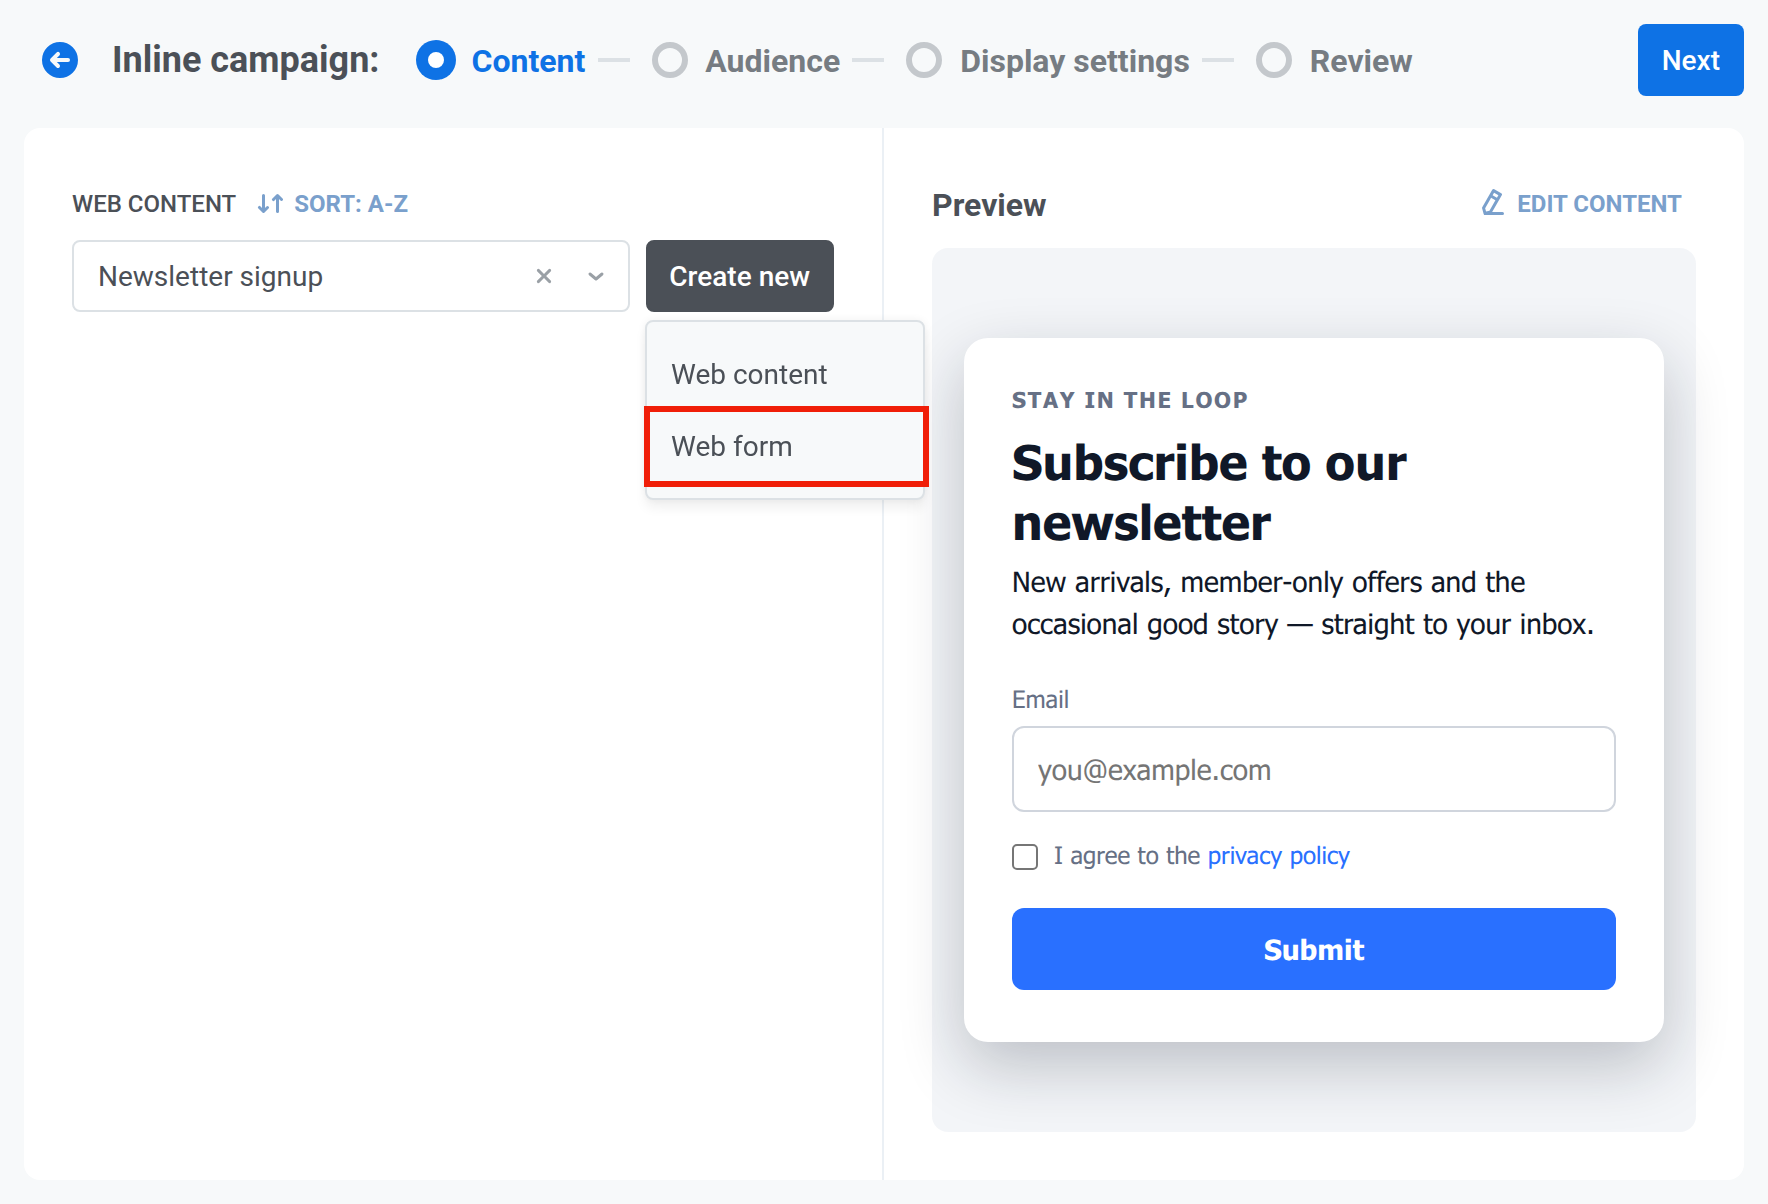
- **New content:** click **Create new** and choose **Web content** or **Web form**. The editor opens for that content type.
To change the order of content in the dropdown, use the sort button above it and choose **Last updated**, **A-Z**, or **Z-A**. The dropdown is sorted by **Last updated** until you pick another order. Pushwoosh remembers your choice and uses it in every **Web content** dropdown, in one-time messages and journeys alike.
Click **Next** when the right content is selected.
### Define audience
Select who should see the campaign.
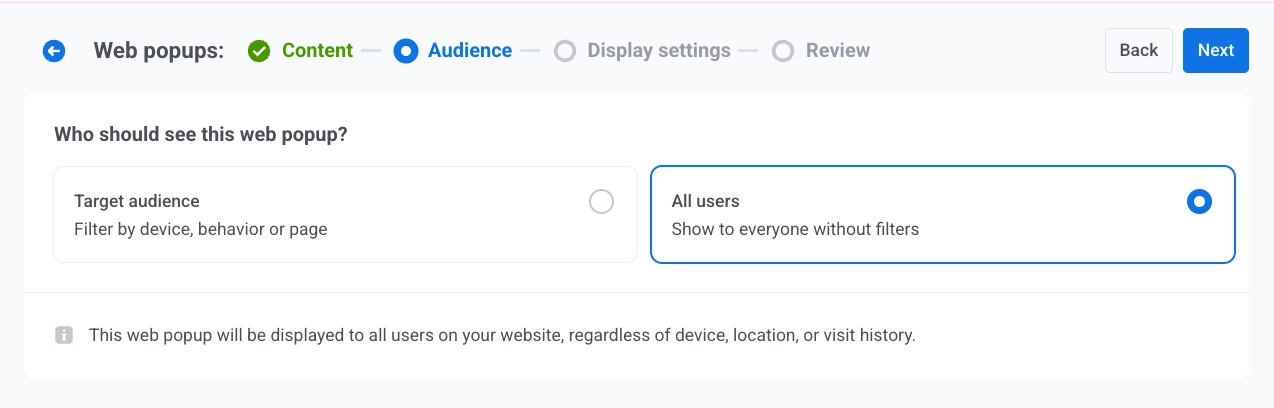
- **All users:** show the campaign to everyone without filters.
- **Target audience:** show the campaign only to users who match a segment or custom conditions. Two sub-options appear:
- **Use existing segment:** pick a saved [segment](/product/audience-data-and-segmentation/segmentation/) from the list. To create one without leaving the wizard, click **Create segment**.
- **Use custom conditions:** build the audience inline by adding filters by [**Tag**](/product/audience-data-and-segmentation/user-data-tags/tags/), [**Event**](/product/audience-data-and-segmentation/events/), [**Segment**](/product/audience-data-and-segmentation/segmentation/), or [**User ID**](/product/pushwoosh-knowledge-hub/users-userids/).
When you're done, click **Next**.
### Configure display settings
Set up when, how often, and where to show this campaign. The first settings depend on the campaign type: follow [Popup campaign](#popup-campaign-when-and-how-often) or [Inline campaign](#inline-campaign-element-and-trigger), then set the [device, push permission, and pages](#device-push-permission-and-pages).
### Popup campaign: when and how often
For a **Popup** campaign, choose when the Web popup appears and how often a visitor sees it.
#### Choose when the popup appears
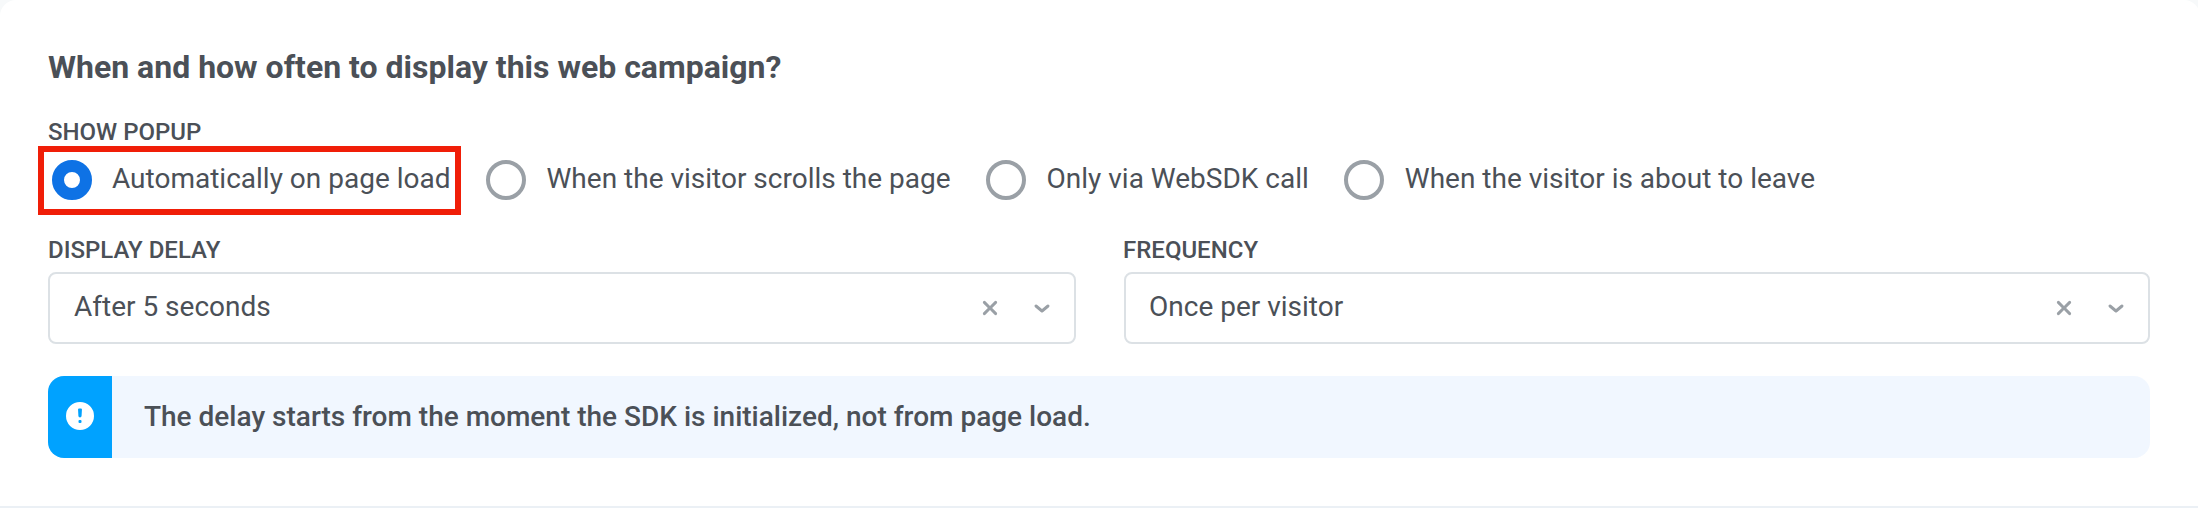
In **Show popup**, choose what makes the Web popup appear:
##### Automatically on page load
The campaign appears by itself on pages that match its settings.
##### When the visitor scrolls the page
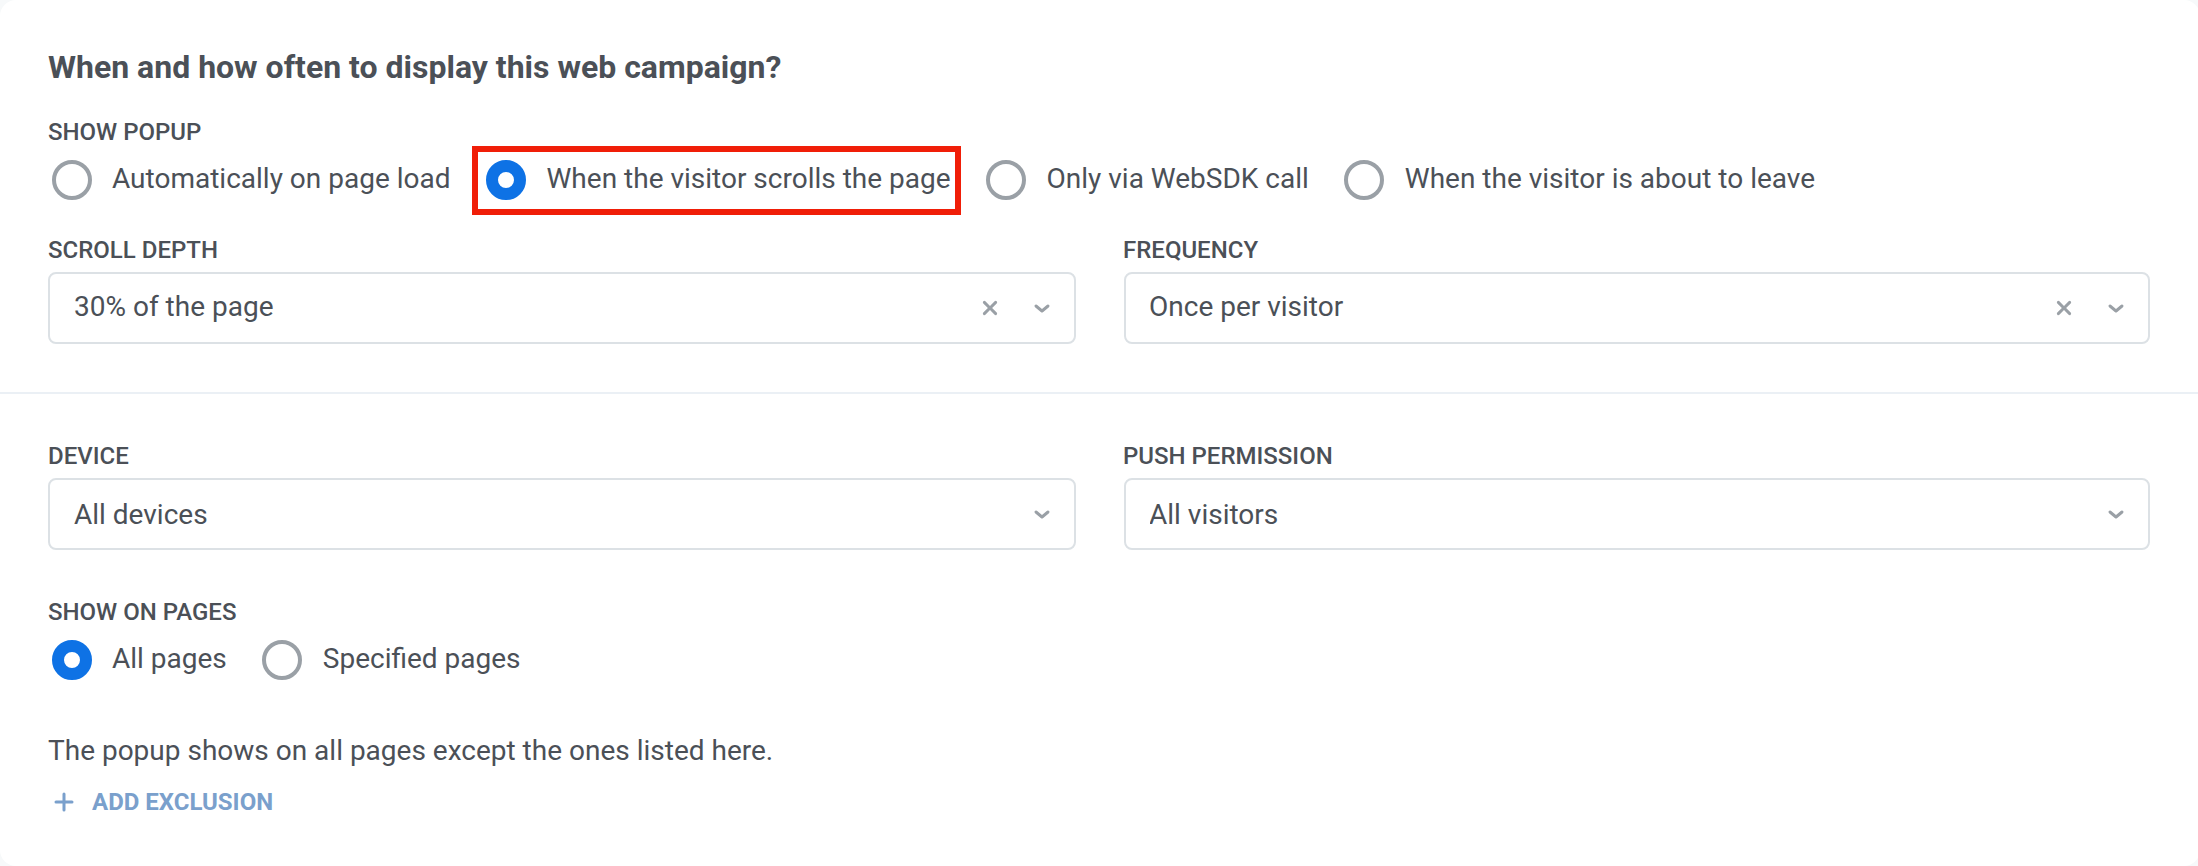
Needs Web SDK 3.110.0 or later. The Web popup appears once the visitor scrolls down to a set point of the page.
1. Select **When the visitor scrolls the page**.
2. In **Scroll depth**, choose **30% of the page**, **50% of the page**, or **70% of the page**.
The Web popup appears when the middle of the visitor's screen reaches that point of the page. For example, with **50% of the page**, it appears when the visitor has scrolled about halfway down. If the page is too short to scroll, it appears right away.
##### When the visitor is about to leave
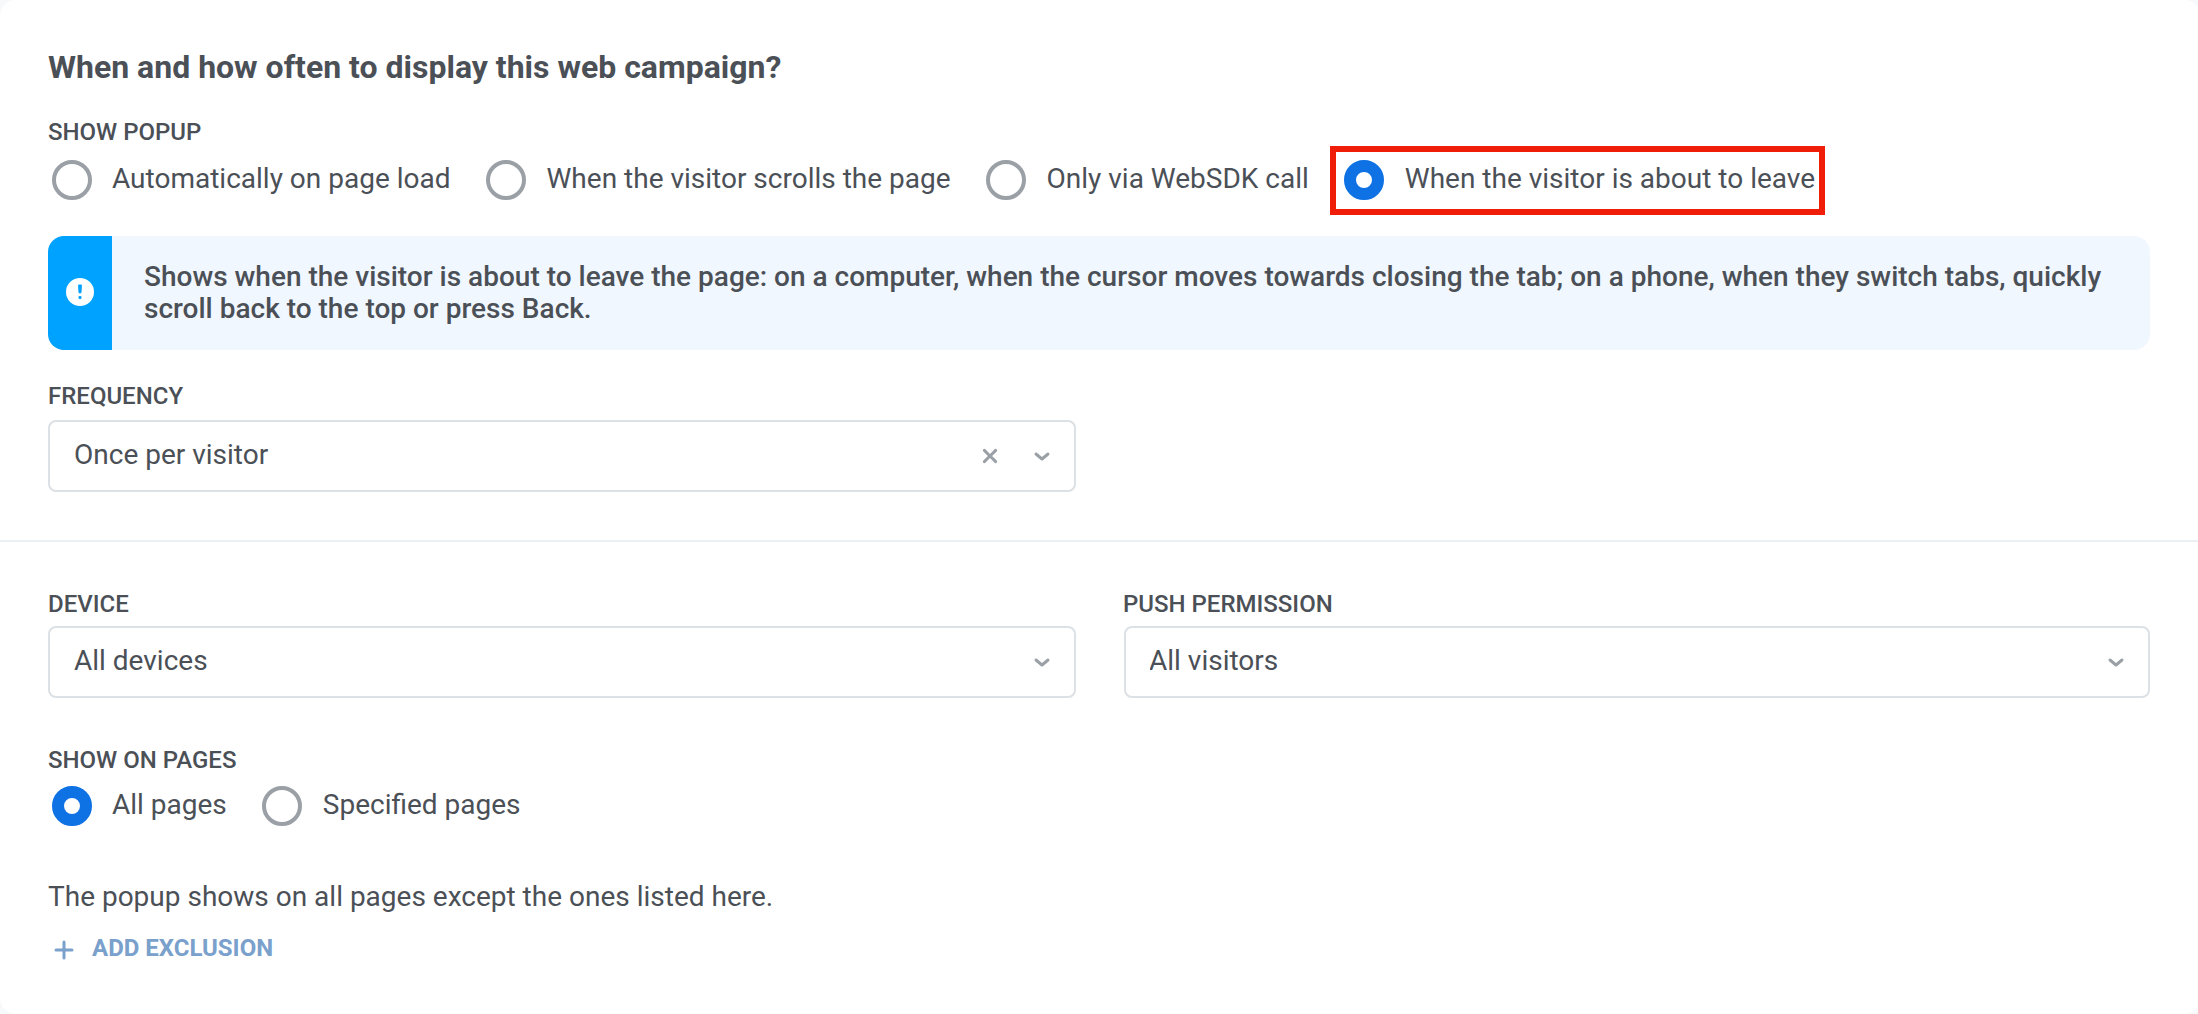
Needs Web SDK 3.111.0 or later. The Web popup appears on the first sign that the visitor is leaving the page. What counts as leaving depends on the device:
* **Computer:** the cursor moves out of the window towards the tabs and the address bar.
* **Phone:** the visitor returns to the page from another tab or app, quickly swipes back to the top of the page, or presses Back in the browser or on the device. The first Back press shows the Web popup, and the next one leaves the page.
##### Only via WebSDK call
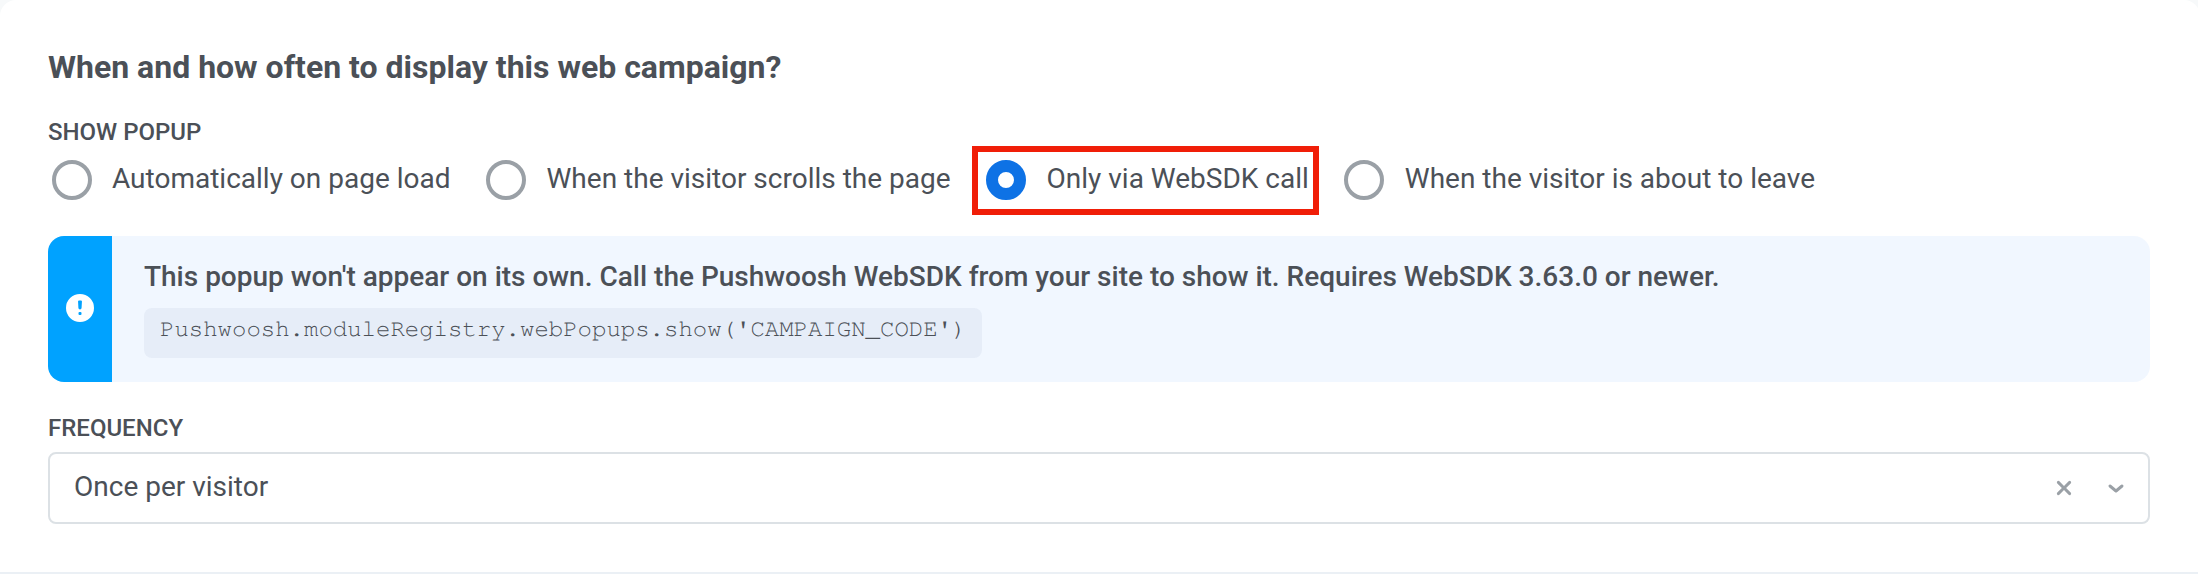
The campaign doesn't appear by itself: your site shows it when it calls the Web SDK. Requires Web SDK 3.63.0 or later.
1. Select **Only via WebSDK call**. The wizard shows the call, for example `Pushwoosh.moduleRegistry.webPopups.show('CAMPAIGN_CODE')`. Until you save a new campaign, the call has `CAMPAIGN_CODE` in place of its code.
2. Ask your developer to add this call to your site where the campaign should appear.
#### Display delay
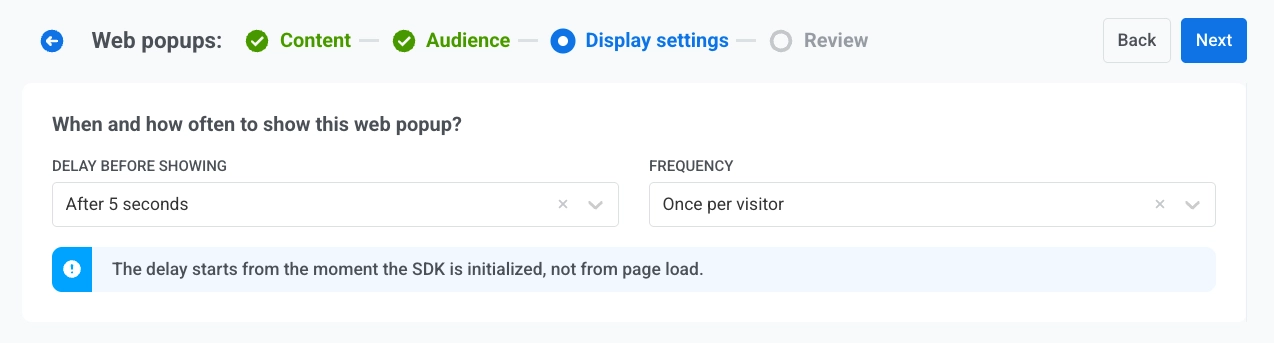
This setting applies when **Show popup** is **Automatically on page load**. With the other options, the visitor's action or your site's call decides when the Web popup appears. Choose when the Web popup may first appear after the page loads.
* **Immediately**
* **After 3 seconds**
* **After 5 seconds**
* **After 10 seconds**
#### Frequency
Under **FREQUENCY**, choose how often a visitor can see this Web popup:
* **Once per visitor:** the visitor sees the popup at most once in that browser, even in a new tab.
* **Once per session:** the visitor sees the popup once per browsing session. If they close a tab and return before the session ends, the popup does not appear again.
* **Every visit:** the popup appears each time the visitor loads a matching page.
### Inline campaign: element and trigger
For an **Inline** campaign, tell Pushwoosh where on your page the campaign appears and what makes it appear.
#### CSS selector
An Inline campaign appears inside a block of your page, and the CSS selector tells Pushwoosh which block.
1. In **CSS selector**, enter the selector of the page element the campaign is placed into, for example `#newsletter-signup`. Use one simple selector: a tag, an `#id`, a `.class`, or an `[attribute]`, without nesting.
2. Under the field, Pushwoosh shows the element to add to your page, for example ``. Ask your developer to add it where the campaign should appear.
The campaign appears inside the first element on the page that matches the selector. If the page has no matching element, the campaign isn't shown there.
#### Choose when the campaign appears
In **Show campaign**, choose what makes the campaign appear:
* **Automatically on page load:** the campaign appears each time a page with the matching element loads.
* **Only via WebSDK call:** the campaign doesn't appear by itself. Ask your developer to add the call that the wizard shows, as described in [Only via WebSDK call](#only-via-websdk-call). Requires Web SDK 3.63.0 or later.
### Device, push permission, and pages
These settings are the same for **Popup** and **Inline** campaigns.
#### Device
In **Device**, choose the devices the campaign appears on: **All devices**, **Desktop**, or **Mobile**.
#### Push permission
In **Push permission**, choose which visitors see the campaign, depending on whether they allowed web push notifications in this browser:
* **All visitors**: everyone, whatever their push permission. This is the default.
* **Not asked yet**: visitors the browser hasn't asked for push permission yet. Use it for a prompt that invites them to subscribe.
* **Subscribed**: visitors who allowed push notifications.
* **Blocked**: visitors who blocked push notifications, for example to explain how to allow them again in the browser.
* **Push not supported**: visitors whose browser can't receive web push notifications. Use it to offer another channel, such as an email form.
The **Review** step shows the option you chose next to the device, as **Push permission:** and the option name.
The visitor's browser checks the permission when the campaign is about to show. If the visitor allows or blocks notifications on the page, campaigns that no longer match are removed, and a campaign that starts to match shows after the next page load.
#### Show on pages
Choose the pages where the campaign can appear. This setting is hidden with **Only via WebSDK call**.
##### All pages
Show the campaign on every page of the site. To keep it off some pages, add up to 10 exclusions:
1. Click **+ Add exclusion**.
2. Enter the page [path](#enter-a-page-path).
3. Choose how the path should match: **Exact match** or **Starts with**.
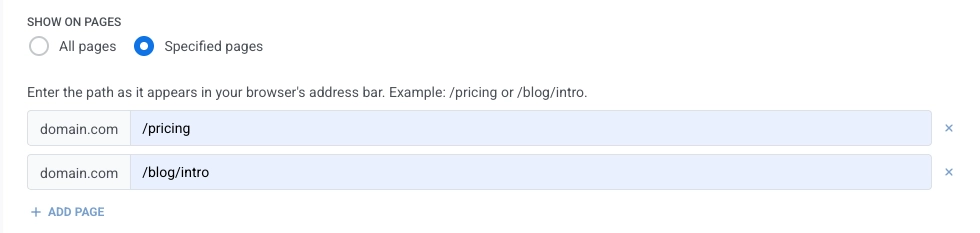
##### Specified pages
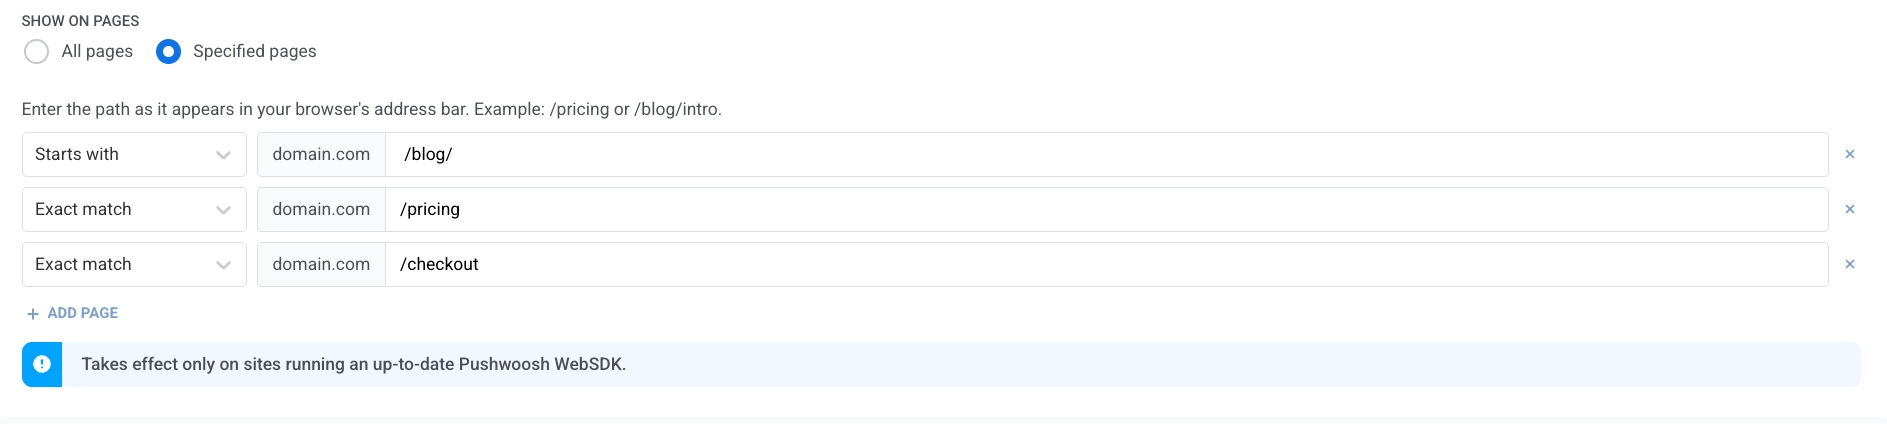
Show the campaign only on the pages you list. You can add up to 10 pages:
1. Click **+ Add page**. To remove a row, click ×.
2. Enter the page [path](#enter-a-page-path).
3. Choose how the path should match: **Exact match** or **Starts with**.
Click **Next** to continue.
##### Enter a page path
The path tells Pushwoosh which pages a rule covers. The same rules apply to exclusions and to specified pages.
**What to enter**
* Enter the path as it appears after your domain, for example `/pricing` or `/blog/intro`.
* The path can contain letters of any alphabet, digits, spaces, and the characters `- _ . ~ ! $ & ' ( ) * + , ; = : @ /`.
* Paths are case-sensitive, so `/Pricing` and `/pricing` are different pages.
**Pasting a full address**
You can also paste the full address from the browser's address bar or an encoded path. Pushwoosh removes the domain, the query string, and the fragment, then saves the path decoded, with the letter case kept. For example:
| You enter | Pushwoosh saves |
| --- | --- |
| `https://example.com/Catalog/?sort=price` | `/Catalog/` |
| `/caf%C3%A9` | `/café` |
**Match types**
The match type decides which pages the path covers:
| Match type | Pages it covers |
| --- | --- |
| **Exact match** | Only the page whose path is the same as what you enter. `/pricing` doesn't cover `/pricing/` or `/Pricing`. |
| **Starts with** | Every page whose path begins with what you enter, in the same letter case. `/blog` covers `/blog/intro` and also `/blog-news`, so enter `/blog/` to cover only the blog section. |
## Review the campaign
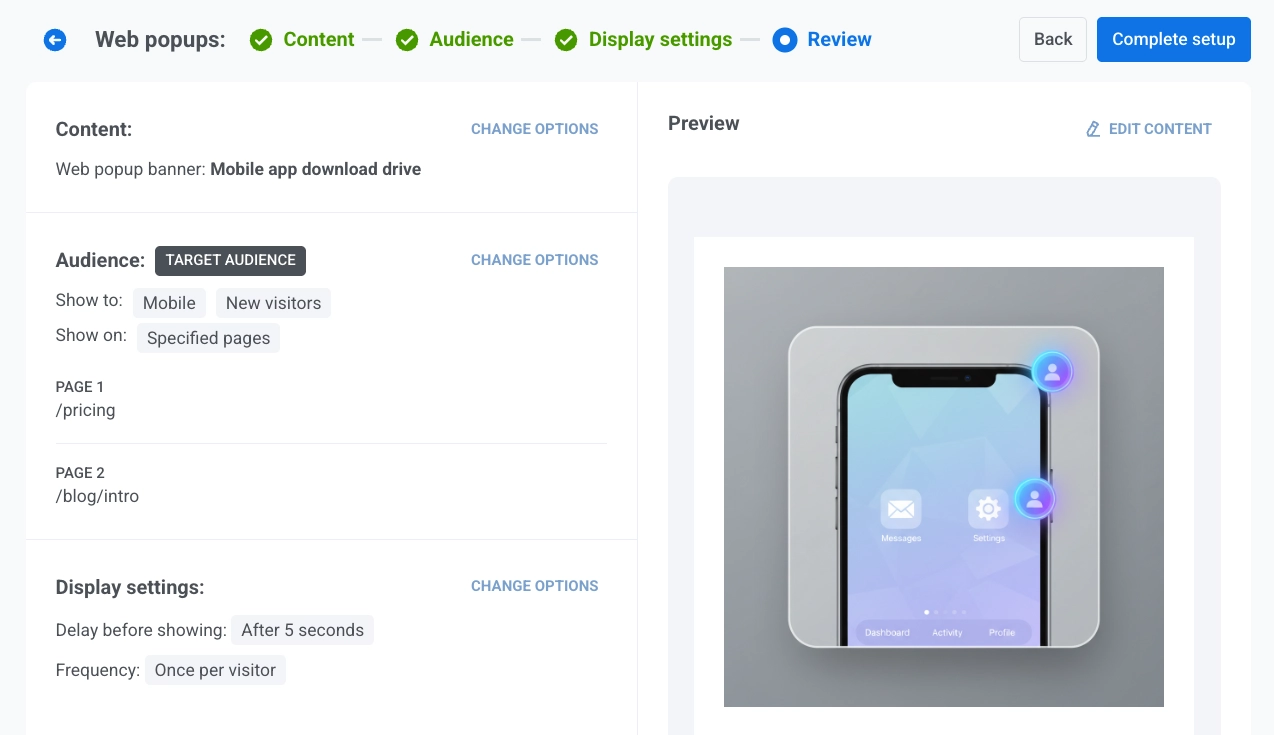
The **Review** screen summarizes:
* **Content:** the web content attached. See [Select web content](#select-web-content). A campaign still linked to a legacy subscription form instead of web content shows that form's name here instead.
* **Audience:** **All users**, or **Target audience** with the selected segment name or custom conditions.
* **Display settings:** the settings from the [Configure display settings](#configure-display-settings) step:
* **CSS selector**, for an **Inline** campaign.
* **Show popup** or **Show campaign**, and **Scroll depth** when the Web popup appears on scroll.
* **Device** and **Push permission**.
* The pages the campaign shows on, including match type and any exclusions. Not shown with **Only via WebSDK call**.
* **Display delay**, for a **Popup** campaign shown **Automatically on page load**.
* **Frequency**, for a **Popup** campaign.
Use **CHANGE OPTIONS** on any block to jump back and edit that part.
The **Preview** area shows how the content looks on a sample viewport. Use **EDIT CONTENT** if you need to adjust the underlying content asset.
When everything looks right, click **Complete setup**.
Then pick an option from the menu:
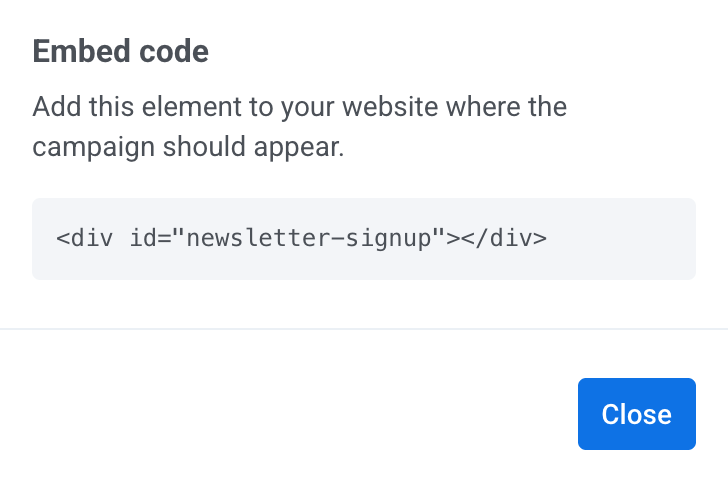
* **Launch campaign…** activates the campaign after you enter a campaign name and confirm. For an **Inline** campaign, an **Embed code** dialog then shows the element to add to your page. You can open it again later with **Get embed code…** in the campaign's row menu.
* **Save as draft…** saves the campaign without activating it. To go live later, go to **Campaigns → Web campaigns**, open the three-dot menu on the draft's row, and choose **Activate campaign…**. To change settings first, choose **Edit campaign…** in the same menu.
To search, filter, and manage campaigns from the list, see [View and manage campaigns](/product/messaging-channels/web-campaigns/#view-and-manage-campaigns).
 ### Select web content
Choose the content this campaign shows to visitors. You can pick existing content or make new content without leaving the wizard.
- **Existing content:** in **Web content**, select an item from the list. Under each name, the list shows its type: **Web content** for regular content or **Web form** for a [web form](/product/content/web-popup-content/web-forms/).
- **New content:** click **Create new** and choose **Web content** or **Web form**. The editor opens for that content type.
 To change the order of content in the dropdown, use the sort button above it and choose **Last updated**, **A-Z**, or **Z-A**. The dropdown is sorted by **Last updated** until you pick another order. Pushwoosh remembers your choice and uses it in every **Web content** dropdown, in one-time messages and journeys alike.
Click **Next** when the right content is selected.
### Define audience
Select who should see the campaign.
- **All users:** show the campaign to everyone without filters.
 - **Target audience:** show the campaign only to users who match a segment or custom conditions. Two sub-options appear:
- **Use existing segment:** pick a saved [segment](/product/audience-data-and-segmentation/segmentation/) from the list. To create one without leaving the wizard, click **Create segment**.
- **Use custom conditions:** build the audience inline by adding filters by [**Tag**](/product/audience-data-and-segmentation/user-data-tags/tags/), [**Event**](/product/audience-data-and-segmentation/events/), [**Segment**](/product/audience-data-and-segmentation/segmentation/), or [**User ID**](/product/pushwoosh-knowledge-hub/users-userids/).
 When you're done, click **Next**.
### Configure display settings
Set up when, how often, and where to show this campaign. The first settings depend on the campaign type: follow [Popup campaign](#popup-campaign-when-and-how-often) or [Inline campaign](#inline-campaign-element-and-trigger), then set the [device, push permission, and pages](#device-push-permission-and-pages).
### Popup campaign: when and how often
For a **Popup** campaign, choose when the Web popup appears and how often a visitor sees it.
#### Choose when the popup appears
In **Show popup**, choose what makes the Web popup appear:
##### Automatically on page load
The campaign appears by itself on pages that match its settings.
 ##### When the visitor scrolls the page
Needs Web SDK 3.110.0 or later. The Web popup appears once the visitor scrolls down to a set point of the page.
1. Select **When the visitor scrolls the page**.
2. In **Scroll depth**, choose **30% of the page**, **50% of the page**, or **70% of the page**.
 The Web popup appears when the middle of the visitor's screen reaches that point of the page. For example, with **50% of the page**, it appears when the visitor has scrolled about halfway down. If the page is too short to scroll, it appears right away.
##### When the visitor is about to leave
Needs Web SDK 3.111.0 or later. The Web popup appears on the first sign that the visitor is leaving the page. What counts as leaving depends on the device:
* **Computer:** the cursor moves out of the window towards the tabs and the address bar.
* **Phone:** the visitor returns to the page from another tab or app, quickly swipes back to the top of the page, or presses Back in the browser or on the device. The first Back press shows the Web popup, and the next one leaves the page.
 ##### Only via WebSDK call
The campaign doesn't appear by itself: your site shows it when it calls the Web SDK. Requires Web SDK 3.63.0 or later.
1. Select **Only via WebSDK call**. The wizard shows the call, for example `Pushwoosh.moduleRegistry.webPopups.show('CAMPAIGN_CODE')`. Until you save a new campaign, the call has `CAMPAIGN_CODE` in place of its code.
2. Ask your developer to add this call to your site where the campaign should appear.
 #### Display delay
This setting applies when **Show popup** is **Automatically on page load**. With the other options, the visitor's action or your site's call decides when the Web popup appears. Choose when the Web popup may first appear after the page loads.
* **Immediately**
* **After 3 seconds**
* **After 5 seconds**
* **After 10 seconds**
#### Frequency
Under **FREQUENCY**, choose how often a visitor can see this Web popup:
* **Once per visitor:** the visitor sees the popup at most once in that browser, even in a new tab.
* **Once per session:** the visitor sees the popup once per browsing session. If they close a tab and return before the session ends, the popup does not appear again.
* **Every visit:** the popup appears each time the visitor loads a matching page.
 ### Inline campaign: element and trigger
For an **Inline** campaign, tell Pushwoosh where on your page the campaign appears and what makes it appear.
#### CSS selector
An Inline campaign appears inside a block of your page, and the CSS selector tells Pushwoosh which block.
1. In **CSS selector**, enter the selector of the page element the campaign is placed into, for example `#newsletter-signup`. Use one simple selector: a tag, an `#id`, a `.class`, or an `[attribute]`, without nesting.
2. Under the field, Pushwoosh shows the element to add to your page, for example ``. Ask your developer to add it where the campaign should appear.
 The campaign appears inside the first element on the page that matches the selector. If the page has no matching element, the campaign isn't shown there.
#### Choose when the campaign appears
In **Show campaign**, choose what makes the campaign appear:
* **Automatically on page load:** the campaign appears each time a page with the matching element loads.
* **Only via WebSDK call:** the campaign doesn't appear by itself. Ask your developer to add the call that the wizard shows, as described in [Only via WebSDK call](#only-via-websdk-call). Requires Web SDK 3.63.0 or later.
 ### Device, push permission, and pages
These settings are the same for **Popup** and **Inline** campaigns.
#### Device
In **Device**, choose the devices the campaign appears on: **All devices**, **Desktop**, or **Mobile**.
#### Push permission
In **Push permission**, choose which visitors see the campaign, depending on whether they allowed web push notifications in this browser:
* **All visitors**: everyone, whatever their push permission. This is the default.
* **Not asked yet**: visitors the browser hasn't asked for push permission yet. Use it for a prompt that invites them to subscribe.
* **Subscribed**: visitors who allowed push notifications.
* **Blocked**: visitors who blocked push notifications, for example to explain how to allow them again in the browser.
* **Push not supported**: visitors whose browser can't receive web push notifications. Use it to offer another channel, such as an email form.
 The **Review** step shows the option you chose next to the device, as **Push permission:** and the option name.
The visitor's browser checks the permission when the campaign is about to show. If the visitor allows or blocks notifications on the page, campaigns that no longer match are removed, and a campaign that starts to match shows after the next page load.
#### Show on pages
Choose the pages where the campaign can appear. This setting is hidden with **Only via WebSDK call**.
##### All pages
Show the campaign on every page of the site. To keep it off some pages, add up to 10 exclusions:
1. Click **+ Add exclusion**.
2. Enter the page [path](#enter-a-page-path).
3. Choose how the path should match: **Exact match** or **Starts with**.
 ##### Specified pages
Show the campaign only on the pages you list. You can add up to 10 pages:
1. Click **+ Add page**. To remove a row, click ×.
2. Enter the page [path](#enter-a-page-path).
3. Choose how the path should match: **Exact match** or **Starts with**.
 Click **Next** to continue.
##### Enter a page path
The path tells Pushwoosh which pages a rule covers. The same rules apply to exclusions and to specified pages.
**What to enter**
* Enter the path as it appears after your domain, for example `/pricing` or `/blog/intro`.
* The path can contain letters of any alphabet, digits, spaces, and the characters `- _ . ~ ! $ & ' ( ) * + , ; = : @ /`.
* Paths are case-sensitive, so `/Pricing` and `/pricing` are different pages.
**Pasting a full address**
You can also paste the full address from the browser's address bar or an encoded path. Pushwoosh removes the domain, the query string, and the fragment, then saves the path decoded, with the letter case kept. For example:
| You enter | Pushwoosh saves |
| --- | --- |
| `https://example.com/Catalog/?sort=price` | `/Catalog/` |
| `/caf%C3%A9` | `/café` |
**Match types**
The match type decides which pages the path covers:
| Match type | Pages it covers |
| --- | --- |
| **Exact match** | Only the page whose path is the same as what you enter. `/pricing` doesn't cover `/pricing/` or `/Pricing`. |
| **Starts with** | Every page whose path begins with what you enter, in the same letter case. `/blog` covers `/blog/intro` and also `/blog-news`, so enter `/blog/` to cover only the blog section. |
## Review the campaign
The **Review** screen summarizes:
* **Content:** the web content attached. See [Select web content](#select-web-content). A campaign still linked to a legacy subscription form instead of web content shows that form's name here instead.
* **Audience:** **All users**, or **Target audience** with the selected segment name or custom conditions.
* **Display settings:** the settings from the [Configure display settings](#configure-display-settings) step:
* **CSS selector**, for an **Inline** campaign.
* **Show popup** or **Show campaign**, and **Scroll depth** when the Web popup appears on scroll.
* **Device** and **Push permission**.
* The pages the campaign shows on, including match type and any exclusions. Not shown with **Only via WebSDK call**.
* **Display delay**, for a **Popup** campaign shown **Automatically on page load**.
* **Frequency**, for a **Popup** campaign.
Use **CHANGE OPTIONS** on any block to jump back and edit that part.
The **Preview** area shows how the content looks on a sample viewport. Use **EDIT CONTENT** if you need to adjust the underlying content asset.
 When everything looks right, click **Complete setup**.
Then pick an option from the menu:
* **Launch campaign…** activates the campaign after you enter a campaign name and confirm. For an **Inline** campaign, an **Embed code** dialog then shows the element to add to your page. You can open it again later with **Get embed code…** in the campaign's row menu.
 * **Save as draft…** saves the campaign without activating it. To go live later, go to **Campaigns → Web campaigns**, open the three-dot menu on the draft's row, and choose **Activate campaign…**. To change settings first, choose **Edit campaign…** in the same menu.
To search, filter, and manage campaigns from the list, see [View and manage campaigns](/product/messaging-channels/web-campaigns/#view-and-manage-campaigns).