# Create a Wallet Pass Campaign
A campaign holds one pass design that you issue to many users. You set it up once on the **New campaign** page, and every pass you issue later follows it.
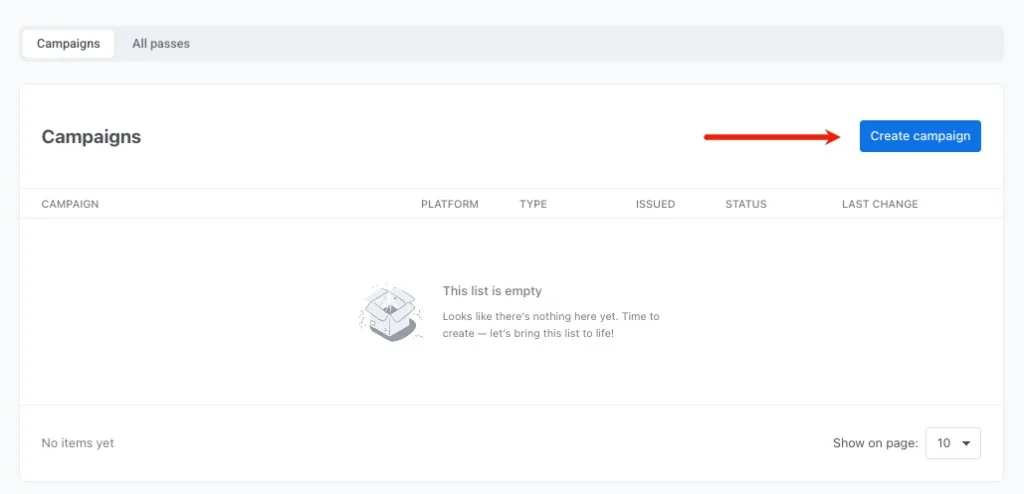
To start, go to **Campaigns → Wallet Passes**. On the **Campaigns** tab, click **Create campaign**.
 ## Set campaign details and platform
1. At the top of the page, select the **Apple Wallet** or **Google Wallet** tab.
2. Optionally, click **Load template** to start from a built-in pass instead of an empty one.
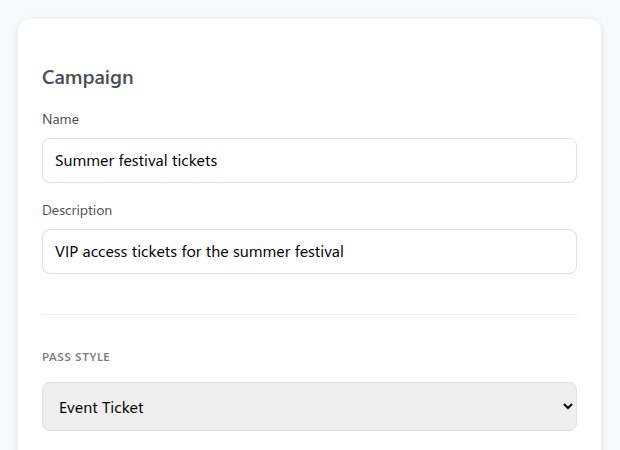
3. Under **Campaign**, enter a **Name** and an optional **Description** for your internal reference. Neither appears on the pass.
4. Under **Pass Style** (Apple) or **Pass Type** (Google), choose the layout for your pass:
* **Apple Wallet:** Boarding Pass, Coupon, Event Ticket, Store Card, Generic. See [Choose a pass style](/product/content/wallet-passes/apple-wallet-pass-builder/#choose-a-pass-style).
* **Google Wallet:** Generic, Offer, Loyalty card, Event ticket, Gift card, Flight, Transit. See [Choose a pass type](/product/content/wallet-passes/google-wallet-pass-builder/#choose-a-pass-type).
You can't change the platform or the pass style or type after you create the campaign.
## Set campaign details and platform
1. At the top of the page, select the **Apple Wallet** or **Google Wallet** tab.
2. Optionally, click **Load template** to start from a built-in pass instead of an empty one.
3. Under **Campaign**, enter a **Name** and an optional **Description** for your internal reference. Neither appears on the pass.
4. Under **Pass Style** (Apple) or **Pass Type** (Google), choose the layout for your pass:
* **Apple Wallet:** Boarding Pass, Coupon, Event Ticket, Store Card, Generic. See [Choose a pass style](/product/content/wallet-passes/apple-wallet-pass-builder/#choose-a-pass-style).
* **Google Wallet:** Generic, Offer, Loyalty card, Event ticket, Gift card, Flight, Transit. See [Choose a pass type](/product/content/wallet-passes/google-wallet-pass-builder/#choose-a-pass-type).
You can't change the platform or the pass style or type after you create the campaign.
 ## Configure pass design and branding
Configure the standard sections of the pass:
* **Basic Information, Colors (Appearance on Google Wallet), and Barcode:** set the pass title, background and text colors, and barcode type. You personalize the barcode in the **Barcode** section too (see [Apple Wallet barcode](/product/content/wallet-passes/apple-wallet-pass-builder/#add-a-barcode) or [Google Wallet barcode](/product/content/wallet-passes/google-wallet-pass-builder/#add-a-barcode)). The campaign uses the same design sections as the pass builder, so for detailed guidance on each section, see the [Apple Wallet pass builder](/product/content/wallet-passes/apple-wallet-pass-builder/) or the [Google Wallet pass builder](/product/content/wallet-passes/google-wallet-pass-builder/).
* **Pass fields:** add the fields that should appear on the card (see [Apple Wallet pass fields](/product/content/wallet-passes/apple-wallet-pass-builder/#fill-in-pass-fields) or [Google Wallet fields and details](/product/content/wallet-passes/google-wallet-pass-builder/#fill-in-pass-fields)).
* **Expiration:** set relevant dates and expiration rules (see [Apple Wallet expiration](/product/content/wallet-passes/apple-wallet-pass-builder/#set-expiration-and-status) or [Google Wallet expiration](/product/content/wallet-passes/google-wallet-pass-builder/#expiration)).
* **Locations:** set location-based relevance (see [Apple Wallet locations](/product/content/wallet-passes/apple-wallet-pass-builder/#location-based-relevance-optional) or [Google Wallet locations](/product/content/wallet-passes/google-wallet-pass-builder/#add-locations-optional)).
* **Who can save the pass (Google Wallet only):** choose whether the pass is tied to a single Google account, a single device, or accessible to anyone with the link.
## Set shared and personal fields
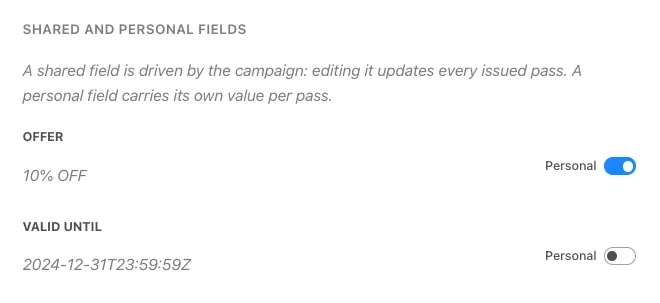
In the **Shared and personal fields** section, configure which fields update globally across all passes and which keep unique values per user. This controls what happens when you edit the campaign later: shared fields update on every issued pass, while personal fields remain unchanged.
Turn on the **Personal** toggle for any field that should hold unique values per user. A field whose value is a single tag placeholder, such as `{Seat}`, is personal by default.
## Configure pass design and branding
Configure the standard sections of the pass:
* **Basic Information, Colors (Appearance on Google Wallet), and Barcode:** set the pass title, background and text colors, and barcode type. You personalize the barcode in the **Barcode** section too (see [Apple Wallet barcode](/product/content/wallet-passes/apple-wallet-pass-builder/#add-a-barcode) or [Google Wallet barcode](/product/content/wallet-passes/google-wallet-pass-builder/#add-a-barcode)). The campaign uses the same design sections as the pass builder, so for detailed guidance on each section, see the [Apple Wallet pass builder](/product/content/wallet-passes/apple-wallet-pass-builder/) or the [Google Wallet pass builder](/product/content/wallet-passes/google-wallet-pass-builder/).
* **Pass fields:** add the fields that should appear on the card (see [Apple Wallet pass fields](/product/content/wallet-passes/apple-wallet-pass-builder/#fill-in-pass-fields) or [Google Wallet fields and details](/product/content/wallet-passes/google-wallet-pass-builder/#fill-in-pass-fields)).
* **Expiration:** set relevant dates and expiration rules (see [Apple Wallet expiration](/product/content/wallet-passes/apple-wallet-pass-builder/#set-expiration-and-status) or [Google Wallet expiration](/product/content/wallet-passes/google-wallet-pass-builder/#expiration)).
* **Locations:** set location-based relevance (see [Apple Wallet locations](/product/content/wallet-passes/apple-wallet-pass-builder/#location-based-relevance-optional) or [Google Wallet locations](/product/content/wallet-passes/google-wallet-pass-builder/#add-locations-optional)).
* **Who can save the pass (Google Wallet only):** choose whether the pass is tied to a single Google account, a single device, or accessible to anyone with the link.
## Set shared and personal fields
In the **Shared and personal fields** section, configure which fields update globally across all passes and which keep unique values per user. This controls what happens when you edit the campaign later: shared fields update on every issued pass, while personal fields remain unchanged.
Turn on the **Personal** toggle for any field that should hold unique values per user. A field whose value is a single tag placeholder, such as `{Seat}`, is personal by default.
 | Field type | Behavior | Examples |
| :--- | :--- | :--- |
| **Shared** | Driven by the campaign. Updating this field syncs the new value to every pass on users' devices, except passes where you changed this field by hand. See [Override a shared field on an individual pass](/product/messaging-channels/wallet-passes/wallet-pass-campaigns/manage-a-campaign/#override-a-shared-field-on-an-individual-pass). | Event date, Gate number, Store address, Discount percentage |
| **Personal** | Unique per user. The campaign does not overwrite these values when updated. | User name, Seat number, Membership ID, Points balance |
A field's value can include a tag placeholder, such as `{Seat}`. Pushwoosh fills it in from the recipient's [tag](/product/audience-data-and-segmentation/user-data-tags/tags/) when it serves the pass, in shared and personal fields alike.
* **Insert a placeholder:** click `{ }` next to the field.
* **Add a format and a fallback:** write `{tag|format|fallback}`. If the recipient has no value for the tag, Pushwoosh uses the fallback, or leaves the field blank when the placeholder has none.
How a **Personal** field appears in the **Issue pass** dialog depends on its value. Shared fields never appear there.
* **Just the tag, nothing else, like `{Seat}`:** the field doesn't appear in the **Issue pass** dialog.
* **The tag mixed with other text, like `Seat {Seat}`, or no tag at all:** the field appears as an editable input in the **Issue pass** dialog, prefilled with that value. Any tag inside it still resolves per recipient when Pushwoosh serves the pass.
## Upload campaign images
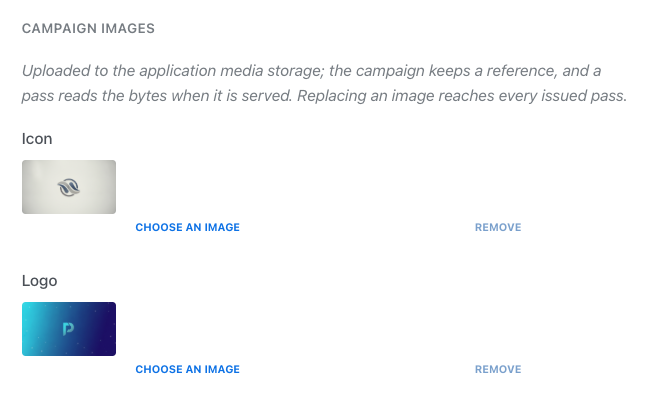
1. In the **Campaign images** section, click **Choose an image** next to an image slot.
2. Pick an image in one of these ways:
* Select an existing image from your [Media storage](/product/content/media-store/).
* Drag and drop a new PNG or JPEG file to upload it.
* Get one in the **Stock photos** or **Generate with AI** tab.
3. Repeat for each available image slot:
* **Apple Wallet:** Icon, Logo, Background, Footer, Strip, and Thumbnail (see [Apple Wallet images](/product/content/wallet-passes/apple-wallet-pass-builder/#images)). **Icon** is required to create the campaign.
* **Google Wallet:** Logo and Hero image.
For the Apple Wallet **Logo** and **Strip** slots, Pushwoosh crops an image wider than 3:1 to 3:1 automatically, keeping its full height, and uses the crop instead of the original. The crop is saved in Media storage next to the original. If the crop can't be created, the original image is used.
| Field type | Behavior | Examples |
| :--- | :--- | :--- |
| **Shared** | Driven by the campaign. Updating this field syncs the new value to every pass on users' devices, except passes where you changed this field by hand. See [Override a shared field on an individual pass](/product/messaging-channels/wallet-passes/wallet-pass-campaigns/manage-a-campaign/#override-a-shared-field-on-an-individual-pass). | Event date, Gate number, Store address, Discount percentage |
| **Personal** | Unique per user. The campaign does not overwrite these values when updated. | User name, Seat number, Membership ID, Points balance |
A field's value can include a tag placeholder, such as `{Seat}`. Pushwoosh fills it in from the recipient's [tag](/product/audience-data-and-segmentation/user-data-tags/tags/) when it serves the pass, in shared and personal fields alike.
* **Insert a placeholder:** click `{ }` next to the field.
* **Add a format and a fallback:** write `{tag|format|fallback}`. If the recipient has no value for the tag, Pushwoosh uses the fallback, or leaves the field blank when the placeholder has none.
How a **Personal** field appears in the **Issue pass** dialog depends on its value. Shared fields never appear there.
* **Just the tag, nothing else, like `{Seat}`:** the field doesn't appear in the **Issue pass** dialog.
* **The tag mixed with other text, like `Seat {Seat}`, or no tag at all:** the field appears as an editable input in the **Issue pass** dialog, prefilled with that value. Any tag inside it still resolves per recipient when Pushwoosh serves the pass.
## Upload campaign images
1. In the **Campaign images** section, click **Choose an image** next to an image slot.
2. Pick an image in one of these ways:
* Select an existing image from your [Media storage](/product/content/media-store/).
* Drag and drop a new PNG or JPEG file to upload it.
* Get one in the **Stock photos** or **Generate with AI** tab.
3. Repeat for each available image slot:
* **Apple Wallet:** Icon, Logo, Background, Footer, Strip, and Thumbnail (see [Apple Wallet images](/product/content/wallet-passes/apple-wallet-pass-builder/#images)). **Icon** is required to create the campaign.
* **Google Wallet:** Logo and Hero image.
For the Apple Wallet **Logo** and **Strip** slots, Pushwoosh crops an image wider than 3:1 to 3:1 automatically, keeping its full height, and uses the crop instead of the original. The crop is saved in Media storage next to the original. If the crop can't be created, the original image is used.
 Images must be under 10 MB. Pushwoosh scales down very large images and rejects images over about 50 megapixels.
You can replace a campaign image at any time, and one edit reaches every issued pass:
* **Apple Wallet:** images of a standalone pass are locked after creation, but campaign images aren't.
* **Google Wallet:** on a standalone pass, you change the logo and hero image one pass at a time via **Edit**.
## Turn on tag sync *(optional)*
To refresh issued passes automatically when a tag behind one of their fields changes, turn on **Update pass fields from tags** in the **Tag sync** section at the top of the page. Tag sync runs only while the campaign is **Active**, and a new campaign is created as **Draft**, so set its status to **Active** after you create it. See [Sync pass fields from tags](/product/messaging-channels/wallet-passes/wallet-pass-campaigns/sync-pass-fields-from-tags/).
## Preview and create the campaign
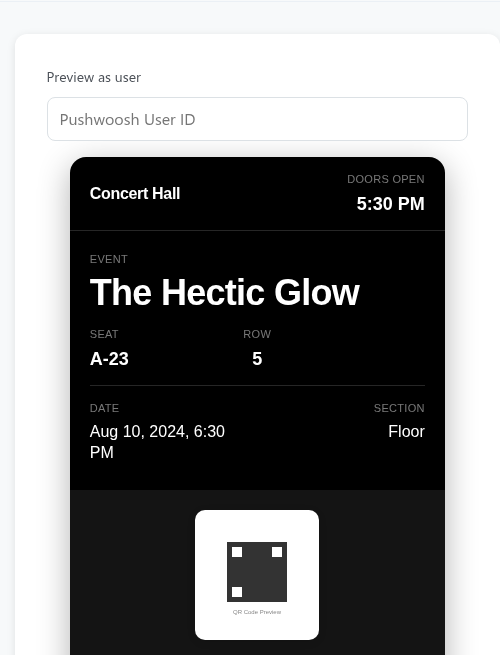
1. Check the preview panel on the right to see how the card looks. For Apple Wallet campaigns, enter a User ID in **Preview as user** to preview personalized fields.
Images must be under 10 MB. Pushwoosh scales down very large images and rejects images over about 50 megapixels.
You can replace a campaign image at any time, and one edit reaches every issued pass:
* **Apple Wallet:** images of a standalone pass are locked after creation, but campaign images aren't.
* **Google Wallet:** on a standalone pass, you change the logo and hero image one pass at a time via **Edit**.
## Turn on tag sync *(optional)*
To refresh issued passes automatically when a tag behind one of their fields changes, turn on **Update pass fields from tags** in the **Tag sync** section at the top of the page. Tag sync runs only while the campaign is **Active**, and a new campaign is created as **Draft**, so set its status to **Active** after you create it. See [Sync pass fields from tags](/product/messaging-channels/wallet-passes/wallet-pass-campaigns/sync-pass-fields-from-tags/).
## Preview and create the campaign
1. Check the preview panel on the right to see how the card looks. For Apple Wallet campaigns, enter a User ID in **Preview as user** to preview personalized fields.
 2. Optionally, click **Validate pass** to check the design against Apple's or Google's requirements. This doesn't create the campaign.
3. Click **Create campaign** at the bottom of the page.
Pushwoosh creates the campaign in **Draft** status and opens its workspace, with **Design**, **Passes**, and **History** tabs.
Creating a campaign only saves the pass design and doesn't send passes to users. To distribute passes, go to [Issue passes from a campaign](/product/messaging-channels/wallet-passes/wallet-pass-campaigns/issue-passes/).
2. Optionally, click **Validate pass** to check the design against Apple's or Google's requirements. This doesn't create the campaign.
3. Click **Create campaign** at the bottom of the page.
Pushwoosh creates the campaign in **Draft** status and opens its workspace, with **Design**, **Passes**, and **History** tabs.
Creating a campaign only saves the pass design and doesn't send passes to users. To distribute passes, go to [Issue passes from a campaign](/product/messaging-channels/wallet-passes/wallet-pass-campaigns/issue-passes/).