# Mobile message inbox
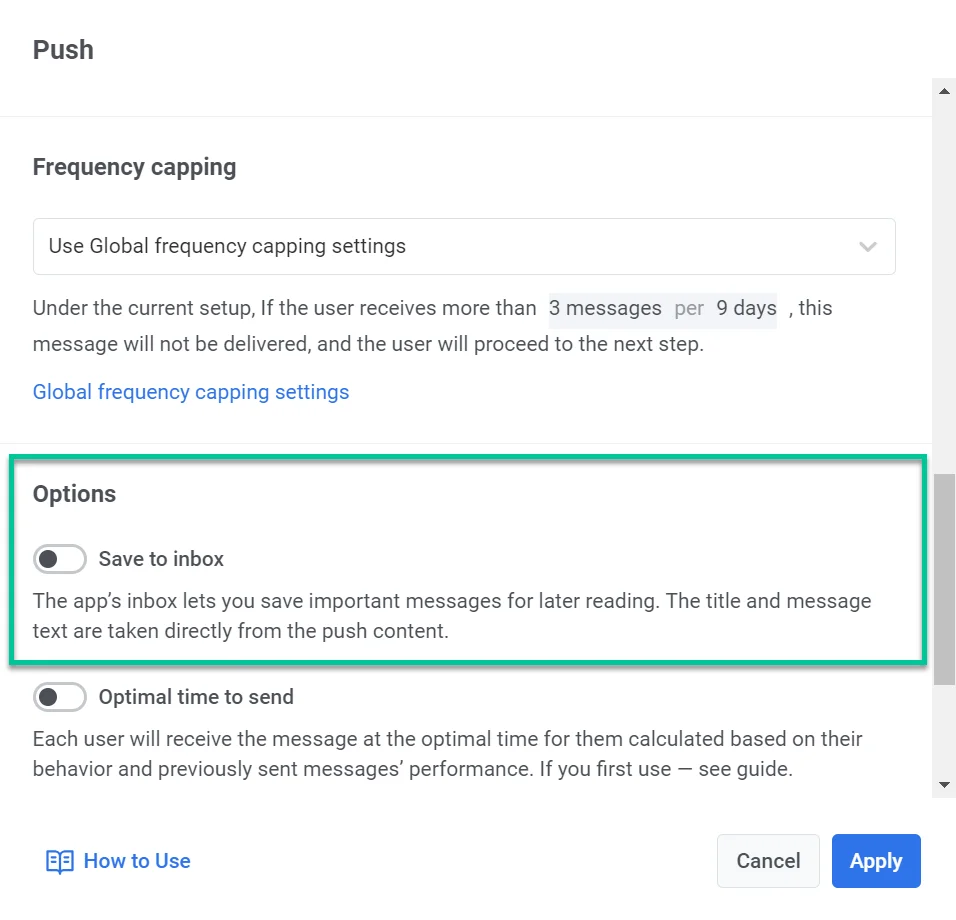
The **Save to inbox** option in [Pushwoosh Customer Journey](/product/customer-journey/pushwoosh-journey-overview) allows you to store push notifications in the app’s inbox, giving users the ability to access and review important messages at their convenience. This ensures that push notifications are not lost and can be revisited later, providing enhanced flexibility and user engagement.
## Setting up the inbox in your app
## Choosing which messages to save to Inbox
Any push notification can be saved to the Inbox. To enable this feature for a notification in a [customer journey](/product/customer-journey/pushwoosh-journey-overview), toggle the **Save to inbox** option in the [Push notification element](/product/customer-journey/journey-elements#push) you've added to the journey.
### Control how long messages stay in your inbox
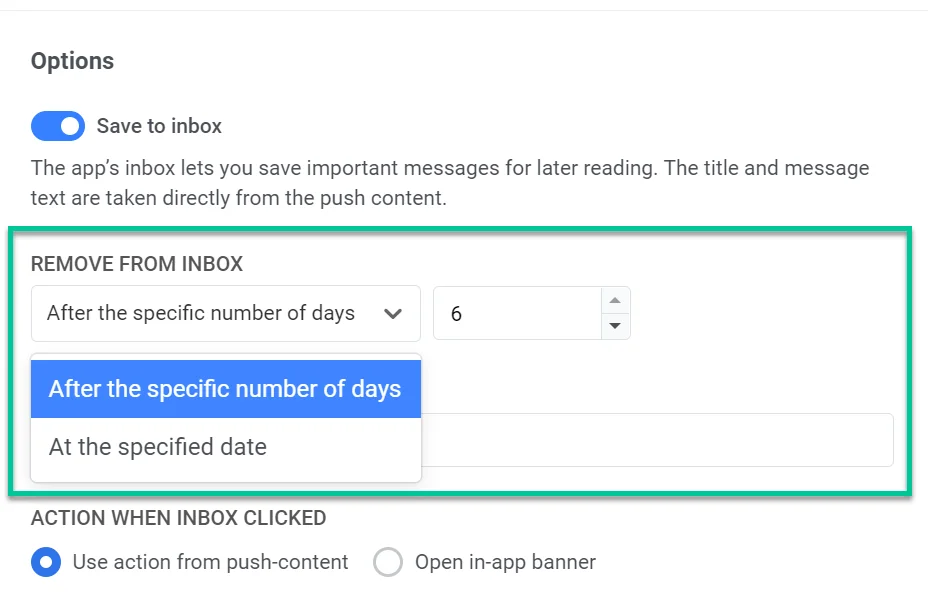
To ensure your inbox remains organized and relevant, set a specific retention period for messages. In the **Remove from Inbox** dropdown, choose one of the following options:
- Set a specific number of days a message should stay in your inbox before it's automatically removed. For example, you could set it to 3 days.
- Select an exact date when the message will be deleted from your inbox.
**Please note:** The maximum retention period for messages in the inbox is six days. If you need to extend this limit, please contact our support team.
### Customize the message icon
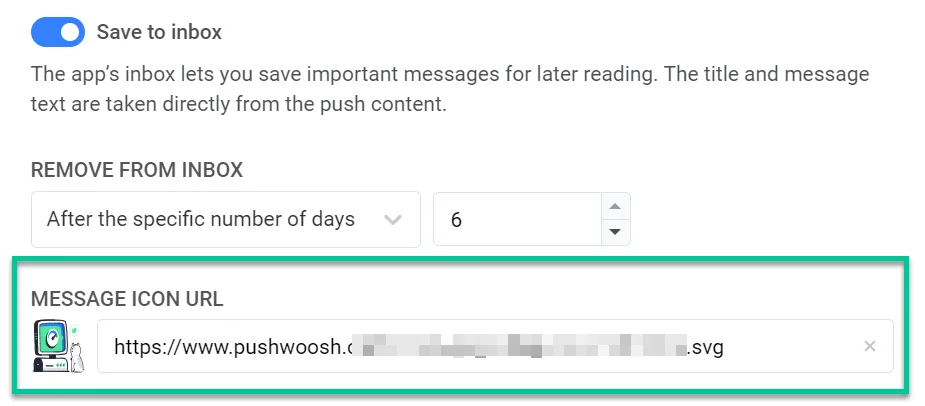
You have the option to customize the appearance of the stored notification by specifying an icon URL. This icon will be displayed next to the message in the inbox, serving as a visual identifier for the notification.
If no icon URL is provided, a default icon will be displayed alongside the message.
### Configure action when Inbox message is clicked
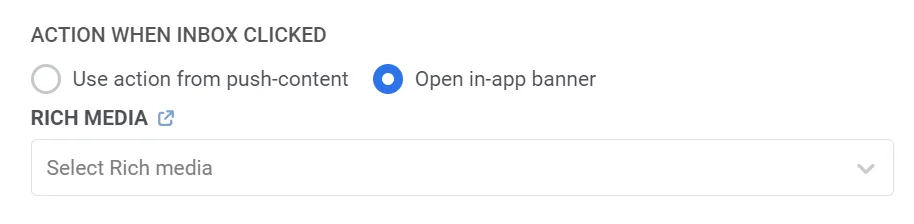
Determine what happens when a user clicks on a notification stored in the inbox. You have two options:
- **Use the action you set in the push content.** This means that the default behavior of the original push notification will be applied, such as redirecting the user to a specific URL or opening a designated screen in the app. Learn more
- **Open in-app banner.** When this option is selected, clicking on the notification will open an [in-app banner](/product/messaging-channels/in-apps), allowing for further interaction with the content directly within the app. If you choose this option, select the [Rich media](/product/content/in-apps) to display from the provided dropdown list. Please note that you need to create this rich media content in advance. [Learn more about creating Rich media](/product/content/in-apps/no-code-in-app-editor/create-rich-media-in-the-built-in-editor)
After configuring the **Save to inbox** feature and other notification settings, remember to click **Apply** to save the changes. You can then proceed with [configuring the rest of your customer journey](/product/customer-journey/journey-elements).
### Example scenario: Using Save to inbox for a promotional campaign
Suppose you manage a retail app and want to engage loyal customers with a time-sensitive 20% discount on summer items. To ensure that users can easily access the promotion, even if they don't immediately act on the push notification, you can use the **Save to Inbox** feature to store promotional messages in the app’s inbox, allowing users to revisit the offer at their convenience.
Here’s how you can do it step by step:
1. Start by [creating a customer journey](/product/customer-journey/create-a-customer-journey-for-your-project) specifically for a [segment of loyal customers](/product/audience-data-and-segmentation/segmentation/) who have previously shown interest in summer products or participated in past promotions. For this add the [Audience-based entry element](/product/customer-journey/journey-elements/#audience-based-entry) to the journey canvas and select the RFM loyal customers segment.
2. Add a [push notification element](/product/customer-journey/journey-elements#push) to the journey canvas and [create the push notification content](/product/content/push-presets). For example,
**Title**: *20% OFF All Summer Items – Limited Time Only!*
**Message**: *Exclusive offer for our loyal customers! Shop now and save 20% on all summer styles. Offer ends in 4 days. Tap to grab your discount!*
3. In the **Push Content Form**, enable the **Save to Inbox** option. Since the promotion is valid for only 4 days, configure the **Remove from Inbox** option to delete the message after 4 days.
4. Add a custom **icon URL** (e.g., your store's logo) to ensure the message is visually identifiable in the inbox and reinforces your brand.
5. Under the **Action when inbox clicked** option, select **Open in-app banner** and choose the **Rich media** to display. Note that you need to create this rich media content in advance. For example, in this rich media content, you can include the **promo code** that your users can apply during checkout.
After configuring the **Save to Inbox** feature and other notification settings, click **Apply** to save the changes. Then proceed with configuring the rest of your customer journey. [Learn more](/product/customer-journey/journey-elements)
## Track inbox message statistics
To view your inbox message statistics, click on the message you want to track on the journey canvas, then select **Full statistics**.
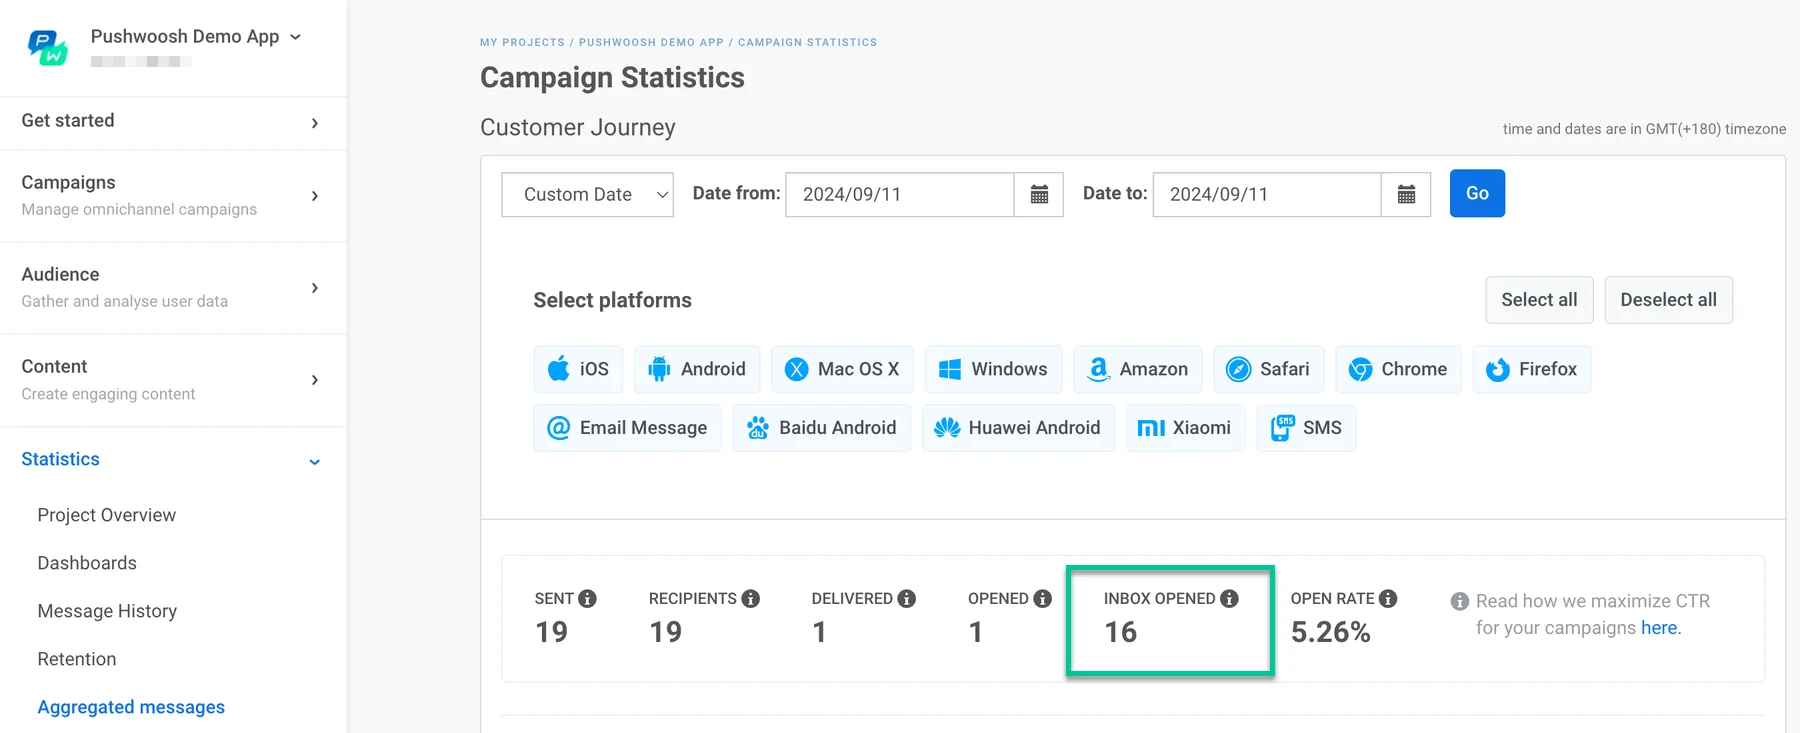
In the window that opens, choose the date range you want to review and locate the **Inbox opened** section, which shows how many times the messages saved to the inbox were opened by users.
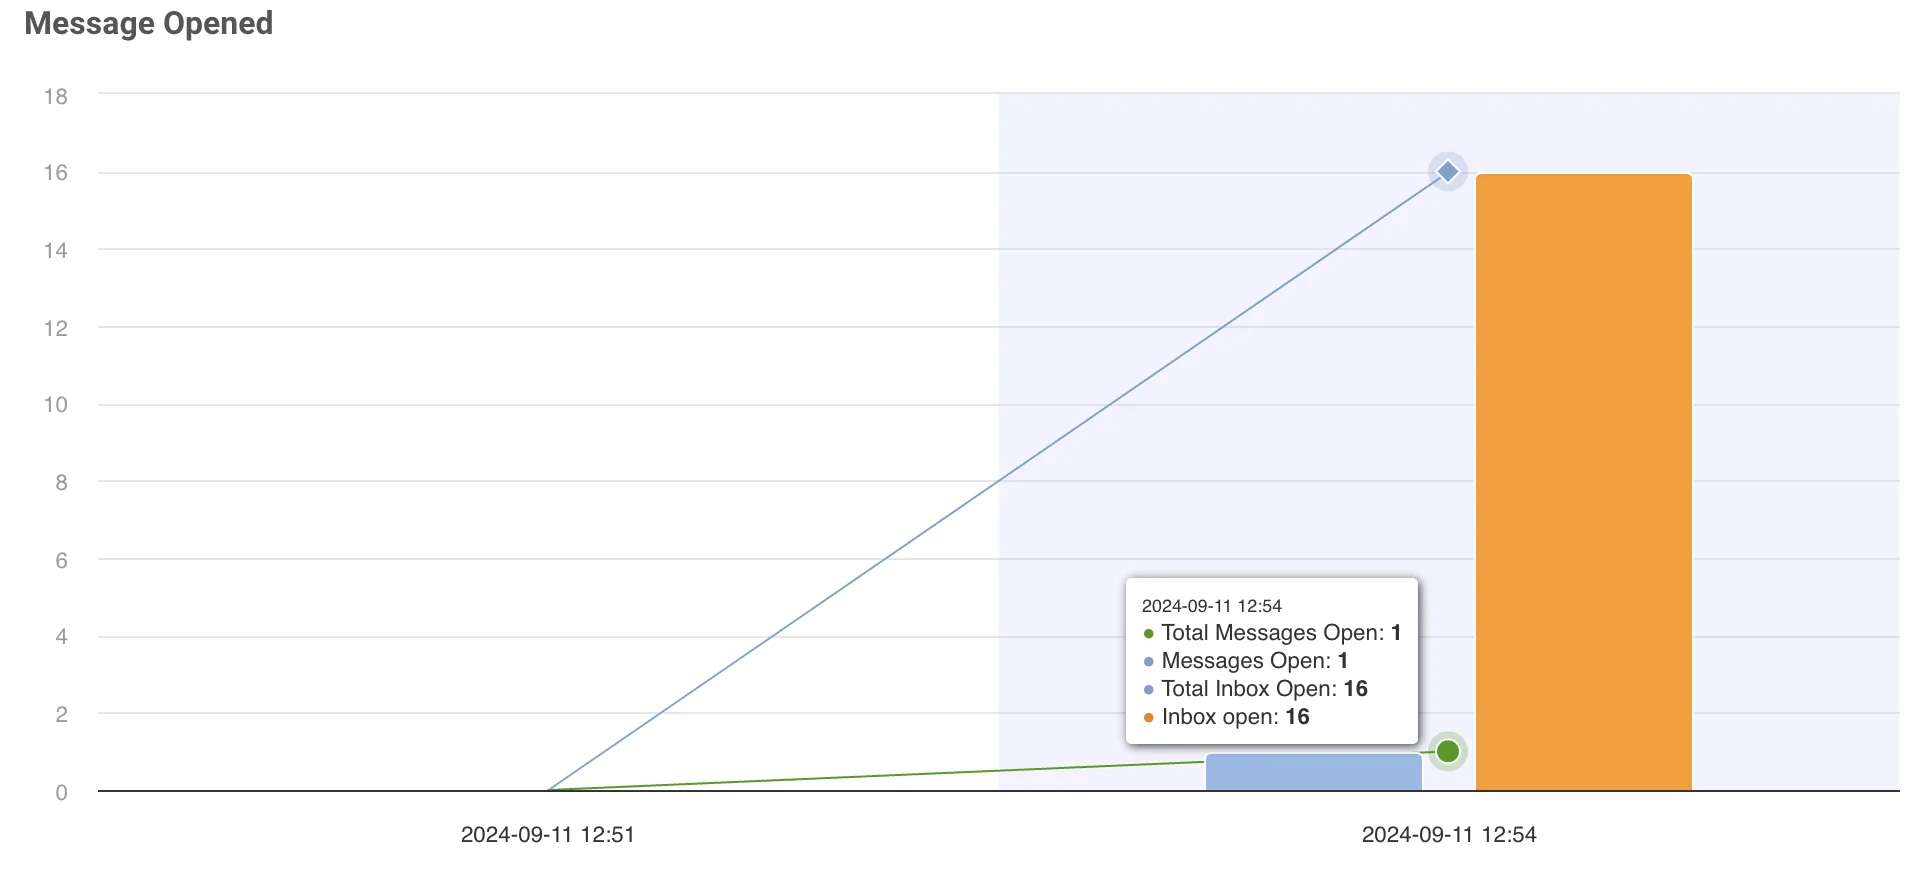
The graph at the bottom visualizes how the messages were opened, including the number of inbox opens.
To see what a specific user currently has in their inbox — rather than aggregated statistics — open [User Explorer → Inbox](/product/audience-data-and-segmentation/user-explorer/#inbox-tab).
 ### Control how long messages stay in your inbox
To ensure your inbox remains organized and relevant, set a specific retention period for messages. In the **Remove from Inbox** dropdown, choose one of the following options:
- Set a specific number of days a message should stay in your inbox before it's automatically removed. For example, you could set it to 3 days.
- Select an exact date when the message will be deleted from your inbox.
**Please note:** The maximum retention period for messages in the inbox is six days. If you need to extend this limit, please contact our support team.
### Control how long messages stay in your inbox
To ensure your inbox remains organized and relevant, set a specific retention period for messages. In the **Remove from Inbox** dropdown, choose one of the following options:
- Set a specific number of days a message should stay in your inbox before it's automatically removed. For example, you could set it to 3 days.
- Select an exact date when the message will be deleted from your inbox.
**Please note:** The maximum retention period for messages in the inbox is six days. If you need to extend this limit, please contact our support team.
 ### Customize the message icon
You have the option to customize the appearance of the stored notification by specifying an icon URL. This icon will be displayed next to the message in the inbox, serving as a visual identifier for the notification.
### Customize the message icon
You have the option to customize the appearance of the stored notification by specifying an icon URL. This icon will be displayed next to the message in the inbox, serving as a visual identifier for the notification.
 If no icon URL is provided, a default icon will be displayed alongside the message.
### Configure action when Inbox message is clicked
Determine what happens when a user clicks on a notification stored in the inbox. You have two options:
- **Use the action you set in the push content.** This means that the default behavior of the original push notification will be applied, such as redirecting the user to a specific URL or opening a designated screen in the app. Learn more
- **Open in-app banner.** When this option is selected, clicking on the notification will open an [in-app banner](/product/messaging-channels/in-apps), allowing for further interaction with the content directly within the app. If you choose this option, select the [Rich media](/product/content/in-apps) to display from the provided dropdown list. Please note that you need to create this rich media content in advance. [Learn more about creating Rich media](/product/content/in-apps/no-code-in-app-editor/create-rich-media-in-the-built-in-editor)
If no icon URL is provided, a default icon will be displayed alongside the message.
### Configure action when Inbox message is clicked
Determine what happens when a user clicks on a notification stored in the inbox. You have two options:
- **Use the action you set in the push content.** This means that the default behavior of the original push notification will be applied, such as redirecting the user to a specific URL or opening a designated screen in the app. Learn more
- **Open in-app banner.** When this option is selected, clicking on the notification will open an [in-app banner](/product/messaging-channels/in-apps), allowing for further interaction with the content directly within the app. If you choose this option, select the [Rich media](/product/content/in-apps) to display from the provided dropdown list. Please note that you need to create this rich media content in advance. [Learn more about creating Rich media](/product/content/in-apps/no-code-in-app-editor/create-rich-media-in-the-built-in-editor)
 After configuring the **Save to inbox** feature and other notification settings, remember to click **Apply** to save the changes. You can then proceed with [configuring the rest of your customer journey](/product/customer-journey/journey-elements).
### Example scenario: Using Save to inbox for a promotional campaign
Suppose you manage a retail app and want to engage loyal customers with a time-sensitive 20% discount on summer items. To ensure that users can easily access the promotion, even if they don't immediately act on the push notification, you can use the **Save to Inbox** feature to store promotional messages in the app’s inbox, allowing users to revisit the offer at their convenience.
Here’s how you can do it step by step:
1. Start by [creating a customer journey](/product/customer-journey/create-a-customer-journey-for-your-project) specifically for a [segment of loyal customers](/product/audience-data-and-segmentation/segmentation/) who have previously shown interest in summer products or participated in past promotions. For this add the [Audience-based entry element](/product/customer-journey/journey-elements/#audience-based-entry) to the journey canvas and select the RFM loyal customers segment.
2. Add a [push notification element](/product/customer-journey/journey-elements#push) to the journey canvas and [create the push notification content](/product/content/push-presets). For example,
**Title**: *20% OFF All Summer Items – Limited Time Only!*
**Message**: *Exclusive offer for our loyal customers! Shop now and save 20% on all summer styles. Offer ends in 4 days. Tap to grab your discount!*
After configuring the **Save to inbox** feature and other notification settings, remember to click **Apply** to save the changes. You can then proceed with [configuring the rest of your customer journey](/product/customer-journey/journey-elements).
### Example scenario: Using Save to inbox for a promotional campaign
Suppose you manage a retail app and want to engage loyal customers with a time-sensitive 20% discount on summer items. To ensure that users can easily access the promotion, even if they don't immediately act on the push notification, you can use the **Save to Inbox** feature to store promotional messages in the app’s inbox, allowing users to revisit the offer at their convenience.
Here’s how you can do it step by step:
1. Start by [creating a customer journey](/product/customer-journey/create-a-customer-journey-for-your-project) specifically for a [segment of loyal customers](/product/audience-data-and-segmentation/segmentation/) who have previously shown interest in summer products or participated in past promotions. For this add the [Audience-based entry element](/product/customer-journey/journey-elements/#audience-based-entry) to the journey canvas and select the RFM loyal customers segment.
2. Add a [push notification element](/product/customer-journey/journey-elements#push) to the journey canvas and [create the push notification content](/product/content/push-presets). For example,
**Title**: *20% OFF All Summer Items – Limited Time Only!*
**Message**: *Exclusive offer for our loyal customers! Shop now and save 20% on all summer styles. Offer ends in 4 days. Tap to grab your discount!*
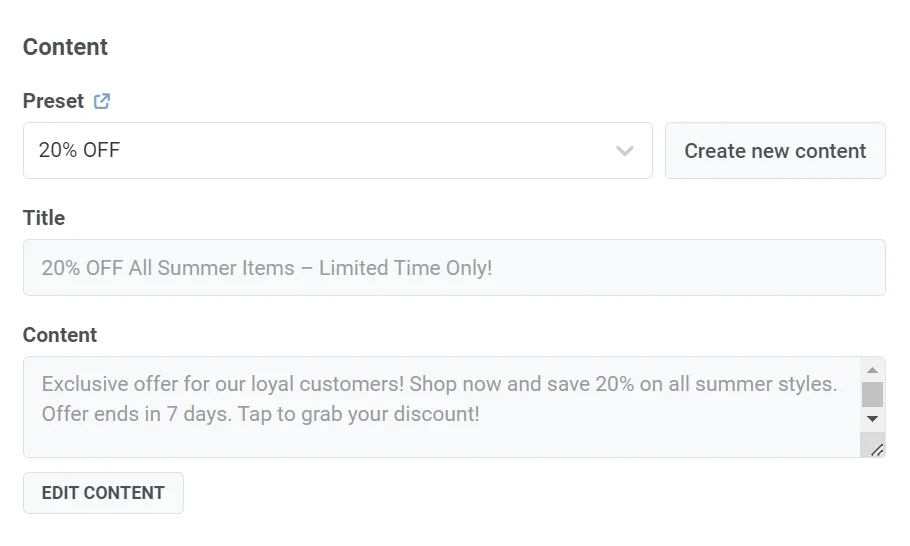 3. In the **Push Content Form**, enable the **Save to Inbox** option. Since the promotion is valid for only 4 days, configure the **Remove from Inbox** option to delete the message after 4 days.
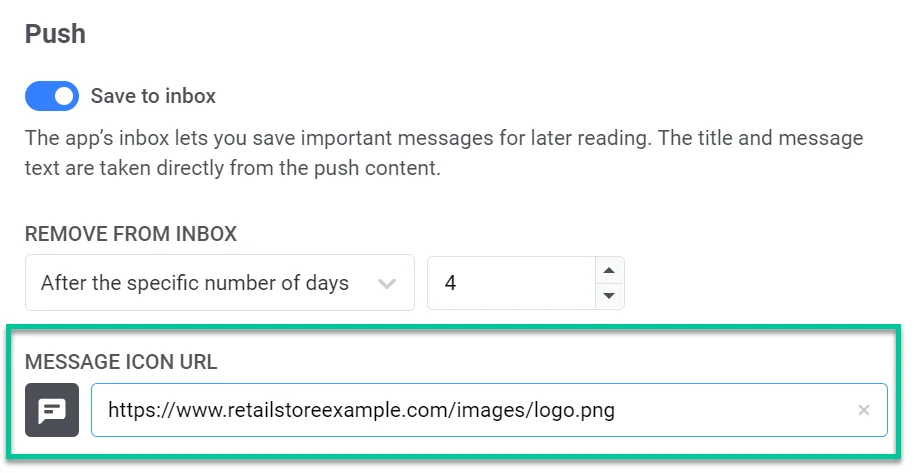
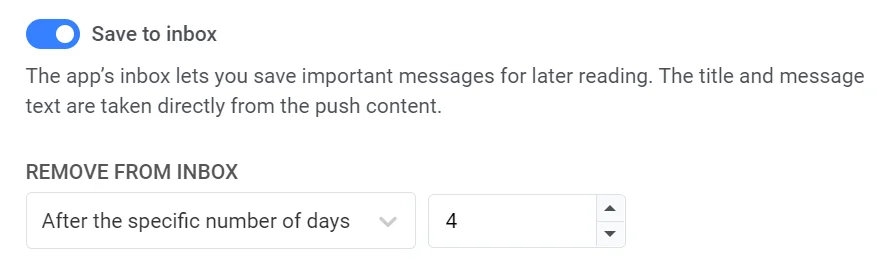 4. Add a custom **icon URL** (e.g., your store's logo) to ensure the message is visually identifiable in the inbox and reinforces your brand.
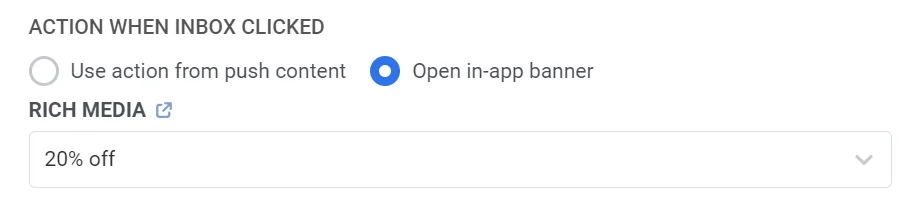
 5. Under the **Action when inbox clicked** option, select **Open in-app banner** and choose the **Rich media** to display. Note that you need to create this rich media content in advance. For example, in this rich media content, you can include the **promo code** that your users can apply during checkout.
 After configuring the **Save to Inbox** feature and other notification settings, click **Apply** to save the changes. Then proceed with configuring the rest of your customer journey. [Learn more](/product/customer-journey/journey-elements)
## Track inbox message statistics
To view your inbox message statistics, click on the message you want to track on the journey canvas, then select **Full statistics**.
In the window that opens, choose the date range you want to review and locate the **Inbox opened** section, which shows how many times the messages saved to the inbox were opened by users.
After configuring the **Save to Inbox** feature and other notification settings, click **Apply** to save the changes. Then proceed with configuring the rest of your customer journey. [Learn more](/product/customer-journey/journey-elements)
## Track inbox message statistics
To view your inbox message statistics, click on the message you want to track on the journey canvas, then select **Full statistics**.
In the window that opens, choose the date range you want to review and locate the **Inbox opened** section, which shows how many times the messages saved to the inbox were opened by users.
 The graph at the bottom visualizes how the messages were opened, including the number of inbox opens.
 To see what a specific user currently has in their inbox — rather than aggregated statistics — open [User Explorer → Inbox](/product/audience-data-and-segmentation/user-explorer/#inbox-tab).