# WooCommerce integration
The Pushwoosh for WooCommerce plugin connects your WordPress store to Pushwoosh. Customers become email and SMS contacts, orders and abandoned carts become events you can start Customer Journeys from, and your storefront gets web push with a subscribe bell.
## Integration overview
[WooCommerce](https://woocommerce.com/) is an open-source e-commerce plugin for WordPress. The [Pushwoosh for WooCommerce](https://wordpress.org/plugins/pushwoosh-for-woocommerce/) plugin sends your store data to Pushwoosh directly through the Pushwoosh API. All calls run in the background through WooCommerce's Action Scheduler, so they don't slow down checkout.
### Integration type
**Destination**: This integration pushes data from your WooCommerce store to Pushwoosh.
### Prerequisites
* WordPress 6.4 or later, WooCommerce 8.2 or later, and PHP 8.1 or later
* Administrator access to your WordPress site
* A Pushwoosh account with an application for your store
* An HTTPS site address, if you want web push. Browsers only register web push on HTTPS sites.
The plugin works with High-Performance Order Storage (HPOS) and with both the classic and the block-based Cart and Checkout pages.
### What the plugin syncs
The table shows what each WooCommerce entity becomes in Pushwoosh:
| WooCommerce | Pushwoosh |
| :---- | :---- |
| Customer, or guest buyer | User with an email contact, plus an SMS contact if the phone number is a valid mobile number |
| Customer name, consent, and mapped fields | Tags |
| Order created, updated, or canceled | `PW_OrderCreated`, `PW_OrderUpdated`, `PW_OrderCanceled` events |
| Abandoned cart | `PW_AbandonedCart` and `PW_AbandonedCartUpdate` events with a link that restores the cart |
| Storefront visitor who allows notifications | Web push subscriber linked to the customer's email |
The user ID in Pushwoosh is the customer's email address in lowercase: the account email for registered customers, the billing email for guests. Contacts, events, and web push subscribers of one customer all land on the same user.
### Use cases
* Send an email or push when a shopper leaves items in the cart, with a button that restores that cart.
* Thank buyers after an order, follow up when an order ships, or win back customers after a cancellation.
* Segment customers by city, country, or any customer field you map to a tag.
* Send web push promotions to storefront visitors who subscribed through the bell.
## Prepare your Pushwoosh application
Do these steps before you turn on the plugin. If the plugin sends an event that doesn't exist yet, Pushwoosh creates it automatically and guesses attribute types from the first values it receives. A guessed type can be wrong (for example, a price saved as an integer), and data sent before you fix the type is lost.
### Create API tokens
The plugin uses two [Device API tokens](/developer/api-reference/api-access-token/#device-api-token). Create both in **Settings → API Access** and give them access to your application:
1. Create a Device API token for the server. The plugin uses it to register contacts and send events. It never leaves your server.
2. Create a second Device API token for the storefront. The plugin prints it into every storefront page to start web push, so it's public. A separate token lets you replace it without touching the server token.
A [Server API token](/developer/api-reference/api-access-token/#server-api-token) is optional. With it, the plugin settings show the list of tags in your application, which helps when you map customer fields to tags.
### Create the events
Create five custom events in **Audience → Events → Create Event → Custom Event**: `PW_OrderCreated`, `PW_OrderUpdated`, `PW_OrderCanceled`, `PW_AbandonedCart`, and `PW_AbandonedCartUpdate`. [Learn how to create custom events](/product/audience-data-and-segmentation/events/custom-events/#creating-custom-events).
Give each event the attributes it receives, with these types:
| Attribute | Type | Events |
| :---- | :---- | :---- |
| `orderId` | integer | Order events |
| `orderId` | string | Cart events |
| `source` | integer | All |
| `orderNumber`, `status`, `wcStatus` | string | Order events |
| `email`, `customerId`, `shippingMethod`, `currency` | string | All |
| `orderUrl` | string | Cart events |
| `totalPrice`, `shippingAmount`, `discountAmount` | decimal (price) | All |
| `taxAmount` | decimal (price) | Order events |
| `createdDate` | date | All |
| `updatedDate` | date | Order events |
| `abandonedDate` | date | Cart events |
| `items` | list | All |
| `historical` | boolean | Order events |
### Create the tags
Create these tags on the [Tags](/product/audience-data-and-segmentation/user-data-tags/tags/#how-to-set-up-a-custom-tag) page:
| Tag | Type |
| :---- | :---- |
| `firstName` | string |
| `lastName` | string |
| `acceptsMarketing` | integer |
Also create a tag for every customer field you plan to map, as described in [Map customer fields to tags](#map-customer-fields-to-tags). The default mapping uses the `City` and `Country` tags.
### Configure web push
To use web push, set up the Web platform for your application. See [Web push configuration](/developer/first-steps/connect-messaging-services/web-push-configuration/).
## Install the plugin
1. In your WordPress admin panel, go to **Plugins → Add New Plugin**.
2. Search for **Pushwoosh for WooCommerce**.
3. Click **Install Now**.
4. Click **Activate**. WooCommerce must already be active.
You can also download the plugin zip from [wordpress.org](https://wordpress.org/plugins/pushwoosh-for-woocommerce/) and upload it in **Plugins → Add New Plugin → Upload Plugin**.
## Connect the plugin to Pushwoosh
Go to **WooCommerce → Settings → Pushwoosh** and fill in the **Connection** section:
1. Leave **API URL** as `https://api.pushwoosh.com` unless Pushwoosh support gave you a different address.
2. In **Application code**, enter your [application code](/developer/api-reference/api-identifiers/#application-code).
3. In **Device API token**, paste the server token you created.
4. In **Web SDK token**, paste the storefront token.
5. Optionally, in **Server API token (optional)**, paste a Server API token.
6. Click **Save changes**.
7. Click **Check connection**.
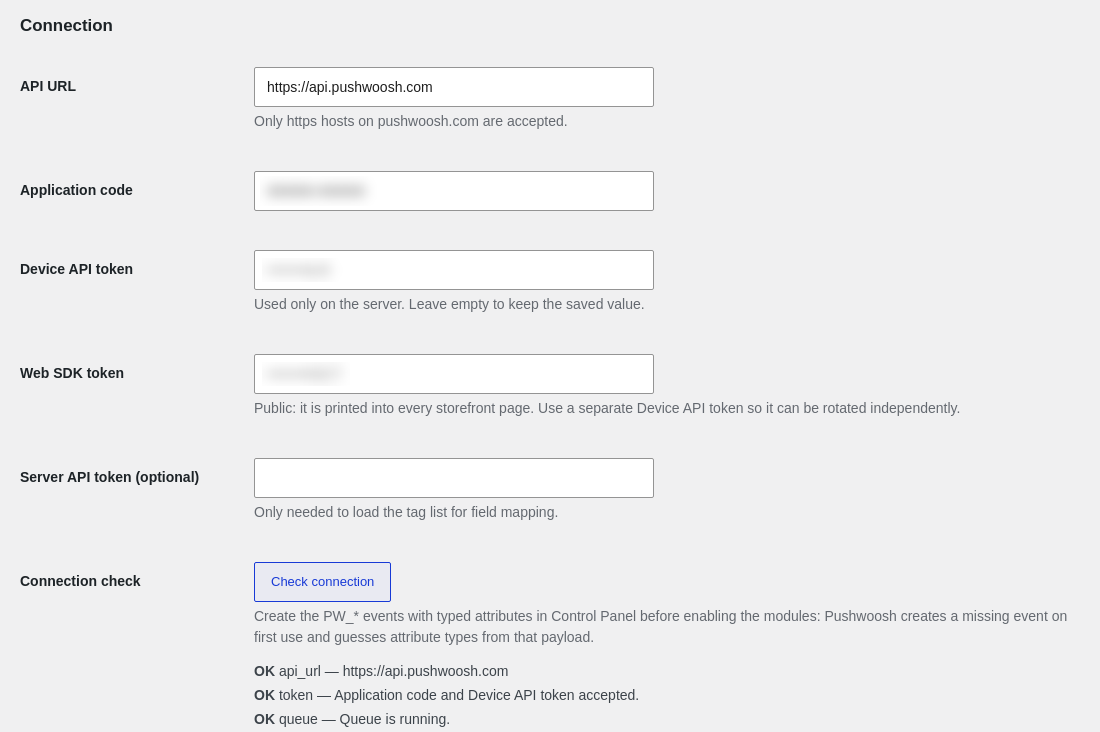
**Check connection** verifies the API URL, the application code and token, the send queue, and the web push service worker. It doesn't send test events, because a test event would create the events with empty attributes. If the check says the token couldn't be verified, your application accepts any Device API token. Ask Pushwoosh support to turn on Device API token checking for the application.
Saved tokens are shown masked. To keep a saved token, leave its field empty when you save the settings.
## Turn on the modules
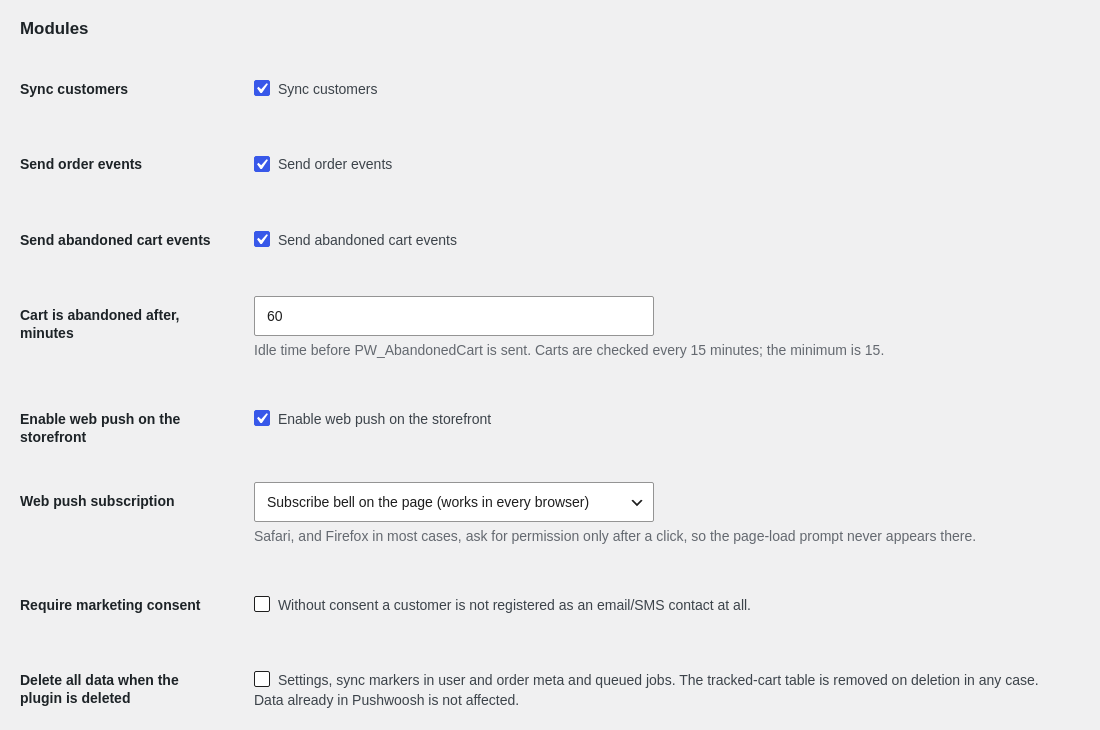
In the **Modules** section, turn on the data you want to send, then click **Save changes**:
* **Sync customers:** registers customers as contacts in Pushwoosh when they sign up and every time their profile is saved.
* **Send order events:** sends order events. Only orders created after you turn this on get `PW_OrderCreated`. To send past orders, see [Import existing customers and orders](#import-existing-customers-and-orders).
* **Send abandoned cart events:** sends cart events. Set **Cart is abandoned after, minutes** to how long a cart must stay untouched before `PW_AbandonedCart` is sent. The default is 60, the minimum is 15.
* **Enable web push on the storefront:** loads web push on every storefront page. See [Set up web push](#set-up-web-push).
* **Require marketing consent:** sends nothing for customers who didn't agree to marketing. See [Collect marketing consent](#collect-marketing-consent).
* **Delete all data when the plugin is deleted:** when you delete the plugin, also removes its settings, its data in user and order records, and queued jobs. Data already in Pushwoosh stays.
### Map customer fields to tags
In the **Customer tags** section, use **Field → tag mapping** to send more customer data as tags. Write one `source = Tag` pair per line:
```
billing_city = City
billing_country = Country
shipping_postcode = Postcode
meta:loyalty_level = Loyalty level
```
* **Source** is a customer field, such as `billing_city` or `shipping_postcode`, or `meta:` followed by a user or order meta key.
* **Tag** is the name of a tag that already exists in your Pushwoosh application.
`firstName`, `lastName`, and `acceptsMarketing` are always sent, so you don't need to map them. With a Server API token saved, the section lists the tags that exist in your application, and it shows any mapping lines it ignored.
### Collect marketing consent
The plugin adds the checkbox **I agree to receive news and offers by email and SMS** to the registration form and to both the classic and the block-based checkout. The answer is stored on the customer and the order, and sent as the `acceptsMarketing` tag (`1` or `0`). A customer who already agreed doesn't see the checkbox again, and an unticked box on a later order doesn't withdraw an earlier agreement.
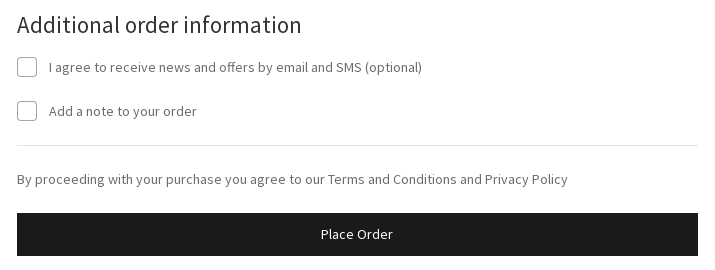
What **Require marketing consent** changes:
* **Off (default):** every customer is registered as a contact, and `acceptsMarketing` tells you who agreed. Use it to filter your audience in segments.
* **On:** customers without consent get no email or SMS contact, their orders send no events, and their carts send no cart events.
When you turn the option on, existing contacts aren't removed right away. A registered customer synced earlier without consent is deleted from Pushwoosh the next time their profile is saved, or when you run the customer import again. Guest contacts aren't deleted.
The block-based checkout shows the checkbox on WooCommerce 8.9 and later. On earlier versions with **Require marketing consent** on, carts from that checkout send no events.
## Events and tags the plugin sends
This section lists every event and tag the plugin sends, so you can build segments and journeys on them.
### Contacts and tags
The plugin registers each customer as an email contact and, when the billing phone is a valid mobile number, as an SMS contact. The contact's language is the store language the customer used when they registered or checked out. Each contact gets these tags:
| Tag | Value |
| :---- | :---- |
| `firstName` | Billing first name, or the account first name if billing is empty |
| `lastName` | Billing last name, or the account last name if billing is empty |
| `acceptsMarketing` | `1` if the customer agreed to marketing, otherwise `0` |
| Mapped tags | Values of the fields in your [field mapping](#map-customer-fields-to-tags) |
Registered customers are synced when they sign up and each time their profile is saved. With **Sync customers** on, guest buyers are registered from their order. A guest who abandons a cart is registered right before the cart event, so the event has a user to land on. When a customer changes their account email, the plugin deletes the old user in Pushwoosh and registers the new one.
Pushwoosh rejects some contacts and the plugin doesn't retry them: emails on invalid or disposable domains and phone numbers that aren't mobile. These are logged as described in [Check that the integration works](#check-that-the-integration-works).
### Order events
The plugin sends one event each time an order changes status:
| Event | When it's sent |
| :---- | :---- |
| `PW_OrderCreated` | The first time an order created after you turned on **Send order events** is synced, in whatever status it has then |
| `PW_OrderUpdated` | Every later status change except cancellation. Also the first event of an order created before you turned on **Send order events**. |
| `PW_OrderCanceled` | The order moves to **Cancelled** |
Draft and failed orders send no events.
The `status` attribute uses the same values as the Magento integration, so journeys built for Magento work without changes. The original WooCommerce status is in `wcStatus`:
| WooCommerce status | `status` |
| :---- | :---- |
| Pending payment, On hold | `pending` |
| Processing | `processing` |
| Completed | `complete` |
| Refunded | `closed` |
| Cancelled | `canceled` |
| Custom status | The status slug as is |
Every order event carries these attributes:
| Attribute | Value |
| :---- | :---- |
| `orderId` | Order ID |
| `orderNumber` | Order number shown to the customer |
| `source` | Always `1` |
| `email` | Billing email |
| `customerId` | The user ID: account email, or billing email for guests |
| `items` | Ordered products, see below |
| `createdDate`, `updatedDate` | Date the order was created and last changed, in the store time zone |
| `shippingMethod` | Name of the first shipping method |
| `totalPrice` | Order total |
| `shippingAmount`, `taxAmount`, `discountAmount` | Shipping, tax, and discount totals |
| `currency` | Order currency code |
| `status`, `wcStatus` | Order status, see the table above |
| `historical` | `true` for past orders sent by the import, otherwise `false` |
Each entry in `items` has `productId`, `sku`, `name`, `description` (short description), `price` (unit price without tax), `quantity`, `imageUrl`, `productUrl`, and `category` (category names separated by commas).
Example `PW_OrderCreated` attributes:
```json
{
"orderId": 1042,
"orderNumber": "1042",
"source": 1,
"email": "jane@example.com",
"customerId": "jane@example.com",
"items": [
{
"productId": 17,
"sku": "TSHIRT-M",
"name": "T-shirt",
"description": "Cotton T-shirt",
"price": 20.0,
"quantity": 2,
"imageUrl": "https://shop.example.com/wp-content/uploads/tshirt.jpg",
"productUrl": "https://shop.example.com/product/t-shirt/",
"category": "Clothing, T-shirts"
}
],
"createdDate": "2026-09-30T12:00:00+02:00",
"updatedDate": "2026-09-30T12:00:00+02:00",
"shippingMethod": "Flat rate",
"totalPrice": 47.6,
"shippingAmount": 5.0,
"taxAmount": 7.6,
"discountAmount": 5.0,
"currency": "EUR",
"status": "pending",
"wcStatus": "on-hold",
"historical": false
}
```
### Abandoned cart events
A cart counts as abandoned when it has an email, stays untouched longer than **Cart is abandoned after, minutes**, and no order is placed from it:
| Event | When it's sent |
| :---- | :---- |
| `PW_AbandonedCart` | The first time a cart is abandoned |
| `PW_AbandonedCartUpdate` | The same cart changed after `PW_AbandonedCart` and is abandoned again |
The plugin checks carts every 15 minutes, so the event normally arrives within 15 minutes after the threshold. If the shopper places an order from the same session or with the same billing email before that, the cart is closed and no event is sent. A closed cart that the shopper fills again starts over with `PW_AbandonedCart`.
The plugin needs the shopper's email to send a cart event:
* **Logged-in shopper:** the account email.
* **Guest:** the email typed into the billing email field at checkout, even if the order is never placed.
Cart event attributes are `orderId` (cart ID), `source`, `email`, `customerId`, `items`, `createdDate`, `abandonedDate` (when the cart last changed), `shippingMethod`, `totalPrice`, `shippingAmount`, `discountAmount`, `currency`, and `orderUrl`. In cart events, item prices include tax.
#### Cart recovery link
`orderUrl` is a link that restores the shopper's cart. Use it as the button link in your reminder:
* Opening the link puts the saved items in the cart and takes the shopper to checkout. It works in any browser, including one where the shopper never visited your store.
* The link doesn't log anyone in.
* The link is valid for 14 days. After an order is placed from the cart, or after the cart is deleted, the link opens the visitor's ordinary cart page instead.
Recovery links stop working when you delete the plugin, even if you install it again, because the key that signs them is deleted with the plugin.
## Build an abandoned cart journey
This example sends an email with the cart items and a button that restores the cart. It needs both **Send abandoned cart events** and **Send order events** turned on, so the journey can tell when the shopper bought.
### Create the email
1. Create an email in the [email content editor](/product/content/email-content/).
2. Add the cart contents with Liquid. The placeholders take their values from the `PW_AbandonedCart` event that starts the journey:
```liquid
Your cart total is {{ totalPrice }} {{ currency }}.
```
3. Add a button and set its link to `{{ orderUrl }}`.
4. Save the email.
### Build the journey
1. Add a [Trigger-based entry](/product/customer-journey/journey-elements/entry-elements/trigger-based-entry/) with the `PW_AbandonedCart` event.
2. Add a [Wait for Trigger](/product/customer-journey/journey-elements/flow-controls/wait-for-trigger/) step.
3. Set its waiting period, for example to 1 hour.
4. In **Wait for Trigger**, name the branch **Order placed**.
5. Add the `PW_OrderCreated` event to the **Order placed** branch.
6. End the **Order placed** branch with an [Exit](/product/customer-journey/journey-elements/flow-controls/exit/) element or by leaving it without an outgoing connection. The shopper already bought.
7. Route the **Not triggered** branch to an [Email](/product/customer-journey/journey-elements/channels/email/) step.
8. In the Email step, select the email you [created](#create-the-email).
9. In the Email step, turn on **Overwrite Liquid placeholders** and select the `PW_AbandonedCart` event.
10. End the branch after the Email step with an **Exit** element or by leaving it without an outgoing connection.
11. Launch the journey.
The plugin already waits for **Cart is abandoned after, minutes** before it sends `PW_AbandonedCart`. The waiting period in **Wait for Trigger** adds to that time, so keep it short.
To remind the shopper with a push instead, use a [Push](/product/customer-journey/journey-elements/channels/push/) step and turn on **Personalize message with event attributes** to insert `orderUrl` or `totalPrice`. See [Dynamic Content and Liquid Templates in journeys](/product/customer-journey/journey-elements/dynamic-content-and-liquid-templates-in-journeys/).
## Set up web push
With web push turned on, every storefront page loads the Pushwoosh Web SDK, and visitors can subscribe to notifications from your store.
1. Make sure the Web platform is configured in your application, as described in [Configure web push](#configure-web-push).
2. In **WooCommerce → Settings → Pushwoosh**, fill in **Web SDK token**.
3. Turn on **Enable web push on the storefront**.
4. In **Web push subscription**, choose how visitors are asked to subscribe:
* **Subscribe bell on the page (works in every browser):** shows a bell in the corner of the page. The browser asks for permission after the visitor clicks it. This is the default.
* **Ask on page load (Chrome and Edge only):** the browser asks for permission as soon as the page opens. Safari, and Firefox in most cases, only show a permission request after a click, so visitors in those browsers aren't asked at all.
5. Click **Save changes**.
6. Click **Check connection** to make sure the service worker loads.
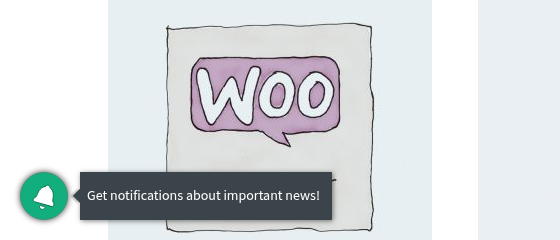
You can change the bell text, the subscription prompt, the default notification title and image, and the Safari settings in your application's [web push configuration](/developer/first-steps/connect-messaging-services/web-push-configuration/#configure-the-subscription-prompt). Those settings override the plugin's defaults.
### How subscribers are linked to customers
A new subscriber is anonymous at first. The plugin links the subscriber to the customer's user in Pushwoosh:
* After a customer logs in.
* On the order confirmation page, for every buyer, including guests.
When a customer logs out or withdraws consent, the link made at login is removed. With **Require marketing consent** on, a subscriber is linked only when the customer or the order has consent.
### Service worker
The plugin serves the web push service worker from `/pushwoosh-sw/` on your site and excludes it from WP Rocket, LiteSpeed Cache, and W3 Total Cache page caching. If **Check connection** reports a wrong status for the service worker, ask your developer to check that the URL isn't blocked or cached by the server.
The service worker covers the whole site, so it replaces any other service worker registered at the site root, such as one from a PWA plugin or another push provider. Your developer can add that other service worker's scripts with the `pushwoosh_wc_service_worker_imports` filter.
## Import existing customers and orders
Send customers and orders that existed before you installed the plugin from the **Historical sync** section of **WooCommerce → Settings → Pushwoosh**:
* **Sync existing customers:** registers all customers with the **Customer** role, then guest buyers of past orders.
* **Send past orders:** sends one `PW_OrderCreated` event with `historical` set to `true` for each past order that never had one. Cancelled orders are skipped.
The section shows the progress of each run. Both runs only queue the calls, and Action Scheduler sends them in the background.
On a large store, ask your developer to run the import with WP-CLI. Add `--since=YYYY-MM-DD` to import only records from that date:
```shell
wp pushwoosh sync customers --since=2025-01-01
wp pushwoosh sync orders --historical --since=2026-01-01
```
## Export and erase personal data
The plugin works with the WordPress personal data tools in **Tools → Export Personal Data** and **Tools → Erase Personal Data**:
* **Export** includes the data the plugin keeps about the customer: the synced email, the consent answer, the language, and the customer's tracked carts.
* **Erase** deletes that data and the customer's tracked carts, cancels pending Pushwoosh calls for the email, and deletes the user and their contacts in Pushwoosh. The customer isn't synced again unless they tick the consent checkbox at a later checkout.
Erasing doesn't remove orders. An order WooCommerce keeps still sends order events with its billing email when its status changes. Whether orders are anonymized is set in WooCommerce's own privacy settings.
Add the data you send to Pushwoosh to your store's privacy policy.
## Check that the integration works
1. Place a test order with an email you can find, and tick the consent checkbox.
2. Open [User Explorer](/product/audience-data-and-segmentation/user-explorer/) and search for that email.
3. Check that the user has an email contact with the `firstName`, `lastName`, and `acceptsMarketing` tags.
4. Check that the user's events include `PW_OrderCreated`.
If data doesn't arrive, open **WooCommerce → Status → Logs** and select the `pushwoosh` source. The log shows each failed call with the reason. Tokens are never logged, and emails are masked.
How the plugin handles errors:
* **Network errors and temporary server errors:** the call is retried after 1, 5, 15, 60, and 240 minutes, then logged as an error.
* **Rejected data**, such as a contact on a disposable email domain: logged as an error and not retried.
* **Rejected token:** sending pauses, and the WordPress admin shows a notice with a **Resume sending** button. Queued calls are kept. Fix the token in the settings, then click **Resume sending**.