# Shopify integration
## Integration overview
Pushwoosh integrates seamlessly with Shopify, a leading e-commerce platform that enables businesses to create, manage, and scale online stores. This guide walks you through installing and configuring the Pushwoosh app in your Shopify store, setting up user identification, and using notifications and automation tools to engage customers across channels like push, email, SMS, and WhatsApp.
### Integration type
- **Destination**: Shopify sends customer data to Pushwoosh, where it is used for targeting and messaging.
### Prerequisites
* A [Pushwoosh account](https://www.pushwoosh.com/)
* Access to your Shopify admin panel
* Pushwoosh [Device API Access Token](/developer/api-reference/api-access-token/#device-api-token) and **Application Code**
* A Shopify store with customers and order data available
### Synchronized entities
* **Customers**: Used to assign and identify Pushwoosh UserIDs via Shopify metafields
* **Customer segments**: Used for group-based targeting and messaging
* **Events and triggers** (e.g., orders placed, tags applied): Used in Shopify Flow to automate messaging across channels
* **Storefront**: Used for capturing web push opt-ins through embedded scripts
### Glossary (mapping entity names if they are different)
| **Shopify** | **Pushwoosh** |
| -------------------------- | --------------------------------------------------------- |
| Customer | UserID |
## How the integration works
Pushwoosh acts as a messaging destination for Shopify. Once integrated, Shopify sends customer and behavioral data to Pushwoosh, where it powers real-time notifications, customer segmentation, and personalized messaging across channels.
### Key components of the integration
1. **Customer identification via metafields**
Each Shopify customer is assigned a unique `UserID`, stored in a metafield (`custom.pushwoosh_userid`). This ID allows Pushwoosh to recognize and message users consistently across platforms.
2. **Event-driven automation via Shopify Flow**
Pushwoosh provides Flow actions that allow you to automate messaging (push, email, SMS, WhatsApp) based on Shopify events, such as:
* New order placed
* Tag applied to customer
* Cart abandonment
3. **Segment-based targeting**
Customer segments from Shopify can be used to send group-specific notifications across channels, such as promotions for first-time buyers or reactivation campaigns for dormant users.
4. **Manual and real-time messaging**
From the Shopify customer or segment view, you can manually trigger notifications using the Pushwoosh Extensions:
* **Notification by Customer**: For personal follow-ups or testing
* **Notification by Segment**: For campaign-based messages
### Web push notifications via storefront embed
By enabling the Pushwoosh embed in your Shopify theme, you can prompt website visitors to opt in to browser-based push notifications—no mobile app required.
#### Data flow overview
```
Shopify Customer & Event Data
↓
Pushwoosh API (via App)
↓
UserID → Segmentation → Triggered or Manual Notifications
```
This integration empowers you to deliver timely, relevant messages that improve user retention, boost conversions, and enhance the customer experience—automatically or on demand.
## Part 1. Installation
### Log into Shopify
1. Go to [Shopify Admin](https://admin.shopify.com/)
2. Select your store from the dashboard
### Install the Pushwoosh app
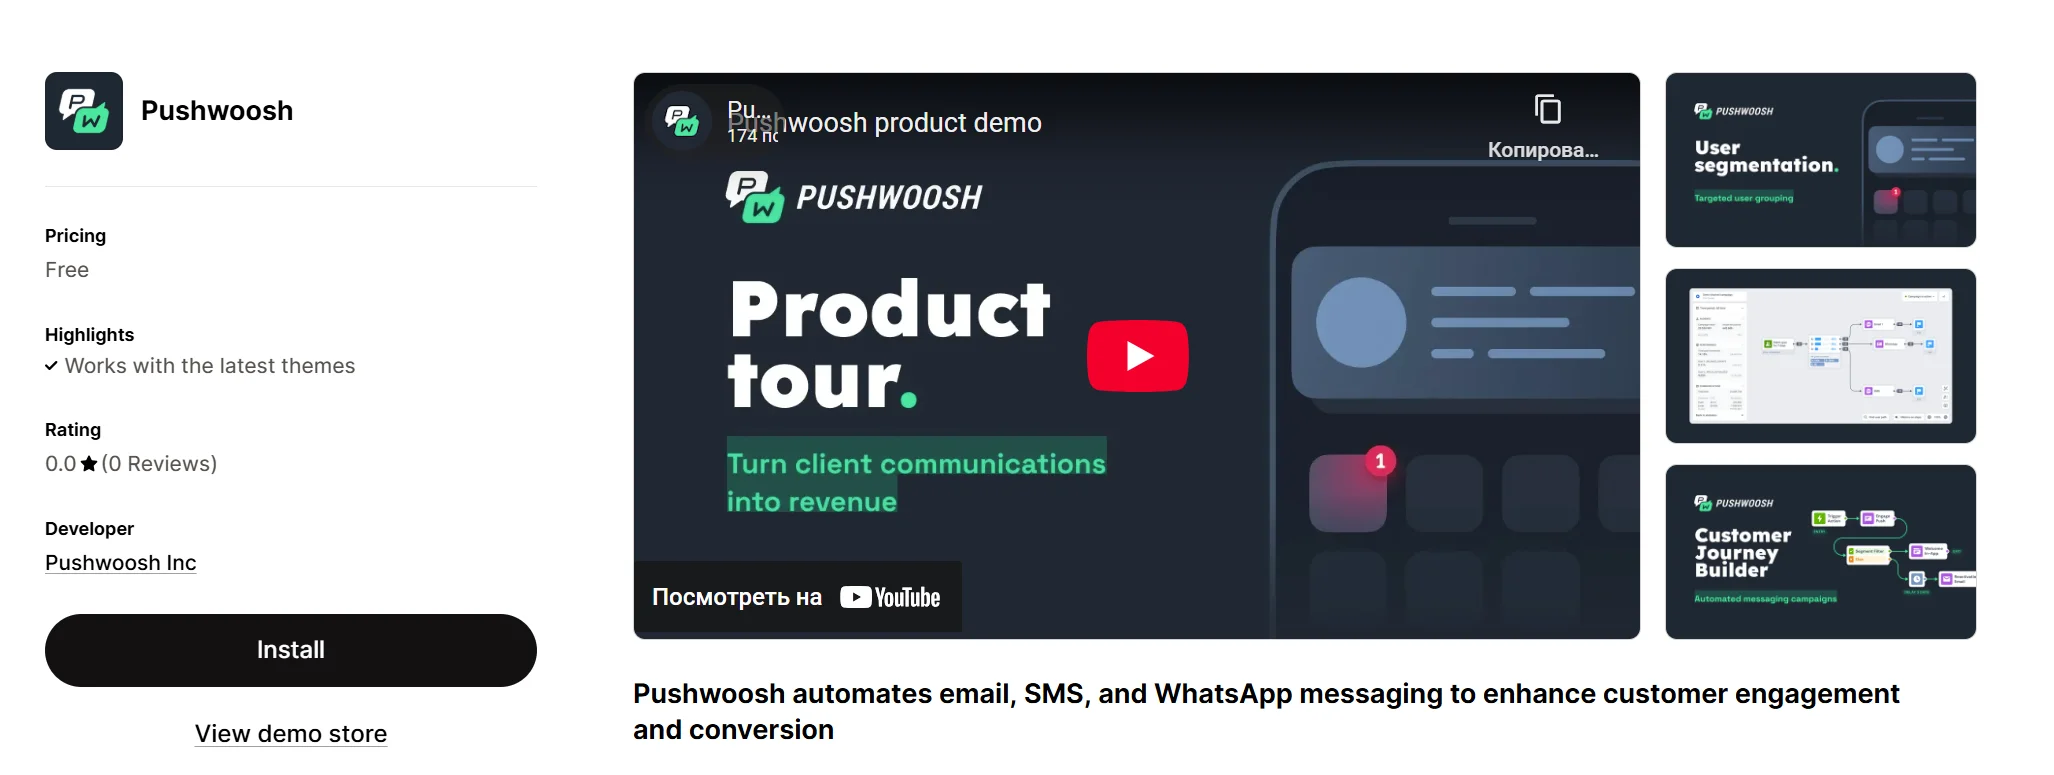
1. Visit the [Pushwoosh App Store page](https://apps.shopify.com/pushwoosh-notifications)
2. Click **Install**
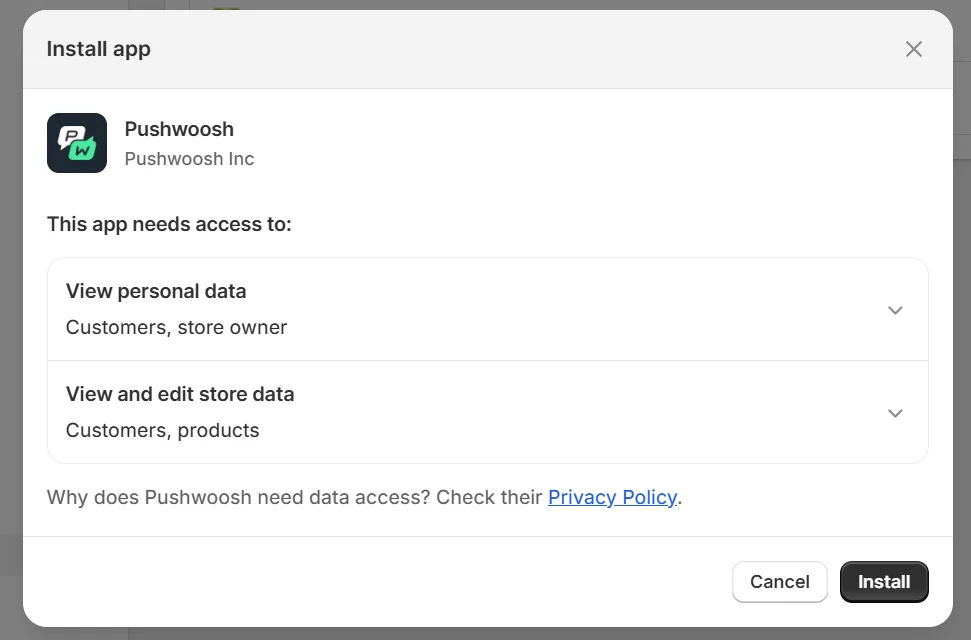
3. Confirm installation in the Shopify dialog
### Connect your Pushwoosh app
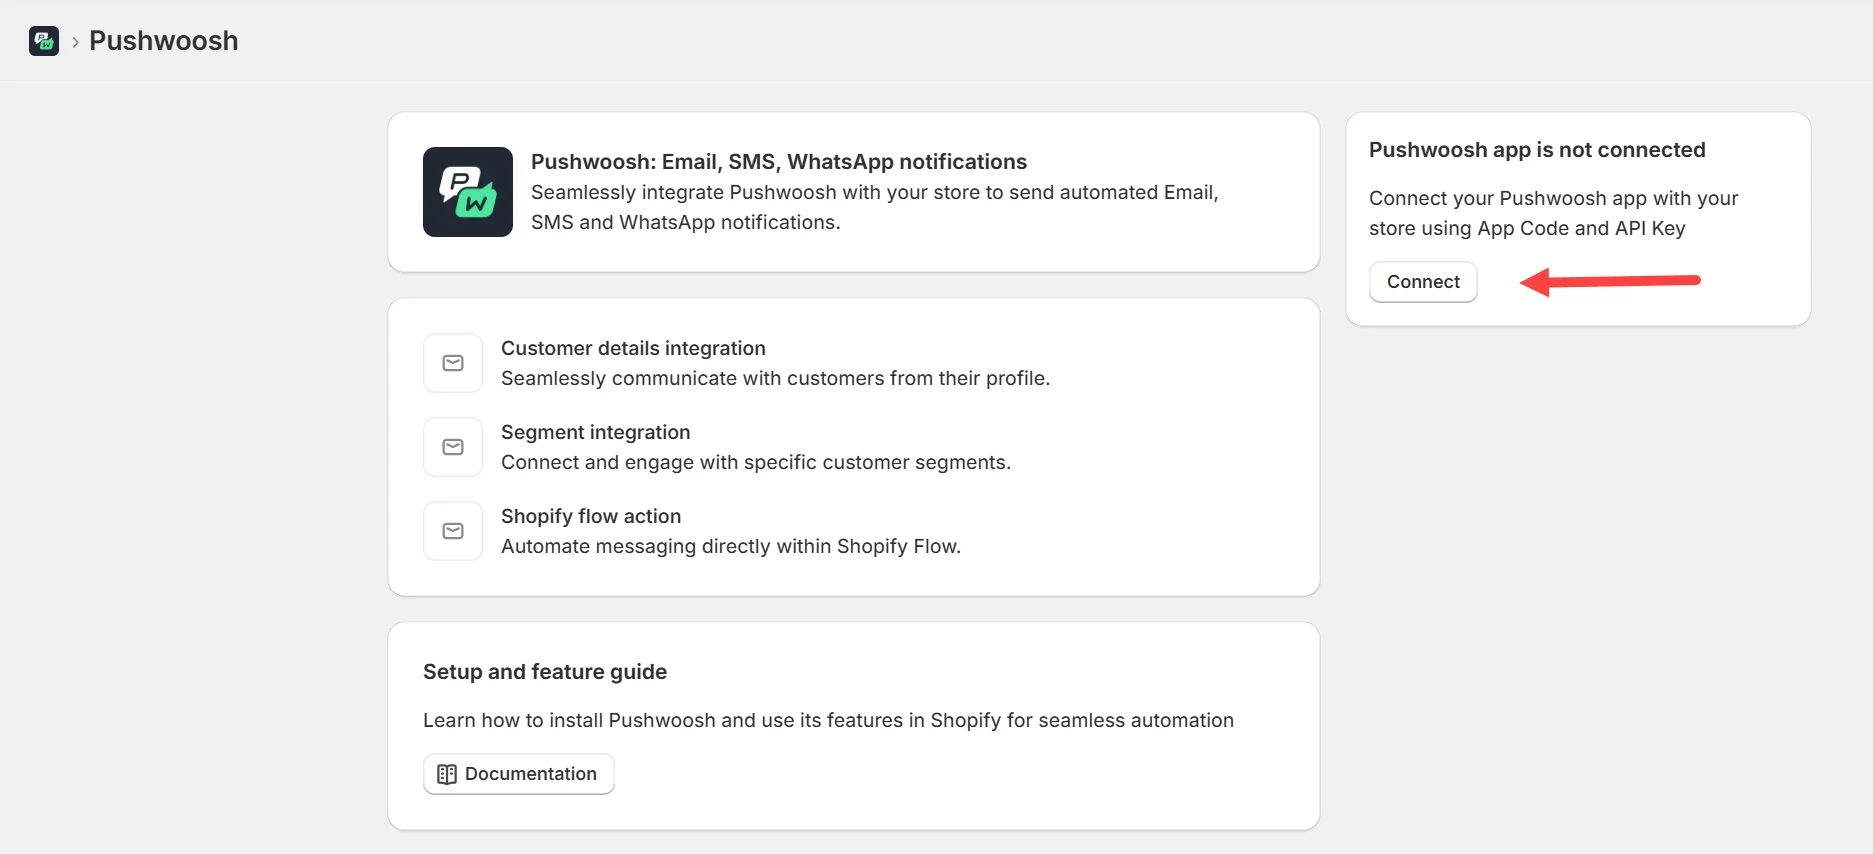
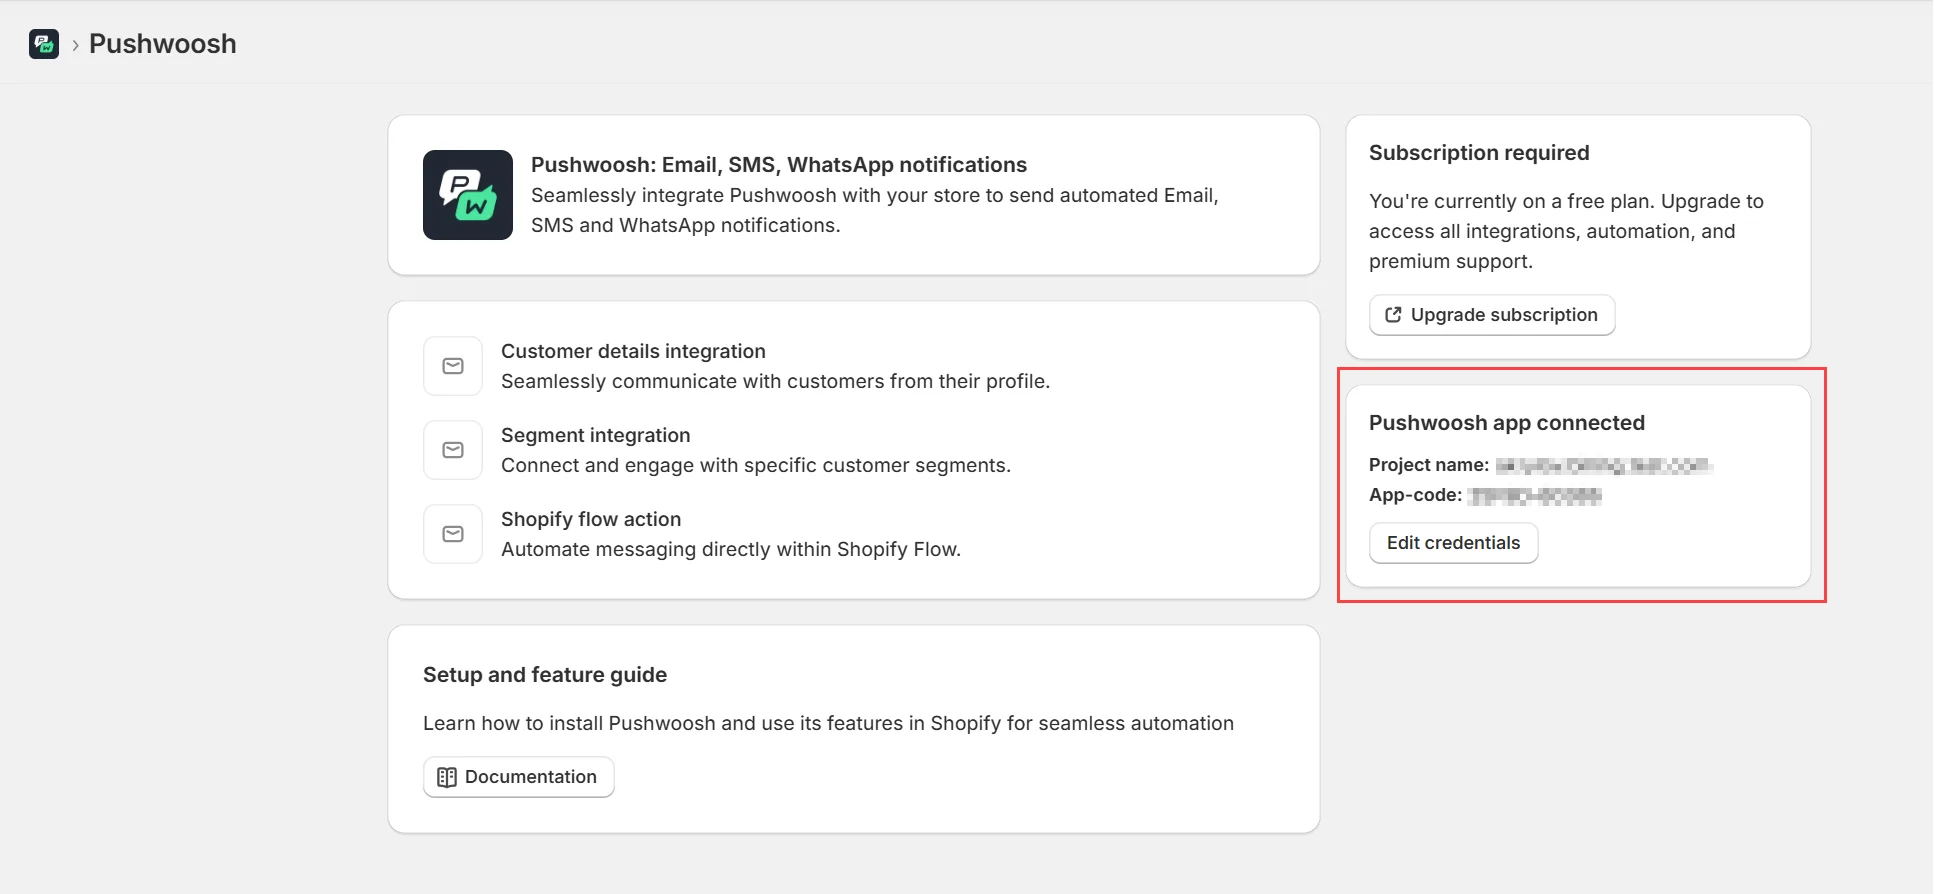
After installation, you will be redirected to the Pushwoosh app inside Shopify.
1. Click **Connect**.
2. Enter the **Application Code** and [Device API Access Token](/developer/api-reference/api-access-token/#device-api-token), which you can find in the **Pushwoosh Control Panel → Settings → API Access**.
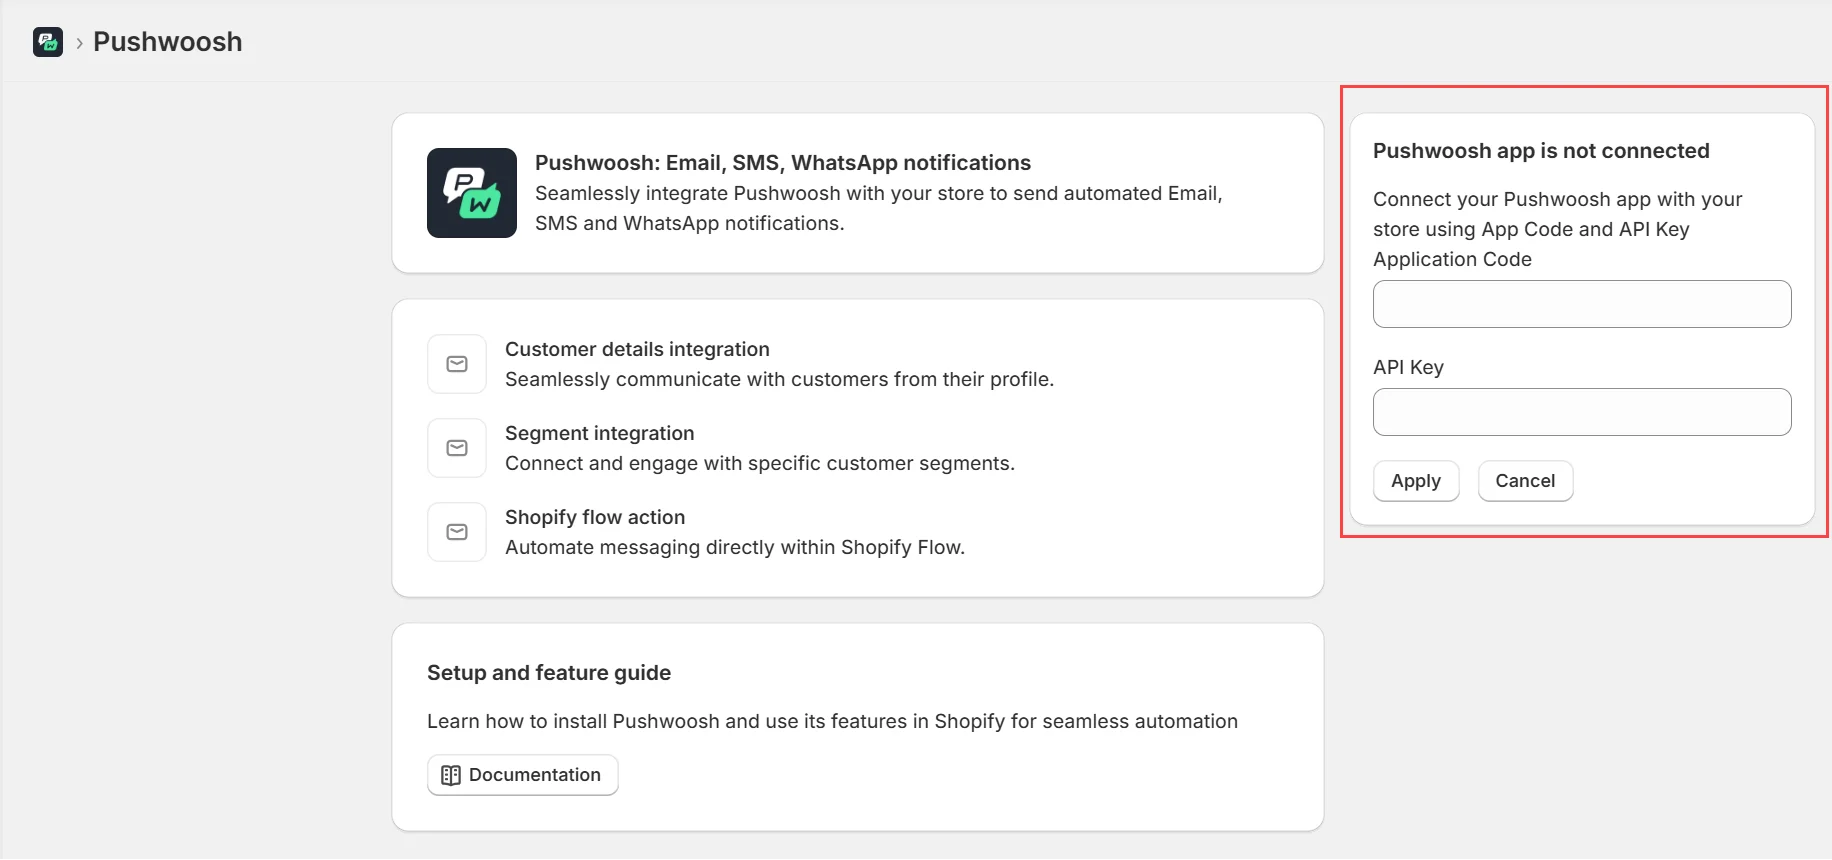
When connected, a success message will appear: "Pushwoosh app connected."
### Subscribe to a plan
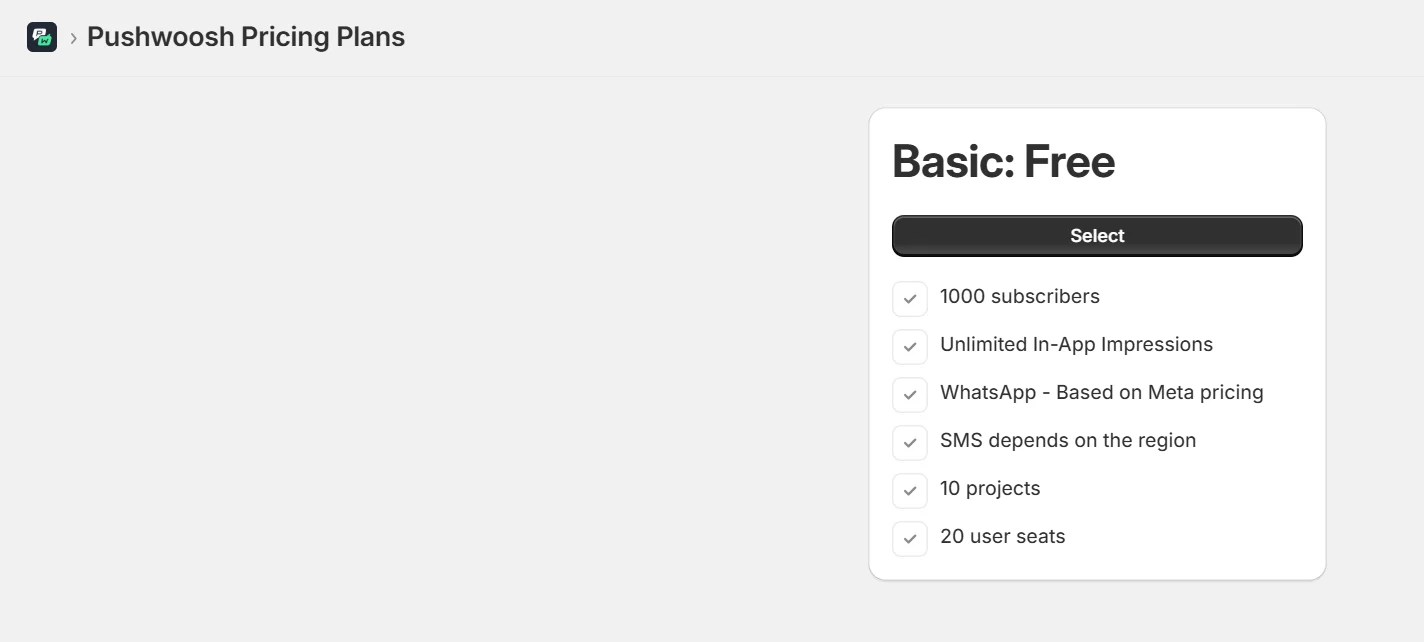
1. Click **Upgrade Subscription**
2. A single usage-based plan will be shown.
3. Confirm the billing.
## Part 2. Setup: Customer User ID via metafields
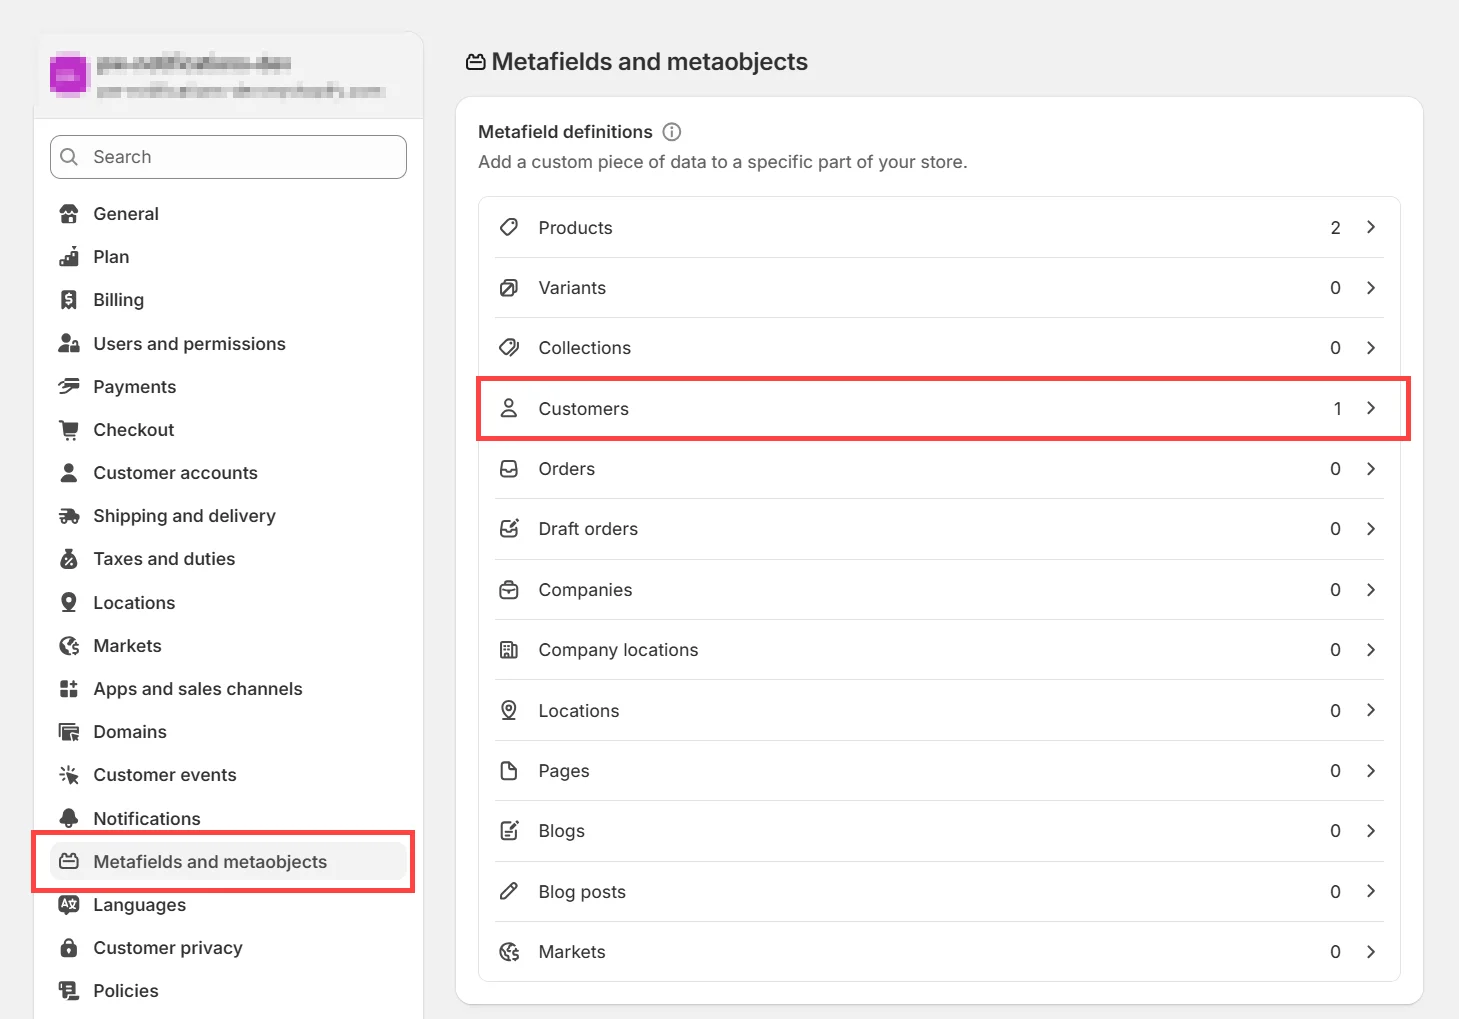
To deliver notifications to identified users across channels (push, email, SMS, WhatsApp), Pushwoosh uses a unique **User ID** per customer. Shopify stores this value inside Shopify’s **Customer metafields**.
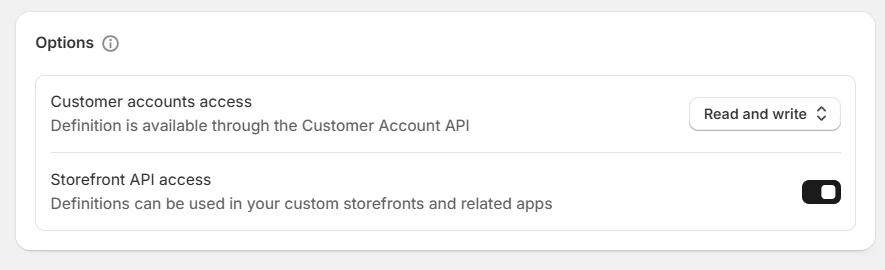
1. Go to **Settings → Metafields and metaobjects → Customers**
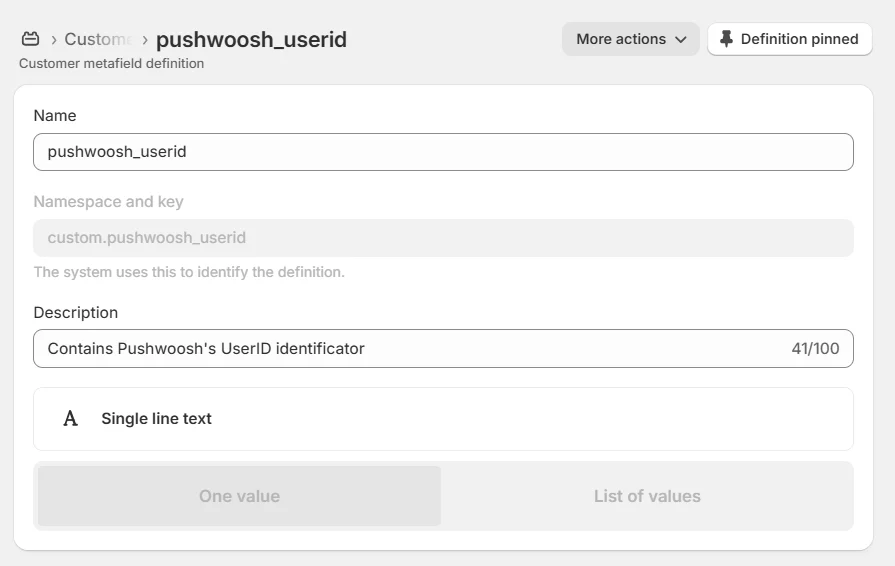
2. Click **Add definition** and use these values:
| Field | Value |
| ----------------------- | ------------------------ |
| Namespace and key | custom.pushwoosh_userid |
| Namespace | custom |
| Type | Single line text |
| Validation | None |
| Customer Account Access | Read and Write |
| Storefront API Access | Enabled |
## Part 3. Using Pushwoosh extensions
Pushwoosh includes Shopify Extensions for segment targeting, automation (Flow), and customer-specific notifications.
### Extension 1. Send notification by customer
#### Use case
Manually send personalized messages or test notifications to a specific user.
#### Steps
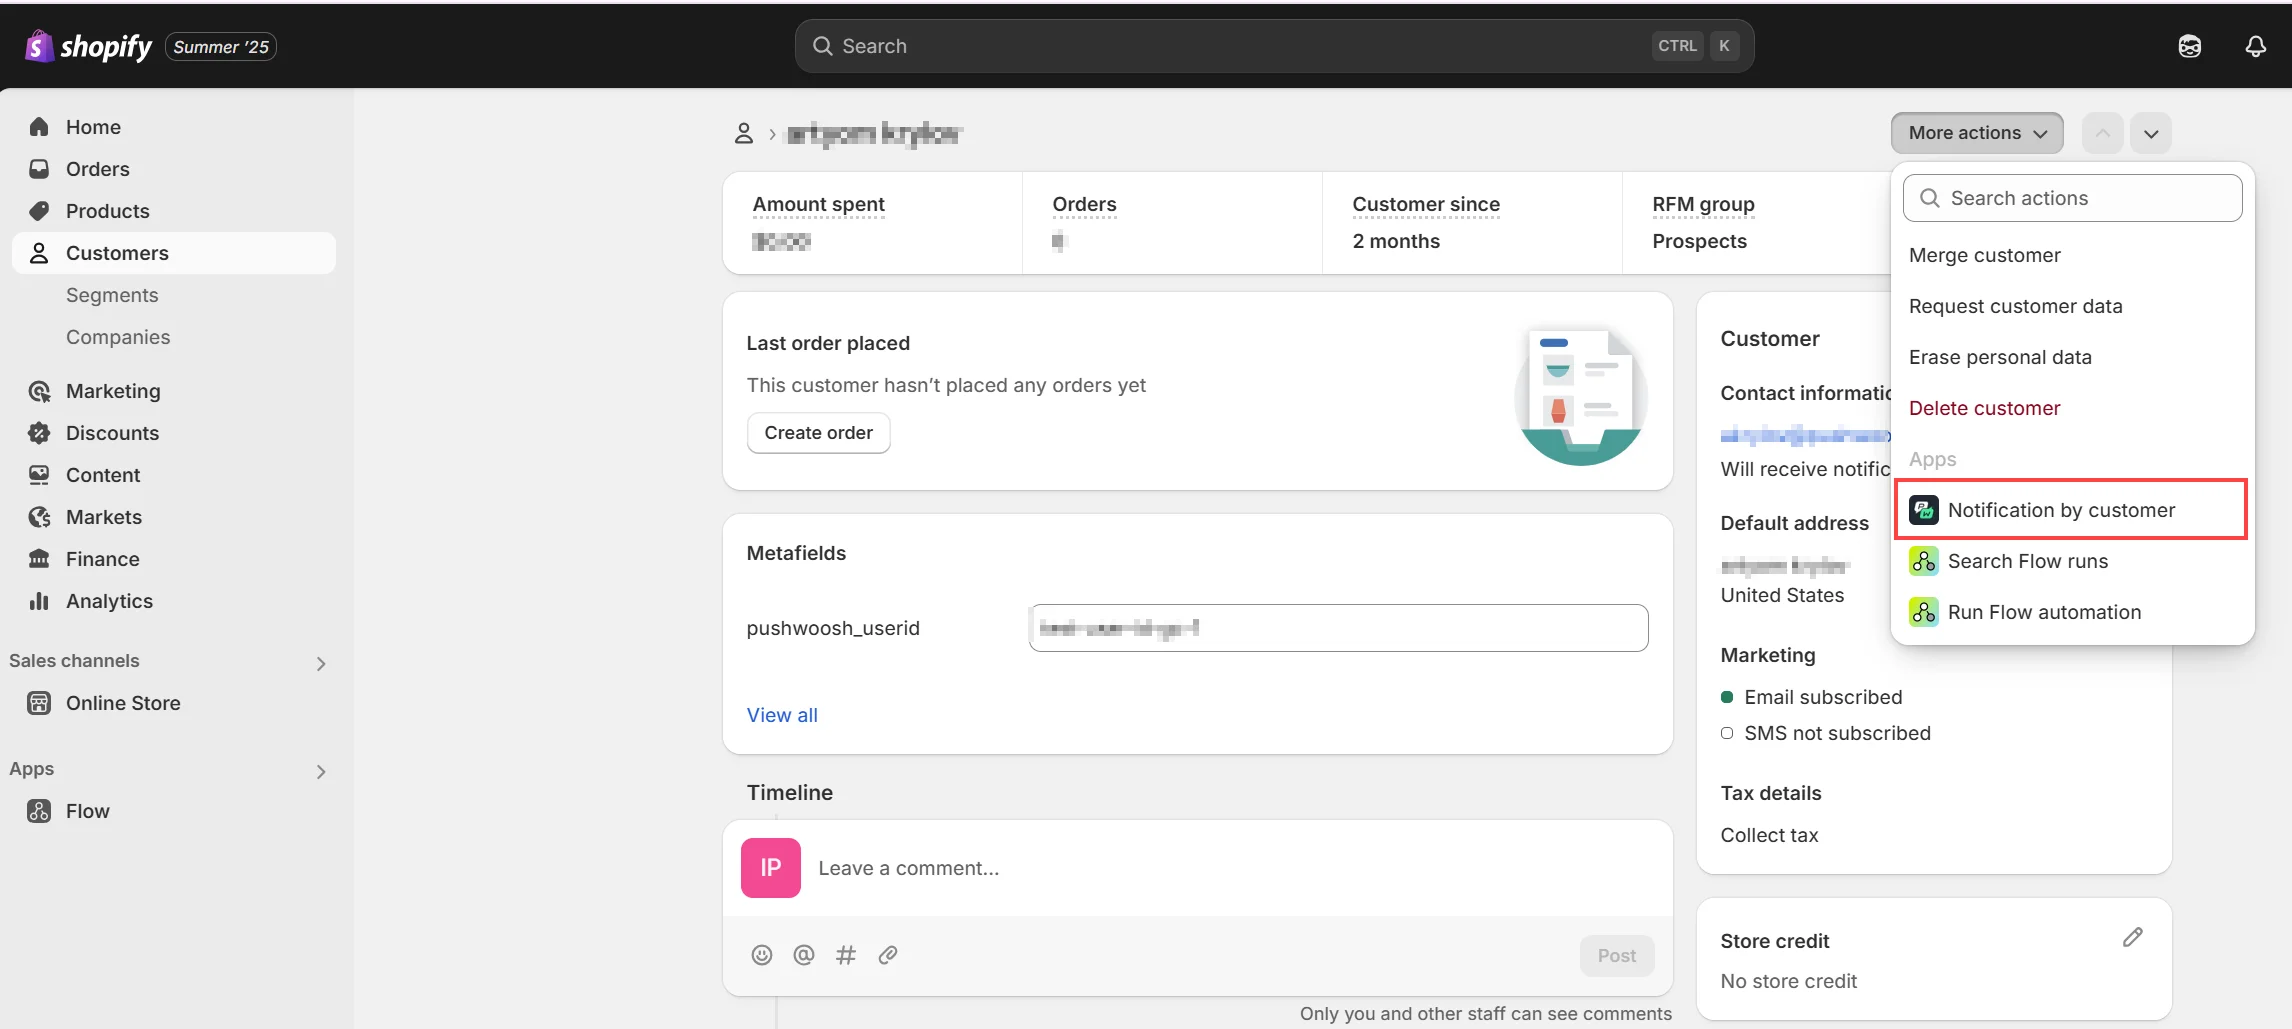
1. Open **Customers → Select a customer**
2. Click **More actions → Notification by customer**
3. Select the messaging platform (e.g., Email) and a [content preset](/product/content/push-presets/).
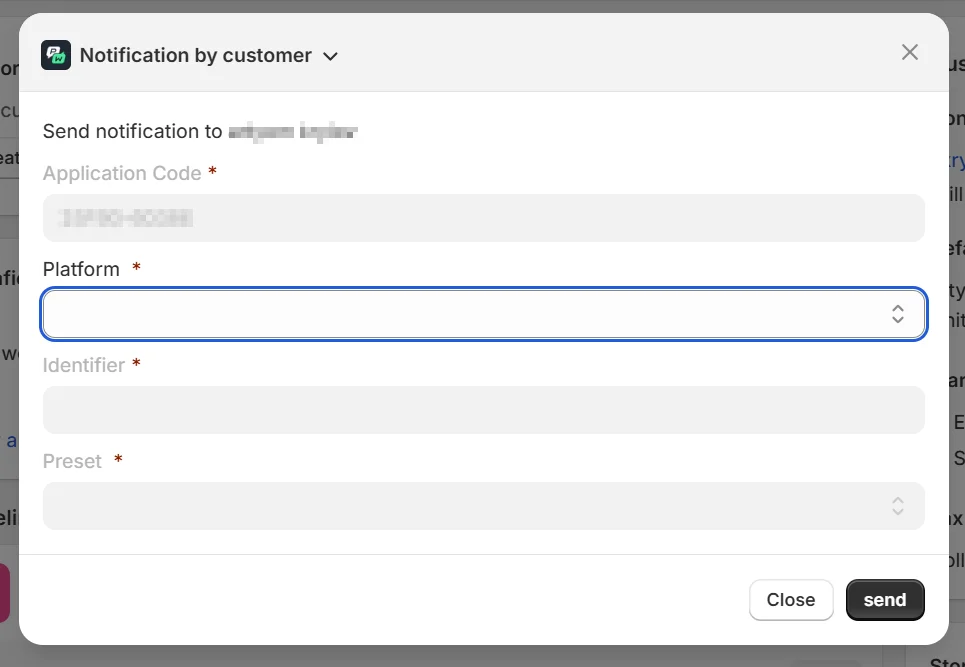
4. Click **Send**
### Extension 2. Notification by segment
#### Use case
Target groups of customers—abandoned carts, first-time buyers, high spenders.
#### Steps
1. Go to **Customers → Segments**
2. Choose a segment → Click **Use Segment**
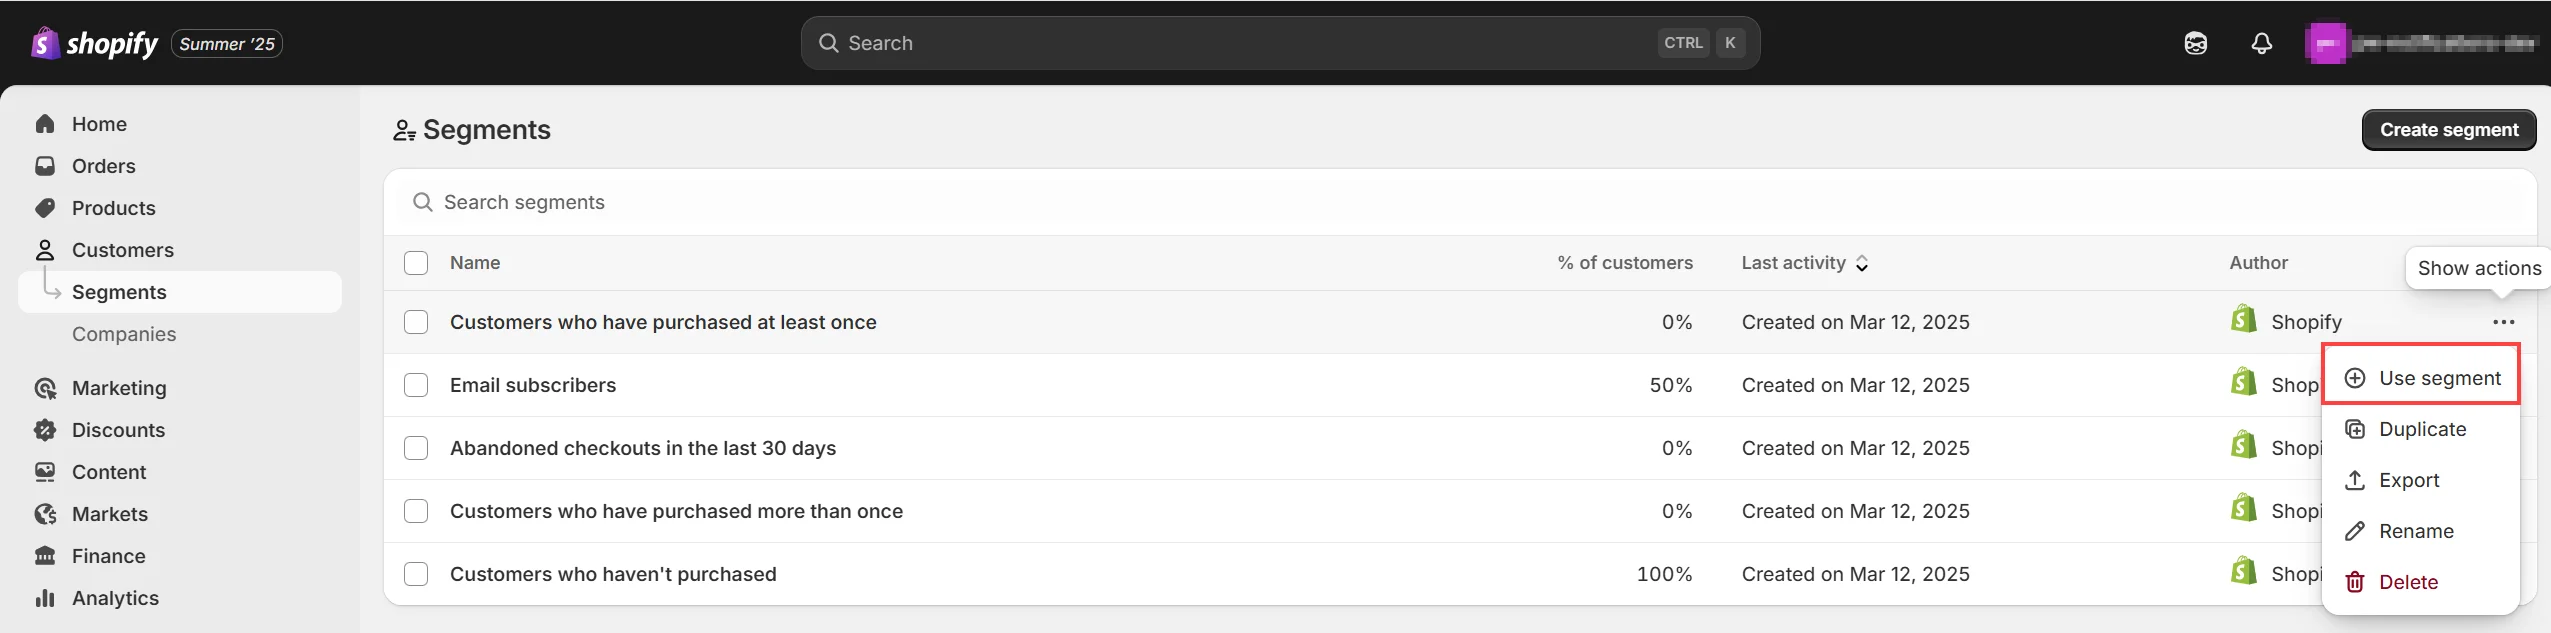
3. Select **Notification by Segment**
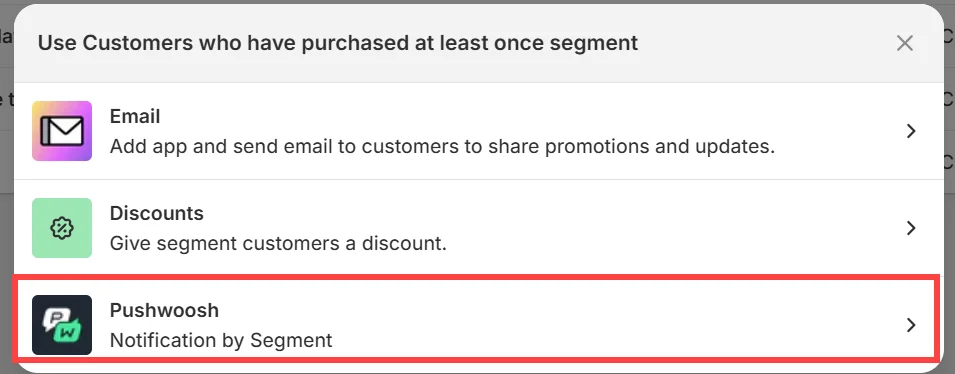
4. Select the desired communication channel and message preset. Click **Send**.
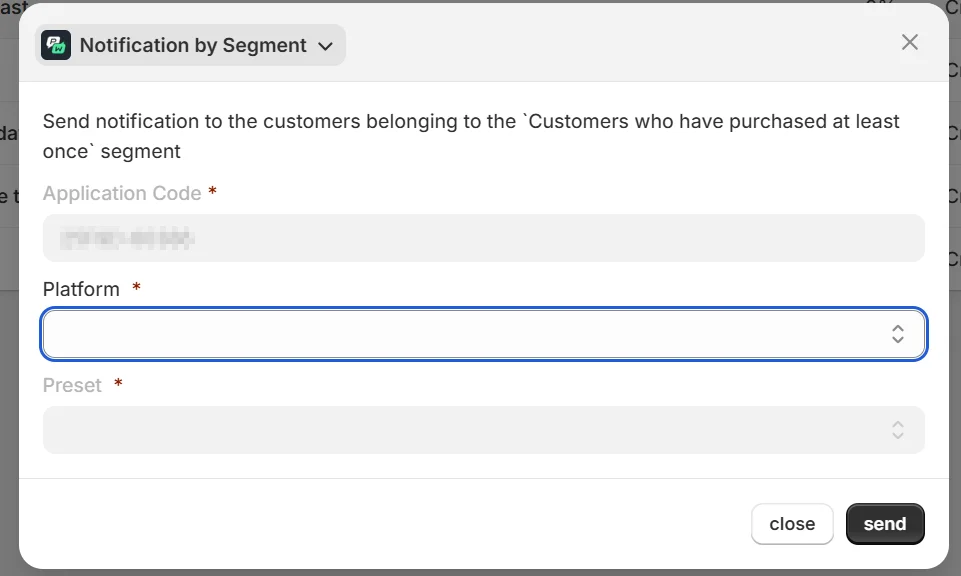
### Extension 3. Pushwoosh in Shopify Flow
#### Use case
Automate messaging in customer journeys using triggers like orders, tags, or behavior.
#### Steps
1. Create a new Flow in **Shopify Flow**
2. Add action → Choose **Pushwoosh notifications**
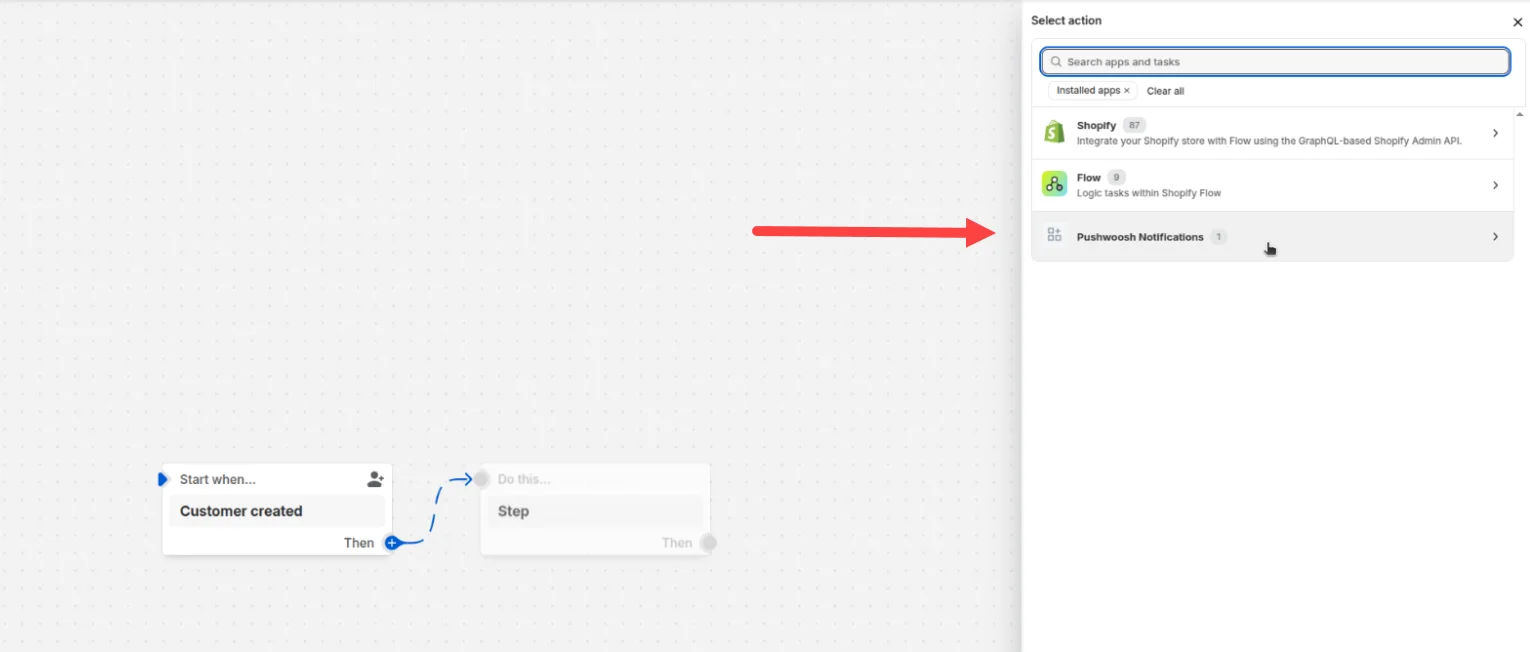
3. Configure message and dynamic fields
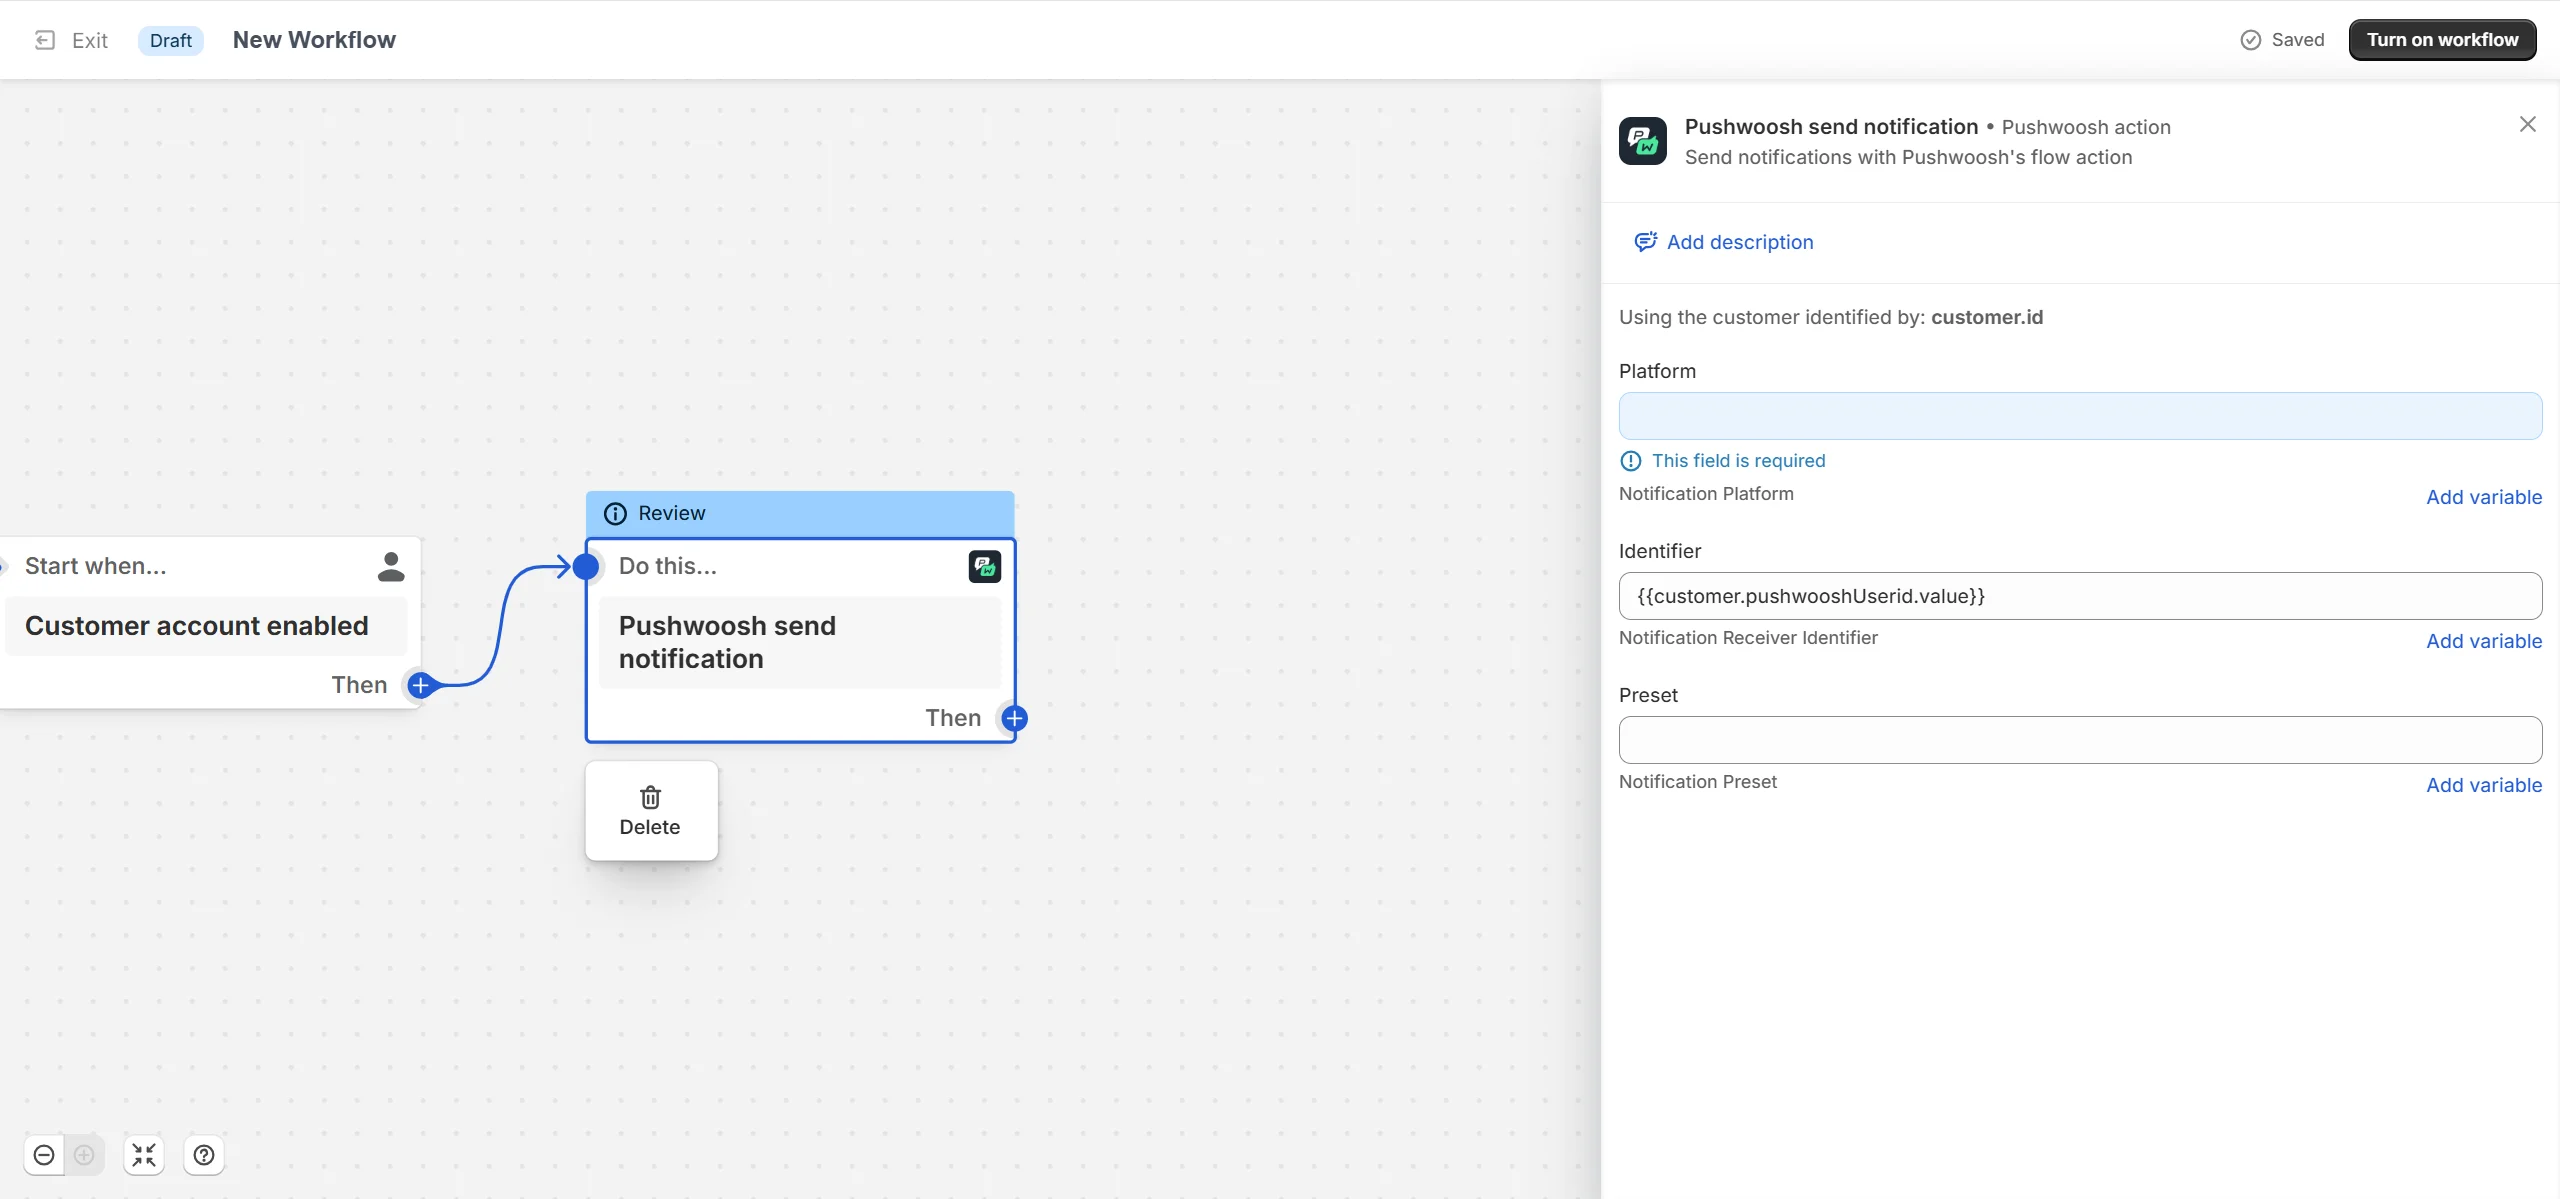
For example:
* Send a message after order placed
* Remind user when cart is abandoned
* Send reactivation push after 30 days of inactivity
## Part 4. Enable web push (optional but recommended)
To support browser-based web push notifications on your storefront, do the following:
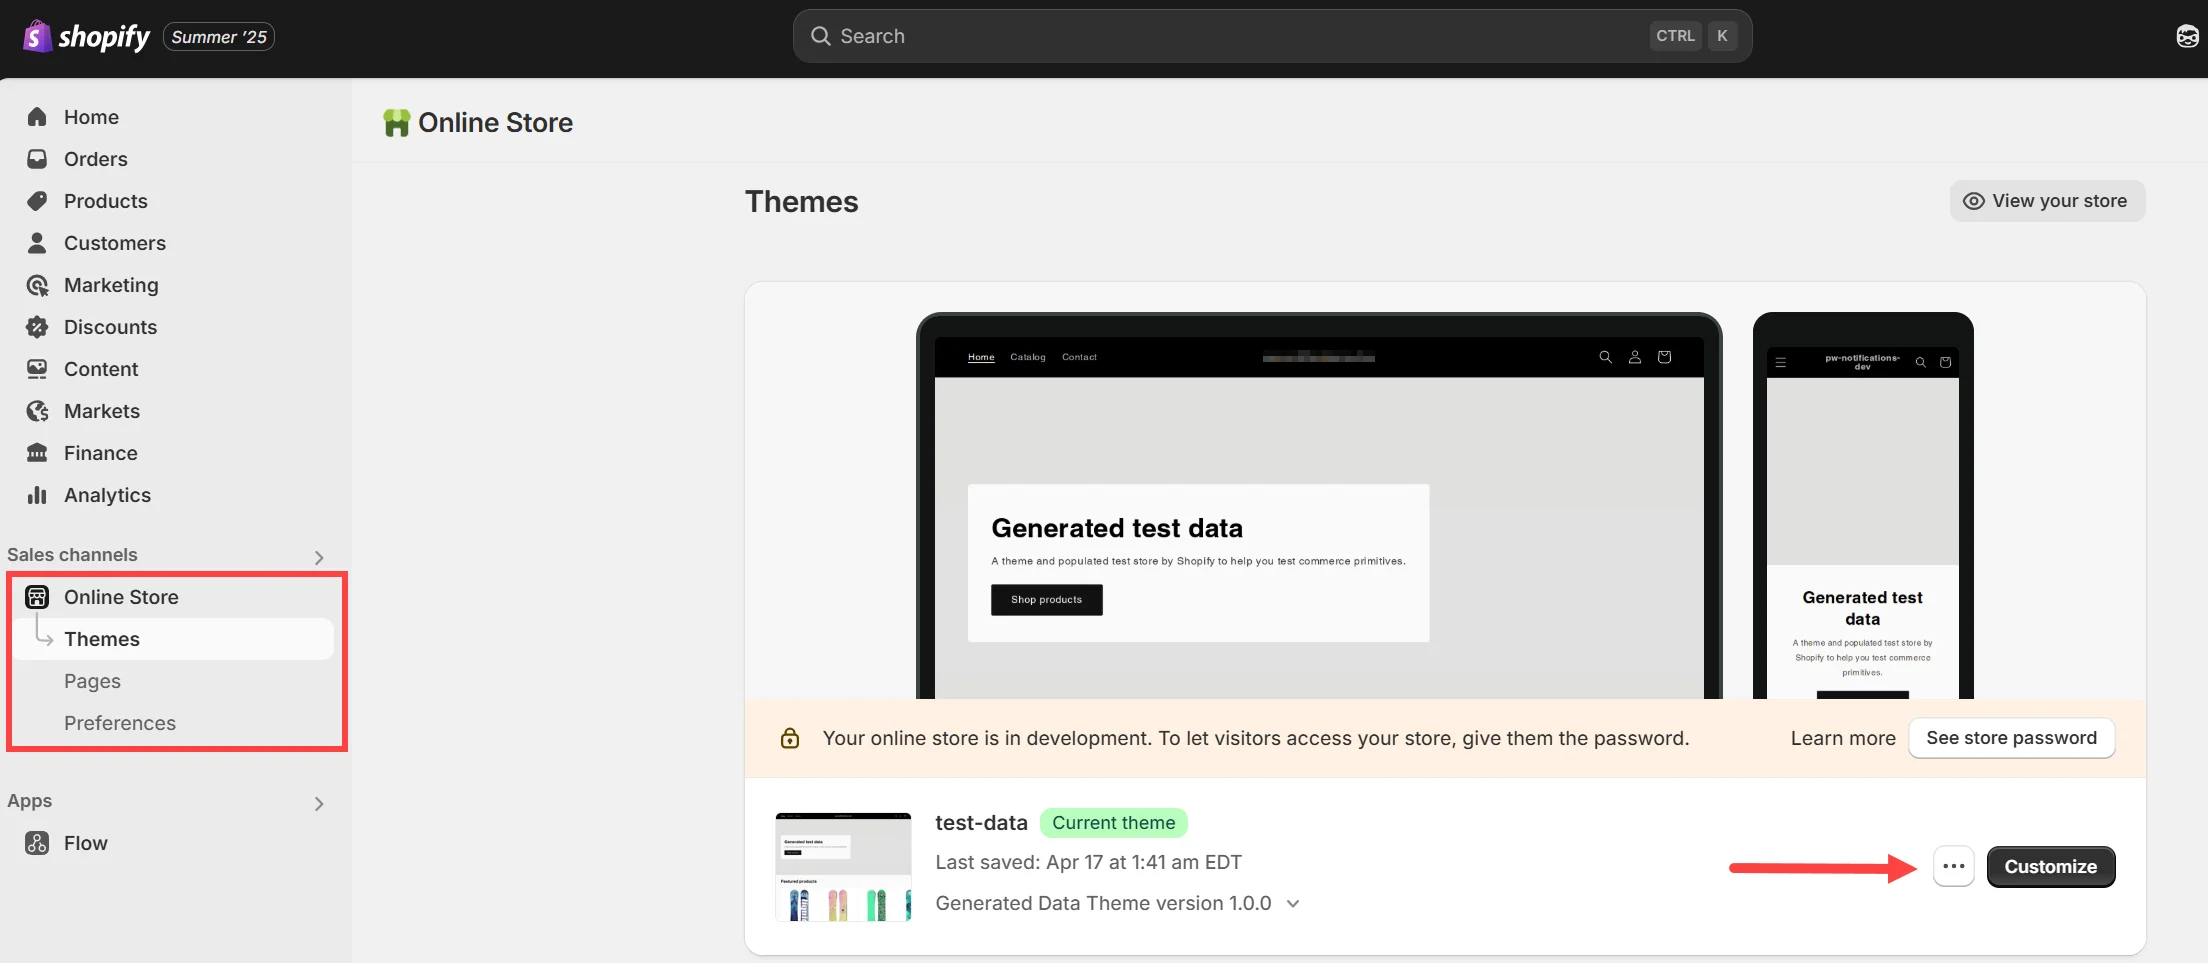
1. Go to **Online Store → Themes → Customize**
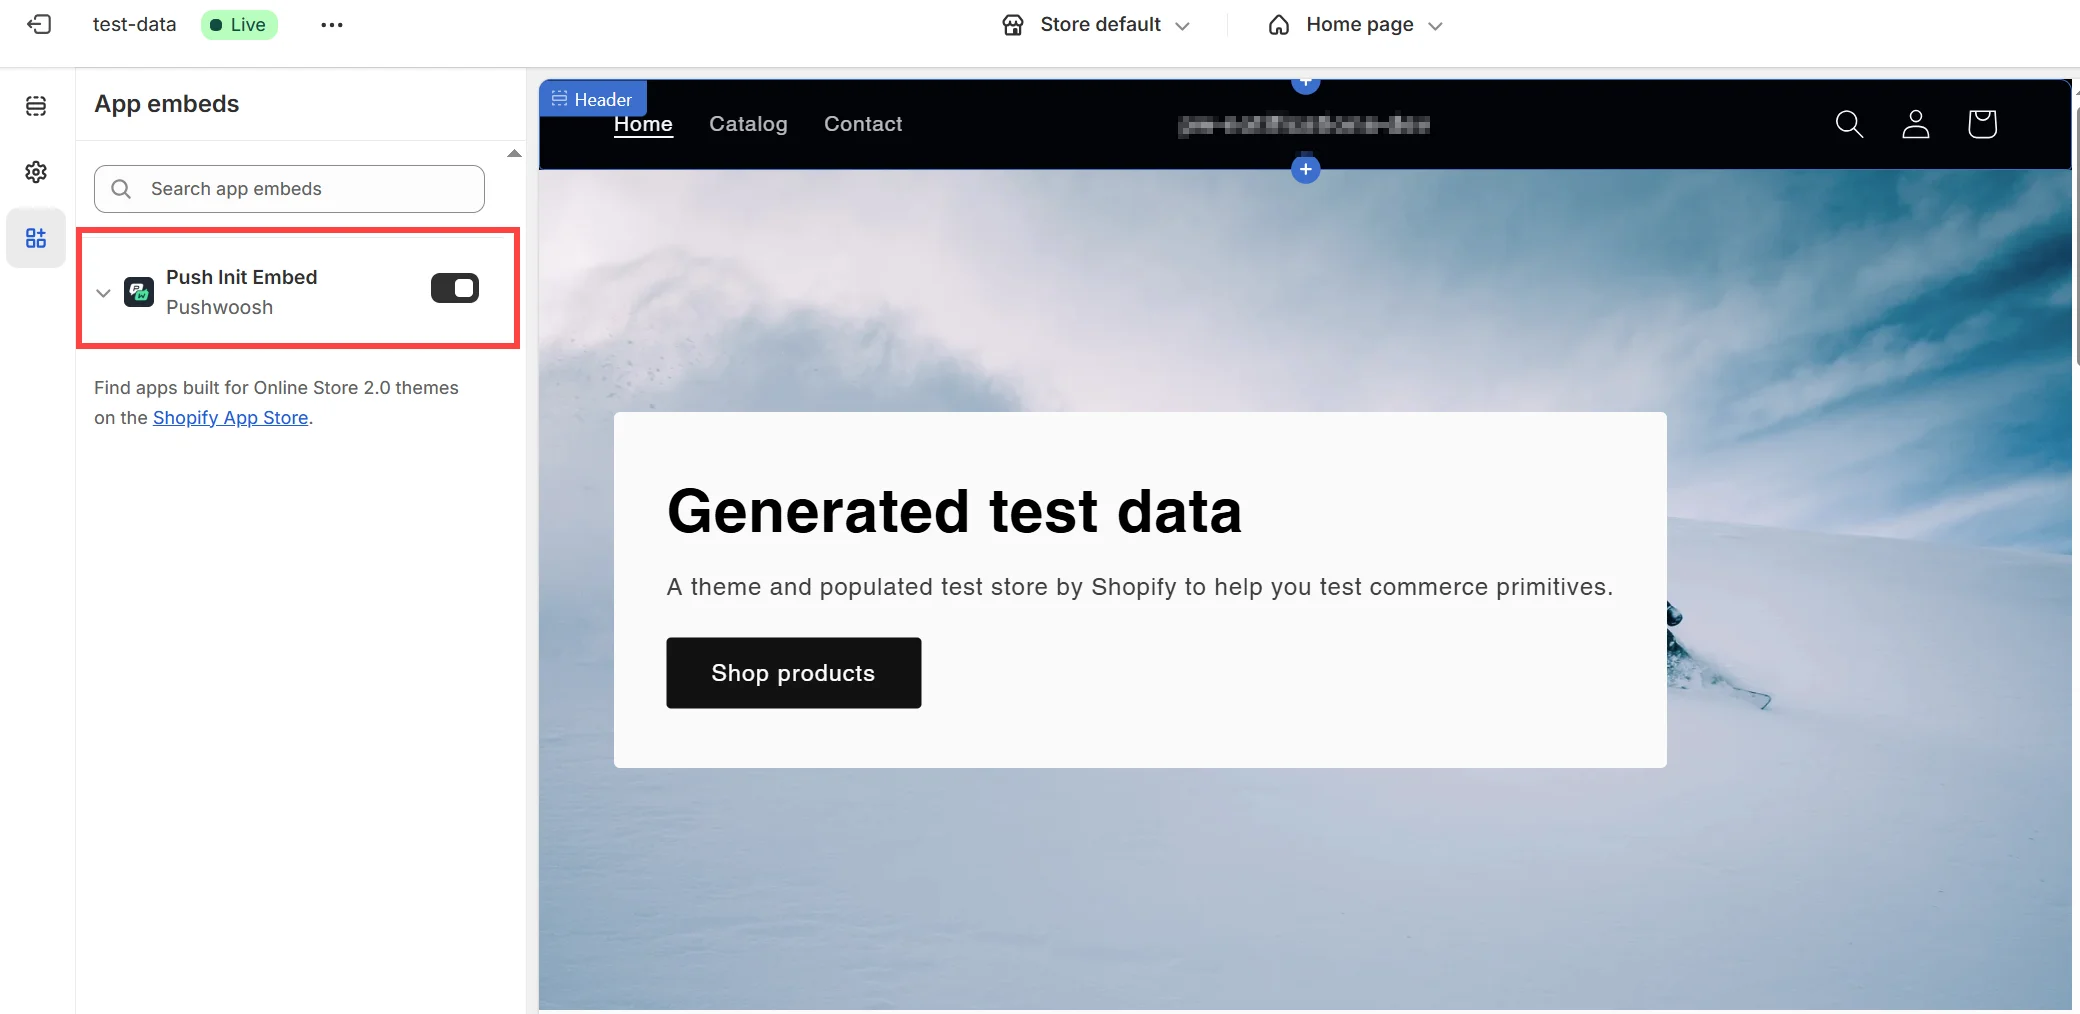
2. Open **App Embeds** from the left menu
3. Toggle **Push Init Embed** ON
## Use cases summary
| Scenario | Tool used |
| ----- | ----- |
| Personalized follow-up | Notification by Customer |
| Cart abandonment reminder | Shopify Flow + Pushwoosh action |
| Segment-based promotion | Notification by Segment |
| Welcome message after signing up | Flow + Metafield tracking |
| Push opt-in | Theme Embed + Push Init Toggle |