# mParticle integration
## Integration overview
[mParticle](https://www.mparticle.com/) is a platform for managing customer data collected from mobile apps, web, and other sources.
If you use mParticle to store customer data, you can easily set up integration with Pushwoosh. This will allow you to create targeted, personalized, and effective campaigns in Pushwoosh using data from mParticle.
You can send the following data from mParticle to Pushwoosh:
* **User attributes**: name, location, device, preferences, behavior, etc. This data will be saved in Pushwoosh as [Tags](/product/audience-data-and-segmentation/user-data-tags/tags/) and their values for each user. The data type for each Tag is identified automatically.
* **Events**: each Event configured in mParticle will be transferred to Pushwoosh and saved as the [Event](/product/audience-data-and-segmentation/events/default-events/) with the same name and tags if there are any. Pushwoosh will also get information about which Events each user has triggered.
* **Segments**: all mParticle Audiences based on user attributes and triggered Events can be transferred to Pushwoosh as Segments. You can use them to create highly targeted campaigns. If an Audience segment is updated in mParticle, that segment will also be updated in Pushwoosh. The update frequency of mParticle segments is configured on the mParticle side.
The data is not transferred back from Pushwoosh to mParticle, but we plan to add this option in the future, so stay tuned.
## Setting up integration
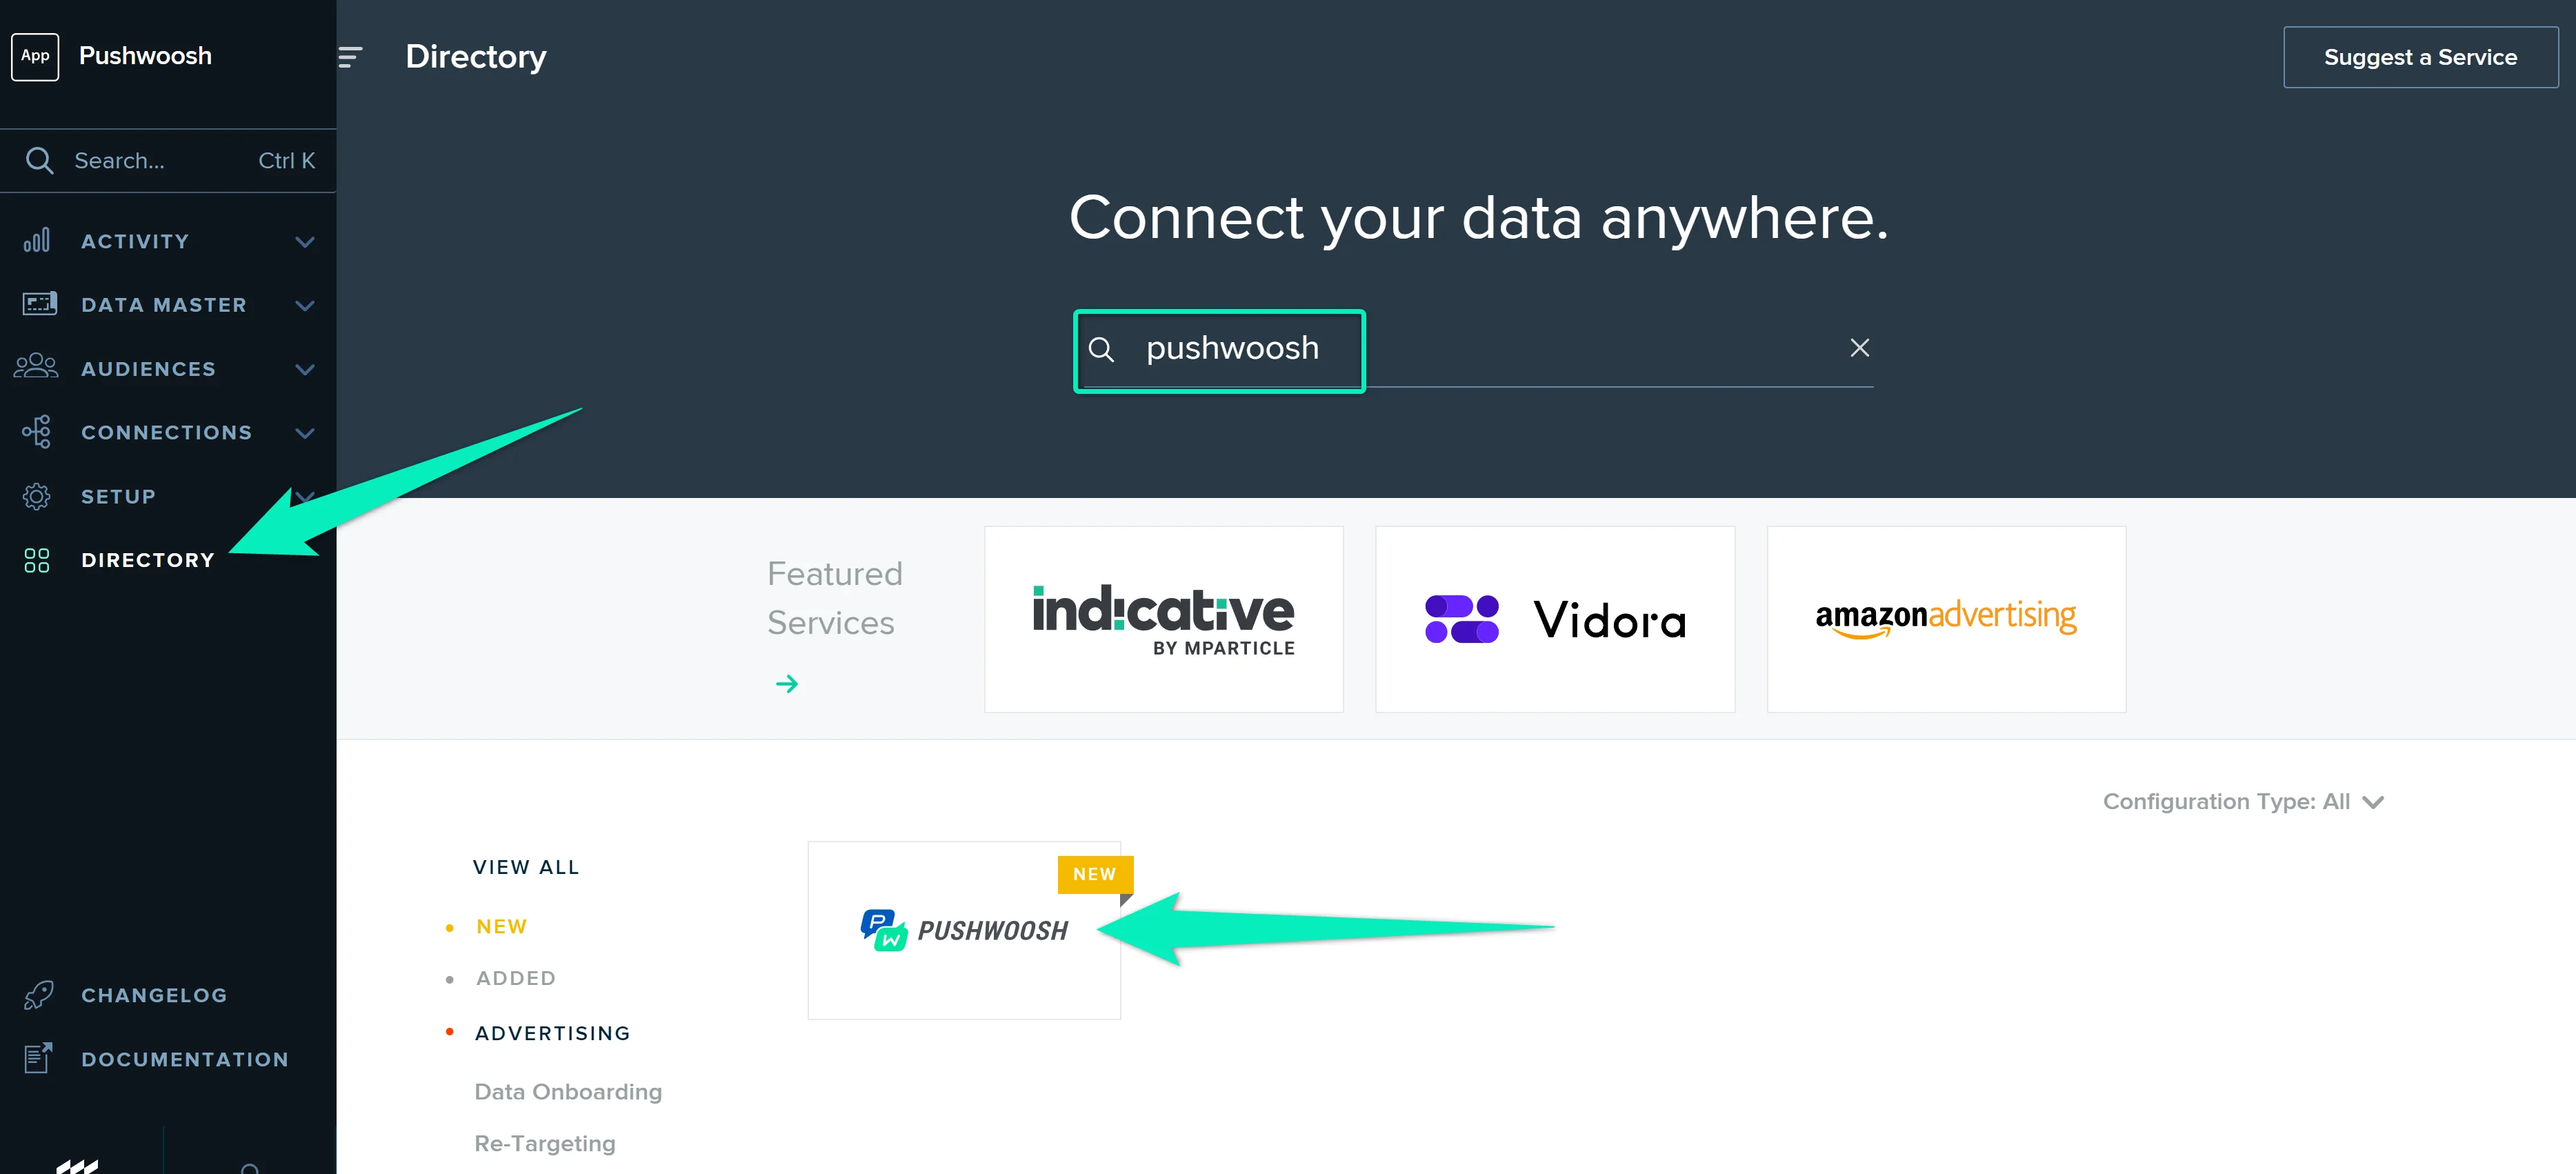
1. [In the mParticle interface](https://app.mparticle.com/login), go to the **Directory** section and find **Pushwoosh** in the list. Hover over the icon and click **Setup**.
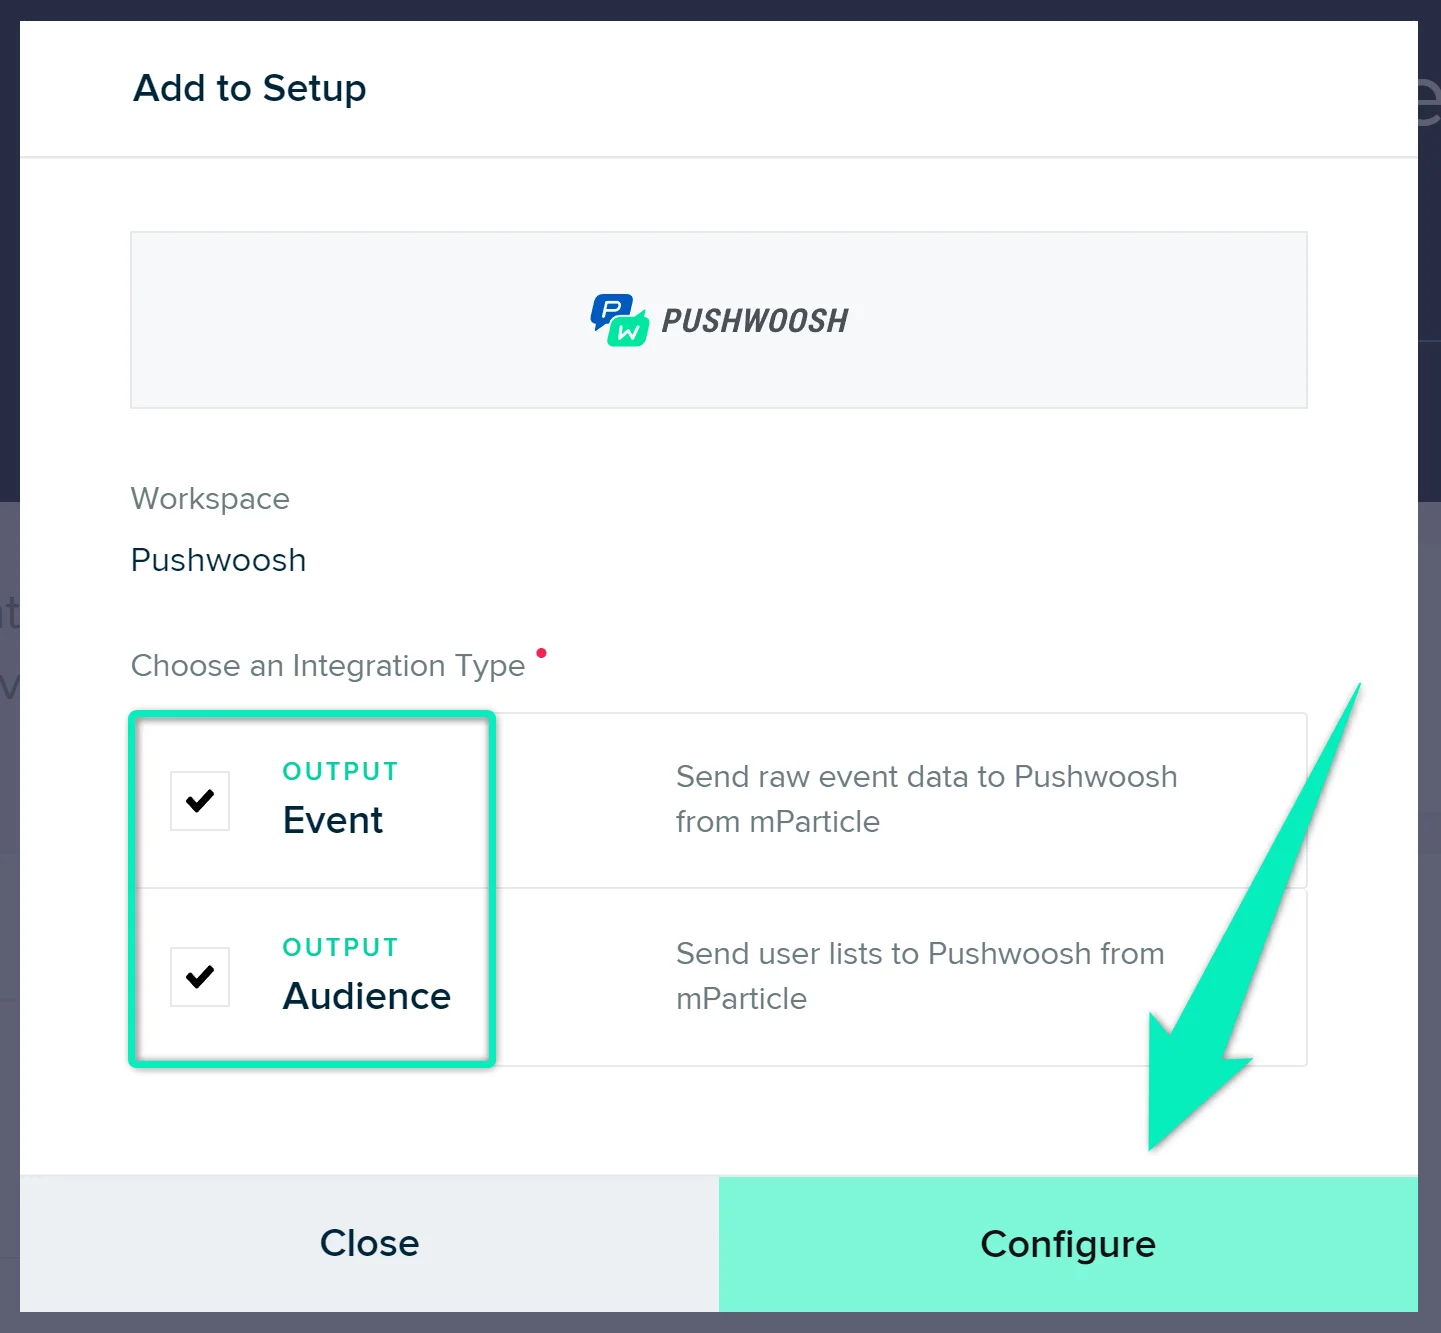
2. Select both **Event** and **Audience** Outputs and click **Configure**:
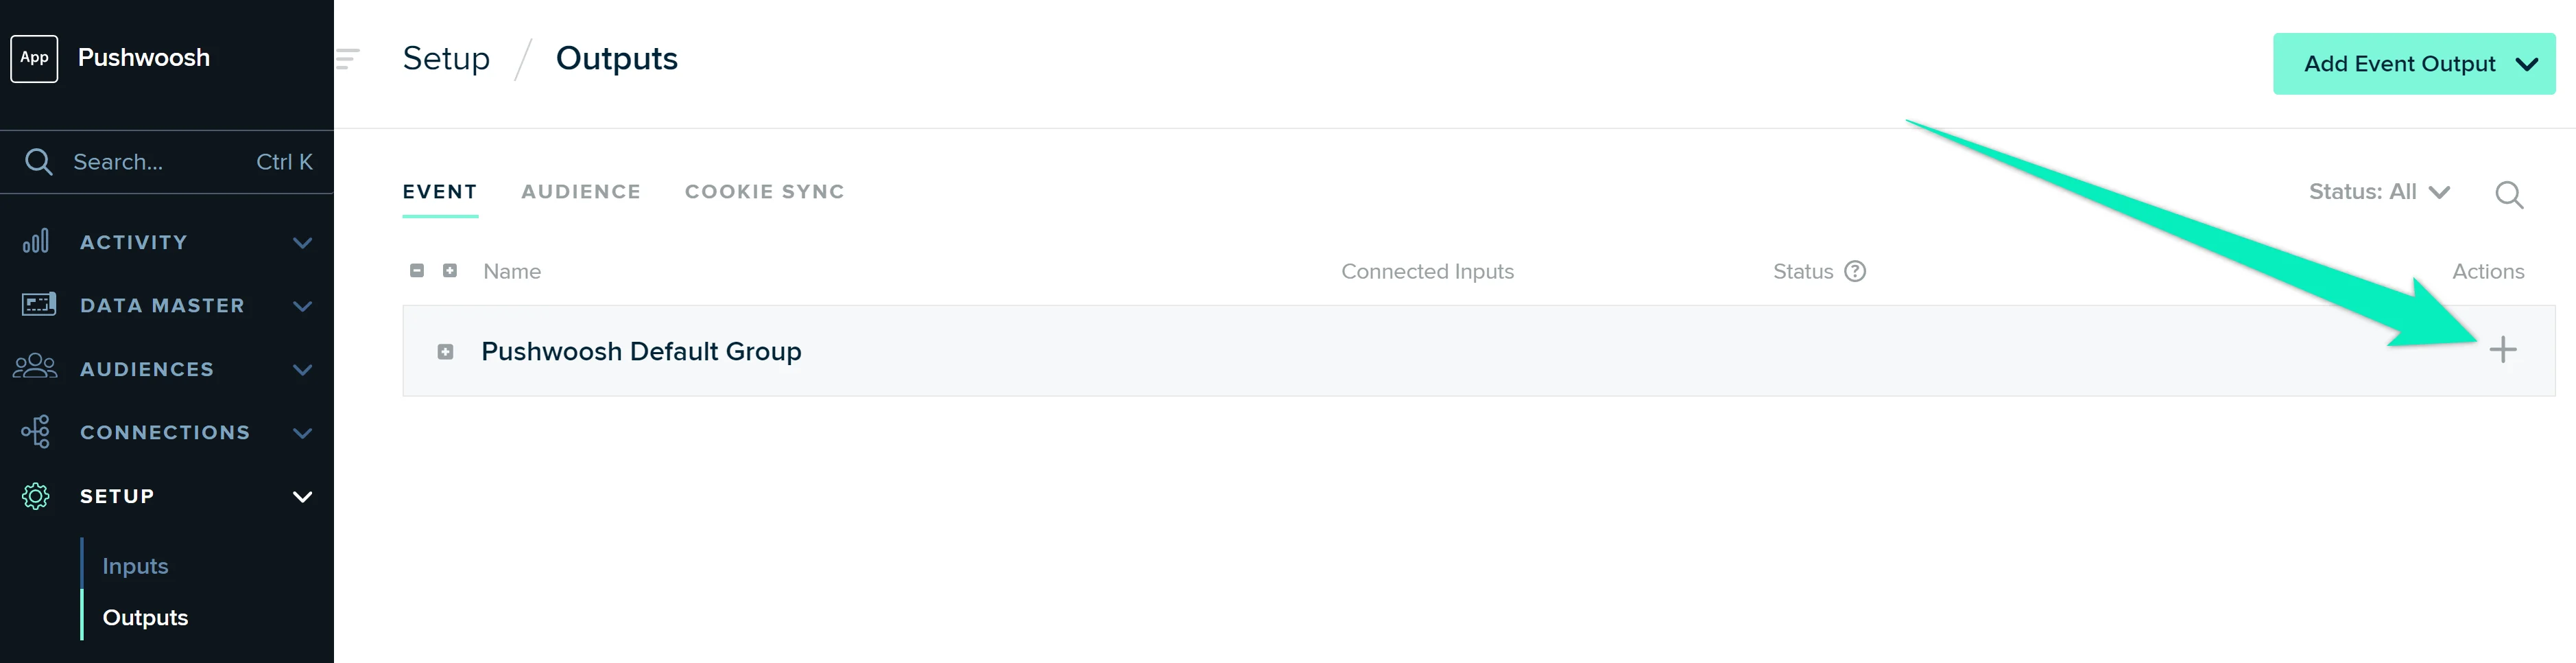
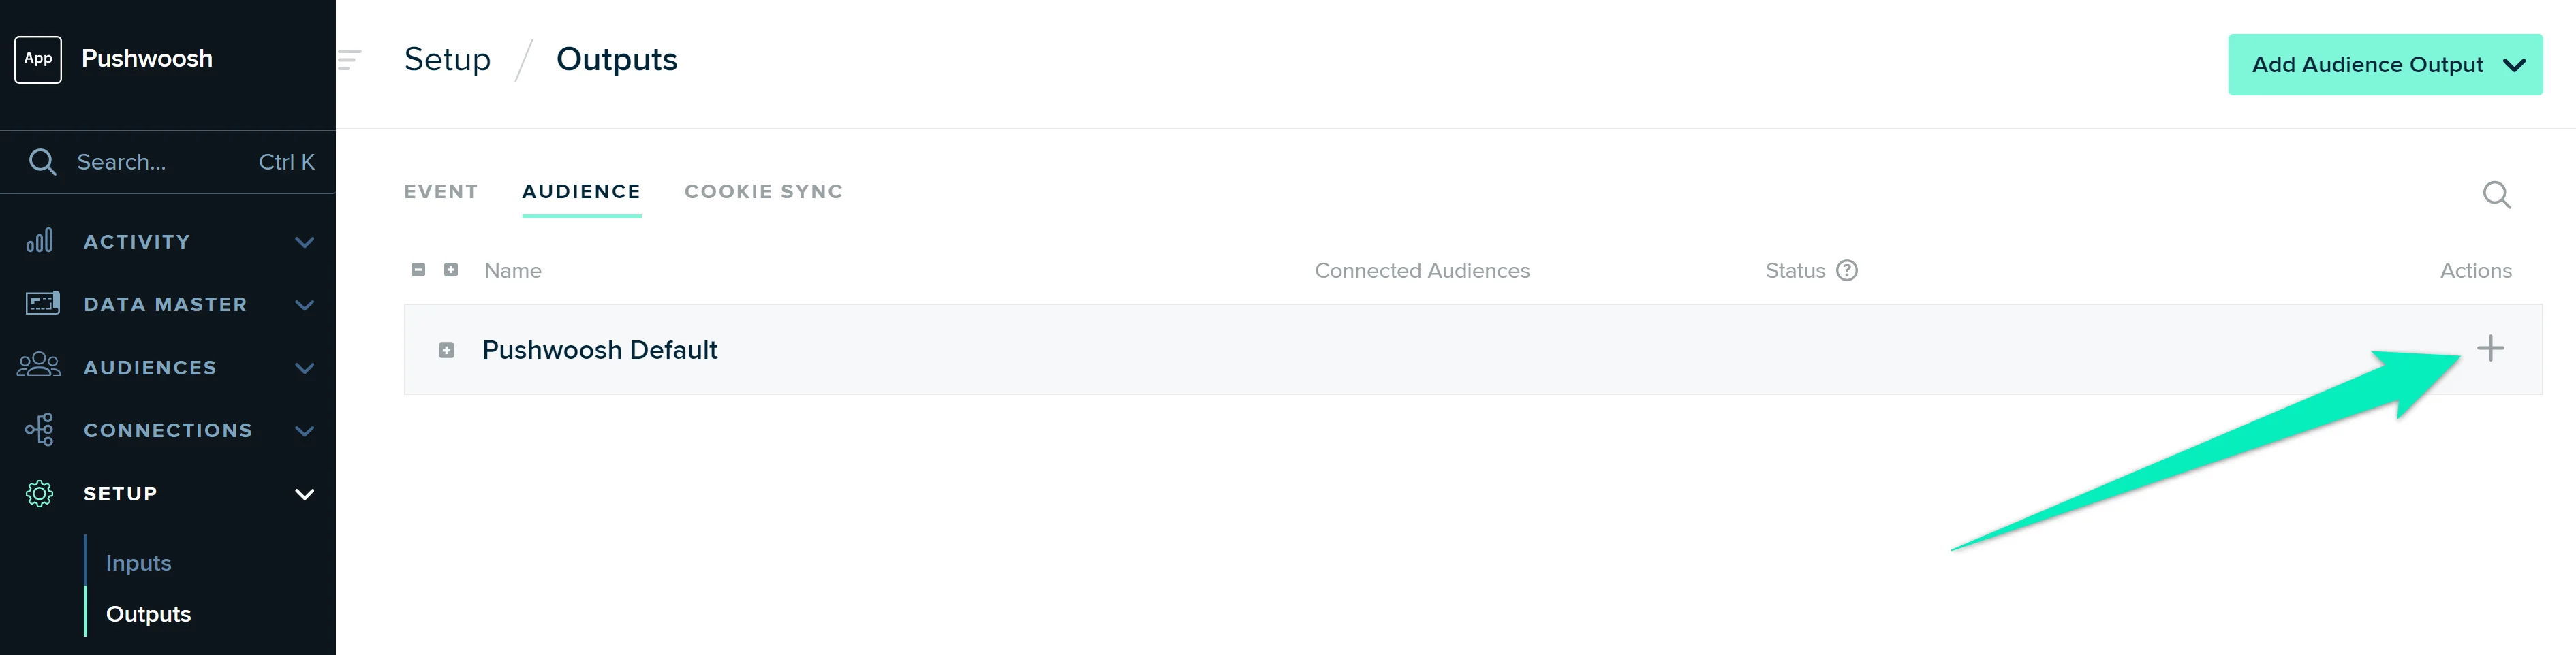
3. On the page that opens (**Setup** → **Outputs**), click on the plus icon in the **Pushwoosh Default Group** row:
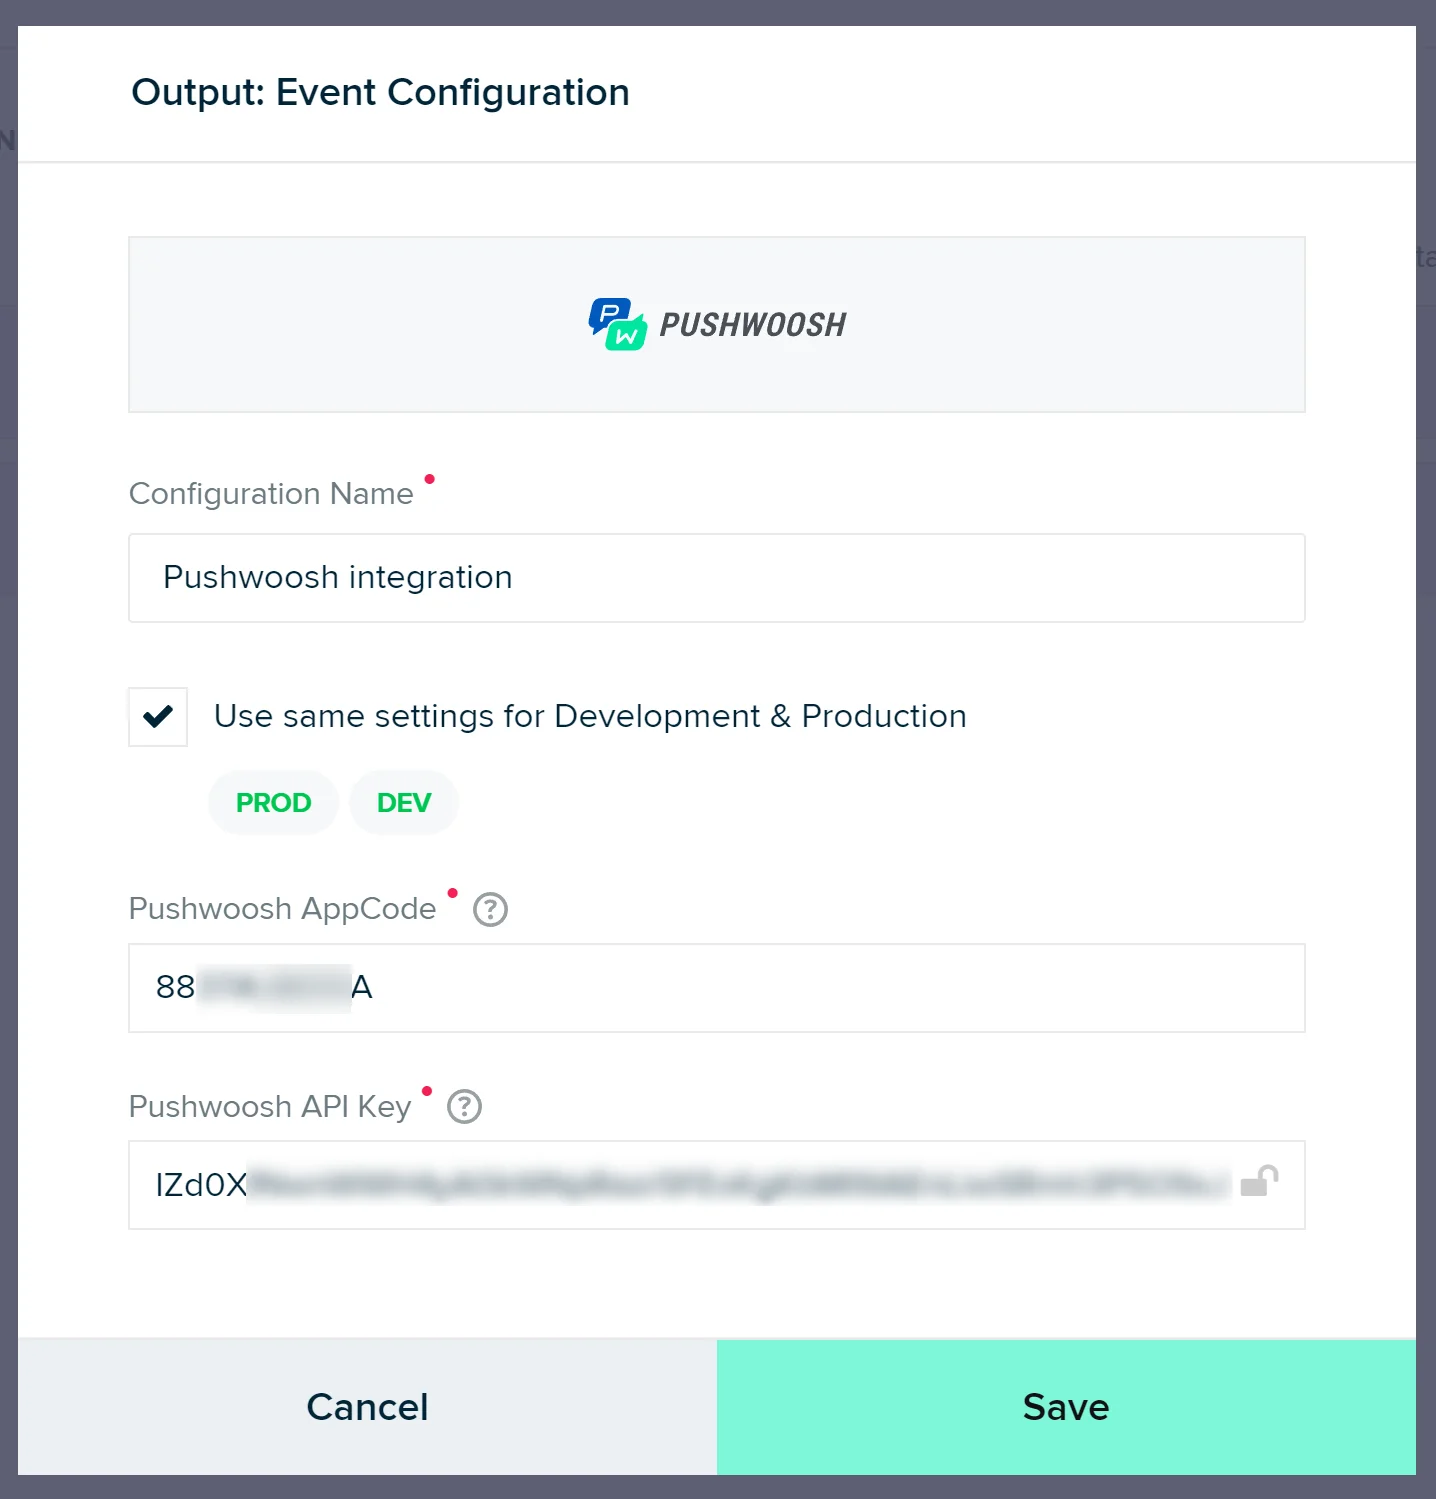
Insert any configuration name (for example, _Pushwoosh integration_), the Pushwoosh application code, and the API key. Click **Save**.
Where can I find the application code and API key?
You can find the application code at the top left corner of the Pushwoosh interface, right below the project name:
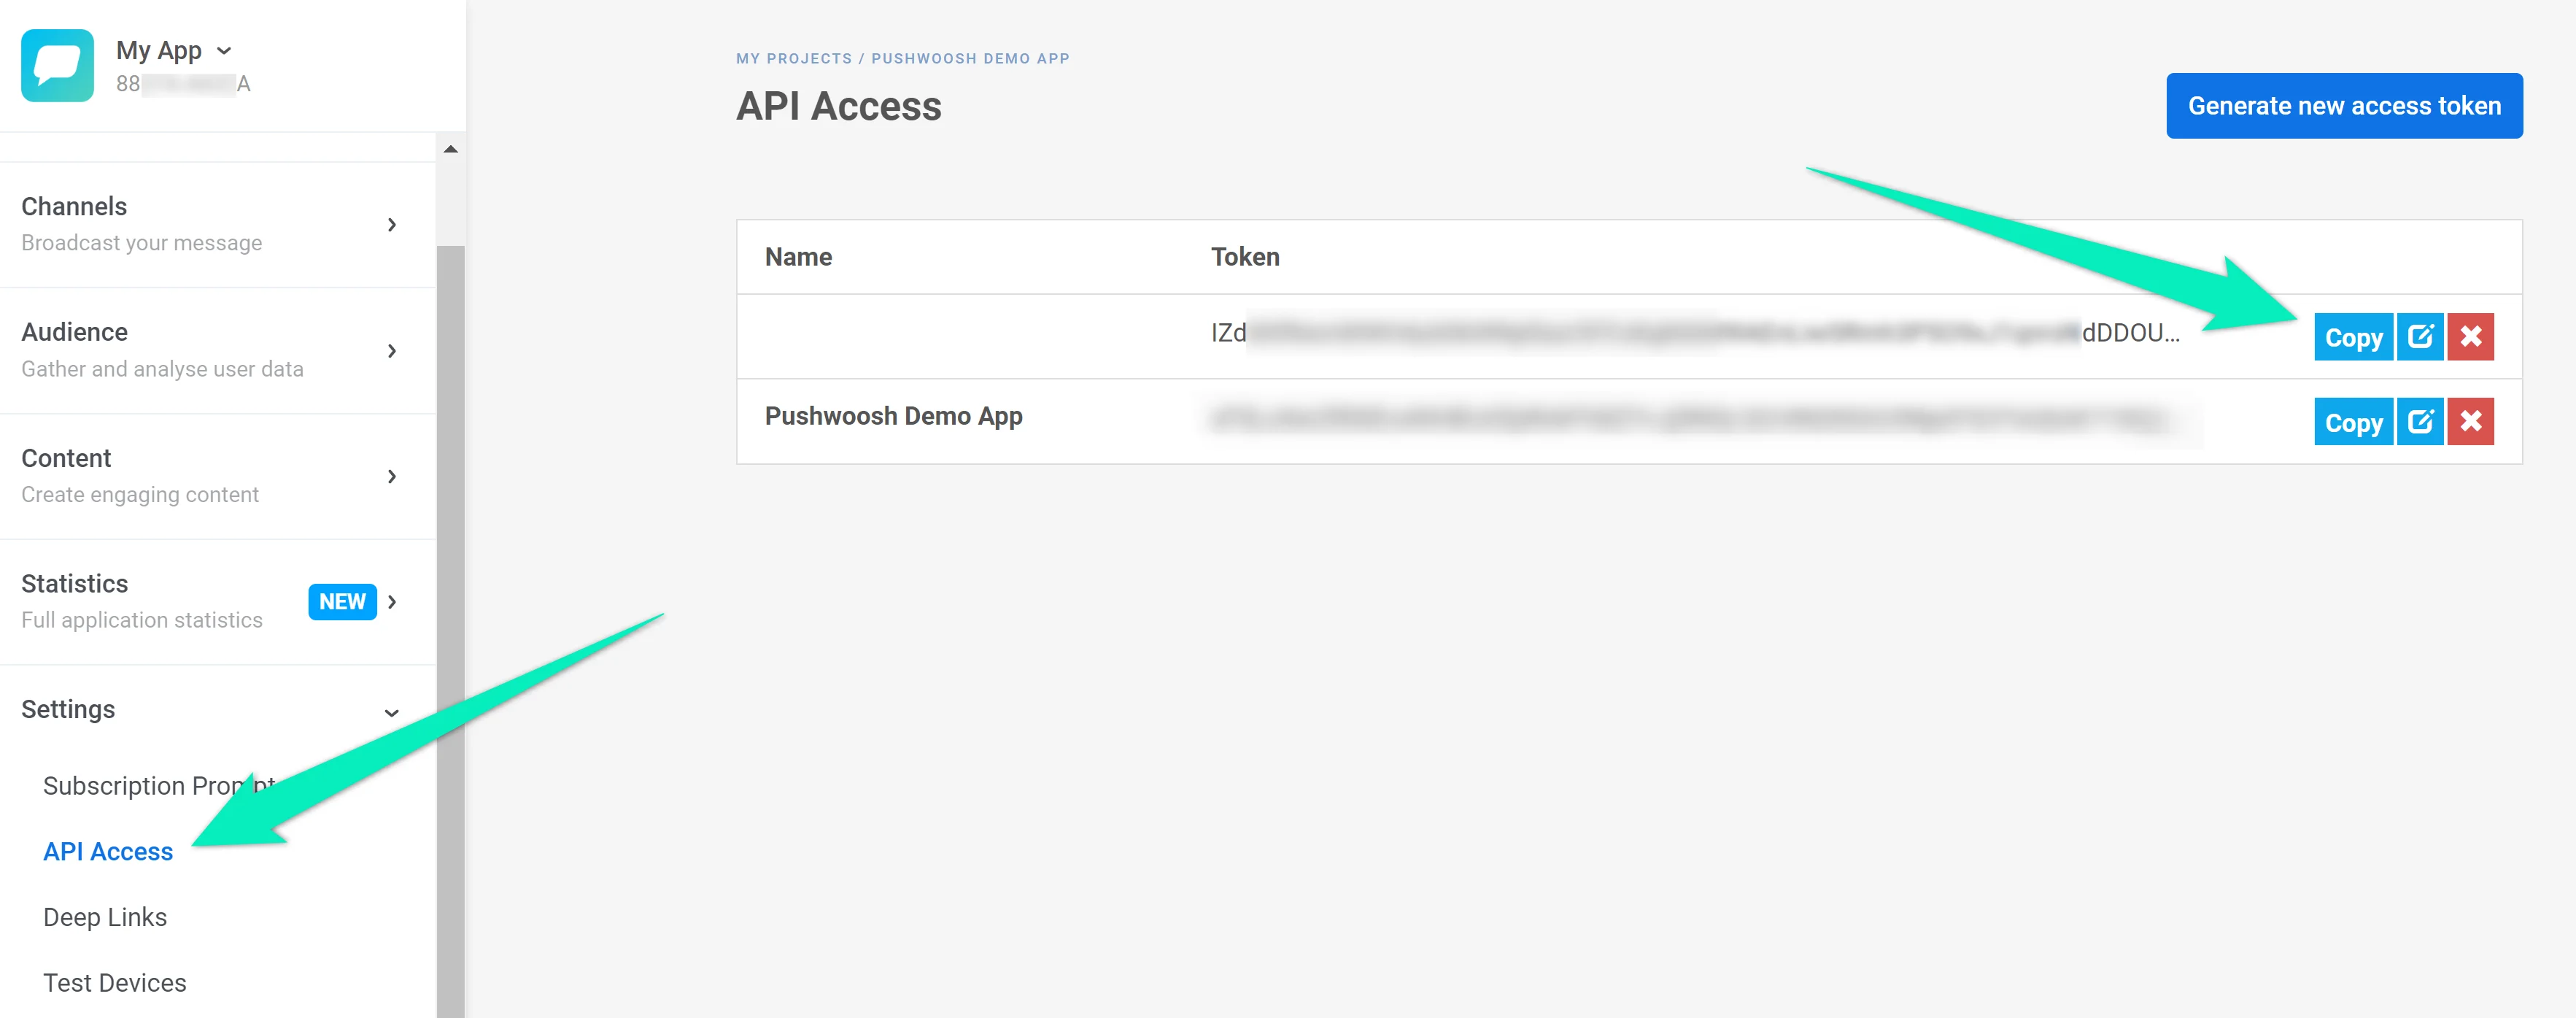
To find the API key, go to **Settings** → **API Access**:
Now switch to the **Audience** tab and repeat these steps for the **Pushwoosh Default** row:
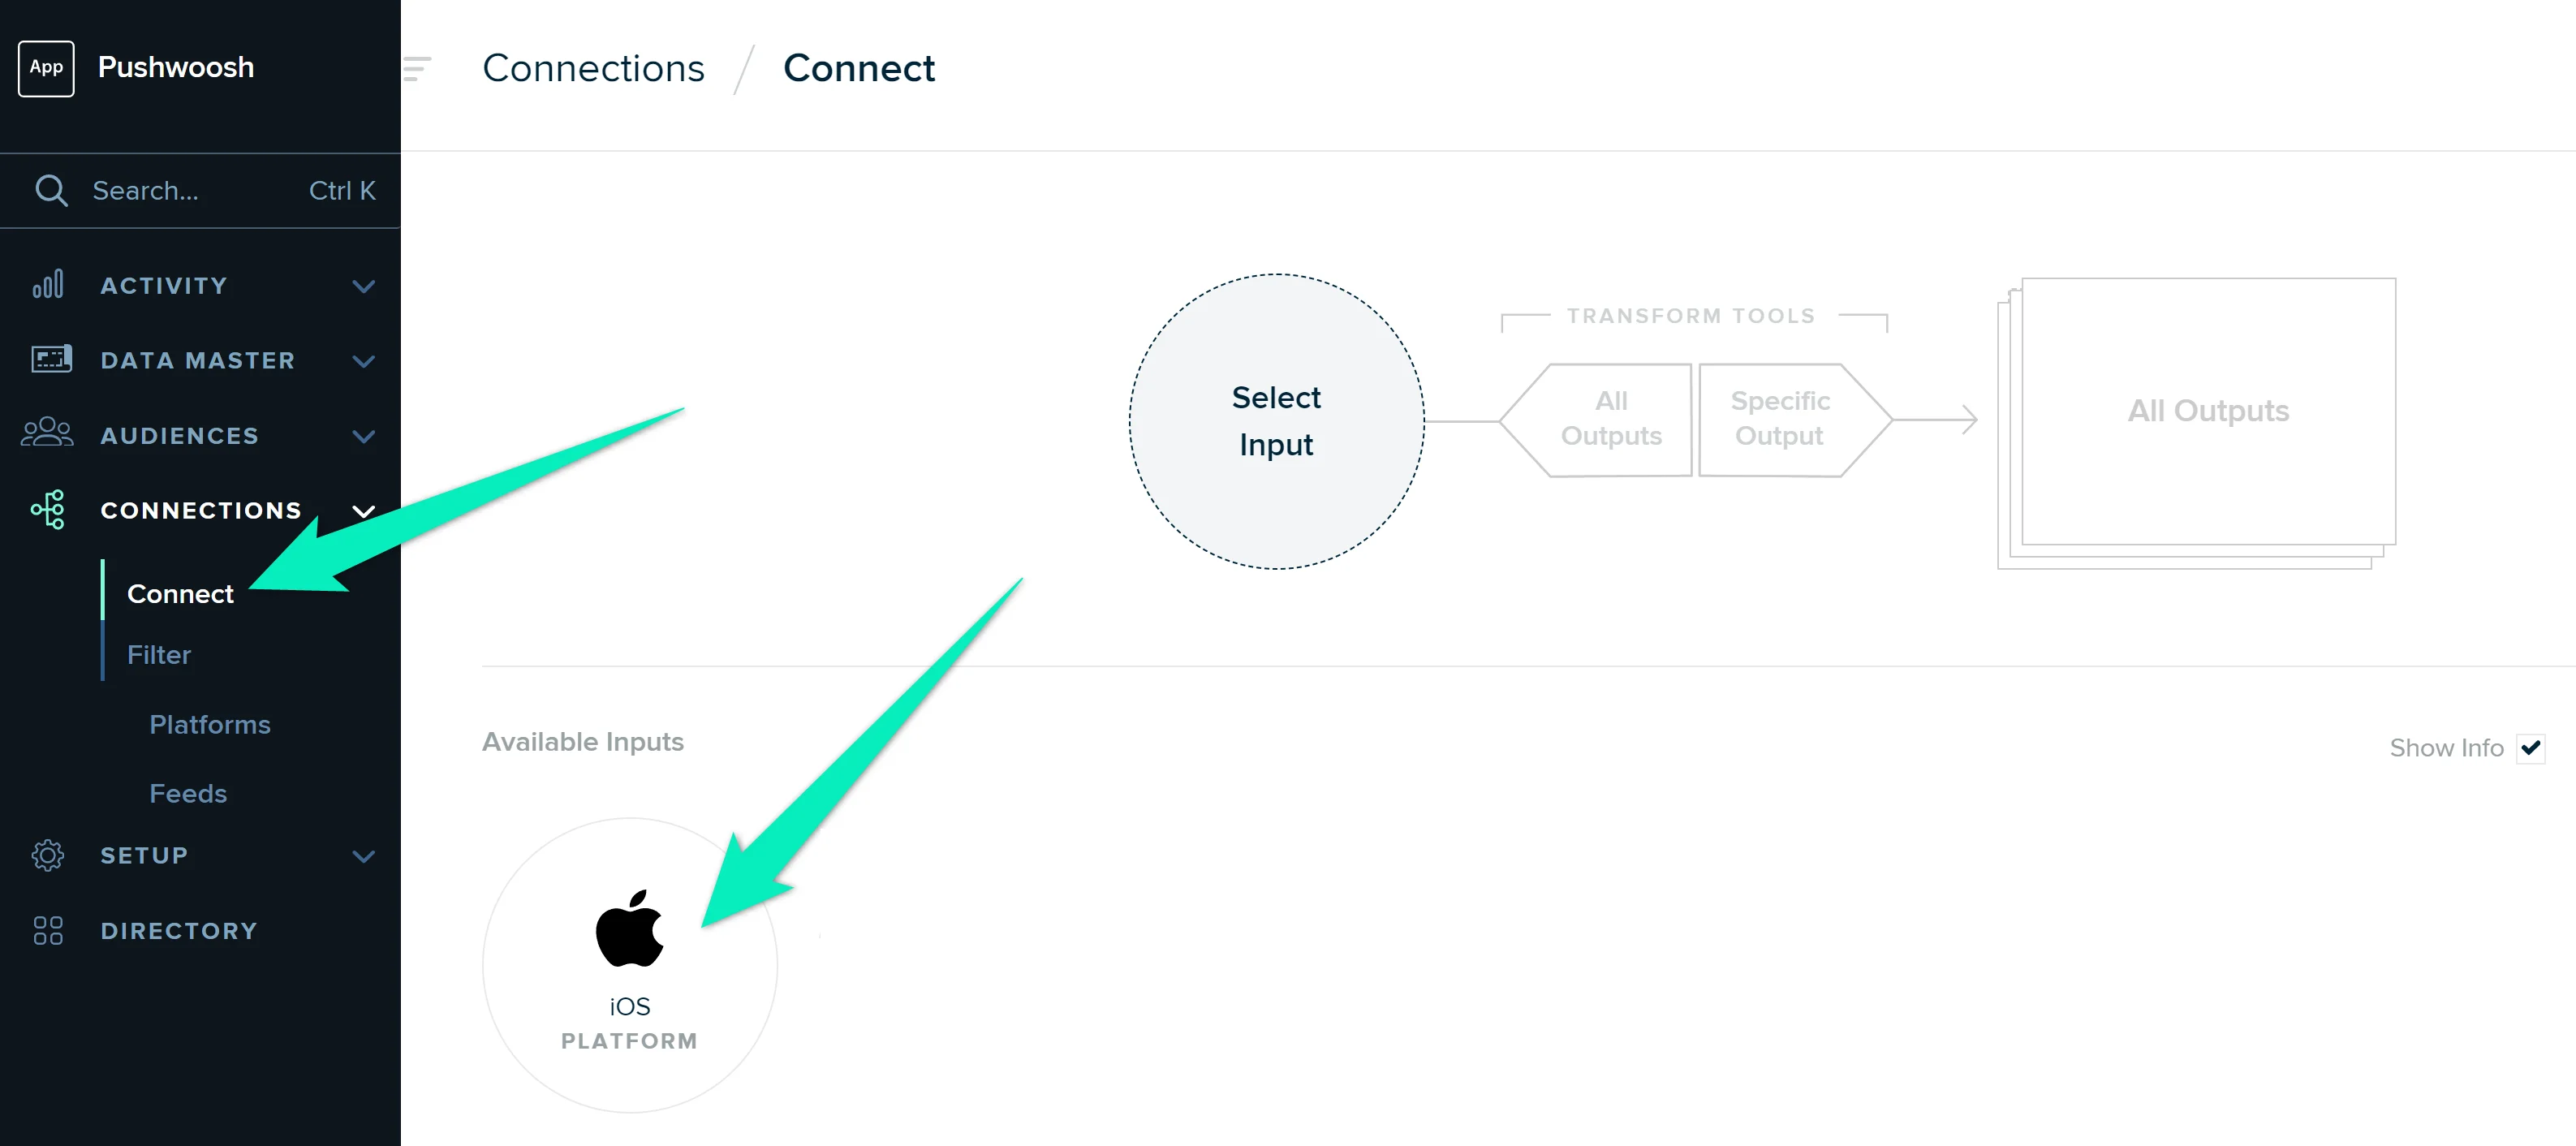
4. Go to **Connections** → **Connect** and click on the Input you want to integrate with Pushwoosh.
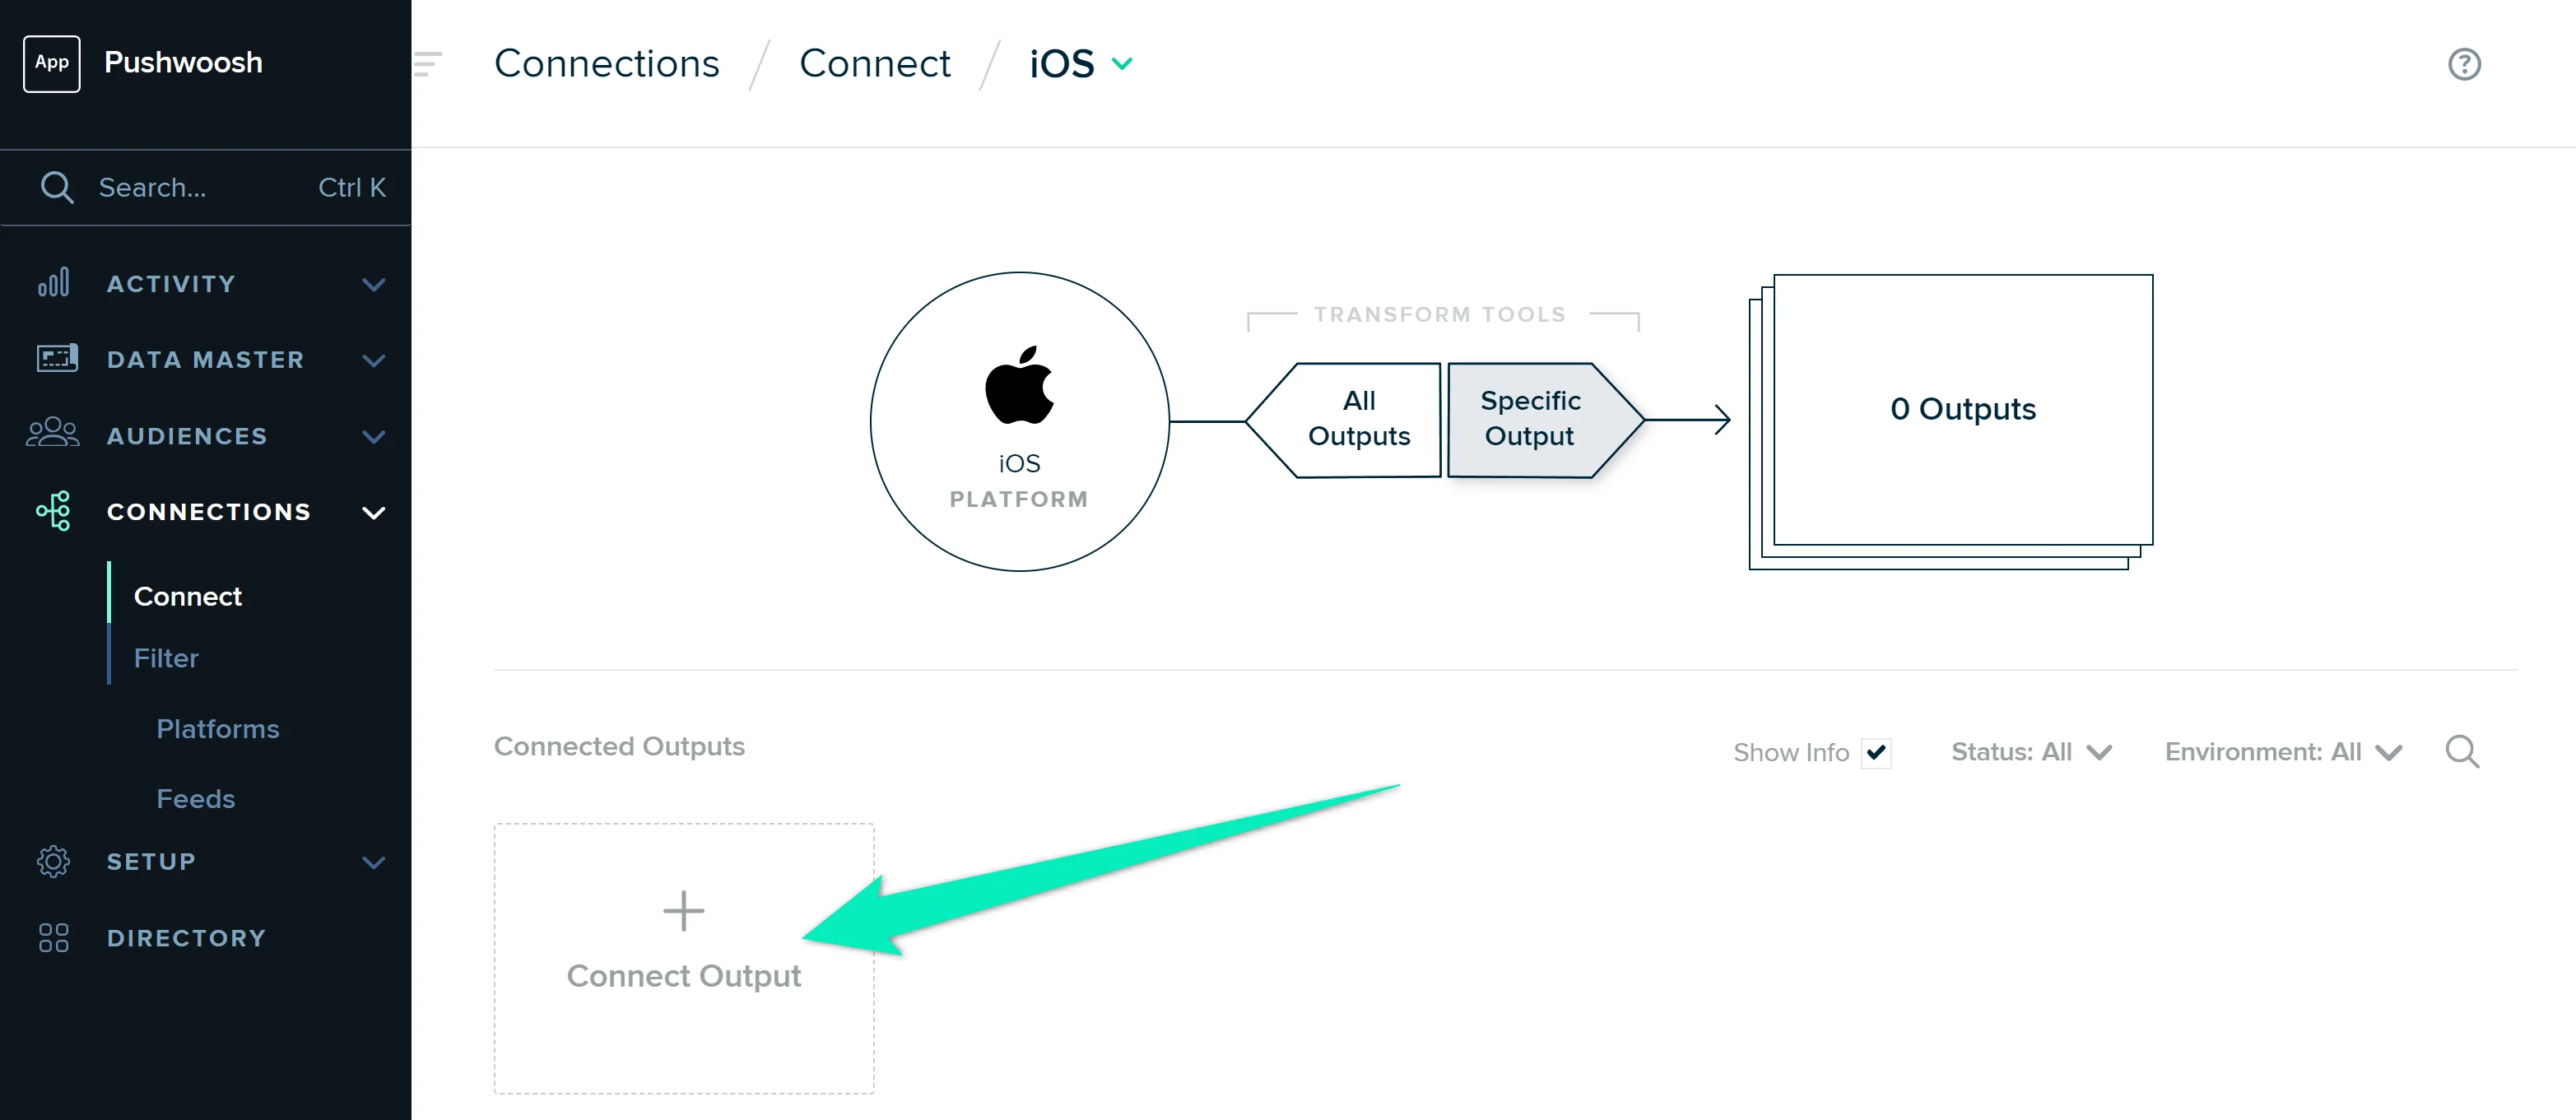
Click **Connect Output**, select **Pushwoosh**, and activate the connection.
Repeat these steps for each Input you want to integrate with Pushwoosh.
If everything is configured correctly, Pushwoosh will start receiving data from mParticle, and you will be able to create [customer journeys](/product/customer-journey/pushwoosh-journey-overview) and send [push notifications](/product/messaging-channels/push-notifications/send-push-notifications/one-time-push/) using customer data from mParticle.
 To find the API key, go to **Settings** → **API Access**:
 2. Select both **Event** and **Audience** Outputs and click **Configure**:
 3. On the page that opens (**Setup** → **Outputs**), click on the plus icon in the **Pushwoosh Default Group** row:
 Insert any configuration name (for example, _Pushwoosh integration_), the Pushwoosh application code, and the API key. Click **Save**.
 Now switch to the **Audience** tab and repeat these steps for the **Pushwoosh Default** row:
 4. Go to **Connections** → **Connect** and click on the Input you want to integrate with Pushwoosh.
 Click **Connect Output**, select **Pushwoosh**, and activate the connection.
 Repeat these steps for each Input you want to integrate with Pushwoosh.
If everything is configured correctly, Pushwoosh will start receiving data from mParticle, and you will be able to create [customer journeys](/product/customer-journey/pushwoosh-journey-overview) and send [push notifications](/product/messaging-channels/push-notifications/send-push-notifications/one-time-push/) using customer data from mParticle.
Repeat these steps for each Input you want to integrate with Pushwoosh.
If everything is configured correctly, Pushwoosh will start receiving data from mParticle, and you will be able to create [customer journeys](/product/customer-journey/pushwoosh-journey-overview) and send [push notifications](/product/messaging-channels/push-notifications/send-push-notifications/one-time-push/) using customer data from mParticle.