# HubSpot integration
import { LinkButton } from '@astrojs/starlight/components';
[**HubSpot**](https://www.hubspot.com/) is a leading CRM platform used for marketing, sales, and customer service automation. By integrating Pushwoosh with HubSpot, you can sync contact data between both systems, trigger push notifications based on CRM events, and enhance customer engagement through automated, personalized messaging.
## Integration overview
### Integration type
* **Source:** Pushwoosh writes back user events or segmentation tags into HubSpot.
* **Destination:** HubSpot sends contact or workflow data to Pushwoosh.
### Prerequisites
* A Pushwoosh account with a valid [Server API token](/developer/api-reference/api-access-token/#server-api-token).
* A HubSpot account with admin access to install integrations.
### Integration scope
This integration is configured per Pushwoosh account. Once installed, it becomes available across all projects within the account.
### Glossary (mapping entity names if they are different)
| Pushwoosh | HubSpot equivalent |
| :---- | :---- |
| Event | Trigger |
### Synchronized entities
* **Contacts:** Pushwoosh and HubSpot contacts are synced in both directions.
* **Events:** Pushwoosh push statistics are linked to corresponding HubSpot contact records.
### Use cases
* Send personalized push notifications during HubSpot workflows.
* Trigger automated push messages based on contact behavior or data using workflows.
## Set up the integration
### Add Pushwoosh integration to HubSpot
To integrate Pushwoosh with your HubSpot account, follow these steps:
1. Log in to your HubSpot account.
2. Click the installation button below to install the application.
Install App
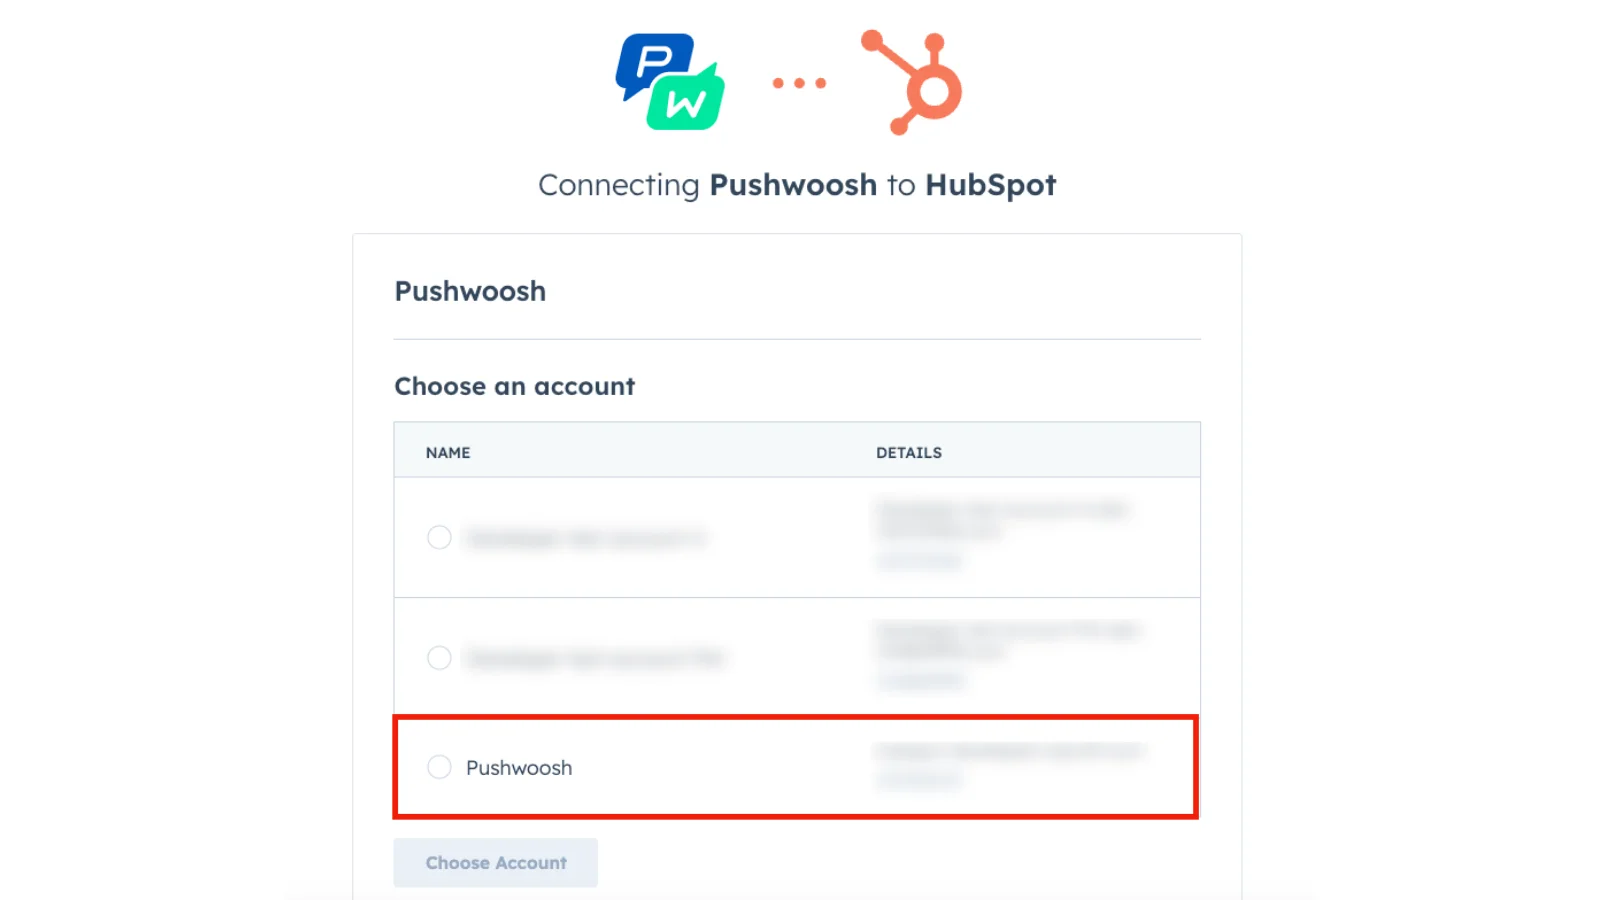
3. In the installation window, select the HubSpot account you want to connect.
4. Click **Choose Account** to proceed.
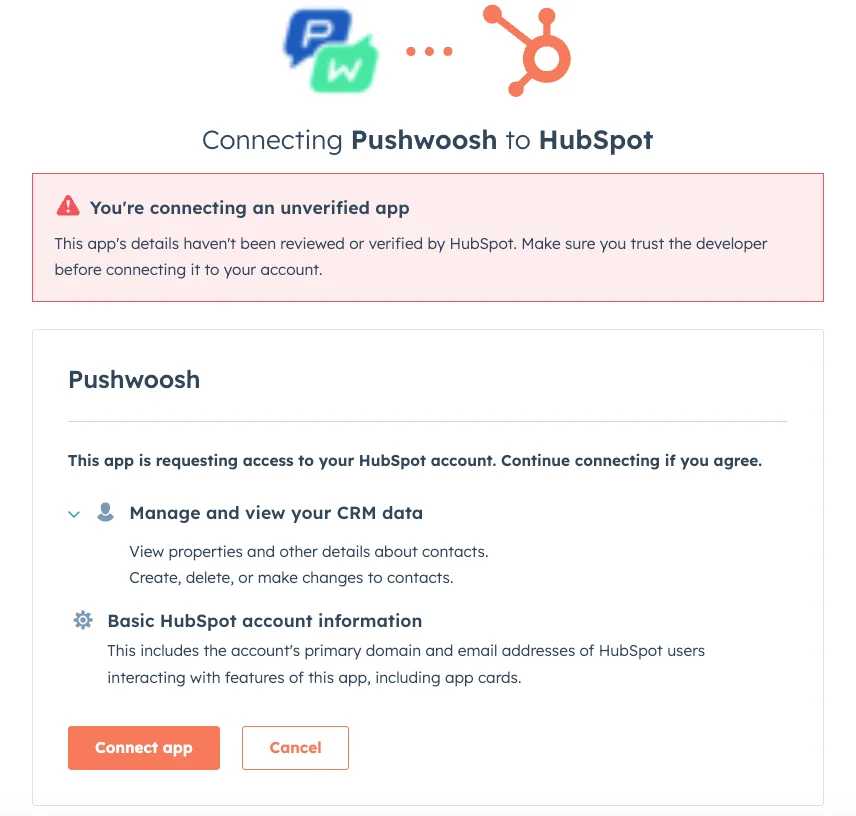
5. Review the required access, then click **Connect App**.
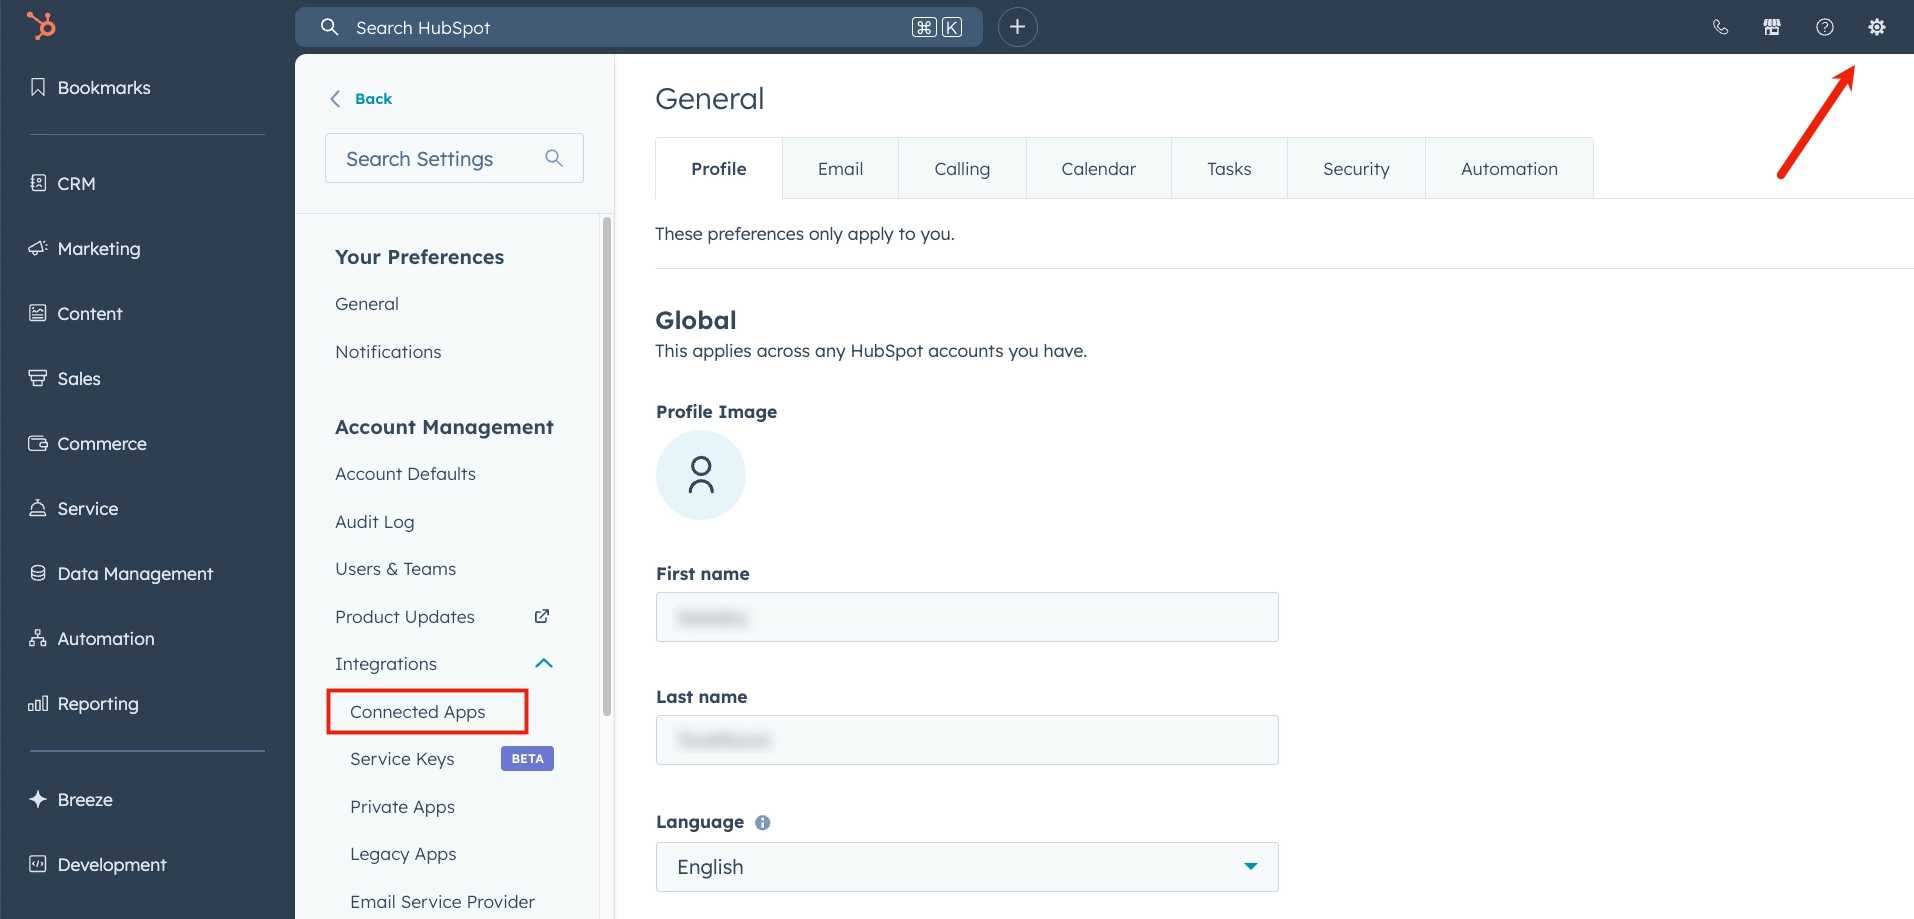
6. After a successful install, in HubSpot go to **Integrations**, then **Connected Apps**.
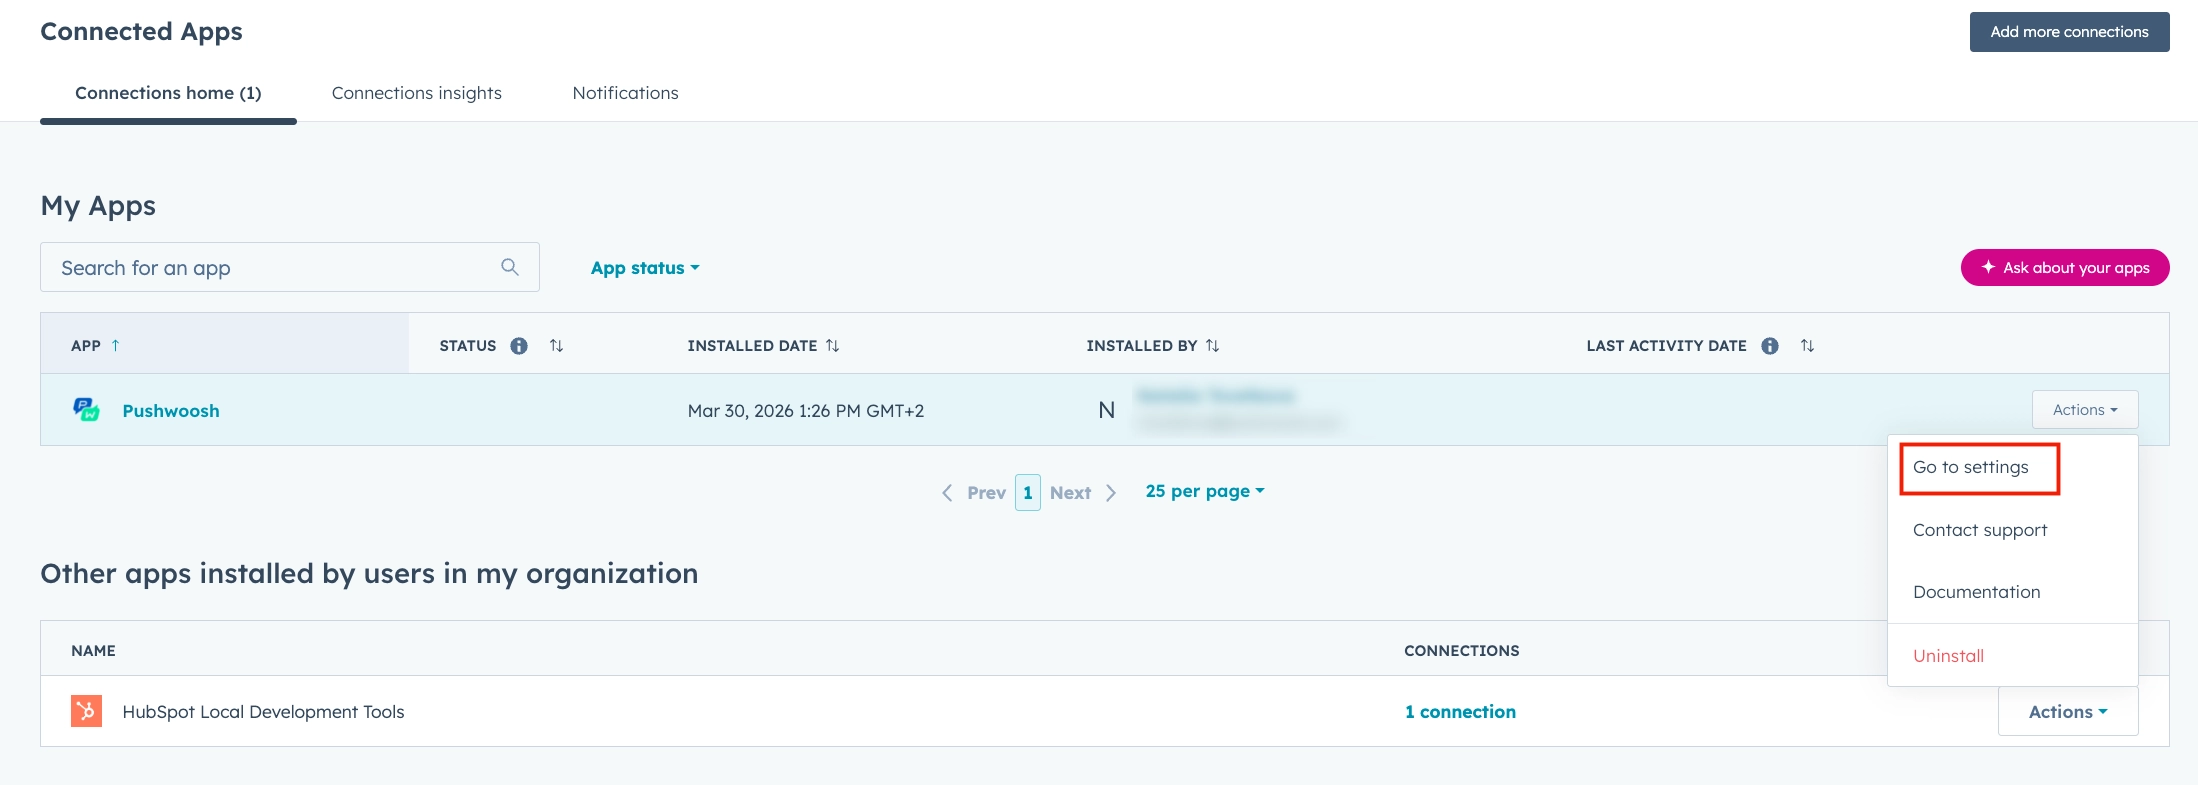
7. In the **My Apps** section, find **Pushwoosh**. On the right side of the row, click **Actions**, then select **Go to settings**.
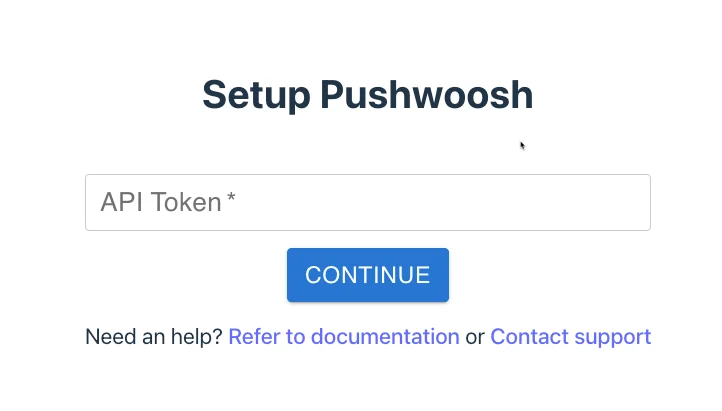
8. Open the **Settings** tab. In the form that appears, enter your Pushwoosh [Server API token](/developer/api-reference/api-access-token/#server-api-token), then click **Connect**.
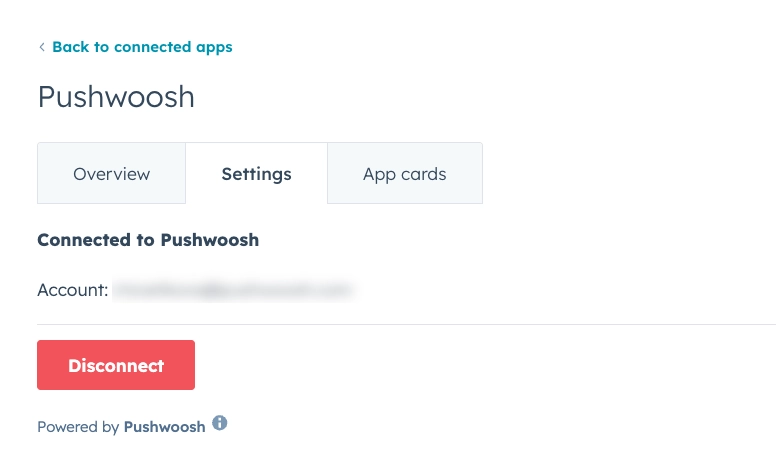
9. After a successful connection, your Pushwoosh account name appears in the **Settings** tab. You can disconnect applications at any time.
When you finish these steps, you can continue in HubSpot and use Pushwoosh features there.
### Set up a CRM card in HubSpot contacts
You can display Pushwoosh data directly on the HubSpot contact page by adding the CRM card. To do this:
1. Go to **Contacts**. Open any contact from your contacts list.
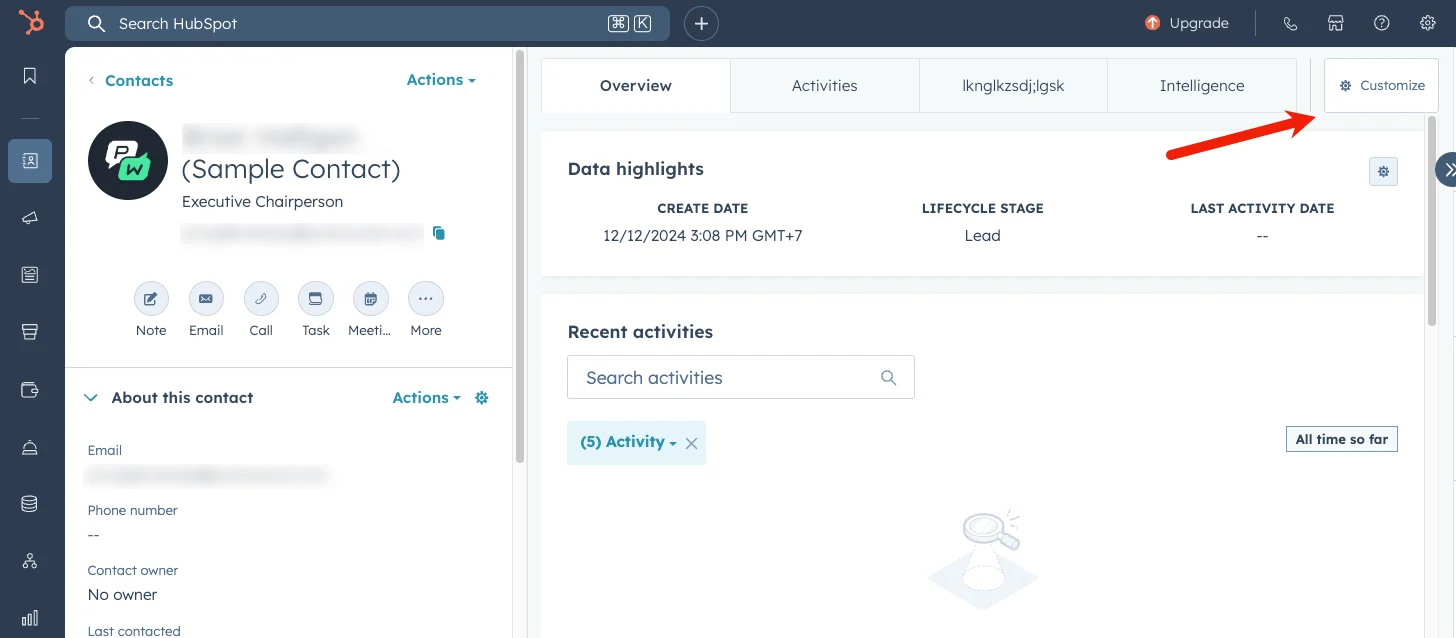
2. Click the **Customize** button in the top-right corner of the middle section.
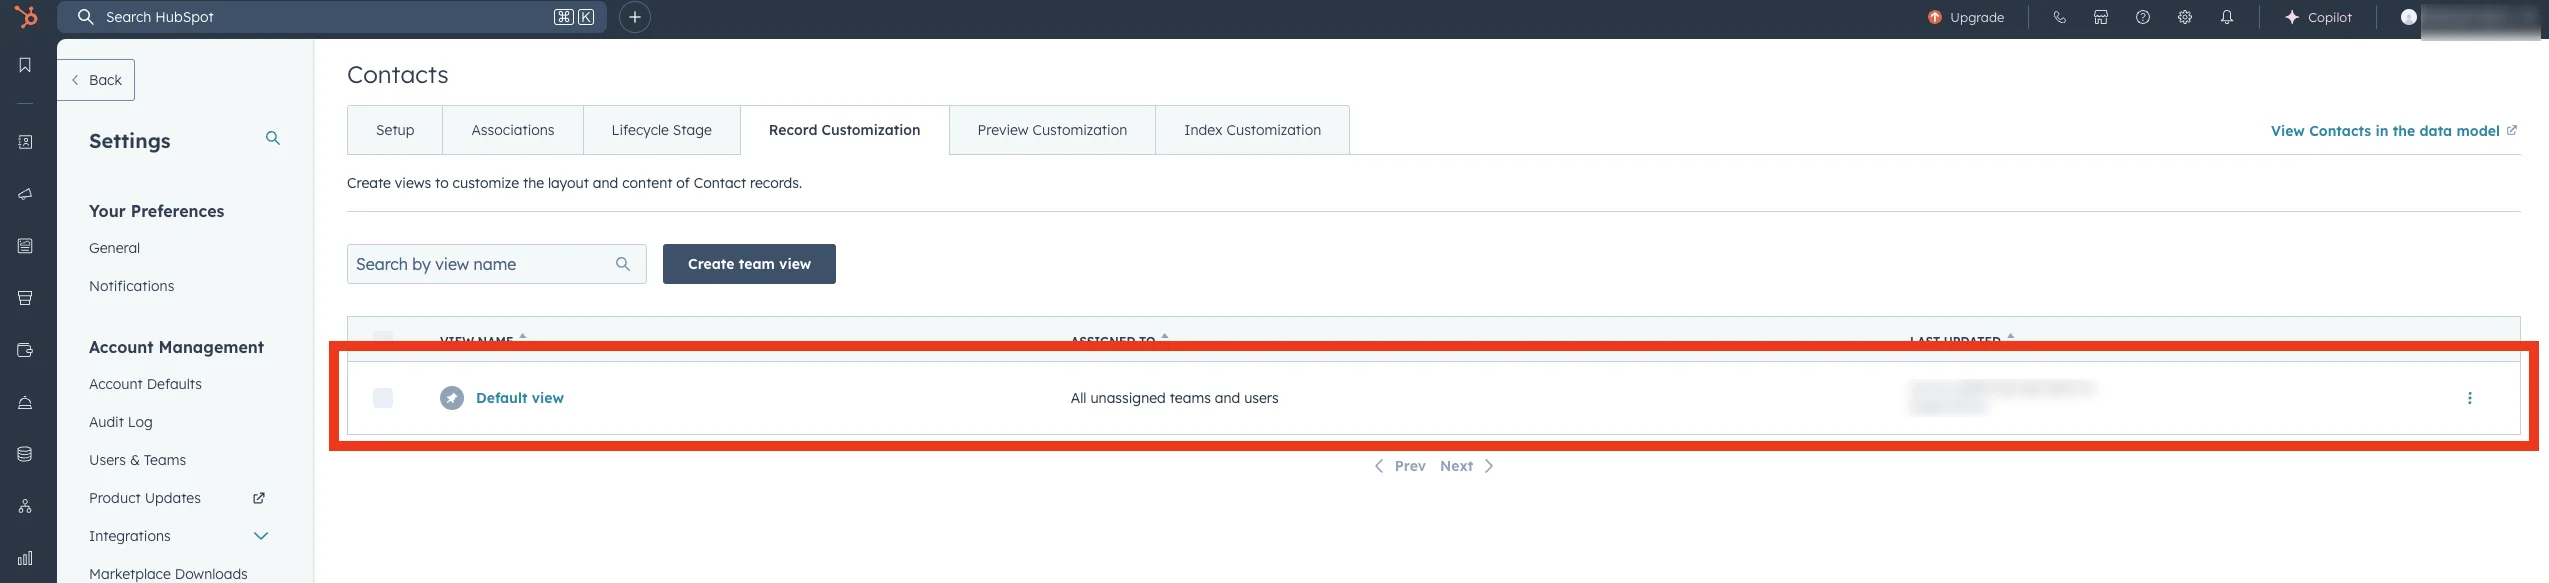
3. On the page that opens, select the view where you want to add the Pushwoosh extension, then click its name. By default, this is usually **the Default view**.
4. In the opened editor, select the required tab or location, then choose **Add new card**. In the menu that appears, go to the **Card library** page and enter **Pushwoosh** in the **Search cards** field. You can now add the Pushwoosh extension to your view.
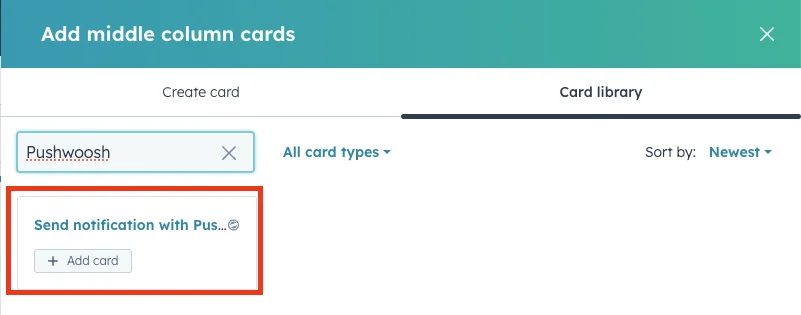
5. Close the Card Library and click **Save and exit** to save your changes.
The Pushwoosh extension is now available in your contact view and ready to use.
## Use the Pushwoosh extension
The Pushwoosh extension allows you to send notifications directly to any contact, either from the HubSpot contact page or as part of a HubSpot workflow.
### Send a notification
To send a notification using the Pushwoosh extension, follow these steps:
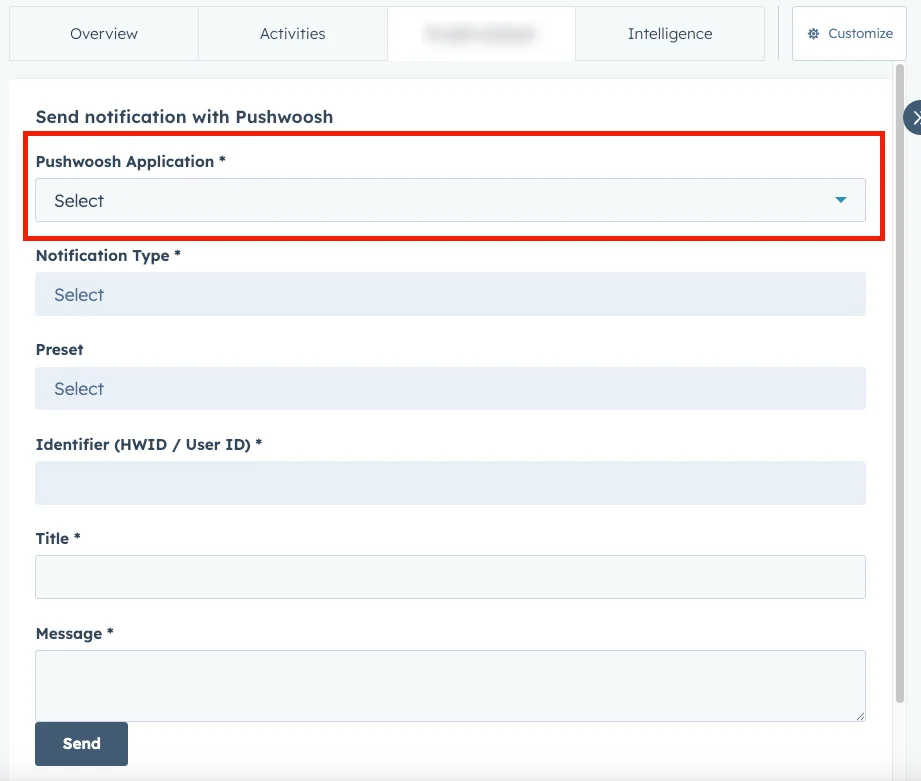
1. **Select a Pushwoosh application**. If you have multiple Pushwoosh applications, choose the one you want to send the notification from.
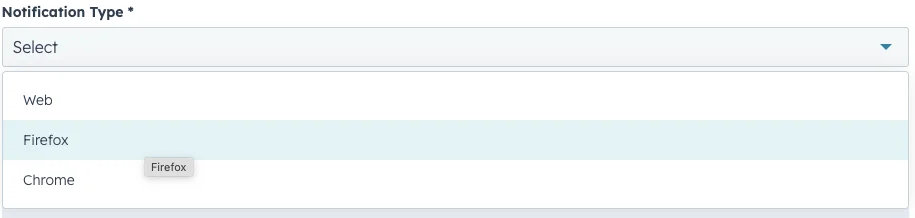
2. **Select a notification type (platform)** from the dropdown, which lists all available options for the selected Pushwoosh application.
3. You can select a notification preset or manually enter the **Title** and **Message**.
Presets contain saved content with pre-filled fields.
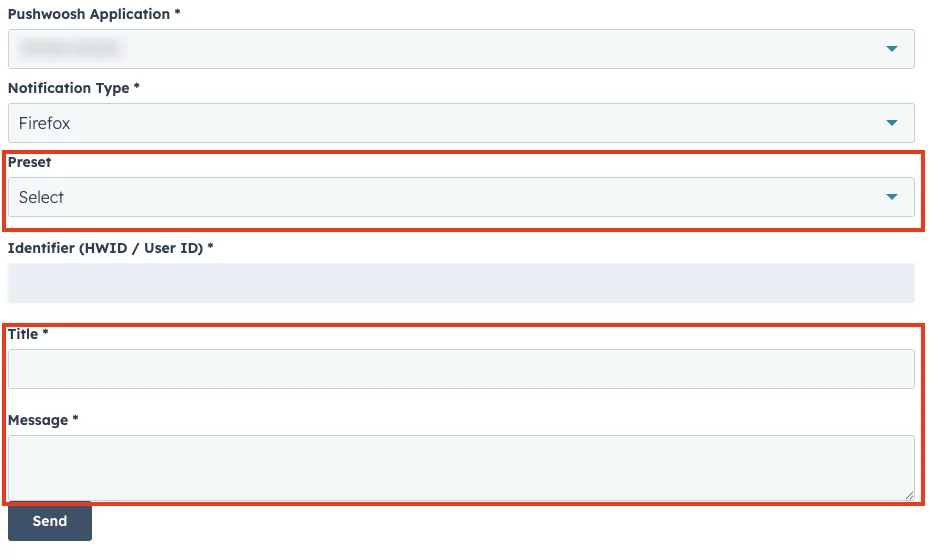
4. Send the notification.
## Send notifications in HubSpot workflows
Pushwoosh allows you to send notifications directly from HubSpot workflows.
To add a Pushwoosh notification to your workflow:
1. Open your HubSpot workflow and add an action.
2. In the **Choose an action** side panel, scroll to **Integrated apps**.
3. Expand **Pushwoosh** and select **Send Notification with Pushwoosh**.
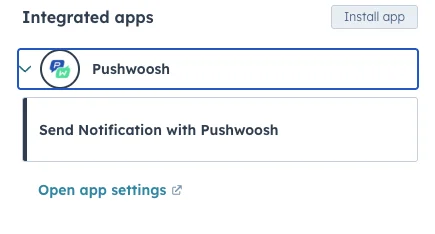
4. Fill in the fields the same way as in the Pushwoosh extension, then click **Save**.
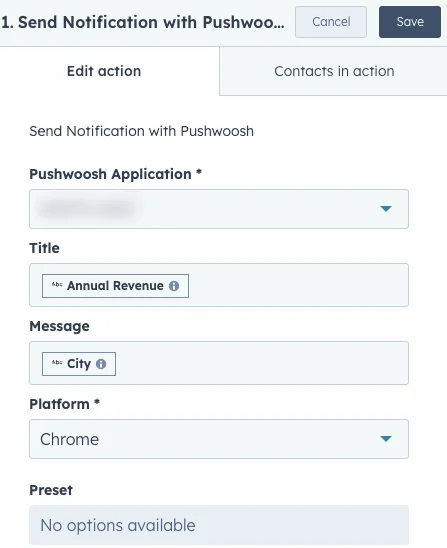
5. Save the workflow.
### Add Pushwoosh triggers to a HubSpot workflow
You can also add triggers from the Pushwoosh application to your HubSpot workflow. To do this:
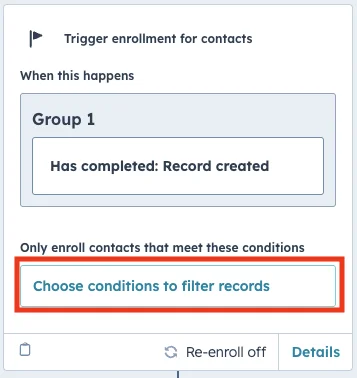
1. In the workflow editor, under **Trigger enrollment**, click **Choose condition to filter records**.
2. In the side panel that opens, click **Add trigger.**
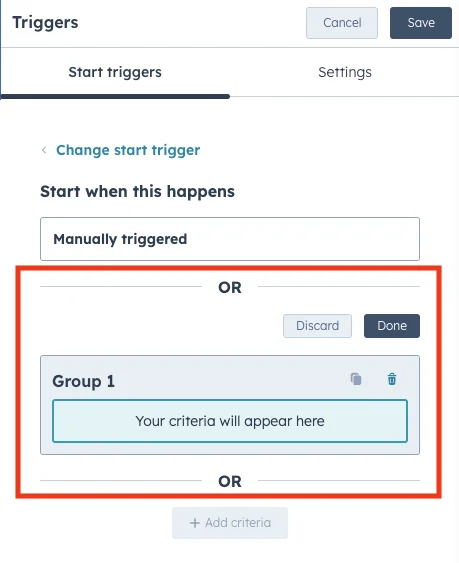
3. Search for and select **Push Statistics Event** in **Triggers**.
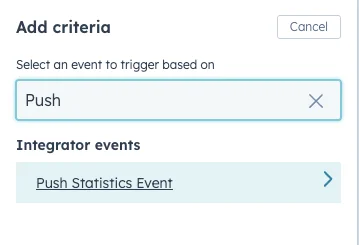
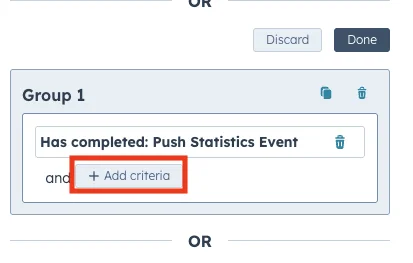
4. Click **Add criteria** to define the trigger conditions.
You can select and configure any of the available options from the list of criteria.
5. Save the workflow.
## Pushwoosh app events in HubSpot
Pushwoosh automatically tracks notification delivery events and syncs them to HubSpot as app events.
When you send a notification through Pushwoosh (**Email**, **SMS**, **WhatsApp**, or **Push**), Pushwoosh looks up the related HubSpot contact by email, phone number, or the custom contact property `userid`.
If Pushwoosh finds a matching contact, it creates an app event on the contact record with delivery details, including event type (for example, `Email Sent` or `SMS Delivered`), platform, user ID, and device ID.
This gives your team direct visibility into Pushwoosh communication history in each HubSpot contact record.
This feature works automatically. To turn event visibility on:
1. Go to **Contacts** and open a contact record.
2. Open the **Activities** tab on the contact record.
3. Open **Filter activity**.
4. In the **Integrations** column, select **Pushwoosh**.
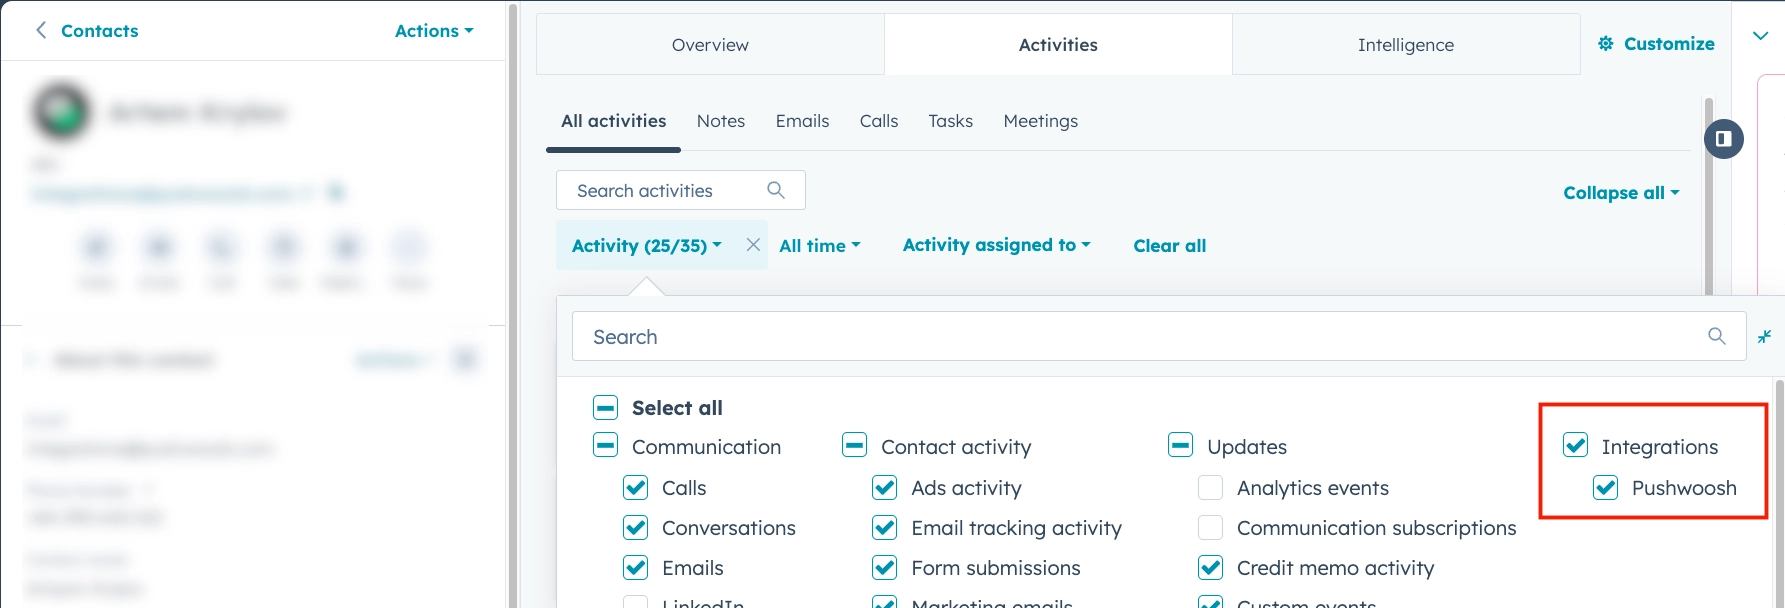
You can now see Pushwoosh delivery events in the contact activity feed.