# Google Analytics integration
Google Analytics [User ID](https://support.google.com/analytics/answer/3123662?authuser=1) feature lets you collect and apply comprehensive user data by connecting multiple data resources to the same users.
Connect Pushwoosh with Google Analytics and use GA data for audience segmentation and targeting your push notifications campaigns. Let's see how it works.
## Enable User ID
To enable User ID feature in your [Google Analytics account](https://analytics.google.com/analytics/web/provision/#/provision), follow the Google guide: [https://support.google.com/analytics/answer/3123666](https://support.google.com/analytics/answer/3123666)
## Set up User ID in your tracking code
## Integrate Pushwoosh Web SDK
To integrate Pushwoosh SDK in your Google Tag Manager, follow the [Web Push SDK guide](/developer/pushwoosh-sdk/web-push-notifications/web-push-sdk-30#installing-from-google-tag-manager).
## Create User ID tag in GTM
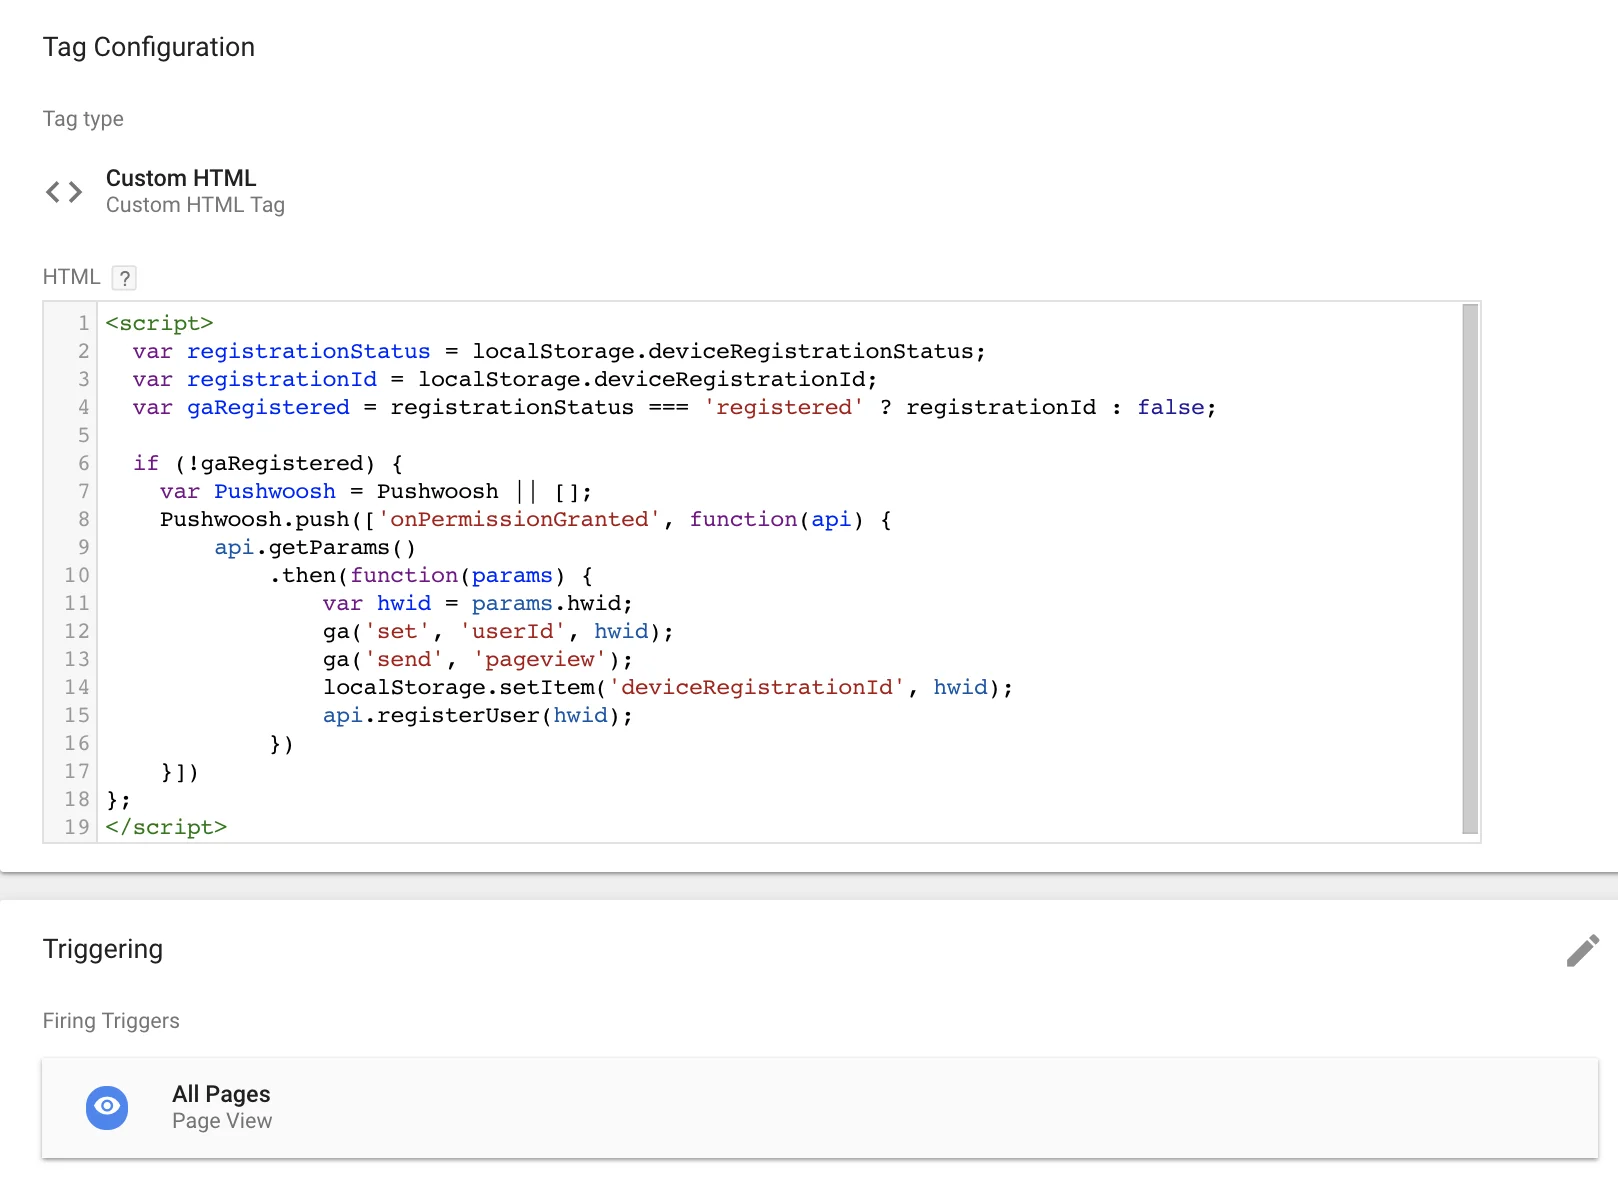
Create a **Custom HTML Tag** firing on **All Pages** trigger.\
Use the following code to set up User ID that matches the user data between Pushwoosh and Google Analytics.
In the example below, we use Pushwoosh Hardware ID (HWID) to set up User ID. You can use a different identifier, but be aware not to put email addresses or any other personally identifiable information (PII) into User ID as this is not compliant with [Google Analytics Privacy Policy](https://policies.google.com/privacy).
```javascript title="JavaScript"
```
## Add User ID to Page View tag
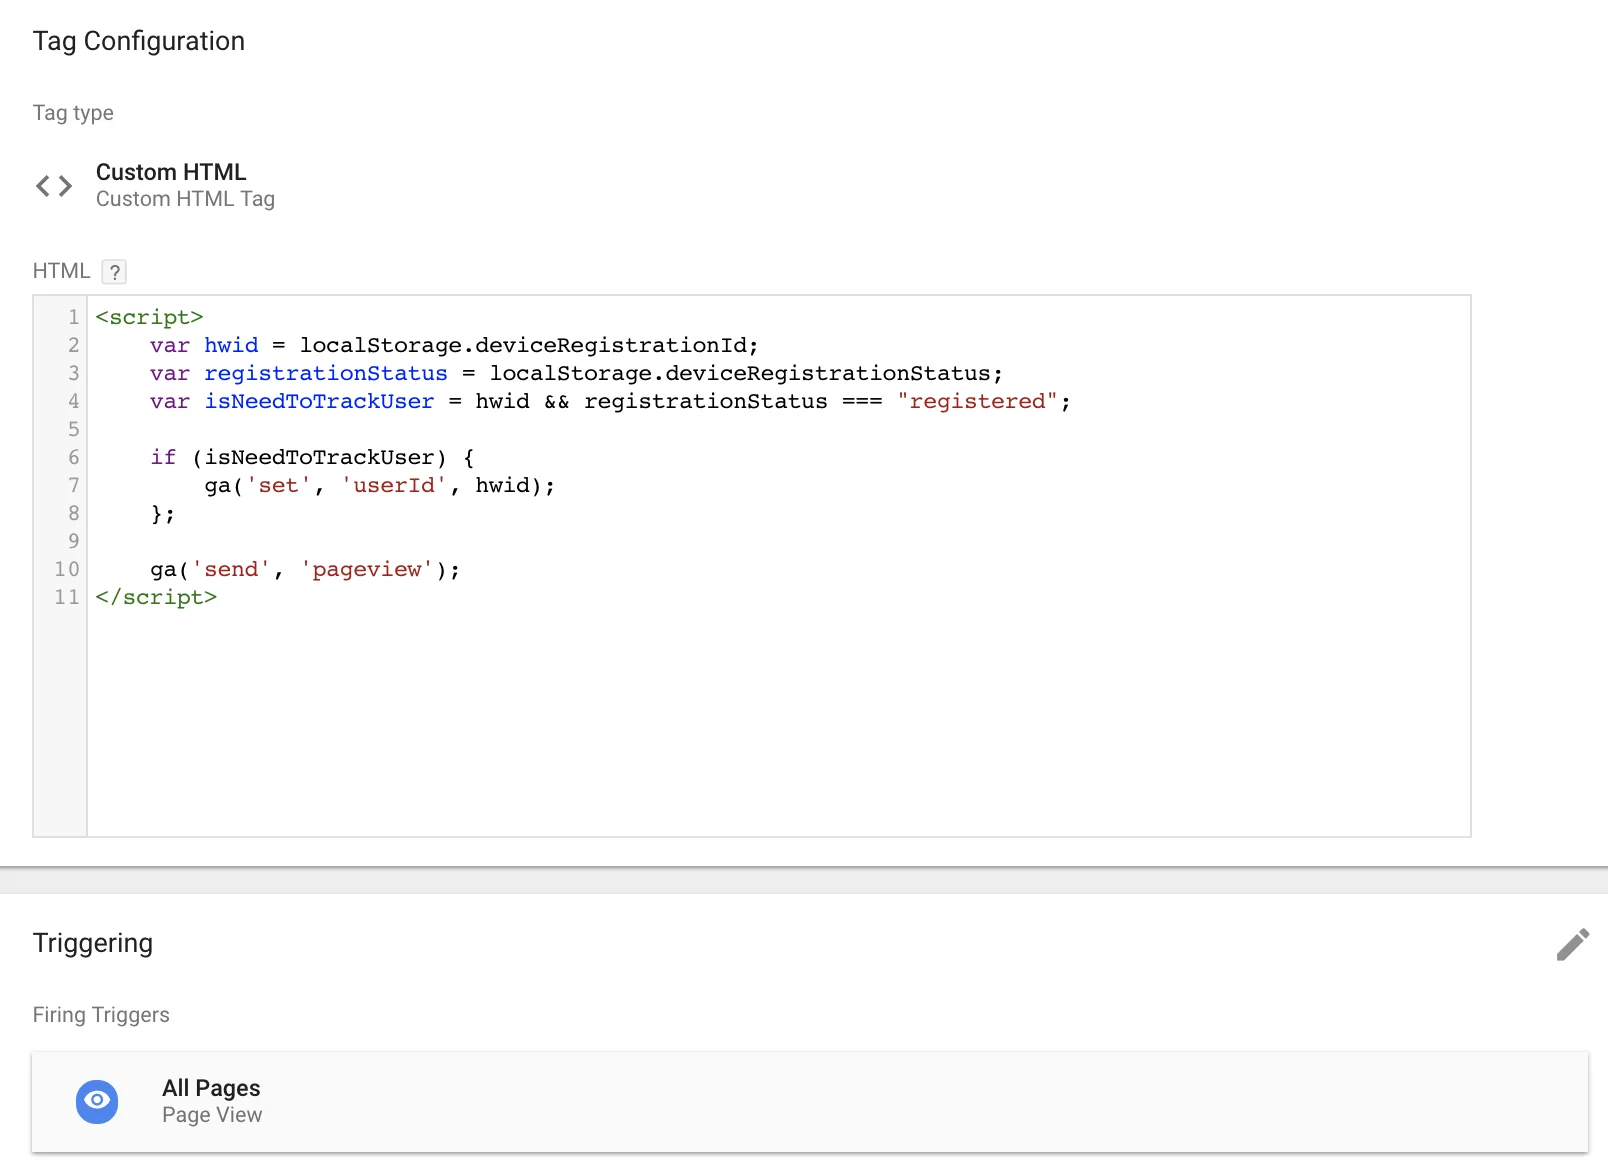
Modify your **Page View tag** to include User ID if it is known for the user:
```javascript title="JavaScript"
```
## Test with User ID coverage report
To test the integration, use "User ID coverage report":\
[https://support.google.com/analytics/answer/3123670](https://support.google.com/analytics/answer/3123670)
## User Explorer
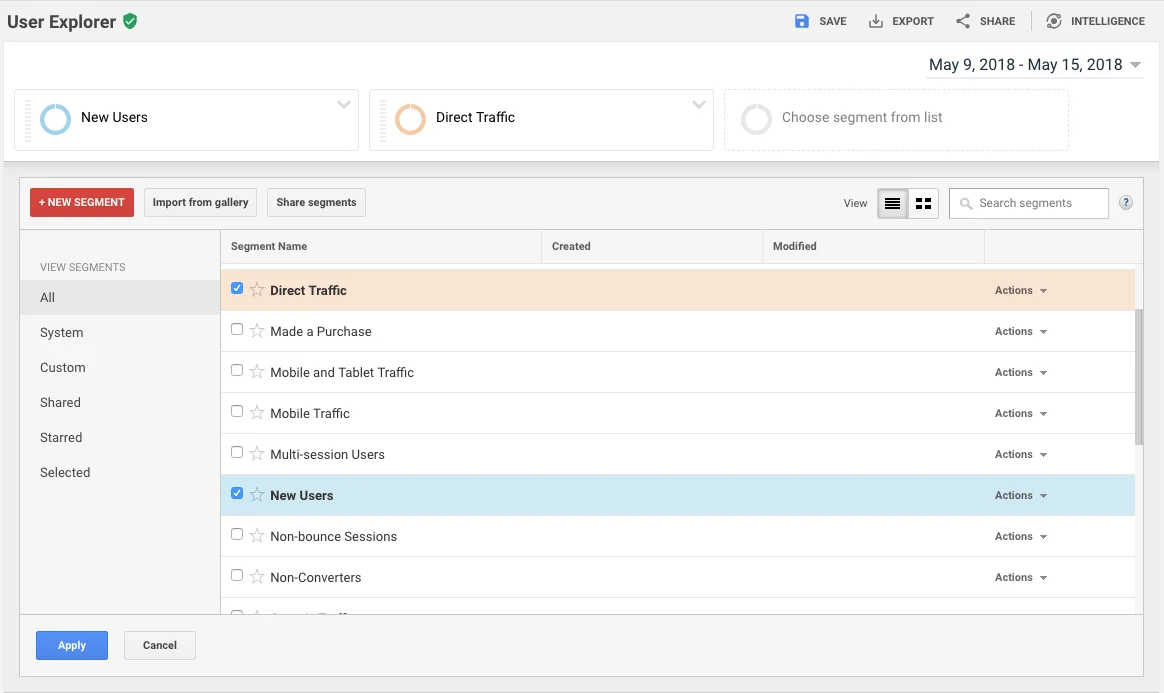
Select your User ID reporting view in Google Analytics. Add any segments there to slice and dice your audience.
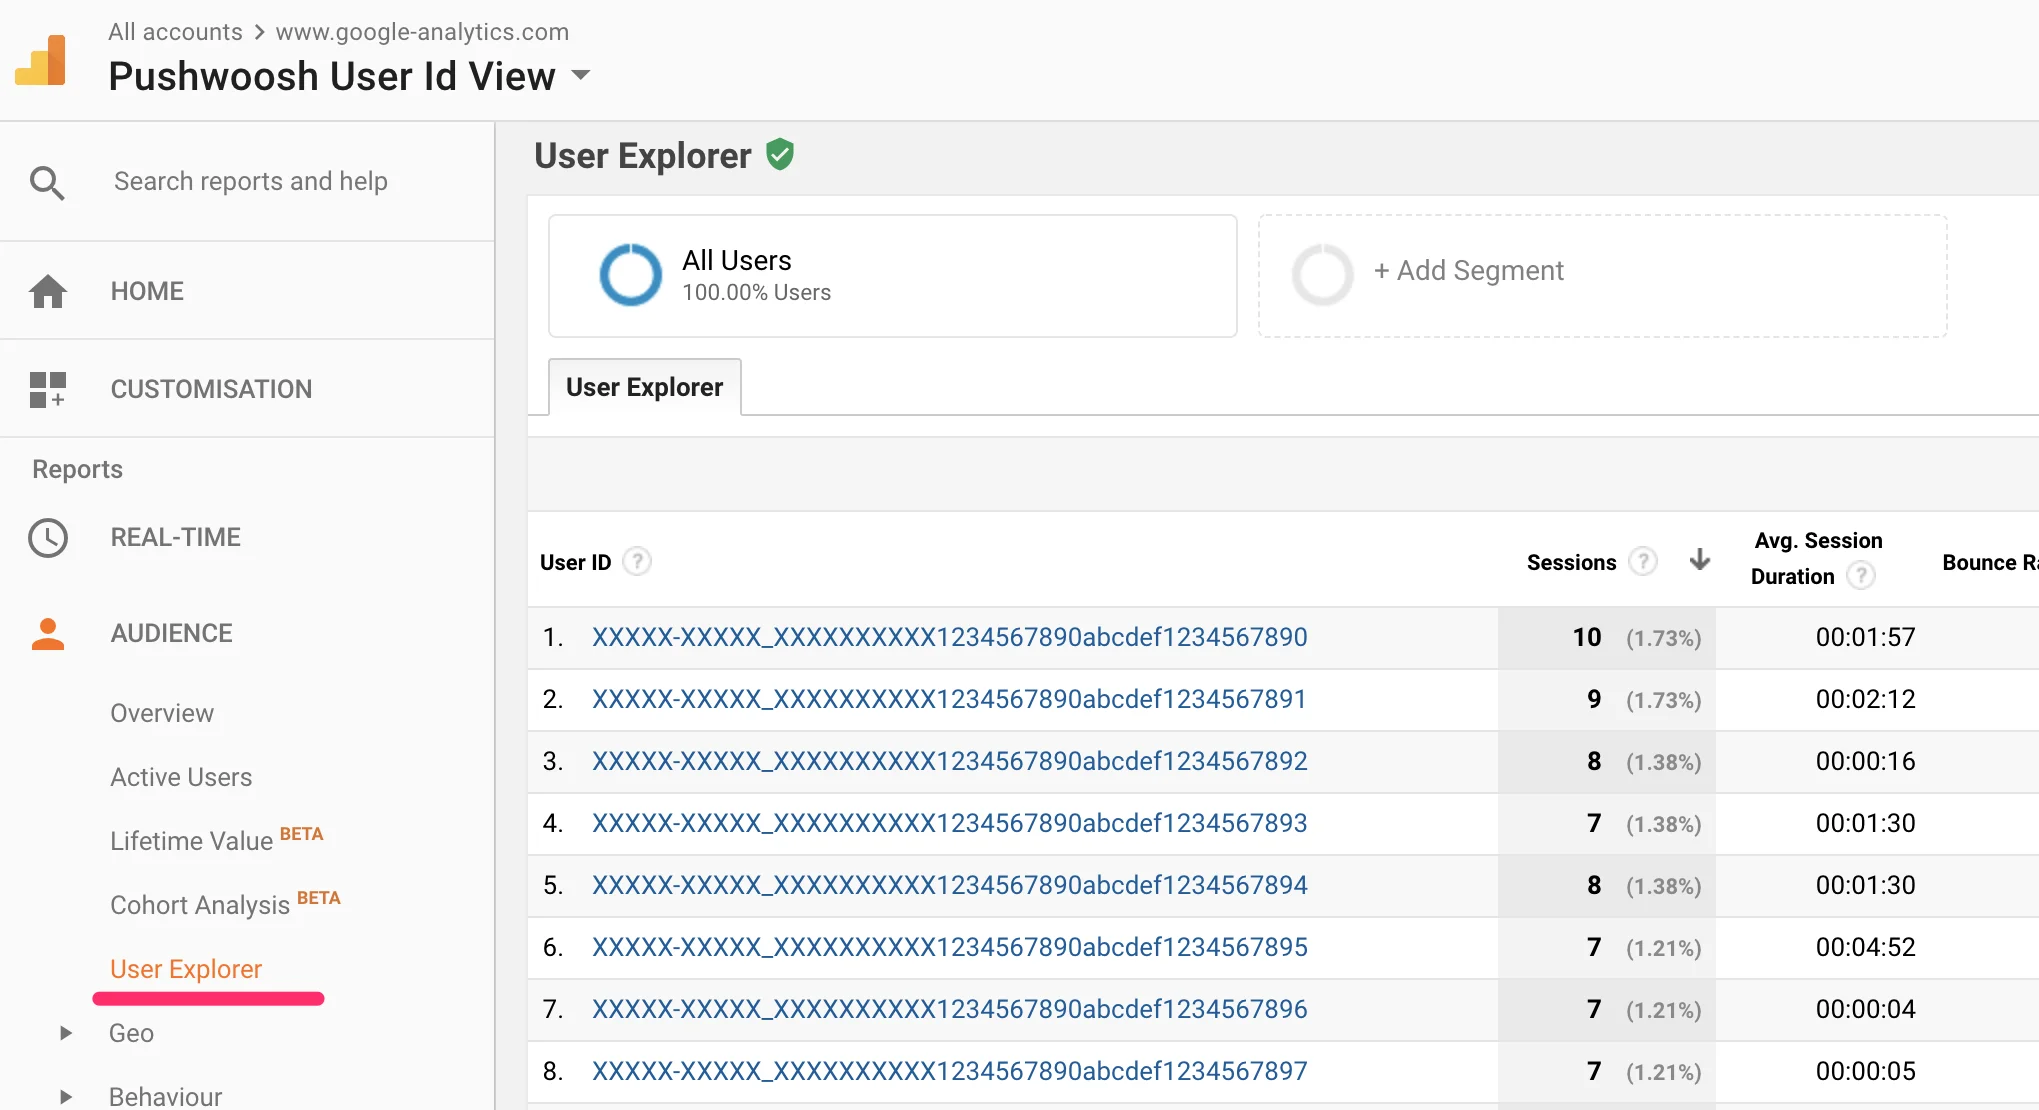
You can see your User IDs displayed in the "User ID" column. Use the **Export** button and select the CSV option to download the list of User IDs.
## Send push notifications to GA User IDs
To send a push to users from your GA audience, use [One-Time Push](/product/messaging-channels/push-notifications/send-push-notifications/one-time-push/) and at the **Audience** step choose **Import segment**. Upload the CSV file you exported from Google Analytics and map the column that contains User IDs to the User ID field. [Learn more](/product/audience-data-and-segmentation/segmentation/create-segments/by-import/#how-to-import-a-segment)
 ## Add User ID to Page View tag
Modify your **Page View tag** to include User ID if it is known for the user:
```javascript title="JavaScript"
```
## Add User ID to Page View tag
Modify your **Page View tag** to include User ID if it is known for the user:
```javascript title="JavaScript"
```
 ## Test with User ID coverage report
To test the integration, use "User ID coverage report":\
[https://support.google.com/analytics/answer/3123670](https://support.google.com/analytics/answer/3123670)
## User Explorer
Select your User ID reporting view in Google Analytics. Add any segments there to slice and dice your audience.
## Test with User ID coverage report
To test the integration, use "User ID coverage report":\
[https://support.google.com/analytics/answer/3123670](https://support.google.com/analytics/answer/3123670)
## User Explorer
Select your User ID reporting view in Google Analytics. Add any segments there to slice and dice your audience.
 You can see your User IDs displayed in the "User ID" column. Use the **Export** button and select the CSV option to download the list of User IDs.
 ## Send push notifications to GA User IDs
To send a push to users from your GA audience, use [One-Time Push](/product/messaging-channels/push-notifications/send-push-notifications/one-time-push/) and at the **Audience** step choose **Import segment**. Upload the CSV file you exported from Google Analytics and map the column that contains User IDs to the User ID field. [Learn more](/product/audience-data-and-segmentation/segmentation/create-segments/by-import/#how-to-import-a-segment)
## Send push notifications to GA User IDs
To send a push to users from your GA audience, use [One-Time Push](/product/messaging-channels/push-notifications/send-push-notifications/one-time-push/) and at the **Audience** step choose **Import segment**. Upload the CSV file you exported from Google Analytics and map the column that contains User IDs to the User ID field. [Learn more](/product/audience-data-and-segmentation/segmentation/create-segments/by-import/#how-to-import-a-segment)