# AppsFlyer ESP 2.0 integration
[AppsFlyer](https://www.appsflyer.com/) is a mobile attribution and marketing analytics platform. [AppsFlyer ESP 2.0](https://support.appsflyer.com/hc/en-us/articles/360004556077-Email-service-provider-ESP-integration-guide) is AppsFlyer's integration for email service providers (ESPs). Connect Pushwoosh with ESP 2.0 to enable link tracking in email campaigns. In this integration, Pushwoosh wraps URLs, and the ESP 2.0 solution keeps deep linking working for iOS Universal Links and Android App Links when links are wrapped for tracking.
This integration also sends link click data to AppsFlyer, giving you full visibility into email performance alongside your other marketing channels and letting you measure the real impact of email on user acquisition and engagement.
## Integration overview
### Prerequisites
* Pushwoosh application with [email sending configured](/product/first-steps/start-with-your-project/configure-platforms/email-verification/)
* AppsFlyer account with the [AppsFlyer ESP 2.0 integration](https://support.appsflyer.com/hc/en-us/articles/360004556077-Email-service-provider-ESP-integration-guide). This is a premium feature. Contact your AppsFlyer CSM or AppsFlyer support to get access.
### Synchronized entities
Email link clicks via your Click Tracking Domain are recorded as click statistics in Pushwoosh and as click events with attribution data in AppsFlyer.
### Use cases
* **Email click tracking:** Measure email link clicks via AppsFlyer.
* **Deep linking from email:** Keep Universal Links (iOS) and App Links (Android) working when links in emails are wrapped.
### How the integration works
Once the integration is live, each click goes through three steps:
1. Pushwoosh replaces links in your emails with tracking URLs on your CTD, for example:
`https://clickpush.yourdomain.com/json/1.3/emailRedirect?d=...`
2. When a user taps the link, the request goes to AppsFlyer via the configured CNAME. AppsFlyer records the attribution, handles deep linking, and redirects the user to the final URL or into the app via Universal Link / App Link. It also sends a GET request to Pushwoosh, passing your CTD in the Host header, so Pushwoosh can record the click:
```
GET https:///json/1.3/emailRedirect
Host:
```
3. Pushwoosh receives the request and records the click for its own statistics.
## Setting up the integration
### Step 1. Create and activate a click tracking domain
The **Click Tracking Domain (CTD)** is the domain part of a tracked link URL shown in an email message. It combines a subdomain with your main domain, for example, `clickpush.esp-integrations1.com`. The subdomain is created in your domain's DNS settings with your domain provider, usually by adding a CNAME record.
1. Decide which subdomain you will use as your CTD (for example, `clickpush.esp-integrations1.com`).
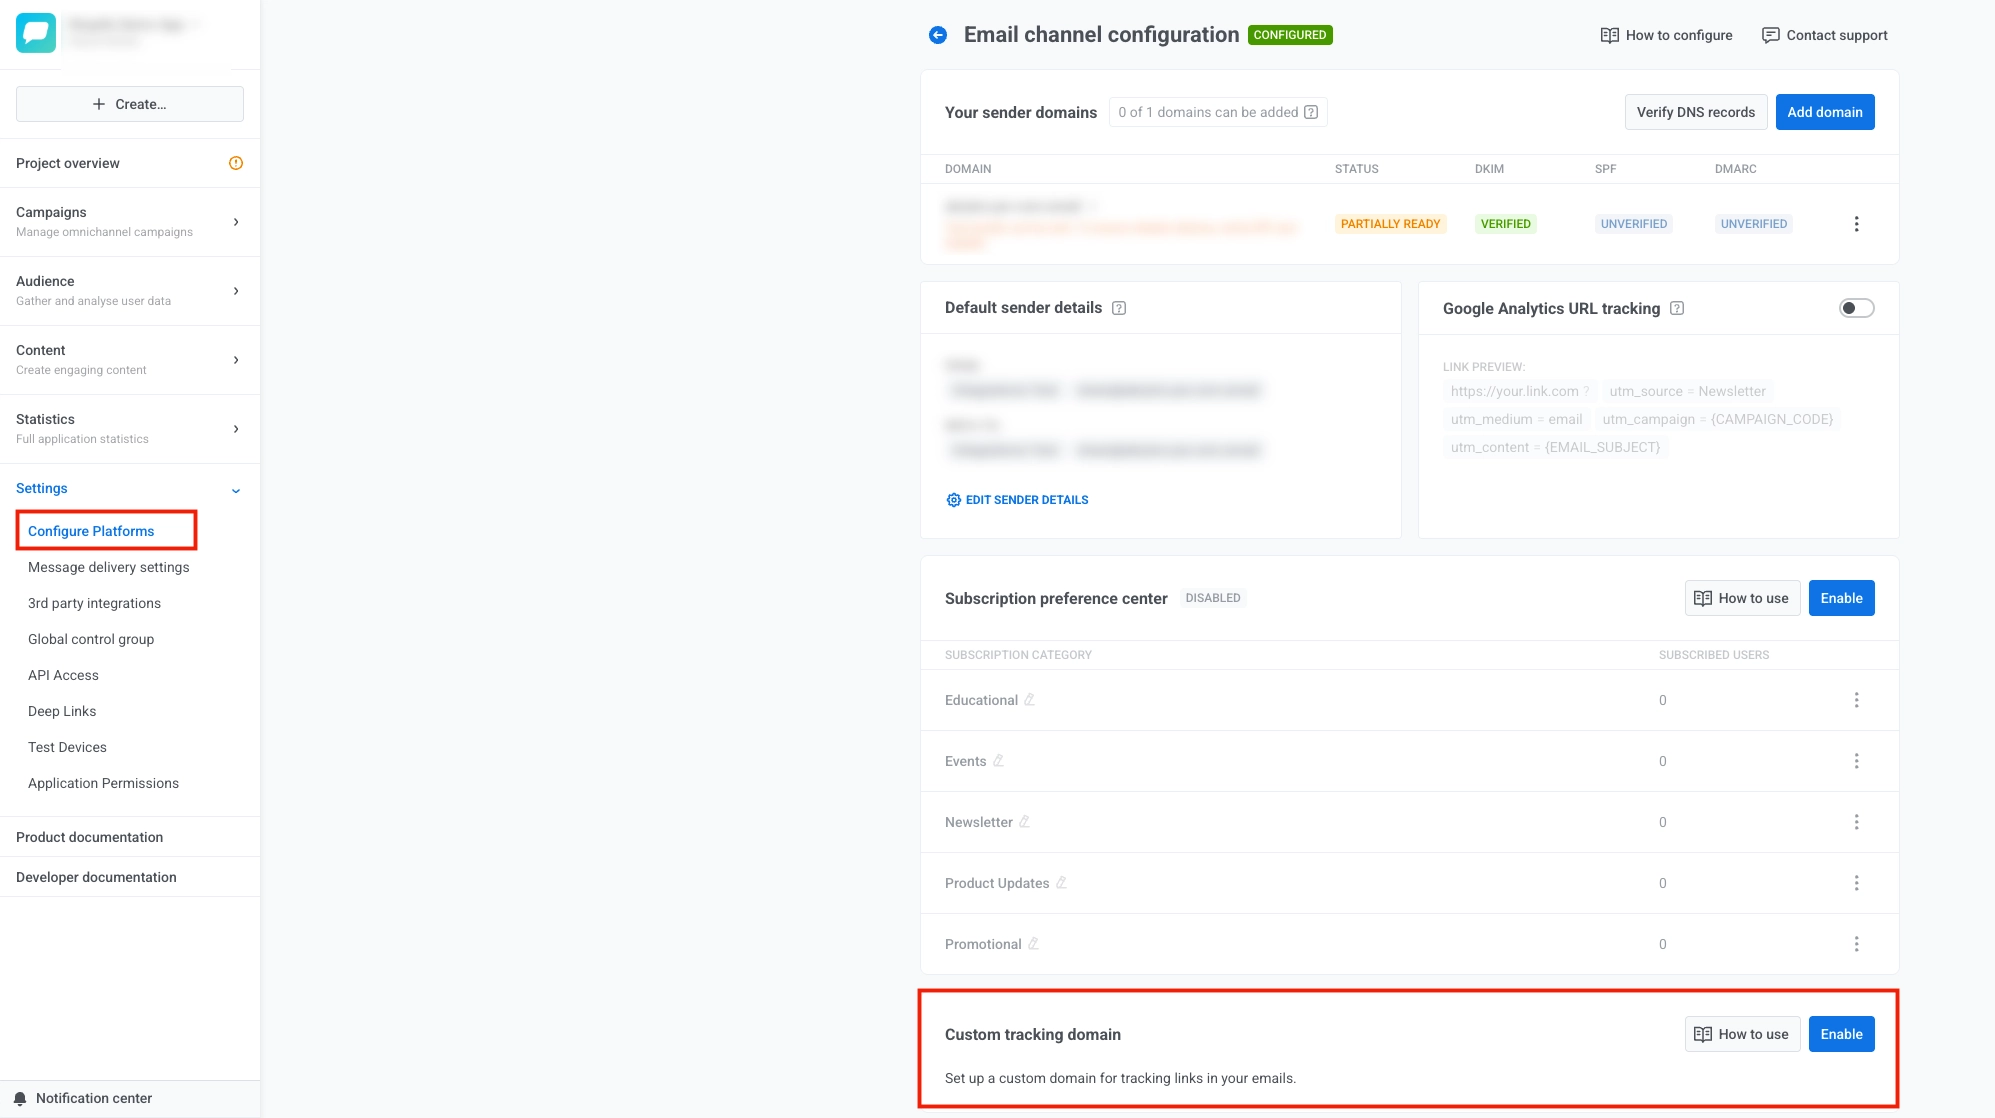
2. In Pushwoosh, open **Settings**, then select **Configure Platforms**.
3. On the **Email channel configuration** page, scroll to **Custom tracking domain** and select **Enable**.
4. Enter your CTD in the **Domain** field and select **Next**.
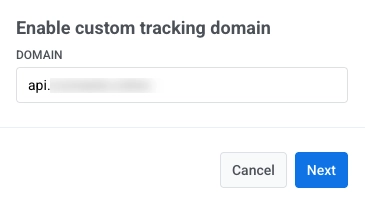
5. Outside Pushwoosh, open the service where you manage public DNS for the domain of your CTD (typically your domain registrar, a DNS host, or your hosting account). In its DNS or zone editor for that domain, add the **CNAME** Pushwoosh shows on this step so your CTD points to `api.pushwoosh.com`.
6. In Pushwoosh, select **Verify**.
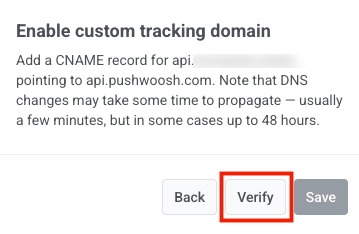
7. When verification succeeds, select **Save**.
8. If you need to change the **Domain** or DNS record, select **Back** and adjust the earlier steps.
9. After you click **Save**, your CTD appears in the **Custom tracking domain** list in **Email channel configuration**.
To disable it later, select `...` next to your CTD, then select **Disable custom tracking domain**.
### Step 2. Start the integration in AppsFlyer
In the [AppsFlyer platform](https://hq1.appsflyer.com/), start the ESP 2.0 integration. Follow the [AppsFlyer guide to set up your ESP integration](https://support.appsflyer.com/hc/en-us/articles/26967438815377-Set-up-your-ESP-integration-with-AppsFlyer).
AppsFlyer will ask for the following details:
* **Click-tracking domain:** your CTD (for example, `clickpush.example.com`)
* **ESP endpoint:** `api.pushwoosh.com` (the CNAME target shown in Pushwoosh when you enable the custom tracking domain)
AppsFlyer will validate the configuration. Keep the CTD CNAME pointing to **`api.pushwoosh.com`** until the validation is complete.
### Step 3. Update CNAME to AppsFlyer
After AppsFlyer validates the setup, it will give you a routing domain (for example, `jyvls.espclicks.appsflyer.com`).
Update your CNAME so the CTD points to AppsFlyer instead of Pushwoosh:
**Before:**
`clickpush.example.com` → `api.pushwoosh.com`
**After:**
`clickpush.example.com` → `jyvls.espclicks.appsflyer.com` (use the domain provided by AppsFlyer)
After switching the CNAME, send a test email and verify that links open correctly and clicks appear in AppsFlyer.
## What happens next
Once the change takes effect, click traffic goes through AppsFlyer’s infrastructure. AppsFlyer provides the routing layer, SSL, AASA (Apple App Site Association), and Android App Links.
Pushwoosh continues to wrap links and record click statistics. No further configuration is needed in Pushwoosh.
To learn more about setup and testing on the AppsFlyer side, see:
 4. Enter your CTD in the **Domain** field and select **Next**.
 5. Outside Pushwoosh, open the service where you manage public DNS for the domain of your CTD (typically your domain registrar, a DNS host, or your hosting account). In its DNS or zone editor for that domain, add the **CNAME** Pushwoosh shows on this step so your CTD points to `api.pushwoosh.com`.
6. In Pushwoosh, select **Verify**.
5. Outside Pushwoosh, open the service where you manage public DNS for the domain of your CTD (typically your domain registrar, a DNS host, or your hosting account). In its DNS or zone editor for that domain, add the **CNAME** Pushwoosh shows on this step so your CTD points to `api.pushwoosh.com`.
6. In Pushwoosh, select **Verify**.
 7. When verification succeeds, select **Save**.
8. If you need to change the **Domain** or DNS record, select **Back** and adjust the earlier steps.
9. After you click **Save**, your CTD appears in the **Custom tracking domain** list in **Email channel configuration**.
7. When verification succeeds, select **Save**.
8. If you need to change the **Domain** or DNS record, select **Back** and adjust the earlier steps.
9. After you click **Save**, your CTD appears in the **Custom tracking domain** list in **Email channel configuration**.
 To disable it later, select `...` next to your CTD, then select **Disable custom tracking domain**.
### Step 2. Start the integration in AppsFlyer
In the [AppsFlyer platform](https://hq1.appsflyer.com/), start the ESP 2.0 integration. Follow the [AppsFlyer guide to set up your ESP integration](https://support.appsflyer.com/hc/en-us/articles/26967438815377-Set-up-your-ESP-integration-with-AppsFlyer).
AppsFlyer will ask for the following details:
* **Click-tracking domain:** your CTD (for example, `clickpush.example.com`)
* **ESP endpoint:** `api.pushwoosh.com` (the CNAME target shown in Pushwoosh when you enable the custom tracking domain)
AppsFlyer will validate the configuration. Keep the CTD CNAME pointing to **`api.pushwoosh.com`** until the validation is complete.
### Step 3. Update CNAME to AppsFlyer
After AppsFlyer validates the setup, it will give you a routing domain (for example, `jyvls.espclicks.appsflyer.com`).
Update your CNAME so the CTD points to AppsFlyer instead of Pushwoosh:
**Before:**
`clickpush.example.com` → `api.pushwoosh.com`
**After:**
`clickpush.example.com` → `jyvls.espclicks.appsflyer.com` (use the domain provided by AppsFlyer)
After switching the CNAME, send a test email and verify that links open correctly and clicks appear in AppsFlyer.
## What happens next
Once the change takes effect, click traffic goes through AppsFlyer’s infrastructure. AppsFlyer provides the routing layer, SSL, AASA (Apple App Site Association), and Android App Links.
Pushwoosh continues to wrap links and record click statistics. No further configuration is needed in Pushwoosh.
To learn more about setup and testing on the AppsFlyer side, see:
To disable it later, select `...` next to your CTD, then select **Disable custom tracking domain**.
### Step 2. Start the integration in AppsFlyer
In the [AppsFlyer platform](https://hq1.appsflyer.com/), start the ESP 2.0 integration. Follow the [AppsFlyer guide to set up your ESP integration](https://support.appsflyer.com/hc/en-us/articles/26967438815377-Set-up-your-ESP-integration-with-AppsFlyer).
AppsFlyer will ask for the following details:
* **Click-tracking domain:** your CTD (for example, `clickpush.example.com`)
* **ESP endpoint:** `api.pushwoosh.com` (the CNAME target shown in Pushwoosh when you enable the custom tracking domain)
AppsFlyer will validate the configuration. Keep the CTD CNAME pointing to **`api.pushwoosh.com`** until the validation is complete.
### Step 3. Update CNAME to AppsFlyer
After AppsFlyer validates the setup, it will give you a routing domain (for example, `jyvls.espclicks.appsflyer.com`).
Update your CNAME so the CTD points to AppsFlyer instead of Pushwoosh:
**Before:**
`clickpush.example.com` → `api.pushwoosh.com`
**After:**
`clickpush.example.com` → `jyvls.espclicks.appsflyer.com` (use the domain provided by AppsFlyer)
After switching the CNAME, send a test email and verify that links open correctly and clicks appear in AppsFlyer.
## What happens next
Once the change takes effect, click traffic goes through AppsFlyer’s infrastructure. AppsFlyer provides the routing layer, SSL, AASA (Apple App Site Association), and Android App Links.
Pushwoosh continues to wrap links and record click statistics. No further configuration is needed in Pushwoosh.
To learn more about setup and testing on the AppsFlyer side, see: