How to set up an email sunset flow
Sunset emails help validate whether inactive or low-engagement users still wish to receive your communications. This process helps improve list hygiene and protect your sender reputation.
Follow the steps below to automate an email sunset flow using Customer Journey:
Create a new journey
Anchor link to-
Go to Campaigns → Customer Journey Builder, then click Create Campaign → Email.
-
Select Build a Journey from Scratch to start configuring your journey.
Configure the Audience-based entry element
Anchor link toUse an Audience-based Entry to target users you want to reconfirm.
For example, you can target users who haven’t opened any emails in the last 90 days. To do this, in the Audience-based Entry element, select an existing segment or click Create Segment.
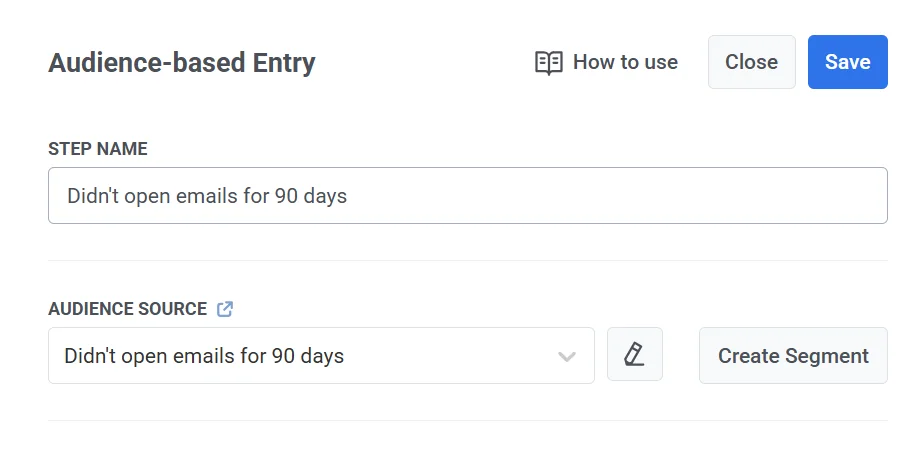
If you’re creating a new segment, in the Segment editor, name the segment (e.g., “Didn’t open for 90 days”) and configure it with the following criteria:
- Event: PW_EmailOpen
- Condition: never
- Timeframe: during the last 90 days
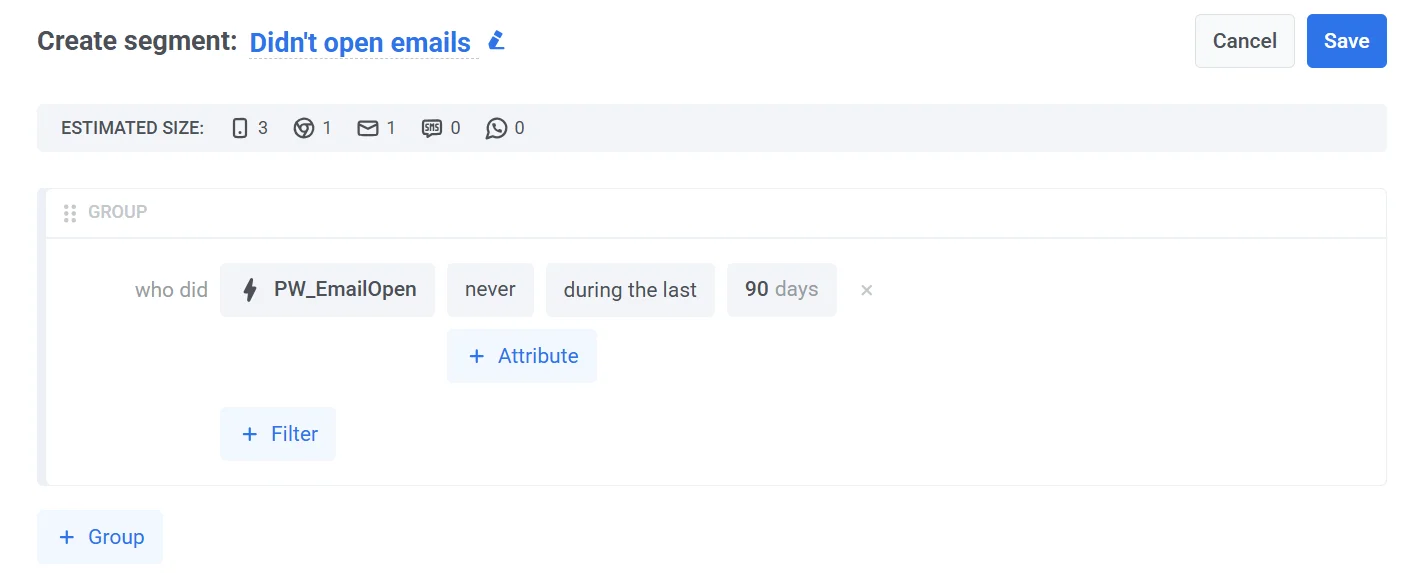
This configuration filters users who haven’t opened any emails within the past 90 days, allowing you to target disengaged recipients for reconfirmation.
Click Save to create and use the segment.
Add the Email element
Anchor link toDrag an Email element onto the canvas and select a sunset email preset or create a new one. Your message should clearly ask users to confirm whether they still want to receive emails from you.
Make sure the email contains a confirmation link that triggers the default PW_EmailLinkClicked event when clicked. This link is essential for tracking user interaction and progressing users through the reconfirmation flow.
Add a Wait for trigger element
Anchor link to-
After the Email element, drag a Wait for Trigger element onto the canvas to monitor whether the user clicks the confirmation link.
-
Set the waiting period, for example, 3 days, to specify how long the system should wait for a response.
-
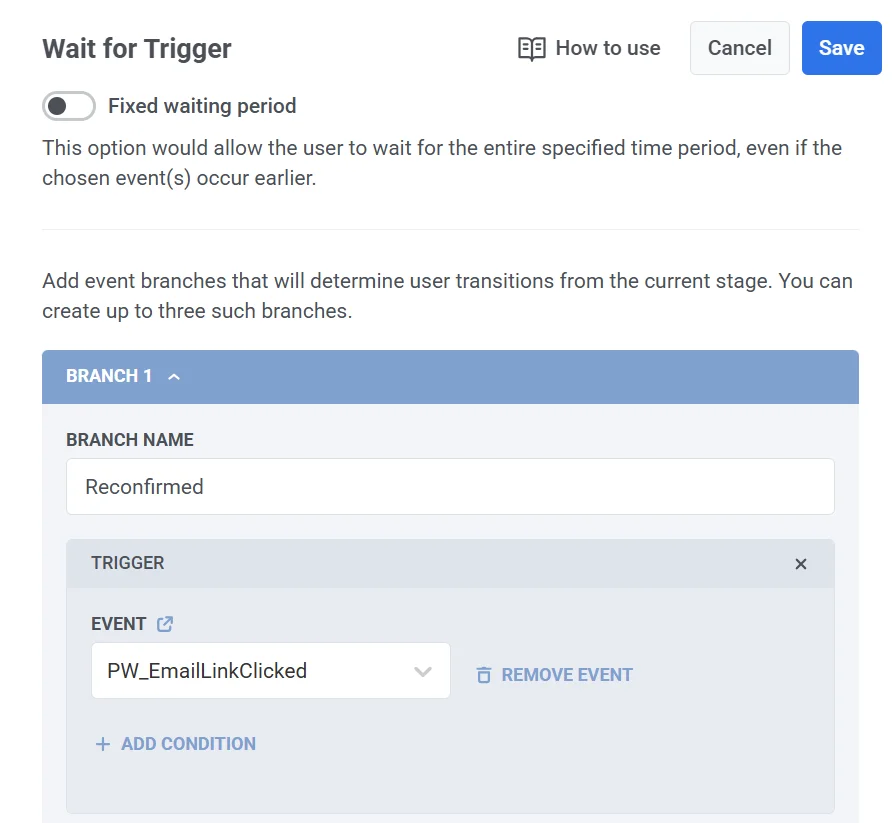
Next, configure a trigger branch to detect users who interact with the confirmation link:
-
Set the Branch Name to something like Reconfirmed.
-
Under Event, choose PW_EmailLinkClicked.
This event is triggered when a user clicks the confirmation link in the email.
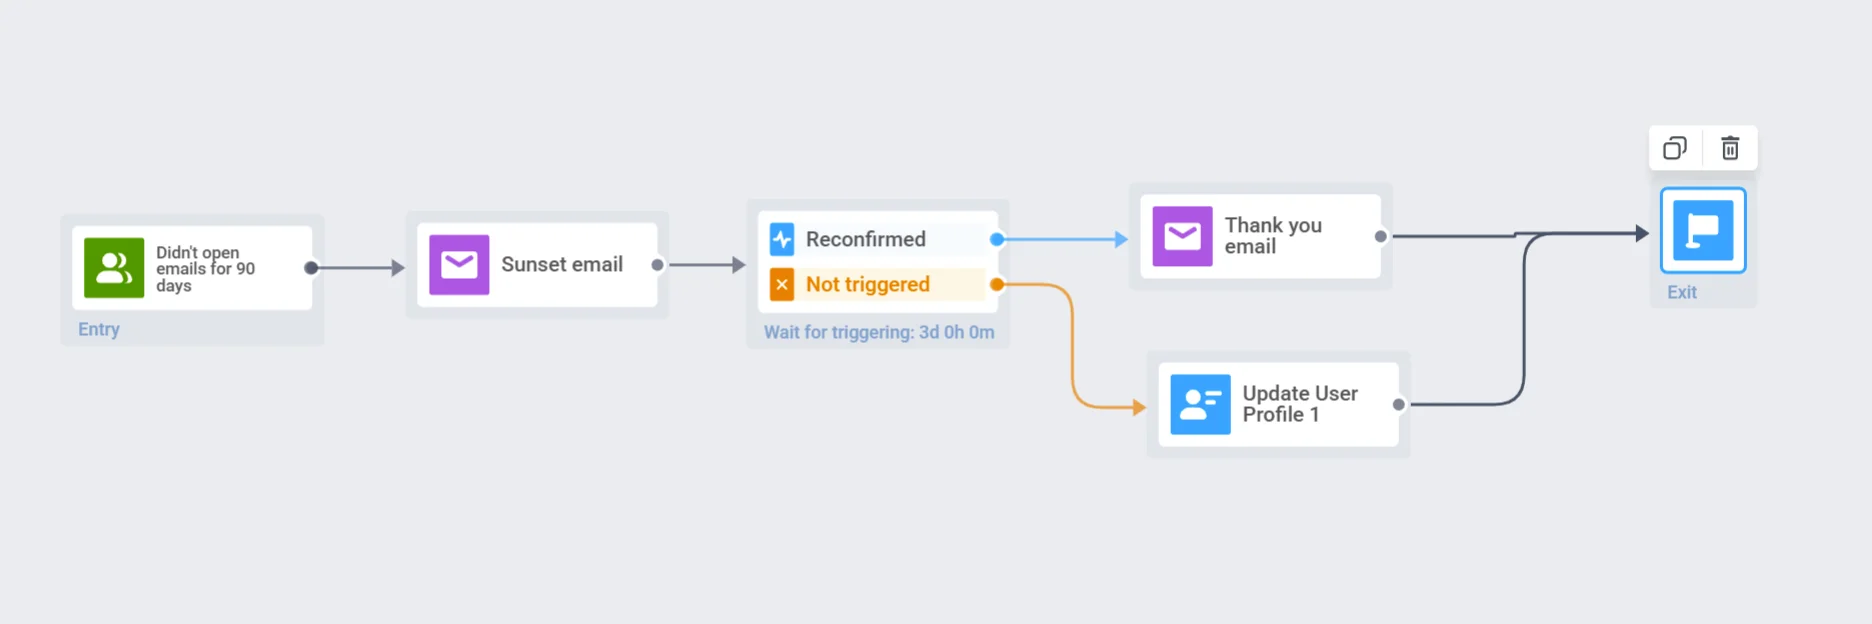
A Not Triggered branch is created automatically. Any users who do not click the link within the specified waiting period will follow this path.
- Click Save to apply the changes and continue building the Journey.
Update the user profile based on response
Anchor link toTriggered Path
After the user clicks the confirmation link, you can optionally send a thank-you email or continue with regular communication as part of your engagement strategy. Then, connect this path to an Exit element to complete the journey for confirmed users.
Not Triggered path
For users who do not click the confirmation link within the specified wait period:
-
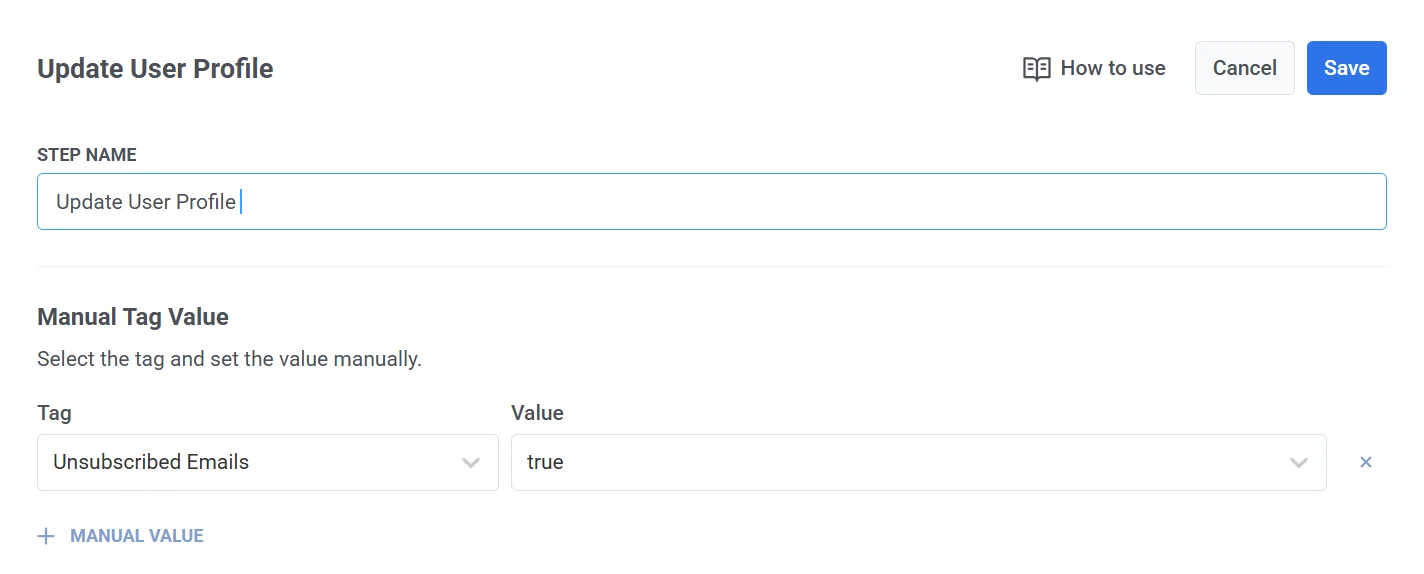
Add an Update User Profile element to the “Not Triggered” branch.
-
Set the tag Unsubscribed Emails = true to exclude these users from your email list.
- Connect this path to an Exit element as well.
Activate the Journey
Anchor link toClick Launch campaign to launch the reconfirmation journey.