How to create a double opt-in email campaign
To keep your email audience high-quality and comply with legal and deliverability standards, don’t add users to your mailing list right after they enter their email, such as during registration or via a form. Instead, use a double opt-in process to confirm their subscription.
What is double opt-in?
Anchor link toDouble opt-in is a two-step subscription method where users must confirm their intent to receive emails. After submitting their email address, they receive a confirmation email with a verification link. Only once they click this link are they added to your mailing list. This extra step verifies consent and helps ensure your list consists of genuinely interested recipients.
Using double opt-in is important because it:
- Confirms user intent, ensuring you email only those who want to hear from you
- Improves deliverability by increasing engagement and reducing bounce rates
- Minimizes spam complaints and protects your sender reputation
- Helps meet legal and compliance obligations regarding user consent
Send a double opt-in email using Customer Journey
Anchor link toTo automate the double opt-in process after a user registers using Customer Journey, follow these steps:
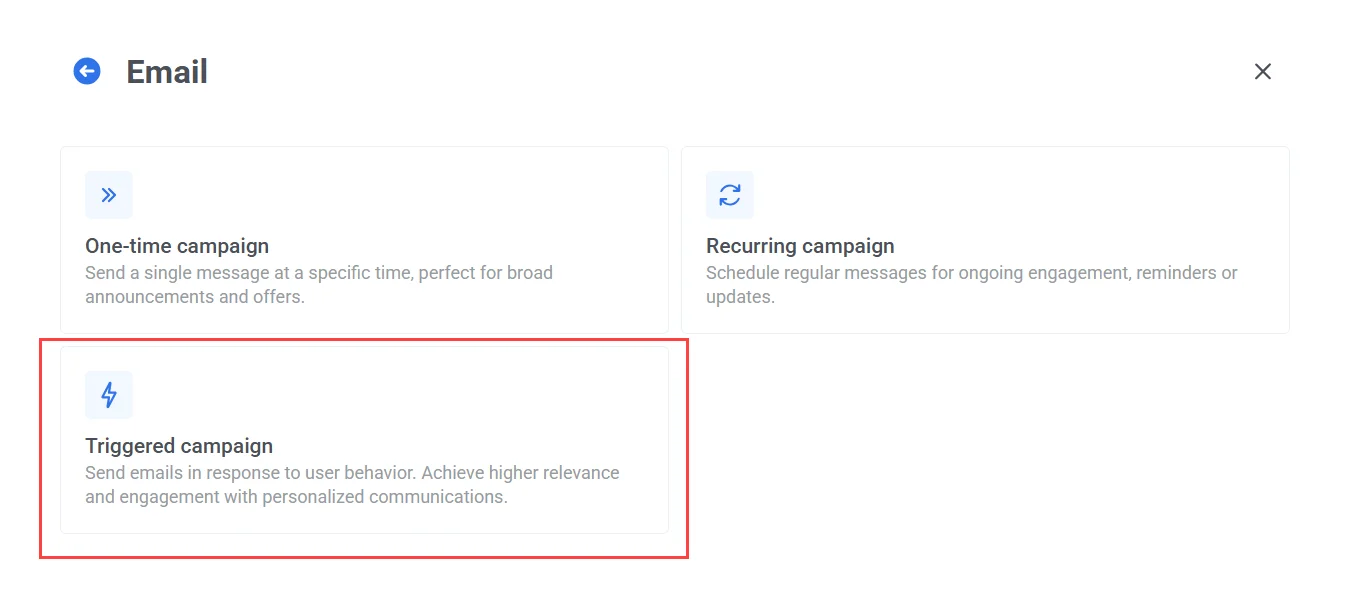
Create a triggered email campaign
Anchor link toGo to Customer Journey Builder → Create campaign → Email and select Triggered Campaign.
Configure the Entry element
Anchor link toIn the Trigger-based entry element, select the default PW_DeviceRegistered event under Event. This event is triggered whenever a new device (including email addresses) is registered in your Pushwoosh project.
Below the event, define a condition to ensure the Journey starts only for email registrations:
-
Field: PW_platform_id
-
Operator: is
-
Value: Email
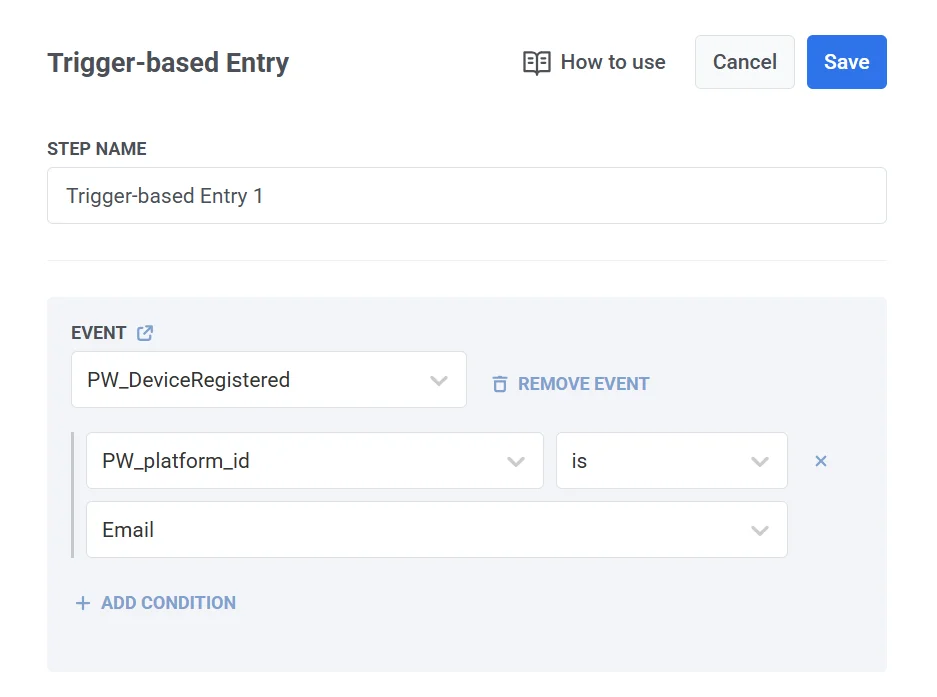
This condition filters the trigger so that only devices registered via email will start the Journey.
Click Save to apply your changes.
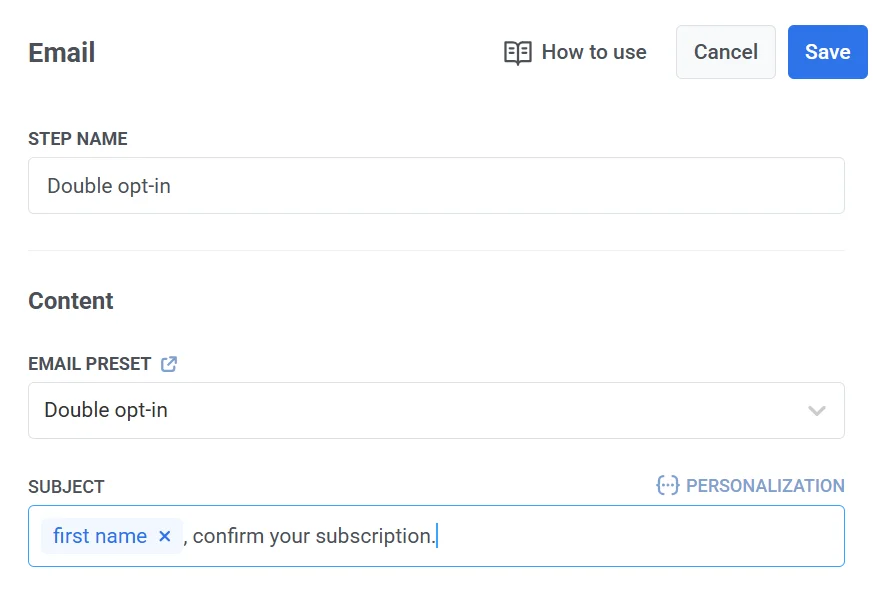
Add and configure the confirmation email content
Anchor link toDrag an Email element onto the canvas and configure it.
In the Content section, select a preset designed for double opt-in. The preset should include a confirmation link and a message asking users to verify their subscription.
Once you’ve set the subject line, added the content, and finished configuring the email element, click Save.
Monitor user confirmation
Anchor link toAdd a Wait for Trigger element to monitor whether the user clicks the confirmation link. Configure the element:
- First, set the wait duration (e.g., 4 days).
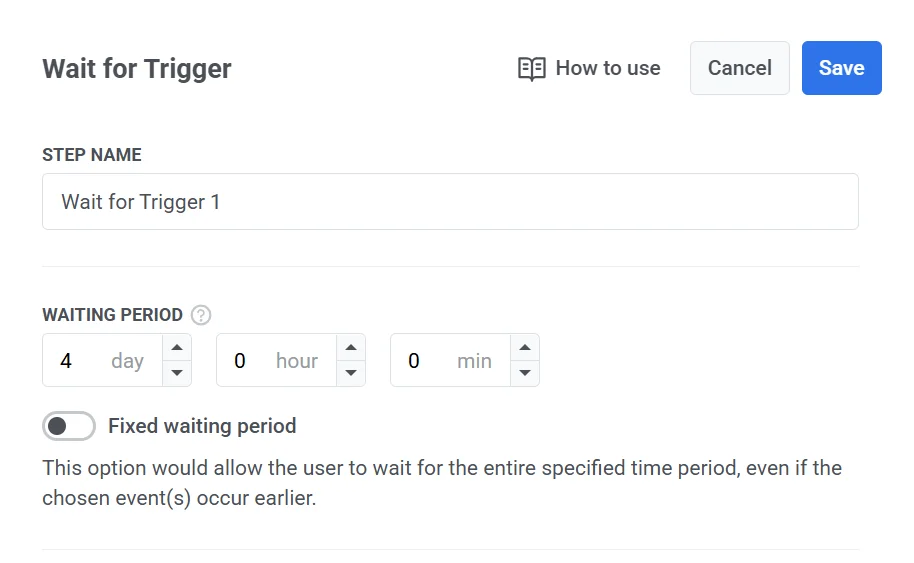
- Next, create a branch for users who confirmed the subscription. Name the branch, for example, Confirmed and select the default event PW_EmailLinkClicked. This event will track whether the user clicks the confirmation link in the email.
A fallback branch (Not Triggered) is created automatically for users who do not confirm.
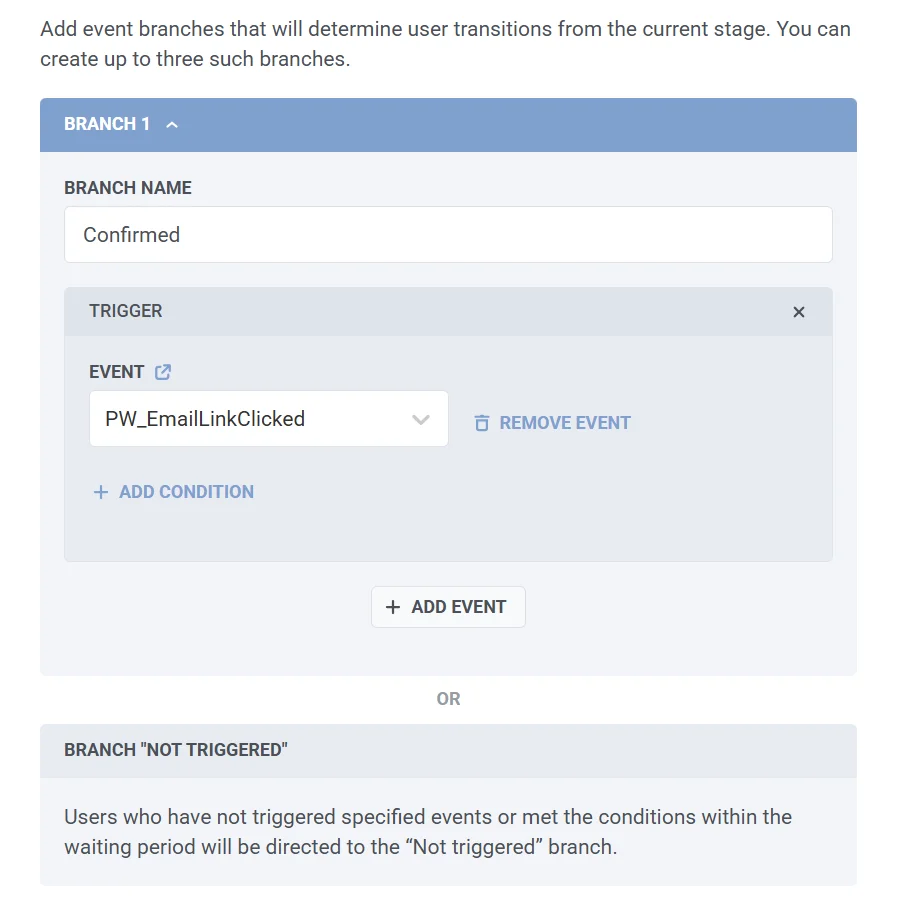
- Click Save to apply the configuration and continue building your journey.
After sending the confirmation email, the Journey waits up to 4 days for the user to confirm.
Tag users who didn’t confirm as unsubscribed
Anchor link toIf a user doesn’t click the confirmation link in your double opt-in email, you can mark them as unsubscribed to avoid sending them future emails.
For this:
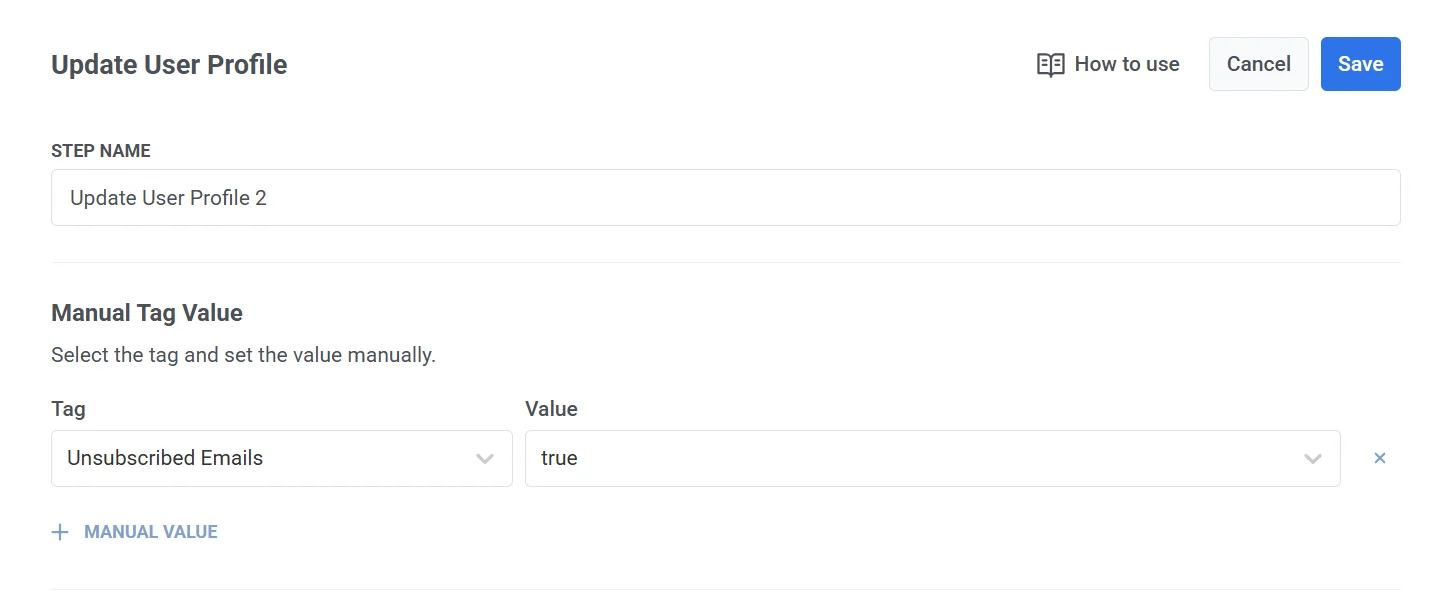
-
Add the Update User Profile element to your Journey.
-
Connect it to the Not Triggered branch of the Wait for Trigger element.
-
In the Manual Tag Value section choose the
Unsubscribed Emailstag and set the value totrue.
This way, only users who confirm their email will stay subscribed and continue receiving your emails.
Finalize the Journey
Anchor link to-
Connect the Confirmed branch to the Exit element.
-
Connect the Not Triggered branch to the Exit element.
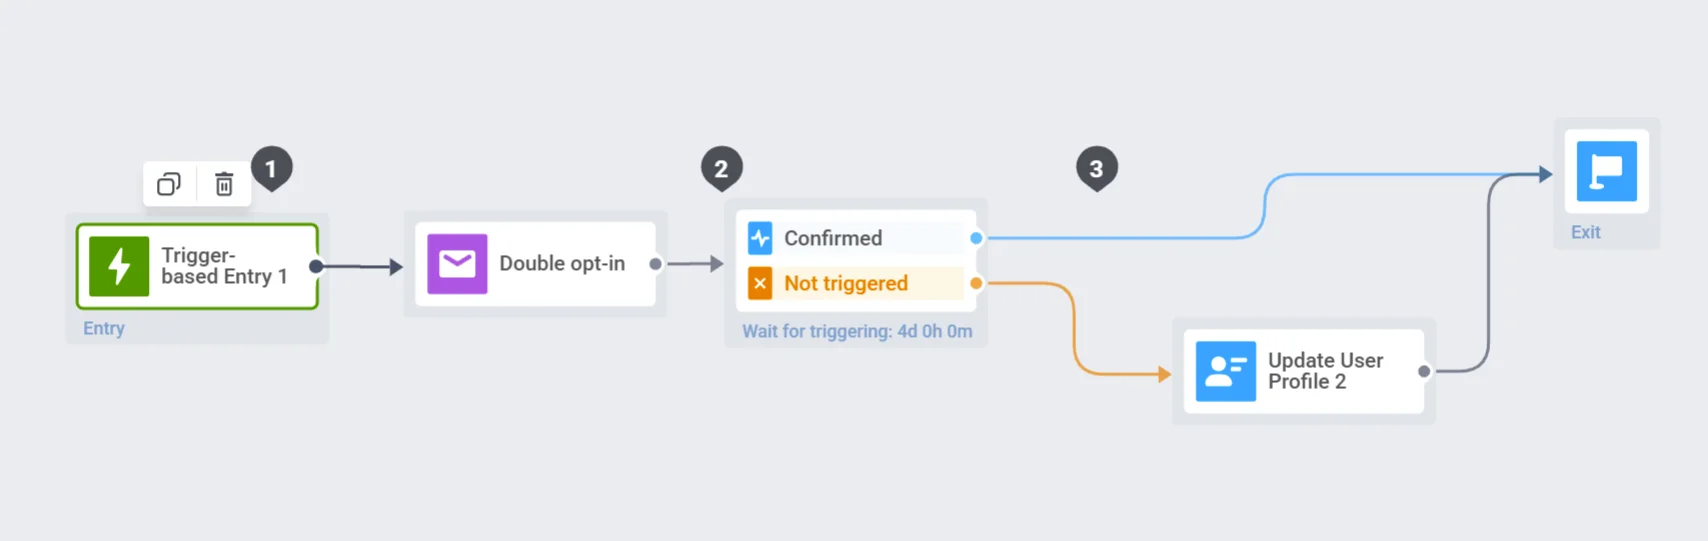
Activate the Journey
Anchor link toClick Launch campaign to launch the journey.