# Create your project
All marketing automation in Pushwoosh is conducted within projects. Usually, one project is enough to work with one app on multiple platforms. If you have several different apps, you can create a separate project for each app.
When you register in Pushwoosh, a default project called **My project** is automatically created for you. If you want to change its name and other settings, go to the [project settings](/product/first-steps/start-with-your-project/create-your-project#project-settings).
## Creating a new project if you already have other projects
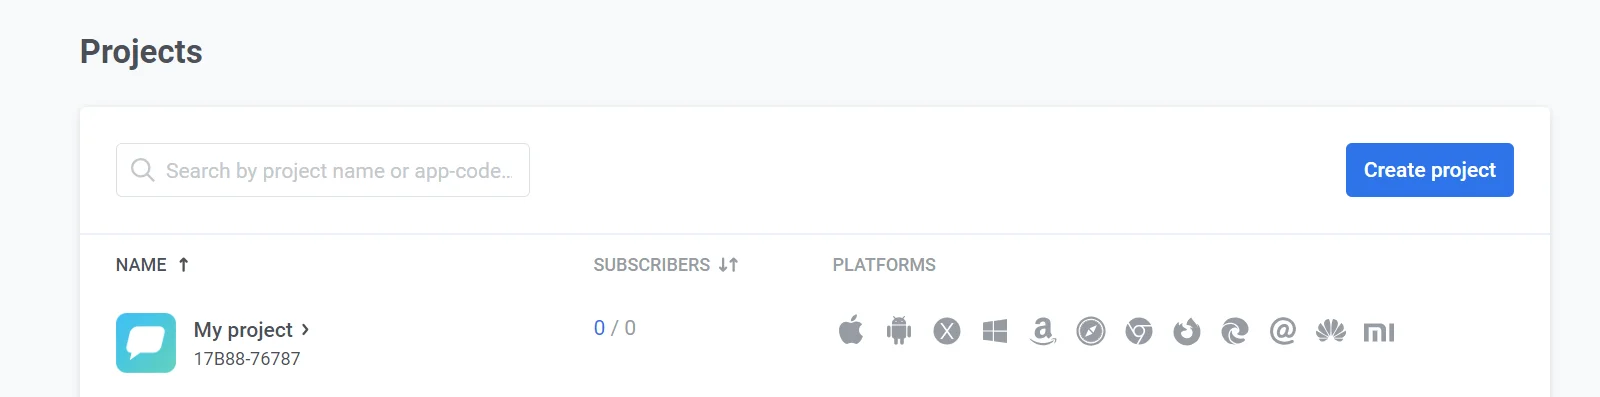
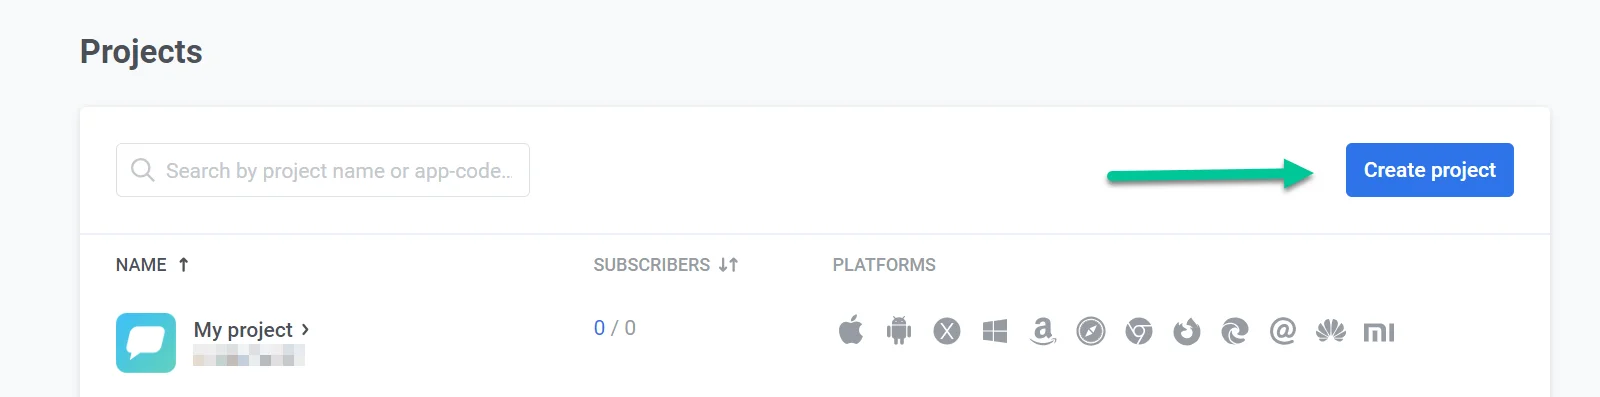
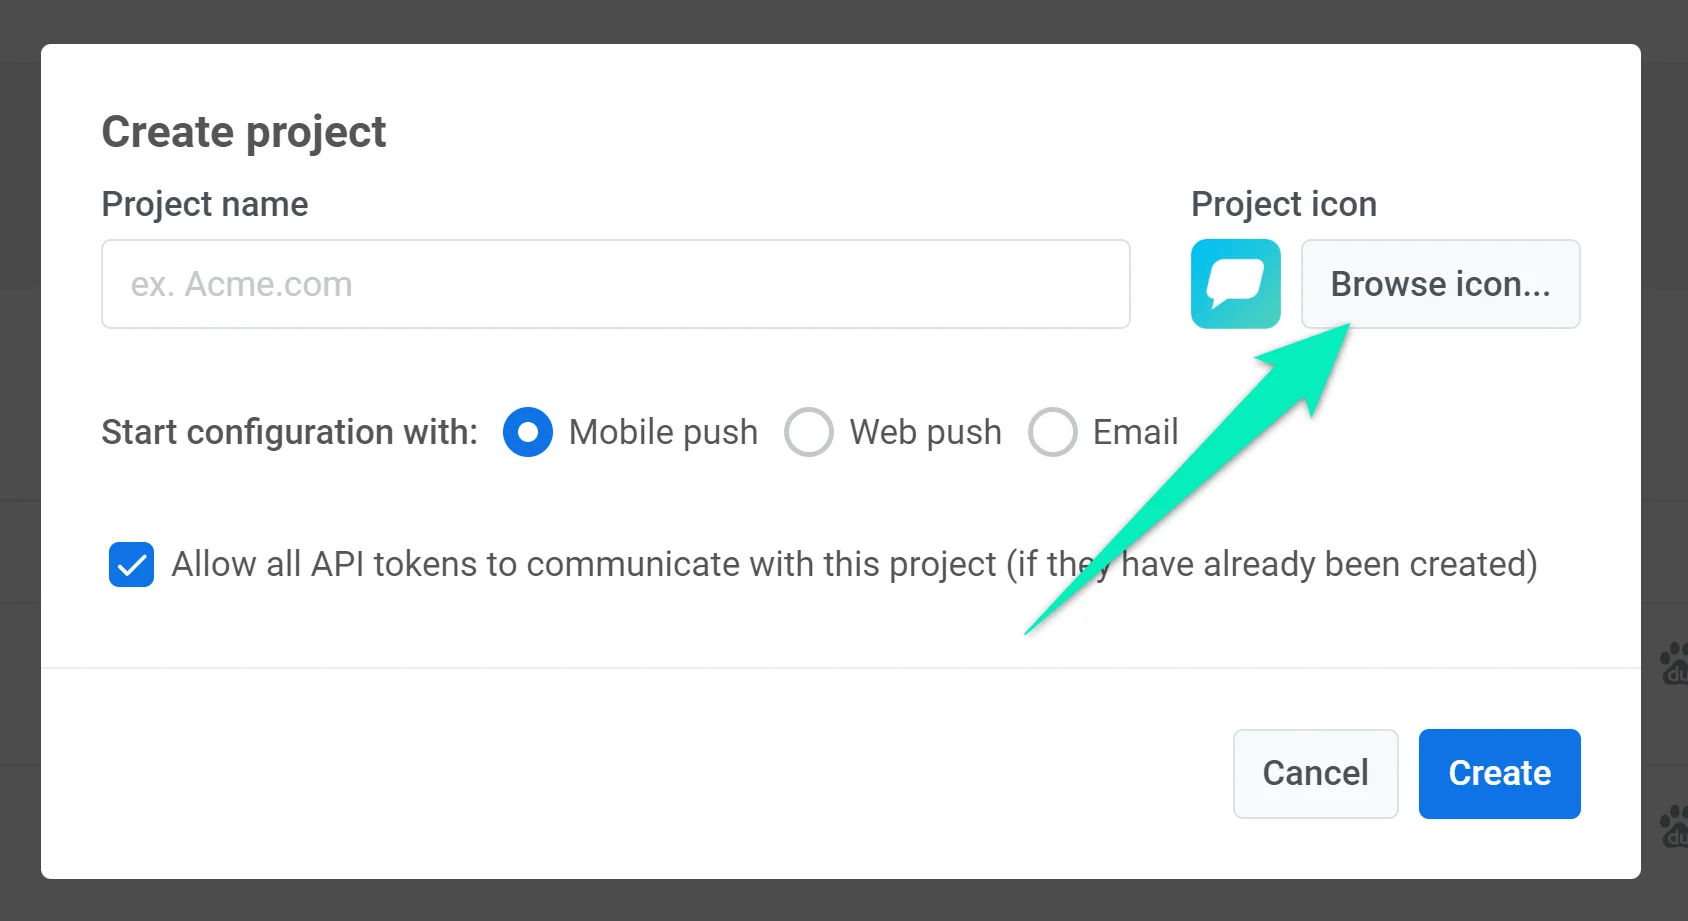
If you need to create a new project, go to the [**Projects**](https://app.pushwoosh.com/projects) section and press **Create project**:
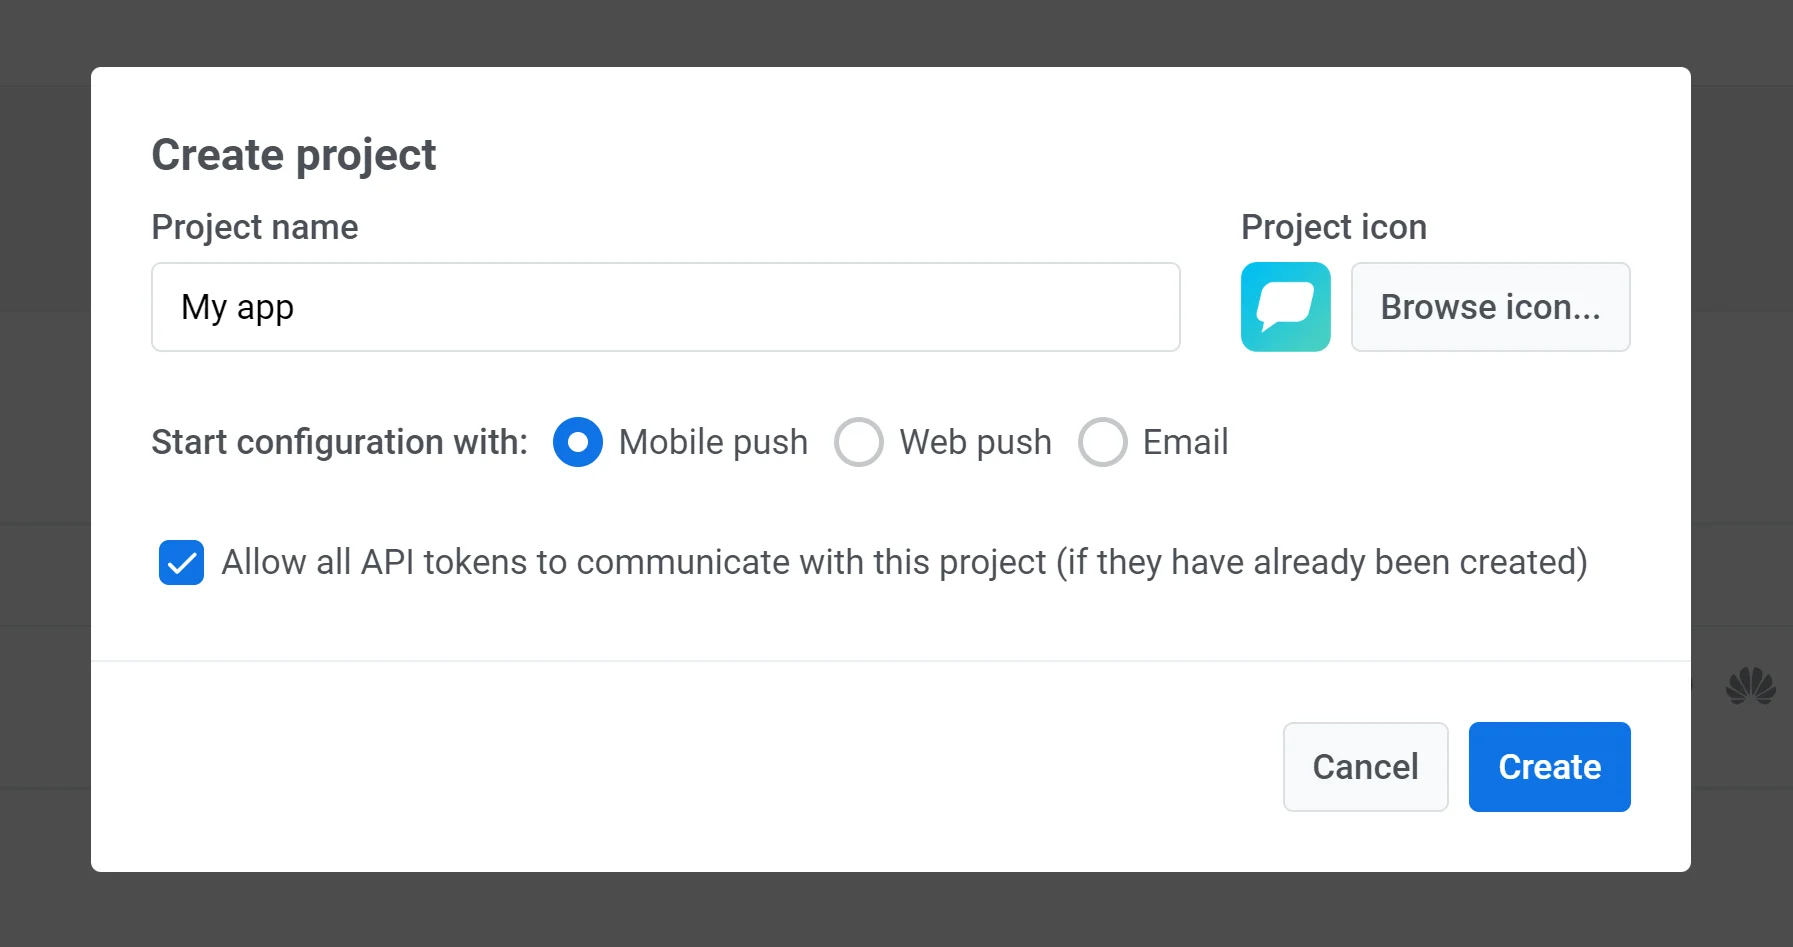
Name your new project and select its start configuration: _Mobile push_, _Web push_, or _Email_. The start configuration only affects which platform will be configured first. You can configure several platforms within one project. For example, if you select _Mobile push_ for start configuration, you can also set up Web and Email platforms at any time.
You can upload your own icon that will be displayed next to the app name in push notifications. To do this, click **Browse icon** and upload the image (preferably not larger than 512x512 and 1MB):
## Project configuration
### Mobile configuration
#### iOS configuration
* [iOS certificate-based configuration](/developer/first-steps/connect-messaging-services/ios-configuration/ios-platform-configuration)
* [iOS token-based configuration](/developer/first-steps/connect-messaging-services/ios-configuration/ios-token-based-configuration)
* [Apple Wallet pass configuration for iOS](/developer/first-steps/connect-messaging-services/ios-configuration/ios-wallet-pass-configuration/)
#### Android Firebase configuration
* [Android Firebase configuration](/developer/first-steps/connect-messaging-services/android-configuration/android-firebase-configuration)
* [Google Wallet pass configuration for Android](/developer/first-steps/connect-messaging-services/android-configuration/android-google-wallet-configuration/)
#### Huawei configuration
* [Huawei configuration](/developer/first-steps/connect-messaging-services/huawei-configuration)
### Web configuration
- Configure web platforms using [these instructions](/developer/first-steps/connect-messaging-services/web-push-configuration/)
### Email configuration
* [Email configuration](/product/first-steps/start-with-your-project/configure-platforms/email-verification)
### SMS configuration
Follow [this guide](/product/first-steps/start-with-your-project/configure-platforms/sms-configuration) to set up the SMS platform.
### WhatsApp configuration
Follow [this guide](/product/first-steps/start-with-your-project/configure-platforms/whatsapp-configuration) to set up the WhatsApp platform.
### Apple Wallet configuration
Follow [this guide](/developer/first-steps/connect-messaging-services/ios-configuration/ios-wallet-pass-configuration/) to set up Apple Wallet passes.
### Google Wallet configuration
Follow [this guide](/developer/first-steps/connect-messaging-services/android-configuration/android-google-wallet-configuration/) to set up Google Wallet passes.
## Project settings
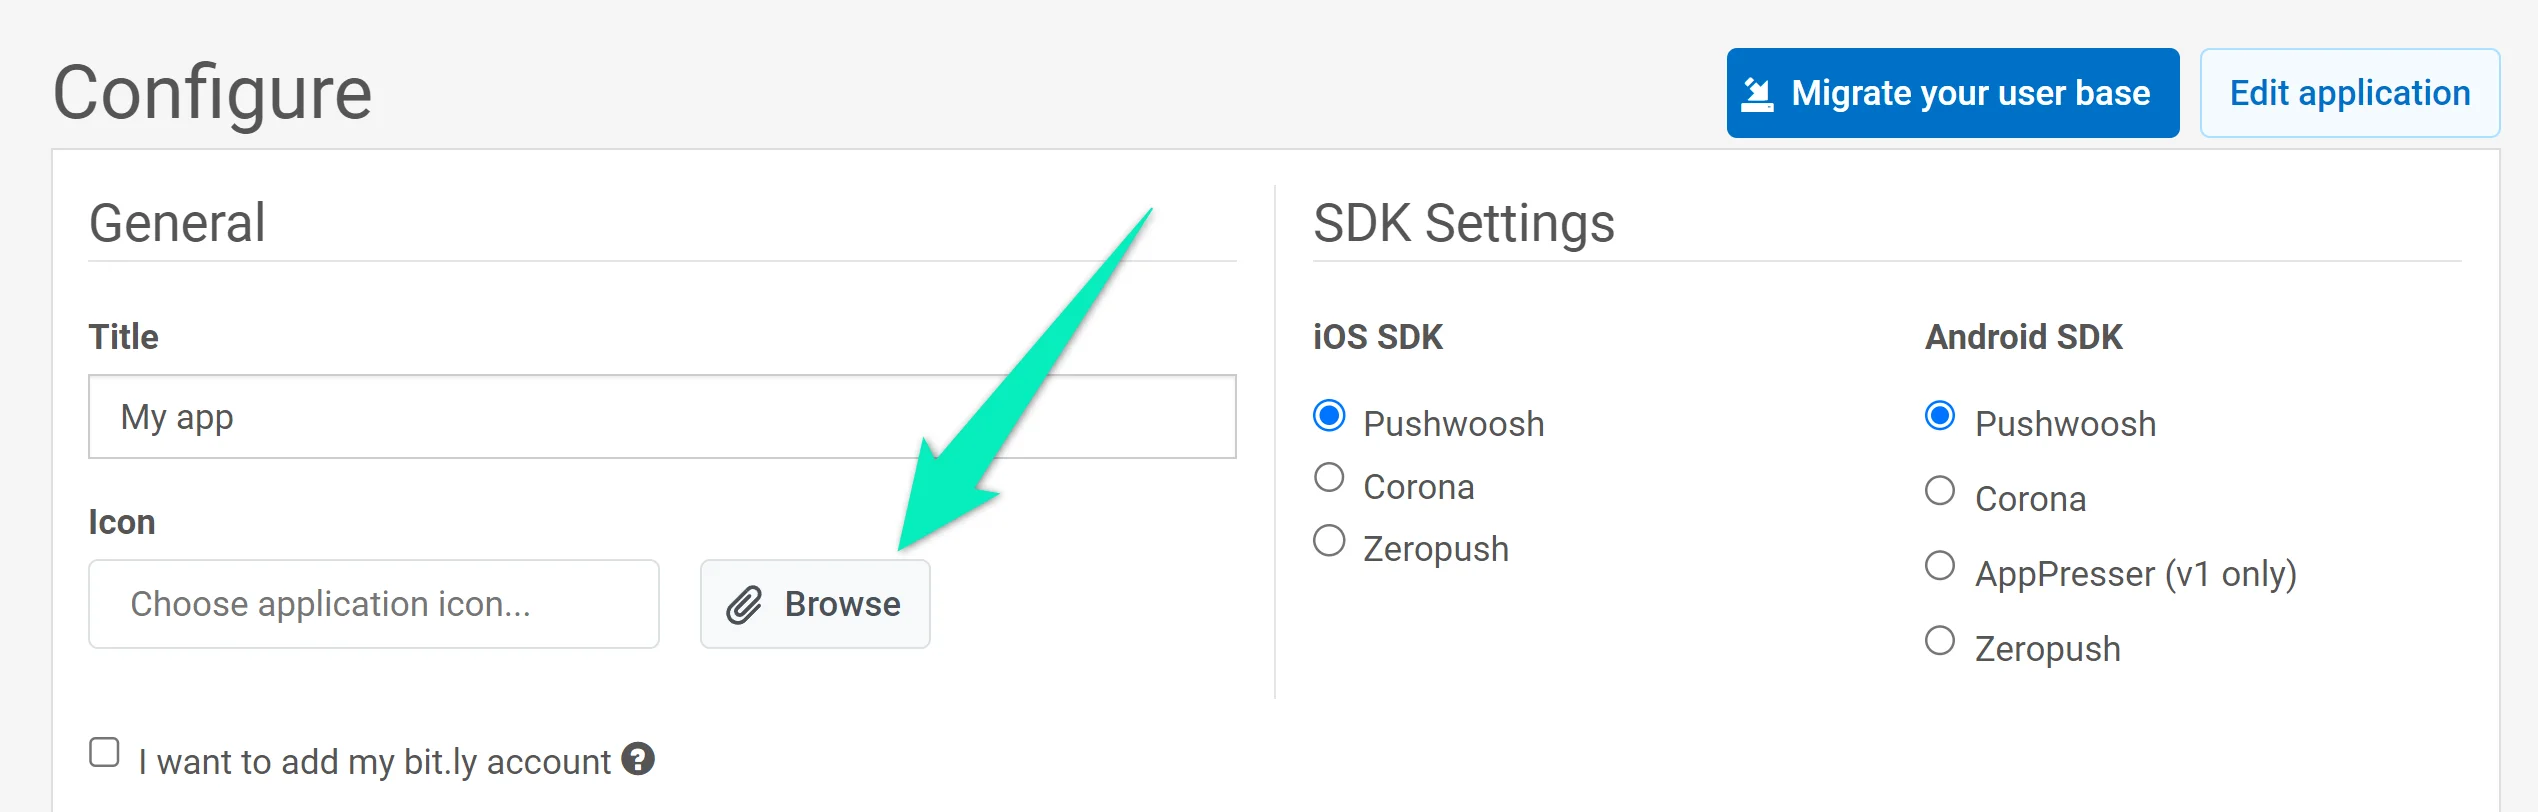
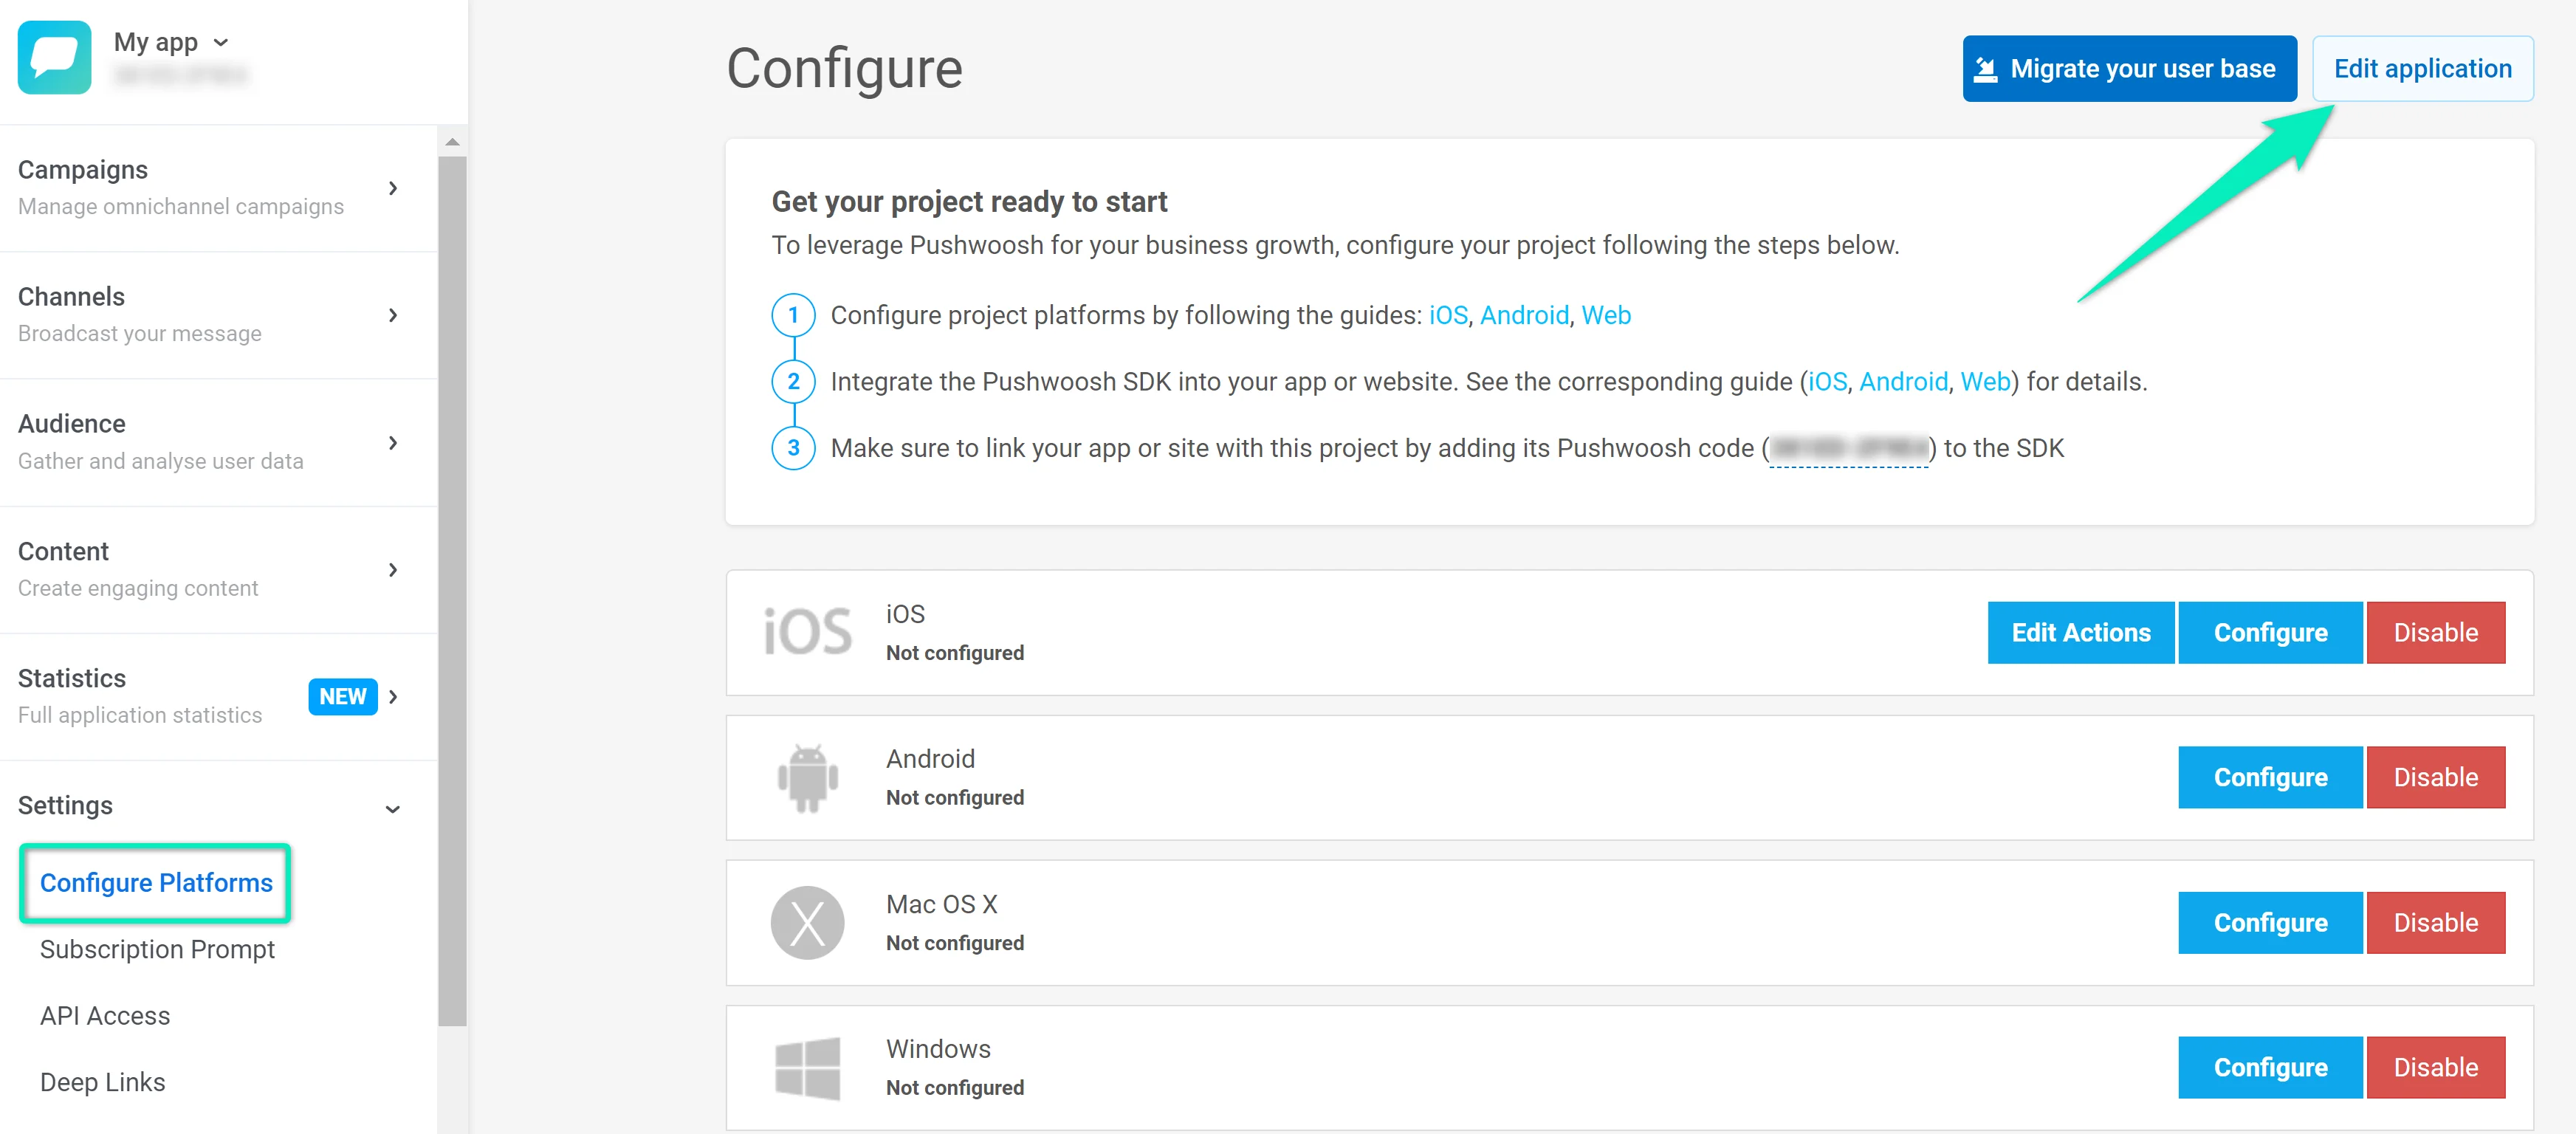
To access project settings, go to the **Configure platforms** section and click **Edit project**:
The **Edit project** dialog lets you change the following:
* **Title:** Update the project name in the **TITLE** field.
* **Icon:** Click **Browse...** next to the current icon to upload a new image (preferably no larger than 512×512 px and 1 MB). The icon is shown next to the app name in push notifications.
* **Bit.ly:** Check **I want to add my bit.ly account**, then enter your bit.ly access token in the **ACCESS TOKEN** field. Using your own account ensures links in your messages are shortened and sent within your shortener limits.
* **Email Notification Settings:** Check **I want to receive Daily Application Performance Emails** to get daily performance reports. Reports are sent for apps with 50 or more subscribers. The recipient email is shown below the checkbox. You can unsubscribe at any time.
Click **Save** to apply your changes or **Cancel** to discard them.
 ## Creating a new project if you already have other projects
If you need to create a new project, go to the [**Projects**](https://app.pushwoosh.com/projects) section and press **Create project**:
## Creating a new project if you already have other projects
If you need to create a new project, go to the [**Projects**](https://app.pushwoosh.com/projects) section and press **Create project**:
 Name your new project and select its start configuration: _Mobile push_, _Web push_, or _Email_. The start configuration only affects which platform will be configured first. You can configure several platforms within one project. For example, if you select _Mobile push_ for start configuration, you can also set up Web and Email platforms at any time.
 You can upload your own icon that will be displayed next to the app name in push notifications. To do this, click **Browse icon** and upload the image (preferably not larger than 512x512 and 1MB):
 ## Project configuration
### Mobile configuration
#### iOS configuration
* [iOS certificate-based configuration](/developer/first-steps/connect-messaging-services/ios-configuration/ios-platform-configuration)
* [iOS token-based configuration](/developer/first-steps/connect-messaging-services/ios-configuration/ios-token-based-configuration)
* [Apple Wallet pass configuration for iOS](/developer/first-steps/connect-messaging-services/ios-configuration/ios-wallet-pass-configuration/)
#### Android Firebase configuration
* [Android Firebase configuration](/developer/first-steps/connect-messaging-services/android-configuration/android-firebase-configuration)
* [Google Wallet pass configuration for Android](/developer/first-steps/connect-messaging-services/android-configuration/android-google-wallet-configuration/)
#### Huawei configuration
* [Huawei configuration](/developer/first-steps/connect-messaging-services/huawei-configuration)
### Web configuration
- Configure web platforms using [these instructions](/developer/first-steps/connect-messaging-services/web-push-configuration/)
### Email configuration
* [Email configuration](/product/first-steps/start-with-your-project/configure-platforms/email-verification)
### SMS configuration
Follow [this guide](/product/first-steps/start-with-your-project/configure-platforms/sms-configuration) to set up the SMS platform.
### WhatsApp configuration
Follow [this guide](/product/first-steps/start-with-your-project/configure-platforms/whatsapp-configuration) to set up the WhatsApp platform.
### Apple Wallet configuration
Follow [this guide](/developer/first-steps/connect-messaging-services/ios-configuration/ios-wallet-pass-configuration/) to set up Apple Wallet passes.
### Google Wallet configuration
Follow [this guide](/developer/first-steps/connect-messaging-services/android-configuration/android-google-wallet-configuration/) to set up Google Wallet passes.
## Project settings
To access project settings, go to the **Configure platforms** section and click **Edit project**:
## Project configuration
### Mobile configuration
#### iOS configuration
* [iOS certificate-based configuration](/developer/first-steps/connect-messaging-services/ios-configuration/ios-platform-configuration)
* [iOS token-based configuration](/developer/first-steps/connect-messaging-services/ios-configuration/ios-token-based-configuration)
* [Apple Wallet pass configuration for iOS](/developer/first-steps/connect-messaging-services/ios-configuration/ios-wallet-pass-configuration/)
#### Android Firebase configuration
* [Android Firebase configuration](/developer/first-steps/connect-messaging-services/android-configuration/android-firebase-configuration)
* [Google Wallet pass configuration for Android](/developer/first-steps/connect-messaging-services/android-configuration/android-google-wallet-configuration/)
#### Huawei configuration
* [Huawei configuration](/developer/first-steps/connect-messaging-services/huawei-configuration)
### Web configuration
- Configure web platforms using [these instructions](/developer/first-steps/connect-messaging-services/web-push-configuration/)
### Email configuration
* [Email configuration](/product/first-steps/start-with-your-project/configure-platforms/email-verification)
### SMS configuration
Follow [this guide](/product/first-steps/start-with-your-project/configure-platforms/sms-configuration) to set up the SMS platform.
### WhatsApp configuration
Follow [this guide](/product/first-steps/start-with-your-project/configure-platforms/whatsapp-configuration) to set up the WhatsApp platform.
### Apple Wallet configuration
Follow [this guide](/developer/first-steps/connect-messaging-services/ios-configuration/ios-wallet-pass-configuration/) to set up Apple Wallet passes.
### Google Wallet configuration
Follow [this guide](/developer/first-steps/connect-messaging-services/android-configuration/android-google-wallet-configuration/) to set up Google Wallet passes.
## Project settings
To access project settings, go to the **Configure platforms** section and click **Edit project**:
 The **Edit project** dialog lets you change the following:
* **Title:** Update the project name in the **TITLE** field.
* **Icon:** Click **Browse...** next to the current icon to upload a new image (preferably no larger than 512×512 px and 1 MB). The icon is shown next to the app name in push notifications.
* **Bit.ly:** Check **I want to add my bit.ly account**, then enter your bit.ly access token in the **ACCESS TOKEN** field. Using your own account ensures links in your messages are shortened and sent within your shortener limits.
* **Email Notification Settings:** Check **I want to receive Daily Application Performance Emails** to get daily performance reports. Reports are sent for apps with 50 or more subscribers. The recipient email is shown below the checkbox. You can unsubscribe at any time.
Click **Save** to apply your changes or **Cancel** to discard them.
The **Edit project** dialog lets you change the following:
* **Title:** Update the project name in the **TITLE** field.
* **Icon:** Click **Browse...** next to the current icon to upload a new image (preferably no larger than 512×512 px and 1 MB). The icon is shown next to the app name in push notifications.
* **Bit.ly:** Check **I want to add my bit.ly account**, then enter your bit.ly access token in the **ACCESS TOKEN** field. Using your own account ensures links in your messages are shortened and sent within your shortener limits.
* **Email Notification Settings:** Check **I want to receive Daily Application Performance Emails** to get daily performance reports. Reports are sent for apps with 50 or more subscribers. The recipient email is shown below the checkbox. You can unsubscribe at any time.
Click **Save** to apply your changes or **Cancel** to discard them.