# WhatsApp platform configuration
Pushwoosh enables you to send personalized messages to customers via WhatsApp. Follow this guide to set up the WhatsApp platform.
## Prerequisites
Before beginning the setup, ensure the following requirements are met:
* **Access to Facebook Business Manager**: You need a Facebook account with permissions to manage the WhatsApp Business Account within Facebook Business Manager.
* **Payment method for WhatsApp**: Meta charges for each message sent via WhatsApp. Pushwoosh does not handle billing, so ensure your payment information is configured in the **Payment settings** of your WhatsApp account.
## Setting up the WhatsApp configuration
To set up the WhatsApp configuration, follow these steps:
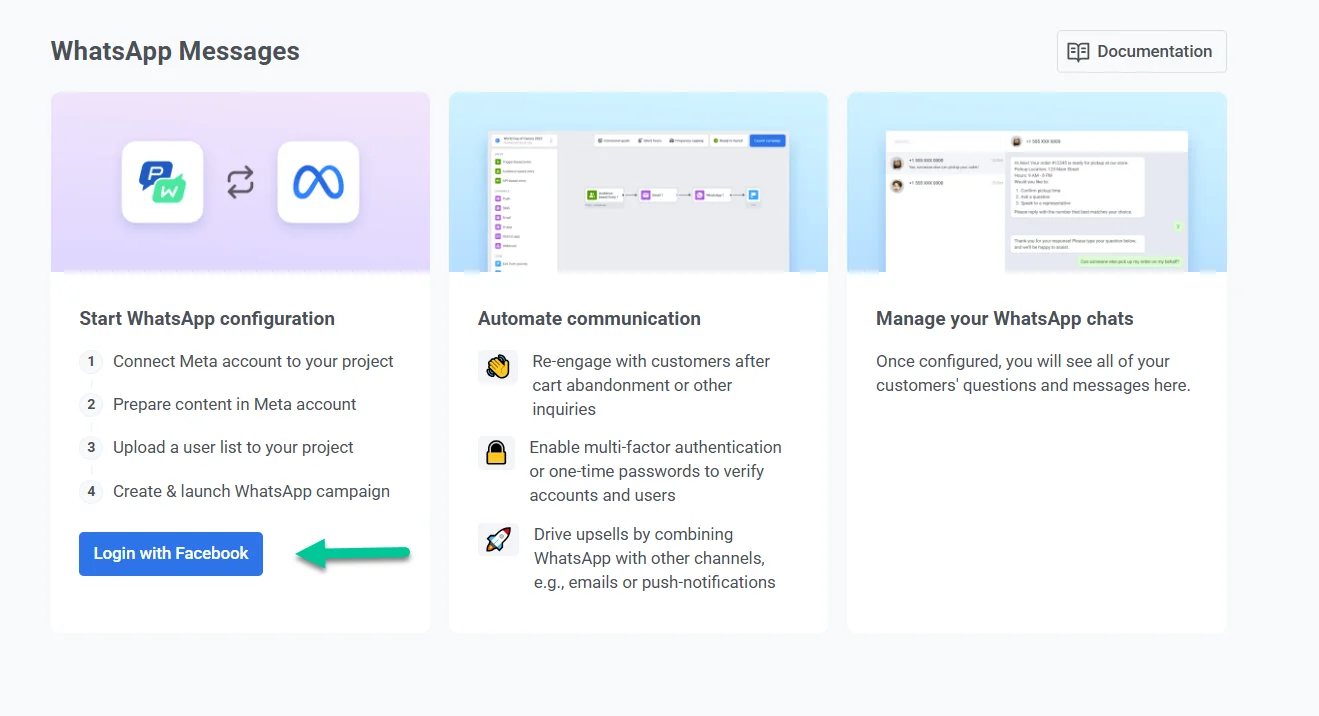
1. Navigate to **Campaigns > WhatsApp messages** and click **Login with Facebook** to start the configuration process.
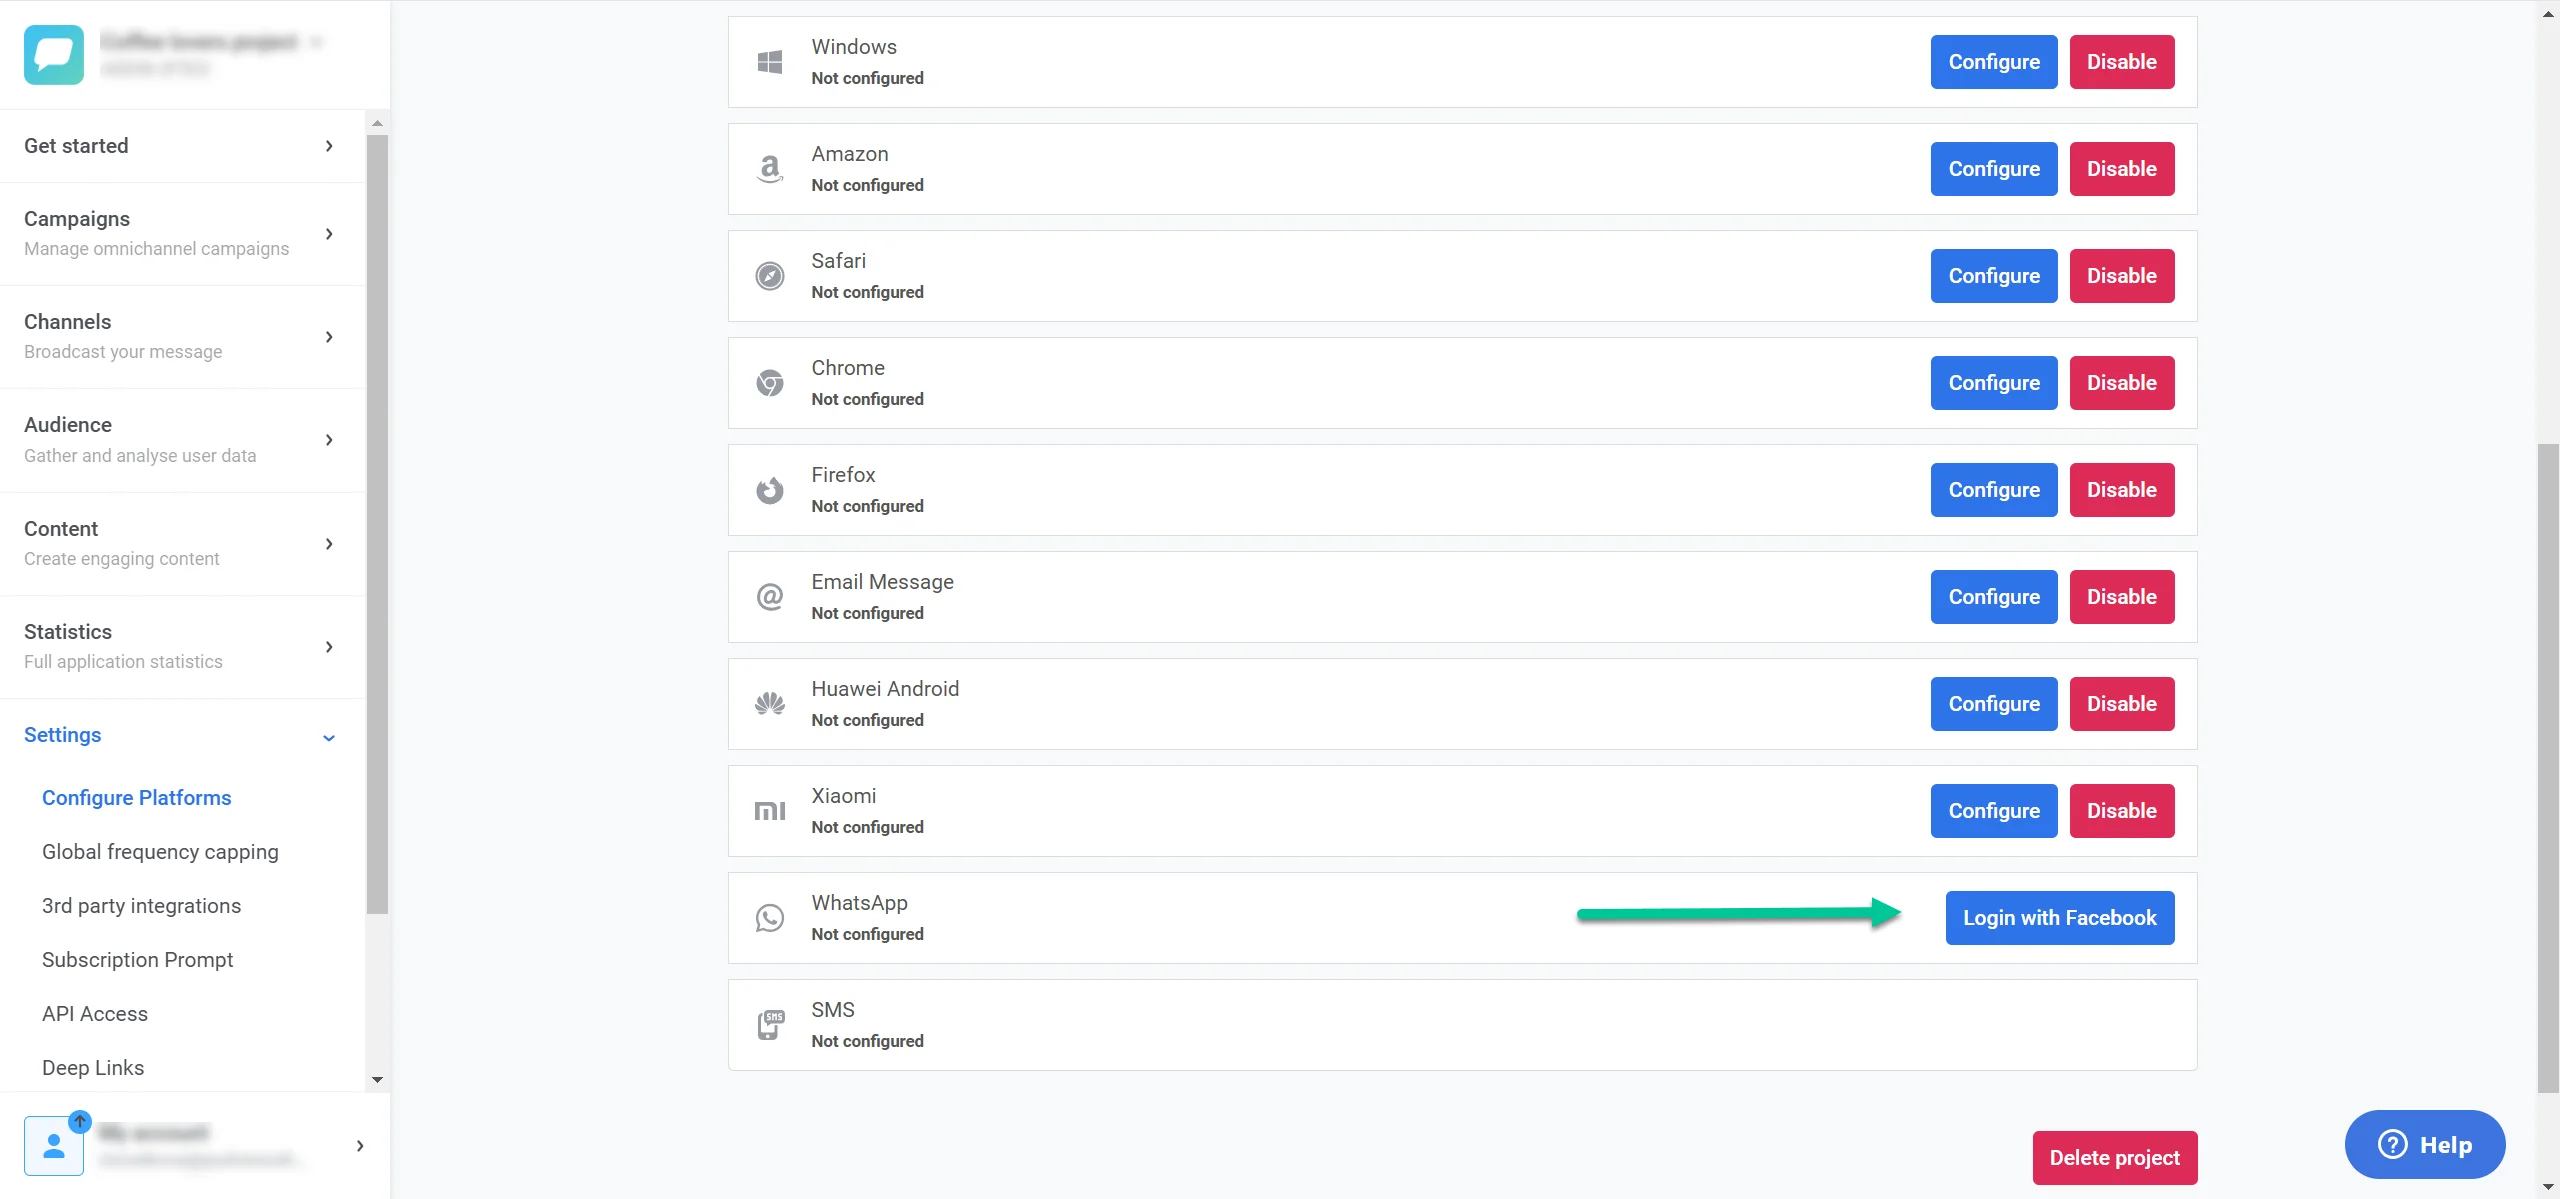
Alternatively, navigate to **Settings > Configure Platforms**. Locate **WhatsApp** in the list of available platforms and click **Login with Facebook** next to the WhatsApp option.
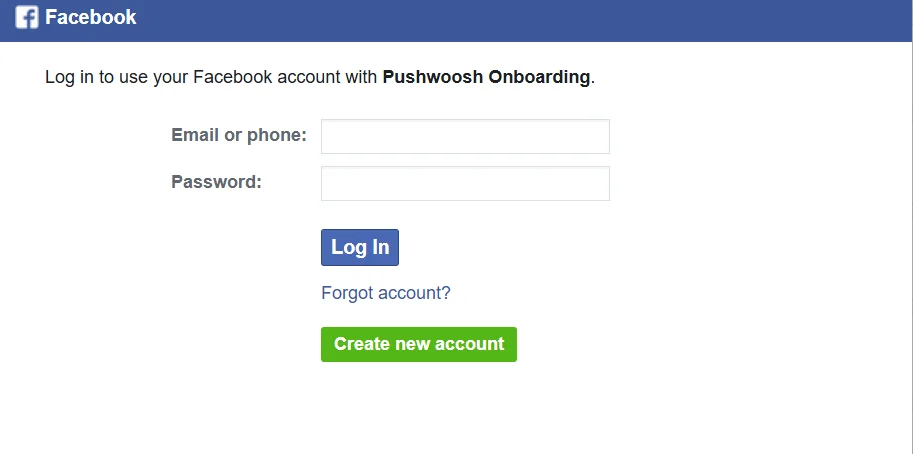
 2. Follow the on-screen prompts to log in with your Facebook Business account.
 3. To proceed with onboarding, click **Continue as [Your Name]** to grant Pushwoosh access to your Facebook profile information, which includes your name and profile picture. This does not allow Pushwoosh to post on Facebook on your behalf.
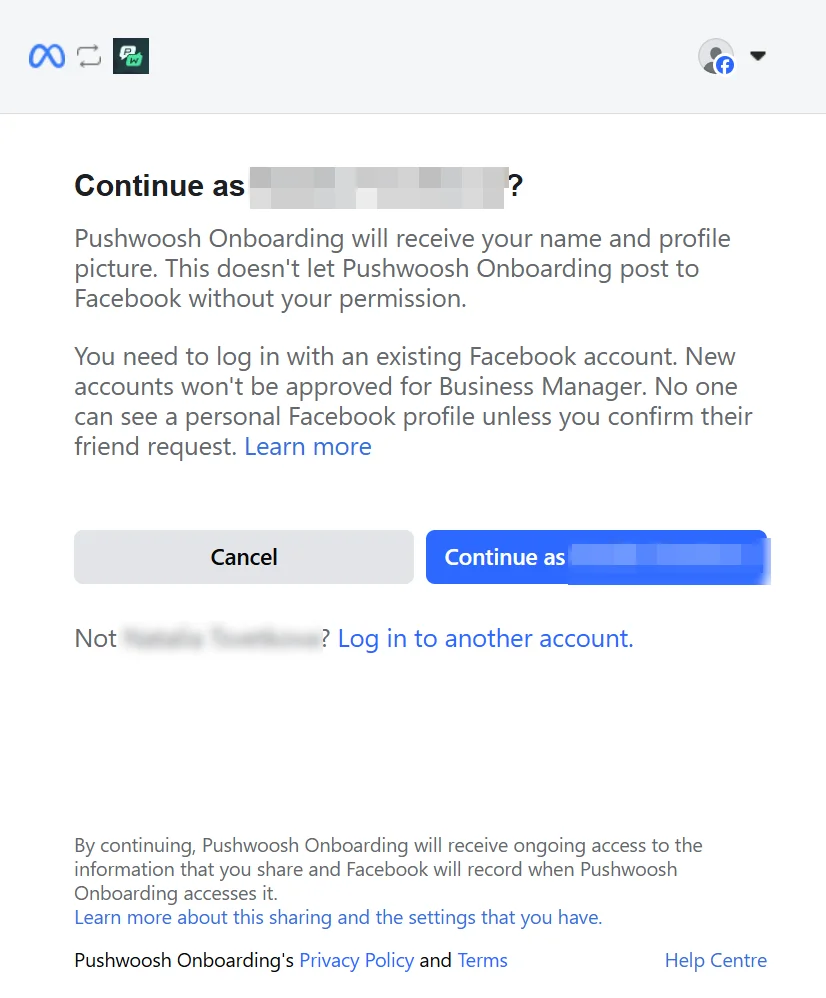 If the displayed account is incorrect, click **Log in to another account** to switch to the appropriate Facebook account with Business Manager access. Ensure you are using an existing Facebook account, as new accounts cannot be approved for Business Manager.
## Connect your account to Pushwoosh and enter your business information
1. After logging in, you’ll see a screen titled **Connect your account to Pushwoosh**. This screen outlines the permissions Pushwoosh will need to send WhatsApp messages on your behalf.
If the displayed account is incorrect, click **Log in to another account** to switch to the appropriate Facebook account with Business Manager access. Ensure you are using an existing Facebook account, as new accounts cannot be approved for Business Manager.
## Connect your account to Pushwoosh and enter your business information
1. After logging in, you’ll see a screen titled **Connect your account to Pushwoosh**. This screen outlines the permissions Pushwoosh will need to send WhatsApp messages on your behalf.
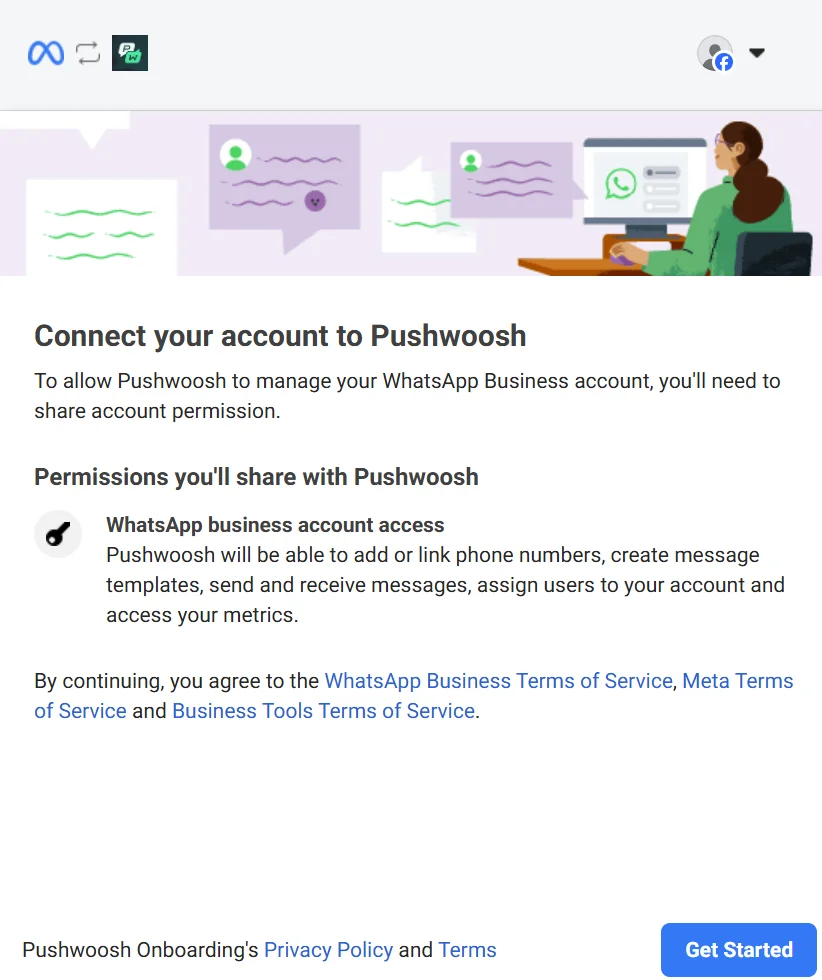 Pushwoosh will request permission to:
* Add or link phone numbers to your WhatsApp Business Account.
* Create and manage message templates.
* Send and receive messages on your behalf.
* Assign users to your account.
* Access your metrics.
Carefully review each permission and the applicable terms of service, including the **WhatsApp Business Terms of Service**, **Meta Terms of Service**, and **Business Tools Terms of Service**. Review **Pushwoosh’s Privacy Policy and Terms** for details on how your data is managed.
Once you’re ready, click **Get started** to continue.
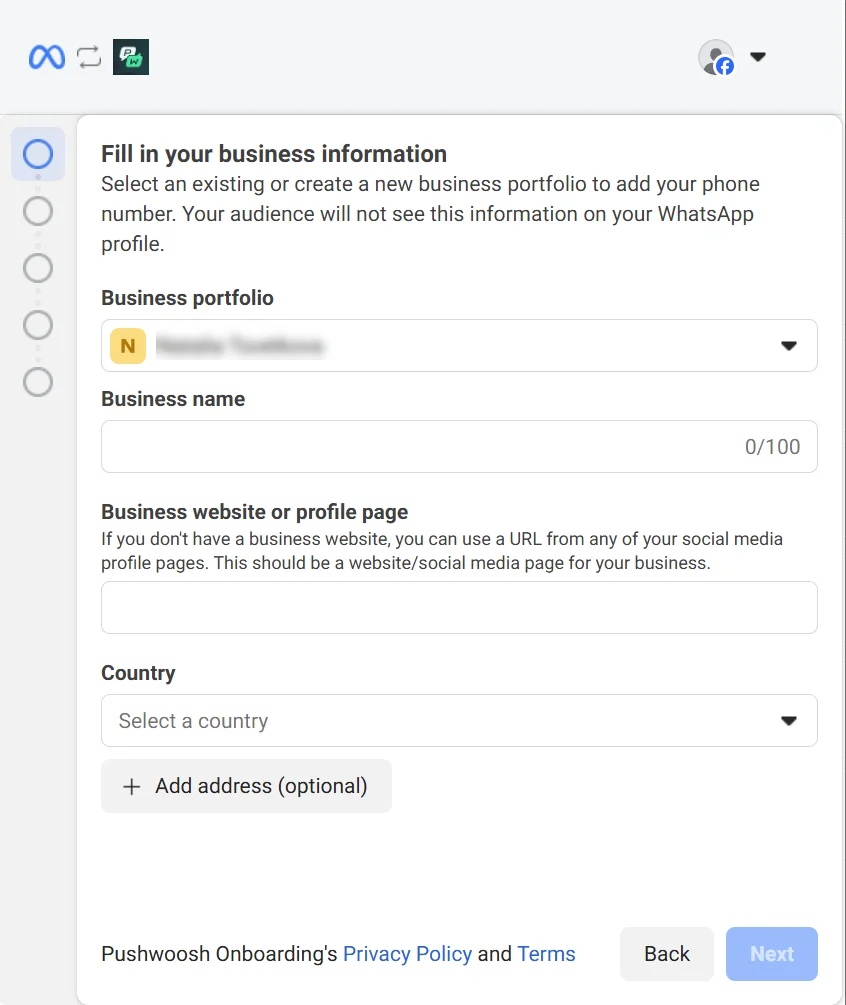
2. To complete the setup, provide your business details. These details are used internally and will not be visible to customers on WhatsApp.
In the **Business portfolio** section, either select an existing portfolio or create a new one.
Then, fill in the required business details:
* **Business name**
* **Business website**
* **Country**
* **Address** (optional)
Pushwoosh will request permission to:
* Add or link phone numbers to your WhatsApp Business Account.
* Create and manage message templates.
* Send and receive messages on your behalf.
* Assign users to your account.
* Access your metrics.
Carefully review each permission and the applicable terms of service, including the **WhatsApp Business Terms of Service**, **Meta Terms of Service**, and **Business Tools Terms of Service**. Review **Pushwoosh’s Privacy Policy and Terms** for details on how your data is managed.
Once you’re ready, click **Get started** to continue.
2. To complete the setup, provide your business details. These details are used internally and will not be visible to customers on WhatsApp.
In the **Business portfolio** section, either select an existing portfolio or create a new one.
Then, fill in the required business details:
* **Business name**
* **Business website**
* **Country**
* **Address** (optional)
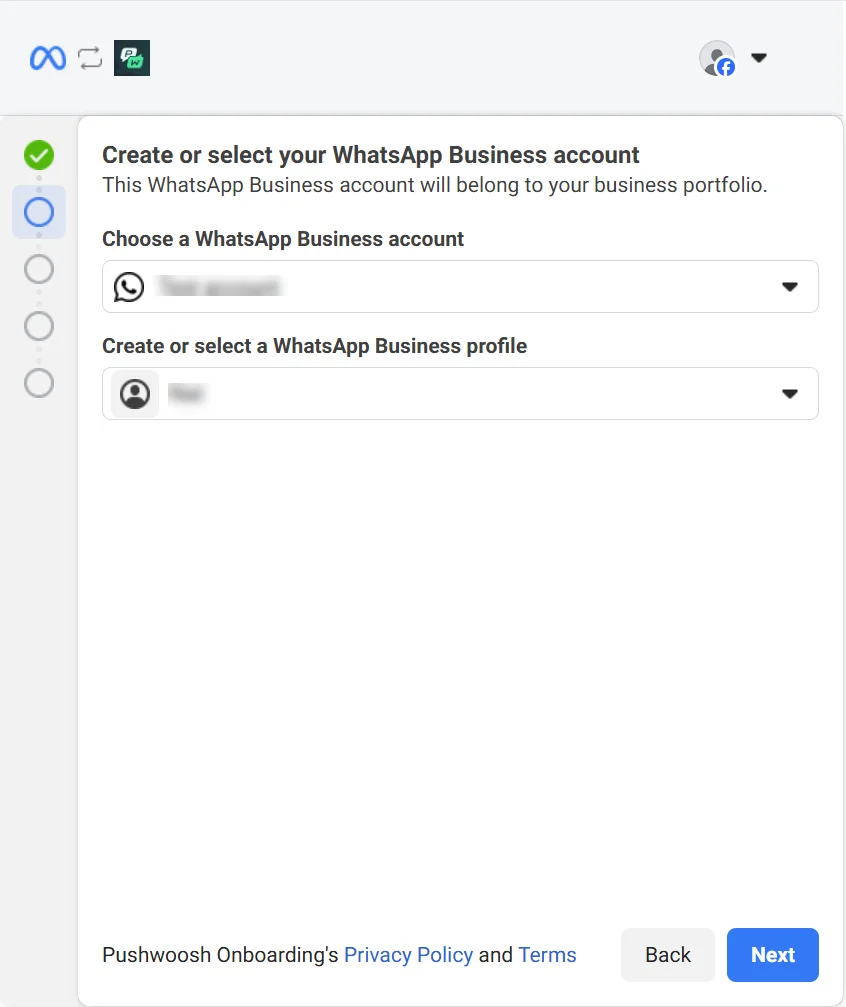
 3. In the **Choose a WhatsApp Business Account** section, select an existing account from the dropdown menu. This account will be linked to your business portfolio in Pushwoosh. If you don’t have a WhatsApp Business account, you can create one by selecting **Create a WhatsApp Business Account**. In the **Create or Select a WhatsApp Business Profile** section, choose an existing profile or create a new one to represent your business on WhatsApp.
 4. Review the permissions Pushwoosh will have to manage your WhatsApp account. These include:
* Managing your selected WhatsApp account.
* Accessing and managing conversations via your selected WhatsApp account.
After reviewing, click **Continue**.
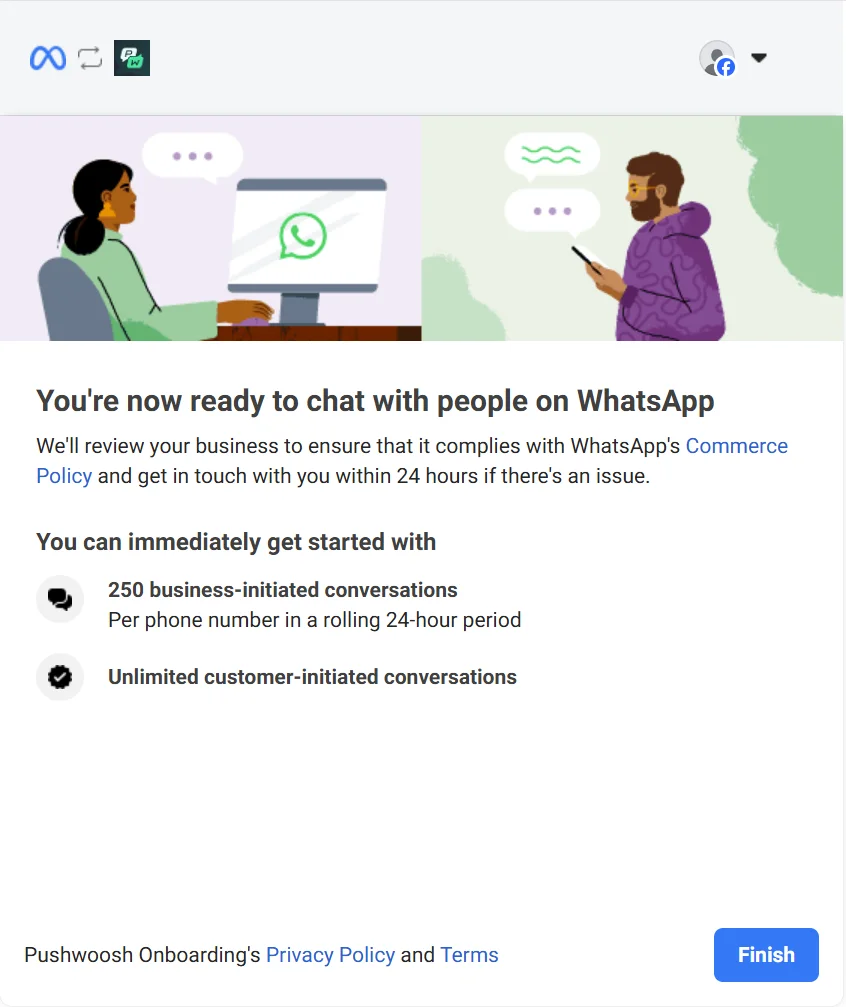
5. Next, you will see a confirmation screen indicating that the WhatsApp setup is complete. Facebook will then review your business to ensure compliance with their Commerce Policy. This review typically occurs in the background, and you will only be contacted if there is an issue, usually within 24 hours.
4. Review the permissions Pushwoosh will have to manage your WhatsApp account. These include:
* Managing your selected WhatsApp account.
* Accessing and managing conversations via your selected WhatsApp account.
After reviewing, click **Continue**.
5. Next, you will see a confirmation screen indicating that the WhatsApp setup is complete. Facebook will then review your business to ensure compliance with their Commerce Policy. This review typically occurs in the background, and you will only be contacted if there is an issue, usually within 24 hours.
 ## Conversation quotas
### Business-initiated conversations
These are conversations that your business starts by sending the first message to a customer. You can initiate up to 250 conversations per phone number within a rolling 24-hour period.
#### Customer-initiated conversations
These are conversations where the customer starts the interaction by messaging your business first. There are no limits on customer-initiated conversations, allowing you to respond to and support customers without restriction.
After reviewing these limits, click **Finish** to finalize the setup.
Once configured and after the review process is complete, the status and basic information of your WhatsApp integration will appear in the list of configured platforms in Pushwoosh, enabling you to [start interacting with customers on WhatsApp](/product/messaging-channels/whatsapp-messages).
## Conversation quotas
### Business-initiated conversations
These are conversations that your business starts by sending the first message to a customer. You can initiate up to 250 conversations per phone number within a rolling 24-hour period.
#### Customer-initiated conversations
These are conversations where the customer starts the interaction by messaging your business first. There are no limits on customer-initiated conversations, allowing you to respond to and support customers without restriction.
After reviewing these limits, click **Finish** to finalize the setup.
Once configured and after the review process is complete, the status and basic information of your WhatsApp integration will appear in the list of configured platforms in Pushwoosh, enabling you to [start interacting with customers on WhatsApp](/product/messaging-channels/whatsapp-messages).