# Configure platforms
To enable Pushwoosh to send messages to your users, it’s essential to configure the platforms you plan to work with.
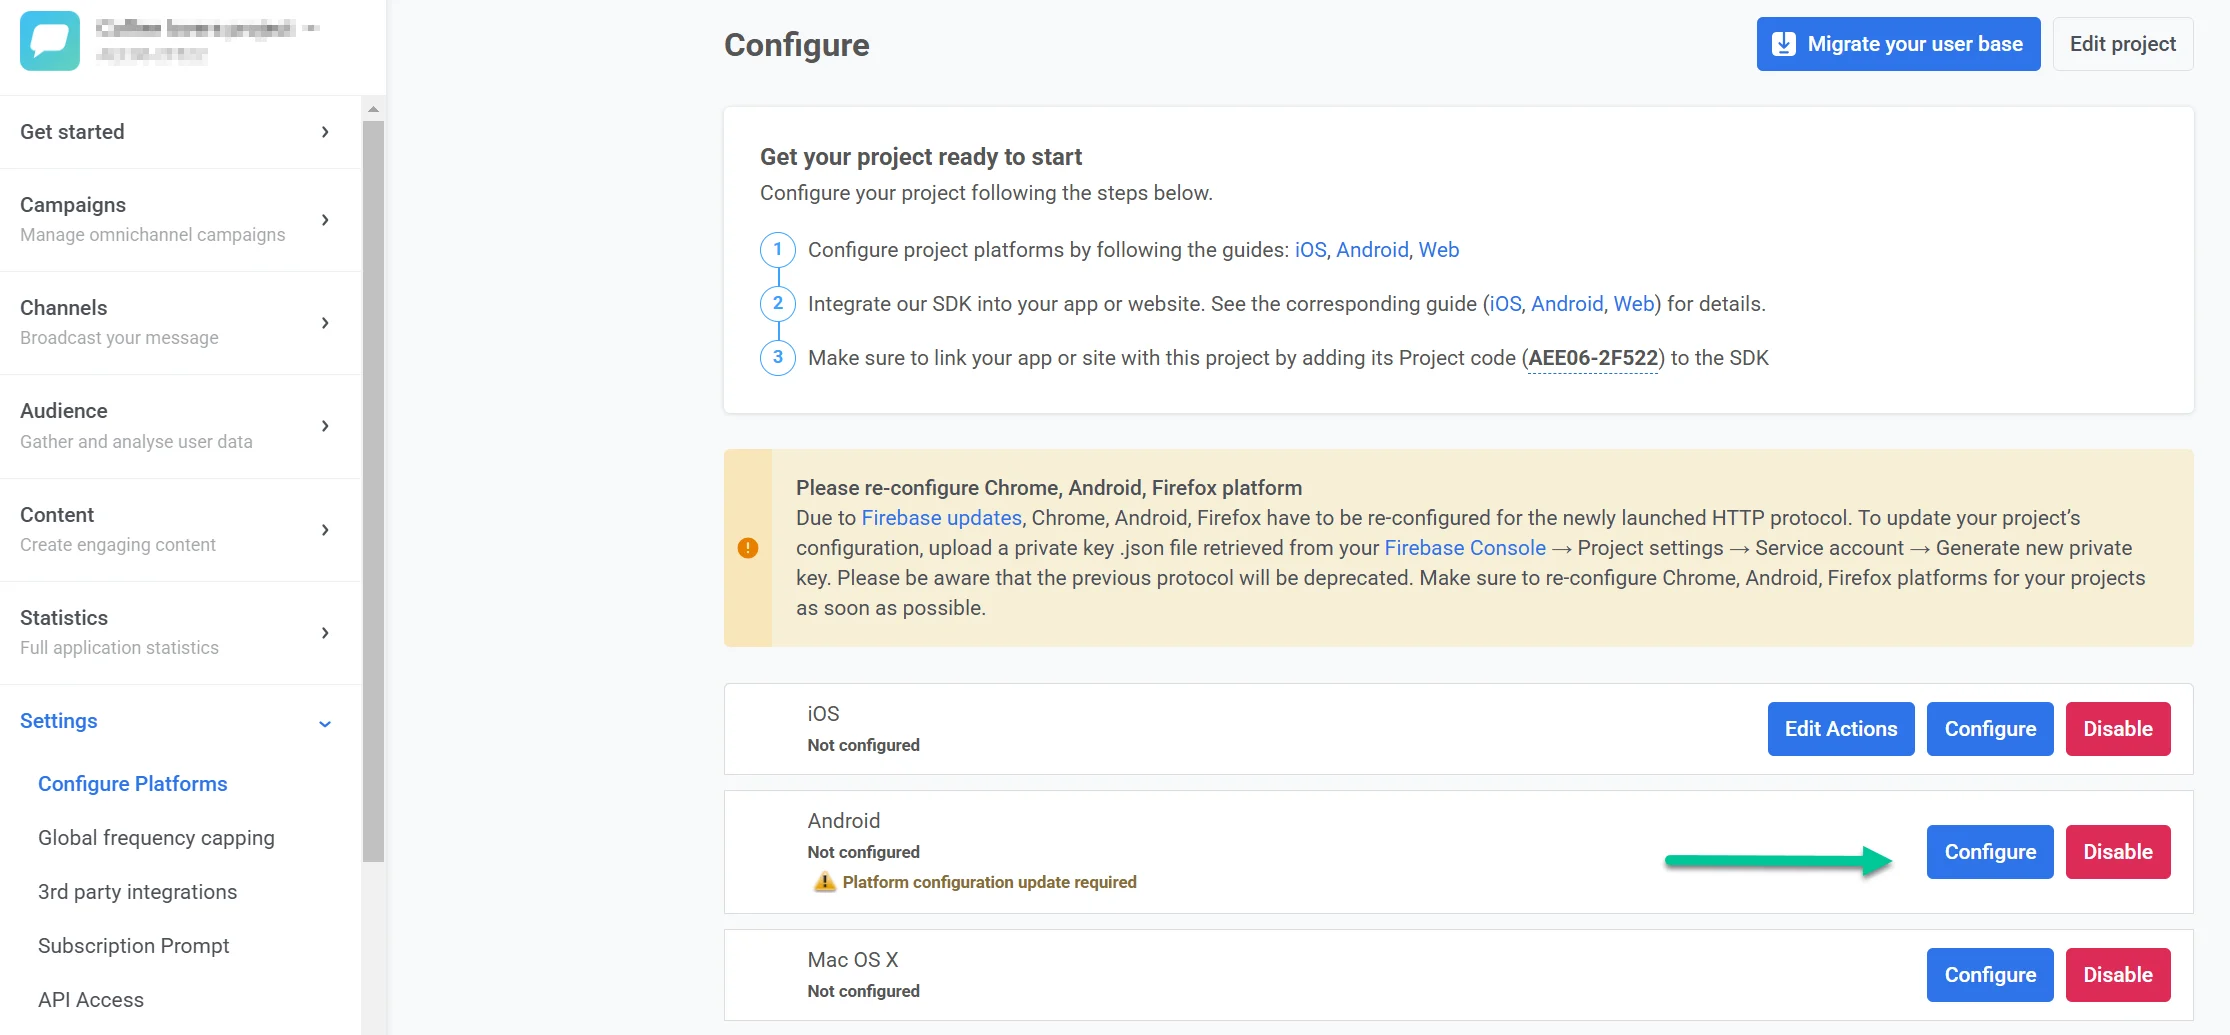
To start configuring a platform, go to **Settings → Configure platforms** and click **Connect** next to the required platform:
## Mobile
### iOS configuration
* [iOS certificate-based configuration](/developer/first-steps/connect-messaging-services/ios-configuration/ios-platform-configuration)
* [iOS token-based configuration](/developer/first-steps/connect-messaging-services/ios-configuration/ios-token-based-configuration)
* [Apple Wallet pass configuration for iOS](/developer/first-steps/connect-messaging-services/ios-configuration/ios-wallet-pass-configuration/)
### Android Firebase configuration
* [Android Firebase configuration](/developer/first-steps/connect-messaging-services/android-configuration/android-firebase-configuration)
* [Google Wallet pass configuration for Android](/developer/first-steps/connect-messaging-services/android-configuration/android-google-wallet-configuration/)
### Amazon configuration
* [Amazon Device Messaging configuration](/developer/first-steps/connect-messaging-services/amazon-configuration/)
### Huawei configuration
* [Huawei configuration](/developer/first-steps/connect-messaging-services/huawei-configuration)
## Web
* [Web push configuration](/developer/first-steps/connect-messaging-services/web-push-configuration/)
## Desktop platforms
* [Windows configuration](/developer/first-steps/connect-messaging-services/windows-configuration)
* **macOS**
## Email
[Email configuration](/product/first-steps/start-with-your-project/configure-platforms/email-verification)
## WhatsApp
Add your WhatsApp Business Account credentials directly in the Control Panel to enable WhatsApp messaging.
- [WhatsApp configuration](/product/first-steps/start-with-your-project/configure-platforms/whatsapp-configuration)
## LINE
Reach one of the most popular messaging audiences by connecting your LINE account to Pushwoosh. Once configured, you can send personalized LINE messages. Use Customer Journey or API to expand your communication strategy and boost engagement.
- [LINE configuration](/developer/first-steps/connect-messaging-services/line-configuration/)
## Kakao
Connect your KakaoTalk account to Pushwoosh to send messages to users in South Korea and other regions. Use approved templates in Customer Journey or via API.
- [KakaoTalk platform configuration](/product/first-steps/start-with-your-project/configure-platforms/kakao-configuration)
## Telegram
Connect a Telegram bot to your Pushwoosh project to send Telegram messages in Customer Journey.
- [Telegram platform configuration](/product/first-steps/start-with-your-project/configure-platforms/telegram-configuration)
## Viber
Connect your Viber account to Pushwoosh to send Viber messages in Customer Journey using Rakuten-approved templates or freeform text.
- [Viber platform configuration](/product/first-steps/start-with-your-project/configure-platforms/viber-configuration)
## SMS
Connect your own SMS provider directly in the Control Panel to enable SMS messaging. Once configured, you can send SMS in one-time campaigns and Customer Journeys.
- [SMS configuration](/product/first-steps/start-with-your-project/configure-platforms/sms-configuration)
- [SMS provider webhooks](/developer/first-steps/connect-messaging-services/sms-configuration/sms-provider-webhooks/) (Developer docs: provider callback URLs)
## Edit project
Click **Edit project** at the top right of the **Configure platforms** page to open project settings. There you can change the project title and icon, connect your bit.ly account to shorten links in push notifications, and manage email notification preferences.
[Learn more about editing your project](/product/account-management-and-security/managing-projects/#editing-projects)
## Hide unconfigured platforms
At the bottom of the **Configure platforms** page, use **Hide unconfigured platforms** to show only the platforms you have already set up. This keeps the list short when you work with a subset of channels.
## Delete project
To delete a project, go to **Settings → Configure platforms**, open the three-dot menu at the top right of the page (next to **Edit project**), and select **Delete project**.
For more on project management, see [Manage projects](/product/account-management-and-security/managing-projects).
 ## Mobile
### iOS configuration
* [iOS certificate-based configuration](/developer/first-steps/connect-messaging-services/ios-configuration/ios-platform-configuration)
* [iOS token-based configuration](/developer/first-steps/connect-messaging-services/ios-configuration/ios-token-based-configuration)
* [Apple Wallet pass configuration for iOS](/developer/first-steps/connect-messaging-services/ios-configuration/ios-wallet-pass-configuration/)
### Android Firebase configuration
* [Android Firebase configuration](/developer/first-steps/connect-messaging-services/android-configuration/android-firebase-configuration)
* [Google Wallet pass configuration for Android](/developer/first-steps/connect-messaging-services/android-configuration/android-google-wallet-configuration/)
### Amazon configuration
* [Amazon Device Messaging configuration](/developer/first-steps/connect-messaging-services/amazon-configuration/)
### Huawei configuration
* [Huawei configuration](/developer/first-steps/connect-messaging-services/huawei-configuration)
## Web
* [Web push configuration](/developer/first-steps/connect-messaging-services/web-push-configuration/)
## Desktop platforms
* [Windows configuration](/developer/first-steps/connect-messaging-services/windows-configuration)
* **macOS**
## Email
[Email configuration](/product/first-steps/start-with-your-project/configure-platforms/email-verification)
## WhatsApp
Add your WhatsApp Business Account credentials directly in the Control Panel to enable WhatsApp messaging.
- [WhatsApp configuration](/product/first-steps/start-with-your-project/configure-platforms/whatsapp-configuration)
## LINE
Reach one of the most popular messaging audiences by connecting your LINE account to Pushwoosh. Once configured, you can send personalized LINE messages. Use Customer Journey or API to expand your communication strategy and boost engagement.
- [LINE configuration](/developer/first-steps/connect-messaging-services/line-configuration/)
## Kakao
Connect your KakaoTalk account to Pushwoosh to send messages to users in South Korea and other regions. Use approved templates in Customer Journey or via API.
- [KakaoTalk platform configuration](/product/first-steps/start-with-your-project/configure-platforms/kakao-configuration)
## Telegram
Connect a Telegram bot to your Pushwoosh project to send Telegram messages in Customer Journey.
- [Telegram platform configuration](/product/first-steps/start-with-your-project/configure-platforms/telegram-configuration)
## Viber
Connect your Viber account to Pushwoosh to send Viber messages in Customer Journey using Rakuten-approved templates or freeform text.
- [Viber platform configuration](/product/first-steps/start-with-your-project/configure-platforms/viber-configuration)
## SMS
Connect your own SMS provider directly in the Control Panel to enable SMS messaging. Once configured, you can send SMS in one-time campaigns and Customer Journeys.
- [SMS configuration](/product/first-steps/start-with-your-project/configure-platforms/sms-configuration)
- [SMS provider webhooks](/developer/first-steps/connect-messaging-services/sms-configuration/sms-provider-webhooks/) (Developer docs: provider callback URLs)
## Edit project
Click **Edit project** at the top right of the **Configure platforms** page to open project settings. There you can change the project title and icon, connect your bit.ly account to shorten links in push notifications, and manage email notification preferences.
[Learn more about editing your project](/product/account-management-and-security/managing-projects/#editing-projects)
## Hide unconfigured platforms
At the bottom of the **Configure platforms** page, use **Hide unconfigured platforms** to show only the platforms you have already set up. This keeps the list short when you work with a subset of channels.
## Delete project
To delete a project, go to **Settings → Configure platforms**, open the three-dot menu at the top right of the page (next to **Edit project**), and select **Delete project**.
For more on project management, see [Manage projects](/product/account-management-and-security/managing-projects).
## Mobile
### iOS configuration
* [iOS certificate-based configuration](/developer/first-steps/connect-messaging-services/ios-configuration/ios-platform-configuration)
* [iOS token-based configuration](/developer/first-steps/connect-messaging-services/ios-configuration/ios-token-based-configuration)
* [Apple Wallet pass configuration for iOS](/developer/first-steps/connect-messaging-services/ios-configuration/ios-wallet-pass-configuration/)
### Android Firebase configuration
* [Android Firebase configuration](/developer/first-steps/connect-messaging-services/android-configuration/android-firebase-configuration)
* [Google Wallet pass configuration for Android](/developer/first-steps/connect-messaging-services/android-configuration/android-google-wallet-configuration/)
### Amazon configuration
* [Amazon Device Messaging configuration](/developer/first-steps/connect-messaging-services/amazon-configuration/)
### Huawei configuration
* [Huawei configuration](/developer/first-steps/connect-messaging-services/huawei-configuration)
## Web
* [Web push configuration](/developer/first-steps/connect-messaging-services/web-push-configuration/)
## Desktop platforms
* [Windows configuration](/developer/first-steps/connect-messaging-services/windows-configuration)
* **macOS**
## Email
[Email configuration](/product/first-steps/start-with-your-project/configure-platforms/email-verification)
## WhatsApp
Add your WhatsApp Business Account credentials directly in the Control Panel to enable WhatsApp messaging.
- [WhatsApp configuration](/product/first-steps/start-with-your-project/configure-platforms/whatsapp-configuration)
## LINE
Reach one of the most popular messaging audiences by connecting your LINE account to Pushwoosh. Once configured, you can send personalized LINE messages. Use Customer Journey or API to expand your communication strategy and boost engagement.
- [LINE configuration](/developer/first-steps/connect-messaging-services/line-configuration/)
## Kakao
Connect your KakaoTalk account to Pushwoosh to send messages to users in South Korea and other regions. Use approved templates in Customer Journey or via API.
- [KakaoTalk platform configuration](/product/first-steps/start-with-your-project/configure-platforms/kakao-configuration)
## Telegram
Connect a Telegram bot to your Pushwoosh project to send Telegram messages in Customer Journey.
- [Telegram platform configuration](/product/first-steps/start-with-your-project/configure-platforms/telegram-configuration)
## Viber
Connect your Viber account to Pushwoosh to send Viber messages in Customer Journey using Rakuten-approved templates or freeform text.
- [Viber platform configuration](/product/first-steps/start-with-your-project/configure-platforms/viber-configuration)
## SMS
Connect your own SMS provider directly in the Control Panel to enable SMS messaging. Once configured, you can send SMS in one-time campaigns and Customer Journeys.
- [SMS configuration](/product/first-steps/start-with-your-project/configure-platforms/sms-configuration)
- [SMS provider webhooks](/developer/first-steps/connect-messaging-services/sms-configuration/sms-provider-webhooks/) (Developer docs: provider callback URLs)
## Edit project
Click **Edit project** at the top right of the **Configure platforms** page to open project settings. There you can change the project title and icon, connect your bit.ly account to shorten links in push notifications, and manage email notification preferences.
[Learn more about editing your project](/product/account-management-and-security/managing-projects/#editing-projects)
## Hide unconfigured platforms
At the bottom of the **Configure platforms** page, use **Hide unconfigured platforms** to show only the platforms you have already set up. This keeps the list short when you work with a subset of channels.
## Delete project
To delete a project, go to **Settings → Configure platforms**, open the three-dot menu at the top right of the page (next to **Edit project**), and select **Delete project**.
For more on project management, see [Manage projects](/product/account-management-and-security/managing-projects).