# Navigating Pushwoosh
This guide helps you navigate the Pushwoosh interface and find the tools you need to create campaigns, manage your audience, organize content, track performance, and configure your project. Learn where to go to accomplish specific tasks and understand how each section helps you engage users across multiple messaging channels.
## Projects page
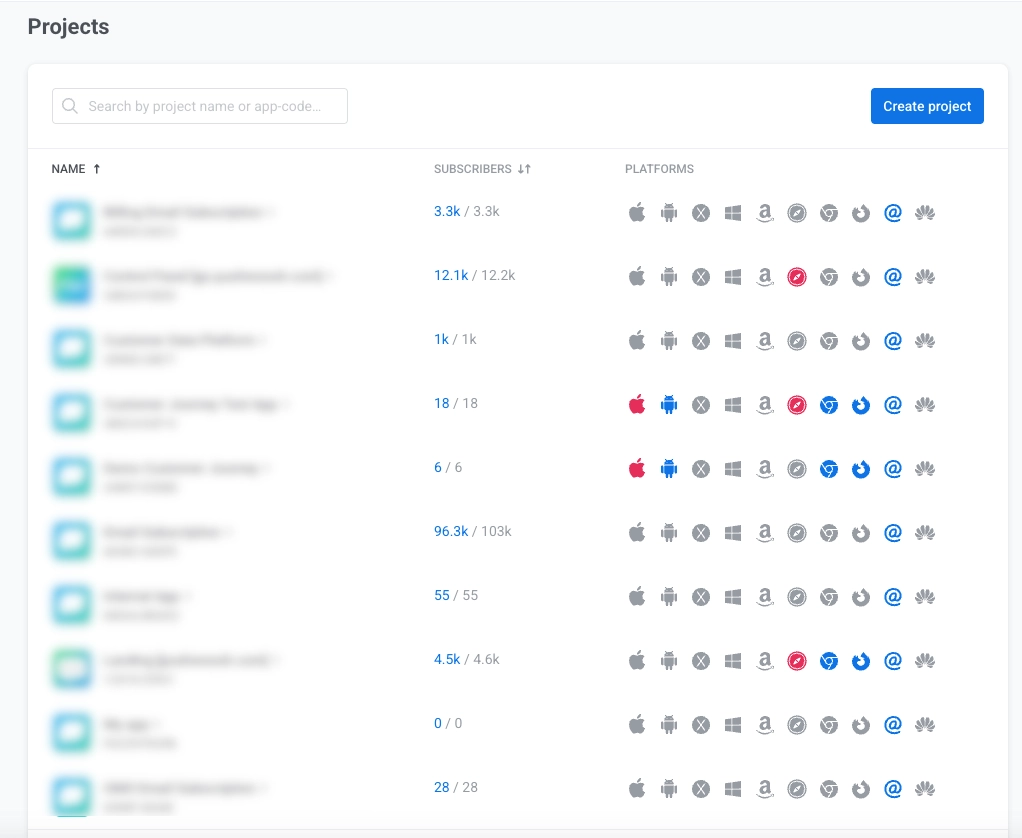
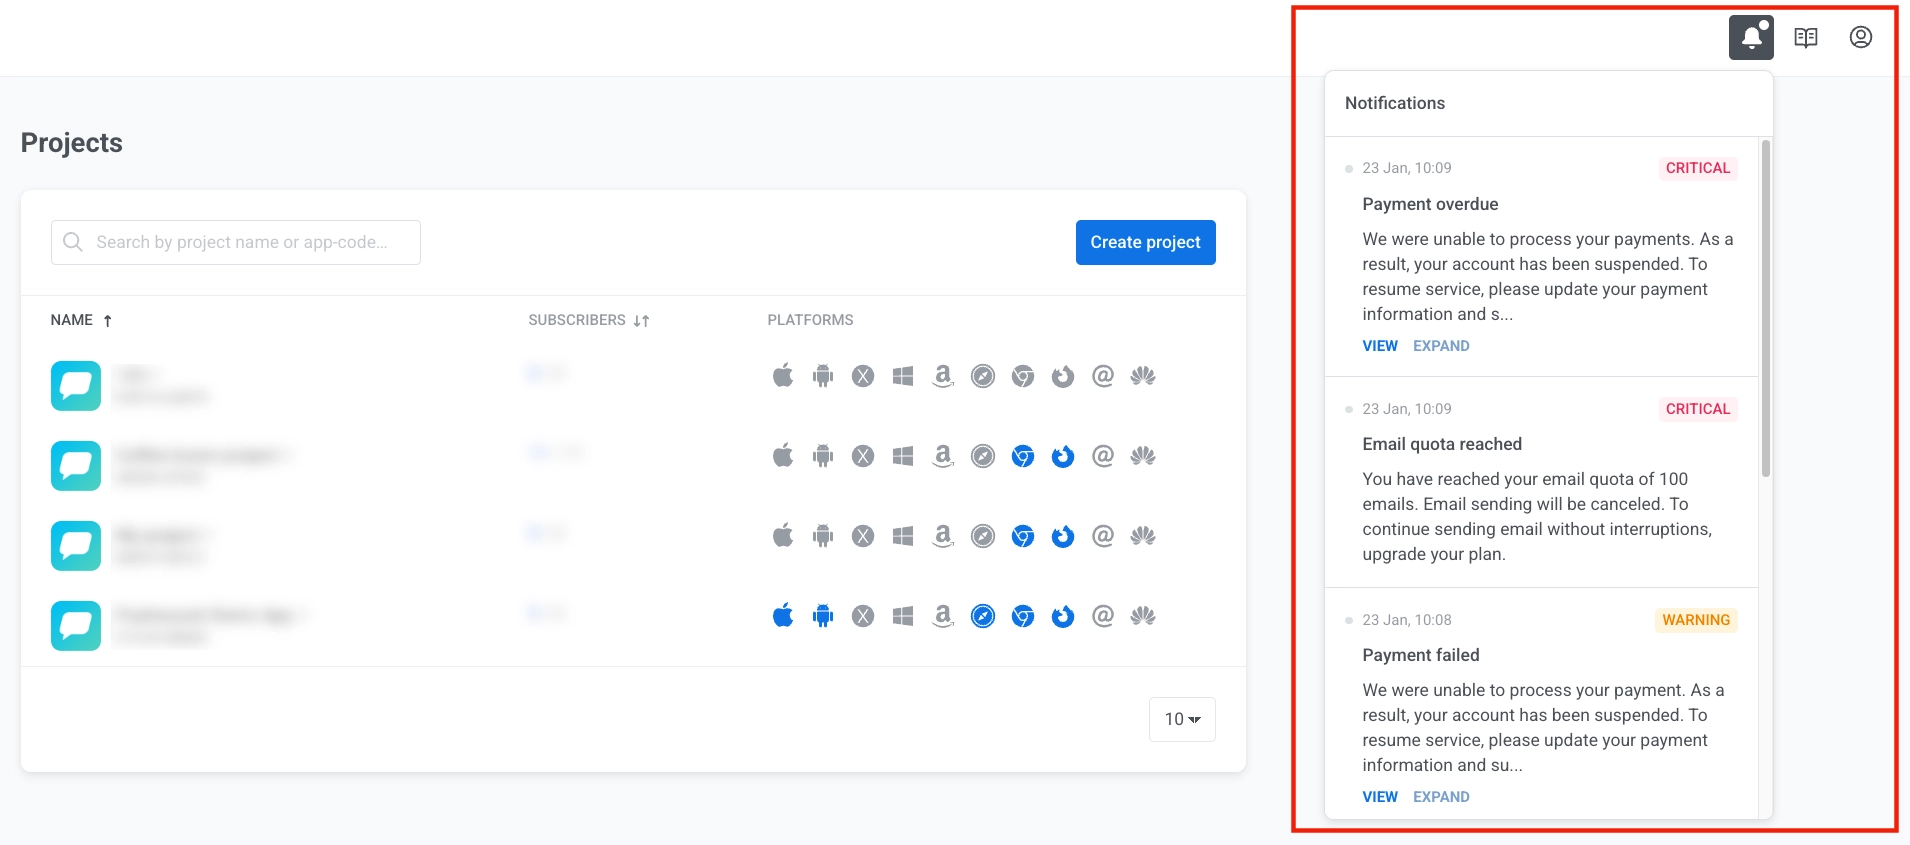
When you log into Pushwoosh, you start on the **Projects page**. This is your central hub for managing all your applications. Each application is treated as a separate project in Pushwoosh.
Each row in the projects table represents a project and includes:
* **Project name**. Below the name, the unique Pushwoosh app code is displayed.
* **Subscribers**: Shows the number of active subscribers and the total number of registered devices.
* **Platforms**: A series of platform indicators show which messaging channels are configured for each project. Platforms that are enabled for the project are highlighted. Platforms not yet configured appear dimmed.
Click **Create a new project** to create a new project. [Learn more](/product/first-steps/start-with-your-project/create-your-project/)
### Notification center
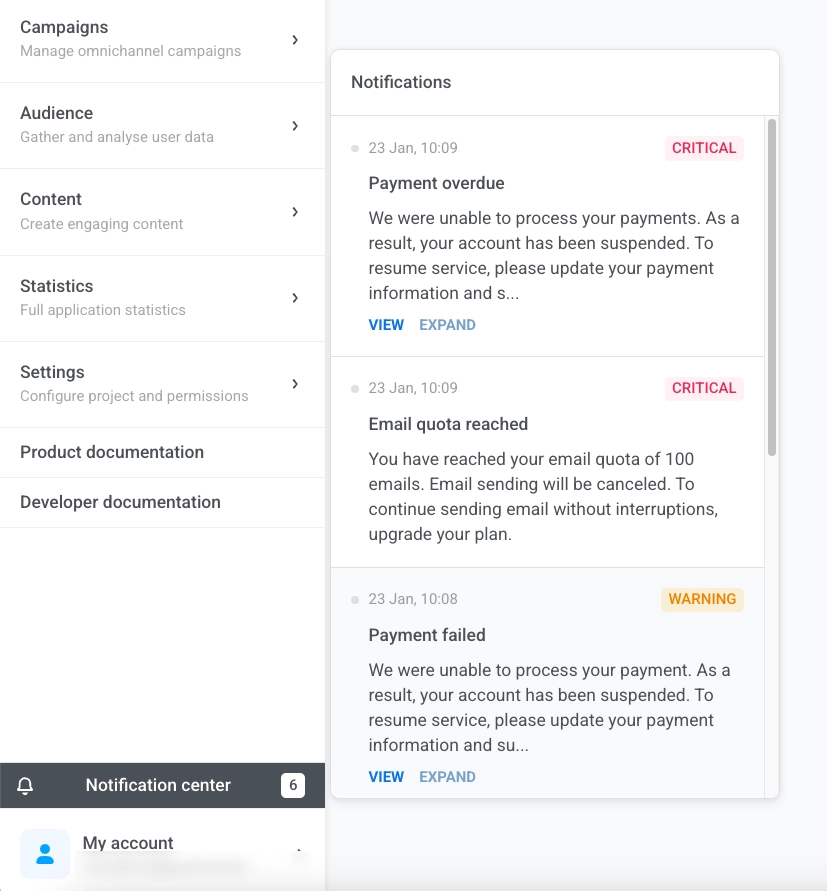
Click the bell icon in the top right corner to see alerts about your account.
Click **View** to see details or **Expand** to read the full message.
After selecting a project, you are taken into the project's workspace. Here, you can create and manage messaging campaigns across different channels, view statistics, configure platforms, and more.
## Project workspace overview
The Pushwoosh interface is organized into logical sections accessible via the left sidebar. Each section serves a specific purpose in your campaign management workflow.
| Section | Description & functionality |
| ----- | ----- |
| **[Current project](#current-project)** | View your current project information and switch between projects. |
| **Create button** | Quick access to create new campaigns, messages, segments, or import users. |
| **[Project overview](#project-overview)** | View a summary dashboard with recent activity and key performance metrics. |
| **[AI Assistant](#manymoney-ai)** | Get help and guidance for any task from ManyMoney AI. |
| **[Campaigns](#campaigns)** | View, create, and manage campaigns for messaging and automation. |
| **[Audience](#audience)** | Manage user data, view subscribers, and create audience segments. |
| **[Content](#content)** | Create, organize, and manage message templates and content for all channels. |
| **[Statistics](#statistics)** | Track campaign and messaging performance, and view analytics dashboards and reports. |
| **[Settings](#settings)** | Set up your project, including platform configuration, message delivery settings, third-party integrations, global control group, API access, deep links, test devices, and application permissions. |
| **Documentation** | Access user guides and developer documentation. |
| **[My account](#my-account)** | Access account settings, billing, user management, referral program, and log out. |
### Current project
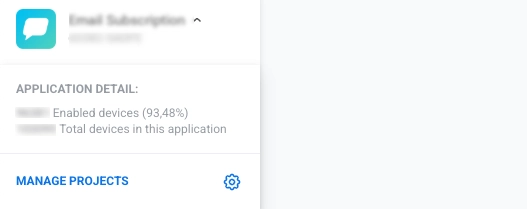
At the top of the sidebar, you'll find information about your current project. This area displays:
- **Project name** and **application code** (formatted as XXXXX-XXXXX, where each X is an uppercase letter or digit)
- **Application detail**: Shows the number of enabled devices with percentage and the total number of devices in the application.
- **Manage Projects** link to access project management settings. Click it to switch between different projects (apps) in your Pushwoosh account.
### Project overview
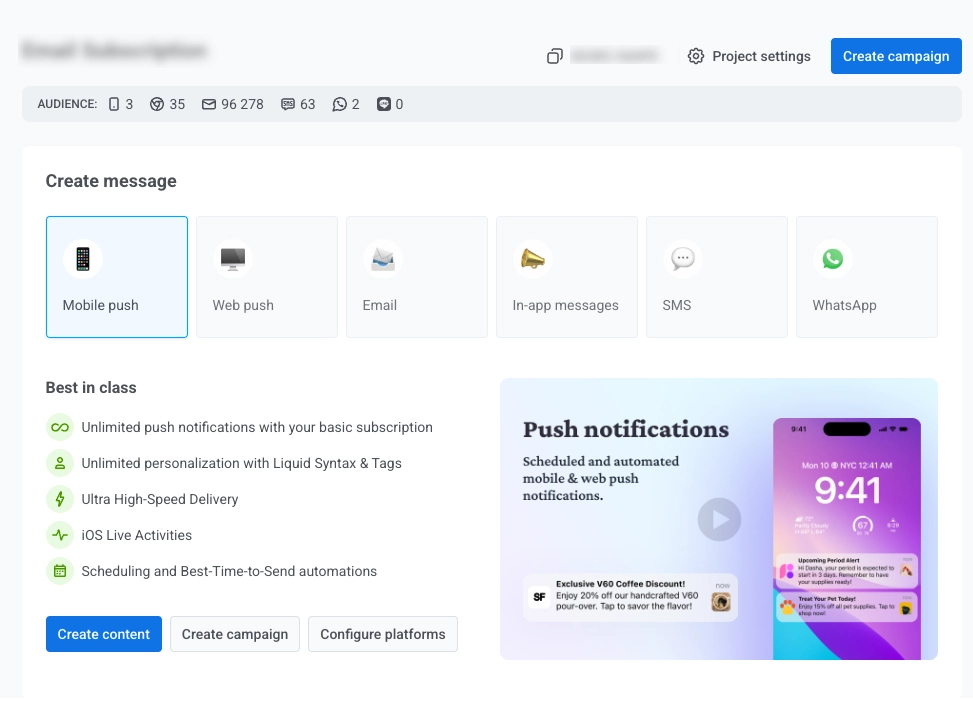
The **Project overview** is the main dashboard you see after opening a project. It shows key audience metrics and gives you quick access to core actions.
The dashboard includes:
##### Quick action buttons
Three buttons for fast access to core tools: [**Create campaign**](/product/customer-journey/pushwoosh-journey-overview/), [**Create content**](/product/content/), and [**Build segment**](/product/audience-data-and-segmentation/segmentation/create-segments/).

##### Summary statistics
The **Total devices** widget displays the total number of devices registered in your project, broken down by platform.

The **Unique users** widget shows all users registered in your project. Each user is counted once regardless of how many devices they use. Each chart also shows the change compared to the previous period.
The widget includes three interactive charts:
* **Total users**: the number of unique user identities ([User IDs](/product/first-steps/start-with-your-project/set-user-id/#what-is-a-user-id)) registered in the project. A person using the app on multiple devices is counted once.
* **MAU (Monthly Active Users)**: The number of unique users that opened the app during a specific month.
* **DAU (Daily Active Users)**: The number of unique users that opened the app on a certain day.
##### Frequency capping
The **Frequency capping** block shows how [frequency capping](/product/messaging-channels/global-frequency-capping) affected message delivery across your project over the last 30 days. It displays two metrics:
* **Suppressions**: the number of times frequency capping prevented a message from being sent over the last 30 days. These sends are not counted in Sent or Delivered.
* **Affected users**: the number of unique users affected by frequency capping over the last 30 days. A single user can be suppressed multiple times within the period, so Suppressions is usually higher than Affected users.
##### Connect more platforms
Click **+ CONNECT MORE PLATFORMS** to expand your messaging capabilities by adding additional communication channels.
##### More resources
Use the **More resources** section to find shortcuts to documentation, the Help Center, webinars, pricing, and other useful materials.
### ManyMoney AI
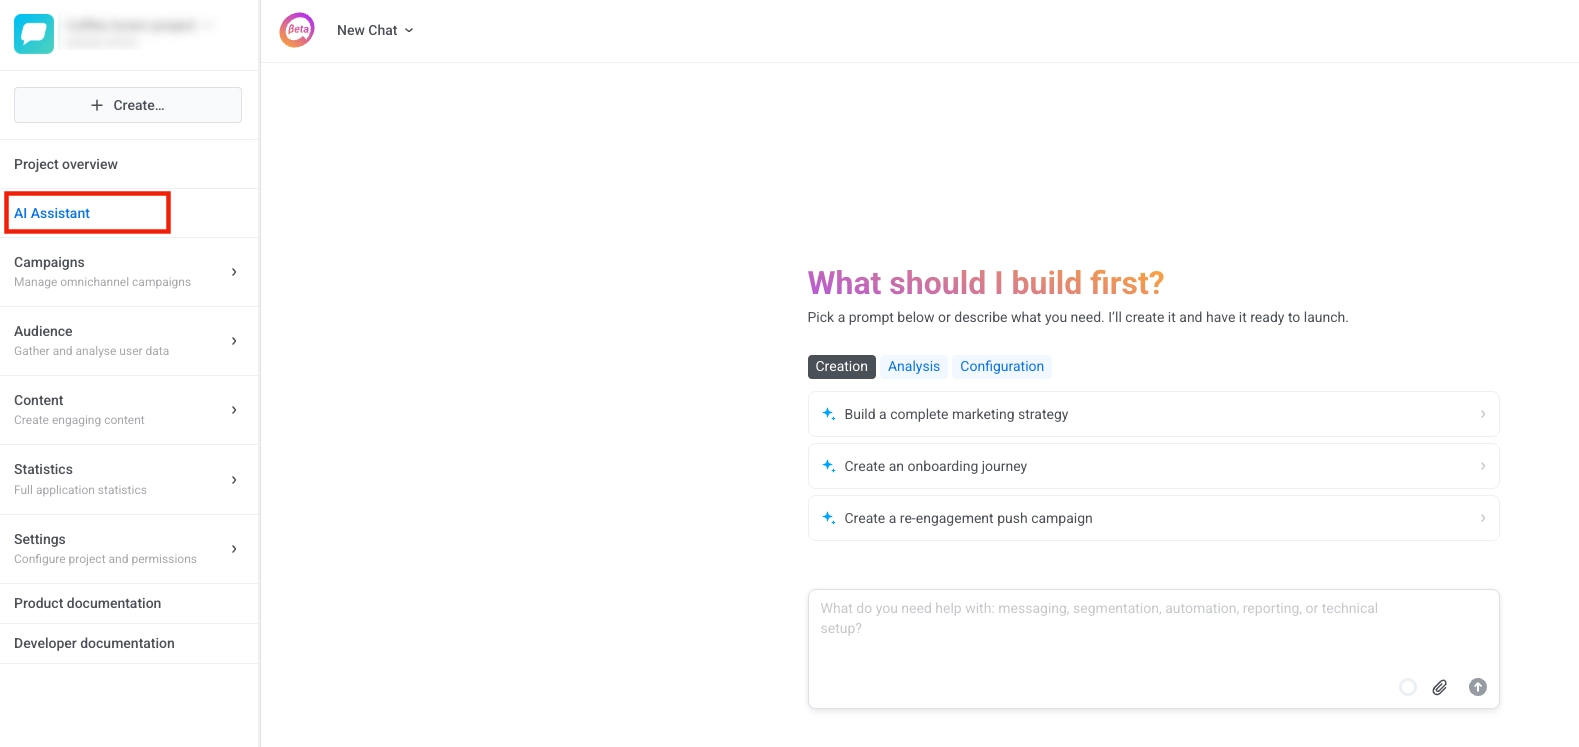
Pushwoosh's AI-powered marketer that can help with almost any task in the platform. Access ManyMoney AI from the navigation sidebar or via the floating button in the bottom-right corner of the screen.
What ManyMoney AI can do:
- Answer questions about Pushwoosh features and documentation
- Create and configure applications
- Build and optimize marketing campaigns
- Manage user data and segmentation
- Generate content and messaging
- Set up customer journeys
- Provide analytics and reporting
- Handle advanced configurations and much more
### Campaigns
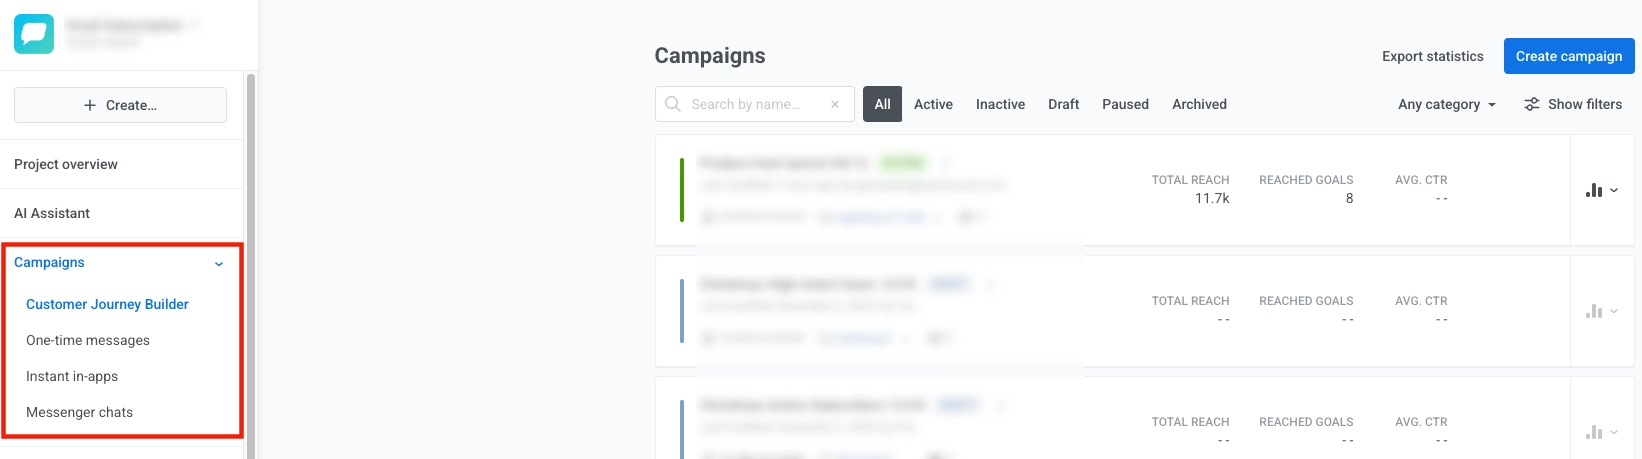
The **Campaigns** section contains all your campaign management tools:
- **Customer Journey Builder**: Design and automate cross-channel customer experiences with an intuitive visual canvas. Easily view and manage all your journeys, along with detailed information for each. [Learn more](/product/customer-journey/pushwoosh-journey-overview)
- **One-time messages**: Send single push notifications or emails to your audience without building a full customer journey, and schedule them for immediate or later delivery. From here you can also review the [history of all sent messages](/product/statistics-and-analytics/message-history) and open detailed statistics for any of them. [Learn more](/product/messaging-channels/push-notifications/send-push-notifications/one-time-push)
- **Instant in-apps**: Display in-app messages immediately when specific events occur, without building a full journey. [Learn more](/product/messaging-channels/in-apps/send-in-apps/send-instant-in-apps/)
- **Web popups (BETA)**: Show targeted overlay messages to visitors on your website and track impressions and conversions. [Learn more](/product/messaging-channels/web-popups/)
- **Geo campaigns**: Trigger push notifications by location using geozones, clusters, and cooldowns. [Learn more](/product/messaging-channels/push-notifications/geo-based-push/)
- **Wallet Passes**: Design, distribute, and update Apple Wallet and Google Wallet passes. Updates sync to every device that saved the pass. [Apple Wallet](/product/messaging-channels/apple-wallet-passes/) · [Google Wallet](/product/messaging-channels/google-wallet-passes/)
- **Messenger chats**: Manage conversations across messenger channels such as SMS, WhatsApp, LINE, and others. [Learn more](/product/messaging-channels/#messenger-chats-and-related-channels)
### Audience
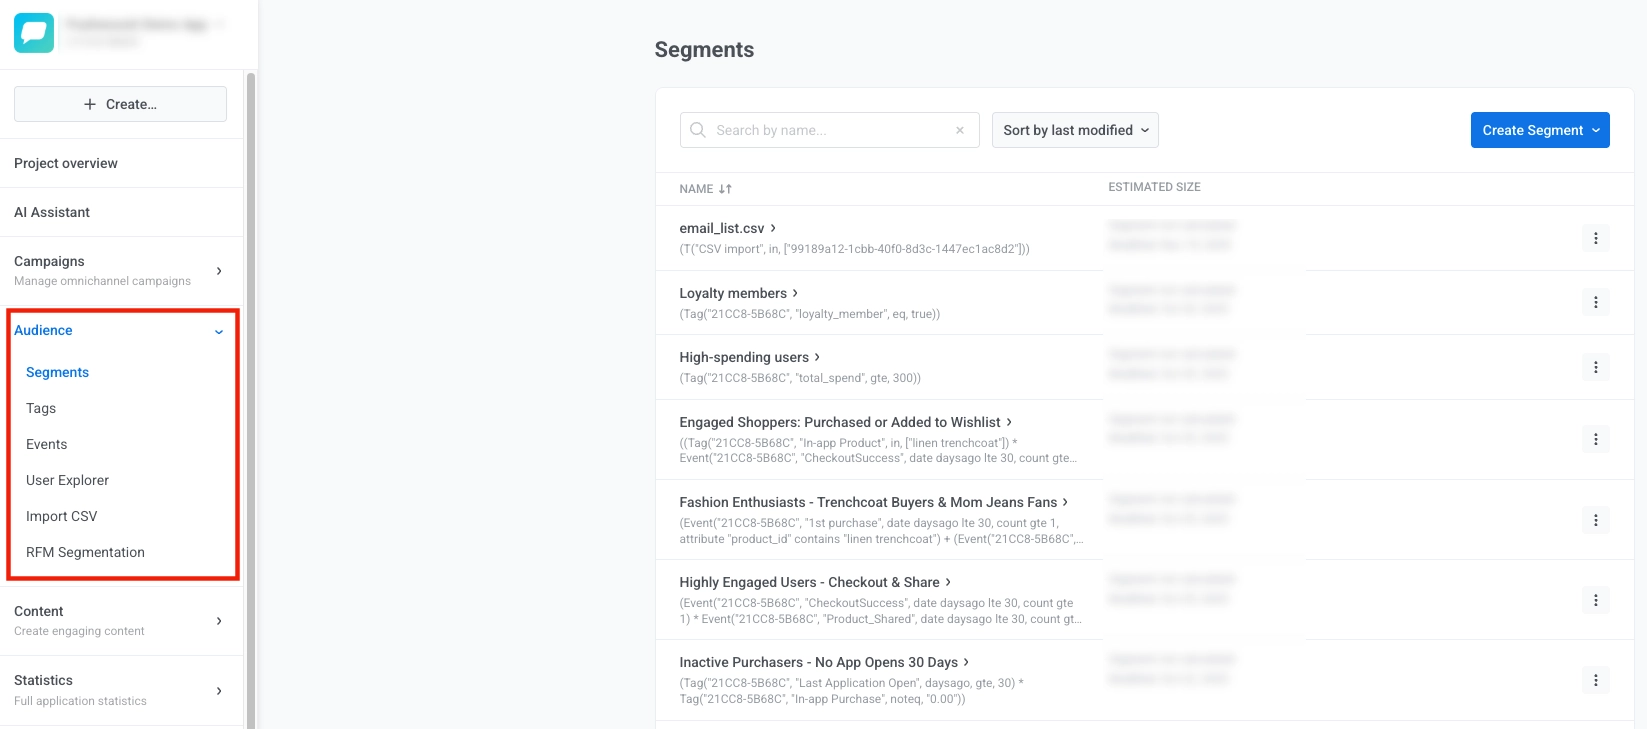
The **Audience** section lets you manage user data, create and view segments, track and manage events, and organize your users for targeted messaging. Use it to build dynamic user groups, store and view user attributes, import user data, and explore individual user profiles.
Here you can manage:
- **Segments**: Create and manage dynamic user groups based on tags, events, or behavior patterns. [Learn more](/product/audience-data-and-segmentation/segmentation/)
- **Tags**: Store and view user attributes like language, location, subscription status, or custom properties. [Learn more](/product/audience-data-and-segmentation/user-data-tags/)
- **Events**: Track user behaviors and actions within your app or website, and view all tracked events. [Learn more](/product/audience-data-and-segmentation/events/)
- **User Explorer**: View individual user profiles, message history, and engagement data. [Learn more](/product/audience-data-and-segmentation/user-explorer)
- **Import CSV**: Create segments from CSV files, import email/SMS contacts, and update tag values.
- **RFM Segmentation**: Use Recency, Frequency, and Monetary segmentation to classify users based on engagement. [Learn more](/product/audience-data-and-segmentation/segmentation/rfm-segmentation)
- **Subscription forms**: Create embedded forms that add subscribers and tags to your audience, with styling and double opt-in options. [Learn more](/product/audience-data-and-segmentation/subscription-forms/)
### Content
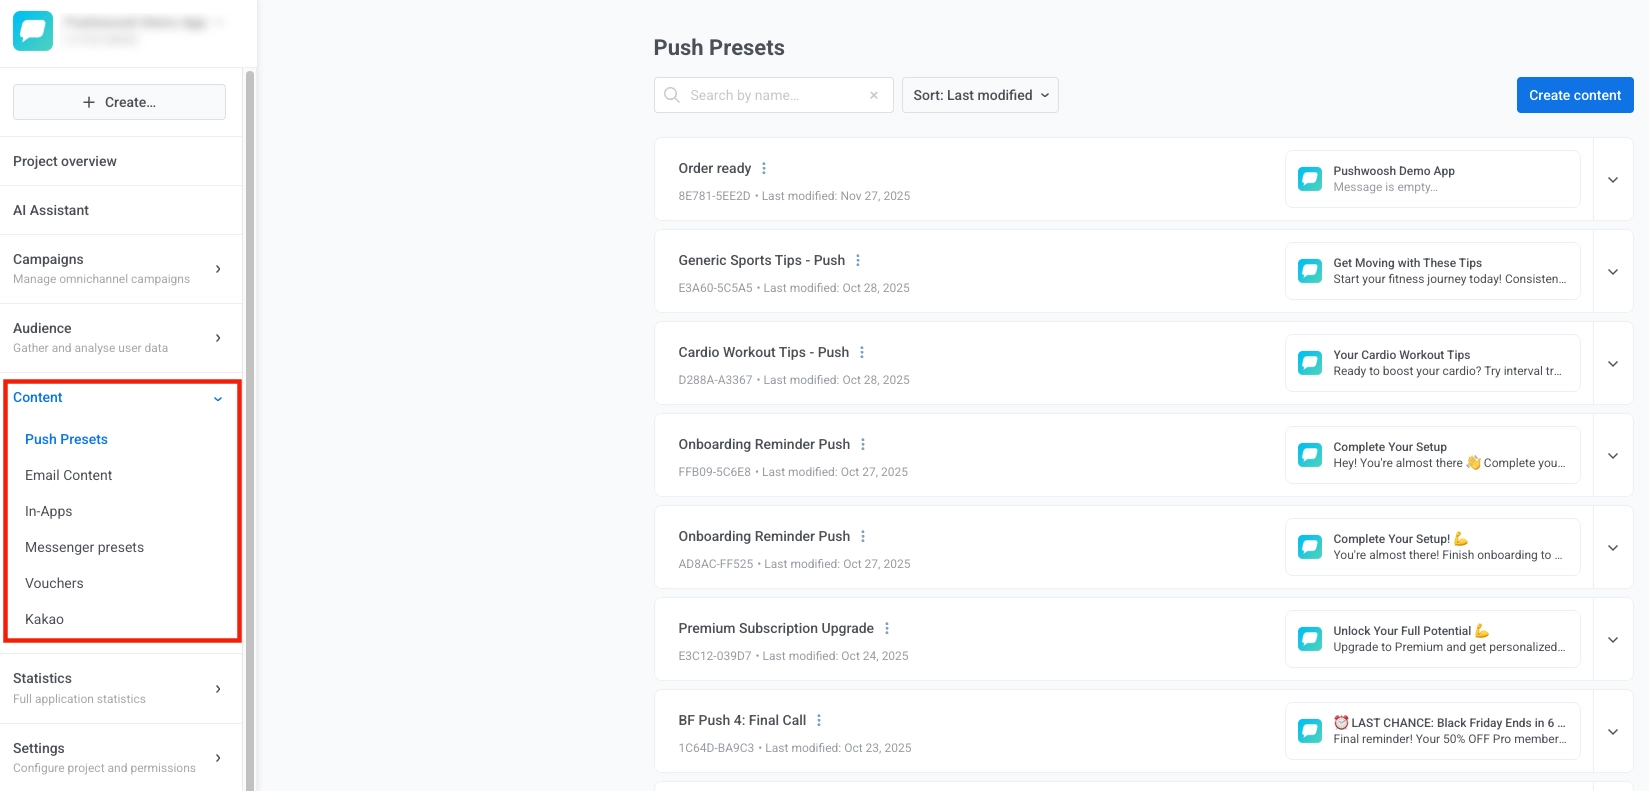
The **Content** section stores all your content and lets you create, view, organize, and manage content for all channels. Use it to access existing content, generate new content, organize it by category, preview how it appears across devices, and handle versions or translations.
Within the Content section, you can access and manage the following types of content:
- **Push presets**: View, create, and manage reusable push notification templates with customizable text, images, and actions. [Learn more](/product/content/push-presets/)
- **Email content**: View, build, and edit HTML emails using templates or the Drag & drop editor. [Learn more](/product/content/email-content/)
- **In-apps**: View and design interactive messages that appear inside your app. [Learn more](/product/content/in-apps/)
- **Messenger presets**: View and create message templates. [Learn more](/product/content/#content-for-messenger-chats-and-related-channels)
- **Vouchers**: View, generate, and manage promo code pools for personalized offers. [Learn more](/product/content/vouchers)
- **Kakao**: View and create message templates for Kakao messaging.
- **Web popup content (BETA)**: Design Web popup layouts from starters or a blank template, then attach them to website Web popup campaigns. [Learn more](/product/content/web-popups-content/)
- **Cloud Pages**: Create and publish Cloud Pages and forms on your domain to capture leads and use submissions in journeys. [Learn more](/product/content/cloud-pages/)
### Statistics
The **Statistics** section lets you track performance and gain insights into your campaign effectiveness.
In the Statistics section, you can find:
- **Project statistics**: View high-level project metrics and export data for stakeholders. [Learn more](/product/statistics-and-analytics/project-overview-statistics)
- **Dashboards**: Create and view custom visual reports with key metrics and KPIs. [Learn more](/product/statistics-and-analytics/dashboards/)
- **Retention**: Track cohort analysis and retention curves. [Learn more](/product/statistics-and-analytics/user-retention-statistics)
- **Aggregated messages**: Analyze and review the combined statistics of multiple messages grouped into a single report for deeper insights into campaign performance. [Learn more](/product/statistics-and-analytics/aggregated-messages)

### Settings
The **Settings** section in the navigation sidebar is an expandable menu that contains all your project configuration tools.
In the Settings section, you’ll find all the essential tools to set up and manage your Pushwoosh project. Here’s what you can do:
- **Configure Platforms**: Set up credentials like API keys and certificates, and configure messaging platforms (iOS, Android, Web, Email, etc.). You can also modify your project settings by clicking **Edit project** at the top of the page, or delete the project. [Learn more](/product/first-steps/start-with-your-project/configure-platforms/)
- **Message delivery settings**: Manage delivery preferences and set up frequency capping. [Learn more](/product/messaging-channels/global-frequency-capping)
- **3rd party integrations**: Connect Pushwoosh with external tools and services. [Learn more](/product/integrations/)
- **Global control group**: Exclude a share of your audience from campaigns for unbiased measurement. [Learn more](/product/audience-data-and-segmentation/global-control-group)
- **API Access**: Manage API tokens and access credentials. [Learn more](/developer/api-reference/api-access-token)
- **Deep Links**: Configure deep linking for push notifications. [Learn more](/product/messaging-channels/push-notifications/advanced-push-features/deep-linking)
- **Test Devices**: Manage devices for testing campaigns. [Learn more](/product/first-steps/start-with-your-project/test-your-integration/test-devices)
- **Application Permissions**: Set up permissions and access control for your project. [Learn more](/product/account-management-and-security/multi-login-accounts#app-specific-permissions)

### Notification center
Check the **Notification center** in the sidebar to see alerts about your projects. The badge shows how many unread notifications you have.
Each alert shows the date and a description. Click **View** to see details or **Expand** to read the full message.
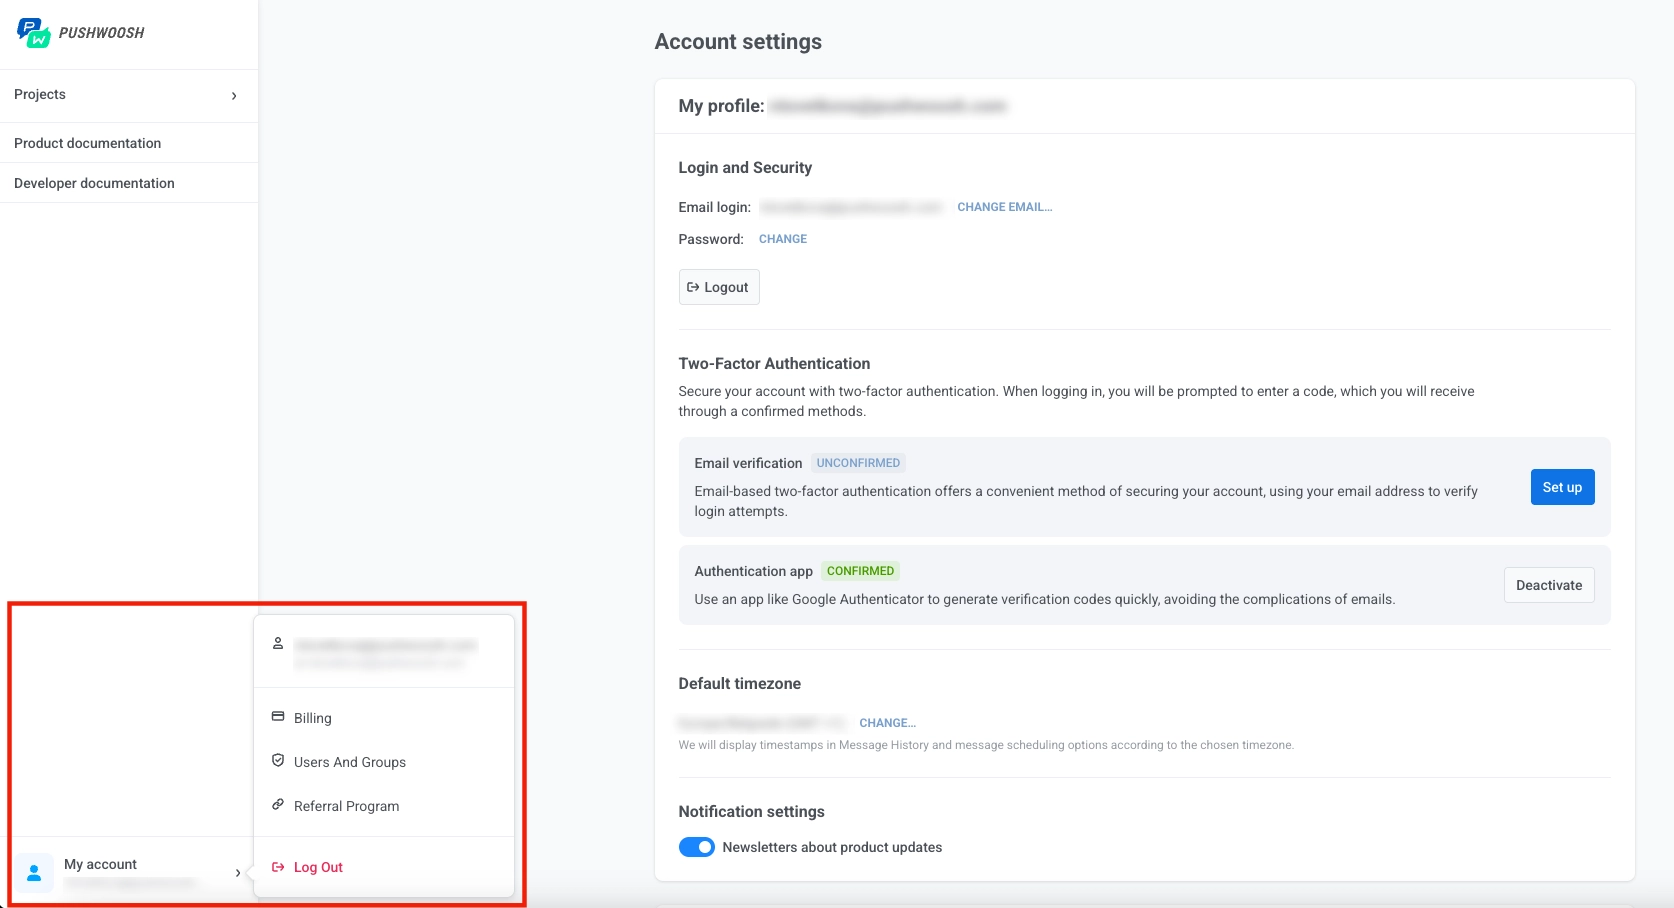
### My account
Manage your Pushwoosh account settings, users, and billing.
In the **My account** section, you can manage your personal and organizational settings:
- **My account**: Update your profile, security preferences, and notification settings. Enable two-factor authentication for added security. [Learn more](/product/account-management-and-security/account-settings)
- **Users and groups**: Invite team members, assign roles and permissions, and review login history. [Learn more](/product/account-management-and-security/multi-login-accounts)
- **Billing**: View usage, manage subscriptions, and handle payments for your account. [Learn more](/product/account-management-and-security/billing-page)
- **Referral program**: Invite others to Pushwoosh and earn rewards for successful referrals.