# Webhook
Webhooks let you send journey data to external services such as analytics, CRM systems, and marketing tools. You can:
* Notify external systems when a customer takes an action in the journey
* Send customer data to analytics tools
* Trigger third-party emails, SMS, or WhatsApp on specific journey events
## How to set up the Webhook element
### Add the Webhook element
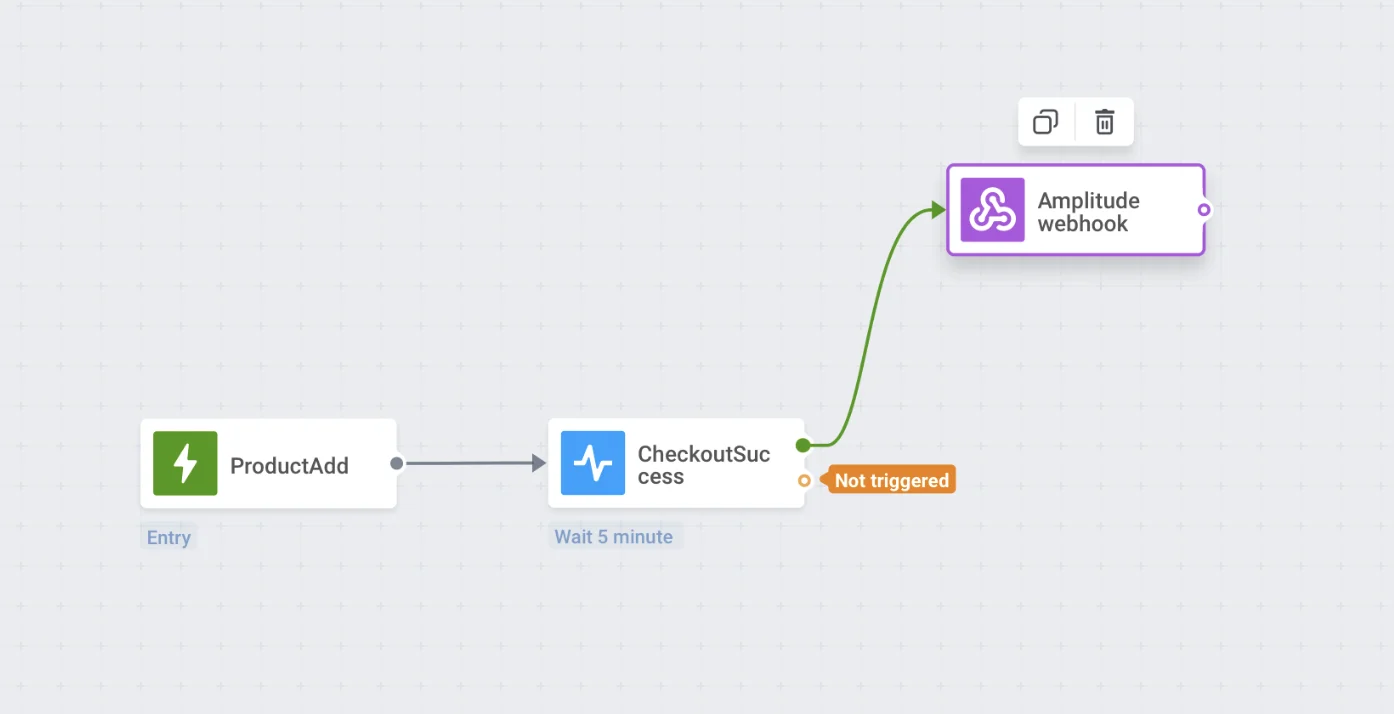
Drag-and-drop the **Webhook** element to the canvas. Place **Webhook** anywhere you'd like, keeping in mind what journey info you're going to send to a third-party service.
### Name the Webhook step and specify the request URL and type
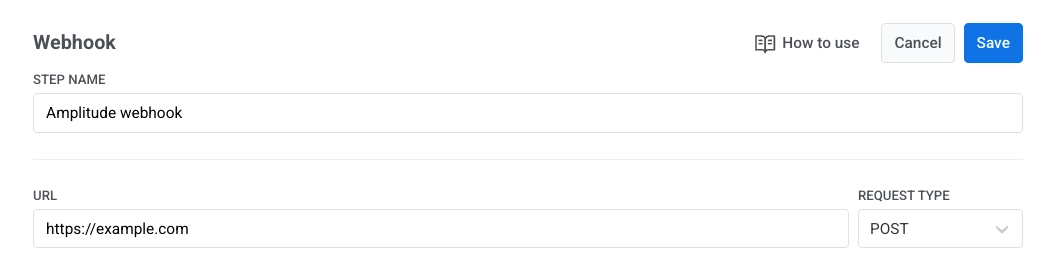
In the **STEP NAME** field, enter a name for the webhook. It might be handy to name webhooks according to the services they send data to or the use case.
Next, in the **URL** field, specify the request URL to which the data should be sent. Next to the URL field, select the request type from the **REQUEST TYPE** dropdown: `GET` or `POST`.
### Configure headers
In the **HEADERS** section, set the content type.
By default, the content type is **application/json**. If the service you're sending the webhook to requires another content type, enter the appropriate one in the **Content-Type** header value.
Examples of content types are:
* `x-www-form-urlencoded`
* `text/plain`
* `text/xml`
Add additional headers if needed by clicking **+ ADD HEADER**. You can remove any header by clicking the 'x' icon next to it.
For example, some APIs may require **HTTP Basic authentication**. To authenticate such requests, do the following:
1. Open a plain text editor and type your username and password with no spaces, separated by a colon. For example: `myuser:mypass`
2. Encode this string into Base64.
3. Copy the resulting Base64 string (for example, `bXl1c2VyOm15cGFzcw==`).
4. In the webhook settings, add an Authorization header with the value: `Basic `. Make sure there is a space after the word "Basic".
### Add the JSON request body
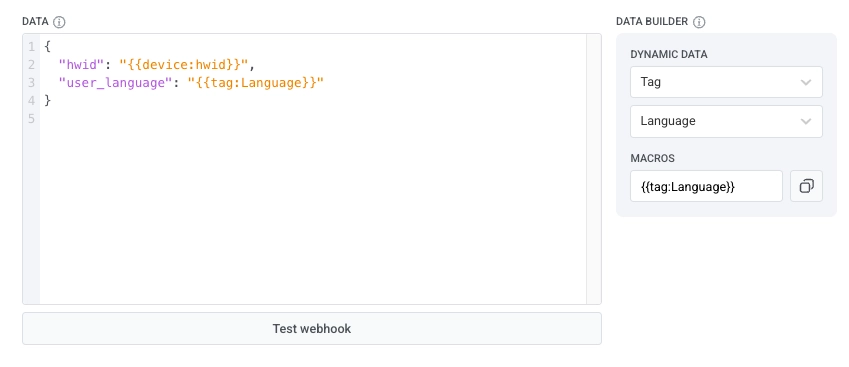
In the **DATA** section, enter your JSON request body. Make sure the request body is in correct JSON format.
Example:
```
{
"hwid": "{{device:hwid}}"
}
```
### Use dynamic data and macros
The **DATA BUILDER** panel allows you to insert dynamic information (such as user, device, tag, or event data) directly into your JSON request body. With Dynamic Data, you can include values specific to the individual user progressing through the journey.
For this:
1. Select a **category**. You can pull data from three categories:
- **Device:** Use Device data when you need technical information tied to the user’s device.
- **Tag:** Use Tag data when you want to send information stored in the user profile.
- **Event:** Use Event data when the webhook should send values from the triggering event of the journey.
2. Select a **parameter** (for example, HWID, favourite category, etc.).
3. Pushwoosh generates a macro that looks like this:
```
{{tag:Language}}
```
4. Copy the macro and paste it into your JSON body in the DATA section.
When the webhook runs in a live journey, Pushwoosh automatically replaces the macro with the actual value for that user.
### Map webhook response data to variables
Besides sending data out, the Webhook element can also capture data from the response it receives and turn it into variables. These variables can then be used later in the journey. For example, set a tag with [**Update user profile**](/product/customer-journey/journey-elements/flow-controls/update-user-profile/#use-a-value-from-a-webhook-response), or schedule a [**Time Delay**](/product/customer-journey/journey-elements/flow-controls/time-delay/#use-a-date-from-a-webhook-response) based on a value returned by the external service. For a full journey example, see [Using webhook response data in your journey](/product/customer-journey/journey-elements/using-webhook-response-data-in-journeys/).
In the **RESPONSE MAPPING** section, click **+ ADD MAPPING** and fill in two fields for each value you want to capture:
* **Path:** the location of the value inside the response JSON body
* **Attribute:** the name you use to reference this value later in the journey
For example, if your CRM responds with:
```
{
"data": {
"user": {
"id": "789xyz"
}
}
}
```
Set **Path** to `data.user.id` and **Attribute** to `crm_user_id` to capture that ID.
### Test the Webhook
Click **Test webhook** to verify that your webhook configuration is correct and the request is sent successfully.
### Save your configuration
Click **Apply** to save your webhook configuration.
 ### Name the Webhook step and specify the request URL and type
In the **STEP NAME** field, enter a name for the webhook. It might be handy to name webhooks according to the services they send data to or the use case.
Next, in the **URL** field, specify the request URL to which the data should be sent. Next to the URL field, select the request type from the **REQUEST TYPE** dropdown: `GET` or `POST`.
### Name the Webhook step and specify the request URL and type
In the **STEP NAME** field, enter a name for the webhook. It might be handy to name webhooks according to the services they send data to or the use case.
Next, in the **URL** field, specify the request URL to which the data should be sent. Next to the URL field, select the request type from the **REQUEST TYPE** dropdown: `GET` or `POST`.
 ### Configure headers
In the **HEADERS** section, set the content type.
By default, the content type is **application/json**. If the service you're sending the webhook to requires another content type, enter the appropriate one in the **Content-Type** header value.
Examples of content types are:
* `x-www-form-urlencoded`
* `text/plain`
* `text/xml`
Add additional headers if needed by clicking **+ ADD HEADER**. You can remove any header by clicking the 'x' icon next to it.
For example, some APIs may require **HTTP Basic authentication**. To authenticate such requests, do the following:
1. Open a plain text editor and type your username and password with no spaces, separated by a colon. For example: `myuser:mypass`
2. Encode this string into Base64.
3. Copy the resulting Base64 string (for example, `bXl1c2VyOm15cGFzcw==`).
4. In the webhook settings, add an Authorization header with the value: `Basic
### Configure headers
In the **HEADERS** section, set the content type.
By default, the content type is **application/json**. If the service you're sending the webhook to requires another content type, enter the appropriate one in the **Content-Type** header value.
Examples of content types are:
* `x-www-form-urlencoded`
* `text/plain`
* `text/xml`
Add additional headers if needed by clicking **+ ADD HEADER**. You can remove any header by clicking the 'x' icon next to it.
For example, some APIs may require **HTTP Basic authentication**. To authenticate such requests, do the following:
1. Open a plain text editor and type your username and password with no spaces, separated by a colon. For example: `myuser:mypass`
2. Encode this string into Base64.
3. Copy the resulting Base64 string (for example, `bXl1c2VyOm15cGFzcw==`).
4. In the webhook settings, add an Authorization header with the value: `Basic 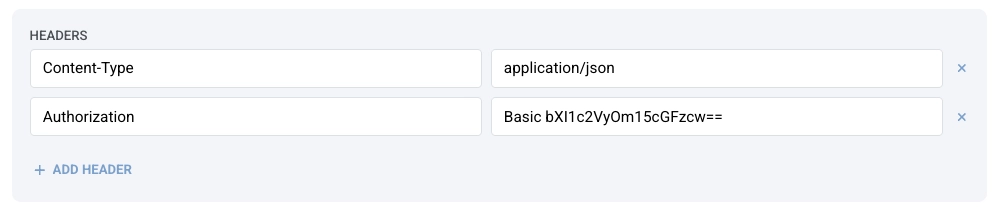 ### Add the JSON request body
In the **DATA** section, enter your JSON request body. Make sure the request body is in correct JSON format.
Example:
```
{
"hwid": "{{device:hwid}}"
}
```
### Use dynamic data and macros
The **DATA BUILDER** panel allows you to insert dynamic information (such as user, device, tag, or event data) directly into your JSON request body. With Dynamic Data, you can include values specific to the individual user progressing through the journey.
For this:
1. Select a **category**. You can pull data from three categories:
- **Device:** Use Device data when you need technical information tied to the user’s device.
- **Tag:** Use Tag data when you want to send information stored in the user profile.
- **Event:** Use Event data when the webhook should send values from the triggering event of the journey.
2. Select a **parameter** (for example, HWID, favourite category, etc.).
3. Pushwoosh generates a macro that looks like this:
```
{{tag:Language}}
```
4. Copy the macro and paste it into your JSON body in the DATA section.
When the webhook runs in a live journey, Pushwoosh automatically replaces the macro with the actual value for that user.
### Add the JSON request body
In the **DATA** section, enter your JSON request body. Make sure the request body is in correct JSON format.
Example:
```
{
"hwid": "{{device:hwid}}"
}
```
### Use dynamic data and macros
The **DATA BUILDER** panel allows you to insert dynamic information (such as user, device, tag, or event data) directly into your JSON request body. With Dynamic Data, you can include values specific to the individual user progressing through the journey.
For this:
1. Select a **category**. You can pull data from three categories:
- **Device:** Use Device data when you need technical information tied to the user’s device.
- **Tag:** Use Tag data when you want to send information stored in the user profile.
- **Event:** Use Event data when the webhook should send values from the triggering event of the journey.
2. Select a **parameter** (for example, HWID, favourite category, etc.).
3. Pushwoosh generates a macro that looks like this:
```
{{tag:Language}}
```
4. Copy the macro and paste it into your JSON body in the DATA section.
When the webhook runs in a live journey, Pushwoosh automatically replaces the macro with the actual value for that user.
 ### Map webhook response data to variables
Besides sending data out, the Webhook element can also capture data from the response it receives and turn it into variables. These variables can then be used later in the journey. For example, set a tag with [**Update user profile**](/product/customer-journey/journey-elements/flow-controls/update-user-profile/#use-a-value-from-a-webhook-response), or schedule a [**Time Delay**](/product/customer-journey/journey-elements/flow-controls/time-delay/#use-a-date-from-a-webhook-response) based on a value returned by the external service. For a full journey example, see [Using webhook response data in your journey](/product/customer-journey/journey-elements/using-webhook-response-data-in-journeys/).
In the **RESPONSE MAPPING** section, click **+ ADD MAPPING** and fill in two fields for each value you want to capture:
* **Path:** the location of the value inside the response JSON body
* **Attribute:** the name you use to reference this value later in the journey
### Map webhook response data to variables
Besides sending data out, the Webhook element can also capture data from the response it receives and turn it into variables. These variables can then be used later in the journey. For example, set a tag with [**Update user profile**](/product/customer-journey/journey-elements/flow-controls/update-user-profile/#use-a-value-from-a-webhook-response), or schedule a [**Time Delay**](/product/customer-journey/journey-elements/flow-controls/time-delay/#use-a-date-from-a-webhook-response) based on a value returned by the external service. For a full journey example, see [Using webhook response data in your journey](/product/customer-journey/journey-elements/using-webhook-response-data-in-journeys/).
In the **RESPONSE MAPPING** section, click **+ ADD MAPPING** and fill in two fields for each value you want to capture:
* **Path:** the location of the value inside the response JSON body
* **Attribute:** the name you use to reference this value later in the journey
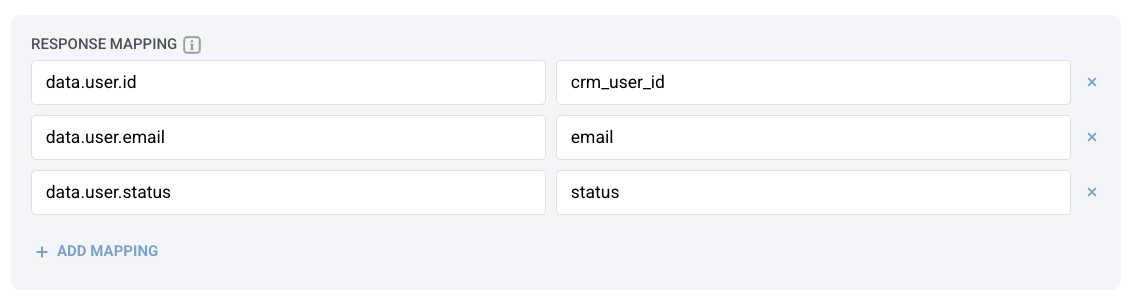 For example, if your CRM responds with:
```
{
"data": {
"user": {
"id": "789xyz"
}
}
}
```
Set **Path** to `data.user.id` and **Attribute** to `crm_user_id` to capture that ID.
For example, if your CRM responds with:
```
{
"data": {
"user": {
"id": "789xyz"
}
}
}
```
Set **Path** to `data.user.id` and **Attribute** to `crm_user_id` to capture that ID.