# Web placement
Use the **Web Placement** element to show [web content](/product/content/web-popup-content/web-content/) on your website to the users who reach this step of the journey. The content appears as a popup over the page or as an inline block inside a page element, on the user's next page view or right after an event.
Unlike a [web popup campaign](/product/messaging-channels/web-popups/), which targets every visitor that matches its rules, a placement is personal: only the users who reach the element see it, and it lives only as long as you set.
The user moves on to the next element as soon as the placement is queued for them. To react to what the user does with the placement, add a [Wait for Trigger](#react-to-shows-clicks-and-closes) element after it.
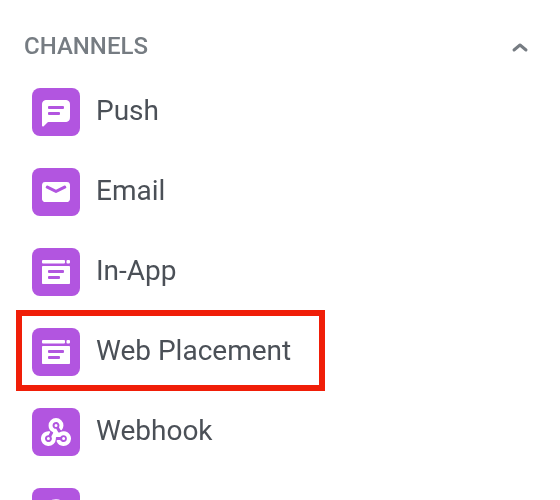
Drag the **Web Placement** element onto the canvas from **Channels**, then click it to open its settings.
## Choose the content
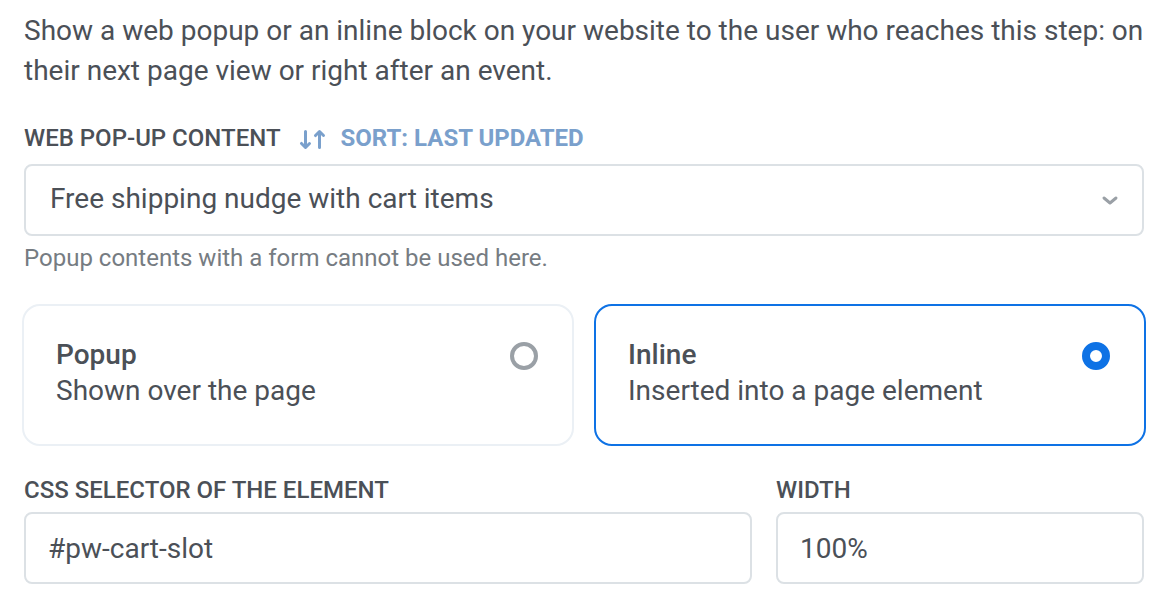
In **Web pop-up content**, select the web content to show. The list shows the web content of the journey's application. Web content with form fields (email input, tag input, consent, or submit) can't be used here. To collect visitor data, use a [web popup campaign](/product/messaging-channels/web-popups/create-web-popups-campaigns/) with a [web form](/product/content/web-popup-content/web-forms/).
To show products from your catalog in the placement, add a [Products block](/product/content/web-popup-content/blocks/#products) to the content.
## Choose the type
* **Popup:** shown over the page.
* **Inline:** inserted into a page element. Set:
* **CSS selector of the element:** the element the block goes into, for example `#cart-slot`. Up to 255 characters. The element must already be on your site.
* **Width:** the CSS width of the block, for example `100%` or `320px`. Leave it empty to keep the element's own width.
An inline block stays on every page that has the element until the lifetime ends, the user closes it, or the hide event happens. A popup is shown once.
Here the element shows the **Free shipping nudge with cart items** content as an inline block in the `#pw-cart-slot` element:
## Set priority and lifetime
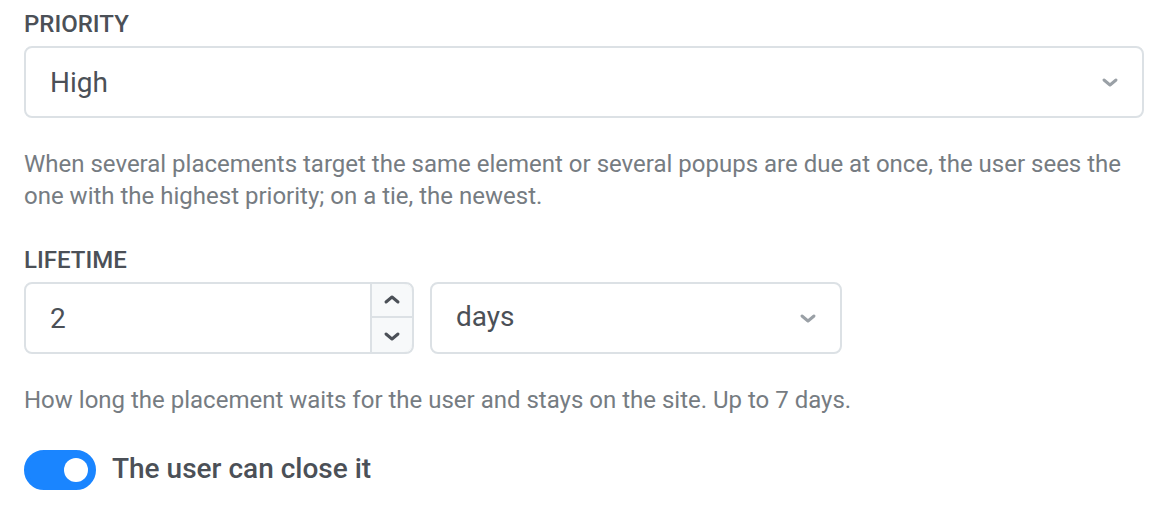
* **Priority:** **High**, **Medium** (default), or **Low**. When several placements target the same element, or several popups are due at the same time, the user sees the one with the highest priority. On a tie, the user sees the newest one. One page shows at most one popup and one inline block per element.
* **Lifetime:** how long the placement waits for the user and stays on the site, in minutes, hours, or days. From 1 minute to 7 days. The default is 1 hour. If the user doesn't visit your site within the lifetime, the placement isn't shown.
## Limit popup shows per day
For a popup, set **Show at most, times a day**: how many popups from this element one user can see in a day, from 0 to 100. `0` means no limit. The limit matters when the same user reaches the element several times, for example when they re-enter the journey or pass a [Loop](/product/customer-journey/journey-elements/flow-controls/loop/). Inline blocks don't have this limit.
## Let the user close the placement
**The user can close it** is on by default. The placement shows a close button (✕). Buttons in the content with the **Close the popup** action, for example **Keep shopping**, close it the same way. A closed placement doesn't come back, and the close counts only as `PW_WebPlacementDismiss`, not as a click.
When the setting is off, an inline block has no ✕ and doesn't show the content's **Close the popup** buttons.
## Choose when to show the placement
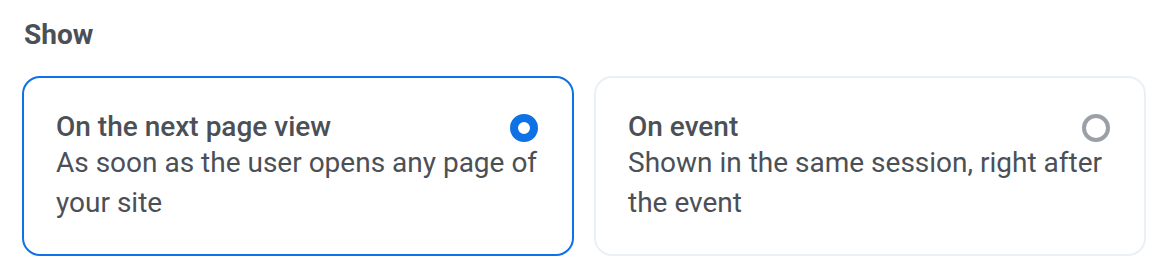
In **Show**, choose:
* **On the next page view:** the placement appears as soon as the user opens any page of your site.
* **On event:** the placement waits for the event you select and appears right after the user triggers it. Optionally, click **Add condition** to filter the event by its attributes.
In **On event** mode, only events sent after the user reaches the element count. If the event doesn't happen within the lifetime, the placement isn't shown.
## Hide the placement after an event
To take the placement off the site when the user does something, for example places an order, turn on **Hide after an event** and select the event. The placement is removed when the event happens, whether or not it was shown.
Placements of a user are also removed when the user leaves the journey or the journey is stopped.
## Preview on a test device
To check the placement on your site before you launch the journey:
1. In **Preview**, select a [test device](/product/first-steps/start-with-your-project/test-your-integration/test-devices/) of the application. The device must be a browser with your website open.
2. Click **Show on test device**.
3. On that device, open or reload a page of your site.
The preview uses the settings in the form, so you don't need to save the journey first. It ignores the **Show** event and appears on the next page view. The preview stays for 1 hour and isn't counted in the journey statistics.
## React to shows, clicks, and closes
A placement sends three events for the user:
| Event | Sent when |
| :---- | :---- |
| `PW_WebPlacementShow` | The placement is shown. An inline block counts as shown when it scrolls into view. |
| `PW_WebPlacementClick` | The user clicks a link or button in the placement, except a close button. |
| `PW_WebPlacementDismiss` | The user closes the placement with ✕ or a **Close the popup** button. |
Each event has the `content_code` attribute with the code of the web content, so you can tell placements apart in conditions.
Use the events:
* In a [Wait for Trigger](/product/customer-journey/journey-elements/flow-controls/wait-for-trigger/) element after the **Web Placement** element, for example a **Clicked** branch with `PW_WebPlacementClick` and a **Not triggered** branch that sends a push.
* As [conversion goals](/product/customer-journey/journey-settings/#conversion-goals) of the journey.
An event appears in the event list once your application has received it at least once. To add it to the list before launch, preview the placement on a test device and click or close it.
## Placement statistics
On the canvas and in the element details of a running journey, the **Web Placement** element shows:
* **Shown:** how many times the placement was shown.
* **Interactions:** how many times it was clicked.
Both counters are totals of events, not unique users. A user who sees an inline block on five pages adds five shows.
## Set up your website
1. Use Web SDK 3.108.1 or later.
2. When a visitor signs in, call `setUserId` with the same user ID the user has in Pushwoosh. Placements are delivered by user ID: without `setUserId`, the site gets only the placements queued for this browser itself, not those of the signed-in user.
3. For inline placements, add the elements the blocks go into, for example ``.
Placements are on by default once the SDK is up to date. To ignore them on a site, see [Web placements](/developer/pushwoosh-sdk/web-push-notifications/web-push-sdk-30/#web-placements) in the Web SDK guide.
 ## Choose the content
In **Web pop-up content**, select the web content to show. The list shows the web content of the journey's application. Web content with form fields (email input, tag input, consent, or submit) can't be used here. To collect visitor data, use a [web popup campaign](/product/messaging-channels/web-popups/create-web-popups-campaigns/) with a [web form](/product/content/web-popup-content/web-forms/).
To show products from your catalog in the placement, add a [Products block](/product/content/web-popup-content/blocks/#products) to the content.
## Choose the type
* **Popup:** shown over the page.
* **Inline:** inserted into a page element. Set:
* **CSS selector of the element:** the element the block goes into, for example `#cart-slot`. Up to 255 characters. The element must already be on your site.
* **Width:** the CSS width of the block, for example `100%` or `320px`. Leave it empty to keep the element's own width.
An inline block stays on every page that has the element until the lifetime ends, the user closes it, or the hide event happens. A popup is shown once.
Here the element shows the **Free shipping nudge with cart items** content as an inline block in the `#pw-cart-slot` element:
 ## Set priority and lifetime
* **Priority:** **High**, **Medium** (default), or **Low**. When several placements target the same element, or several popups are due at the same time, the user sees the one with the highest priority. On a tie, the user sees the newest one. One page shows at most one popup and one inline block per element.
* **Lifetime:** how long the placement waits for the user and stays on the site, in minutes, hours, or days. From 1 minute to 7 days. The default is 1 hour. If the user doesn't visit your site within the lifetime, the placement isn't shown.
 ## Limit popup shows per day
For a popup, set **Show at most, times a day**: how many popups from this element one user can see in a day, from 0 to 100. `0` means no limit. The limit matters when the same user reaches the element several times, for example when they re-enter the journey or pass a [Loop](/product/customer-journey/journey-elements/flow-controls/loop/). Inline blocks don't have this limit.
## Let the user close the placement
**The user can close it** is on by default. The placement shows a close button (✕). Buttons in the content with the **Close the popup** action, for example **Keep shopping**, close it the same way. A closed placement doesn't come back, and the close counts only as `PW_WebPlacementDismiss`, not as a click.
When the setting is off, an inline block has no ✕ and doesn't show the content's **Close the popup** buttons.
## Choose when to show the placement
In **Show**, choose:
* **On the next page view:** the placement appears as soon as the user opens any page of your site.
* **On event:** the placement waits for the event you select and appears right after the user triggers it. Optionally, click **Add condition** to filter the event by its attributes.
In **On event** mode, only events sent after the user reaches the element count. If the event doesn't happen within the lifetime, the placement isn't shown.
 ## Hide the placement after an event
To take the placement off the site when the user does something, for example places an order, turn on **Hide after an event** and select the event. The placement is removed when the event happens, whether or not it was shown.
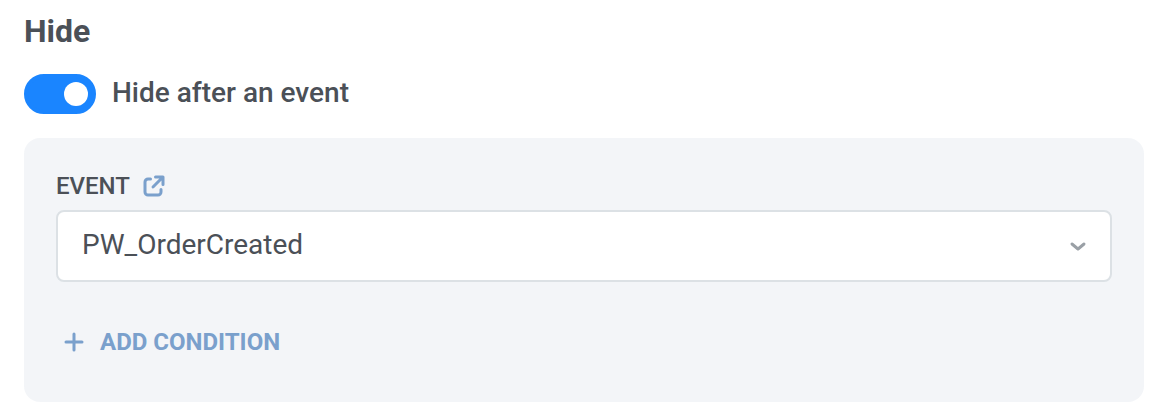 Placements of a user are also removed when the user leaves the journey or the journey is stopped.
## Preview on a test device
To check the placement on your site before you launch the journey:
1. In **Preview**, select a [test device](/product/first-steps/start-with-your-project/test-your-integration/test-devices/) of the application. The device must be a browser with your website open.
2. Click **Show on test device**.
3. On that device, open or reload a page of your site.
The preview uses the settings in the form, so you don't need to save the journey first. It ignores the **Show** event and appears on the next page view. The preview stays for 1 hour and isn't counted in the journey statistics.
## React to shows, clicks, and closes
A placement sends three events for the user:
| Event | Sent when |
| :---- | :---- |
| `PW_WebPlacementShow` | The placement is shown. An inline block counts as shown when it scrolls into view. |
| `PW_WebPlacementClick` | The user clicks a link or button in the placement, except a close button. |
| `PW_WebPlacementDismiss` | The user closes the placement with ✕ or a **Close the popup** button. |
Each event has the `content_code` attribute with the code of the web content, so you can tell placements apart in conditions.
Use the events:
* In a [Wait for Trigger](/product/customer-journey/journey-elements/flow-controls/wait-for-trigger/) element after the **Web Placement** element, for example a **Clicked** branch with `PW_WebPlacementClick` and a **Not triggered** branch that sends a push.
* As [conversion goals](/product/customer-journey/journey-settings/#conversion-goals) of the journey.
An event appears in the event list once your application has received it at least once. To add it to the list before launch, preview the placement on a test device and click or close it.
## Placement statistics
On the canvas and in the element details of a running journey, the **Web Placement** element shows:
* **Shown:** how many times the placement was shown.
* **Interactions:** how many times it was clicked.
Both counters are totals of events, not unique users. A user who sees an inline block on five pages adds five shows.
## Set up your website
1. Use Web SDK 3.108.1 or later.
2. When a visitor signs in, call `setUserId` with the same user ID the user has in Pushwoosh. Placements are delivered by user ID: without `setUserId`, the site gets only the placements queued for this browser itself, not those of the signed-in user.
3. For inline placements, add the elements the blocks go into, for example ``.
Placements are on by default once the SDK is up to date. To ignore them on a site, see [Web placements](/developer/pushwoosh-sdk/web-push-notifications/web-push-sdk-30/#web-placements) in the Web SDK guide.