# Vouchers
Voucher pools in Pushwoosh allow you to personalize push, email, WhatsApp, and other messages by inserting unique voucher codes. A voucher pool is a collection of codes that share common settings such as name and optional expiration date.
### Create a voucher pool
To create a new voucher pool:
1. Go to **Content > Vouchers** in the Pushwoosh Control Panel.
2. Click **Create Voucher Pool**.
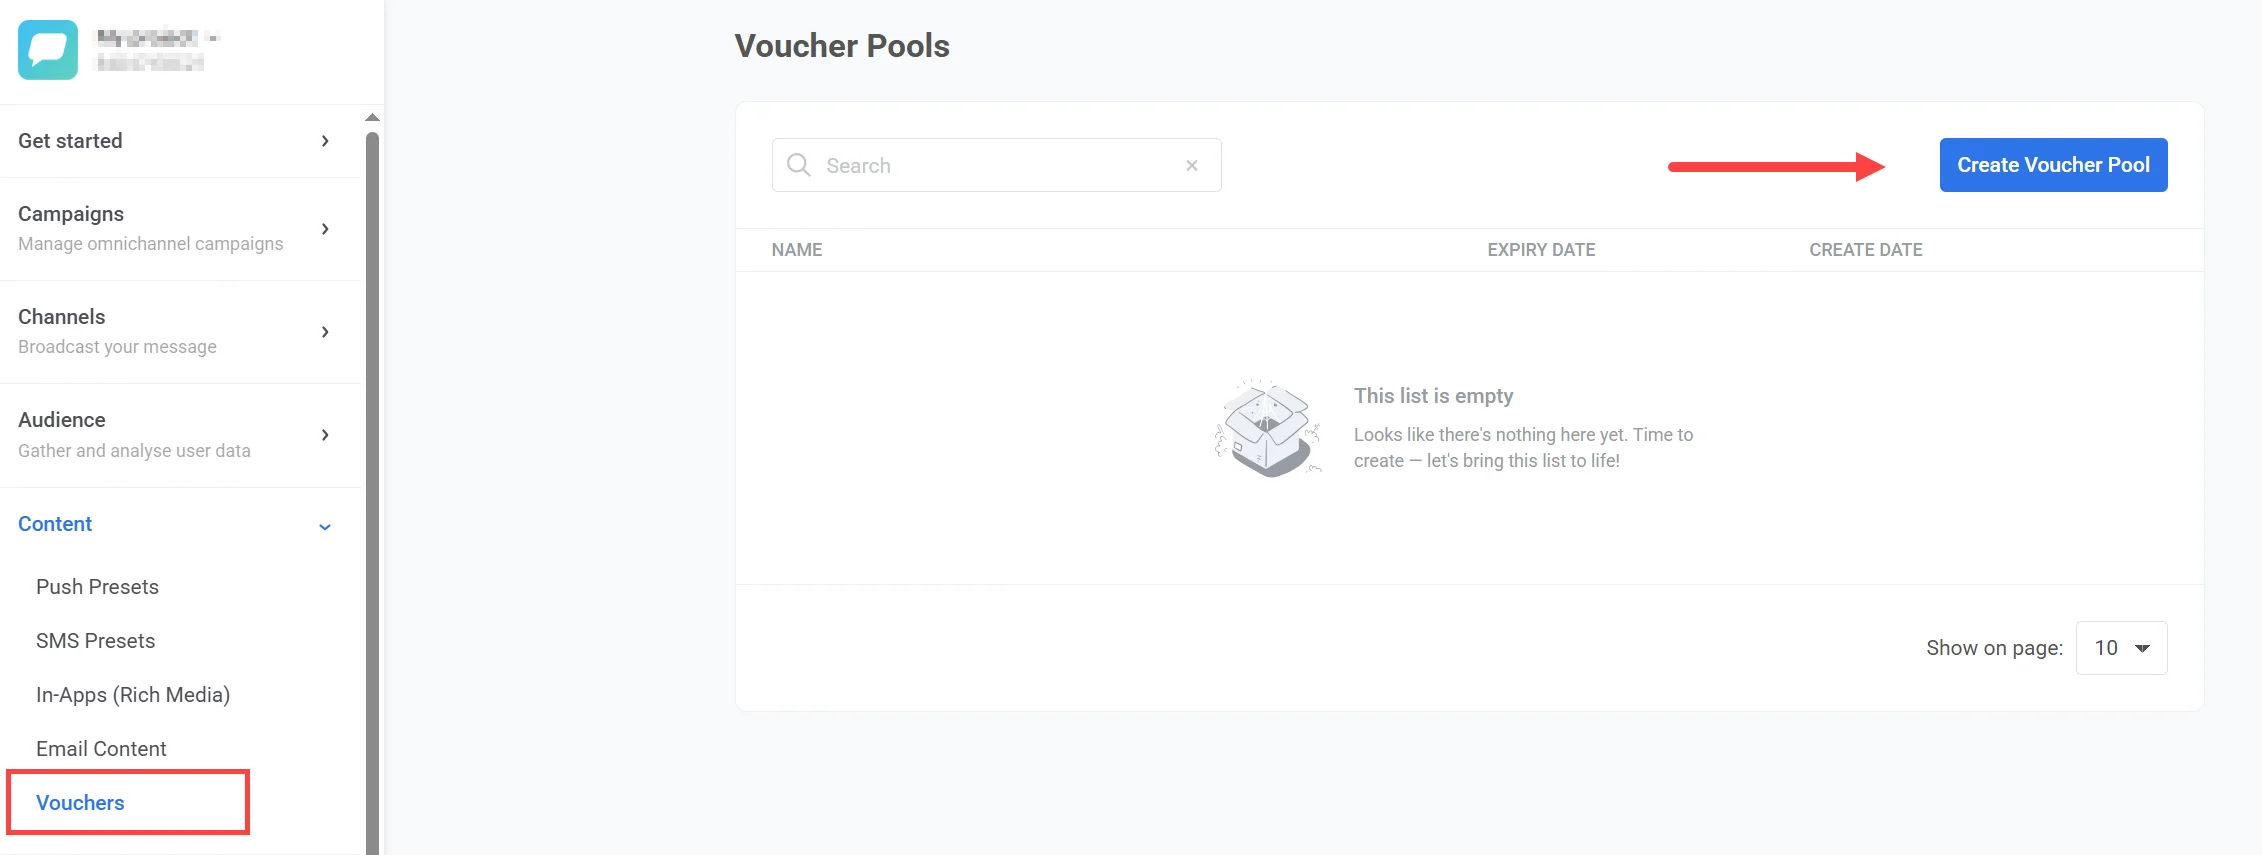
3. Upload a `.csv` file containing your voucher codes in the window that opens.
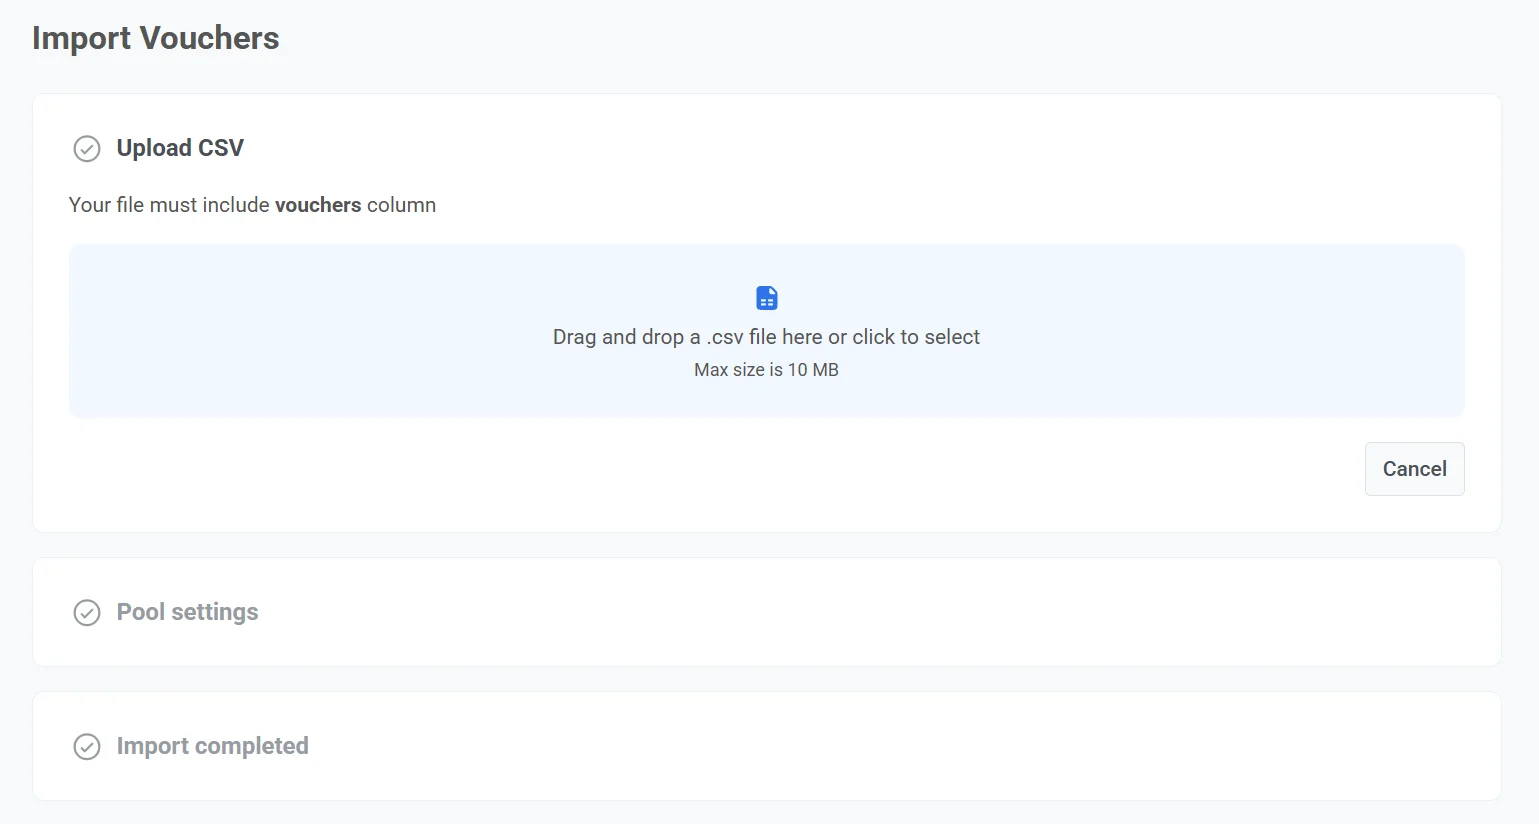
#### CSV requirements
* The file must have a column called `vouchers`.
* The file size must not exceed **10 MB**.
* If the file contains duplicate codes, only one copy of each will be added.
* Save the file in `.csv` format and make sure it’s encoded in UTF-8.
##### Example CSV file
```
vouchers
WELCOME2025-A1
WELCOME2025-B2
WELCOME2025-C3
WELCOME2025-D4
WELCOME2025-E5
```
4. Enter the name of the pool (max 300 characters).
5. Optionally, enable **Use expiry date** to define how long the voucher pool remains active. Set the validity period in GMT.
Once the pool expires:
* It will no longer appear in the list of available voucher pools in Customer Journey.
* Vouchers from the expired pool will not be sent.
* Any attempt to send a push message with them will result in a drop-off with the reason: **Voucher pool has expired**.
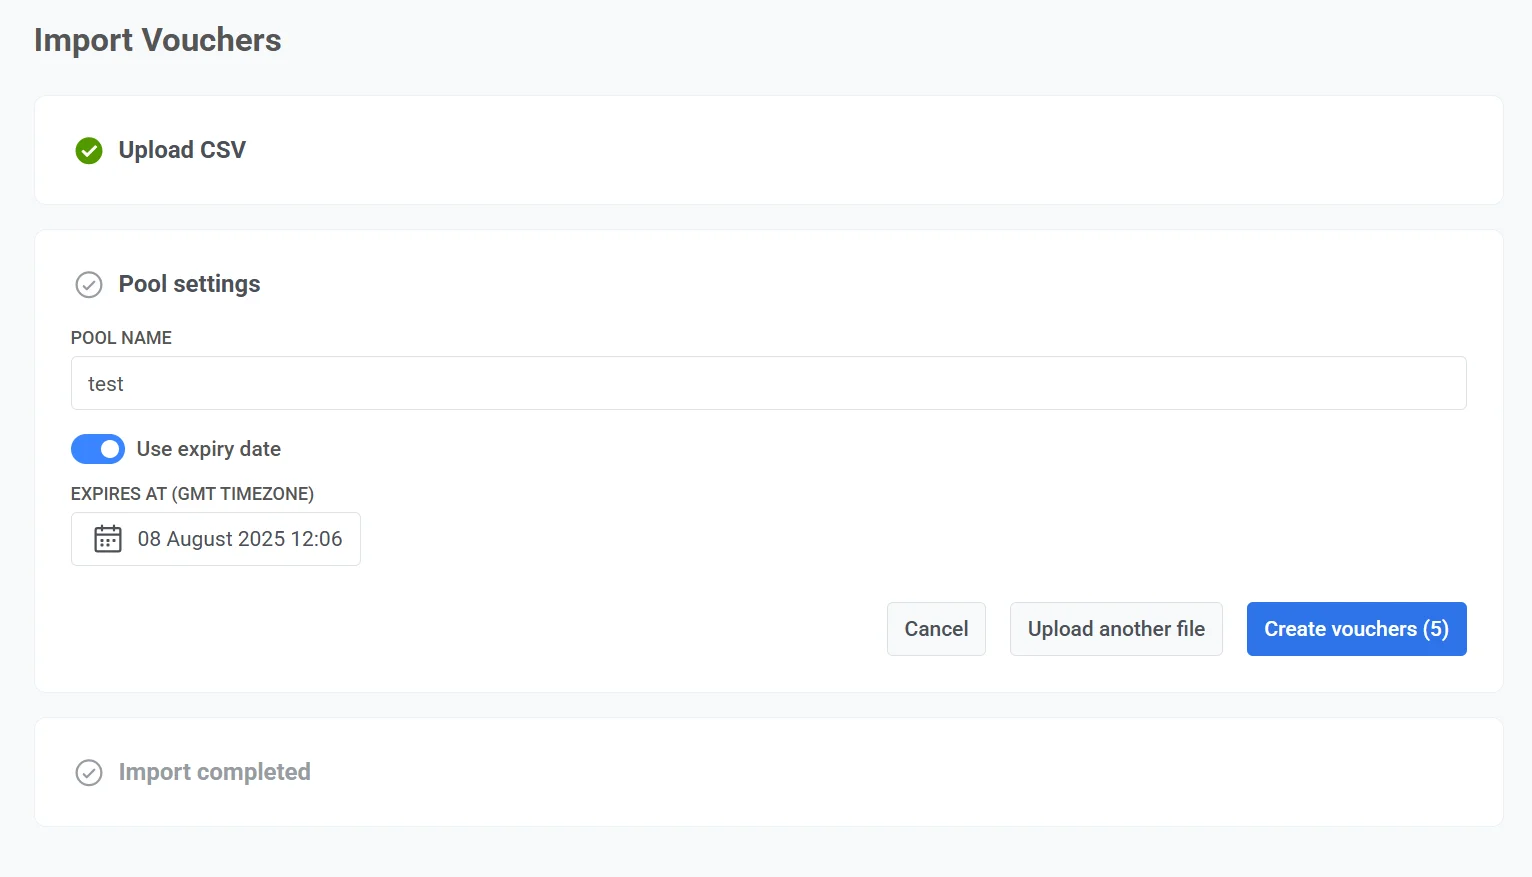
> **Note:** Creating a pool may take up to 10 seconds if the uploaded file contains a large number of vouchers.
### Add vouchers to an existing pool
To add more vouchers to an existing pool:
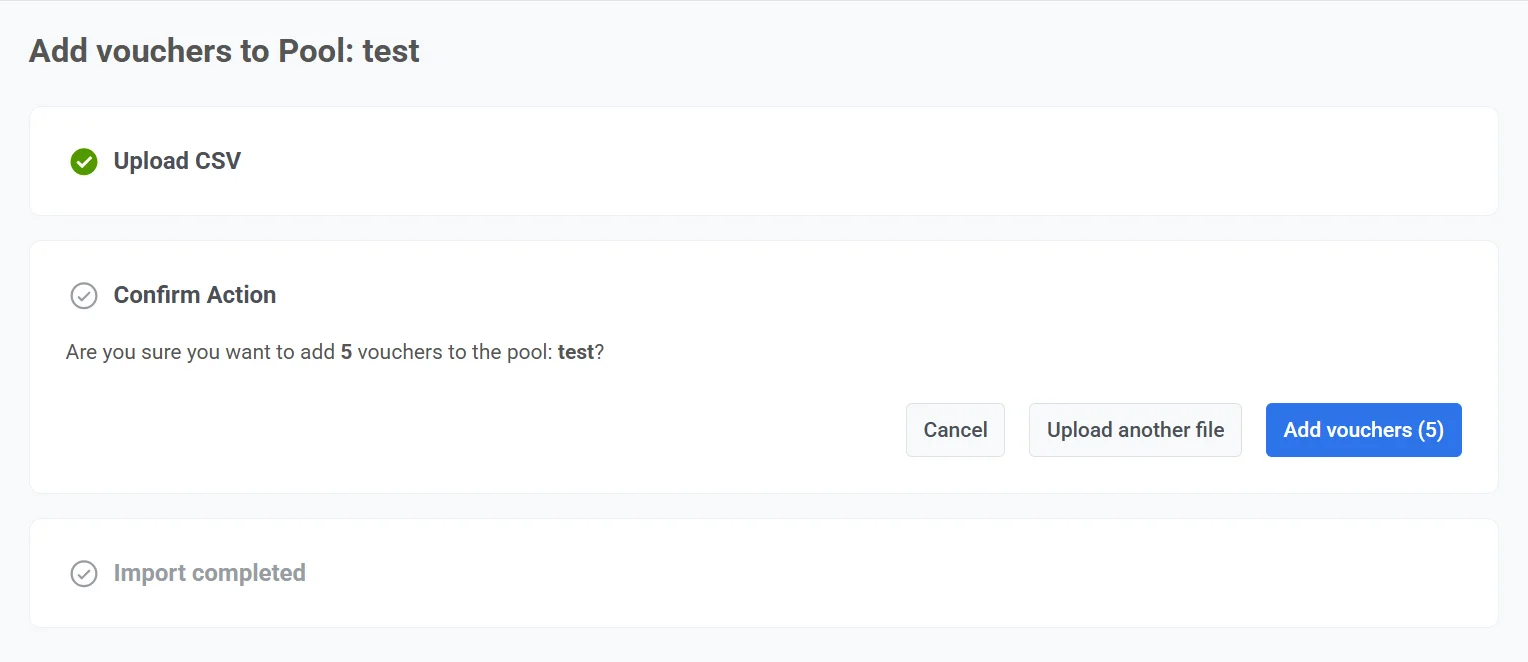
1. On the voucher pool list page, click the three dots next to the target pool and select **Add vouchers**.
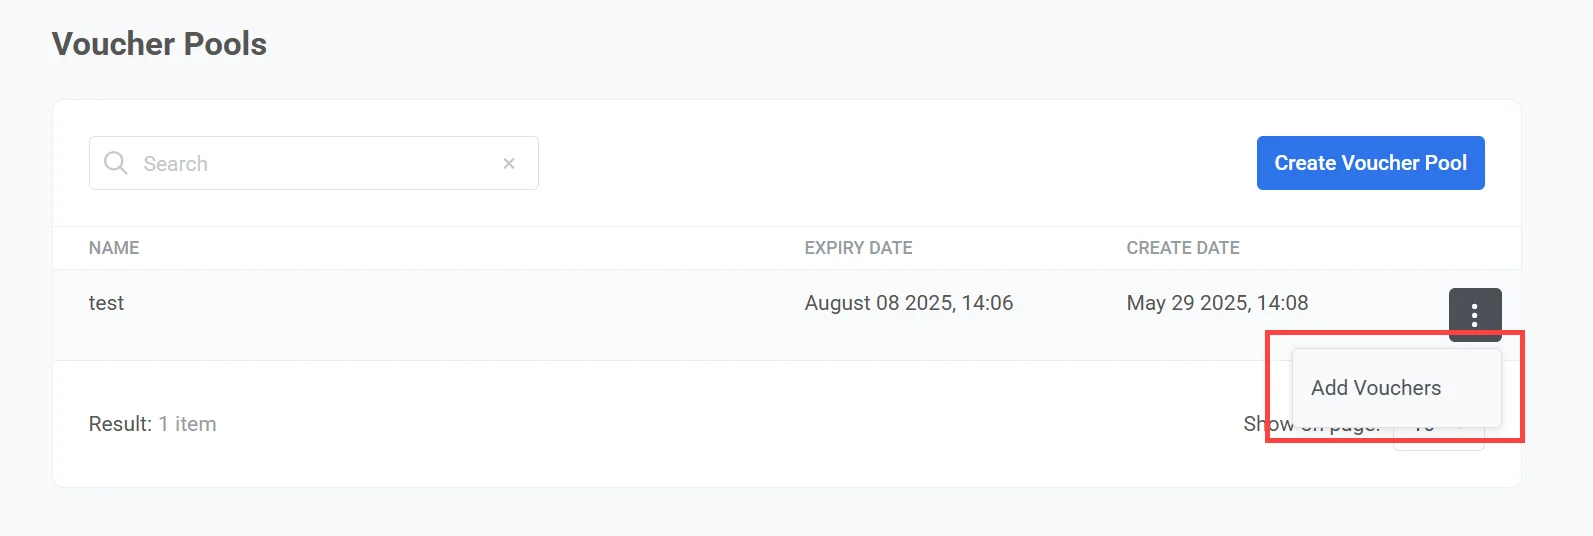
2. Upload a `.csv` file that includes a **vouchers** column with the codes to add.
3. Click **Add vouchers**. Any duplicates already in the pool will be skipped.
### Delete vouchers
To remove vouchers from a pool:
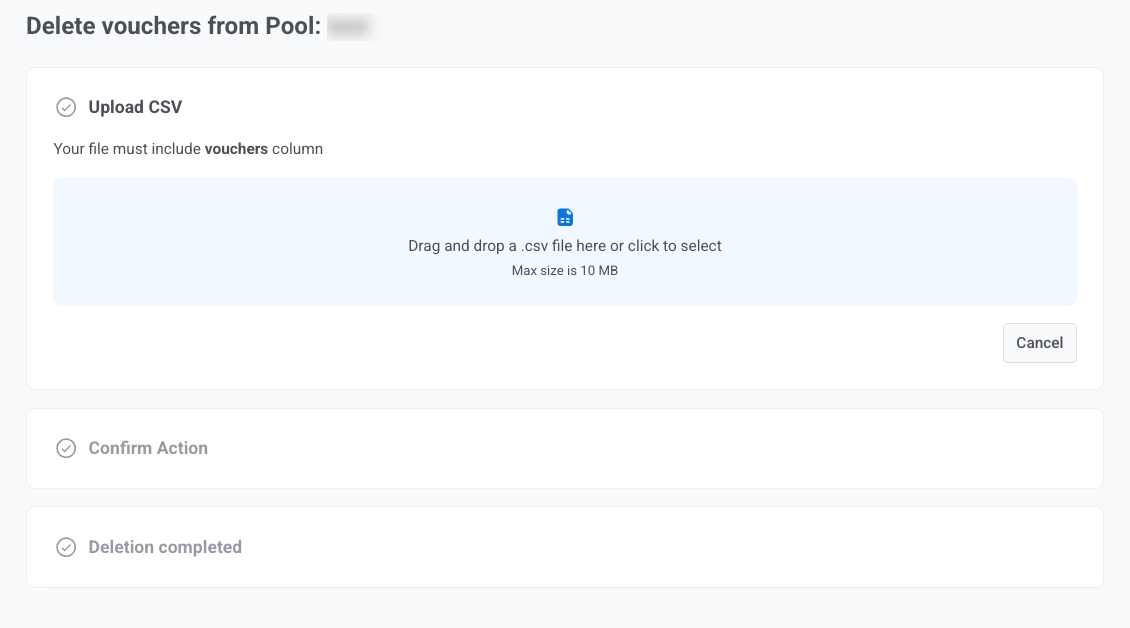
1. On the voucher pool list page, click the three dots next to the target pool and select **Delete vouchers**.
2. Upload a `.csv` file that includes a `vouchers` column with the codes to remove. Max file size is 10 MB.
3. On the **Confirm Action** step, click **Delete vouchers** to confirm, or **Cancel**. You can also click **Upload another file** to change the selection.
### Delete pool
To delete an entire voucher pool:
1. On the voucher pool list page, click the three dots next to the target pool and select **Delete pool**.
2. In the confirmation dialog, check the pool name and click **Delete** to confirm.
### Send vouchers via Customer Journey
You can send unique voucher codes to users through various messaging channels in Pushwoosh Customer Journey, including [push](/product/customer-journey/journey-elements/#push), [email](/product/customer-journey/journey-elements/#email), [SMS](/product/customer-journey/journey-elements/#sms), [LINE](/product/customer-journey/journey-elements/#line), [Data to app](/product/customer-journey/journey-elements/#data-to-app) and [WhatsApp](/product/customer-journey/journey-elements/#whatsapp).
This example shows how to send vouchers through push notifications using [Pushwoosh Customer Journey](/product/customer-journey/pushwoosh-journey-overview/).
Follow these steps:
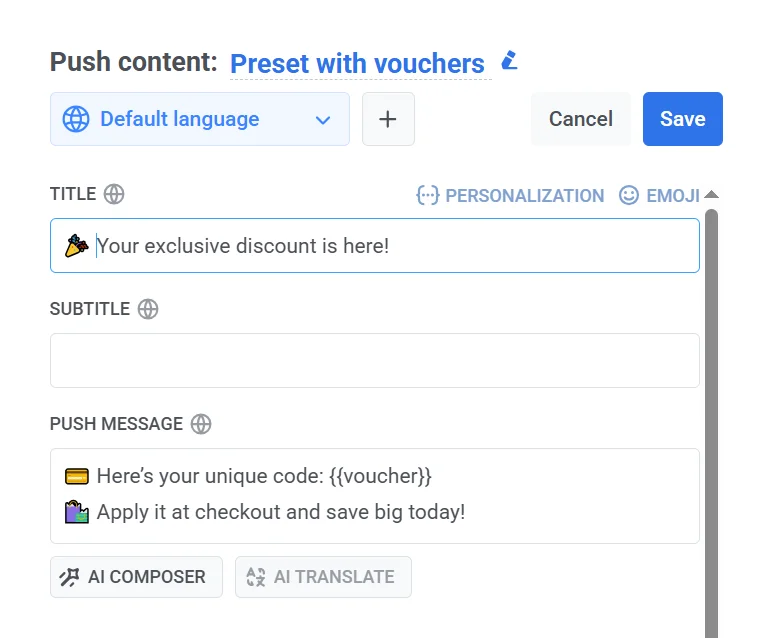
1. Create a push preset that includes the placeholder ``{{voucher}}``. This can be placed in the title, subtitle, or message body.
2. In the Customer Journey, add a [Push element](/product/customer-journey/journey-elements/#push) and select a preset with vouchers.
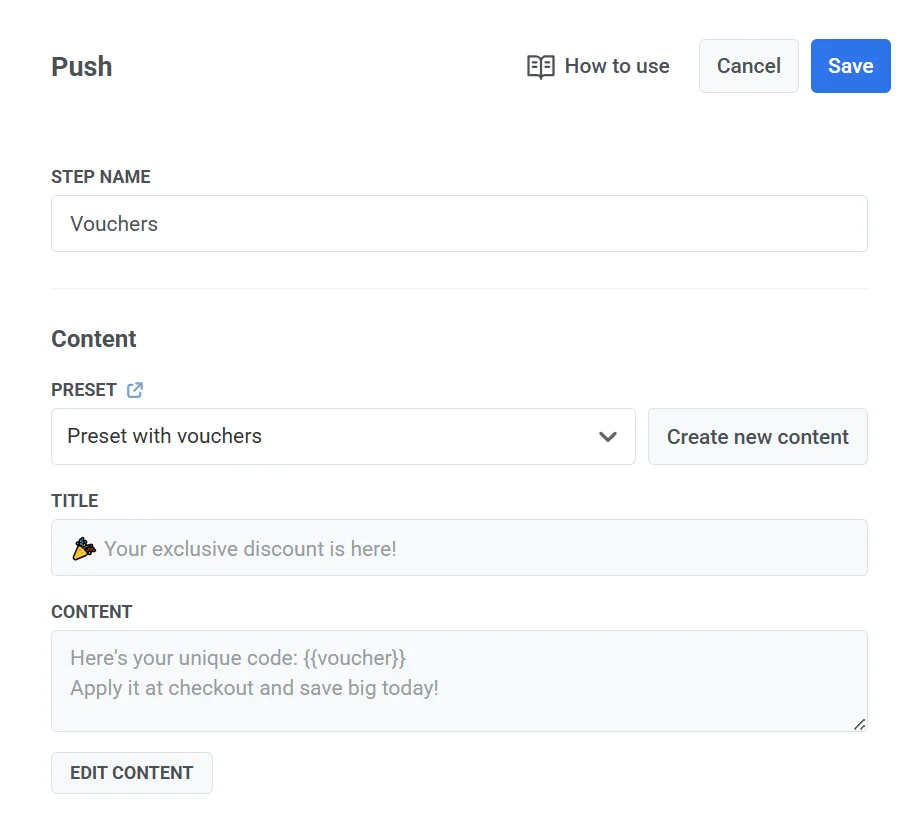
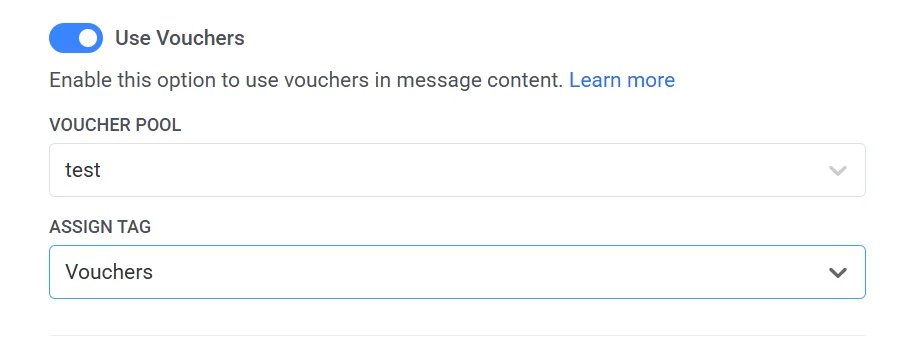
3. Under **Overwrite personalization**, enable the **Use Vouchers** option. Select the voucher pool you want to use.
4. Optionally, set a [tag](/product/audience-data-and-segmentation/user-data-tags/tags/). This tag is a custom attribute that will be saved on the user's device when a voucher is sent.
The exact voucher code delivered will be stored in this tag, allowing you to view it later in the [View Subscriber section](/product/audience-data-and-segmentation/user-explorer/#custom-tags) under the device or user profile.
### Drop-off reasons
Possible errors during message sending:
| | |
|-------------------------------|-----------------------------------------------------------------------------|
| No vouchers left in the pool | All vouchers in the selected pool have been used. Add more vouchers to continue. |
| Voucher pool has expired | The pool’s expiration date has passed. Vouchers from this pool can no longer be sent. |