# LINE presets
You can create and preview LINE message content directly in the **Pushwoosh Control Panel**.
To create a LINE preset, navigate to **Content > Line Presets** and click **Create new preset**.
## Define languages
You can create localized LINE messages in multiple languages to ensure users receive content in their preferred language.
Start by creating your default message, which will be sent to all users unless a more specific language version is available.
You can then add additional languages to provide localized content based on users’ language settings.
To support multiple languages in a LINE preset:
1. In the message editor, click the **plus (+) icon** next to the **Default language** dropdown.
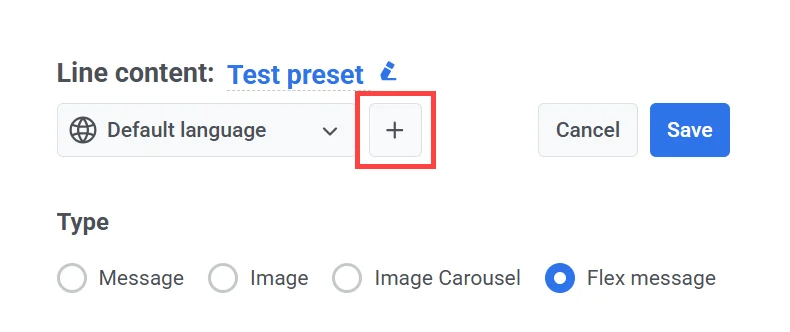
2. From the list that appears, select the additional languages you want to include.
3. Enter localized content for each selected language. Use the left and right arrows next to the language dropdown to switch between languages and fill in the corresponding content fields.
## Select the message type
In the editor, under **Type**, select the format of the message you want to send:
* **Message**: A simple text-based message.
* **Image**: A message that includes a single image.
* **Image Carousel**: A scrollable set of multiple images.
* **Flex message**: A fully customizable rich-format message defined using LINE's Flex Message JSON schema.
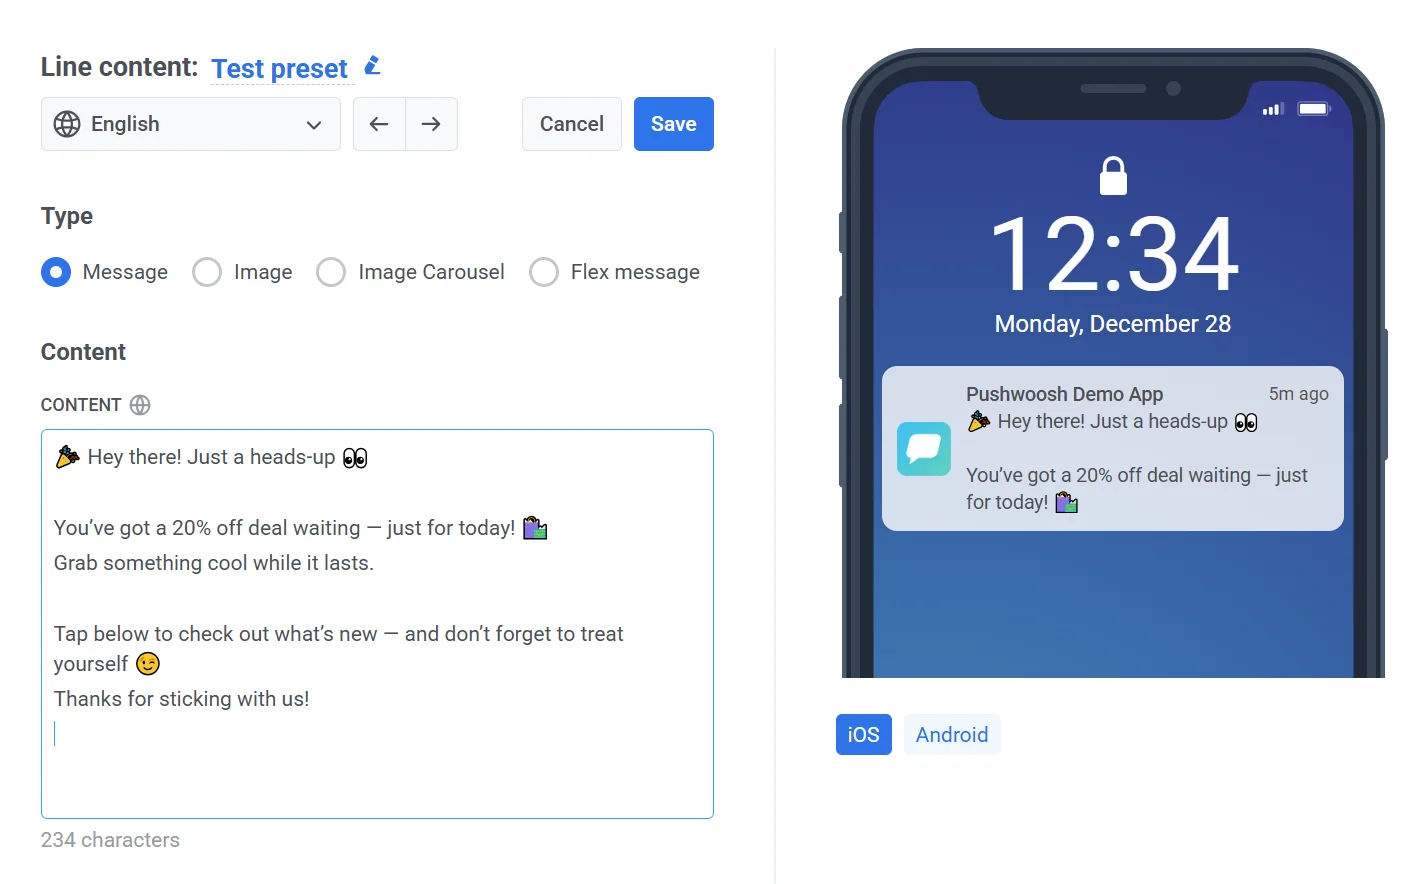
You can preview how your message will appear on iOS and Android devices in the panel on the right.
### Create a text message preset
1. Select **Message** as the message type.
2. Enter your message text in the **Content** field.
[Learn more about LINE text messages](https://developers.line.biz/en/docs/messaging-api/message-types/#text-messages)
### Create an image message preset
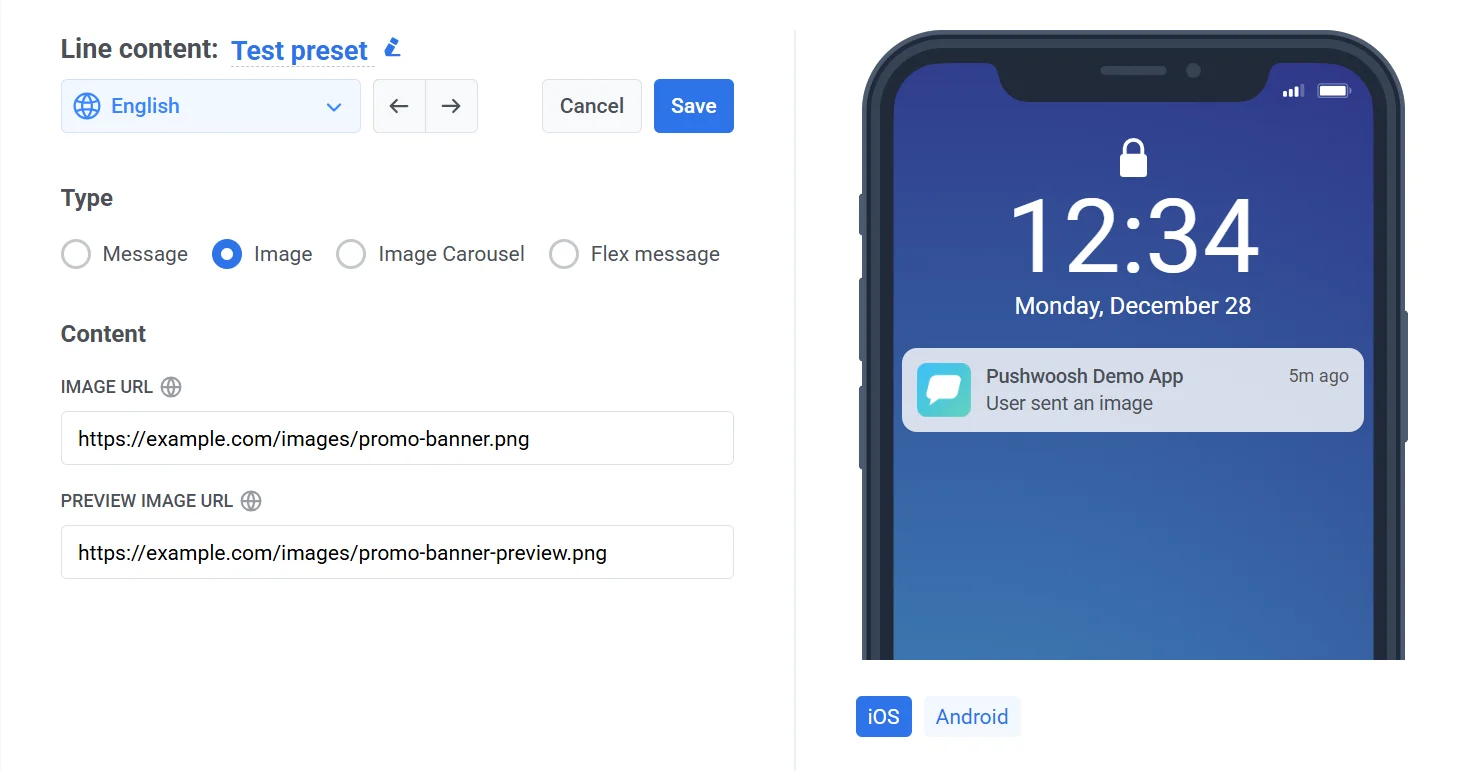
Image messages let you send a single image to users. To do this, you need to provide two links: one for the full-size image and one for a smaller preview version.
The preview image is what users see in the chat before opening the full image, so it should be smaller and load faster.
To create an image message:
1. Select **Image** under **Type**.
2. In the **Content** section, provide the following:
* **Image URL:** The full-size image that will be displayed in the message.
* **Preview image URL:** A smaller version of the image, shown in the chat bubble before the image expands.
##### Image requirements
| Requirement | Image URL | Preview image URL |
| :---- | :---- | :---- |
| **Protocol** | HTTPS | HTTPS |
| **Max length** | 2000 characters | 2000 characters |
| **Supported formats** | JPEG, PNG | JPEG, PNG |
| **Max file size** | 10 MB | 1 MB |
> **Important:** Both URLs need to be publicly accessible so LINE can load and show the images properly.
[Learn more about LINE image messages](https://developers.line.biz/en/docs/messaging-api/message-types/#image-messages)
### Create an image carousel message preset
The **Image Carousel** message type allows you to send multiple images in a horizontal, scrollable format. Each image acts as an interactive panel and can trigger an action (e.g., open a URL) when tapped.
To create image carousel message content:
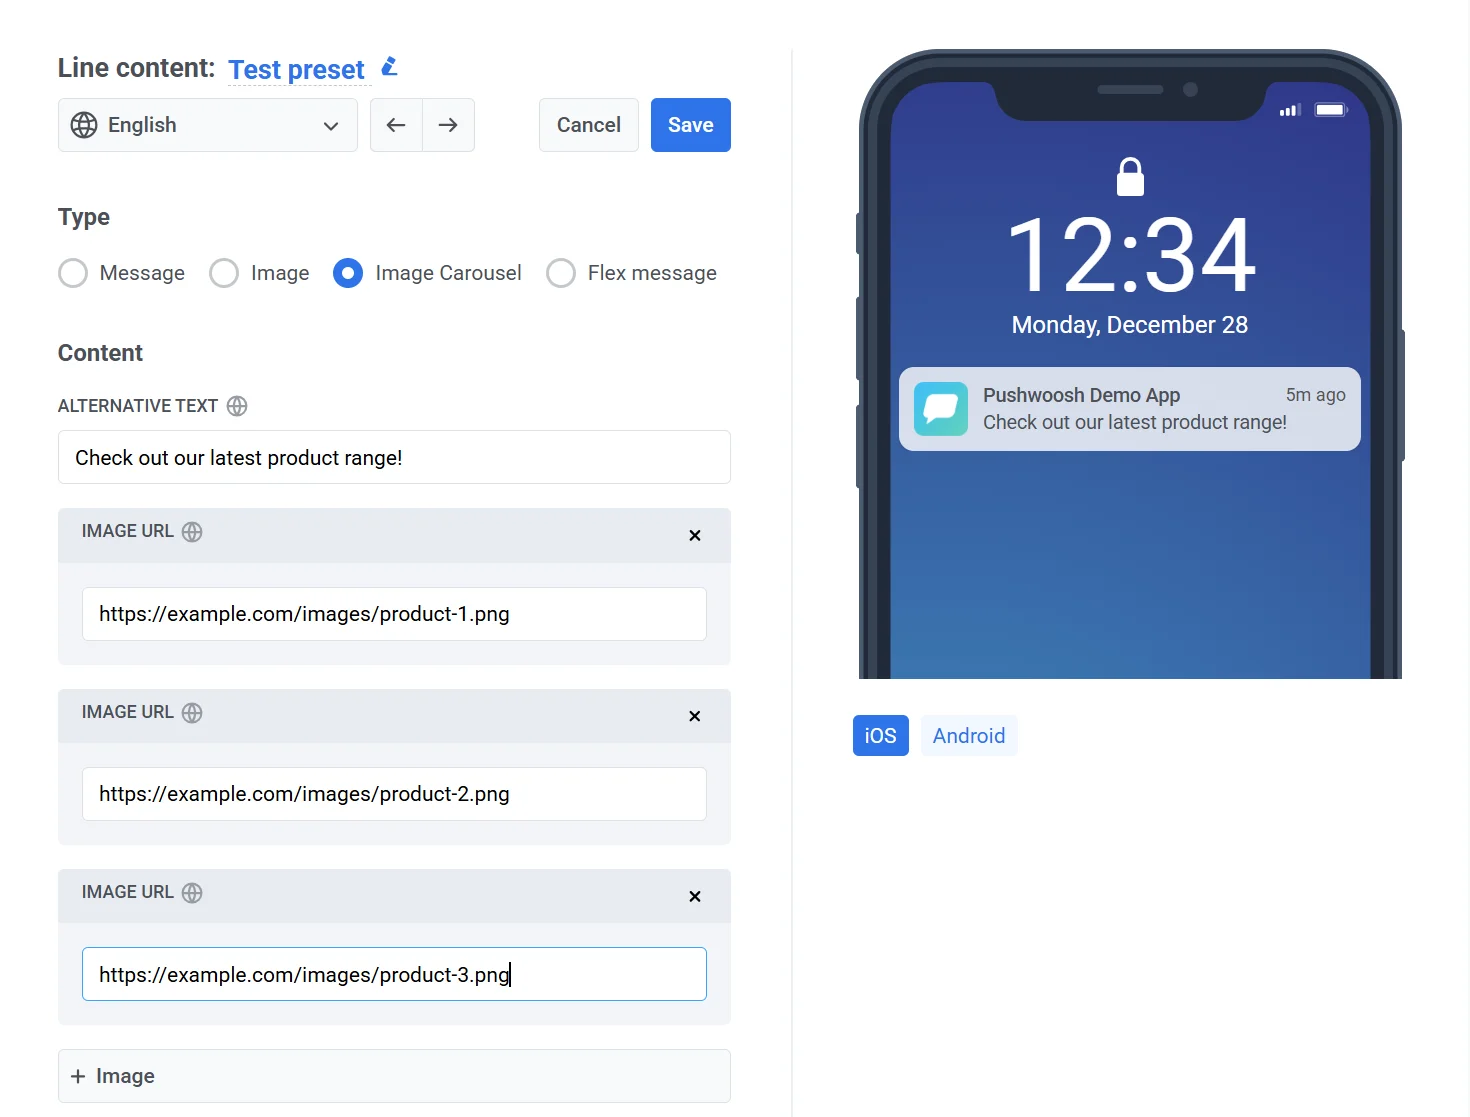
1. Select **Image Carousel**.
2. In the **Content** section, set the following:
* **Alternative text**. Enter a fallback message shown in clients that don't support rich messages (e.g., “View our latest products.”).
* **Image URL.** Add one or more image URLs. Each image will appear as a separate panel in the carousel.
3. To add more images, click the **+ Image** button. **Note:** You can add a minimum of 1 and up to 10 images.
##### Image requirements
Each image must meet the following criteria:
| | |
|------------------|------------------|
| **Protocol** | HTTPS only |
| **Max URL length** | 2000 characters |
| **Format** | JPEG or PNG |
| **Max file size** | 10 MB per image |
> **Important:** Make sure all images are publicly accessible so LINE can retrieve and display them properly.
For more information on formatting and supported actions, refer to the [LINE Image Carousel documentation.](https://developers.line.biz/en/docs/messaging-api/message-types/#carousel-template)
### Create a Flex message preset
Flex messages offer a highly customizable way to design message layouts in LINE using JSON. They are ideal for delivering structured content such as product details, promotions, or interactive menus.
To create a Flex message:
1. Under **Type**, select **Flex message**.
2. In the **Content** section, complete the following fields:
* **Alternative text:** Enter fallback text to display on devices that do not support Flex messages. This text should briefly describe the message content.
* **Content (JSON):** Provide a valid Flex Message JSON payload that defines the structure and appearance of the message.
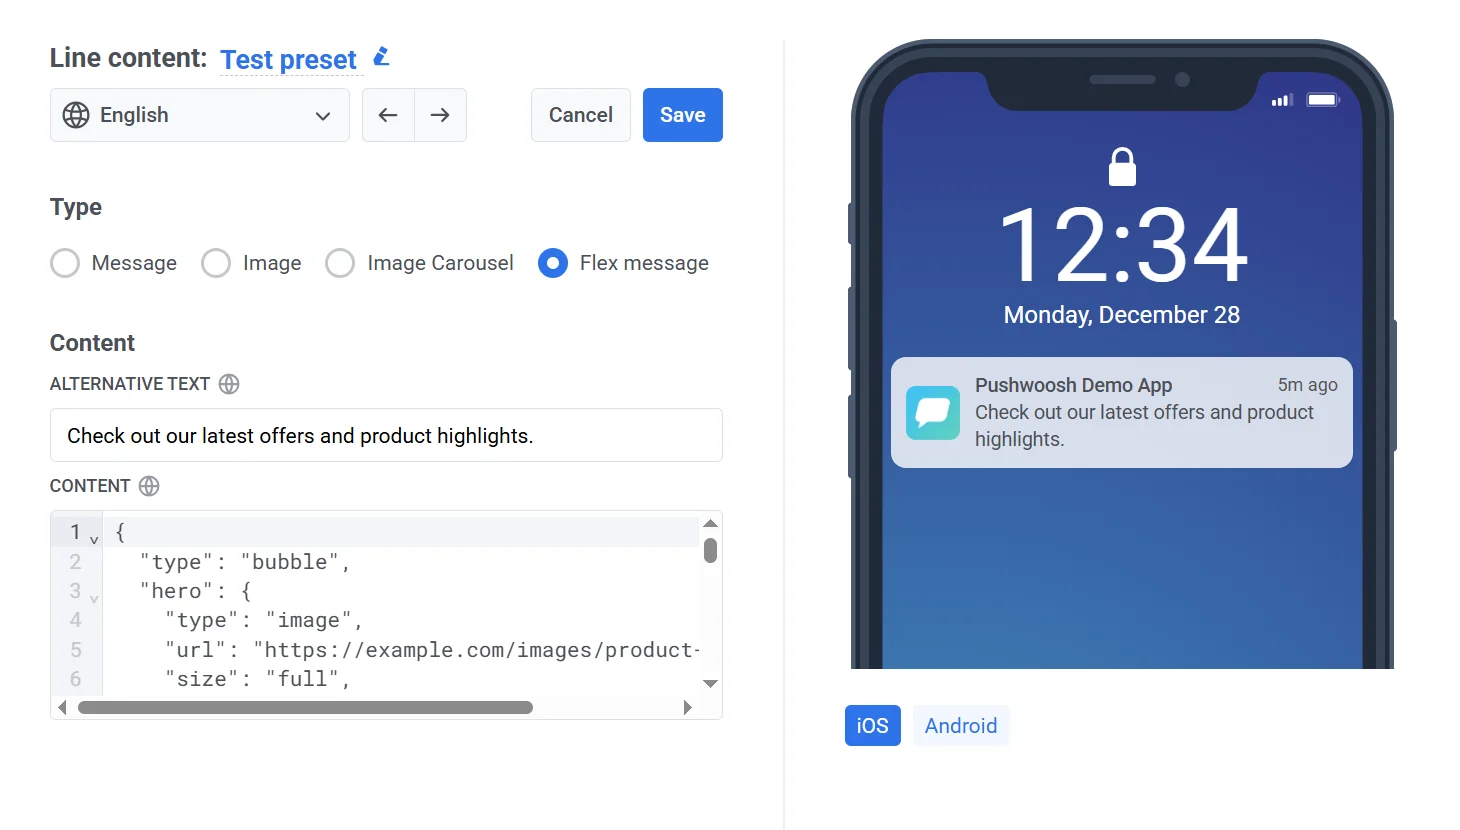
For detailed information on supported properties and layout options, refer to the [LINE Flex Message Reference](https://developers.line.biz/en/docs/messaging-api/using-flex-messages/).
## Preview and save the message
Once you're satisfied with the content and format:
* Click **Save** to apply your changes.
* Click **Cancel** to discard your edits.