# Show an in-app before the push permission prompt

A pre-permission in-app is a message you show **before** the system push permission prompt. On iOS, the system asks only once per install. If the user taps **Don't Allow**, push is lost until they re-enable it in Settings. Asking in-app first lets you explain the value and spend that one shot on users who already said yes.

This guide builds the prompt as a single HTML in-app that works on both iOS and Android. If you only target iOS, the native [iOS push primer](/developer/pushwoosh-sdk/ios-sdk/ios-push-primer/) covers the same idea without building your own HTML, though its content lives in app code rather than the Control Panel and it can't be triggered by an event.

## Delay the system prompt

There's nothing to configure to delay the prompt. The SDK never requests the push permission on its own, not even on startup. The system prompt only appears when your app calls the native registration method, which the button below triggers through the JavaScript bridge. As long as nothing calls it, the prompt stays deferred for as long as you need.

## Build the in-app

<Aside type="note">
The JavaScript bridge this guide uses only runs inside an HTML-based in-app, whether built in the [built-in editor](/product/content/in-apps/no-code-in-app-editor/create-rich-media-in-the-built-in-editor/) or [uploaded as a ZIP](/developer/guides/content/rich-media-templates-syntax/). It isn't available in a [native in-app template](/product/content/in-apps/create-native-in-app-messages/), so don't build this prompt with **Create native rich media**.
</Aside>

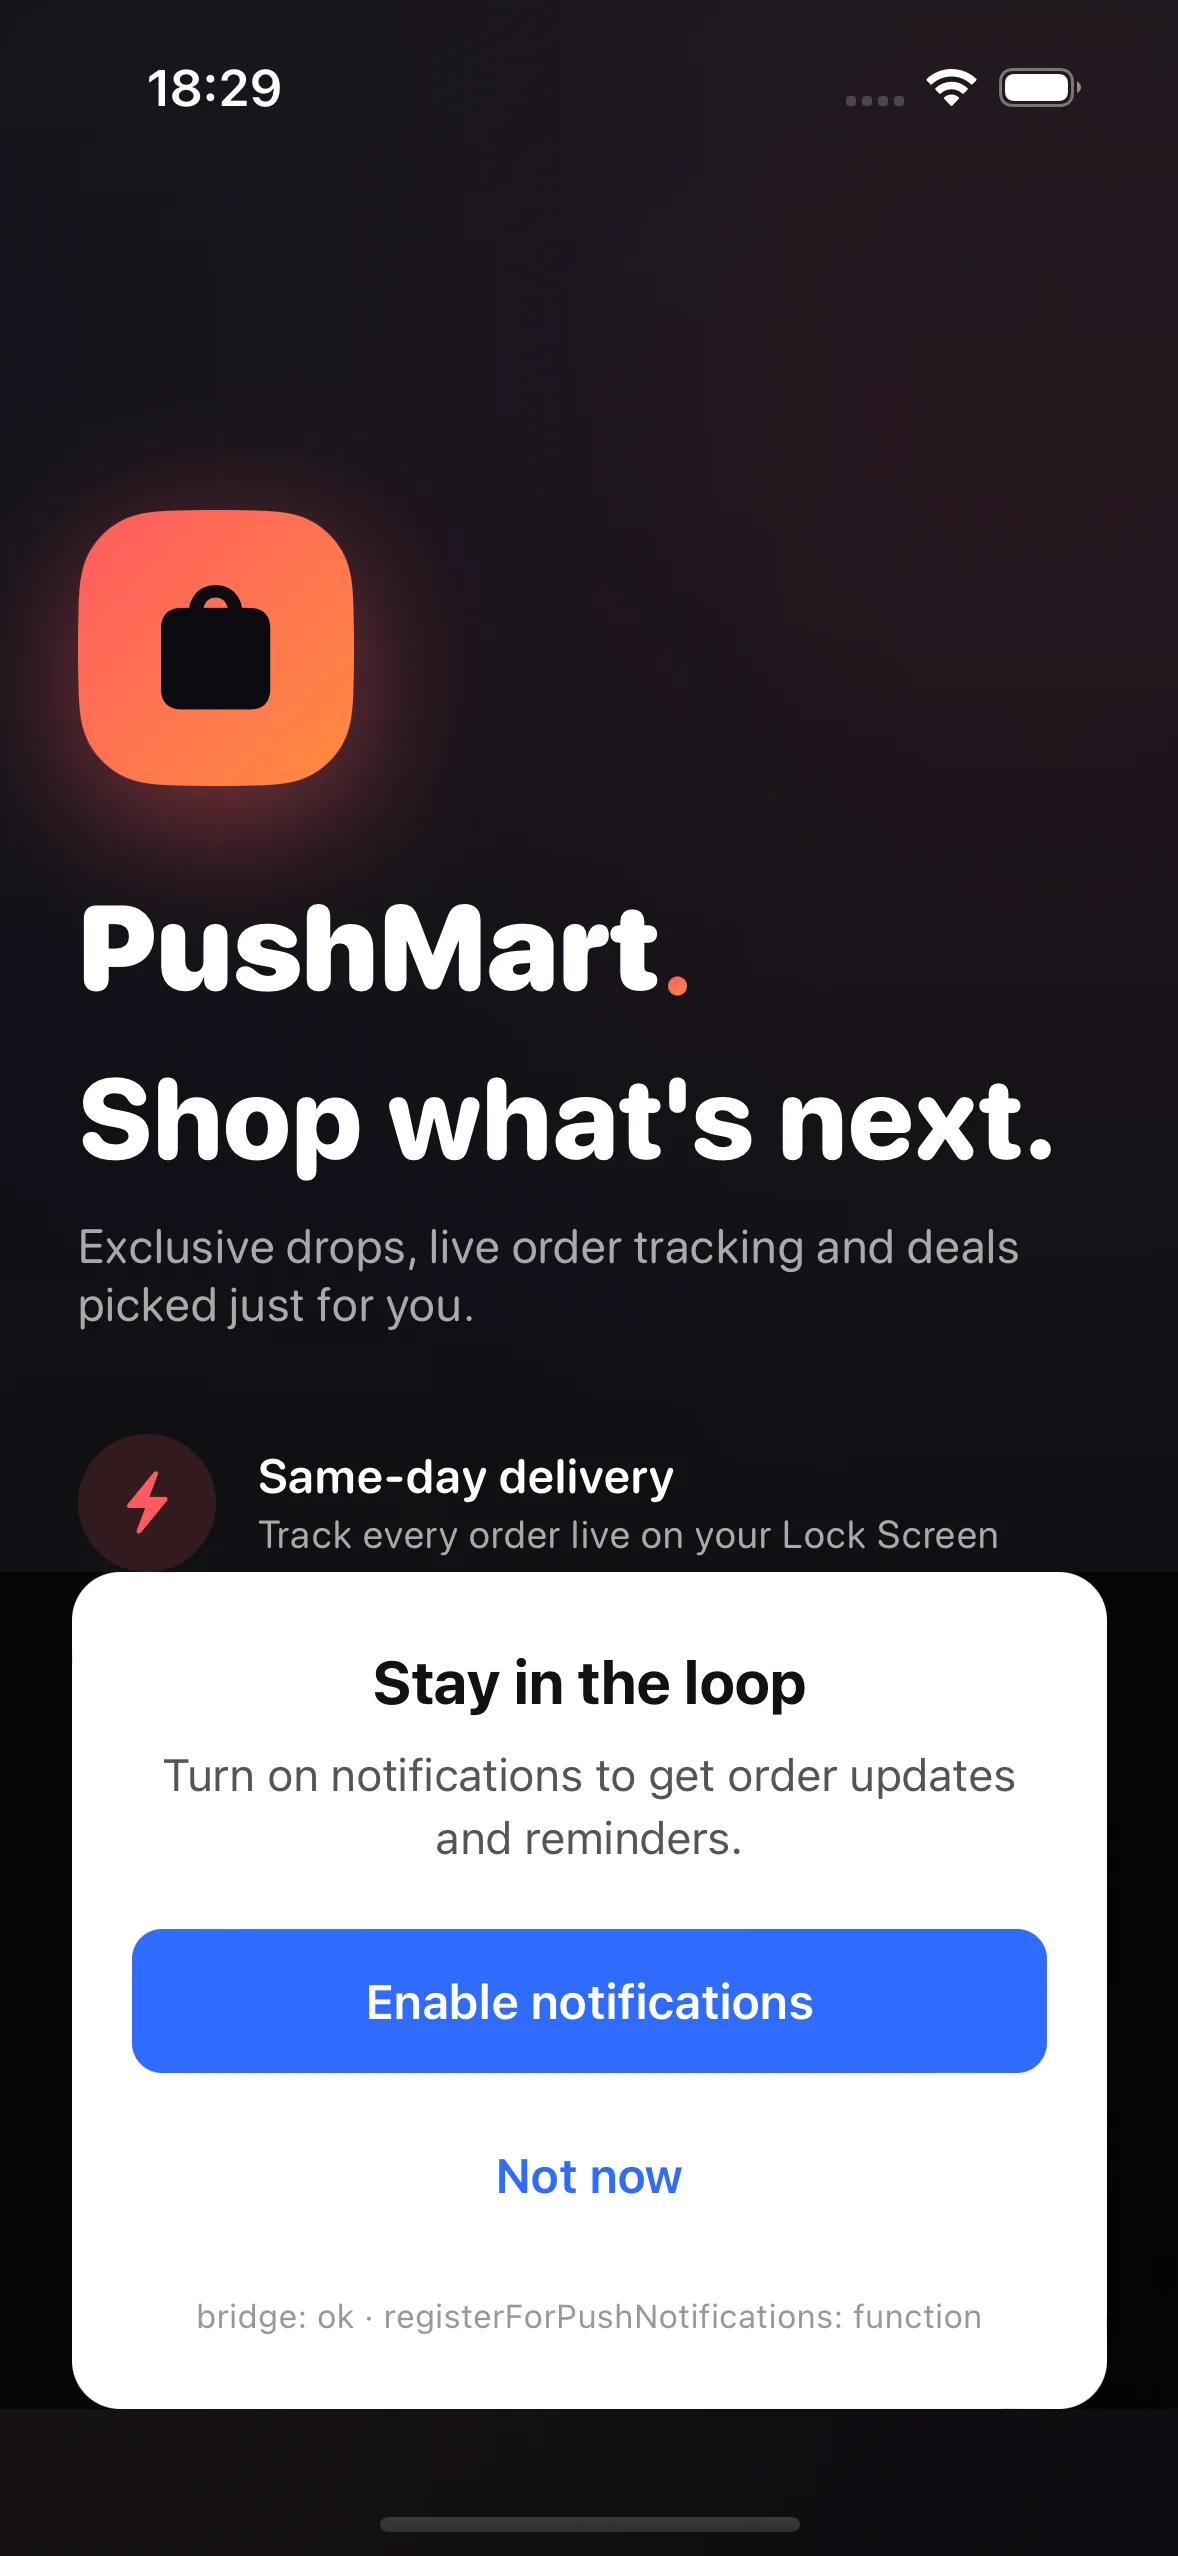
Create an in-app template with your pitch for enabling push, an accept button, and a decline button. The bridge is ready as soon as the in-app loads, so both buttons can call it right away with no setup or ready event to wait for.

<figure style={{ textAlign: "center" }}>
  <img
    src="/show-in-app-before-push-permission-prompt-1.webp"
    alt="Pre-permission in-app bottom sheet with Enable notifications and Not now buttons, shown over the app screen on iOS"
    style={{ display: "block", margin: "0 auto", maxWidth: "300px", height: "auto" }}
    width="300"
  />
  <figcaption>A pre-permission in-app shown before the system prompt</figcaption>
</figure>

If you build in the [built-in editor](/product/content/in-apps/no-code-in-app-editor/create-rich-media-in-the-built-in-editor/), set each button's **Action type** to **Custom Javascript** and paste only the code below into **onClick**. Don't paste a full `<button>` tag there.

* **Accept button:**

```js
pushwoosh.registerForPushNotifications();
pushwoosh.closeInApp();
```

* **Decline button:**

```js
pushwoosh.closeInApp();
```

`registerForPushNotifications()` triggers the platform's native permission dialog. Call `closeInApp()` right after it on both platforms, as shown above. [Learn more about the JavaScript bridge](/developer/guides/messaging-channels/inapp-with-javascript/), including why the explicit call is required on Android but not on iOS.

<Aside type="tip">
Building a raw HTML file for [ZIP upload](/developer/guides/content/rich-media-templates-syntax/) instead? Use the full tag there:

```html
<button onclick="pushwoosh.registerForPushNotifications(); pushwoosh.closeInApp();">Enable notifications</button>
<button onclick="pushwoosh.closeInApp();">Not now</button>
```
</Aside>

## Skip the prompt for users who already opted in

Wrap the prompt content in one block and add a [display condition](/product/content/in-apps/no-code-in-app-editor/show-in-app-content-to-specific-users/#show-content-to-specific-users) so the in-app hides itself for users who already granted push, even if a later trigger shows it to them again:

1. Select the block and turn on **Show this block conditionally**.
2. Set the rule to **Push Alerts Enabled** **is false**.
3. Under **If value is unknown**, choose **Show block**. A fresh install with no tag value yet should still see the prompt.

<Aside type="caution">
**Push Alerts Enabled** updates on the device's next app open, not the moment the user flips the permission toggle in system Settings. A user who enables push from Settings can still see this block once more until they reopen the app.
</Aside>

## Trigger the in-app before permission is requested

A device that hasn't gone through registration yet has no push token, so you can't reach it with a push notification. Trigger the in-app by event instead.

1. Have your development team call [`postEvent`](/developer/api-reference/user-centric-api#postevent) at the moment you want to ask (for example, right after onboarding, or after the user taps a feature that needs notifications). [Learn more about events](/product/audience-data-and-segmentation/events/#implementation).
2. Build a journey with a [Trigger-based entry](/product/customer-journey/journey-elements/entry-elements/trigger-based-entry/) using that event, and add an In-app element with your template. [Learn more about sending in-apps via Customer Journey](/product/messaging-channels/in-apps/send-in-apps/send-in-apps-via-customer-journey/).

## Build a segment of users who still have push disabled

The default **Push Alerts Enabled** tag is a Boolean the SDK sets automatically to reflect whether push is allowed in the device's system settings. It reads `false` for any device with no push token, including one that hasn't gone through registration yet, so a pre-permission device already falls into this segment instead of waiting for a decline to tag it. Filter on it to find users who declined or never granted the permission:

1. In the segment builder, add a filter by the **Push Alerts Enabled** tag and set the operator to **is false**. [Learn more about building segments by tags](/product/audience-data-and-segmentation/segmentation/create-segments/by-tags/#boolean-tag-operators).

Use this segment to hold back a repeat prompt from users who already declined, or to run a periodic win-back journey. See the [opt-out recovery segment](/product/content/in-apps/create-opt-in-and-opt-out-recovery-popups-in-pushwoosh-in-app-editor/#opt-out-recovery-popup) for a worked example with the same tag.

## See also

* [iOS push primer](/developer/pushwoosh-sdk/ios-sdk/ios-push-primer/): the native, iOS-only alternative to this cross-platform HTML approach.
* [Create opt-in and opt-out popups](/product/content/in-apps/create-opt-in-and-opt-out-recovery-popups-in-pushwoosh-in-app-editor/): recover users who already disabled push, using the same Push Alerts Enabled tag.
* [Create in-apps with JavaScript](/developer/guides/messaging-channels/inapp-with-javascript/): the full JavaScript bridge reference.