# Create email content with Drag & drop editor
Build email content in the Pushwoosh built-in editor without writing code. You get a reusable layout with content blocks, images, buttons, personalized text, and a compliant footer that you can use in a Customer Journey or a one-time email.
## Create new email content
1. Go to **Content** → **Email content**.
2. Choose how to start:
* Click **Create email content** to open the Drag & drop editor and build an email from scratch.
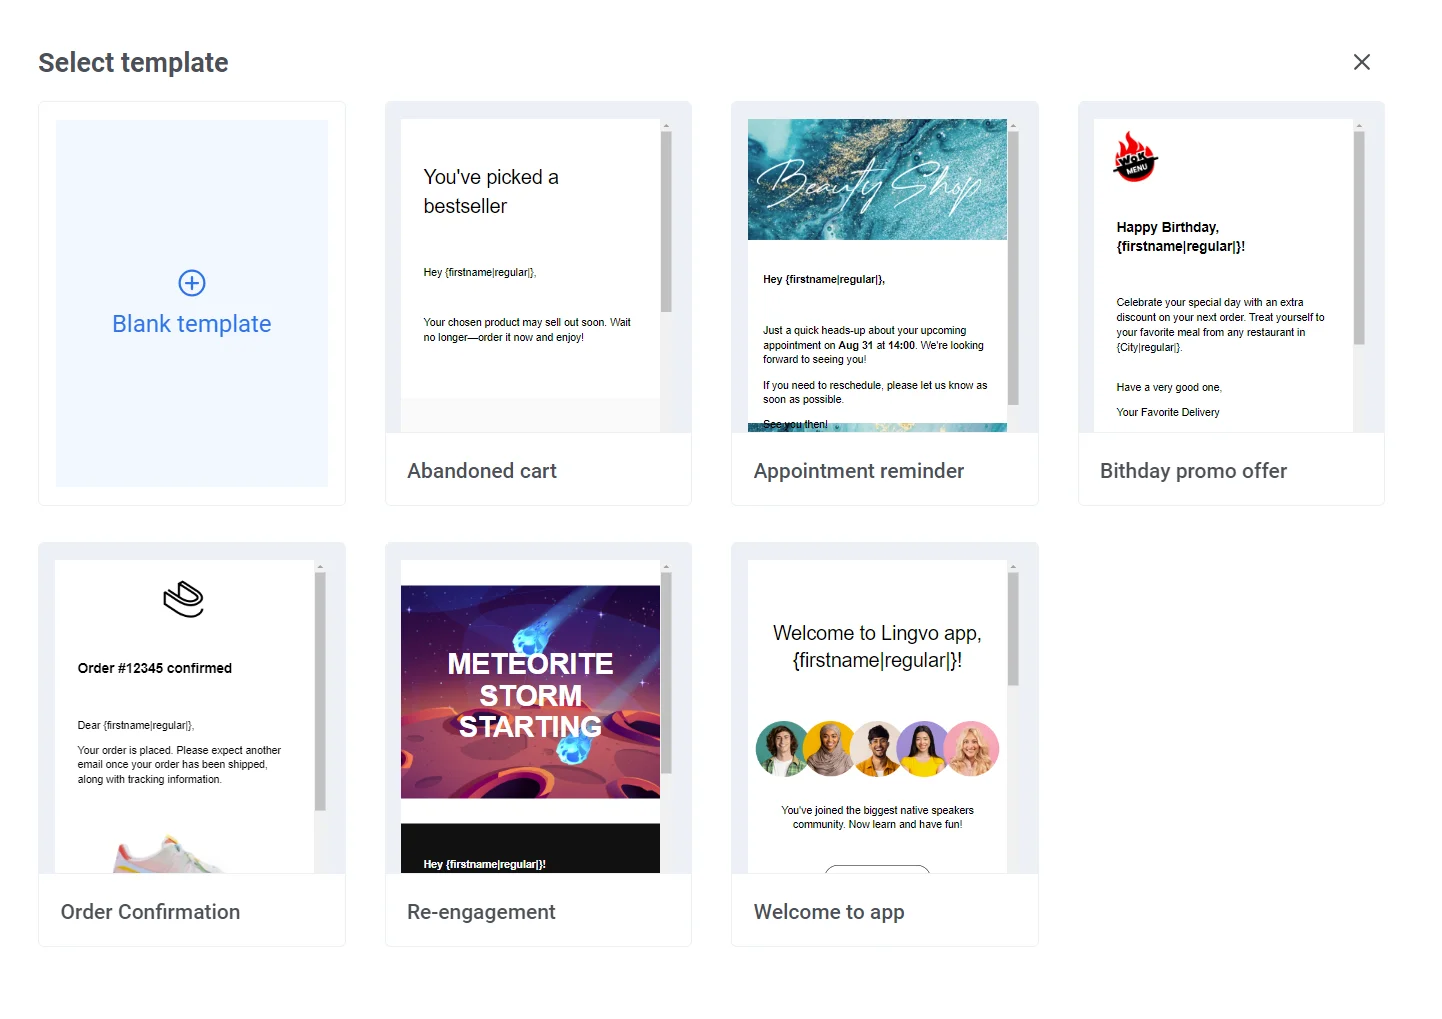
* Click the arrow next to **Create email content**, then select **Use a template** to start from a pre-built layout in the gallery.
* Click the arrow next to **Create email content**, then select **HTML code** to use the HTML code editor. [Learn more](/product/content/email-content/html-code-editor/)
## Explore the editor layout
Once you open an email, the built-in editor has these areas:
**Top bar**
Rename the email, undo or redo changes, run **Check** to catch issues before you send, and save your work. See [Check your email before sending](#check-your-email-before-sending). Open the **⋮** menu for more actions:
* **Preview:** see the email as it will render for recipients, with its own Desktop/Mobile toggle. See [Edit the mobile view](#edit-the-mobile-view).
* **Validate Liquid:** check the [Liquid](/product/personalization/liquid-templates/) syntax in your subject, preheader, footer, and body across all languages before you send. The same check is also one click away at the bottom of the **Smart check** panel. See [Check your email before sending](#check-your-email-before-sending).
* **Test email:** send a preview to a test device or address. See [Send a test email](#send-a-test-email).
* **Brand book:** apply your saved logo, colors, fonts, and block defaults to this email in one click. [Learn more](/product/content/email-content/drag-and-drop-email-editor/brand-book/)
* **Version history:** view and restore an earlier saved version of this email. See [Restore a previous version](#restore-a-previous-version).
**Language / Subject / Preheader bar**
Above the canvas, switch the editing language, set the subject line and preheader for the email, and use **Auto-translate** to fill in missing translations. [Learn how to set up languages and localization](/product/content/email-content/drag-and-drop-email-editor/set-up-your-email-in-the-editor/#define-the-languages-you-want-to-use-in-your-email).
**Canvas**
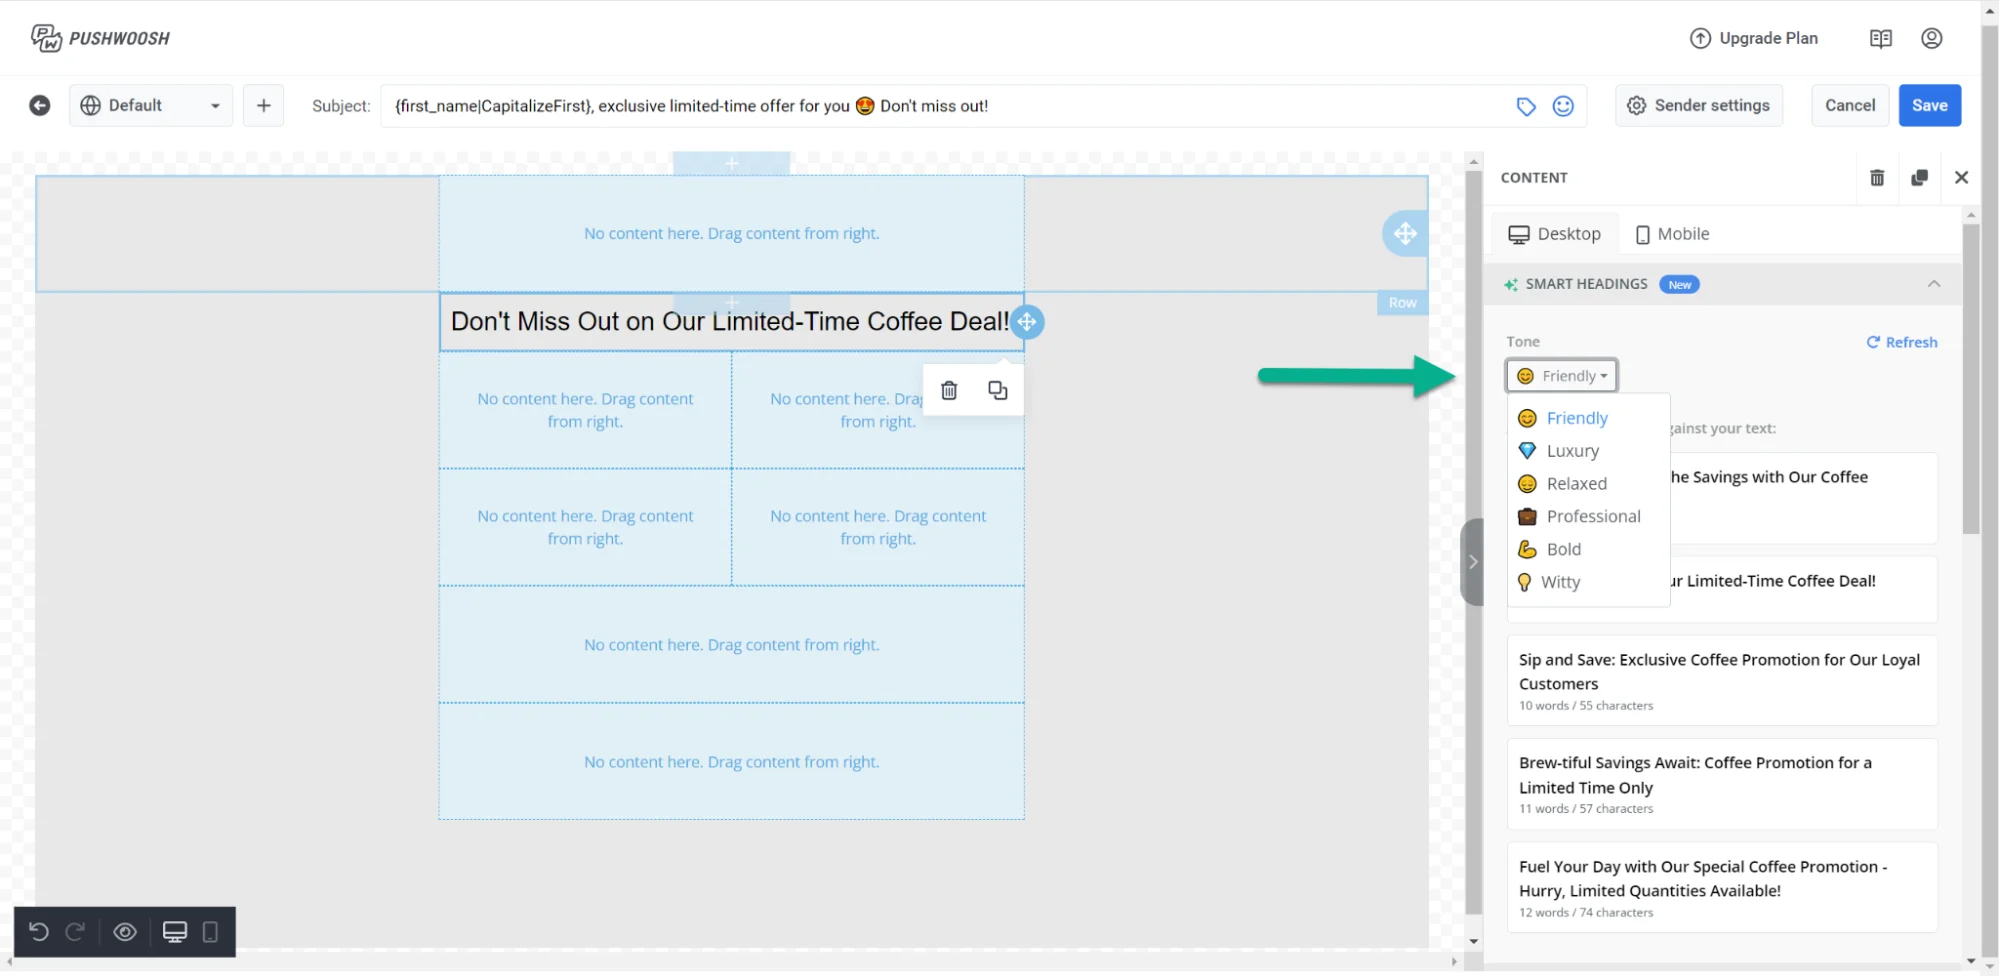
See the email as recipients will see it, and edit text, images, and buttons directly on the layout. An empty email shows **Start with a block**.
**Layers panel**
Lists every block in your email as a tree, in the same order as on the canvas. Open it from the left edge to select a nested block or drag rows to reorder content.
**Right panel**
Switch between three tabs:
* **Blocks:** add content to the email. See [Email content blocks reference](/product/content/email-content/drag-and-drop-email-editor/blocks/).
* **Settings:** apply styling to the whole email at once. See [Configure email-wide styling and footer](/product/content/email-content/drag-and-drop-email-editor/configure-email-styling-and-footer/).
* **AI:** chat with the AI assistant to generate or edit content from a prompt.
## Add content blocks
1. Open the **Blocks** tab in the right panel.
2. Drag a block onto the canvas, or click a block to add it at the end of the email.
3. Keep adding blocks until the layout is ready.
Each block type serves a different purpose in the email:
* **[Heading](/product/content/email-content/drag-and-drop-email-editor/blocks/#heading-and-text):** titles and short headlines
* **[Text](/product/content/email-content/drag-and-drop-email-editor/blocks/#heading-and-text):** body copy and longer descriptions
* **[Button](/product/content/email-content/drag-and-drop-email-editor/blocks/#button):** a clickable call to action
* **[Image](/product/content/email-content/drag-and-drop-email-editor/blocks/#image):** pictures from [Media store](/product/content/media-store/), upload, or URL
* **[Video](/product/content/email-content/drag-and-drop-email-editor/blocks/#video):** a clickable video poster that opens on YouTube or Vimeo
* **[Card](/product/content/email-content/drag-and-drop-email-editor/blocks/#card):** an image with heading, text, and button in one layout
* **[Divider](/product/content/email-content/drag-and-drop-email-editor/blocks/#divider):** a line that separates sections
* **[Columns](/product/content/email-content/drag-and-drop-email-editor/blocks/#columns):** side-by-side layouts (2, 3, or 4 equal columns, or 33/67 and 67/33 splits)
* **[Products](/product/content/email-content/drag-and-drop-email-editor/blocks/#products):** a grid of product cards — enter products by hand, or pull them from your [Product catalog](/product/content/product-catalog/) or a recipient's abandoned cart
* **[Timer](/product/content/email-content/drag-and-drop-email-editor/blocks/#countdown-timer):** a countdown for offers and deadlines
* **[Menu](/product/content/email-content/drag-and-drop-email-editor/blocks/#menu):** a row or column of navigation or contact links
* **[Social](/product/content/email-content/drag-and-drop-email-editor/blocks/#social):** icons that link to your social profiles
* **[HTML](/product/content/email-content/drag-and-drop-email-editor/blocks/#html):** custom HTML, such as a form, survey, or embedded video
See the [Email content blocks reference](/product/content/email-content/drag-and-drop-email-editor/blocks/) for settings for each block, [how to save and reuse blocks](/product/content/email-content/drag-and-drop-email-editor/blocks/#save-and-reuse-blocks), and [link types](/product/content/email-content/drag-and-drop-email-editor/blocks/#add-links) for buttons and text.
### Show content to specific recipients
To show a block only to some recipients, set a [display condition](/product/content/email-content/drag-and-drop-email-editor/show-content-to-specific-recipients/).
## Edit the mobile view
Once you've added your content blocks, switch to mobile to check and adjust how they look on a phone. Next to the language switcher above the canvas, use the **Desktop / Mobile** toggle to switch into a fully editable mobile view at real phone width. Select, edit, and rearrange content exactly the way your subscribers will see it on their phone, instead of just previewing how the desktop layout adapts.
Every mobile-overridable setting has a checkbox next to it. When the checkbox is off, a hint shows the inherited desktop value, and the setting keeps using it. Turn the checkbox on to set a separate value for mobile. Turn it off again to fall back to the desktop value.
### Set different padding and font size per device
* **Padding:** every block, column, card, and individual element (such as text, an image, or a button) has a padding control you can override for mobile. Switch the canvas to **Mobile**, turn on the checkbox next to **Padding**, and set the new value. The desktop padding stays the same until you turn the checkbox on.
* **Font size:** turn on **Font size (mobile)** on a text element to set a size just for mobile. Without this override, large headlines shrink automatically to fit the phone screen.
### Control how columns stack on mobile
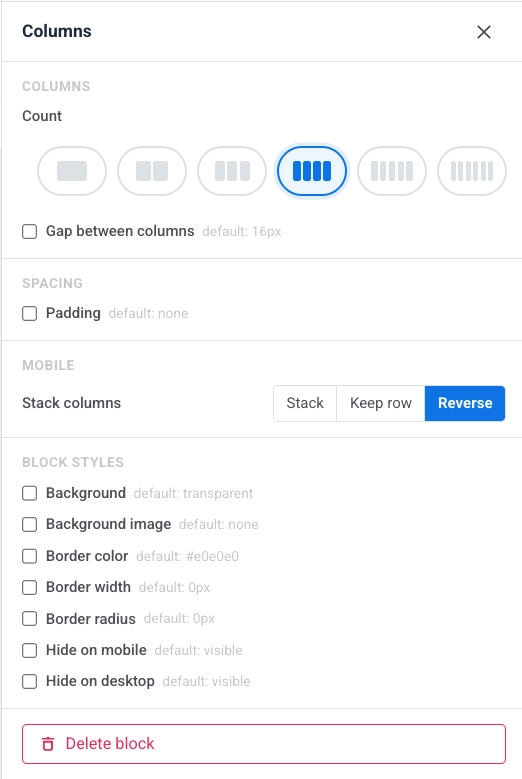
[Columns](/product/content/email-content/drag-and-drop-email-editor/blocks/#columns) layouts stack vertically on phones by default. In the mobile view, use **Stack columns** to set how each Columns block behaves:
* **Stack:** columns flow into a single column, top to bottom (default).
* **Keep row:** columns stay side by side, preserving the desktop layout.
* **Reverse:** columns stack in reverse order. Useful for image + text rows: keep the image on the right on desktop, but show it on top on mobile.
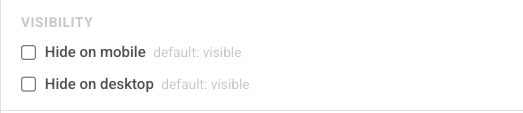
### Show or hide content per device
Open a block or element's settings and use **Hide on mobile** or **Hide on desktop** under **Visibility** to show it on only one device, so you can build device-specific banners, CTAs, or navigation without maintaining two templates.
## Configure email-wide styling and footer
After the main layout is in place, open the **Settings** tab to set fonts, colors, and spacing that apply across the whole email, and fill in the **Footer** with your company details and unsubscribe link. Defaults here keep new blocks consistent until you override them on the canvas. [Learn more](/product/content/email-content/drag-and-drop-email-editor/configure-email-styling-and-footer/)
## Save your email
Click **Save** in the top bar to save your changes. Use **Undo**/**Redo** in the top bar to step back and forward through your edits.
### Restore a previous version
Pushwoosh saves a snapshot every time you click **Save**. To access them, open the **⋮** menu in the top bar and select **Version history** — available once the email has been saved at least once.
The left panel lists saved versions newest first, with the author, timestamp, and a **Latest** badge on the current version. Select any version to preview it on the right, then click **Restore** to load it into the editor.
Restoring loads the version as unsaved changes. Nothing is overwritten until you click **Save**. To undo a restore, press **Cmd/Ctrl+Z**. Pushwoosh keeps the 20 most recent versions per email.
## Check your email before sending
Click **Check** in the top bar to open **Smart check** and scan your email for common issues:
* Buttons without a link
* Unfilled AI placeholders
* Empty image slots and missing alt text
* Text contrast that doesn't meet WCAG AA
* An empty or too-long subject line
* A missing sender postal address in the footer of a marketing email
* Content that pushes the email over Gmail's clipping limit (~102 KB, after which Gmail truncates the message)
* Untranslated content
* A countdown timer whose end date has already passed
* A [display condition](/product/content/email-content/drag-and-drop-email-editor/show-content-to-specific-recipients/) with a broken or empty rule, a branch that lost the block it chains to, or a condition that won't apply because dynamic content is disabled for the account
Click a finding to jump straight to the affected element on the canvas.
If you use [Liquid](/product/personalization/liquid-templates/) in the subject, preheader, footer, or body, click **Validate Liquid syntax** at the bottom of the Smart check panel. Pushwoosh checks the syntax in every language you added.
## Send a test email
Before sending your email campaign, you can send a test email to preview how the content will appear in recipients' inboxes.
1. Open the **⋮** menu in the top bar and select **Test email**.
2. In the window that opens, pick a saved [test device](/developer/first-steps/test-your-integration/test-devices/) or type any email address.
3. Click **Send** to send the test message to the address you chose.
## Use your saved email content
Now that your email content is ready, it can be used in email campaigns. [Learn more about how to use it](/product/messaging-channels/emails/sending-emails)
 ## Explore the editor layout
Once you open an email, the built-in editor has these areas:
**Top bar**
Rename the email, undo or redo changes, run **Check** to catch issues before you send, and save your work. See [Check your email before sending](#check-your-email-before-sending). Open the **⋮** menu for more actions:
* **Preview:** see the email as it will render for recipients, with its own Desktop/Mobile toggle. See [Edit the mobile view](#edit-the-mobile-view).
* **Validate Liquid:** check the [Liquid](/product/personalization/liquid-templates/) syntax in your subject, preheader, footer, and body across all languages before you send. The same check is also one click away at the bottom of the **Smart check** panel. See [Check your email before sending](#check-your-email-before-sending).
* **Test email:** send a preview to a test device or address. See [Send a test email](#send-a-test-email).
* **Brand book:** apply your saved logo, colors, fonts, and block defaults to this email in one click. [Learn more](/product/content/email-content/drag-and-drop-email-editor/brand-book/)
* **Version history:** view and restore an earlier saved version of this email. See [Restore a previous version](#restore-a-previous-version).
## Explore the editor layout
Once you open an email, the built-in editor has these areas:
**Top bar**
Rename the email, undo or redo changes, run **Check** to catch issues before you send, and save your work. See [Check your email before sending](#check-your-email-before-sending). Open the **⋮** menu for more actions:
* **Preview:** see the email as it will render for recipients, with its own Desktop/Mobile toggle. See [Edit the mobile view](#edit-the-mobile-view).
* **Validate Liquid:** check the [Liquid](/product/personalization/liquid-templates/) syntax in your subject, preheader, footer, and body across all languages before you send. The same check is also one click away at the bottom of the **Smart check** panel. See [Check your email before sending](#check-your-email-before-sending).
* **Test email:** send a preview to a test device or address. See [Send a test email](#send-a-test-email).
* **Brand book:** apply your saved logo, colors, fonts, and block defaults to this email in one click. [Learn more](/product/content/email-content/drag-and-drop-email-editor/brand-book/)
* **Version history:** view and restore an earlier saved version of this email. See [Restore a previous version](#restore-a-previous-version).
 **Language / Subject / Preheader bar**
Above the canvas, switch the editing language, set the subject line and preheader for the email, and use **Auto-translate** to fill in missing translations. [Learn how to set up languages and localization](/product/content/email-content/drag-and-drop-email-editor/set-up-your-email-in-the-editor/#define-the-languages-you-want-to-use-in-your-email).
**Language / Subject / Preheader bar**
Above the canvas, switch the editing language, set the subject line and preheader for the email, and use **Auto-translate** to fill in missing translations. [Learn how to set up languages and localization](/product/content/email-content/drag-and-drop-email-editor/set-up-your-email-in-the-editor/#define-the-languages-you-want-to-use-in-your-email).
 **Canvas**
See the email as recipients will see it, and edit text, images, and buttons directly on the layout. An empty email shows **Start with a block**.
**Canvas**
See the email as recipients will see it, and edit text, images, and buttons directly on the layout. An empty email shows **Start with a block**.
 **Layers panel**
Lists every block in your email as a tree, in the same order as on the canvas. Open it from the left edge to select a nested block or drag rows to reorder content.
**Layers panel**
Lists every block in your email as a tree, in the same order as on the canvas. Open it from the left edge to select a nested block or drag rows to reorder content.
 **Right panel**
Switch between three tabs:
* **Blocks:** add content to the email. See [Email content blocks reference](/product/content/email-content/drag-and-drop-email-editor/blocks/).
* **Settings:** apply styling to the whole email at once. See [Configure email-wide styling and footer](/product/content/email-content/drag-and-drop-email-editor/configure-email-styling-and-footer/).
* **AI:** chat with the AI assistant to generate or edit content from a prompt.
## Add content blocks
1. Open the **Blocks** tab in the right panel.
2. Drag a block onto the canvas, or click a block to add it at the end of the email.
3. Keep adding blocks until the layout is ready.
Each block type serves a different purpose in the email:
* **[Heading](/product/content/email-content/drag-and-drop-email-editor/blocks/#heading-and-text):** titles and short headlines
* **[Text](/product/content/email-content/drag-and-drop-email-editor/blocks/#heading-and-text):** body copy and longer descriptions
* **[Button](/product/content/email-content/drag-and-drop-email-editor/blocks/#button):** a clickable call to action
* **[Image](/product/content/email-content/drag-and-drop-email-editor/blocks/#image):** pictures from [Media store](/product/content/media-store/), upload, or URL
* **[Video](/product/content/email-content/drag-and-drop-email-editor/blocks/#video):** a clickable video poster that opens on YouTube or Vimeo
* **[Card](/product/content/email-content/drag-and-drop-email-editor/blocks/#card):** an image with heading, text, and button in one layout
* **[Divider](/product/content/email-content/drag-and-drop-email-editor/blocks/#divider):** a line that separates sections
* **[Columns](/product/content/email-content/drag-and-drop-email-editor/blocks/#columns):** side-by-side layouts (2, 3, or 4 equal columns, or 33/67 and 67/33 splits)
* **[Products](/product/content/email-content/drag-and-drop-email-editor/blocks/#products):** a grid of product cards — enter products by hand, or pull them from your [Product catalog](/product/content/product-catalog/) or a recipient's abandoned cart
* **[Timer](/product/content/email-content/drag-and-drop-email-editor/blocks/#countdown-timer):** a countdown for offers and deadlines
* **[Menu](/product/content/email-content/drag-and-drop-email-editor/blocks/#menu):** a row or column of navigation or contact links
* **[Social](/product/content/email-content/drag-and-drop-email-editor/blocks/#social):** icons that link to your social profiles
* **[HTML](/product/content/email-content/drag-and-drop-email-editor/blocks/#html):** custom HTML, such as a form, survey, or embedded video
See the [Email content blocks reference](/product/content/email-content/drag-and-drop-email-editor/blocks/) for settings for each block, [how to save and reuse blocks](/product/content/email-content/drag-and-drop-email-editor/blocks/#save-and-reuse-blocks), and [link types](/product/content/email-content/drag-and-drop-email-editor/blocks/#add-links) for buttons and text.
### Show content to specific recipients
To show a block only to some recipients, set a [display condition](/product/content/email-content/drag-and-drop-email-editor/show-content-to-specific-recipients/).
## Edit the mobile view
Once you've added your content blocks, switch to mobile to check and adjust how they look on a phone. Next to the language switcher above the canvas, use the **Desktop / Mobile** toggle to switch into a fully editable mobile view at real phone width. Select, edit, and rearrange content exactly the way your subscribers will see it on their phone, instead of just previewing how the desktop layout adapts.
Every mobile-overridable setting has a checkbox next to it. When the checkbox is off, a hint shows the inherited desktop value, and the setting keeps using it. Turn the checkbox on to set a separate value for mobile. Turn it off again to fall back to the desktop value.
### Set different padding and font size per device
* **Padding:** every block, column, card, and individual element (such as text, an image, or a button) has a padding control you can override for mobile. Switch the canvas to **Mobile**, turn on the checkbox next to **Padding**, and set the new value. The desktop padding stays the same until you turn the checkbox on.
* **Font size:** turn on **Font size (mobile)** on a text element to set a size just for mobile. Without this override, large headlines shrink automatically to fit the phone screen.
### Control how columns stack on mobile
[Columns](/product/content/email-content/drag-and-drop-email-editor/blocks/#columns) layouts stack vertically on phones by default. In the mobile view, use **Stack columns** to set how each Columns block behaves:
* **Stack:** columns flow into a single column, top to bottom (default).
* **Keep row:** columns stay side by side, preserving the desktop layout.
* **Reverse:** columns stack in reverse order. Useful for image + text rows: keep the image on the right on desktop, but show it on top on mobile.
**Right panel**
Switch between three tabs:
* **Blocks:** add content to the email. See [Email content blocks reference](/product/content/email-content/drag-and-drop-email-editor/blocks/).
* **Settings:** apply styling to the whole email at once. See [Configure email-wide styling and footer](/product/content/email-content/drag-and-drop-email-editor/configure-email-styling-and-footer/).
* **AI:** chat with the AI assistant to generate or edit content from a prompt.
## Add content blocks
1. Open the **Blocks** tab in the right panel.
2. Drag a block onto the canvas, or click a block to add it at the end of the email.
3. Keep adding blocks until the layout is ready.
Each block type serves a different purpose in the email:
* **[Heading](/product/content/email-content/drag-and-drop-email-editor/blocks/#heading-and-text):** titles and short headlines
* **[Text](/product/content/email-content/drag-and-drop-email-editor/blocks/#heading-and-text):** body copy and longer descriptions
* **[Button](/product/content/email-content/drag-and-drop-email-editor/blocks/#button):** a clickable call to action
* **[Image](/product/content/email-content/drag-and-drop-email-editor/blocks/#image):** pictures from [Media store](/product/content/media-store/), upload, or URL
* **[Video](/product/content/email-content/drag-and-drop-email-editor/blocks/#video):** a clickable video poster that opens on YouTube or Vimeo
* **[Card](/product/content/email-content/drag-and-drop-email-editor/blocks/#card):** an image with heading, text, and button in one layout
* **[Divider](/product/content/email-content/drag-and-drop-email-editor/blocks/#divider):** a line that separates sections
* **[Columns](/product/content/email-content/drag-and-drop-email-editor/blocks/#columns):** side-by-side layouts (2, 3, or 4 equal columns, or 33/67 and 67/33 splits)
* **[Products](/product/content/email-content/drag-and-drop-email-editor/blocks/#products):** a grid of product cards — enter products by hand, or pull them from your [Product catalog](/product/content/product-catalog/) or a recipient's abandoned cart
* **[Timer](/product/content/email-content/drag-and-drop-email-editor/blocks/#countdown-timer):** a countdown for offers and deadlines
* **[Menu](/product/content/email-content/drag-and-drop-email-editor/blocks/#menu):** a row or column of navigation or contact links
* **[Social](/product/content/email-content/drag-and-drop-email-editor/blocks/#social):** icons that link to your social profiles
* **[HTML](/product/content/email-content/drag-and-drop-email-editor/blocks/#html):** custom HTML, such as a form, survey, or embedded video
See the [Email content blocks reference](/product/content/email-content/drag-and-drop-email-editor/blocks/) for settings for each block, [how to save and reuse blocks](/product/content/email-content/drag-and-drop-email-editor/blocks/#save-and-reuse-blocks), and [link types](/product/content/email-content/drag-and-drop-email-editor/blocks/#add-links) for buttons and text.
### Show content to specific recipients
To show a block only to some recipients, set a [display condition](/product/content/email-content/drag-and-drop-email-editor/show-content-to-specific-recipients/).
## Edit the mobile view
Once you've added your content blocks, switch to mobile to check and adjust how they look on a phone. Next to the language switcher above the canvas, use the **Desktop / Mobile** toggle to switch into a fully editable mobile view at real phone width. Select, edit, and rearrange content exactly the way your subscribers will see it on their phone, instead of just previewing how the desktop layout adapts.
Every mobile-overridable setting has a checkbox next to it. When the checkbox is off, a hint shows the inherited desktop value, and the setting keeps using it. Turn the checkbox on to set a separate value for mobile. Turn it off again to fall back to the desktop value.
### Set different padding and font size per device
* **Padding:** every block, column, card, and individual element (such as text, an image, or a button) has a padding control you can override for mobile. Switch the canvas to **Mobile**, turn on the checkbox next to **Padding**, and set the new value. The desktop padding stays the same until you turn the checkbox on.
* **Font size:** turn on **Font size (mobile)** on a text element to set a size just for mobile. Without this override, large headlines shrink automatically to fit the phone screen.
### Control how columns stack on mobile
[Columns](/product/content/email-content/drag-and-drop-email-editor/blocks/#columns) layouts stack vertically on phones by default. In the mobile view, use **Stack columns** to set how each Columns block behaves:
* **Stack:** columns flow into a single column, top to bottom (default).
* **Keep row:** columns stay side by side, preserving the desktop layout.
* **Reverse:** columns stack in reverse order. Useful for image + text rows: keep the image on the right on desktop, but show it on top on mobile.
 ### Show or hide content per device
Open a block or element's settings and use **Hide on mobile** or **Hide on desktop** under **Visibility** to show it on only one device, so you can build device-specific banners, CTAs, or navigation without maintaining two templates.
### Show or hide content per device
Open a block or element's settings and use **Hide on mobile** or **Hide on desktop** under **Visibility** to show it on only one device, so you can build device-specific banners, CTAs, or navigation without maintaining two templates.
 ## Configure email-wide styling and footer
After the main layout is in place, open the **Settings** tab to set fonts, colors, and spacing that apply across the whole email, and fill in the **Footer** with your company details and unsubscribe link. Defaults here keep new blocks consistent until you override them on the canvas. [Learn more](/product/content/email-content/drag-and-drop-email-editor/configure-email-styling-and-footer/)
## Save your email
Click **Save** in the top bar to save your changes. Use **Undo**/**Redo** in the top bar to step back and forward through your edits.
### Restore a previous version
Pushwoosh saves a snapshot every time you click **Save**. To access them, open the **⋮** menu in the top bar and select **Version history** — available once the email has been saved at least once.
The left panel lists saved versions newest first, with the author, timestamp, and a **Latest** badge on the current version. Select any version to preview it on the right, then click **Restore** to load it into the editor.
## Configure email-wide styling and footer
After the main layout is in place, open the **Settings** tab to set fonts, colors, and spacing that apply across the whole email, and fill in the **Footer** with your company details and unsubscribe link. Defaults here keep new blocks consistent until you override them on the canvas. [Learn more](/product/content/email-content/drag-and-drop-email-editor/configure-email-styling-and-footer/)
## Save your email
Click **Save** in the top bar to save your changes. Use **Undo**/**Redo** in the top bar to step back and forward through your edits.
### Restore a previous version
Pushwoosh saves a snapshot every time you click **Save**. To access them, open the **⋮** menu in the top bar and select **Version history** — available once the email has been saved at least once.
The left panel lists saved versions newest first, with the author, timestamp, and a **Latest** badge on the current version. Select any version to preview it on the right, then click **Restore** to load it into the editor.
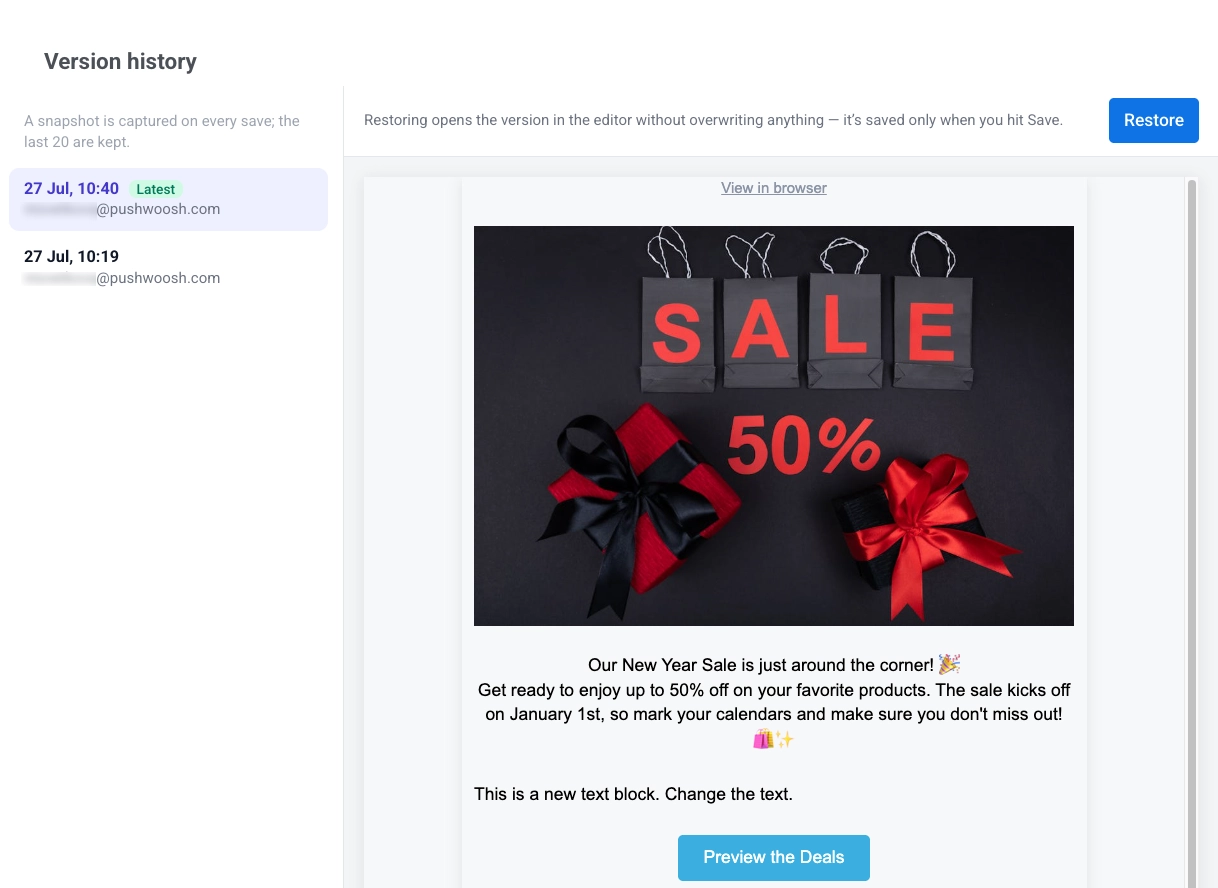 Restoring loads the version as unsaved changes. Nothing is overwritten until you click **Save**. To undo a restore, press **Cmd/Ctrl+Z**. Pushwoosh keeps the 20 most recent versions per email.
## Check your email before sending
Click **Check** in the top bar to open **Smart check** and scan your email for common issues:
* Buttons without a link
* Unfilled AI placeholders
* Empty image slots and missing alt text
* Text contrast that doesn't meet WCAG AA
* An empty or too-long subject line
* A missing sender postal address in the footer of a marketing email
* Content that pushes the email over Gmail's clipping limit (~102 KB, after which Gmail truncates the message)
* Untranslated content
* A countdown timer whose end date has already passed
* A [display condition](/product/content/email-content/drag-and-drop-email-editor/show-content-to-specific-recipients/) with a broken or empty rule, a branch that lost the block it chains to, or a condition that won't apply because dynamic content is disabled for the account
Restoring loads the version as unsaved changes. Nothing is overwritten until you click **Save**. To undo a restore, press **Cmd/Ctrl+Z**. Pushwoosh keeps the 20 most recent versions per email.
## Check your email before sending
Click **Check** in the top bar to open **Smart check** and scan your email for common issues:
* Buttons without a link
* Unfilled AI placeholders
* Empty image slots and missing alt text
* Text contrast that doesn't meet WCAG AA
* An empty or too-long subject line
* A missing sender postal address in the footer of a marketing email
* Content that pushes the email over Gmail's clipping limit (~102 KB, after which Gmail truncates the message)
* Untranslated content
* A countdown timer whose end date has already passed
* A [display condition](/product/content/email-content/drag-and-drop-email-editor/show-content-to-specific-recipients/) with a broken or empty rule, a branch that lost the block it chains to, or a condition that won't apply because dynamic content is disabled for the account
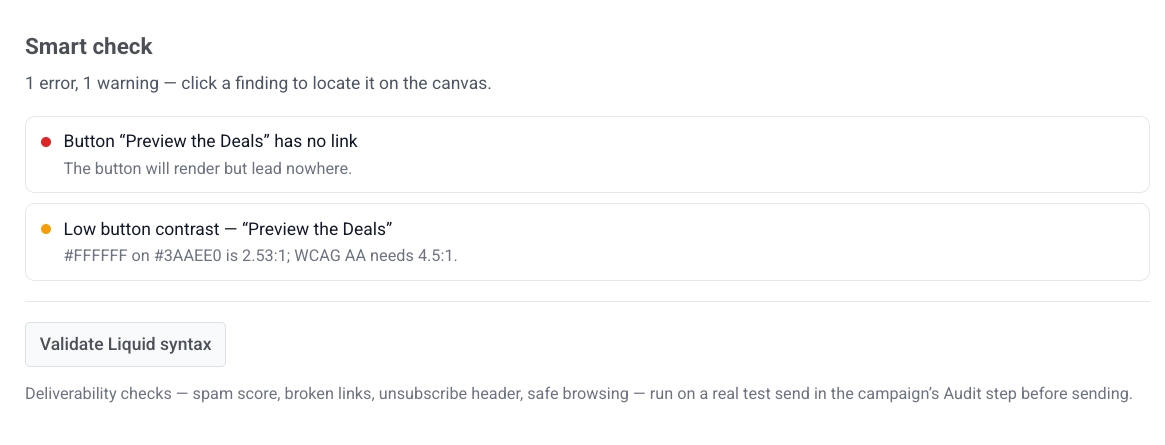 Click a finding to jump straight to the affected element on the canvas.
If you use [Liquid](/product/personalization/liquid-templates/) in the subject, preheader, footer, or body, click **Validate Liquid syntax** at the bottom of the Smart check panel. Pushwoosh checks the syntax in every language you added.
## Send a test email
Before sending your email campaign, you can send a test email to preview how the content will appear in recipients' inboxes.
1. Open the **⋮** menu in the top bar and select **Test email**.
Click a finding to jump straight to the affected element on the canvas.
If you use [Liquid](/product/personalization/liquid-templates/) in the subject, preheader, footer, or body, click **Validate Liquid syntax** at the bottom of the Smart check panel. Pushwoosh checks the syntax in every language you added.
## Send a test email
Before sending your email campaign, you can send a test email to preview how the content will appear in recipients' inboxes.
1. Open the **⋮** menu in the top bar and select **Test email**.
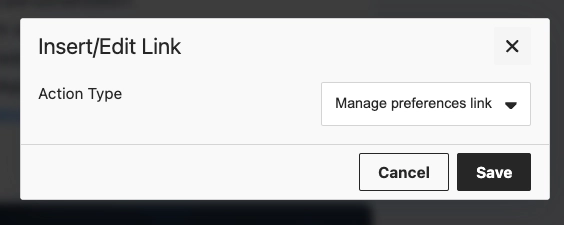 2. In the window that opens, pick a saved [test device](/developer/first-steps/test-your-integration/test-devices/) or type any email address.
 3. Click **Send** to send the test message to the address you chose.
## Use your saved email content
Now that your email content is ready, it can be used in email campaigns. [Learn more about how to use it](/product/messaging-channels/emails/sending-emails)
3. Click **Send** to send the test message to the address you chose.
## Use your saved email content
Now that your email content is ready, it can be used in email campaigns. [Learn more about how to use it](/product/messaging-channels/emails/sending-emails)