 **Toolbar options**
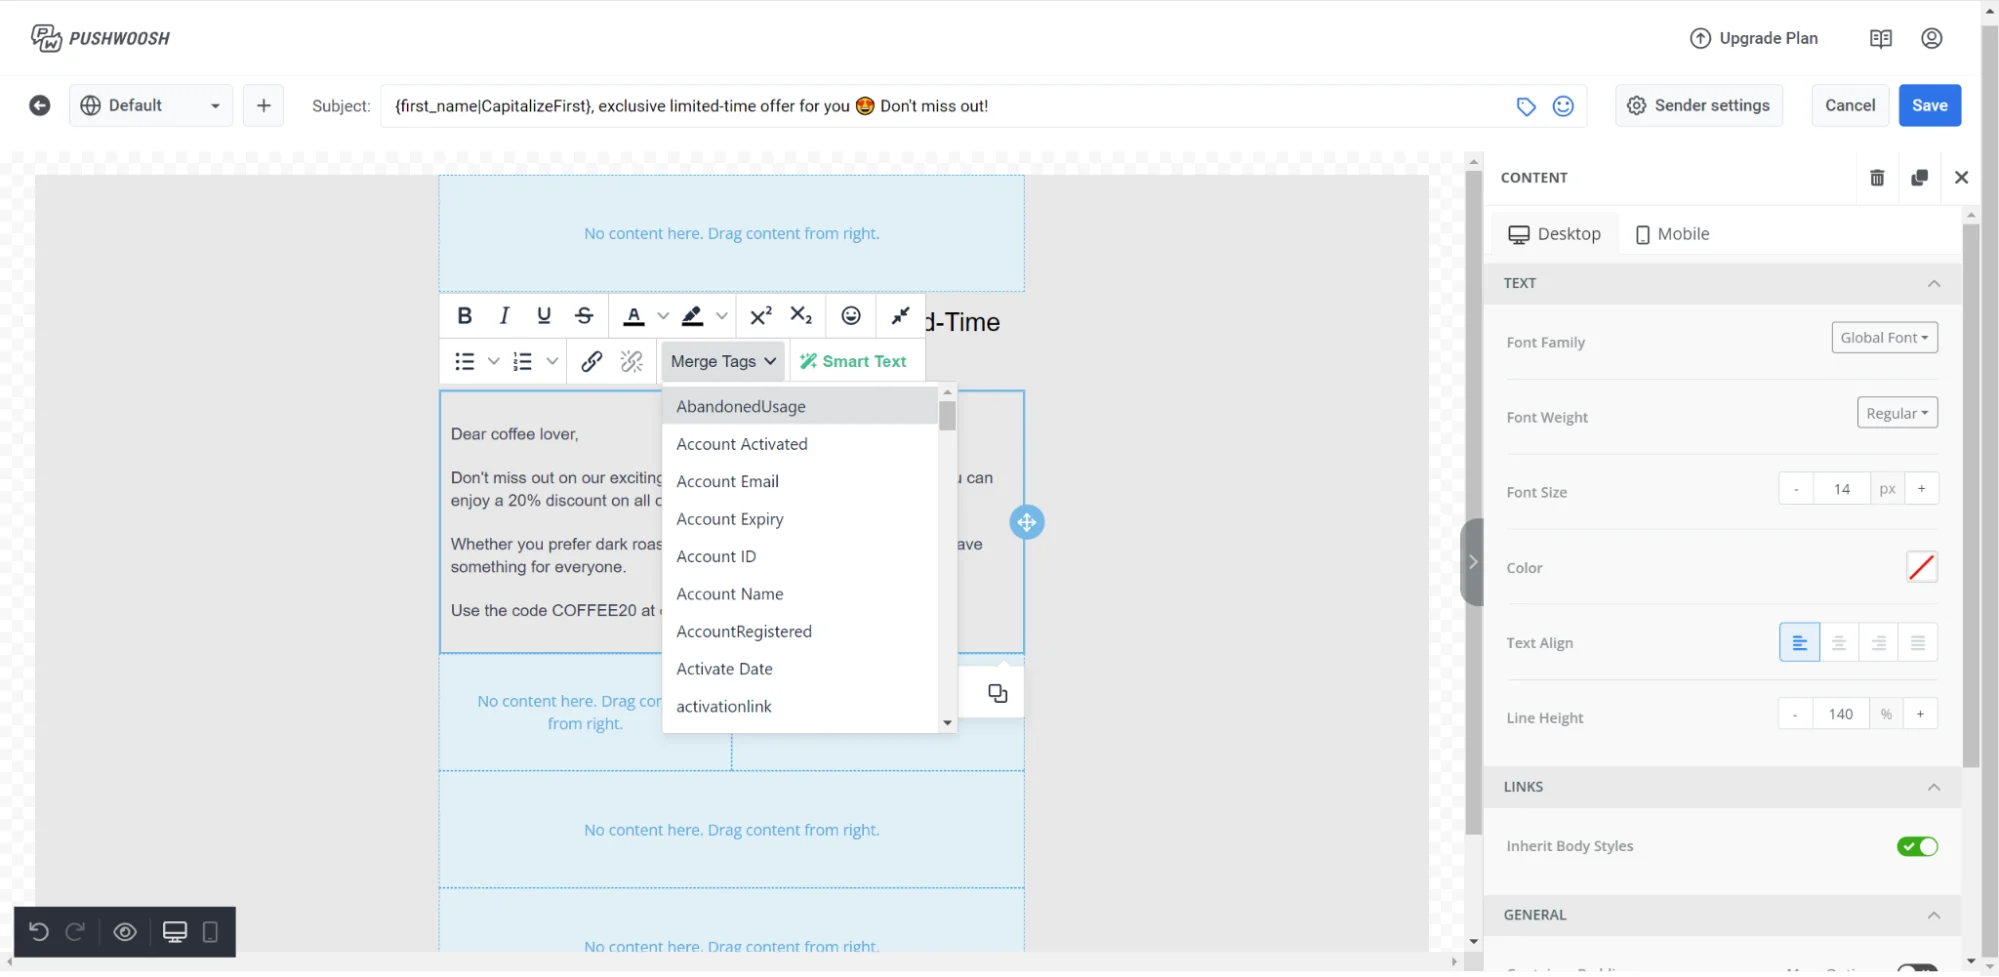
* **Text style:** set a paragraph style (Heading 1, Heading 2, Normal, etc.) for the whole block
* **Font size:** resize selected text, or apply a size to the whole paragraph
* **Bold / Italic / Underline / Strikethrough:** standard character formatting
* **Alignment:** left, center, or right
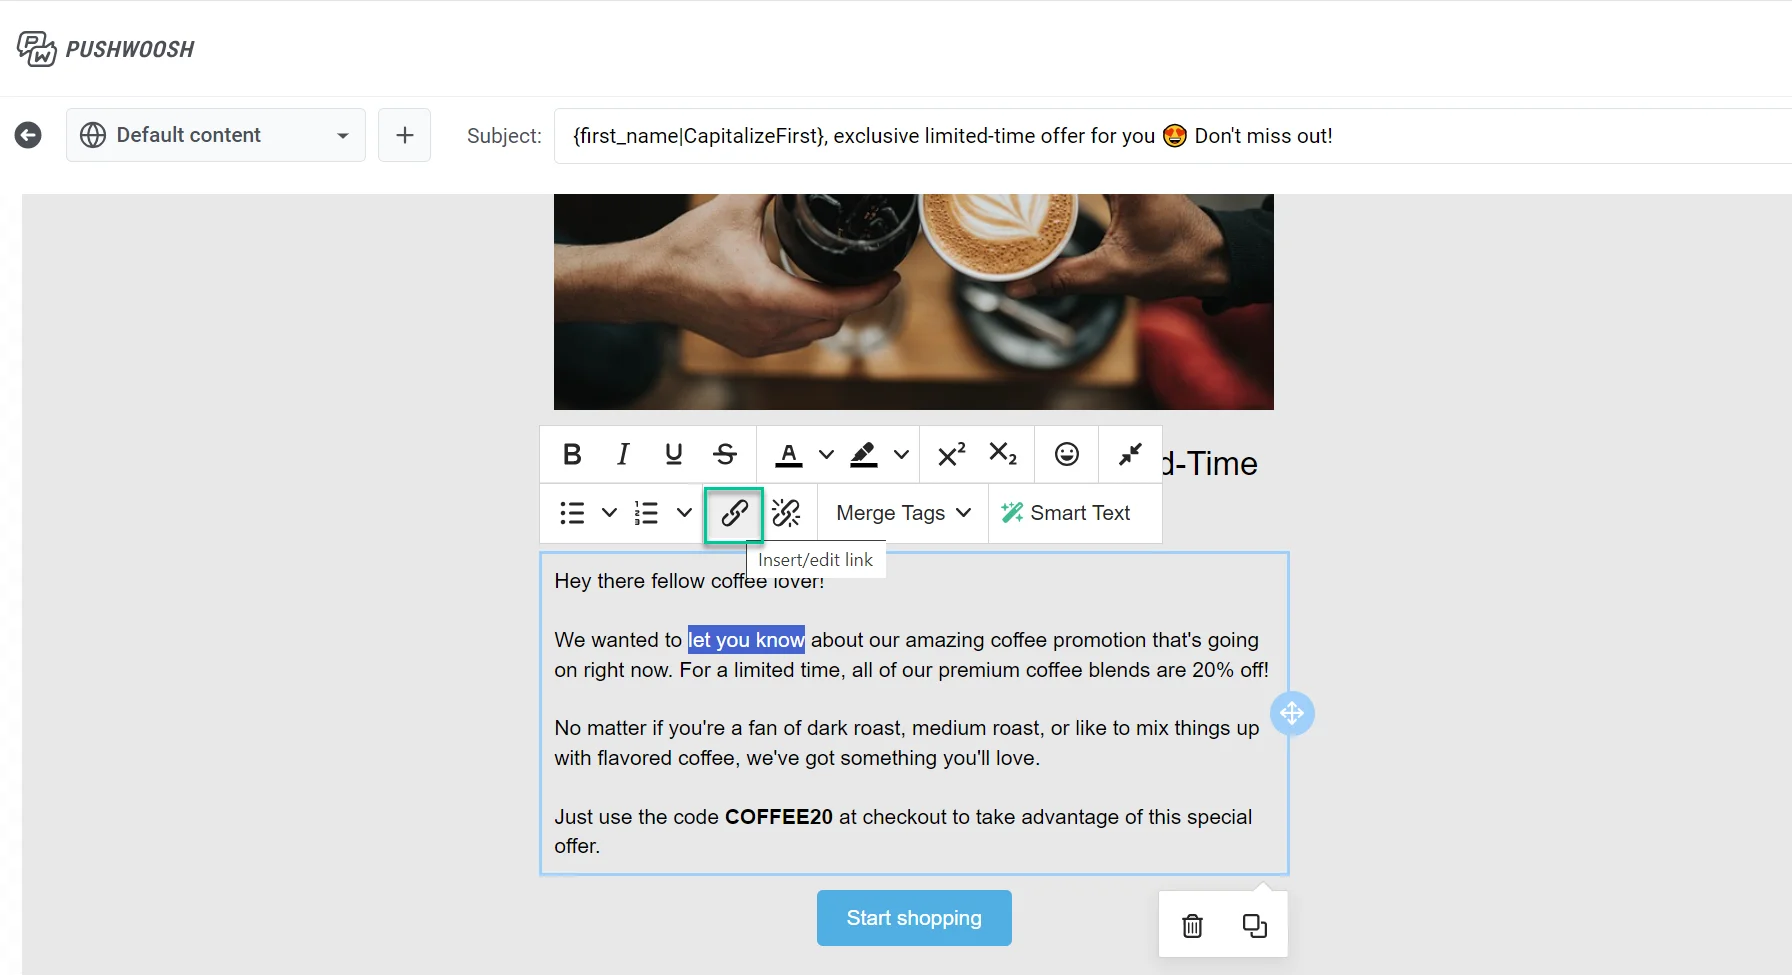
* **Link:** wrap selected text in a hyperlink
Select the block (not a text range) to open its settings in the right panel, then turn on **Letter spacing** to loosen or tighten character spacing for the whole block. Accepts fractional and negative values. To apply letter spacing across all text blocks at once instead, set it as an email-wide default under **Typography**. See [Configure email-wide styling](/product/content/email-content/drag-and-drop-email-editor/configure-email-styling-and-footer/#configure-email-wide-styling).
**Personalization with Merge Tags**
Merge Tags are placeholders that insert a [Tag](/product/audience-data-and-segmentation/user-data-tags/tags/) value from the recipient's profile, so each subscriber sees personalized copy. To add one, select the text, click **Merge Tags** in the toolbar, and choose a Tag from your account.
### Image
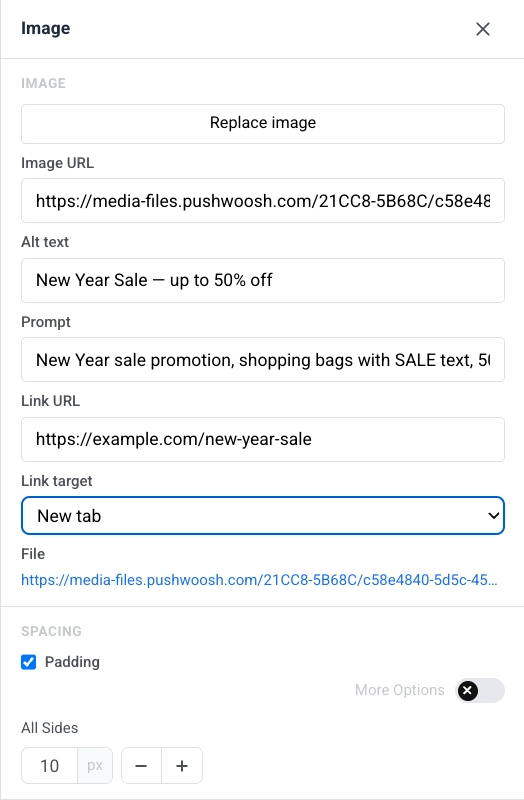
An **Image** block displays a picture in the email. Select it on the canvas to open the **Image** settings in the right panel.
**Adding an image**
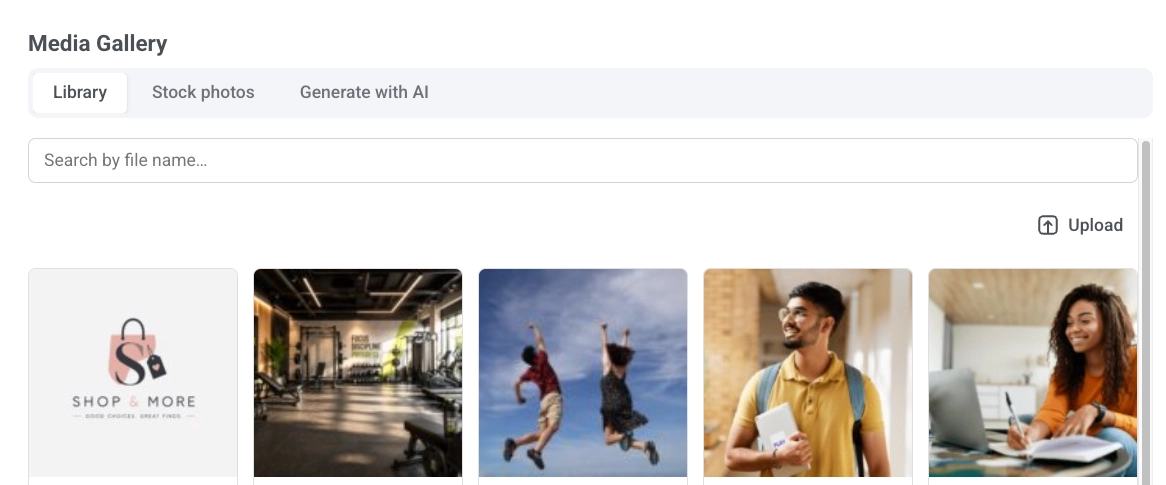
Click **Add image** when the block is empty, or **Replace image** when a picture is already set. This opens the **Media Gallery** with three tabs:
* **Library:** your uploaded files, searchable by file name.
* **Stock photos:** search free Pexels photos without leaving the editor. Click one to copy it into your library and insert it.
* **Generate with AI:** describe the image you want and pick an aspect ratio. The generated image is saved to your library.
**Toolbar options**
* **Text style:** set a paragraph style (Heading 1, Heading 2, Normal, etc.) for the whole block
* **Font size:** resize selected text, or apply a size to the whole paragraph
* **Bold / Italic / Underline / Strikethrough:** standard character formatting
* **Alignment:** left, center, or right
* **Link:** wrap selected text in a hyperlink
Select the block (not a text range) to open its settings in the right panel, then turn on **Letter spacing** to loosen or tighten character spacing for the whole block. Accepts fractional and negative values. To apply letter spacing across all text blocks at once instead, set it as an email-wide default under **Typography**. See [Configure email-wide styling](/product/content/email-content/drag-and-drop-email-editor/configure-email-styling-and-footer/#configure-email-wide-styling).
**Personalization with Merge Tags**
Merge Tags are placeholders that insert a [Tag](/product/audience-data-and-segmentation/user-data-tags/tags/) value from the recipient's profile, so each subscriber sees personalized copy. To add one, select the text, click **Merge Tags** in the toolbar, and choose a Tag from your account.
### Image
An **Image** block displays a picture in the email. Select it on the canvas to open the **Image** settings in the right panel.
**Adding an image**
Click **Add image** when the block is empty, or **Replace image** when a picture is already set. This opens the **Media Gallery** with three tabs:
* **Library:** your uploaded files, searchable by file name.
* **Stock photos:** search free Pexels photos without leaving the editor. Click one to copy it into your library and insert it.
* **Generate with AI:** describe the image you want and pick an aspect ratio. The generated image is saved to your library.
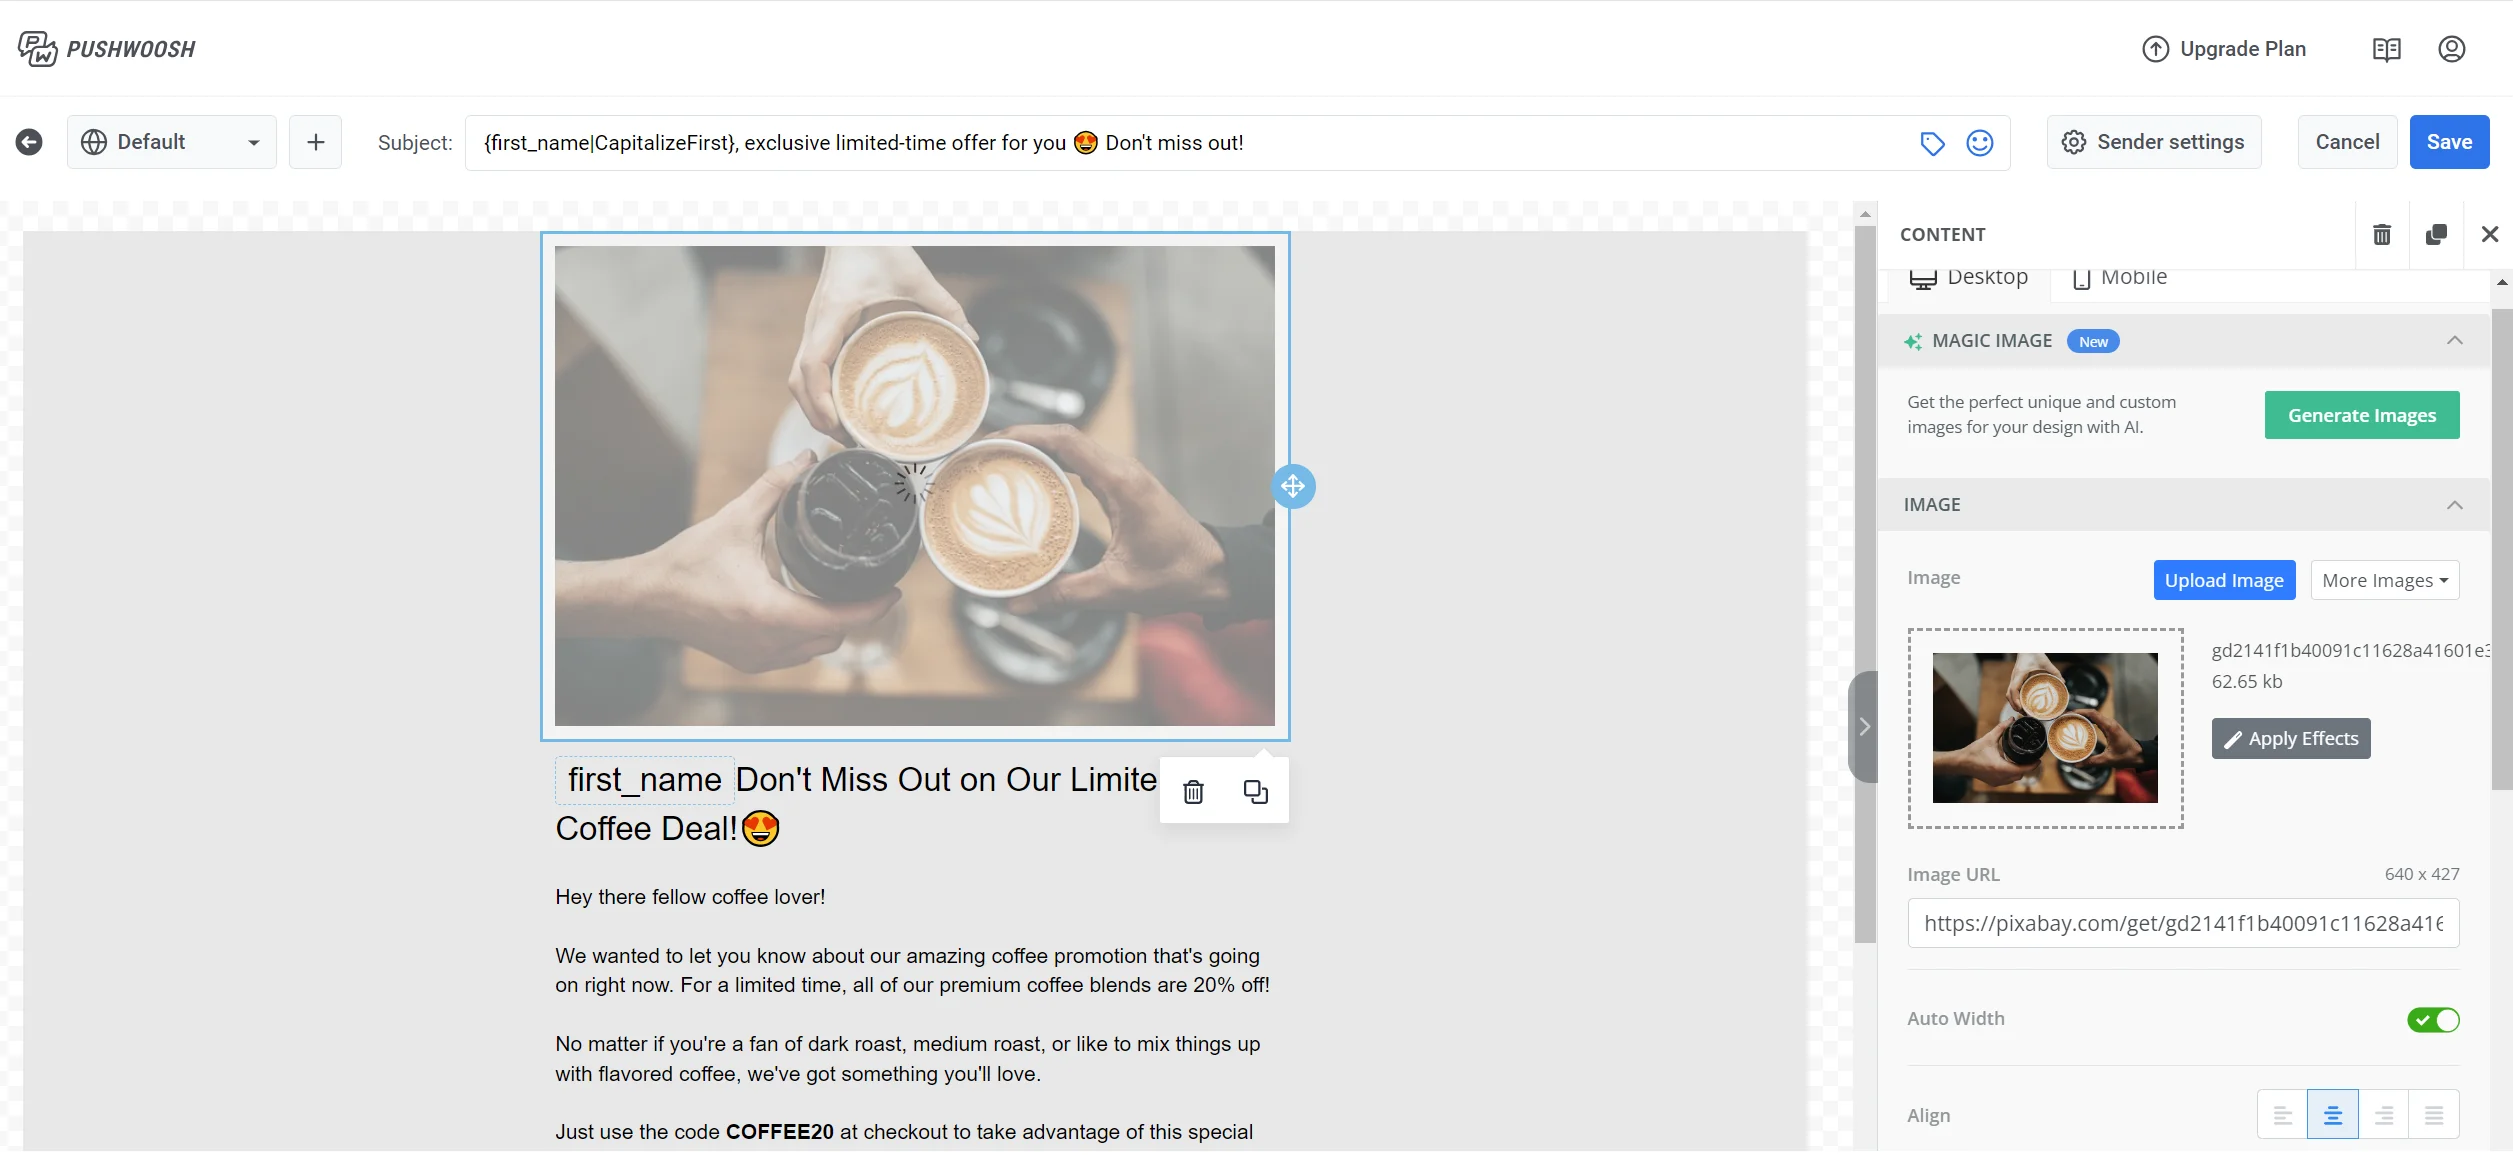
 You can also paste a hosted link directly into **Image URL** to skip the gallery.
**Alt text**
Describe the image in **Alt text** for accessibility, or click **Generate alt with AI** to have AI write it from the image in your current editing language. Images added from Stock photos or Generate with AI get alt text automatically.
**Links and spacing**
To open a link when the image is clicked, enter it in **Link URL** and set **Link target** to open in the same tab or a new one. See [Add links](#add-links) for available link types.
In **Spacing**, turn on **Padding** to add space around the image. Use **All sides** for uniform padding, or turn on **More options** to set each side separately.
You can also paste a hosted link directly into **Image URL** to skip the gallery.
**Alt text**
Describe the image in **Alt text** for accessibility, or click **Generate alt with AI** to have AI write it from the image in your current editing language. Images added from Stock photos or Generate with AI get alt text automatically.
**Links and spacing**
To open a link when the image is clicked, enter it in **Link URL** and set **Link target** to open in the same tab or a new one. See [Add links](#add-links) for available link types.
In **Spacing**, turn on **Padding** to add space around the image. Use **All sides** for uniform padding, or turn on **More options** to set each side separately.
 ### Video
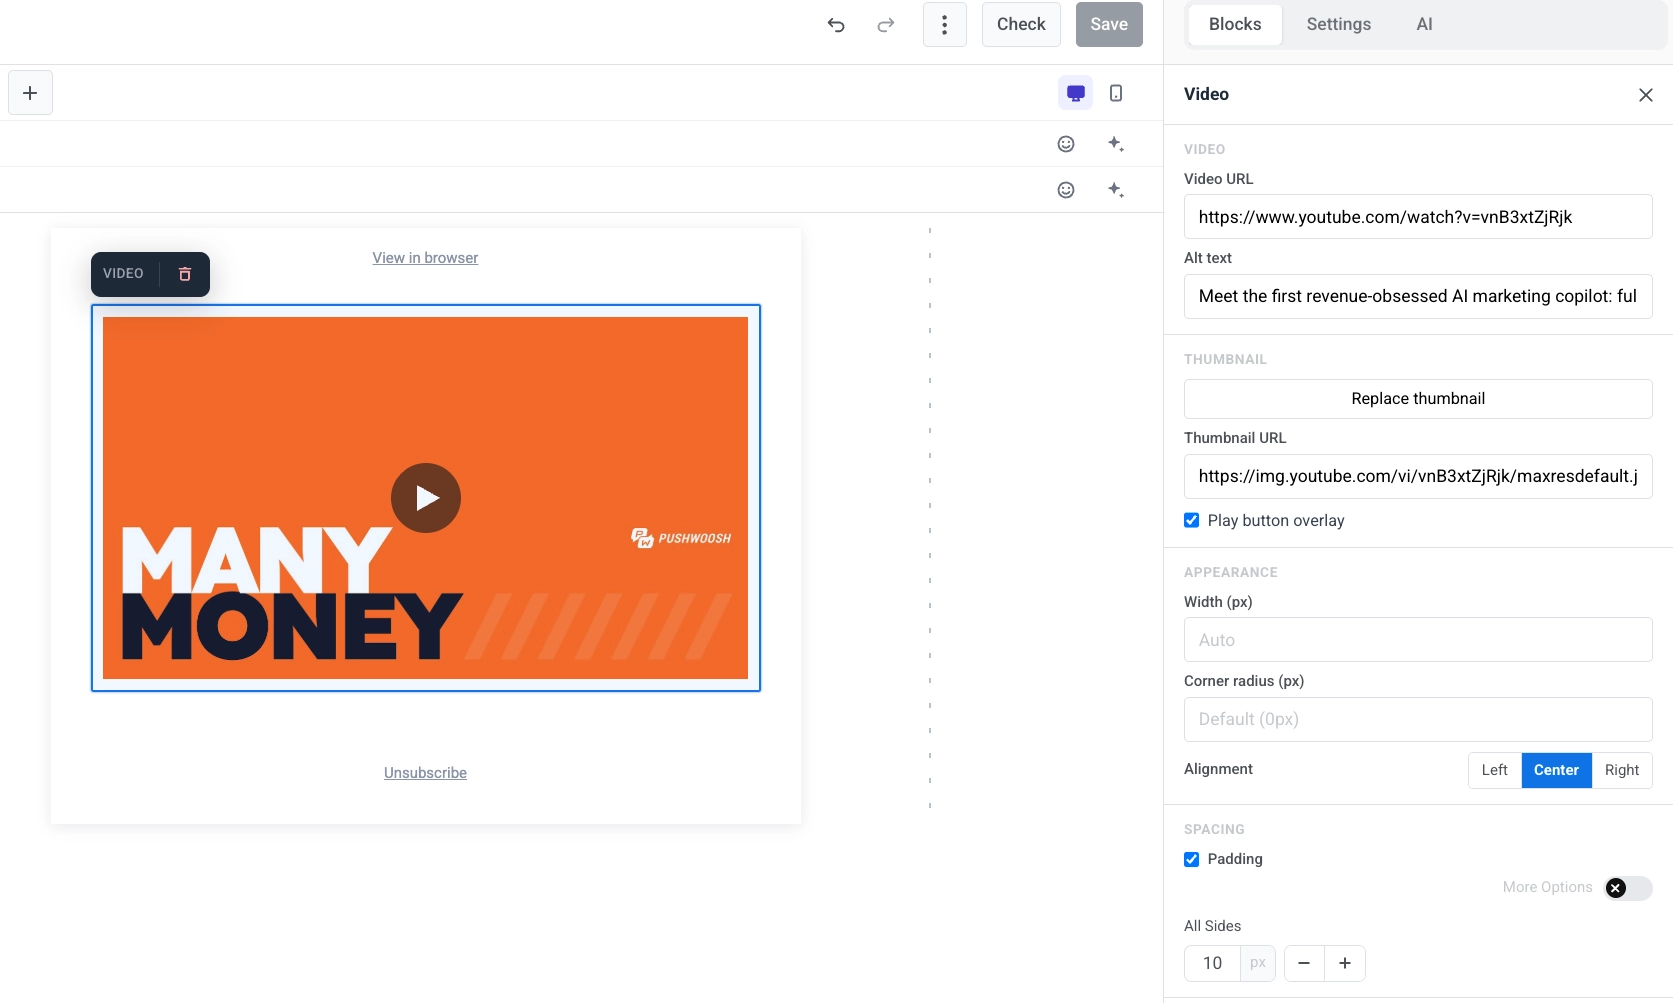
A **Video** block adds a YouTube or Vimeo video to the email as a clickable thumbnail. Email clients can't play video inside the message, so the block shows a still image with a ▶ overlay. When the recipient taps it, the video opens on YouTube or Vimeo. This works in every major client, including Outlook.
Select the Video block on the canvas to open its settings in the right panel.
* **Video URL:** paste a YouTube or Vimeo link. The editor fetches a thumbnail automatically.
* **Alt text:** describe the video for accessibility.
* **Thumbnail URL:** keep the auto-fetched thumbnail, or click **Add thumbnail** / **Replace thumbnail** to pick one from the Media Gallery, or paste a hosted link directly.
* **Play button overlay:** on by default. Turn off to show the plain thumbnail without the ▶ overlay. The overlay isn't available for thumbnails on some external hosts — the editor warns you when that applies, and the email shows the plain thumbnail instead.
* **Width (px)**, **Corner radius (px)**, and **Alignment:** control how the thumbnail looks and where it sits in the layout. You can set alignment separately for mobile.
### Video
A **Video** block adds a YouTube or Vimeo video to the email as a clickable thumbnail. Email clients can't play video inside the message, so the block shows a still image with a ▶ overlay. When the recipient taps it, the video opens on YouTube or Vimeo. This works in every major client, including Outlook.
Select the Video block on the canvas to open its settings in the right panel.
* **Video URL:** paste a YouTube or Vimeo link. The editor fetches a thumbnail automatically.
* **Alt text:** describe the video for accessibility.
* **Thumbnail URL:** keep the auto-fetched thumbnail, or click **Add thumbnail** / **Replace thumbnail** to pick one from the Media Gallery, or paste a hosted link directly.
* **Play button overlay:** on by default. Turn off to show the plain thumbnail without the ▶ overlay. The overlay isn't available for thumbnails on some external hosts — the editor warns you when that applies, and the email shows the plain thumbnail instead.
* **Width (px)**, **Corner radius (px)**, and **Alignment:** control how the thumbnail looks and where it sits in the layout. You can set alignment separately for mobile.
 ### Card
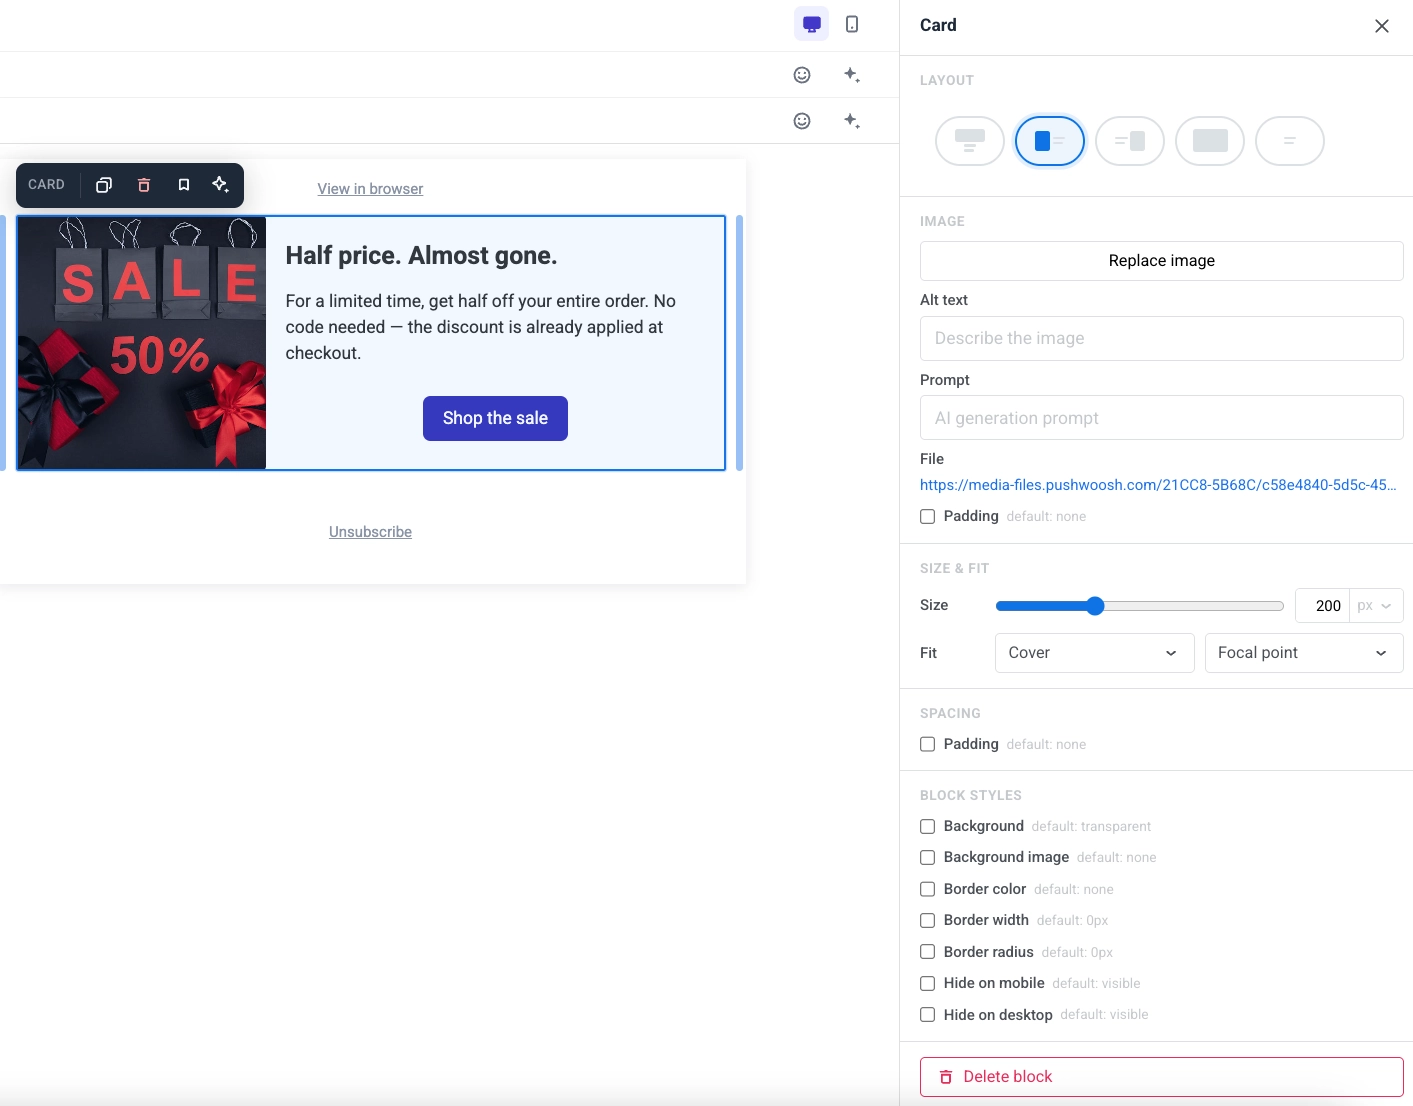
A **Card** block pairs an image with a heading, text, and button in a single ready-made layout. Select it on the canvas to open its settings in the right panel.
* **Layout:** choose which side the image sits on relative to the content.
* **Image:** replace the image, set alt text, and (for AI-generated images) edit the prompt used to create it.
* **Size & fit:** set the image size and how it fits and positions within its area.
* **Spacing:** set the padding around the card's content.
### Card
A **Card** block pairs an image with a heading, text, and button in a single ready-made layout. Select it on the canvas to open its settings in the right panel.
* **Layout:** choose which side the image sits on relative to the content.
* **Image:** replace the image, set alt text, and (for AI-generated images) edit the prompt used to create it.
* **Size & fit:** set the image size and how it fits and positions within its area.
* **Spacing:** set the padding around the card's content.
 ### Button
A **Button** is a clickable call to action in the email.
Click a **Button** block to edit its label on the canvas. Use the toolbar to change font size, text color, bold, italic, underline, strikethrough, and alignment.
To set what happens when the recipient clicks the button:
* Click the link icon in the toolbar to open **Insert/Edit Link**.
* Or use **Action type** and **URL** in the **Link** section of the right panel.
### Button
A **Button** is a clickable call to action in the email.
Click a **Button** block to edit its label on the canvas. Use the toolbar to change font size, text color, bold, italic, underline, strikethrough, and alignment.
To set what happens when the recipient clicks the button:
* Click the link icon in the toolbar to open **Insert/Edit Link**.
* Or use **Action type** and **URL** in the **Link** section of the right panel.
 See [Add links](#add-links) for the available action types.
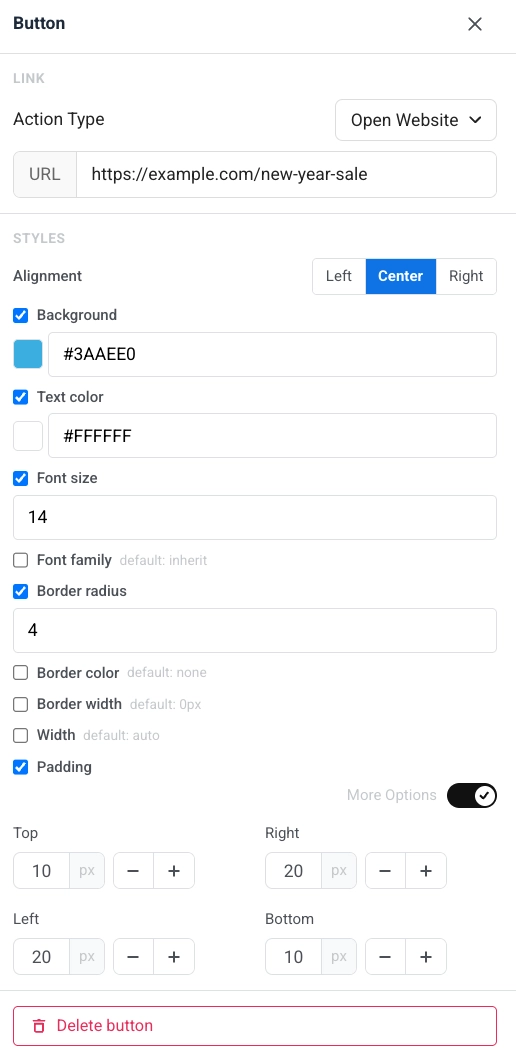
In the right panel, under **Styles**:
* **Alignment:** left, center, or right.
* **Background**, **Text color**, **Font size**, and **Font family:** turn each option on to override the default look.
* **Border radius**, **Border color**, and **Border width:** shape and outline of the button.
* **Width:** set a fixed button width or leave it automatic.
* **Padding:** add space inside the button. Use **All sides** for uniform padding, or turn on **More options** to set each side separately.
See [Add links](#add-links) for the available action types.
In the right panel, under **Styles**:
* **Alignment:** left, center, or right.
* **Background**, **Text color**, **Font size**, and **Font family:** turn each option on to override the default look.
* **Border radius**, **Border color**, and **Border width:** shape and outline of the button.
* **Width:** set a fixed button width or leave it automatic.
* **Padding:** add space inside the button. Use **All sides** for uniform padding, or turn on **More options** to set each side separately.
 ### Divider
A **Divider** is a horizontal line between content blocks. Use it to separate sections visually in the email.
Configure **line style** (Solid, Dashed, Dotted), **color**, **thickness**, and **width** in the settings panel.
### Divider
A **Divider** is a horizontal line between content blocks. Use it to separate sections visually in the email.
Configure **line style** (Solid, Dashed, Dotted), **color**, **thickness**, and **width** in the settings panel.
 ### HTML
The **HTML** block lets you paste custom HTML into your email. Use it for a custom form, survey, or embedded video.
#### Examples
### HTML
The **HTML** block lets you paste custom HTML into your email. Use it for a custom form, survey, or embedded video.
#### Examples
HTML code
```htmlGet your New Year Sale code
Enter your email and we'll send you an exclusive promo code for up to 50% off.
HTML code
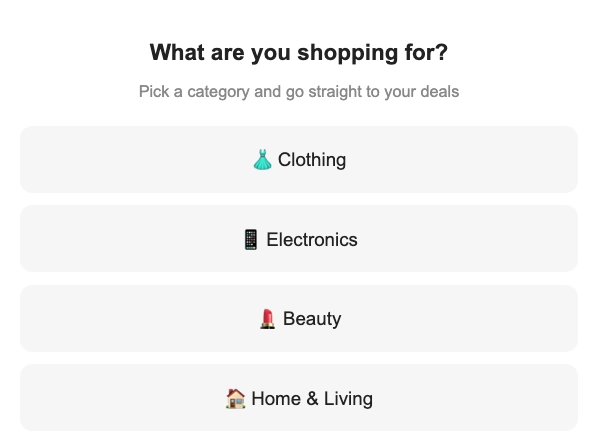
```htmlWhat are you shopping for?
Pick a category and go straight to your deals
👗 Clothing 📱 Electronics 💄 Beauty 🏠 Home & Living ```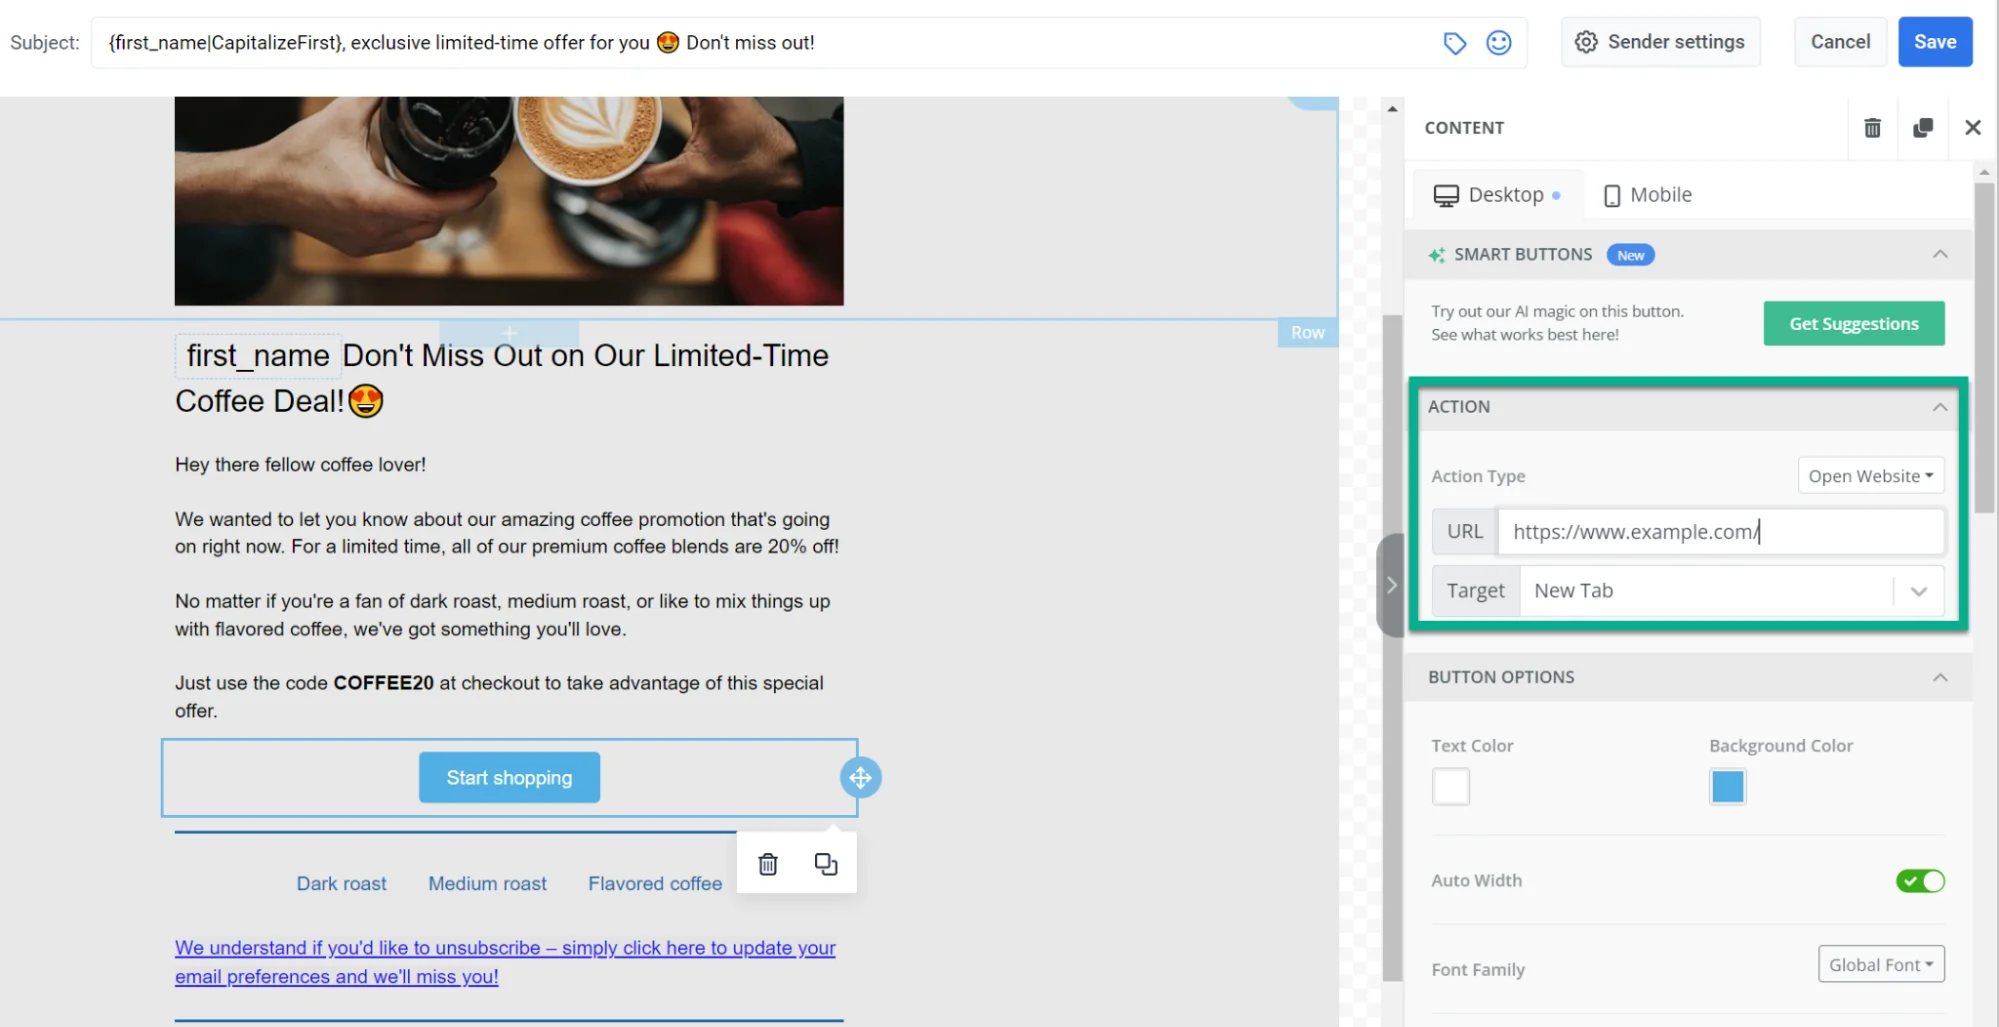 ### Social
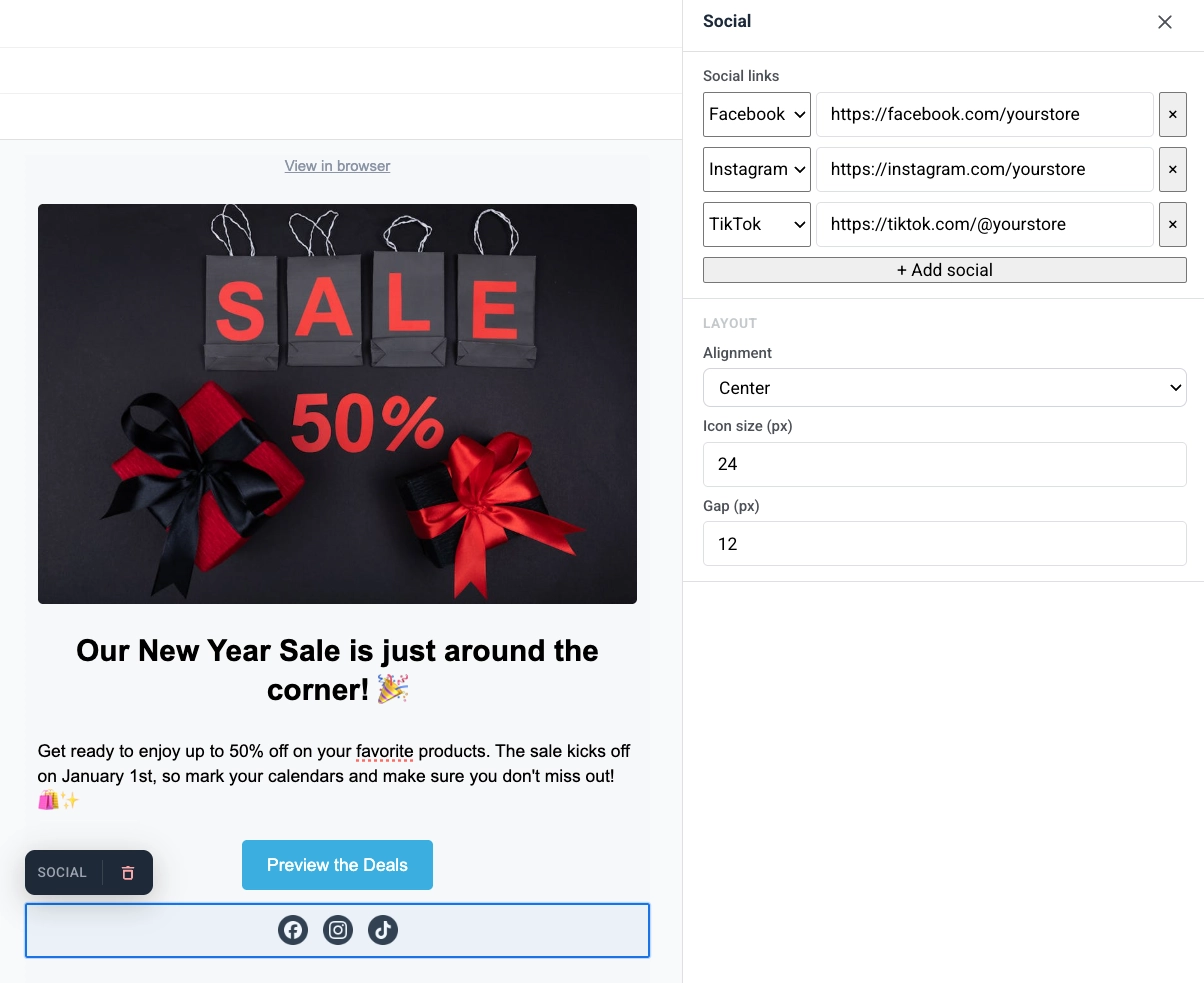
The **Social** block displays a row of social media icons that link to your profiles. Use it to send recipients to Facebook, Instagram, X, and other platforms from the email.
Add platform entries, then set alignment, icon size, and the gap between icons.
### Social
The **Social** block displays a row of social media icons that link to your profiles. Use it to send recipients to Facebook, Instagram, X, and other platforms from the email.
Add platform entries, then set alignment, icon size, and the gap between icons.
 ### Countdown timer
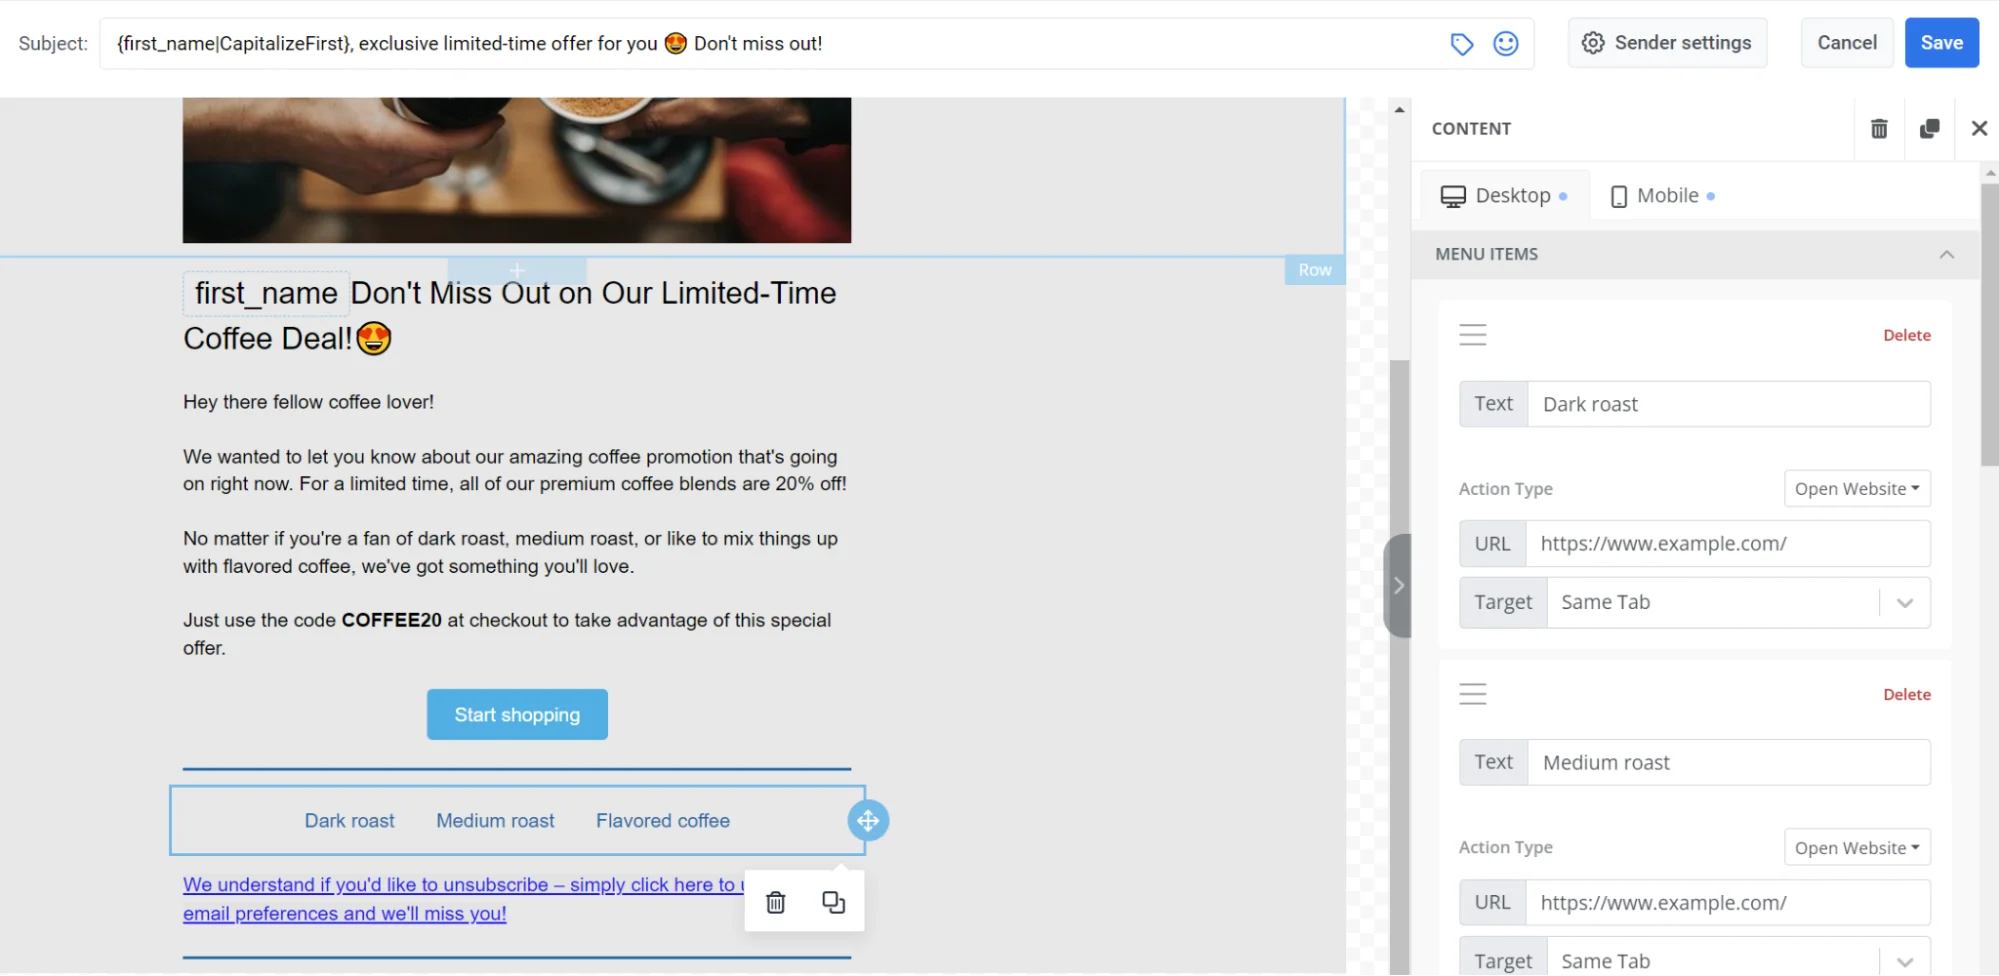
The **Timer** block is a countdown in the email. Use it for limited-time offers, flash sales, and event reminders.
To set it up:
1. In **Countdown**, set **End date** and **End time**, then choose the **Timezone** and **Language** for the timer labels.
2. Turn **Labels** on to show "days / hours / minutes / seconds" captions under the digits, or off for numbers only.
3. In **Appearance**, set **Background**, **Digits color**, **Labels color**, and the font size for digits (default 40px) and labels (default 16px).
4. Adjust **Spacing** (padding) as needed.
### Countdown timer
The **Timer** block is a countdown in the email. Use it for limited-time offers, flash sales, and event reminders.
To set it up:
1. In **Countdown**, set **End date** and **End time**, then choose the **Timezone** and **Language** for the timer labels.
2. Turn **Labels** on to show "days / hours / minutes / seconds" captions under the digits, or off for numbers only.
3. In **Appearance**, set **Background**, **Digits color**, **Labels color**, and the font size for digits (default 40px) and labels (default 16px).
4. Adjust **Spacing** (padding) as needed.
 The timer renders as a sharp image at any language or size, with a background that stretches across the full email row, and a version rendered natively for mobile width rather than a shrunk desktop image.
### Columns
**Columns** split the canvas into side-by-side sections so you can place content next to each other in one row.
Drag one of these blocks onto the canvas:
* **2 columns:** two equal columns
* **3 columns:** three equal columns
* **4 columns:** four equal columns
* **33 / 67:** left column about 33% wide, right about 67%
* **67 / 33:** left column about 67% wide, right about 33%
Then add content to each column. To change spacing for all columns in the email, open **Settings** → **Columns defaults** and adjust outer padding, column padding, and the gap between columns.
### Products
A **Products** block shows a grid of product cards from one shared template. Each card can include an image, title, description, price, and a buy button. The template repeats for every product you add.
The timer renders as a sharp image at any language or size, with a background that stretches across the full email row, and a version rendered natively for mobile width rather than a shrunk desktop image.
### Columns
**Columns** split the canvas into side-by-side sections so you can place content next to each other in one row.
Drag one of these blocks onto the canvas:
* **2 columns:** two equal columns
* **3 columns:** three equal columns
* **4 columns:** four equal columns
* **33 / 67:** left column about 33% wide, right about 67%
* **67 / 33:** left column about 67% wide, right about 33%
Then add content to each column. To change spacing for all columns in the email, open **Settings** → **Columns defaults** and adjust outer padding, column padding, and the gap between columns.
### Products
A **Products** block shows a grid of product cards from one shared template. Each card can include an image, title, description, price, and a buy button. The template repeats for every product you add.
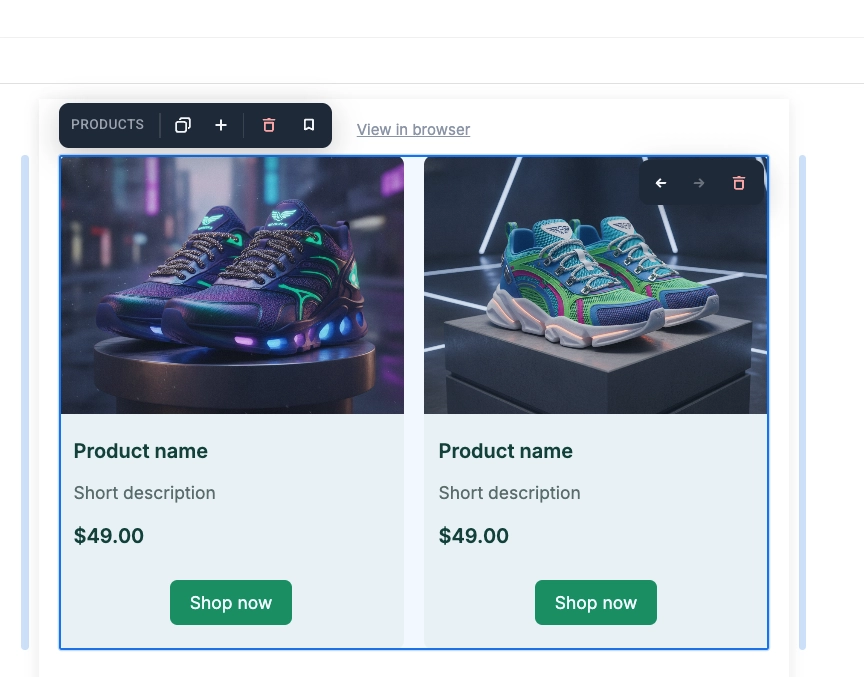 Click a card on the canvas to make it active and edit it:
* Change the title, description, price, picture, or per-product link to update only that card.
* Change the template layout, colors, padding, or which elements it contains to update every card.
In the settings panel:
* **Number of products:** set how many cards to show (1–24), or click **Add product** to add one more.
* **Columns:** choose 1, 2, or 3 cards per row. On mobile, cards always stack in one column.
* **Gap:** turn on to set the space between cards. Off uses the default (16px).
* **Product images:** click a thumbnail to replace that product's picture.
* **Product links:** enter a URL for each product.
* **Card template:** pick a layout, then set **Card background**, **Card corner radius**, and **Content padding**. These styles apply to every card.
## Save and reuse blocks
Save a block to reuse it in this or other emails instead of rebuilding it each time.
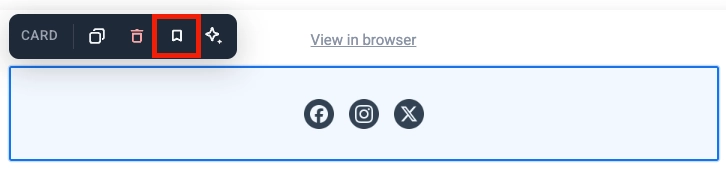
1. Click the block itself (its frame or background, not the text or button inside it) to select the whole block. Card, Columns, and Social are examples of blocks that work this way.
2. Click the bookmark icon in the block's toolbar and give it a name.
Click a card on the canvas to make it active and edit it:
* Change the title, description, price, picture, or per-product link to update only that card.
* Change the template layout, colors, padding, or which elements it contains to update every card.
In the settings panel:
* **Number of products:** set how many cards to show (1–24), or click **Add product** to add one more.
* **Columns:** choose 1, 2, or 3 cards per row. On mobile, cards always stack in one column.
* **Gap:** turn on to set the space between cards. Off uses the default (16px).
* **Product images:** click a thumbnail to replace that product's picture.
* **Product links:** enter a URL for each product.
* **Card template:** pick a layout, then set **Card background**, **Card corner radius**, and **Content padding**. These styles apply to every card.
## Save and reuse blocks
Save a block to reuse it in this or other emails instead of rebuilding it each time.
1. Click the block itself (its frame or background, not the text or button inside it) to select the whole block. Card, Columns, and Social are examples of blocks that work this way.
2. Click the bookmark icon in the block's toolbar and give it a name.
 Saved blocks appear under **Saved blocks** at the bottom of the **Blocks** tab.
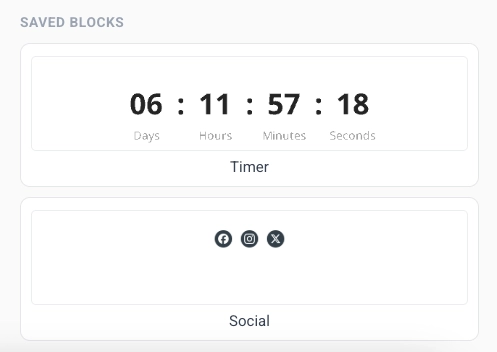 * Drag a saved block onto the canvas, or click it to add it at the end of the email.
* Click the **×** on a saved block's tile to delete it.
### Keep copies in sync
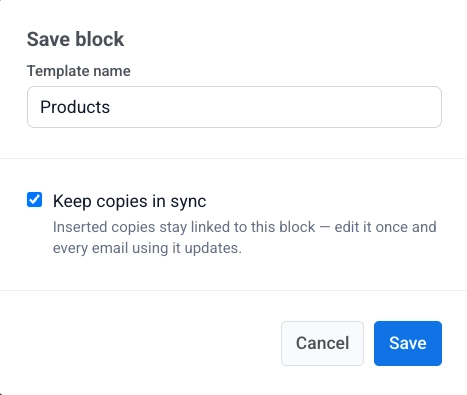
When you save a block, turn on **Keep copies in sync** to link every inserted copy to the same source. Edit the source once, and the change applies everywhere that block is used, including emails already scheduled to send.
* Drag a saved block onto the canvas, or click it to add it at the end of the email.
* Click the **×** on a saved block's tile to delete it.
### Keep copies in sync
When you save a block, turn on **Keep copies in sync** to link every inserted copy to the same source. Edit the source once, and the change applies everywhere that block is used, including emails already scheduled to send.
 A synced copy is locked on the canvas. You can't edit it directly. Select the copy to open its settings:
* **Edit synced block:** unlock this copy so you can change it. A banner appears at the top. Click **Apply to all** to save your changes to the source and every other copy, or **Cancel** to discard them. You can unlock only one synced block at a time.
* **Update from source:** replace this copy with the latest version from the source.
* **Detach from source:** unlink this copy from the source so you can edit it on its own.
## Add links
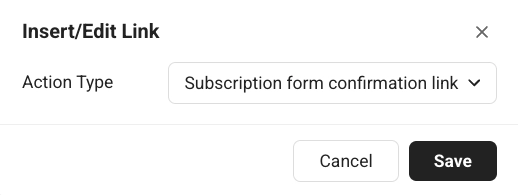
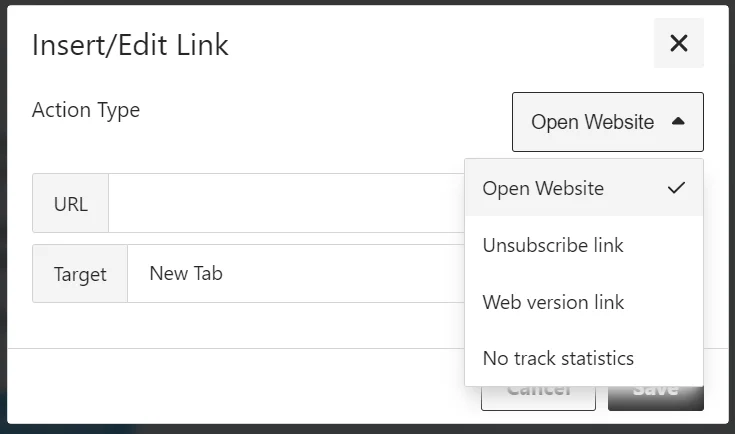
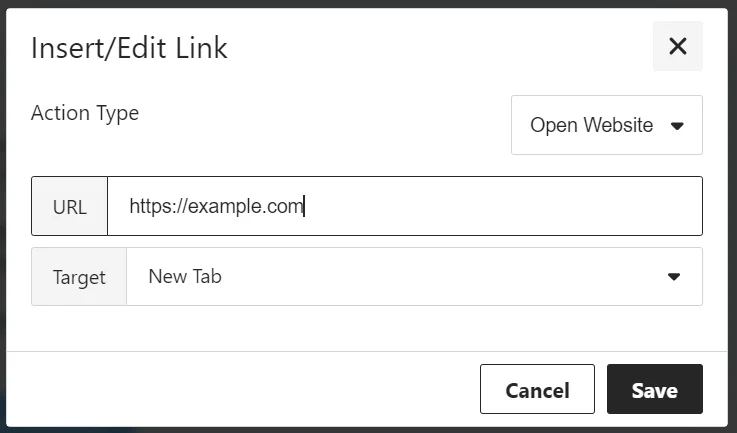
Use the **Insert/Edit Link** dialog to set what happens when a recipient clicks a button or selected text. Choose an **Action type**, then fill in the fields for that action.
### Open Website
Opens a link when the recipient clicks. Enter the address in **URL**.
A synced copy is locked on the canvas. You can't edit it directly. Select the copy to open its settings:
* **Edit synced block:** unlock this copy so you can change it. A banner appears at the top. Click **Apply to all** to save your changes to the source and every other copy, or **Cancel** to discard them. You can unlock only one synced block at a time.
* **Update from source:** replace this copy with the latest version from the source.
* **Detach from source:** unlink this copy from the source so you can edit it on its own.
## Add links
Use the **Insert/Edit Link** dialog to set what happens when a recipient clicks a button or selected text. Choose an **Action type**, then fill in the fields for that action.
### Open Website
Opens a link when the recipient clicks. Enter the address in **URL**.
 ### Manage preferences link
Adds a link to the [subscription preference center](/product/messaging-channels/emails/email-preferences/#optional-setup-full-preference-center) where recipients can choose which email categories they receive. The link is inserted automatically.
### Manage preferences link
Adds a link to the [subscription preference center](/product/messaging-channels/emails/email-preferences/#optional-setup-full-preference-center) where recipients can choose which email categories they receive. The link is inserted automatically.
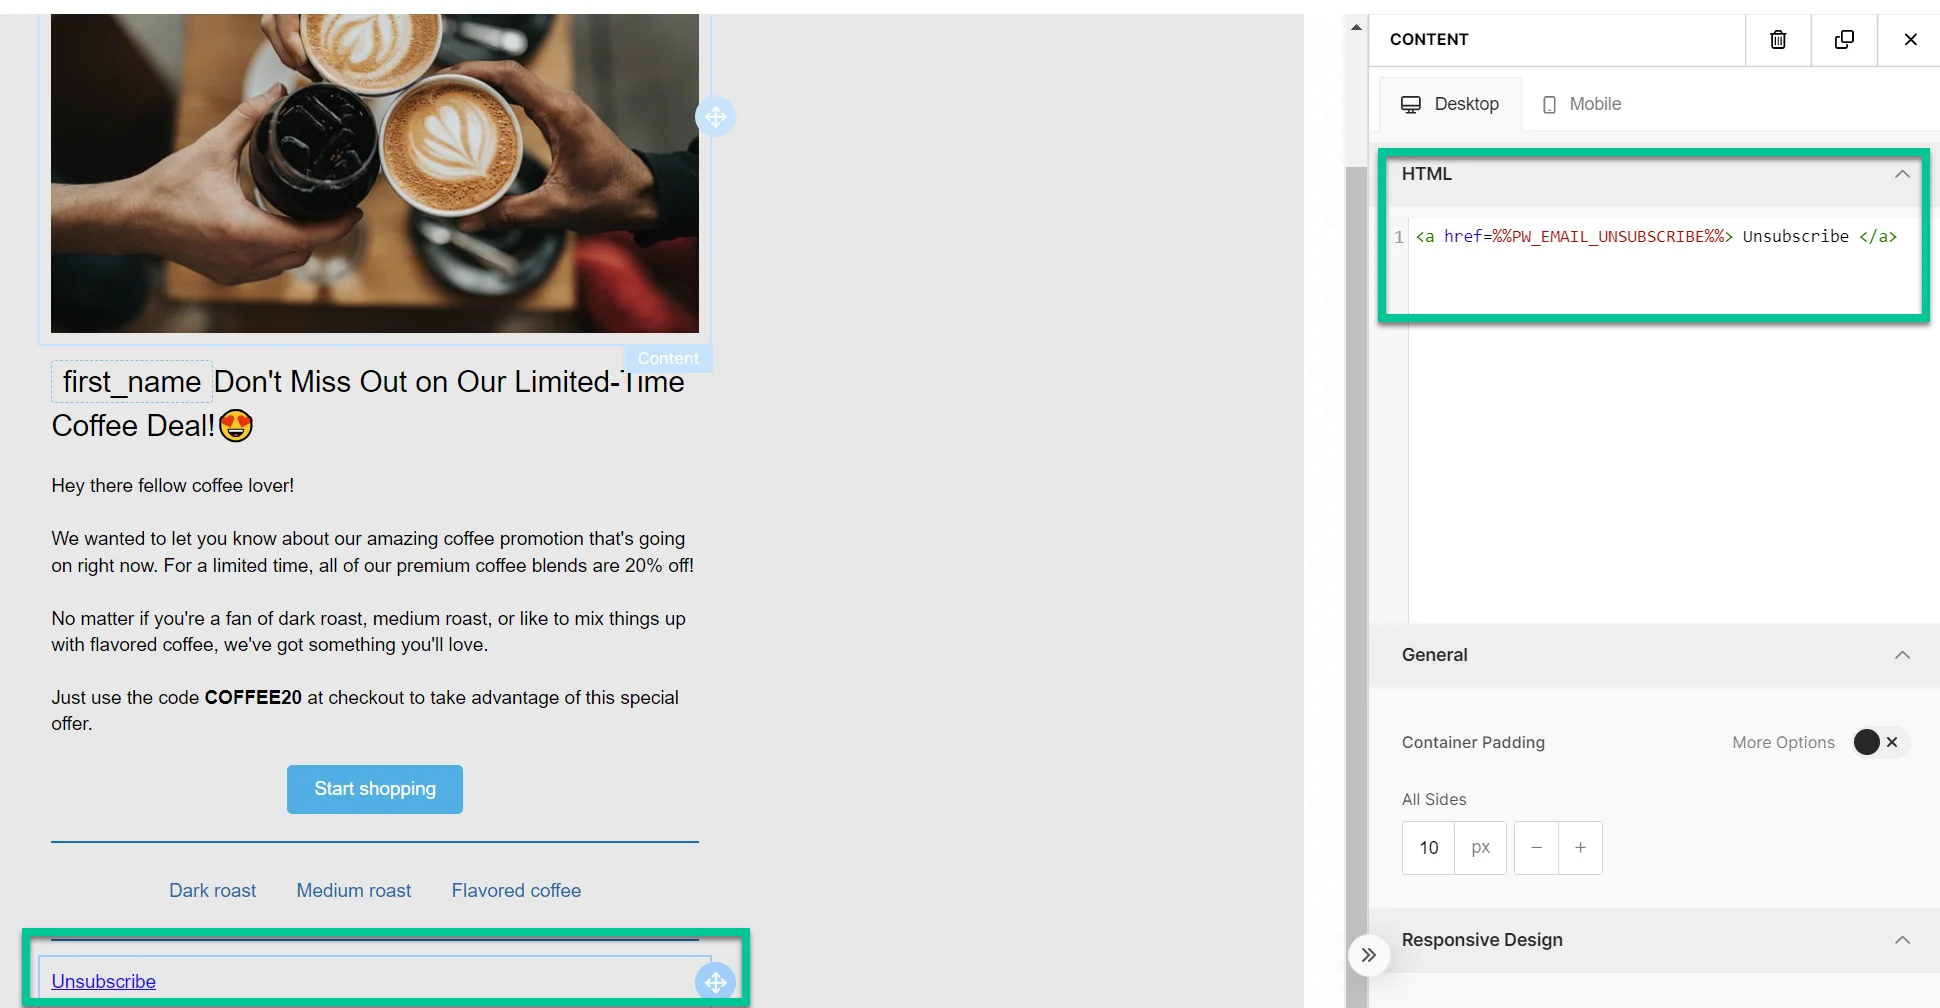
 ### Unsubscribe link
Lets recipients opt out in line with regulations and their preferences.
### Unsubscribe link
Lets recipients opt out in line with regulations and their preferences.
 #### What happens when the recipient clicks the unsubscribe link
##### If the subscription preference center is enabled
The recipient is unsubscribed only from the category assigned to that email (e.g., *Newsletter*). The category name is removed from their [**Subscribed Email Categories**](/product/messaging-channels/emails/email-preferences/#how-subscriptions-are-stored) tag.
A confirmation screen appears with **Resubscribe** and **Manage preferences** options. [Learn more](/product/messaging-channels/emails/email-preferences/#default-behavior-unsubscribe-from-a-category).
##### If the subscription preference center is not enabled
The recipient is opted out of all marketing emails and the [**Unsubscribed Emails**](/product/audience-data-and-segmentation/user-data-tags) tag is set to `true`. Transactional emails are not affected and will continue to be delivered. [Learn more about message types](/product/messaging-channels/marketing-vs-transactional/).
Clicks are counted in the unsubscribe rate in [Message History](/product/statistics-and-analytics/message-history).
### Web version link
Gives recipients access to a web version of the email, useful if they have trouble viewing it in their inbox.
#### What happens when the recipient clicks the unsubscribe link
##### If the subscription preference center is enabled
The recipient is unsubscribed only from the category assigned to that email (e.g., *Newsletter*). The category name is removed from their [**Subscribed Email Categories**](/product/messaging-channels/emails/email-preferences/#how-subscriptions-are-stored) tag.
A confirmation screen appears with **Resubscribe** and **Manage preferences** options. [Learn more](/product/messaging-channels/emails/email-preferences/#default-behavior-unsubscribe-from-a-category).
##### If the subscription preference center is not enabled
The recipient is opted out of all marketing emails and the [**Unsubscribed Emails**](/product/audience-data-and-segmentation/user-data-tags) tag is set to `true`. Transactional emails are not affected and will continue to be delivered. [Learn more about message types](/product/messaging-channels/marketing-vs-transactional/).
Clicks are counted in the unsubscribe rate in [Message History](/product/statistics-and-analytics/message-history).
### Web version link
Gives recipients access to a web version of the email, useful if they have trouble viewing it in their inbox.
 ### No track statistics
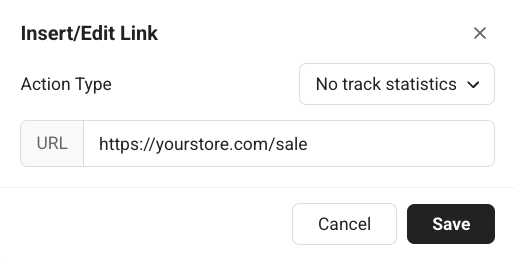
Opens a link when the recipient clicks, without counting the click toward your email's click statistics. Enter the address in **URL**.
### No track statistics
Opens a link when the recipient clicks, without counting the click toward your email's click statistics. Enter the address in **URL**.
 ### Subscription form confirmation link
Inserts a confirmation link for a subscription form submission (for example, to confirm a double opt-in). [Learn more about double opt-in](/product/audience-data-and-segmentation/subscription-forms/double-opt-in/).
### Subscription form confirmation link
Inserts a confirmation link for a subscription form submission (for example, to confirm a double opt-in). [Learn more about double opt-in](/product/audience-data-and-segmentation/subscription-forms/double-opt-in/).