# Create a Cloud Page
Use this guide to create and publish a Cloud Page.
## Before you start
- Cloud Pages is available on request. Contact [Pushwoosh Support](https://help.pushwoosh.com/hc/en-us/requests/new) to enable it for your project.
- Decide where to redirect users after the main action on the page, for example to a thank-you page, a results page, or any other URL.
## Create a page
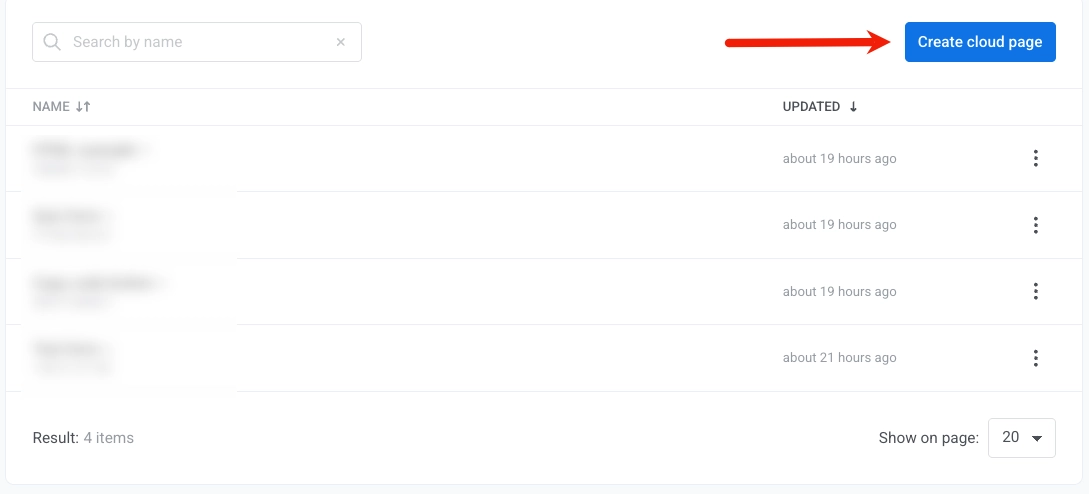
1. Go to **Content** → **Cloud Pages**.
2. Click **Create cloud page**.
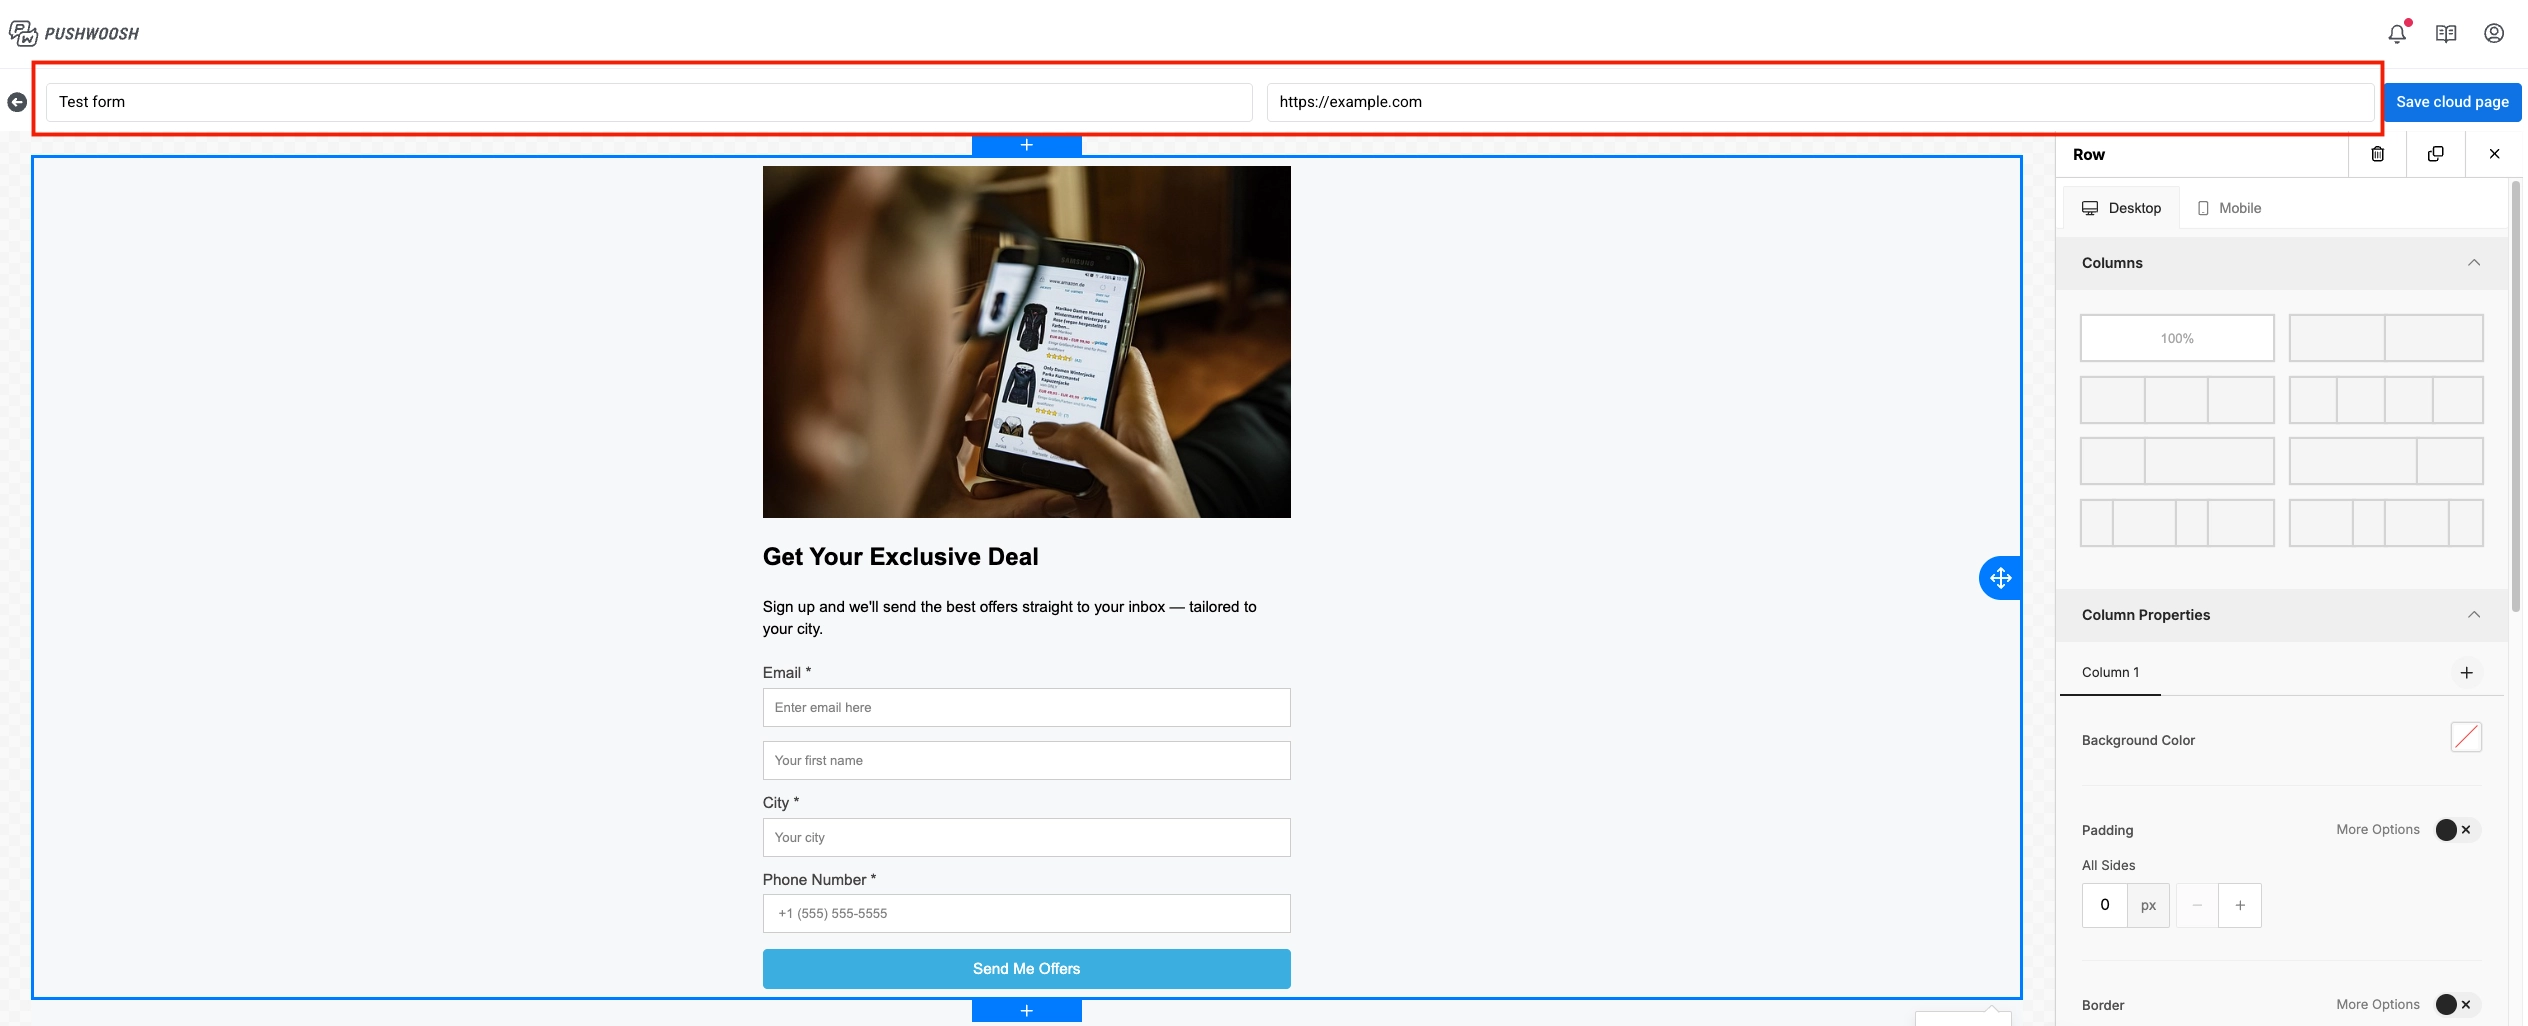
3. Enter the page name.
4. Add the URL in **Redirect to (after form submit)**. This field is required. Use it to define where users go after completing an action on the page, for example to a thank-you page or another campaign page.
5. In **On existing user**, choose what happens when an existing contact submits the form again:
- **Update existing user** (default): updates the contact profile fields with the submitted values.
- **Skip existing user**: registers the device the user submits from, but does not update existing tags on the contact profile.
- **Error for existing user**: for one-time signups such as exclusive offers or webinars. If the contact already exists, the submission is rejected, the profile is not updated, and the user is redirected back to the form and sees an error message.
## Build page content
The drag-and-drop workflow is similar to the [Drag & drop editor](/product/content/email-content/drag-and-drop-email-editor/).
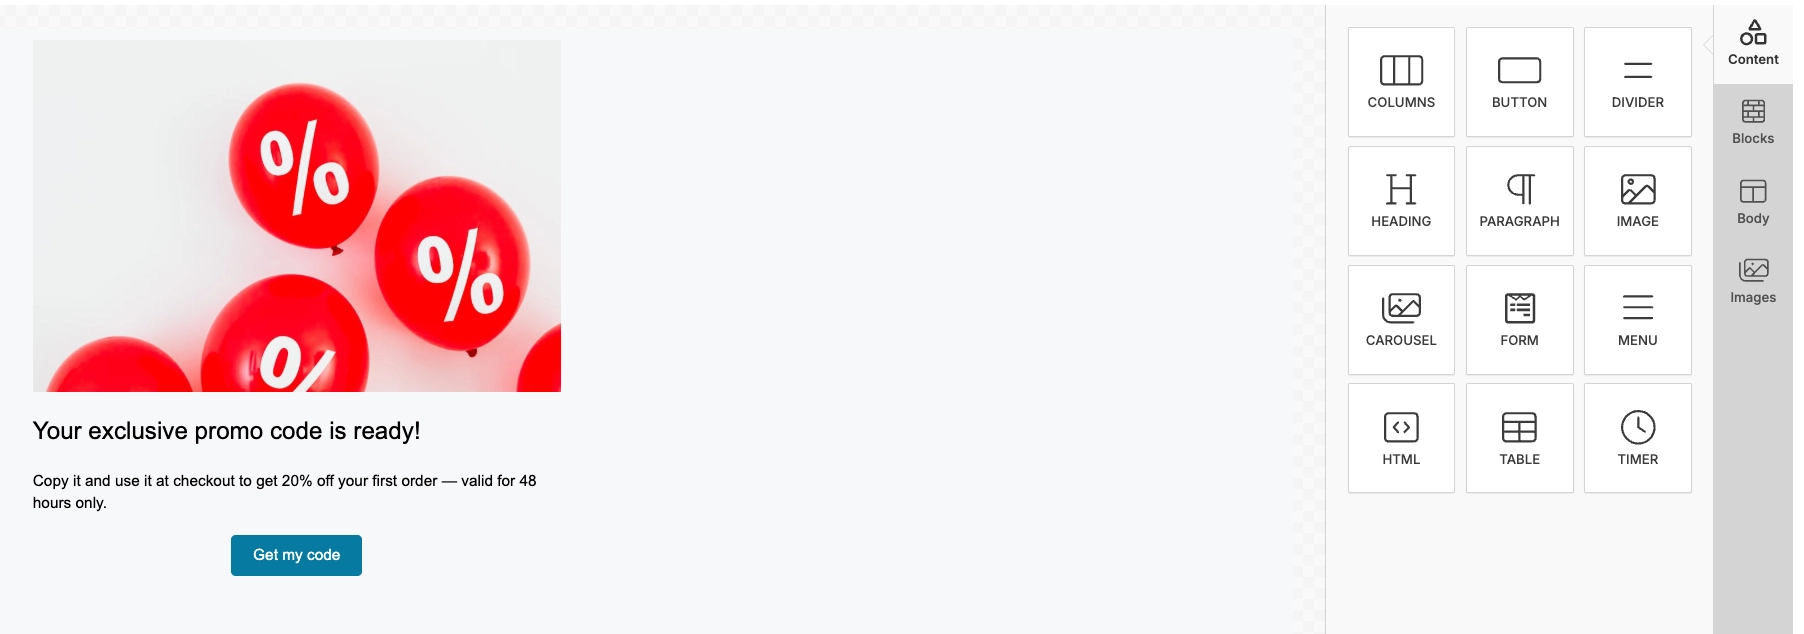
1. Open the **Content** panel in the editor.
2. Drag a block to the canvas.
3. Edit the block content.
4. Repeat for each required block.
5. Click **Save cloud page**.
### Add images
To add an image, drag an **Image** block to the canvas. Upload a file, pick a stock photo (**More Images** → **Stock Photos**), or paste an image URL from your [Media store](/product/content/media-store/).
## Create a lead or submission form
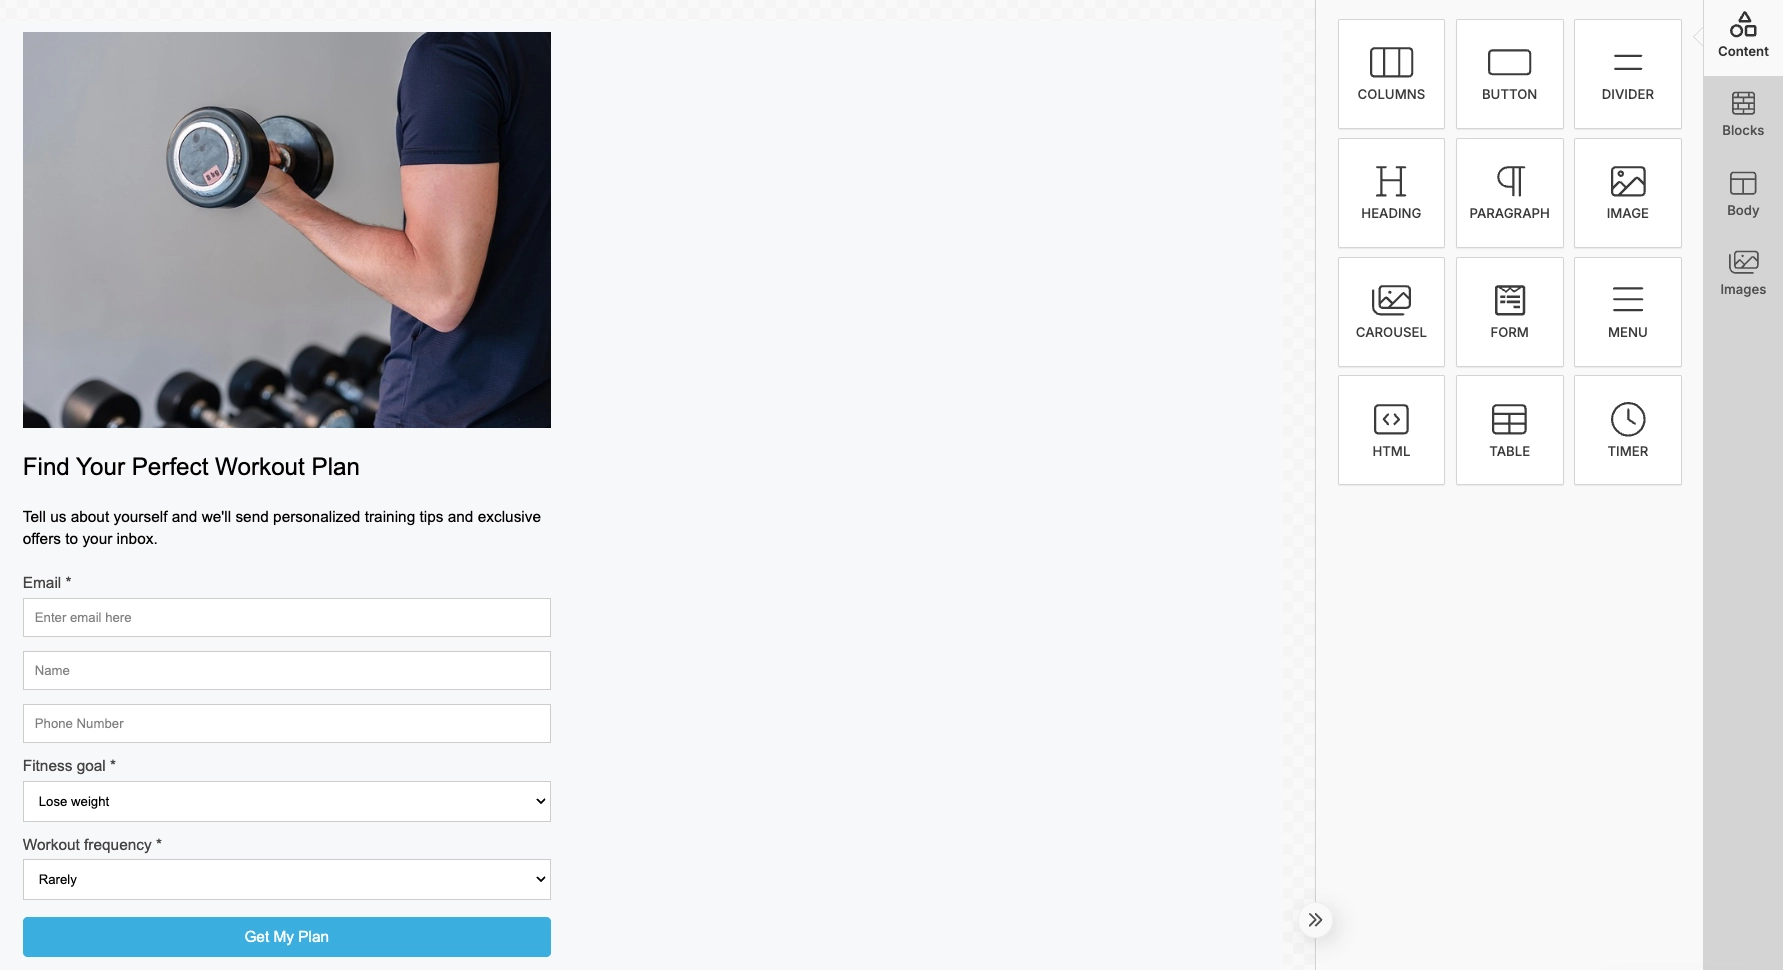
Add a form to collect contact details and other values you need for segmentation.
1. Add a **Form** block.
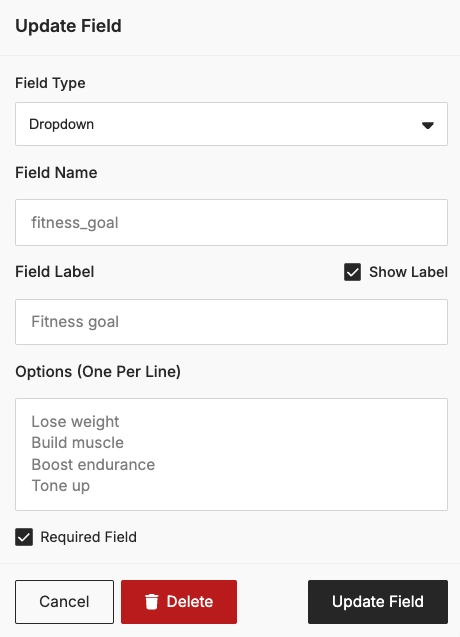
2. Add the fields you need. For each field, set the field type and field name, then enable **Required Field** for values users must provide before submit.
3. Configure the **Submit button**.
4. Once everything is ready, click **Save cloud page**.
### What happens after form submission
##### Contact profile and devices
When a user submits the form, Pushwoosh creates or updates a contact profile in [User Explorer](/product/audience-data-and-segmentation/user-explorer/).
For example, if the form includes an email field and a phone field, Pushwoosh registers one Email device and one SMS device. Both devices are linked under one [User ID](/product/pushwoosh-knowledge-hub/users-userids/).
##### Tags
All other fields are saved as custom tags by field name. For example, if your form has `fitness_goal` and `workout_frequency` fields, the contact profile will show tags like `fitness_goal = Boost endurance` and `workout_frequency = 3–4x a week`.
The page code is saved in the `PW_CloudPageCode` tag.
##### Event
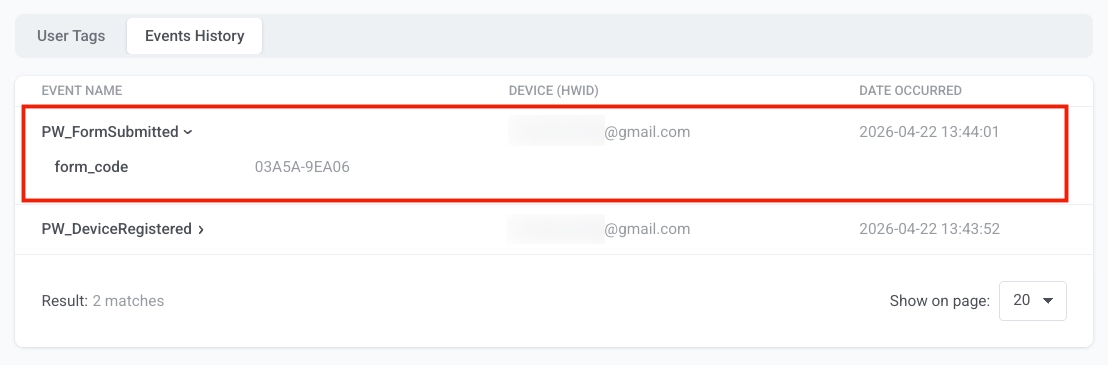
Pushwoosh fires `PW_FormSubmitted` on every form submission. You can see it in the **Events History** tab on the contact profile in [User Explorer](/product/audience-data-and-segmentation/user-explorer/). The event includes a `form_code` attribute that identifies which Cloud Page the submission came from, and a timestamp of when it occurred.
Use it as a trigger in Customer Journey to start welcome sequences, follow-up flows, and other automation.
For example, you can build a journey that sends a welcome email immediately after a user submits a fitness quiz form, then follows up with a personalized workout plan 24 hours later.
## Test the page
After you save the page, it becomes publicly accessible via its URL. The default format is `https://cloud-pages.svc-nue.pushwoosh.com/cloud-pages/v1/page/`.
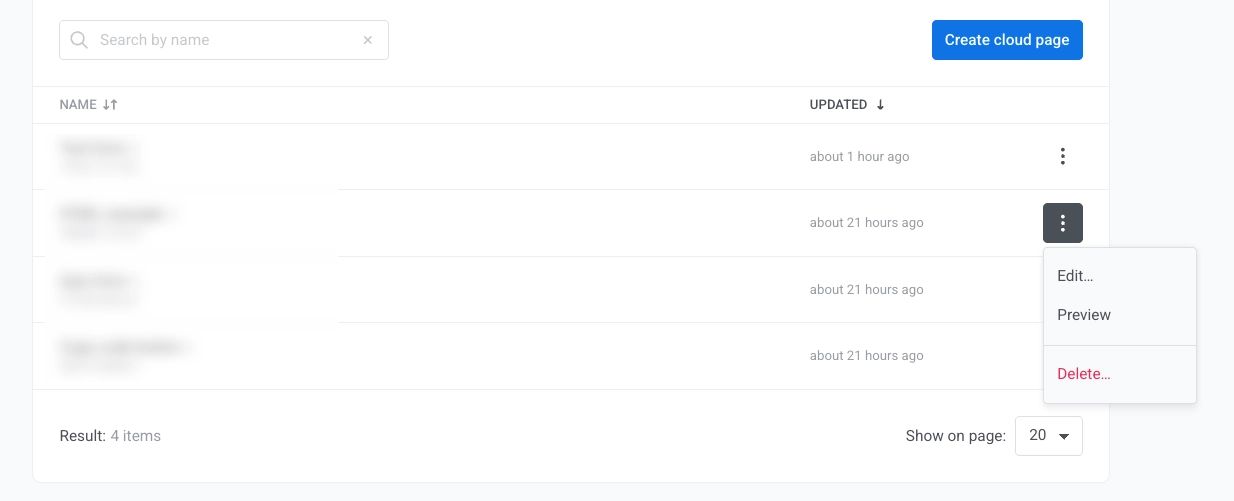
1. In the page list, open the page action menu and click **Preview**.
2. Verify that the page content loads correctly and is displayed as expected.
3. If your page includes a form, fill in the form with test data and click the submit button.
4. Confirm that the redirect opens the expected page.
5. Open [User Explorer](/product/audience-data-and-segmentation/user-explorer/) and confirm that the submitted user data and tags are displayed.
## Edit or delete a page
All Cloud Pages are listed in **Content** → **Cloud Pages**, where you can manage and edit them.
1. Go to **Content** → **Cloud Pages**.
2. Open the page action menu.
3. Click **Edit** or **Delete** the page.
 3. Enter the page name.
4. Add the URL in **Redirect to (after form submit)**. This field is required. Use it to define where users go after completing an action on the page, for example to a thank-you page or another campaign page.
3. Enter the page name.
4. Add the URL in **Redirect to (after form submit)**. This field is required. Use it to define where users go after completing an action on the page, for example to a thank-you page or another campaign page.
 5. In **On existing user**, choose what happens when an existing contact submits the form again:
- **Update existing user** (default): updates the contact profile fields with the submitted values.
- **Skip existing user**: registers the device the user submits from, but does not update existing tags on the contact profile.
- **Error for existing user**: for one-time signups such as exclusive offers or webinars. If the contact already exists, the submission is rejected, the profile is not updated, and the user is redirected back to the form and sees an error message.
5. In **On existing user**, choose what happens when an existing contact submits the form again:
- **Update existing user** (default): updates the contact profile fields with the submitted values.
- **Skip existing user**: registers the device the user submits from, but does not update existing tags on the contact profile.
- **Error for existing user**: for one-time signups such as exclusive offers or webinars. If the contact already exists, the submission is rejected, the profile is not updated, and the user is redirected back to the form and sees an error message.
 ## Build page content
The drag-and-drop workflow is similar to the [Drag & drop editor](/product/content/email-content/drag-and-drop-email-editor/).
1. Open the **Content** panel in the editor.
2. Drag a block to the canvas.
3. Edit the block content.
4. Repeat for each required block.
5. Click **Save cloud page**.
## Build page content
The drag-and-drop workflow is similar to the [Drag & drop editor](/product/content/email-content/drag-and-drop-email-editor/).
1. Open the **Content** panel in the editor.
2. Drag a block to the canvas.
3. Edit the block content.
4. Repeat for each required block.
5. Click **Save cloud page**.
 ### Add images
To add an image, drag an **Image** block to the canvas. Upload a file, pick a stock photo (**More Images** → **Stock Photos**), or paste an image URL from your [Media store](/product/content/media-store/).
## Create a lead or submission form
Add a form to collect contact details and other values you need for segmentation.
1. Add a **Form** block.
2. Add the fields you need. For each field, set the field type and field name, then enable **Required Field** for values users must provide before submit.
### Add images
To add an image, drag an **Image** block to the canvas. Upload a file, pick a stock photo (**More Images** → **Stock Photos**), or paste an image URL from your [Media store](/product/content/media-store/).
## Create a lead or submission form
Add a form to collect contact details and other values you need for segmentation.
1. Add a **Form** block.
2. Add the fields you need. For each field, set the field type and field name, then enable **Required Field** for values users must provide before submit.
 3. Configure the **Submit button**.
4. Once everything is ready, click **Save cloud page**.
3. Configure the **Submit button**.
4. Once everything is ready, click **Save cloud page**.
 ### What happens after form submission
##### Contact profile and devices
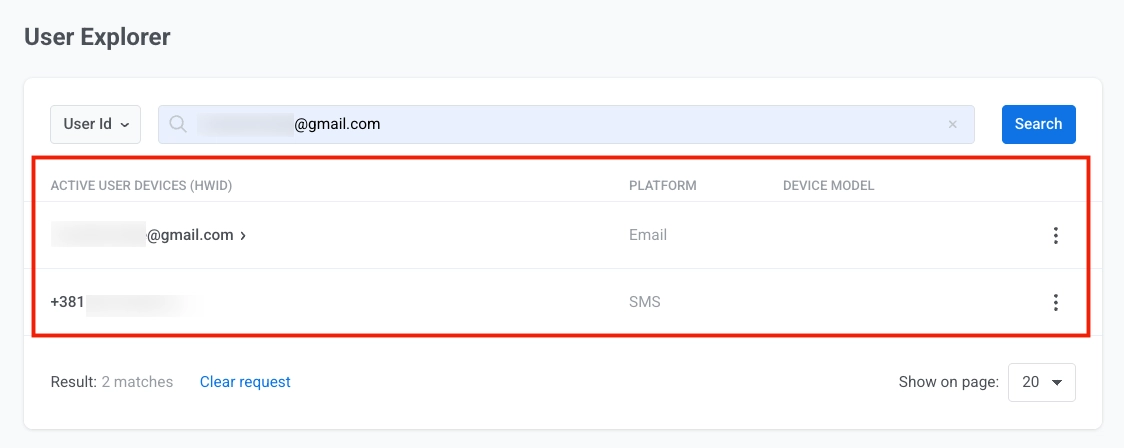
When a user submits the form, Pushwoosh creates or updates a contact profile in [User Explorer](/product/audience-data-and-segmentation/user-explorer/).
For example, if the form includes an email field and a phone field, Pushwoosh registers one Email device and one SMS device. Both devices are linked under one [User ID](/product/pushwoosh-knowledge-hub/users-userids/).
### What happens after form submission
##### Contact profile and devices
When a user submits the form, Pushwoosh creates or updates a contact profile in [User Explorer](/product/audience-data-and-segmentation/user-explorer/).
For example, if the form includes an email field and a phone field, Pushwoosh registers one Email device and one SMS device. Both devices are linked under one [User ID](/product/pushwoosh-knowledge-hub/users-userids/).
 ##### Tags
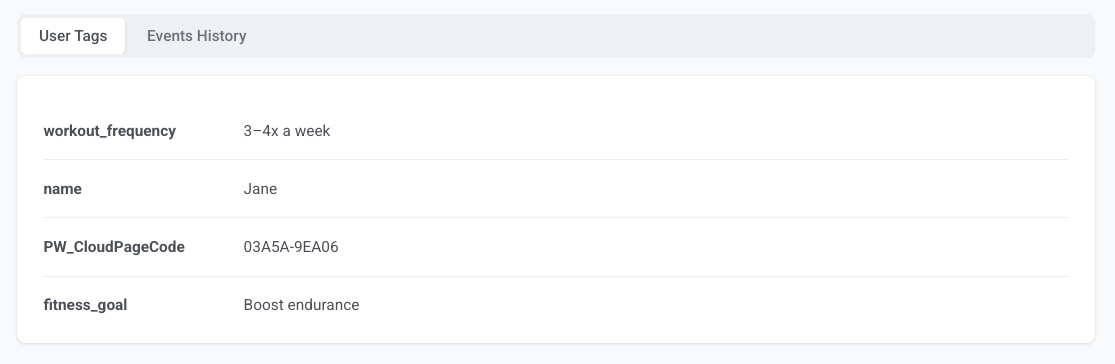
All other fields are saved as custom tags by field name. For example, if your form has `fitness_goal` and `workout_frequency` fields, the contact profile will show tags like `fitness_goal = Boost endurance` and `workout_frequency = 3–4x a week`.
The page code is saved in the `PW_CloudPageCode` tag.
##### Tags
All other fields are saved as custom tags by field name. For example, if your form has `fitness_goal` and `workout_frequency` fields, the contact profile will show tags like `fitness_goal = Boost endurance` and `workout_frequency = 3–4x a week`.
The page code is saved in the `PW_CloudPageCode` tag.
 ##### Event
Pushwoosh fires `PW_FormSubmitted` on every form submission. You can see it in the **Events History** tab on the contact profile in [User Explorer](/product/audience-data-and-segmentation/user-explorer/). The event includes a `form_code` attribute that identifies which Cloud Page the submission came from, and a timestamp of when it occurred.
##### Event
Pushwoosh fires `PW_FormSubmitted` on every form submission. You can see it in the **Events History** tab on the contact profile in [User Explorer](/product/audience-data-and-segmentation/user-explorer/). The event includes a `form_code` attribute that identifies which Cloud Page the submission came from, and a timestamp of when it occurred.
 Use it as a trigger in Customer Journey to start welcome sequences, follow-up flows, and other automation.
For example, you can build a journey that sends a welcome email immediately after a user submits a fitness quiz form, then follows up with a personalized workout plan 24 hours later.
## Test the page
After you save the page, it becomes publicly accessible via its URL. The default format is `https://cloud-pages.svc-nue.pushwoosh.com/cloud-pages/v1/page/
Use it as a trigger in Customer Journey to start welcome sequences, follow-up flows, and other automation.
For example, you can build a journey that sends a welcome email immediately after a user submits a fitness quiz form, then follows up with a personalized workout plan 24 hours later.
## Test the page
After you save the page, it becomes publicly accessible via its URL. The default format is `https://cloud-pages.svc-nue.pushwoosh.com/cloud-pages/v1/page/