Understanding segments
What are segments?
Anchor link toSegments are groups of app subscribers who meet the conditions you specify. These are users who have specific tag values assigned to their devices and/or user IDs.
Use segments to target audiences via push notifications, in-app messages, emails, customer journeys, etc.
Why use segments?
Anchor link toSegments enable you to:
- Target the right users: Send messages only to users who match your specific criteria
- Personalize campaigns: Create relevant content for different audience groups
- Improve engagement: Reach users at the right time with the right message
- Optimize costs: Avoid sending messages to uninterested users
How segments work
Anchor link toSegments are built using filters to define who should be included:
- Tags: User attributes like age, language, or subscription status
- Events: User actions like purchases or app opens
- Existing segments: Previously created segments that you can reuse and refine
- User ID: Known users identified by their Pushwoosh User ID
- Geo: Users who are near a selected point on the map
- Compound filters: Combinations of several filters and logic operators
When combining multiple conditions, use logical operators:
- AND: Users who meet all conditions
- OR: Users who meet any condition
- AND NOT: Users who meet first condition but exclude those who also meet second condition
This flexibility lets you create simple or complex audience targeting based on your needs.
Segment types at a glance
Anchor link toChoose the segment type that best fits your use case:
| Segment Type | What it does | Best for |
|---|---|---|
| By tags | Target users based on their attributes and profile data | Segmenting by age, language, or subscription status |
| By events | Target users based on their actions and app behavior | Targeting purchasers, users who opened the app, content viewers |
| By existing segments | Combine or refine previously created segments | Reusing complex segment logic, combining multiple segments |
| By User ID | Target known users by Pushwoosh User ID | Precise targeting for known user lists |
| By geolocation | Target users near a selected point within a defined radius | Location-based campaigns and local offers |
| With compound filters | Combine multiple filter types using AND/OR/AND NOT logic | Advanced targeting like “purchased AND opened app in last 7 days” |
| Anniversary segments | Target users on specific dates each year | Birthday campaigns, app anniversary offers, seasonal promotions |
| From CSV import | Upload a file with user IDs or device IDs | Bulk importing user lists |
| With AI | Instantly creates segments from your plain-language descriptions using advanced natural language processing | Quick segment creation, intuitive design for new users, time-saving automation |
| RFM segmentation | Classifies users based on Recency, Frequency, and Monetary value of their purchase behavior | Purchase behavior analysis, identifying top spenders, churn risk detection |
Create your segment
Anchor link toTo build a segment:
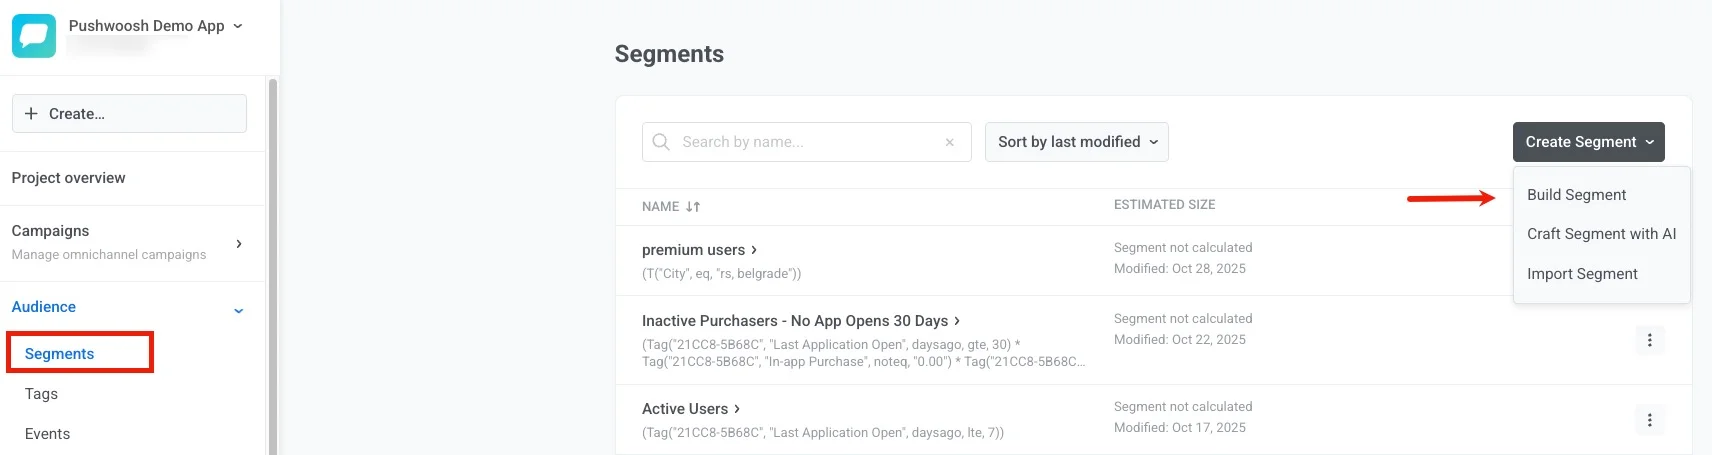
- Go to the Segments section of the Pushwoosh Control Panel (Audience → Segments).
- Press the Create Segment button.
- Choose Build Segment from the dropdown menu.
Manage your segments
Anchor link toKeep your segments up-to-date and optimized with the following management options.
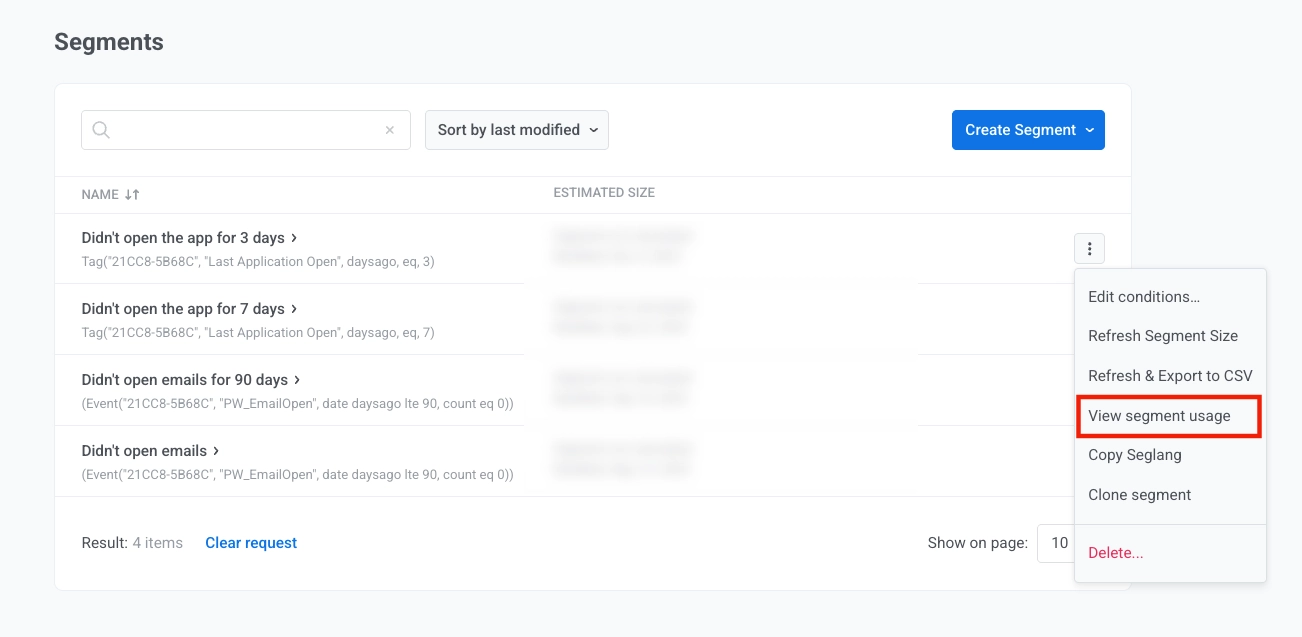
Segments list
Anchor link toOn the Segments page you can search segments, sort by last modified, and create new ones with the Create Segment dropdown.
The table shows:
- Name: Segment name with the segment logic (Seglang) under it
- Estimated size: The calculated size or “Segment not calculated” and the last modified date
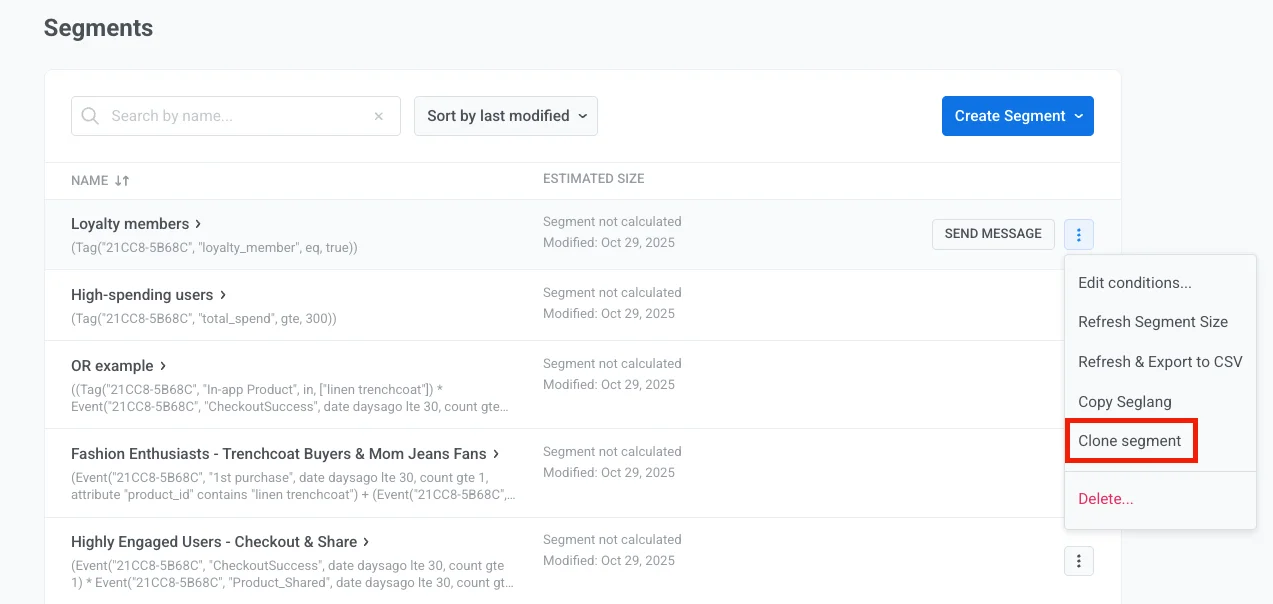
- Actions: Open the three-dot menu to edit conditions, refresh size, export to CSV, view segment usage, copy Seglang, clone, or delete the segment
- Send message: Click it to open the Create campaign dialog, where you choose a campaign type (one-time push or email, or an advanced campaign: push-based, email, in-app, SMS, or WhatsApp).
Actions with segments
Anchor link toThese actions are available from the three-dot menu next to each segment in the Segments list. Some actions are also available on the segment detail page.
Edit conditions
Anchor link toTo change the rules that define a segment, choose Edit conditions.
Alternatively, open the segment and click Edit conditions in the header.
Refresh segment size
Anchor link toSelect Refresh Segment Size to recalculate audience counts.
Export segment users
Anchor link toExport segment data to CSV to analyze user lists, integrate with external systems, or back up segment information.
You can export a segment in two ways:
-
Select Export segment users… in the action menu next to the segment.
-
Select Generate CSV for export from the three-dot menu on the segment detail page.
Before export, choose which fields to include in the CSV directly in the Control Panel:
- Select identifiers in Data fields.
- Select the required items in Tags.
- Click Export.
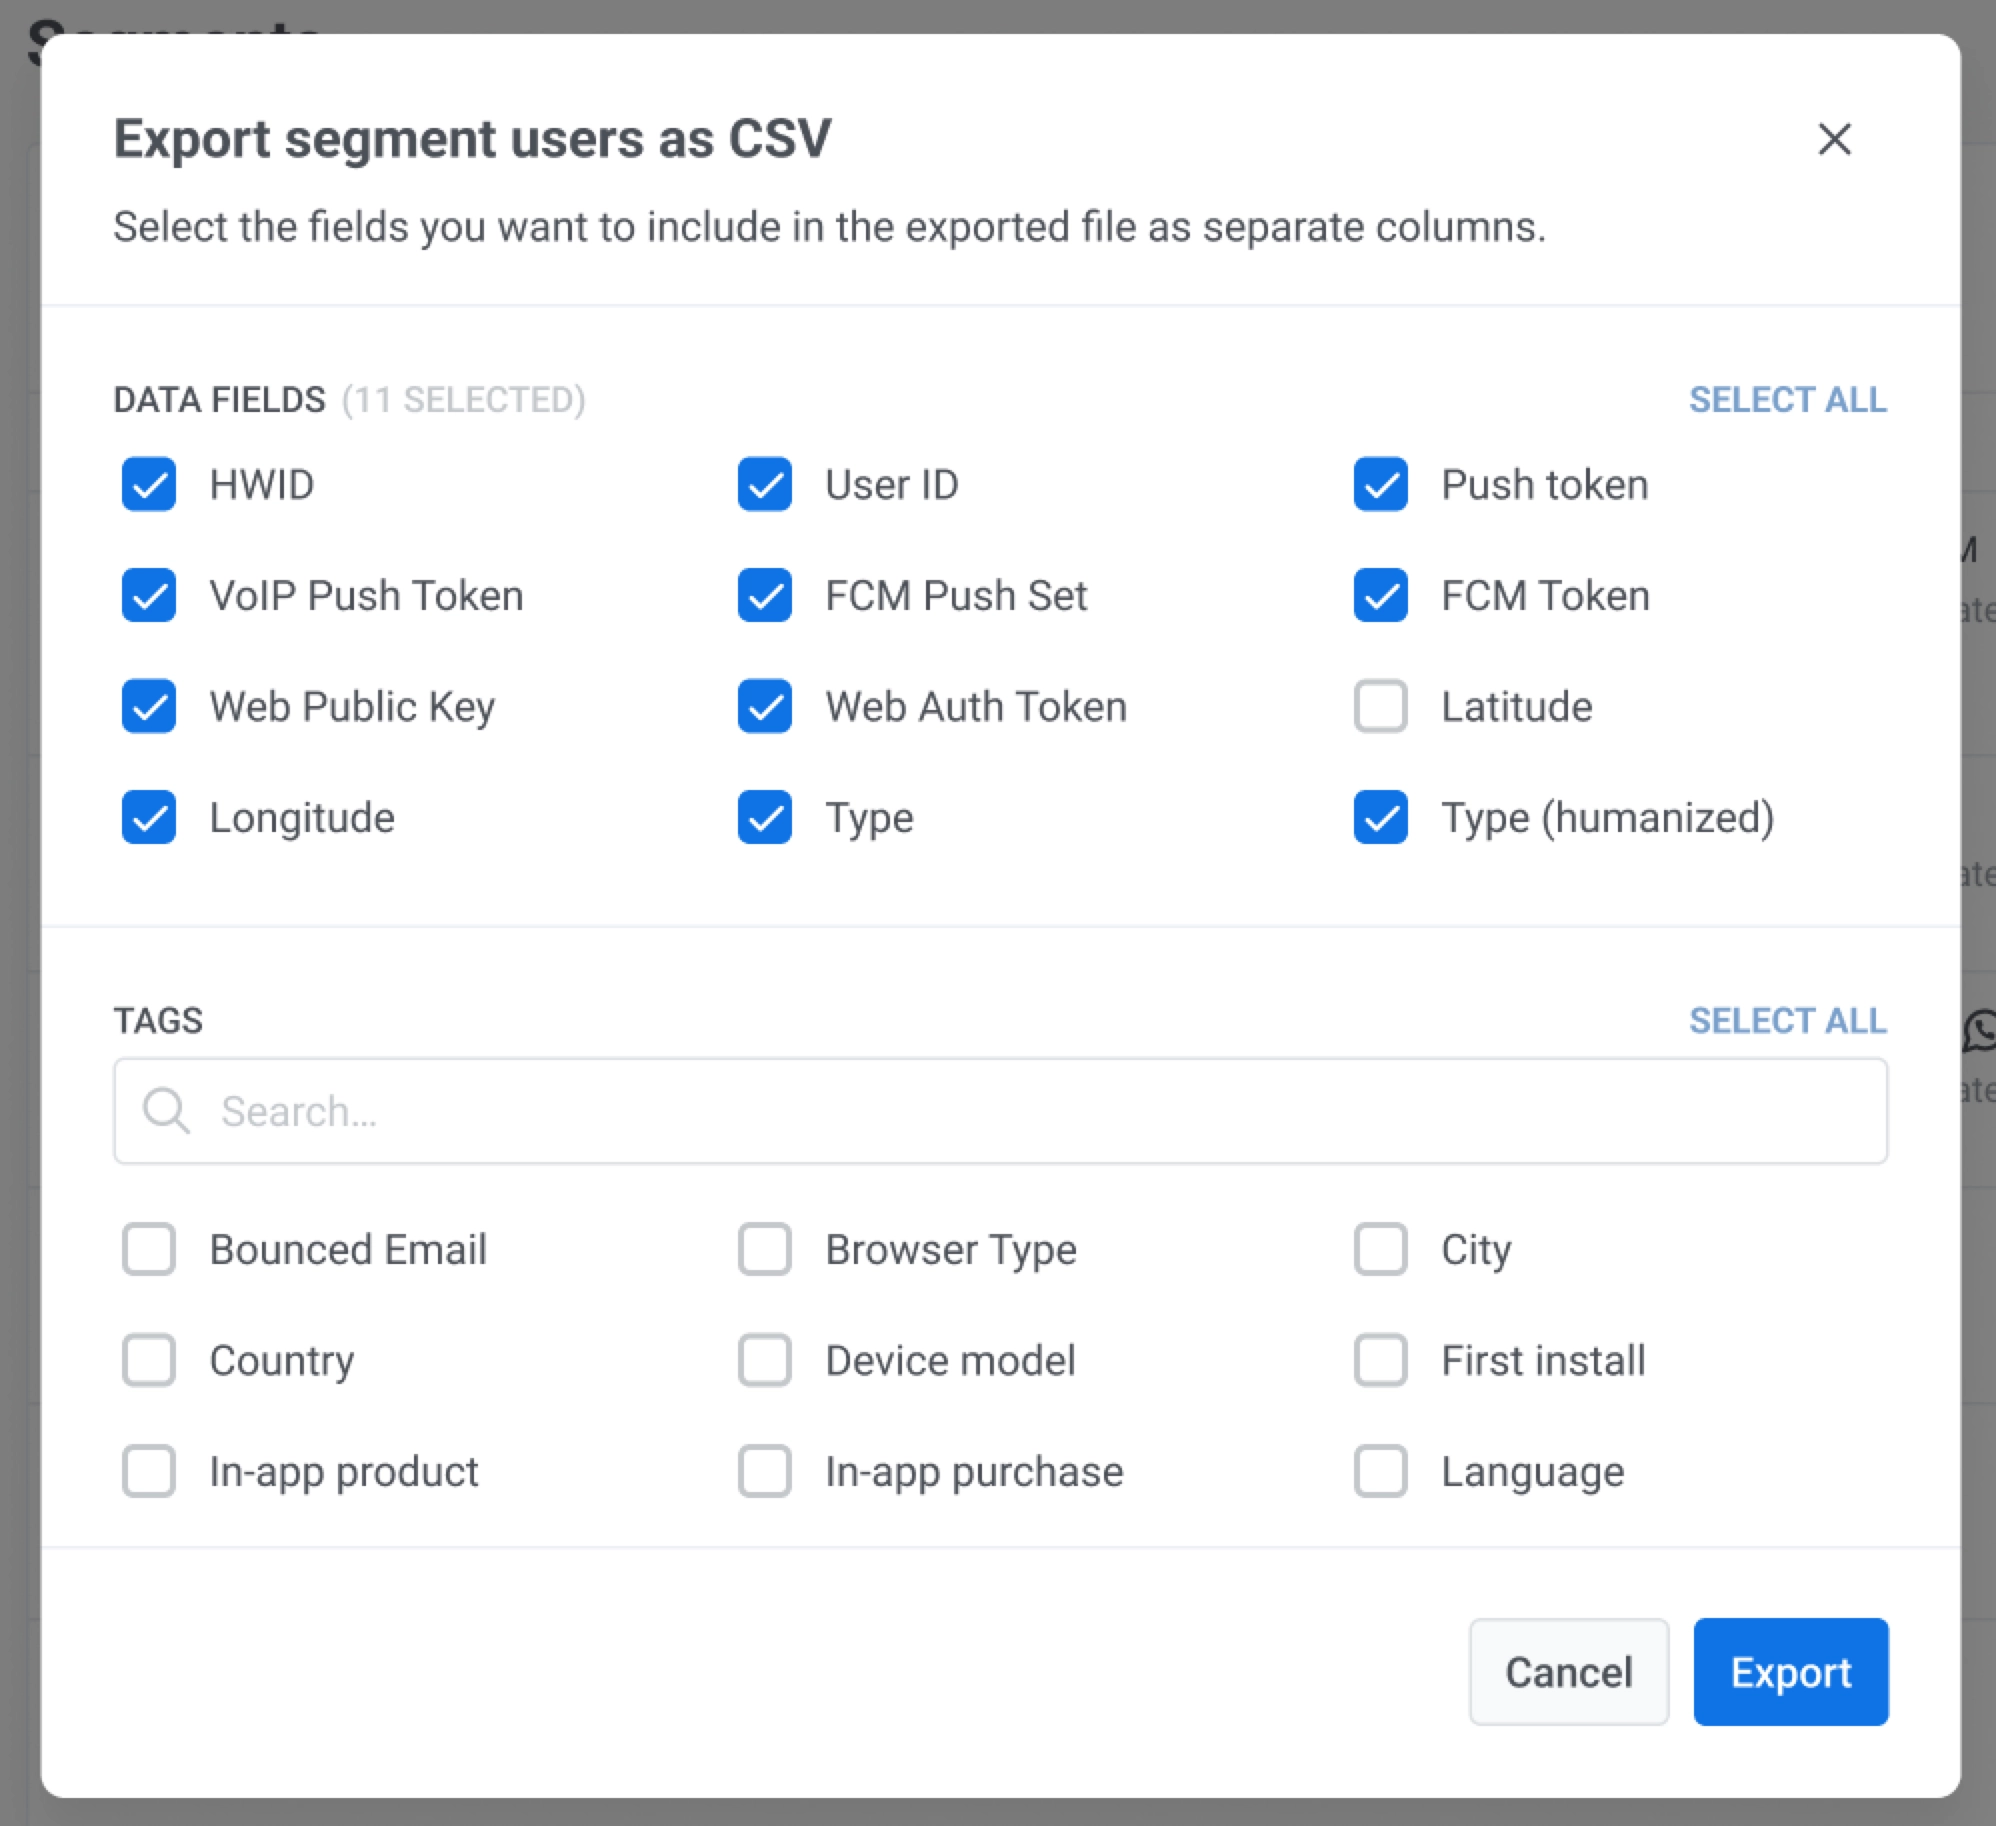
The CSV fields depend on your selection in the export dialog.
Copy Seglang
Anchor link toSegmentation Language is a syntax to define and apply specific conditions or filters when segmenting your audience.
The Copy Seglang option allows you to copy the underlying logic of a segment you’ve created.
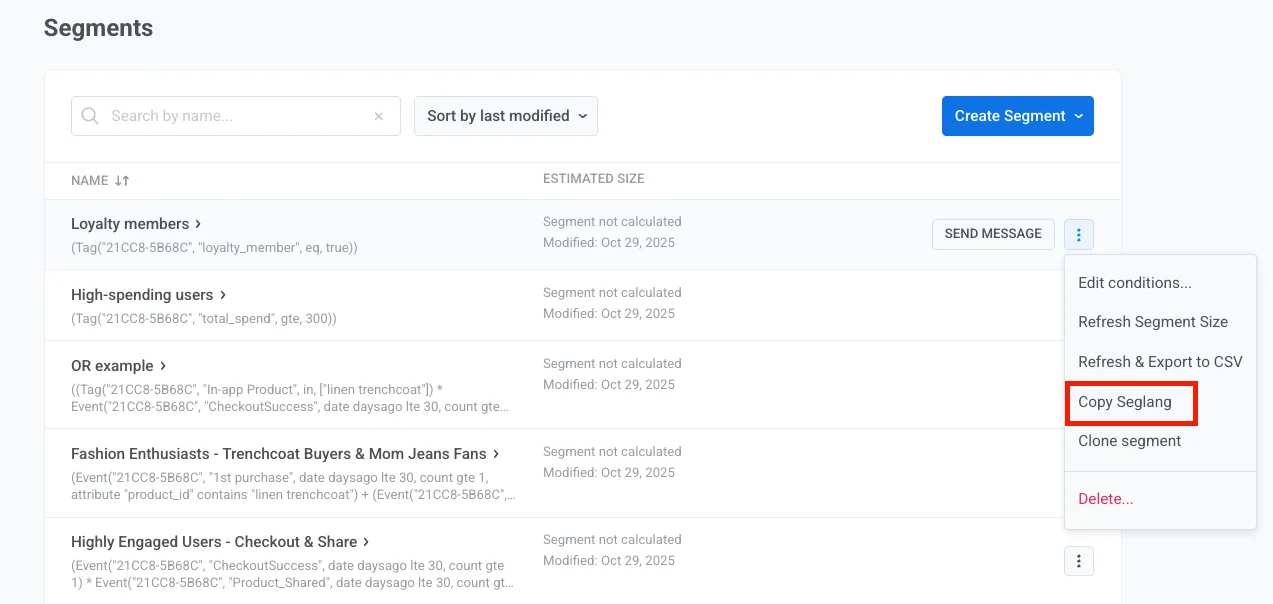
The copied Segmentation Language can then be used in API calls, such as the createmessage API method or API-based customer journey entries, to replicate the same segmentation logic.
Clone segment
Anchor link toQuickly create new segments based on existing ones. Cloning saves time when you need similar audience definitions with slight modifications.
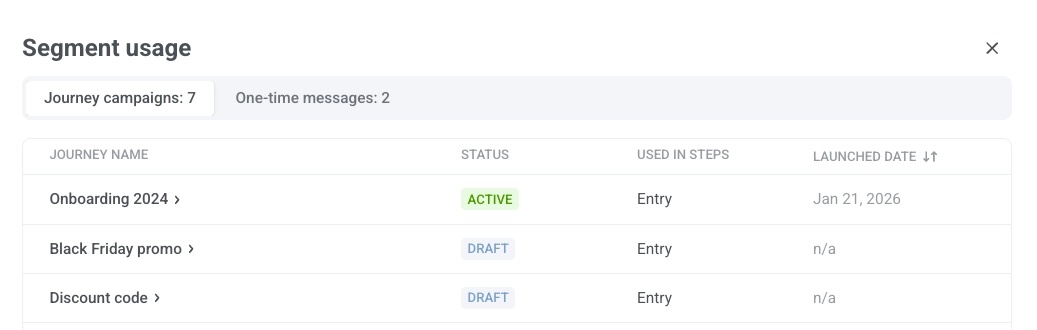
View segment usage
Anchor link toBefore changing or deleting a segment, you can see which customer journeys use it. Choose View segment usage.
The Segment usage modal shows a table with the journeys and campaigns that use the segment.
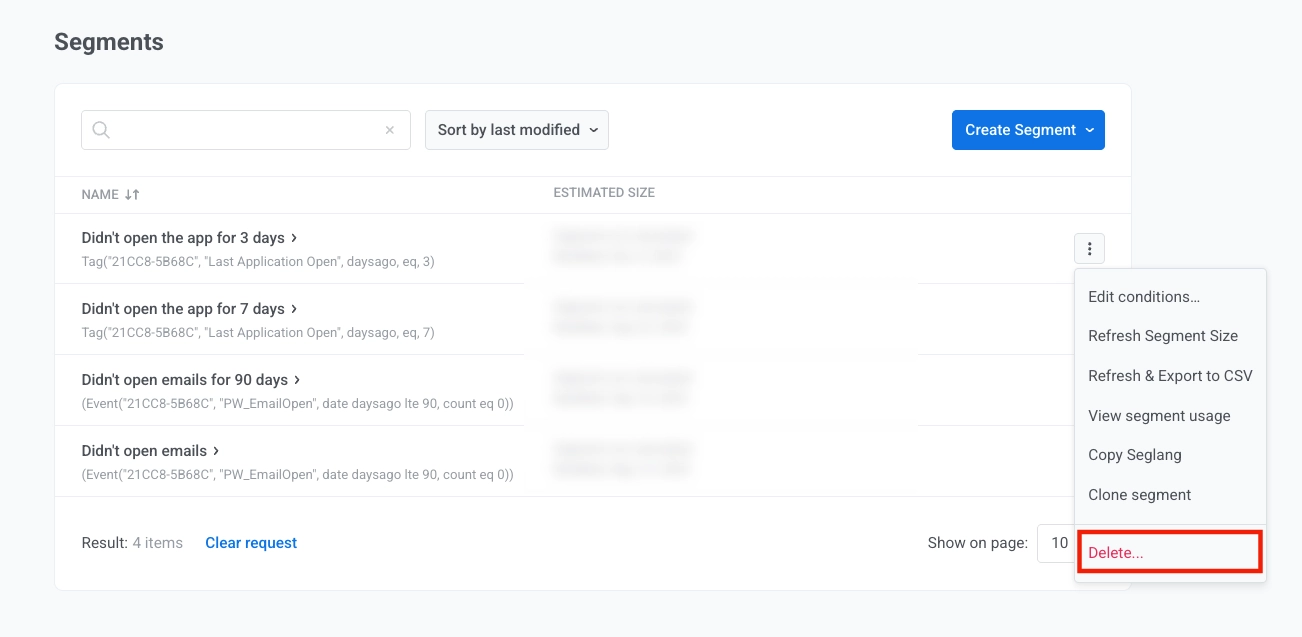
Delete segment
Anchor link toTo remove a segment, choose Delete.
Deleting a segment does not remove or change user data. Campaigns (customer journeys) that use this segment will be paused, and any messages scheduled to that segment will be cancelled. Before confirming, you can see which journeys use the segment and how they will be affected.
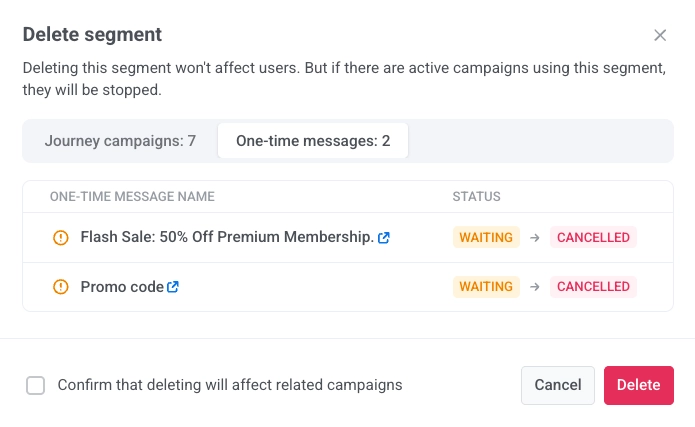
Check Confirm that deleting will affect related campaigns to acknowledge the impact, then click Delete to proceed or Cancel to close.
Advanced features
Anchor link toHigh-Speed Delivery segments
Anchor link toHigh-Speed Delivery segments keep updated every 10 minutes, ensuring minimal delay when launching messages. Use these segments when you need the fastest possible message delivery.
RFM analysis
Anchor link toUse recency, frequency, and monetary analysis to identify your most valuable customers and create targeted campaigns for different customer value tiers.
API-based segmentation
Anchor link toCreate and manage segments programmatically using API methods. This approach is ideal for automated segment management and integration with external systems.