# Understanding events in Pushwoosh
**Events** are intended to record various actions a user performs in the app. Unlike Tags that store flat data (such as country, device model, or installation data), event data is stored historically. This creates a history of user behavior rather than static device information. All contextual information about the event can be passed as attributes and their values.
Pushwoosh events fall into three categories: [Default events](/product/audience-data-and-segmentation/events/default-events/) available out of the box, [Custom events](/product/audience-data-and-segmentation/events/custom-events/) you define for your app, and [Conversion events](/product/audience-data-and-segmentation/events/conversion-events/) for tracking revenue in a unified format.
Once properly collected, this data can be used to:
* Trigger behavior-based messages.
* Build segments of users who perform a specific action in the app.
* Get insights about user flow, usage metrics, and other statistical data.
## Implementation
### 1. Create events in Pushwoosh Control Panel
All events sent by your app must be created in Pushwoosh first with the set of attributes and their types. Otherwise, Pushwoosh will not recognize them.
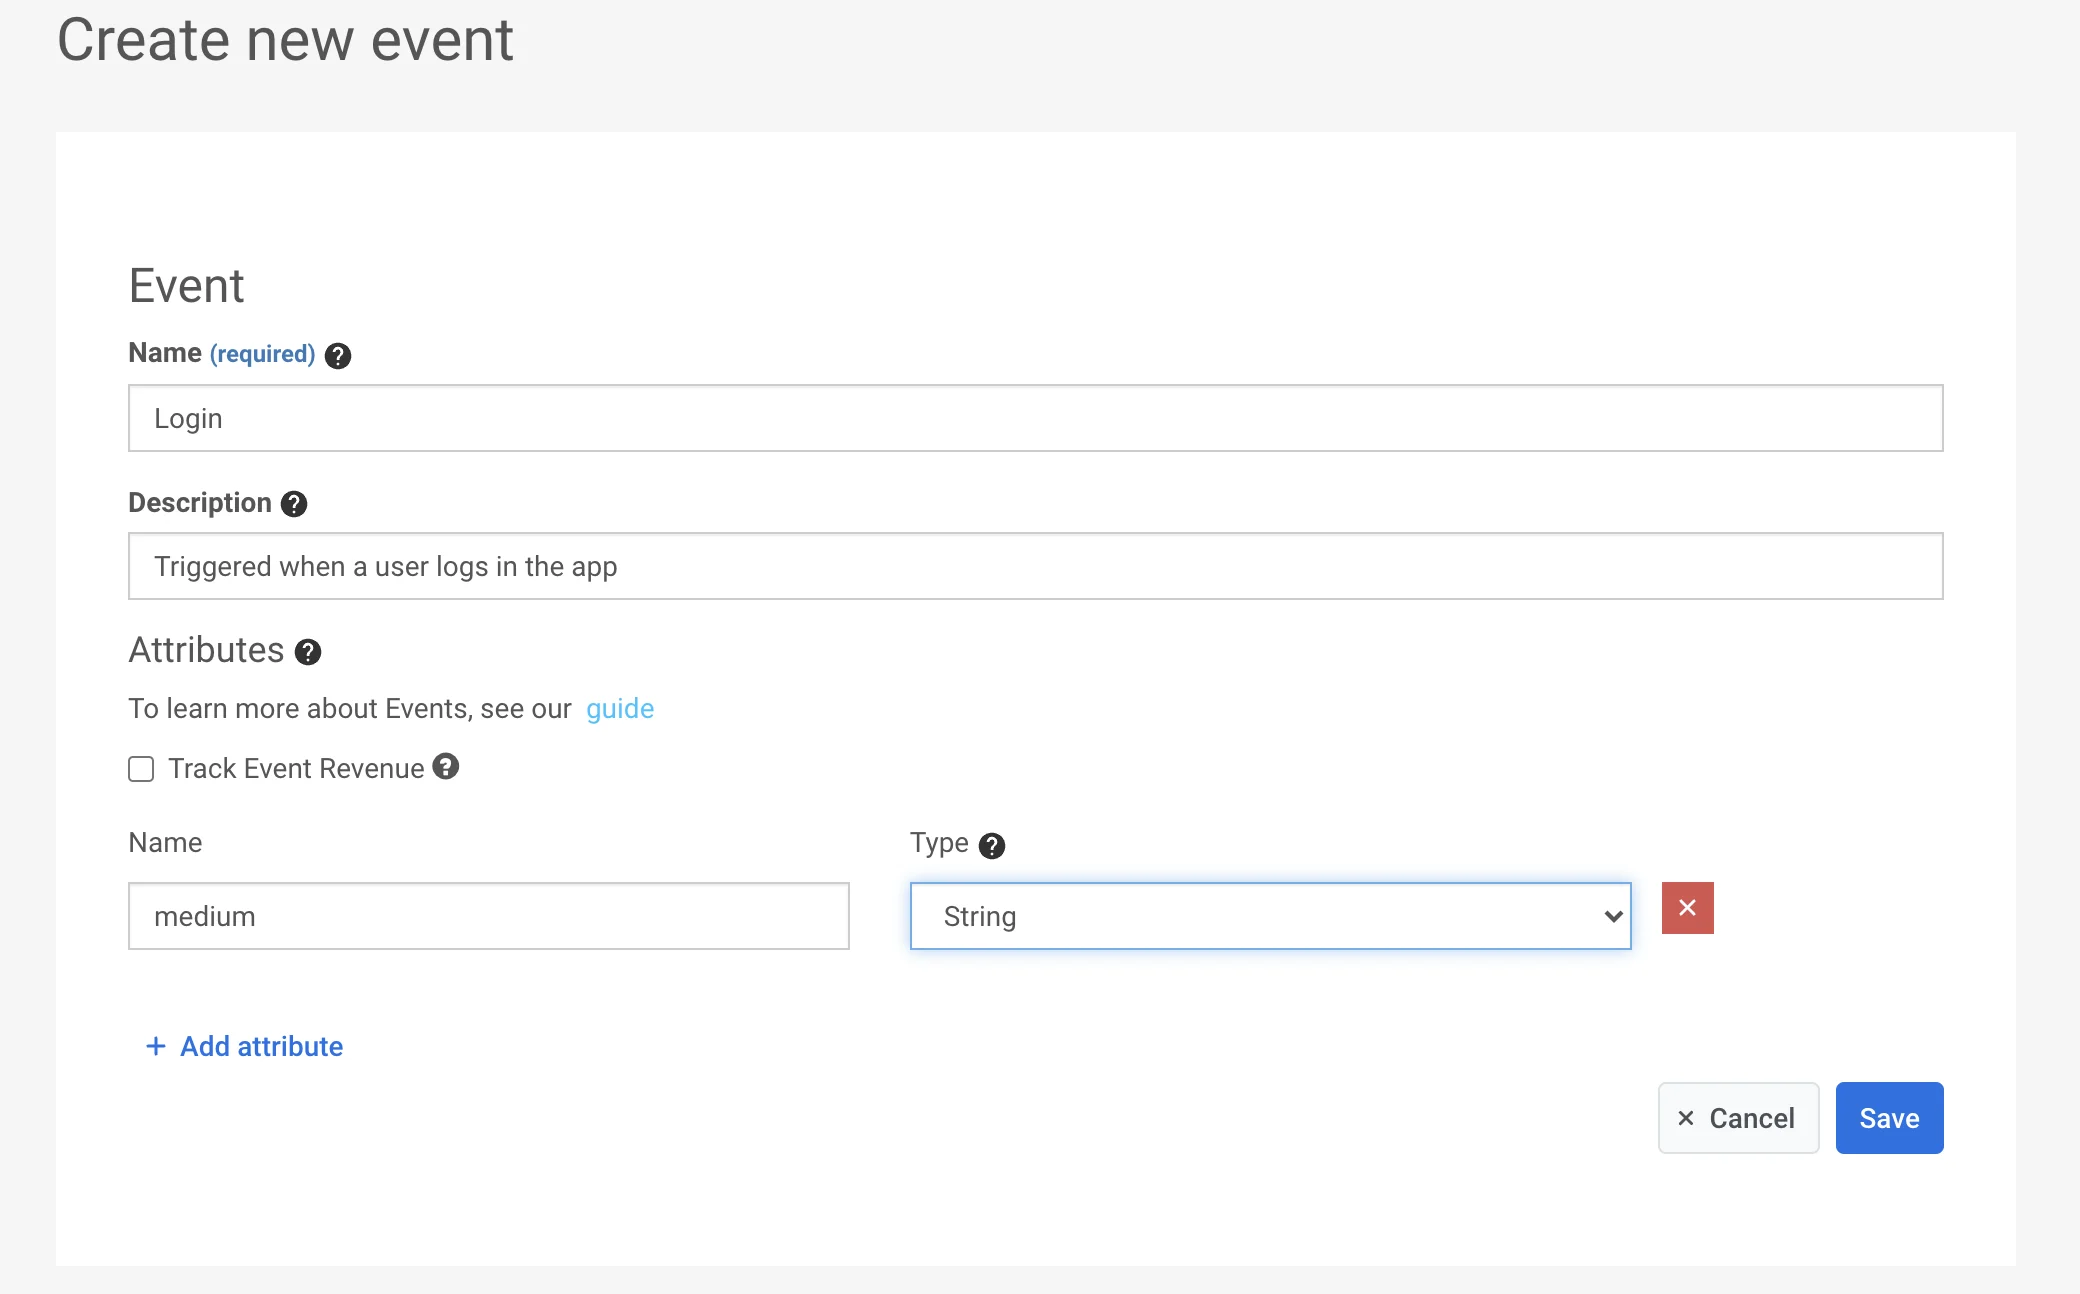
To create an event, go to the **Events** section of your Control Panel and press the **Add event** button. Enter the name and description and add the [attributes](#2-set-attributes) if needed.
### 2. Set attributes
All details describing an event are provided with its attributes. Attributes are key/value pairs. In the Control Panel you can choose one of these types:
* **integer**
* **string**
* **boolean**
* **list**
* **decimal (price)**
* **date**
For example, you can track user logins and collect login credentials (e.g., logged in with Facebook, Google, Twitter, or email), internet connection type (wifi, cellular, unknown), and whether it was successful or not (true or false values) with a single Login event by specifying its attributes as follows:
| attribute | type | value |
| ---------- | ------- | -------------------------------- |
| type | string | facebook, google, twitter, email |
| connection | string | wifi, cellular, unknown |
| success | boolean | true, false |
This event will be recorded in Pushwoosh with attribute values and a timestamp, so later it can be used for building segments, targeting messages, and collecting stats.
### 3. Call /postEvent API
## Importing events
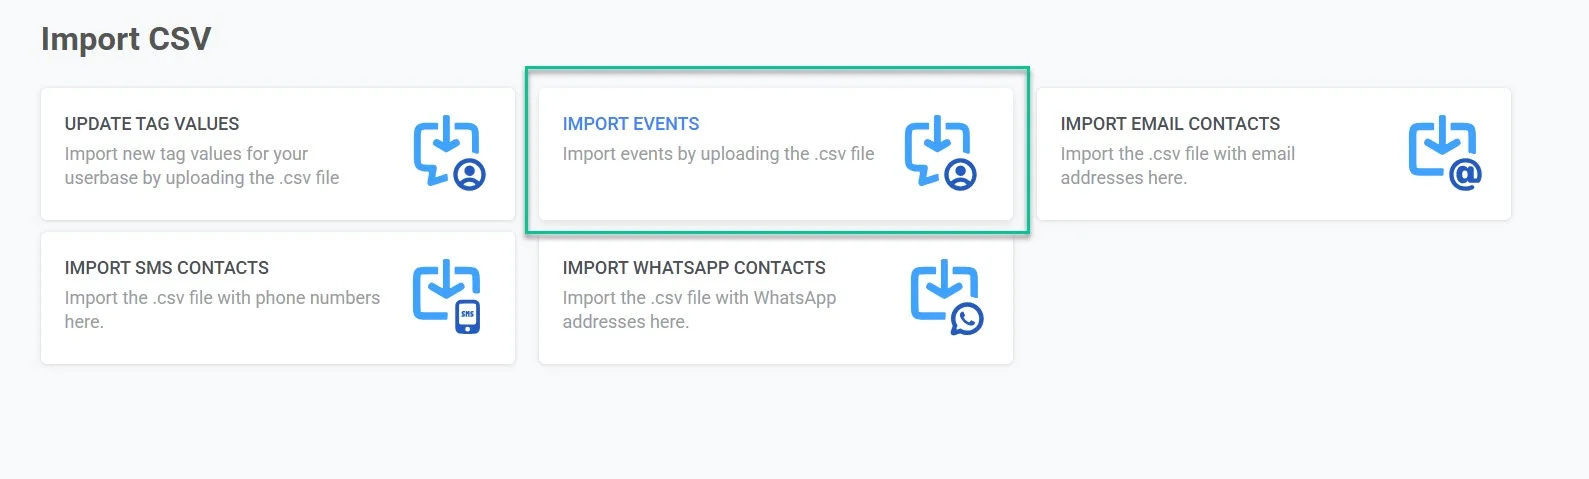
The **Import events** feature allows you to upload event data from a CSV file, making it easy to track and analyze user activity in bulk. You can import events from various analytics and CRM systems to enhance your data and improve segmentation.
To import events, navigate to **Audience** → **Import CSV** → **Import events**.
### Step 1. Upload CSV
Upload a CSV file containing event data. The file must include the following required columns:
* **Event name:** the name of the event.
* **Event date:** the date and time when the event occurred.
* **HWID or User ID:** a unique identifier for the user associated with the event.
You can also include additional columns for optional event attributes to enhance your data.
To upload your file, drag and drop the CSV into the upload area or click to select a file from your device. The maximum file size allowed is 100 MB.
### Step 2\. Map columns
After uploading the file, you must map the CSV columns to the corresponding event attributes in Pushwoosh.
* Assign each required field (Event Name, Event Date, HWID, or User ID) to the correct column in your file.
* If your CSV contains custom attributes, map them to meaningful names that align with your data tracking needs.
* Click **Add attribute** to include extra fields if needed.
Once all columns are correctly mapped, click **Import events**.
Once the import is successfully completed, a confirmation message will be displayed. You can now use these events to maximize the potential of your campaigns.
If needed, you can upload another file to continue importing additional data.
You can find the imported events in the **Events History** section of [**User Explorer**](/product/audience-data-and-segmentation/user-explorer/).
 ### 2. Set attributes
All details describing an event are provided with its attributes. Attributes are key/value pairs. In the Control Panel you can choose one of these types:
* **integer**
* **string**
* **boolean**
* **list**
* **decimal (price)**
* **date**
### 2. Set attributes
All details describing an event are provided with its attributes. Attributes are key/value pairs. In the Control Panel you can choose one of these types:
* **integer**
* **string**
* **boolean**
* **list**
* **decimal (price)**
* **date**
 For example, you can track user logins and collect login credentials (e.g., logged in with Facebook, Google, Twitter, or email), internet connection type (wifi, cellular, unknown), and whether it was successful or not (true or false values) with a single Login event by specifying its attributes as follows:
| attribute | type | value |
| ---------- | ------- | -------------------------------- |
| type | string | facebook, google, twitter, email |
| connection | string | wifi, cellular, unknown |
| success | boolean | true, false |
This event will be recorded in Pushwoosh with attribute values and a timestamp, so later it can be used for building segments, targeting messages, and collecting stats.
### 3. Call /postEvent API
## Importing events
The **Import events** feature allows you to upload event data from a CSV file, making it easy to track and analyze user activity in bulk. You can import events from various analytics and CRM systems to enhance your data and improve segmentation.
To import events, navigate to **Audience** → **Import CSV** → **Import events**.

### Step 1. Upload CSV
Upload a CSV file containing event data. The file must include the following required columns:
* **Event name:** the name of the event.
* **Event date:** the date and time when the event occurred.
* **HWID or User ID:** a unique identifier for the user associated with the event.
You can also include additional columns for optional event attributes to enhance your data.
To upload your file, drag and drop the CSV into the upload area or click to select a file from your device. The maximum file size allowed is 100 MB.
### Step 2\. Map columns
After uploading the file, you must map the CSV columns to the corresponding event attributes in Pushwoosh.
* Assign each required field (Event Name, Event Date, HWID, or User ID) to the correct column in your file.
* If your CSV contains custom attributes, map them to meaningful names that align with your data tracking needs.
* Click **Add attribute** to include extra fields if needed.
Once all columns are correctly mapped, click **Import events**.
Once the import is successfully completed, a confirmation message will be displayed. You can now use these events to maximize the potential of your campaigns.
If needed, you can upload another file to continue importing additional data.
You can find the imported events in the **Events History** section of [**User Explorer**](/product/audience-data-and-segmentation/user-explorer/).
For example, you can track user logins and collect login credentials (e.g., logged in with Facebook, Google, Twitter, or email), internet connection type (wifi, cellular, unknown), and whether it was successful or not (true or false values) with a single Login event by specifying its attributes as follows:
| attribute | type | value |
| ---------- | ------- | -------------------------------- |
| type | string | facebook, google, twitter, email |
| connection | string | wifi, cellular, unknown |
| success | boolean | true, false |
This event will be recorded in Pushwoosh with attribute values and a timestamp, so later it can be used for building segments, targeting messages, and collecting stats.
### 3. Call /postEvent API
## Importing events
The **Import events** feature allows you to upload event data from a CSV file, making it easy to track and analyze user activity in bulk. You can import events from various analytics and CRM systems to enhance your data and improve segmentation.
To import events, navigate to **Audience** → **Import CSV** → **Import events**.

### Step 1. Upload CSV
Upload a CSV file containing event data. The file must include the following required columns:
* **Event name:** the name of the event.
* **Event date:** the date and time when the event occurred.
* **HWID or User ID:** a unique identifier for the user associated with the event.
You can also include additional columns for optional event attributes to enhance your data.
To upload your file, drag and drop the CSV into the upload area or click to select a file from your device. The maximum file size allowed is 100 MB.
### Step 2\. Map columns
After uploading the file, you must map the CSV columns to the corresponding event attributes in Pushwoosh.
* Assign each required field (Event Name, Event Date, HWID, or User ID) to the correct column in your file.
* If your CSV contains custom attributes, map them to meaningful names that align with your data tracking needs.
* Click **Add attribute** to include extra fields if needed.
Once all columns are correctly mapped, click **Import events**.
Once the import is successfully completed, a confirmation message will be displayed. You can now use these events to maximize the potential of your campaigns.
If needed, you can upload another file to continue importing additional data.
You can find the imported events in the **Events History** section of [**User Explorer**](/product/audience-data-and-segmentation/user-explorer/).