# Set up two-factor authentication
You can add an extra layer of security to your account with two-factor authentication (2FA). Pushwoosh provides two options for two-factor authentication: email verification and an authentication app (e.g., Google Authenticator).
You have the flexibility to enable both email verification and the authentication app. This allows you to choose either method when logging in, and ensures you have a backup option in case there are issues with receiving codes.
## Enabling two-factor authentication
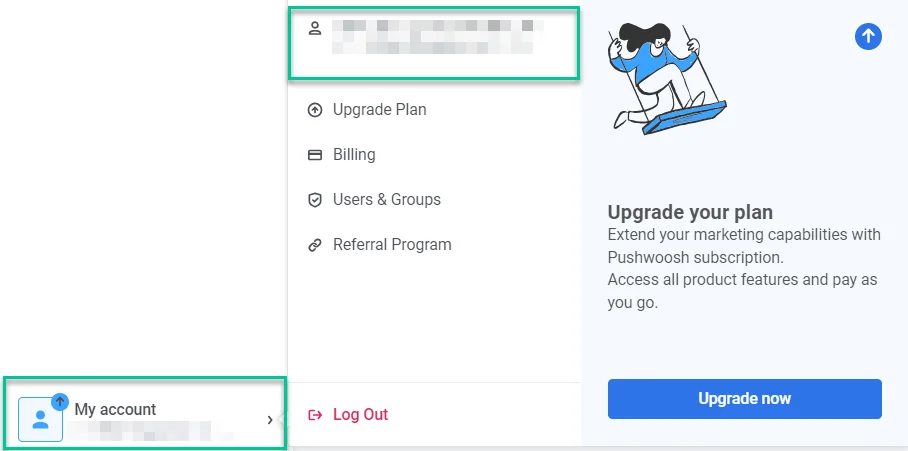
**1.** Log in to your account in **Pushwoosh Control Panel** and go to **My Account > Account settings**.
**2.** Then, click **Get started** in the **Two-Factor Authentication** section.
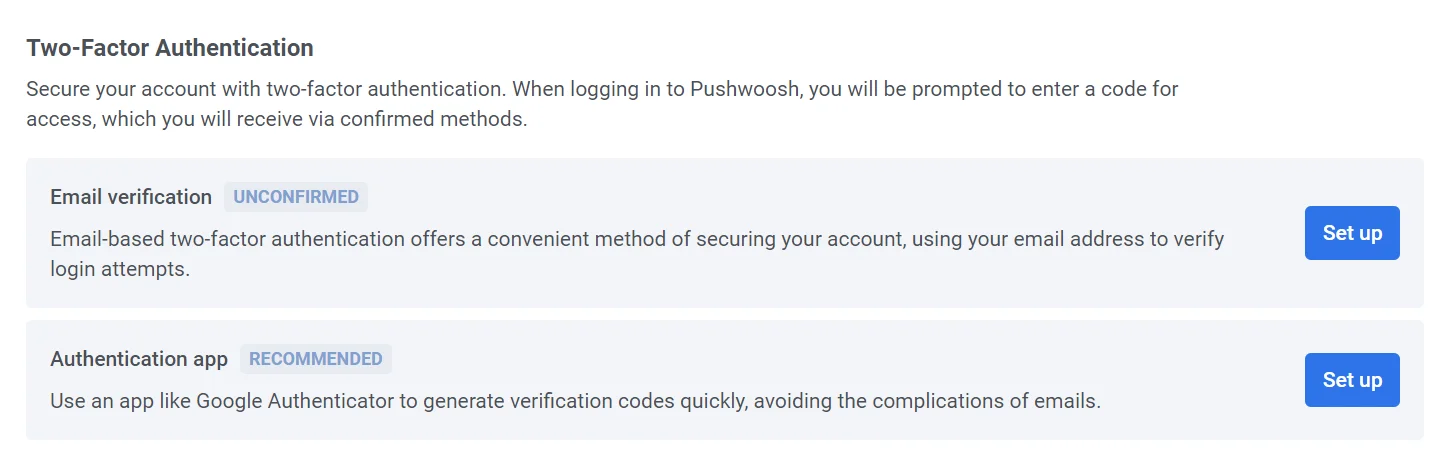
3. Select the authentication method.
### Email verification
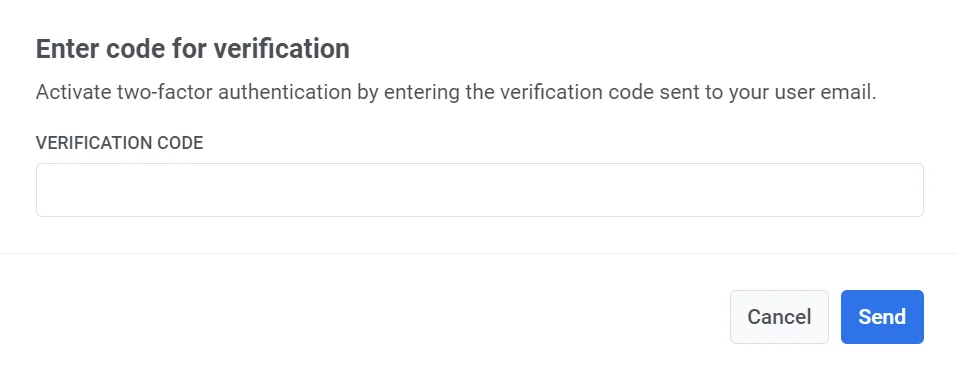
Click **Set up** to receive a verification code. Enter the code in the provided field to activate two-factor authentication.
If two-factor authentication is enabled on your account, you will see a _**Your account is protected**_ message along with a green **Email Confirmed** badge. To log in to Pushwoosh, you will need to enter a verification code that will be sent to your registered email.
To turn off two-factor authentication, click the **Deactivate** button and enter the verification code that was sent to your email in the pop-up window that appears.
### Authentication app
To quickly and securely generate verification codes, use an app like Google Authenticator. Click **Set up** next to the **Authentication app** to configure this option.
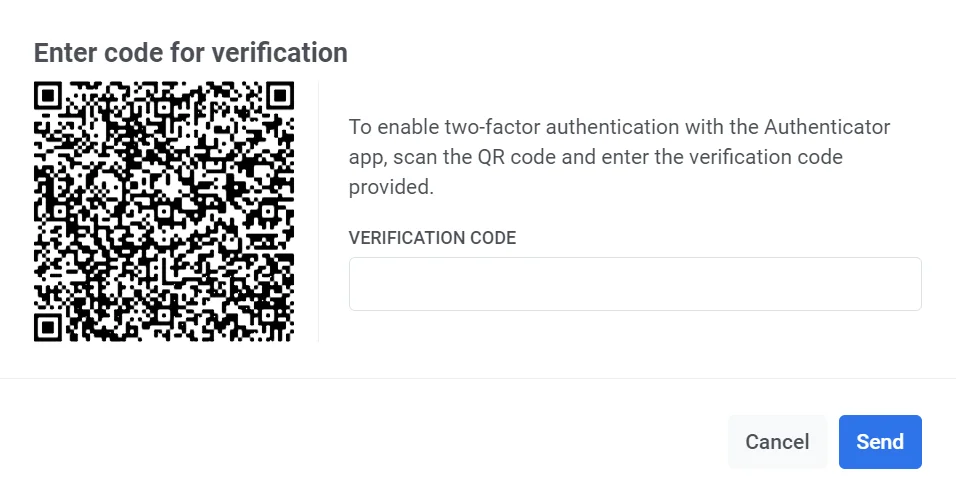
Open your authentication app and scan the QR code that appears. Then enter the verification code provided by the app.
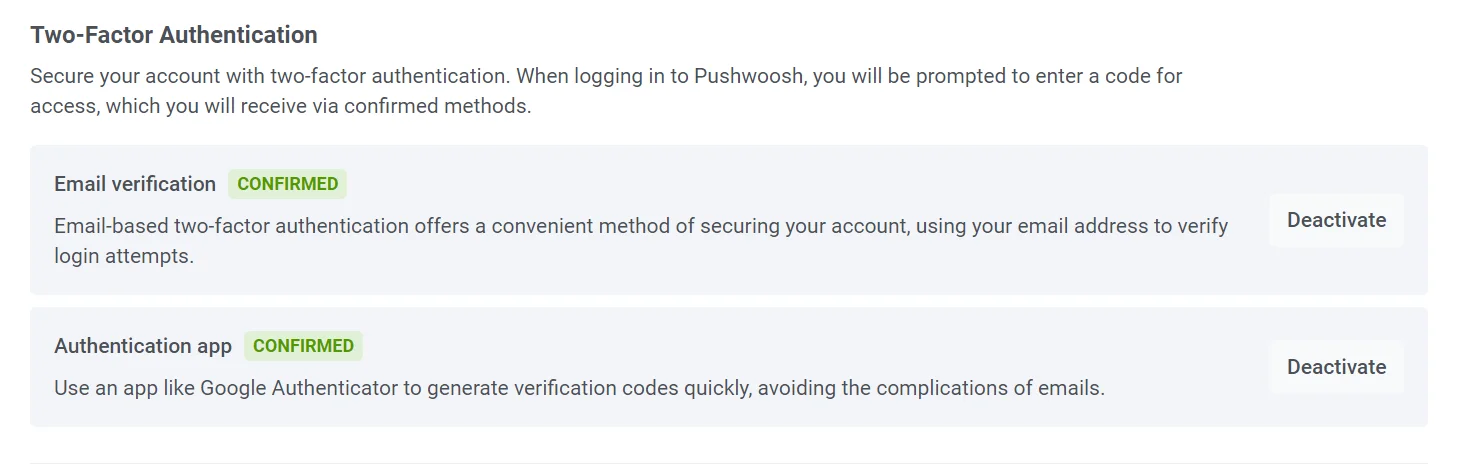
Once the setup process is complete, you will see the **Confirmed** status next to the **Authentication app** option.
## Setting up two-factor authentication for sub-accounts
[Invited users or sub-users](/product/account-management-and-security/multi-login-accounts/#how-to-invite-a-user) can set up two-factor authentication for their accounts using the same process as account owners. Each user must configure their own two-factor authentication settings.
To enable two-factor authentication:
**1.** Log in to your account in **Pushwoosh Control Panel** and go to **My Account > Account settings**.
**2.** Click **Get started** in the **Two-Factor Authentication** section.
**3.** Follow the same setup steps described in the [Enabling two-factor authentication](#enabling-two-factor-authentication) section above, choosing either email verification or an authentication app.
Once two-factor authentication is enabled, you will need to enter a verification code each time you log in to your account.
 **2.** Then, click **Get started** in the **Two-Factor Authentication** section.
 3. Select the authentication method.
 ### Email verification
Click **Set up** to receive a verification code. Enter the code in the provided field to activate two-factor authentication.
### Email verification
Click **Set up** to receive a verification code. Enter the code in the provided field to activate two-factor authentication.
 If two-factor authentication is enabled on your account, you will see a _**Your account is protected**_ message along with a green **Email Confirmed** badge. To log in to Pushwoosh, you will need to enter a verification code that will be sent to your registered email.
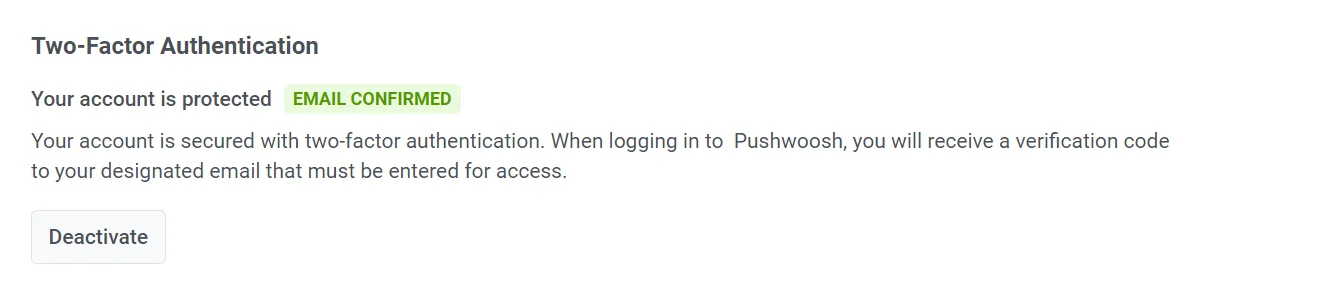 To turn off two-factor authentication, click the **Deactivate** button and enter the verification code that was sent to your email in the pop-up window that appears.
### Authentication app
To quickly and securely generate verification codes, use an app like Google Authenticator. Click **Set up** next to the **Authentication app** to configure this option.
To turn off two-factor authentication, click the **Deactivate** button and enter the verification code that was sent to your email in the pop-up window that appears.
### Authentication app
To quickly and securely generate verification codes, use an app like Google Authenticator. Click **Set up** next to the **Authentication app** to configure this option.
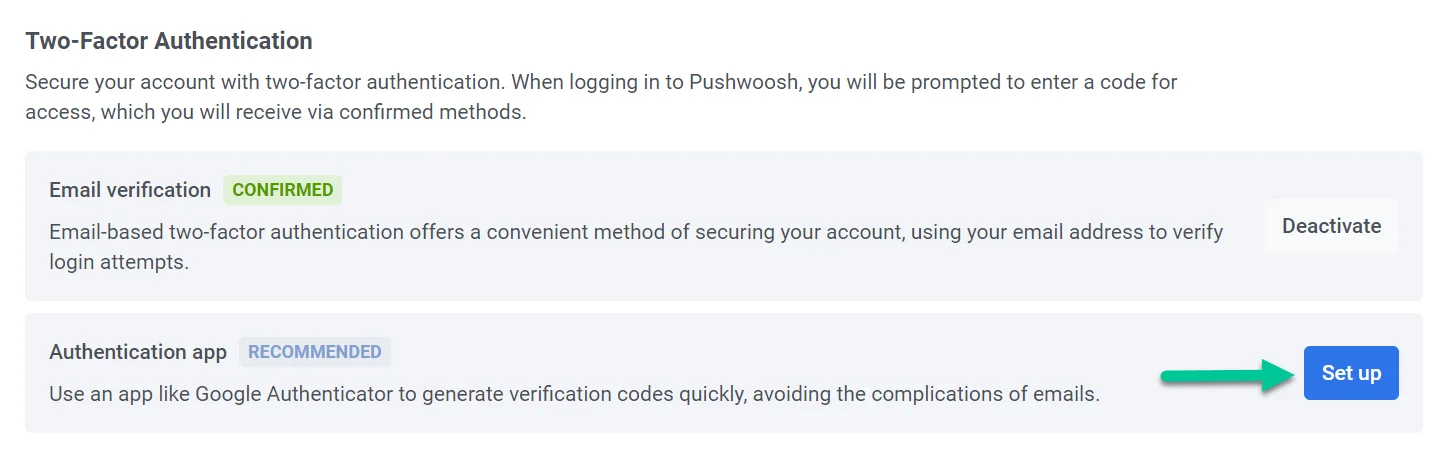 Open your authentication app and scan the QR code that appears. Then enter the verification code provided by the app.
 Once the setup process is complete, you will see the **Confirmed** status next to the **Authentication app** option.
 ## Setting up two-factor authentication for sub-accounts
[Invited users or sub-users](/product/account-management-and-security/multi-login-accounts/#how-to-invite-a-user) can set up two-factor authentication for their accounts using the same process as account owners. Each user must configure their own two-factor authentication settings.
To enable two-factor authentication:
**1.** Log in to your account in **Pushwoosh Control Panel** and go to **My Account > Account settings**.
**2.** Click **Get started** in the **Two-Factor Authentication** section.
**3.** Follow the same setup steps described in the [Enabling two-factor authentication](#enabling-two-factor-authentication) section above, choosing either email verification or an authentication app.
Once two-factor authentication is enabled, you will need to enter a verification code each time you log in to your account.
## Setting up two-factor authentication for sub-accounts
[Invited users or sub-users](/product/account-management-and-security/multi-login-accounts/#how-to-invite-a-user) can set up two-factor authentication for their accounts using the same process as account owners. Each user must configure their own two-factor authentication settings.
To enable two-factor authentication:
**1.** Log in to your account in **Pushwoosh Control Panel** and go to **My Account > Account settings**.
**2.** Click **Get started** in the **Two-Factor Authentication** section.
**3.** Follow the same setup steps described in the [Enabling two-factor authentication](#enabling-two-factor-authentication) section above, choosing either email verification or an authentication app.
Once two-factor authentication is enabled, you will need to enter a verification code each time you log in to your account.